Ever spent hours hunched over tiny seeds, only to watch them wash away with the first rain? I’ve been there too! Many gardeners struggle with planting small seeds that need careful spacing.
What if I told you there’s a simple fix for this common garden problem?
If you’re wondering how to make seed tape, the answer lies in using paper strips with seeds perfectly spaced and ready to plant. Seed tape is my go-to solution. It saves my time, reduces waste, and gives me better results than traditional sowing.
It works wonderfully for small seeds like carrots, lettuce, radishes, and herbs, which are the hardest to handle! Ready to make your own? Let’s get started.
Tools & Materials You’ll Need
| Item | Purpose |
|---|---|
| Toilet paper (1-ply) | Base layer for the seed tape |
| All-purpose flour | The main ingredient for the natural adhesive |
| Water | Combines with flour to make a paste |
| Measuring spoons | To maintain 2:1 flour-to-water ratio |
| Small container or bowl | For mixing the paste |
| Paintbrush or cotton swab | To apply glue dots |
| Scissors | For cutting the toilet paper strips |
| A measuring tape or ruler | To space the seeds accurately |
| Seeds (for direct sowing) | Carrots, radishes, Swiss chard, etc. |
| Flat drying surface | Countertop, tray, or table covered with parchment or cloth |
Warm and Simple Steps on How to Make Seed Tape
Creating seed tape at home is easier than most gardeners expect.
If you want to learn how to make seed tape, these seven simple steps will change ordinary household items into a garden tool that delivers perfect plant spacing every time.
Step 1: Prepare Your Seed Tape Strips
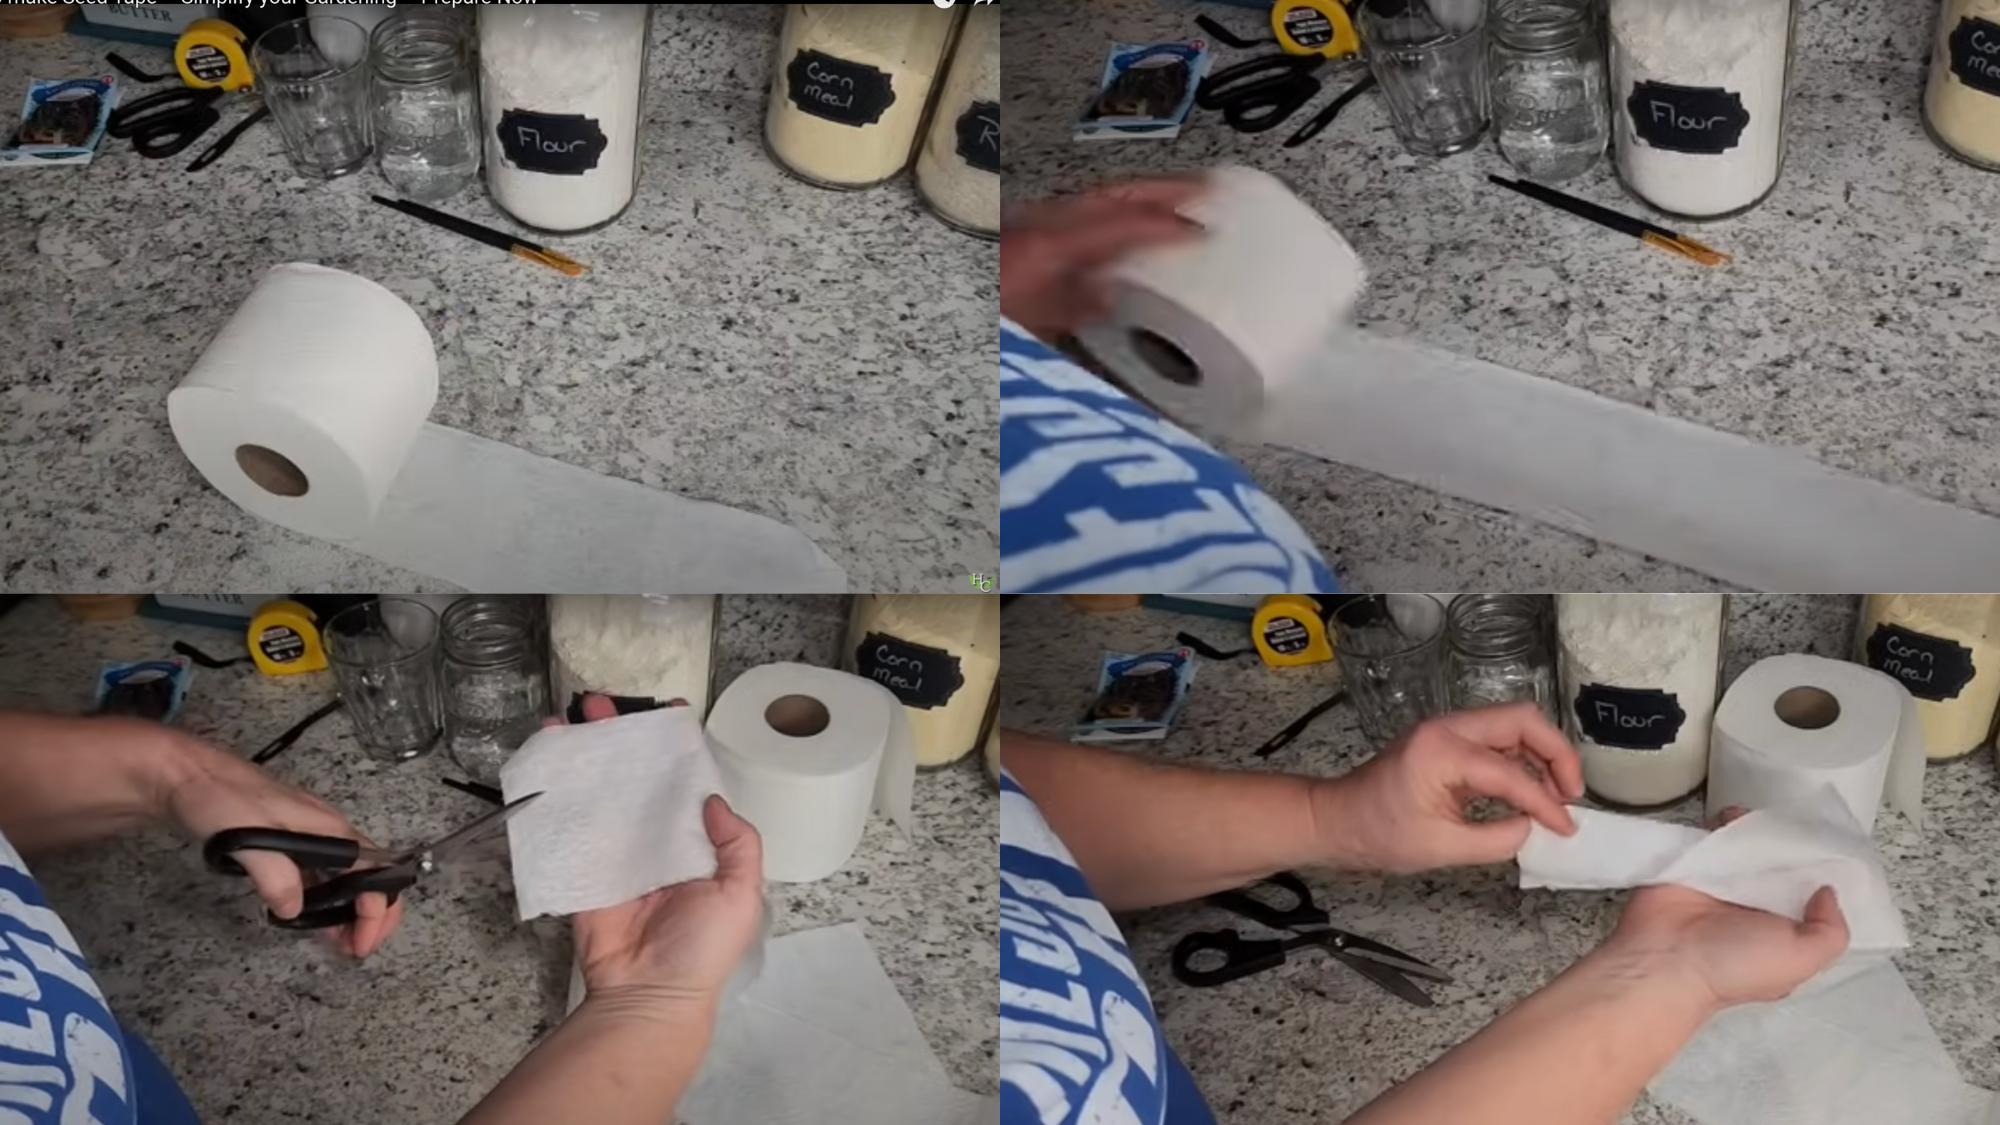
Cut your toilet paper to the desired length for your garden bed. If you’re using 2-ply, gently separate the layers to create thinner strips.
Cut each strip in half lengthwise to make narrower seed tapes that are easier to handle and plant.
Step 2: Mix a Gentle, Garden-Safe Paste
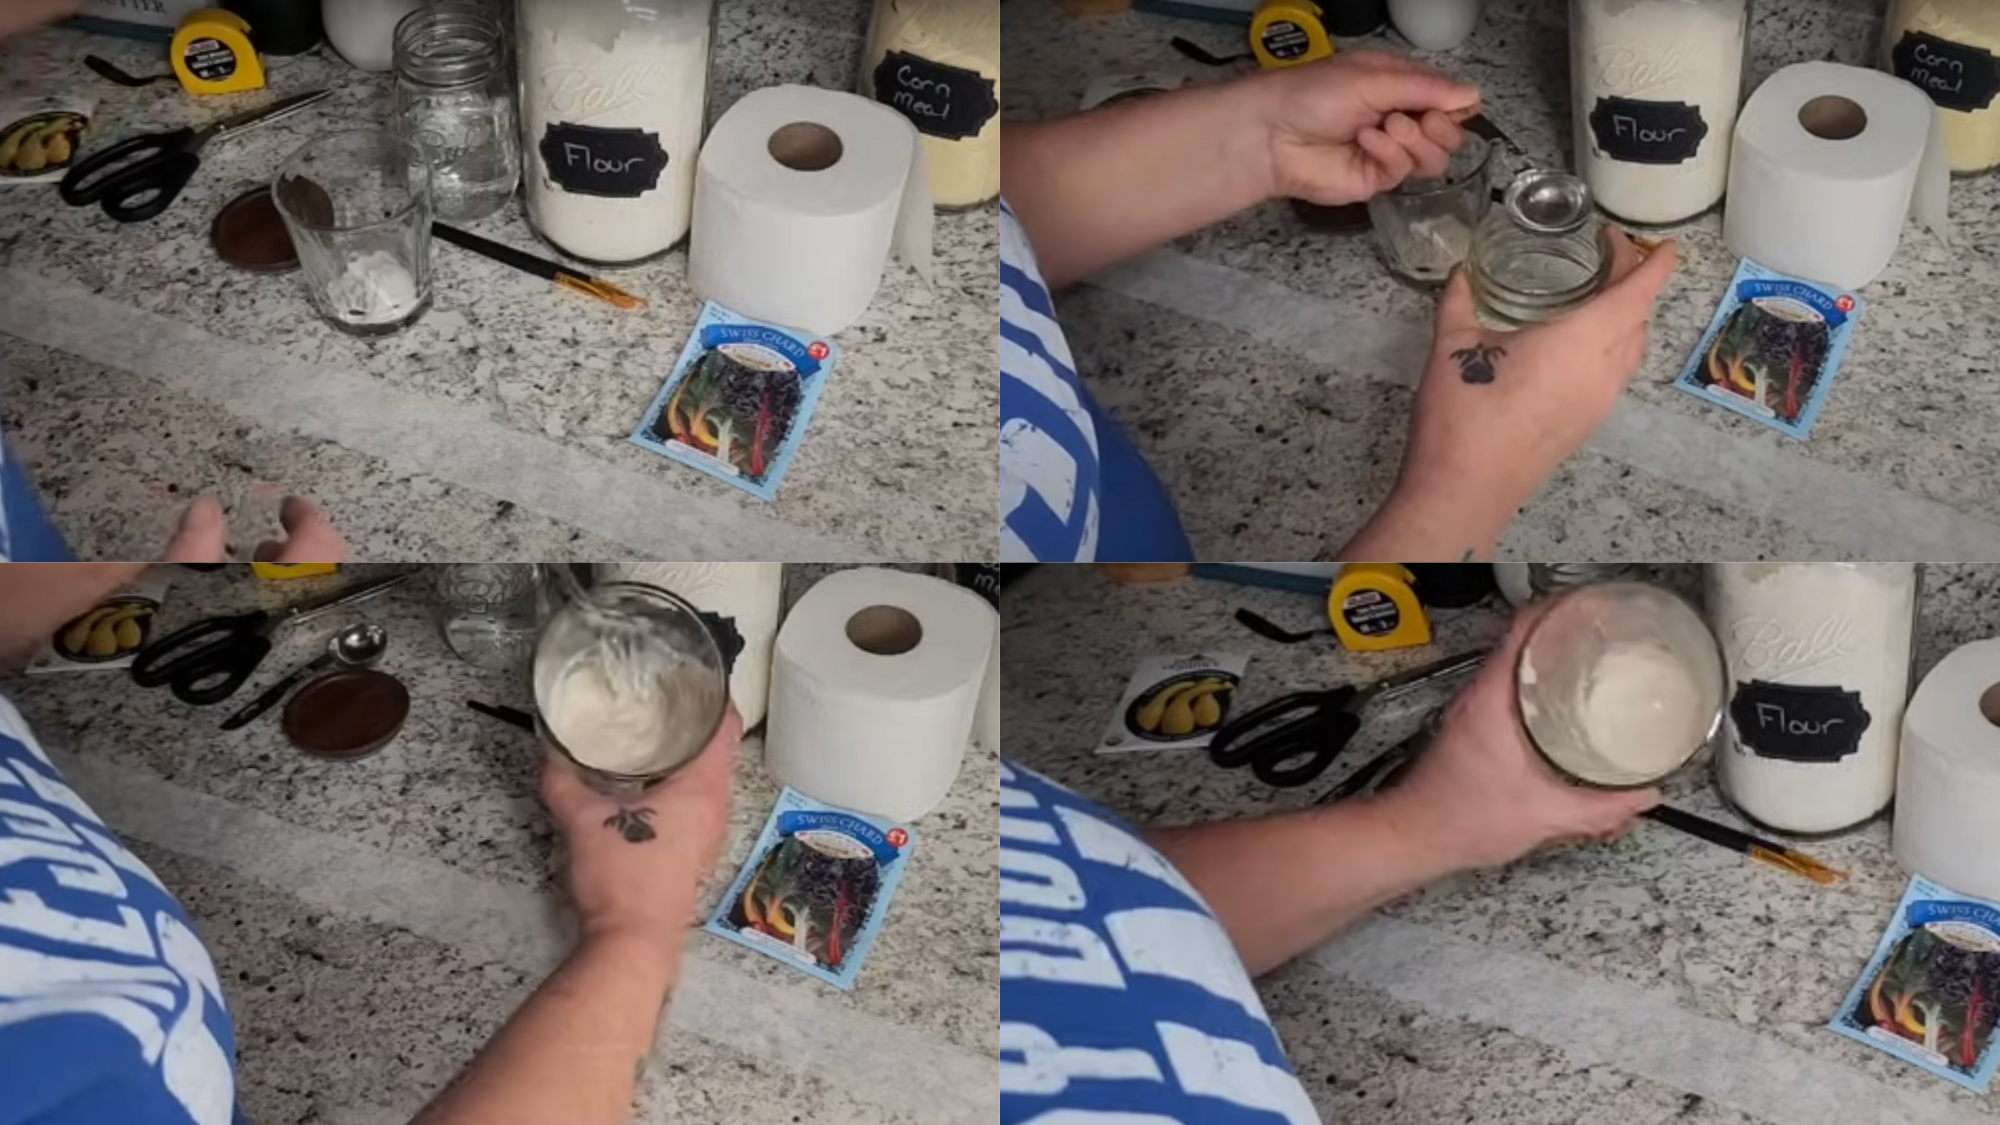
In a small container, combine 2 parts flour with 1 part water to form a smooth, sticky paste. Stir well using a fork or spoon until it reaches a glue-like consistency. If it’s too thick, add a drop of water; if it’s too runny, add a bit more flour.
Step 3: Set Up and Mark Seed Spacing
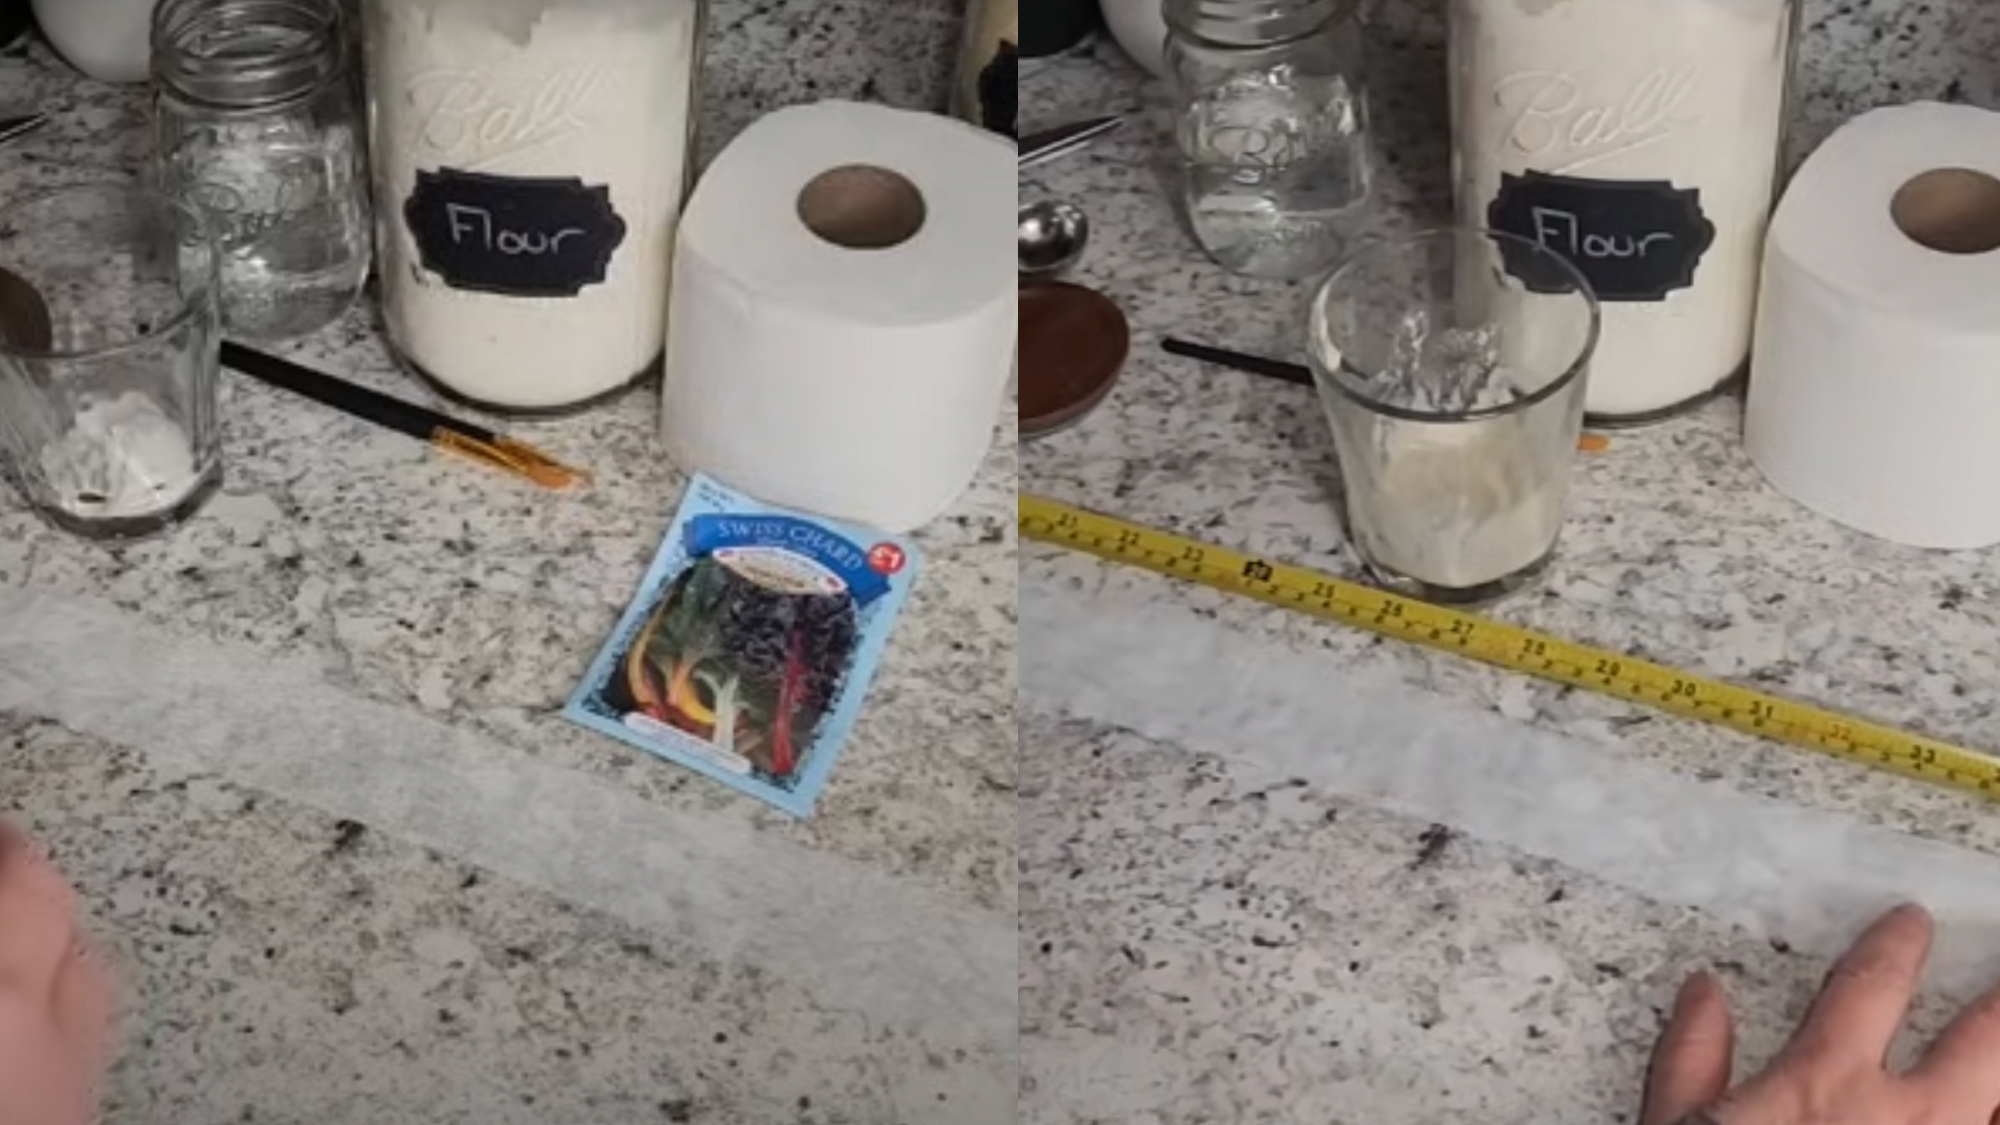
Lay out your strip on a clean, flat surface.
Use a ruler or measuring tape to mark out seed spacing based on your seed packet’s recommendations (e.g., every 6 inches for Swiss chard). These marks will guide where each seed goes.
Step 4: Dab the Glue, Drop the Seeds
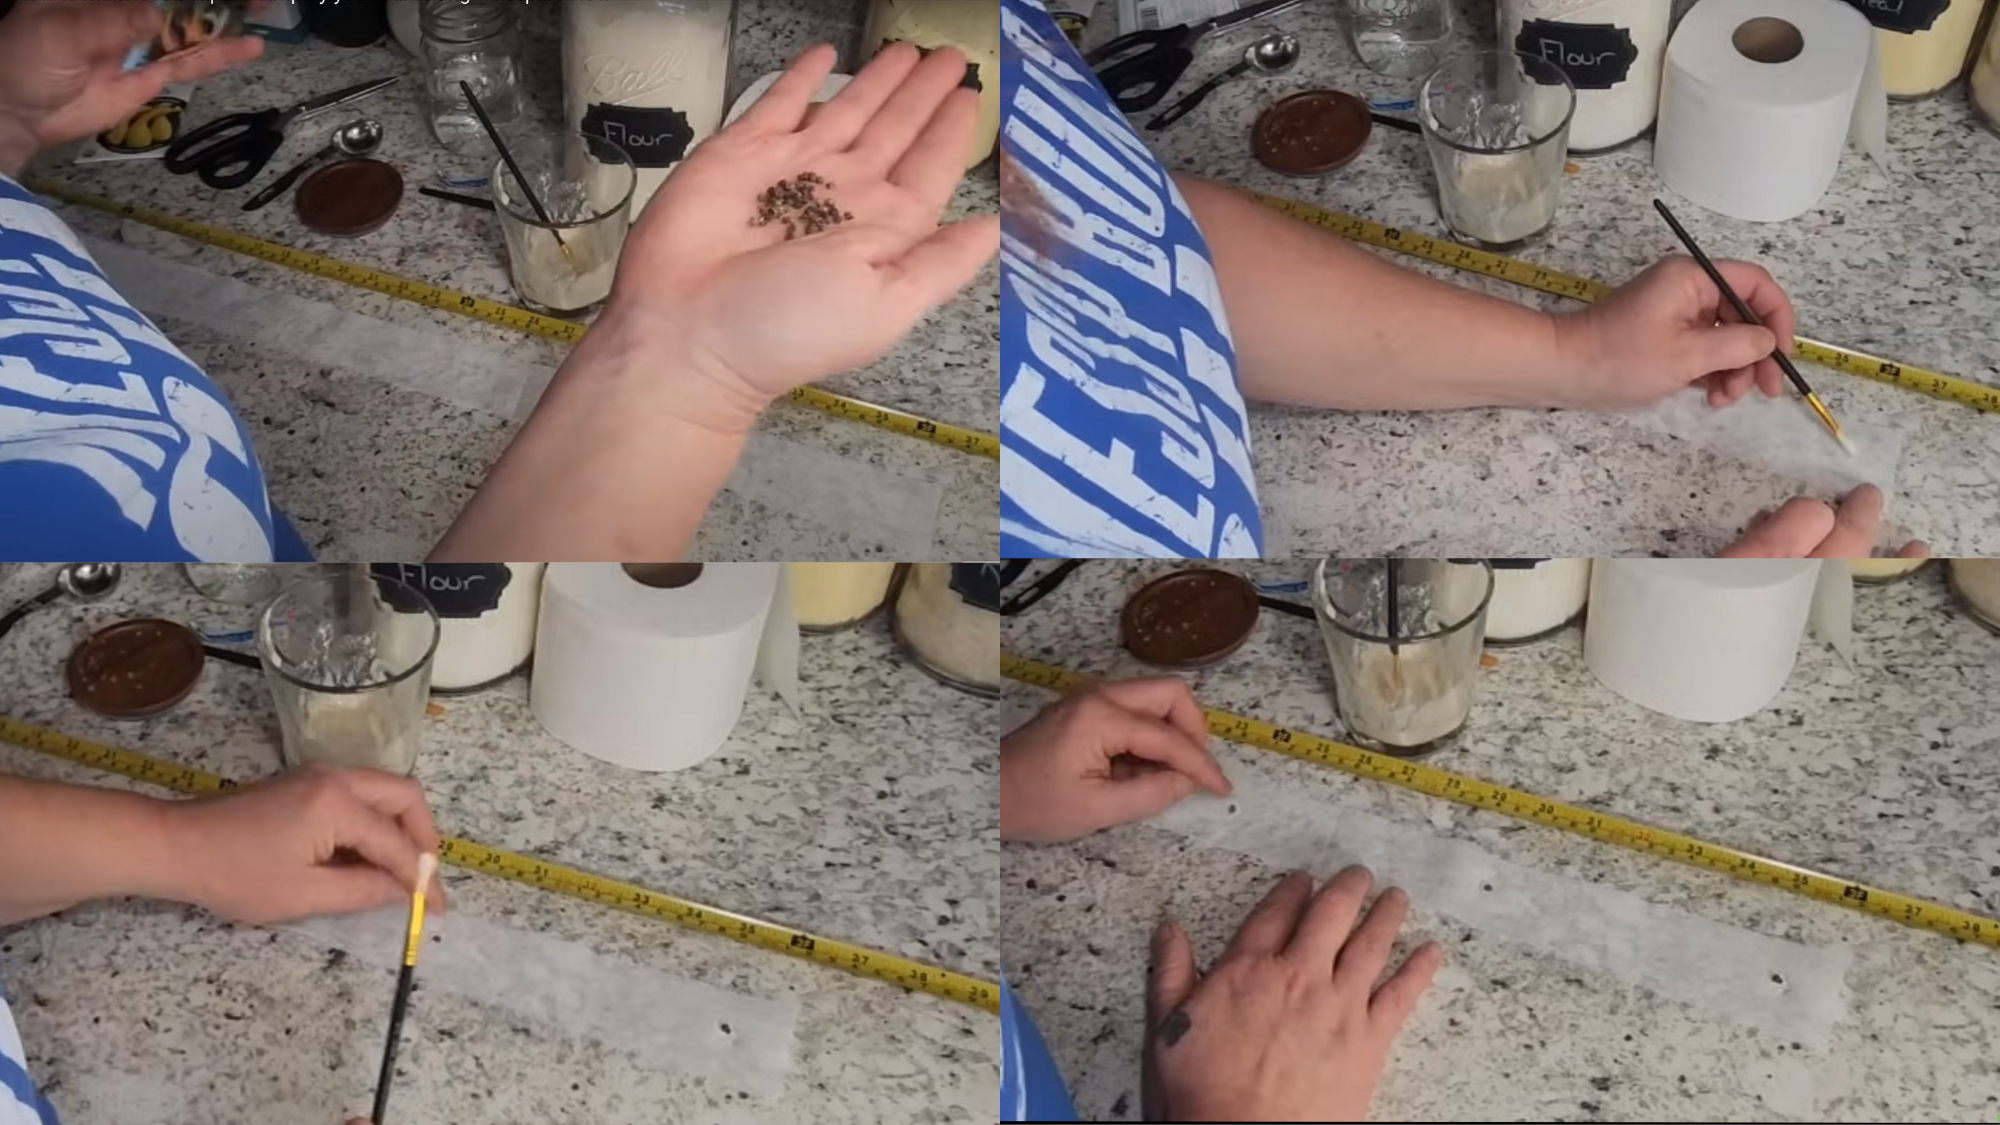
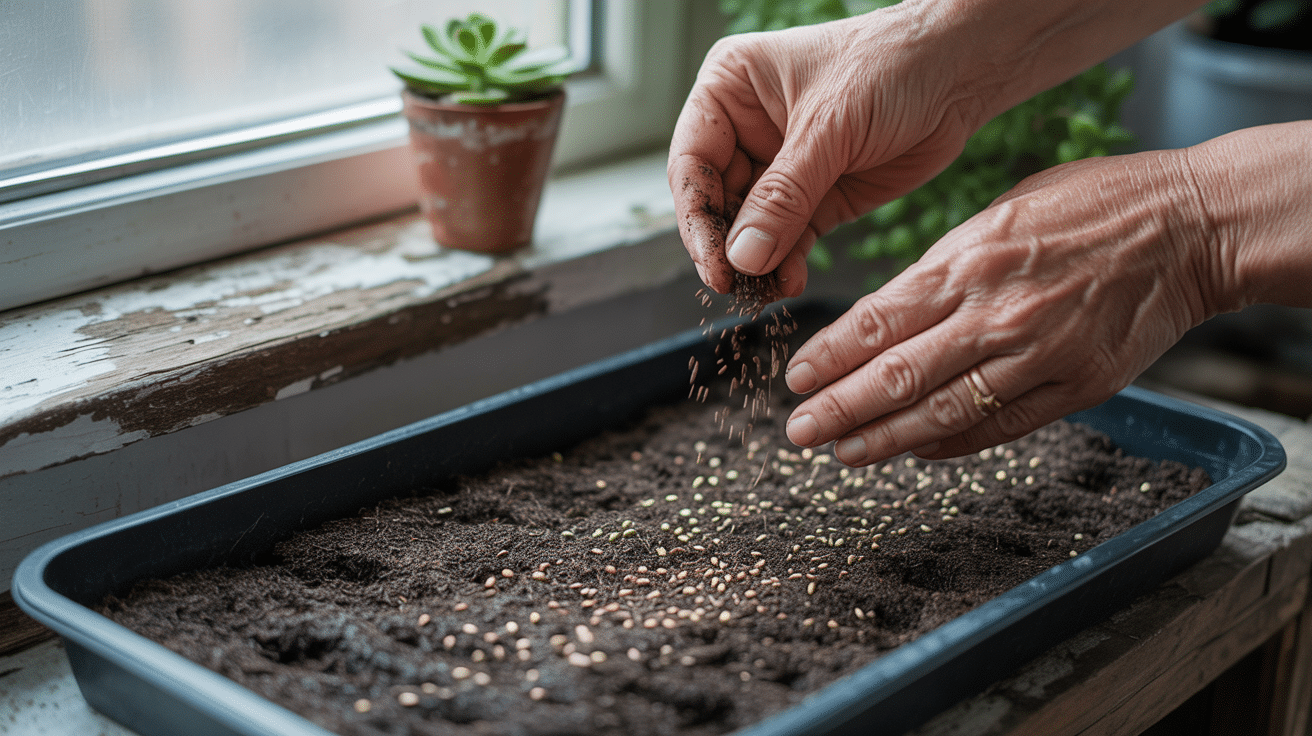
Using a brush or cotton swab, place a tiny dab of flour paste at each marked spot. Carefully place one or two seeds on each glue spot. Gently press them in so they stay in place; there is no need to overdo it!
Step 5: Fold and Seal the Tape
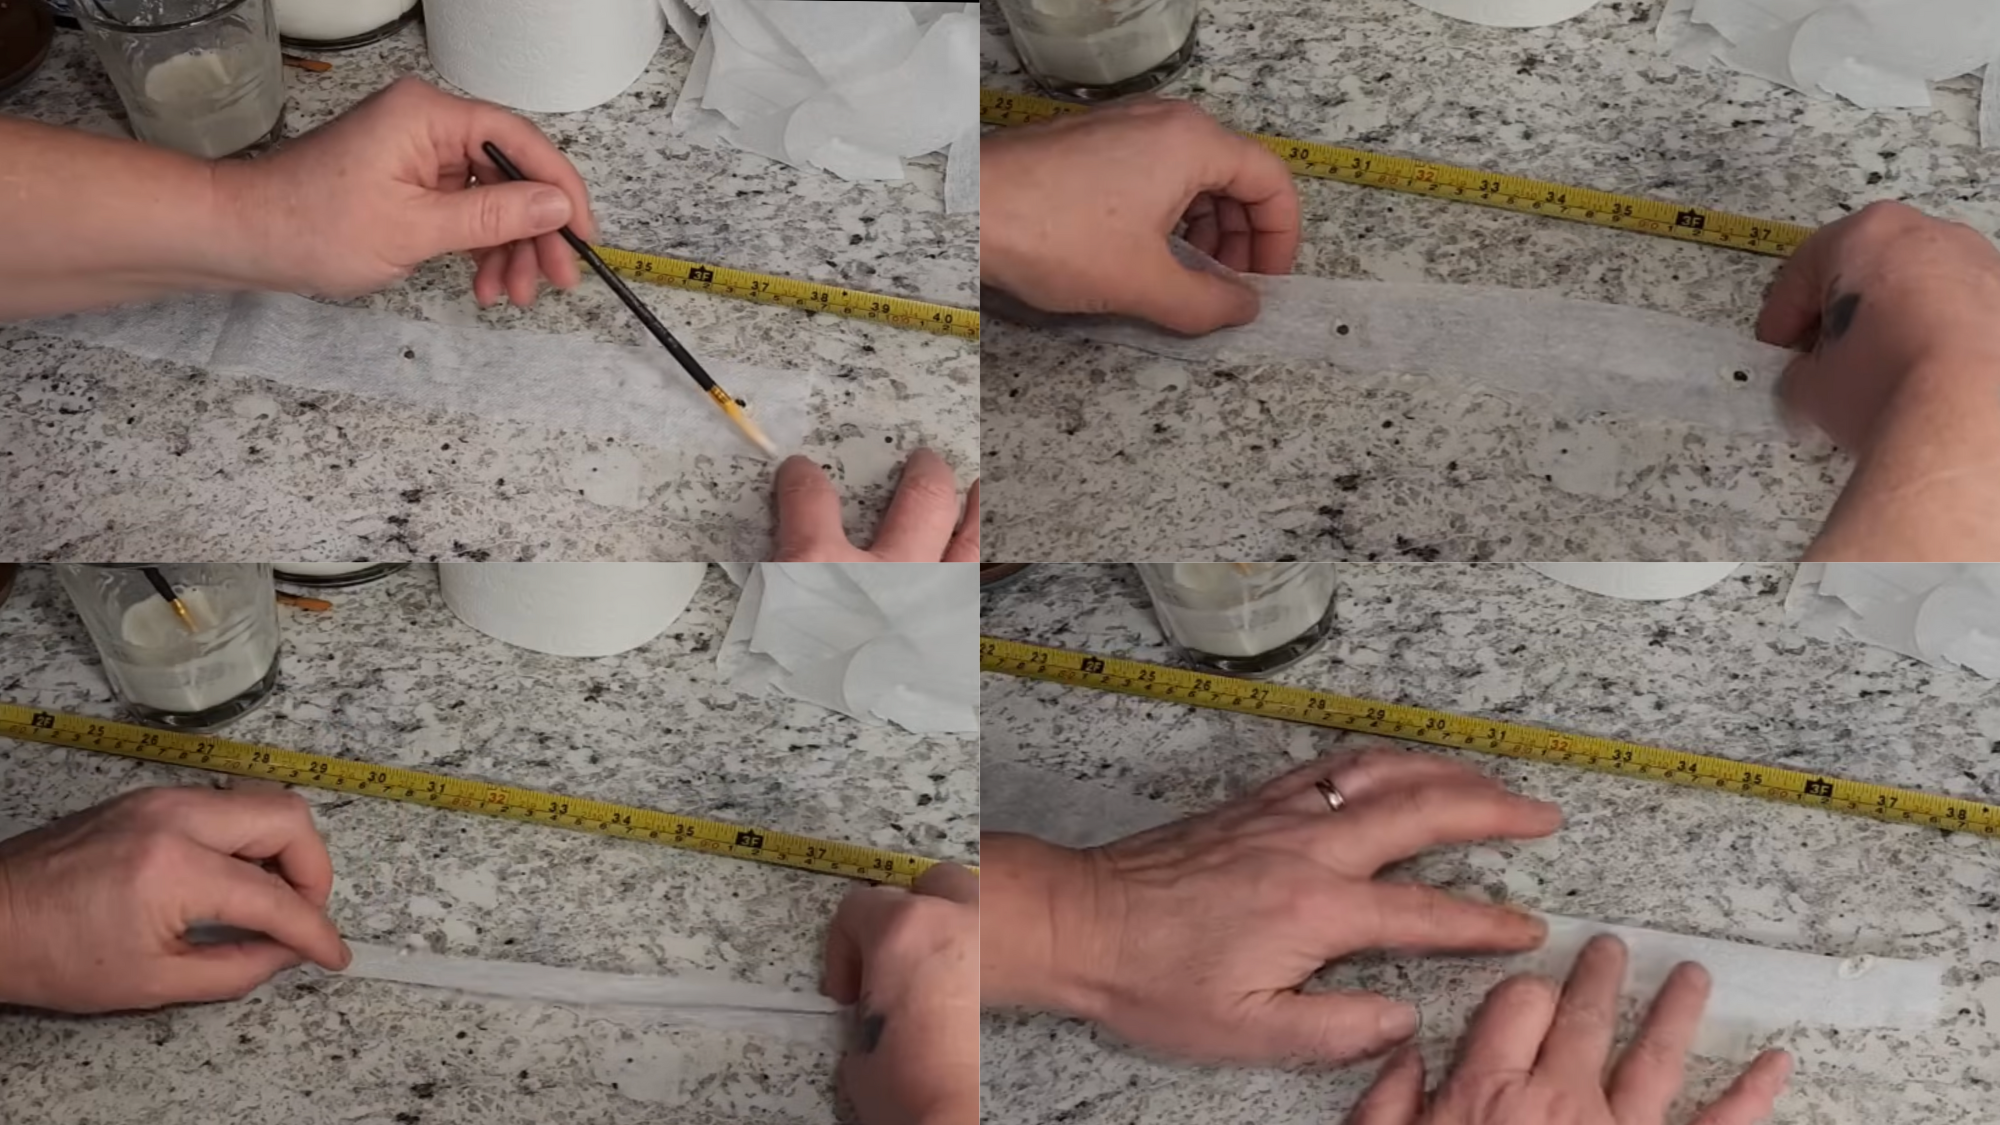
Once all your seeds are placed, run a light line of paste along the edge of the paper. Fold the strip in half lengthwise and press gently to seal the seeds inside.
It doesn’t need to be perfect; just enough to keep everything snug and tidy.
Step 6: Let It Dry Completely
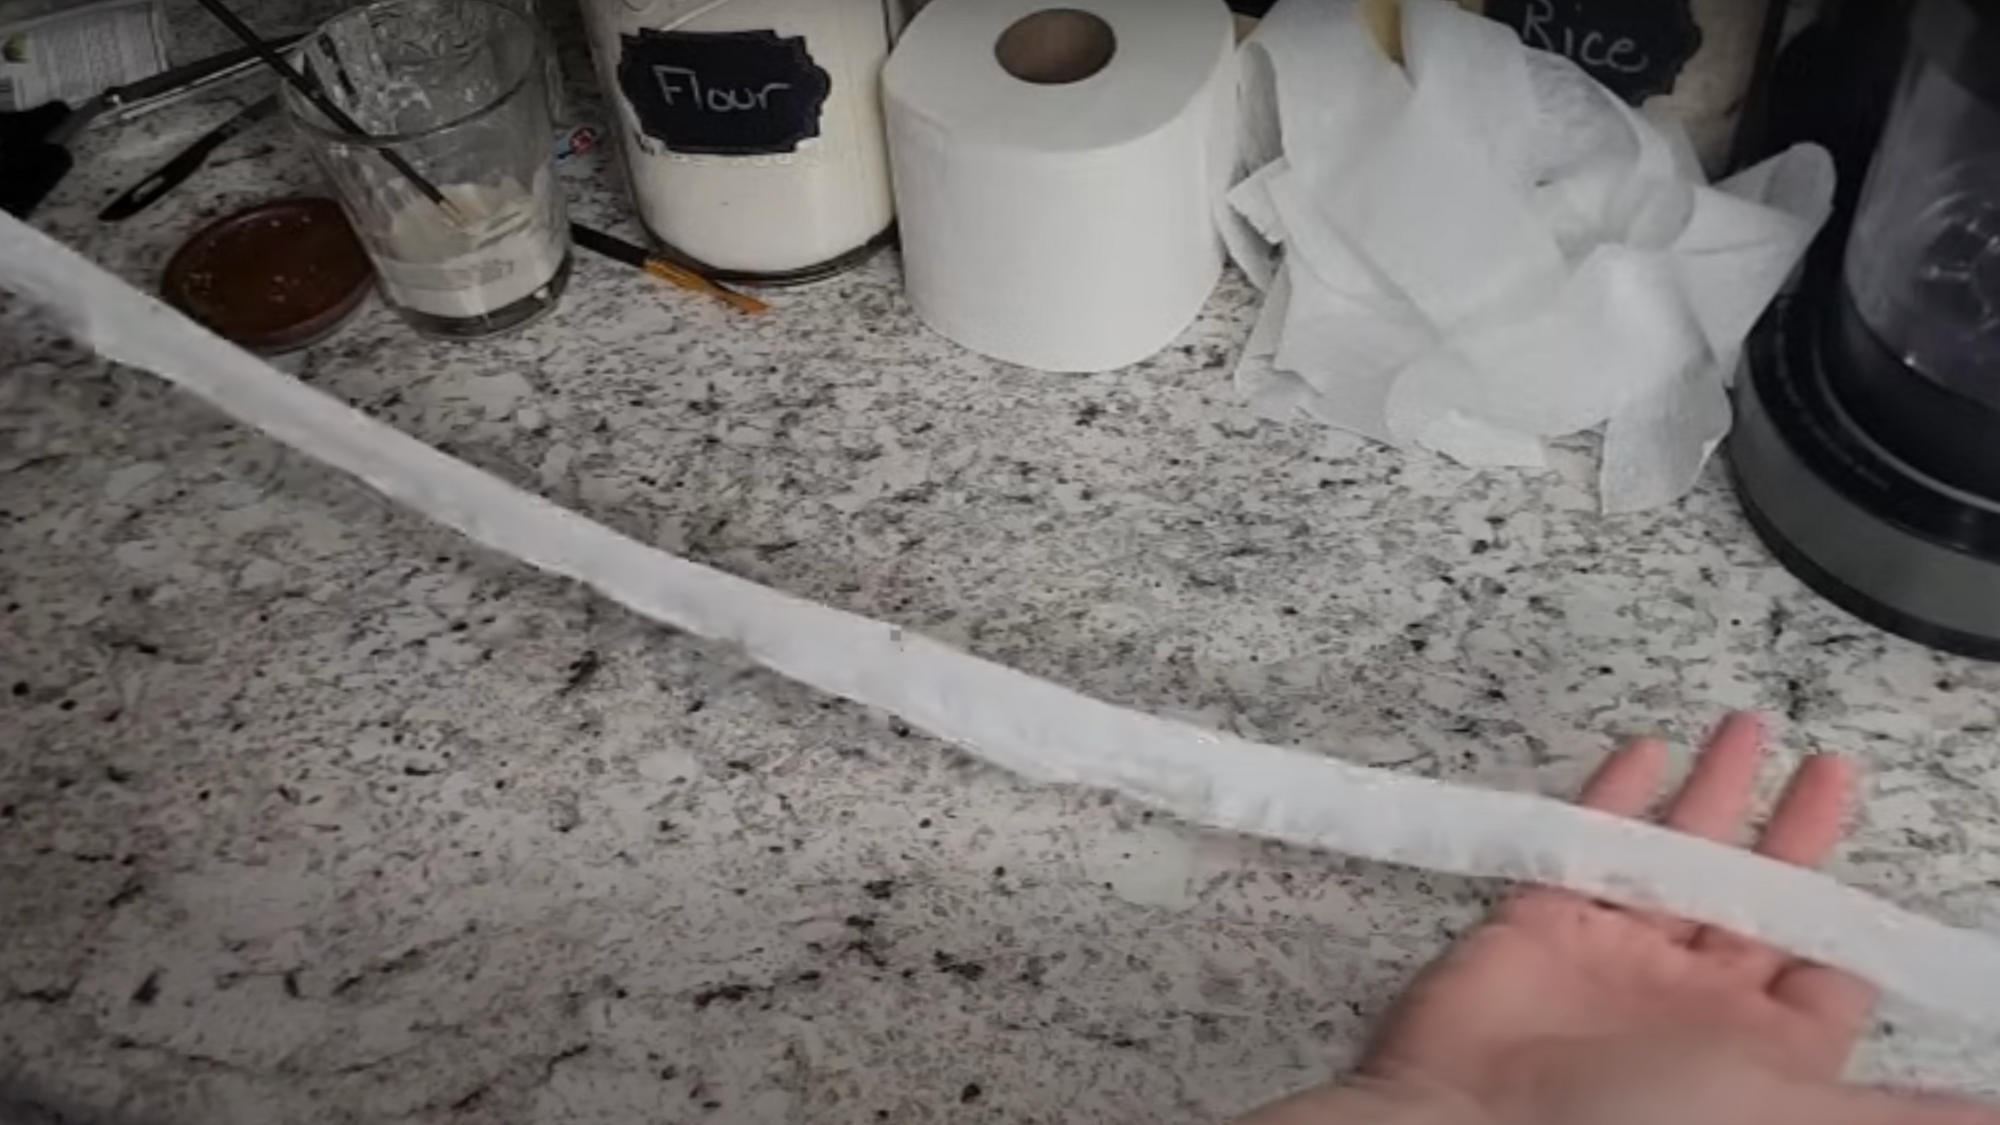
Transfer the tape to a dry surface and let it air-dry for at least 2–3 hours.
If you’re working on a counter, gently lift it before drying to prevent sticking. Don’t rush this step; proper drying keeps seeds mold-free and ready to use.
Step 7: Store Your Seed Tape Smartly
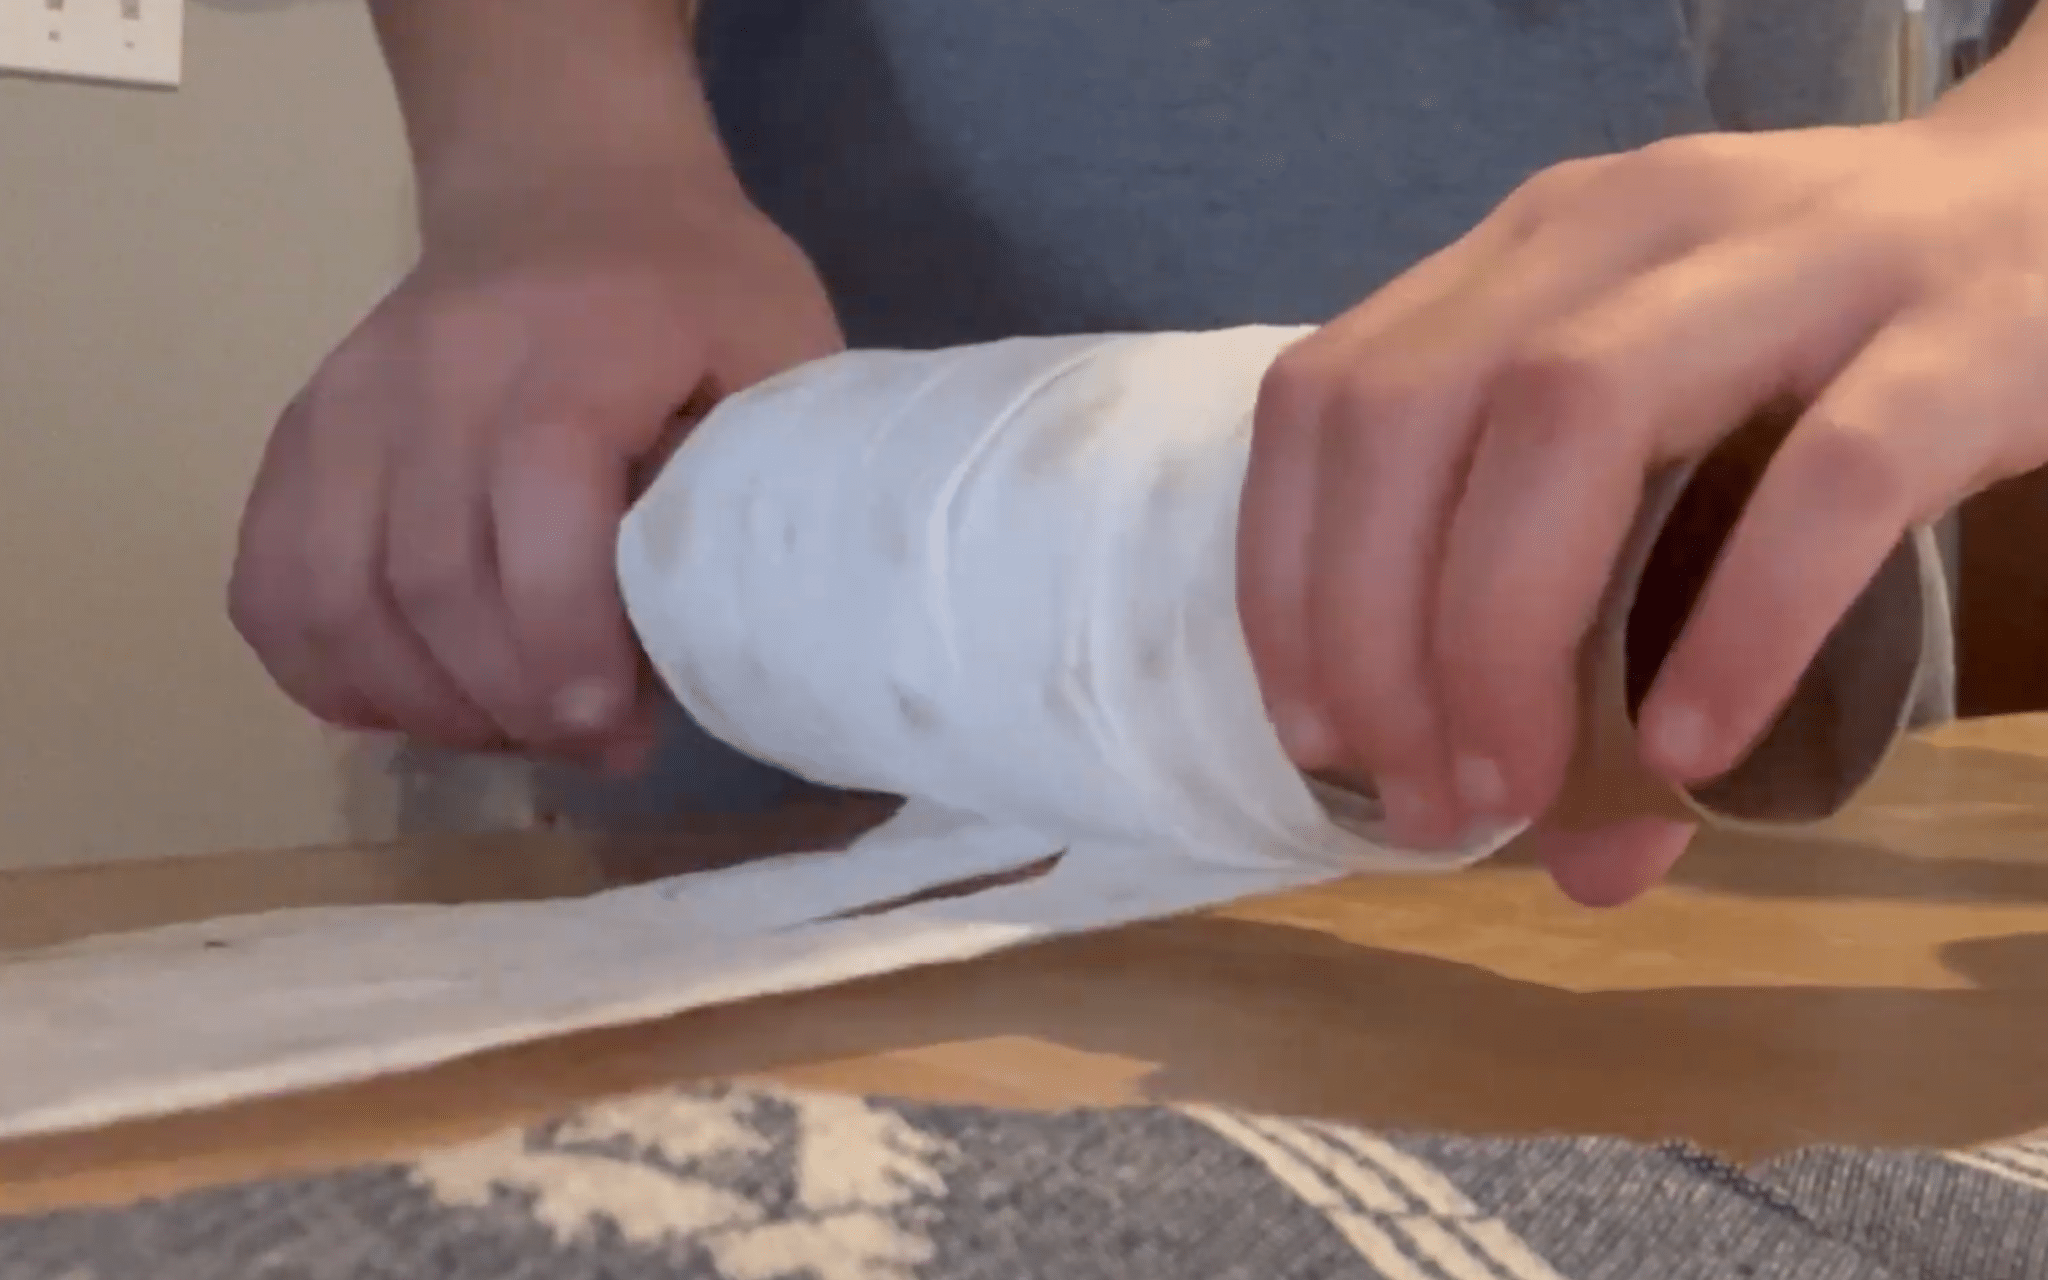
Roll or fold your finished seed tape and store it in a paper envelope or a labeled zip-lock bag.
Leave it unsealed for a couple of days to ensure it’s completely dry. Then keep it with your seed packets so you’re ready when planting season hits.
For a more detailed tutorial on how to make seed tape, check out the video below:
How Seed Tape Amplifies Your Garden
I can’t count how many hours I’ve saved using seed tape in my garden. Before I started learning how to make seed tape, I’d spend whole afternoons hunched over, dropping tiny seeds one by one.
Now, I lay down my pre-made tapes and cover them with soil. The perfect spacing makes a huge difference in my harvests.
My plants no longer compete for sunlight, water, or nutrients. This means stronger, healthier crops and much better yields.
I hardly need to thin seedlings these days. The seeds are already spaced just right on the tape, so almost every plant has room to grow. This cuts my spring garden work in half and wastes fewer seeds.
I find seed tape especially helpful for planting straight rows. No more zigzag carrot rows in my garden! Plus, I can plant earlier in spring when my fingers are still stiff from cold weather. The tapes allow me to place seeds exactly where I want them without struggling with tiny seeds on windy days.
Customizing and Scaling Your Seed Tape
| Customization Technique | Best For | My Tips |
|---|---|---|
| Mixed Variety Tapes | Maximizing space | I place fast-growing radishes between slower carrots to mark rows and harvest before carrots need space. |
| Adjusted Spacing | Different soil types | I space seeds farther apart in clay soil and closer in sandy soil for better growth. |
| Assembly Line Production | Large gardens | My family team can produce 20+ tapes in an hour: one person marks, one applies paste, one adds seeds. |
| Natural Paste Alternatives | Eco-friendly gardening | I use cornstarch + water or chia seed gel instead of flour paste for added soil benefits. |
| Double-Width Tapes | Wide row planting | I make 3-4 inch wide tapes with staggered seed placement for broadcast-style growth in beds. |
| Long-Term Storage | Seed saving | I store tapes in paper envelopes with silica packets to keep them viable for next season. |
I’ve found these customizations make my garden more productive while saving me time. The small adjustments to the basic method really pay off when harvest time comes around!
Common Mistakes to Avoid When Making Seed Tape
When I first learned how to make seed tape, I made plenty of mistakes that affected my results.
Here are the most common pitfalls I’ve encountered so you can avoid them and get the best from your garden.
1. Planting too deep: I learned to place seed tape just under a thin layer of soil (about 1/4 inch for most vegetables), rather than burying it deep like regular seeds.
2. Watering too forcefully: After washing away my first seed tape with a strong hose spray, I now only use a gentle sprinkler or mist setting on newly planted areas.
3. Improper storage: I once kept leftover tapes in my damp garage and found them moldy. Now I store them in paper envelopes inside airtight containers with silica packets.
4. Not labeling properly: When my unlabeled lettuce varieties all looked the same as seedlings, I started placing plant markers at the end of each row to track what was growing where.
5. Disturbing the soil: My impatience led me to check for germination too early, damaging delicate seedlings. I’ve learned that patience is essential with seed tape gardening.
6. Using the wrong paper: Thick paper doesn’t break down quickly enough. I stick with toilet paper or thin paper towels that decompose easily in soil.
To Conclude
I’ve shown you how simple it is to make your seed tape. This small project can modify your garden work from tedious to enjoyable.
The few minutes you spend crafting these tapes now will save you hours of planting time when spring arrives.
What I love most is how seed tape solves so many common garden problems at once: no more wasted seeds, better spacing between plants, and straight, tidy rows that make me proud to show off my garden.
Why not start with just one seed type? Make a tape for those tiny carrot or lettuce seeds that always give you trouble. I’d love to hear how seed tape works in your garden!