Growing fresh basil at home feels like pure magic, doesn’t it?
I know that feeling when you snip those fragrant leaves and instantly smell summer in your kitchen. Here’s the thing – buying new basil plants every season gets expensive fast.
I’m going to show you exactly how to propagate basil from cuttings, so you’ll never run out of this herb again. Plus, you’ll save money and feel that satisfying rush of growing your own plants.
In this blog post, I’ll walk you through the simple steps to turn one basil plant into dozens.
What is Basil Propagation and Why Try It?
Let me break this down for you in simple terms. Basil propagation is basically creating new basil plants from parts of an existing plant, usually stem cuttings.
Think of it as plant cloning, but way easier than it sounds. Instead of buying seeds or new plants, you take a healthy cutting from your current basil plant and grow it into a whole new plant.
I’ve been doing this for years, and it never gets old watching those tiny roots appear in a glass of water. You’re not just saving money, though that’s a nice bonus. I used to spend at least $3-4 every few weeks on fresh basil from the store. Now I have a constant supply right on my windowsill.
There’s something deeply satisfying about snipping fresh basil for tonight’s pasta, knowing I grew it myself from a single cutting.
Interested in learning more about other edible plants? Check out the blog: 24 Growing Edible Herbs: Tips for Planting and Harvesting.
Step-by-Step Guide to Propagating Basil
Propagating basil is simple and rewarding, whether you use water or soil. Both methods let you multiply your plants from cuttings, ensuring a steady supply of fresh, aromatic leaves for your kitchen.
Here’s a concise set of instructions for both propagation techniques, plus troubleshooting and care tips for healthy roots and vibrant growth
Method 1: Water Propagation
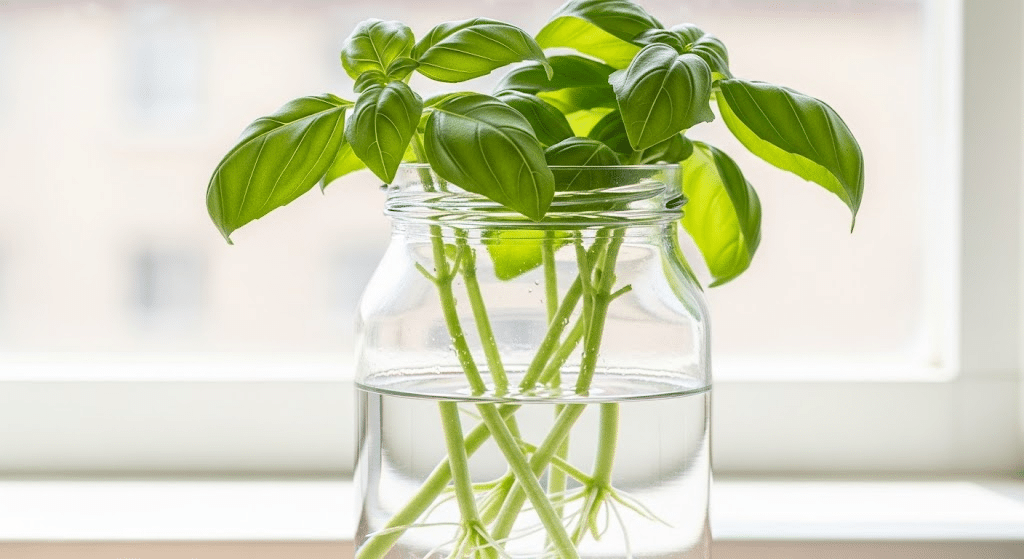
Propagating basil in water is an easy, rewarding way to multiply your plants and watch roots develop right before your eyes. Here’s a concise, skimmable guide for success, plus quick troubleshooting tips.
Step-by-step process, from cutting to rooting
- Cut a 4–6 inch stem from healthy basil, ensuring several leaf nodes.
- Remove lower leaves, leaving the top 4–6 leaves intact.
- Place the cutting in a clean glass with about 2 inches of water.
- Change the water every 2–3 days to keep it fresh.
- Tiny white roots appear in about a week.
- When roots reach 1–2 inches long, the cutting is ready to be planted in soil.
Troubleshooting common issues
- If cuttings turn black or mushy, the water may be dirty or the stem damaged; change the water immediately and trim off any affected parts.
- Wilting leaves often mean too much direct sun; move cuttings to bright, indirect light.
- No roots after two weeks? Try a new, younger cutting or add a drop of liquid fertilizer, as older woody stems usually don’t root well.
Method 2: Soil Propagation
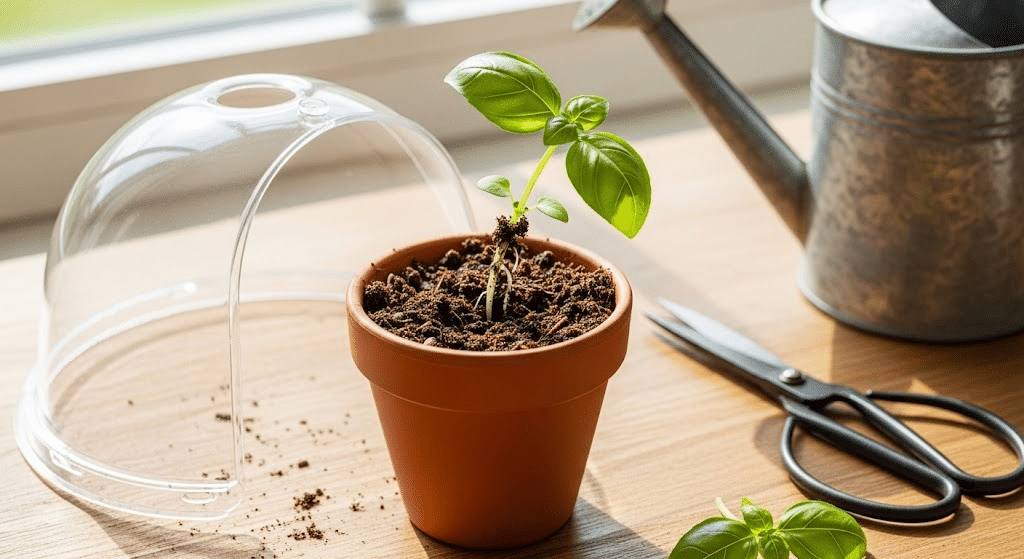
Soil propagation feels more natural to me because plants go straight into their permanent growing medium. The roots develop stronger and adapt better since they’re not shocked by the transition from water to soil.
Step-by-step guide on how to propagate basil in soil
- Take a 4–6 inch healthy basil cutting, cutting just below a leaf node.
- Remove the lower leaves, leaving the top two sets intact.
- (Optional) Dip the cut end in rooting hormone.
- Fill a small pot with moist, well-draining potting mix.
- Plant the cutting about 2 inches deep and firm the soil gently around it.
- Water lightly to settle the soil.
- Cover with a plastic bag to create humidity (use a stake to keep the plastic off leaves).
- Place in bright, indirect light.
- Keep soil moist but not soggy; air out daily to prevent mold.
- Roots form in 2–4 weeks. Check by gently tugging for resistance
Tips for monitoring soil conditions and watering
- Check the soil daily by gently watering the top inch; if it feels dry, keep the soil consistently moist but not soggy.
- Mist leaves occasionally to boost humidity and monitor for signs of wilting or dryness.
- After about 10 days, gently tug on the cutting; resistance indicates that roots are forming. Remove the plastic cover once new growth appears.
Basil Propagation Techniques
Learning how to propagate basil opens up a world of fresh, homegrown herbs using various techniques.
1. Rooting Hormones & Special Tools
I use rooting hormone when propagating harder-to-root basil varieties like African Blue or Cardinal basil. Just dip the cut stem in powder before planting.
Heat mats speed up rooting by keeping the soil warm. Sharp, clean pruning shears prevent stem damage that can cause rot.
2. Hybrid Methods
I start cuttings in water for 5-7 days until tiny root nubs appear, then transfer to moist soil. This gives me the best of both worlds, I can monitor early root development while letting roots strengthen in the soil naturally.
3. Propagating Basil from Seeds
I use seeds when I want specific varieties not available as plants, or when starting large quantities. Seeds give me stronger root systems and avoid disease transfer from parent plants.
It takes longer but costs less for big herb gardens.
4. Air Layering Method
When my basil gets woody and cuttings won’t root easily, I try air layering. I make a small cut halfway through a stem, wrap it with moist moss and plastic wrap.
Roots form while the stem stays attached to the parent plant for nutrients.
5. Division Method
Some basil varieties, like Greek basil, form clumps with multiple stems.
I carefully dig up the whole plant and gently separate individual stems with their own roots. Each division becomes a new plant – it’s like getting several plants from one purchase.
To Conclude
Now you’ve got all the tools to turn one basil plant into your own mini herb farm. I’ve shown how to propagate basil for quick results, soil methods for stronger plants, and even some advanced tricks.
You can start today with just a glass of water and a cutting.
Don’t overthink it – basil wants to grow and multiply. I’ve seen complete beginners succeed on their first try. Give it a shot this weekend and watch those roots appear.
Your kitchen will thank you, and so will your wallet. Share your propagation wins I’d love to hear how it goes!