Concrete floors can look dull and uninviting.
I understand that a gray, bare surface doesn’t exactly scream “cozy home.” Maybe you’re staring at your garage floor, basement, or even your living space, thinking there has to be a better way to make it look good.
I’m going to show you how to change that plain concrete into something you’ll want to look at. Painting concrete floors isn’t as difficult as you might think, and the results can completely transform the way a space feels.
We’ll cover prepping your surface properly and applying it like a pro. Plus, I’ll share some tips I’ve learned that’ll save you time and headaches along the way.
Essential Supplies and Tools for Concrete Floor Painting
Painting concrete floors requires specific materials to ensure a smooth, durable finish. The provided document outlines the tools and products used for the project. Gather the following things before learning how to paint concrete.
- Cleaner: Diluted with water to scrub off stubborn adhesive.
- Scrub Brush: For scrubbing adhesive and etching solution into the concrete.
- Paint Scraper: To scrape off softened adhesive from the concrete surface.
- Nail Remover: A Specialized tool to extract nails embedded in the concrete.
- Rubber Mallet: Used with the nail remover to apply force and remove nails.
- Crack and Patch Repair: To fill crevices and holes in the concrete.
- Safety Glasses: To protect eyes during cleaning and etching processes.
- Gloves: For hand protection while handling chemicals and tools.
- Paintbrush: For trimming edges and painting hard-to-reach areas.
- Paint Roller: For applying paint evenly across large areas of the floor.
- Paint Tray: To hold paint for the roller, ensuring efficient use and even application
Prepping the Surface Before Painting
Properly prepping a concrete floor before painting is crucial for durability and adhesion. Start by thoroughly cleaning the surface to remove all dust, dirt, grease, and oil stains, using heavy-duty detergents or specialized cleaners if needed.
Any existing paint or coatings should be stripped away by abrasive methods like diamond grinding or sandblasting to create a rough texture that helps the paint adhere better. Repair any holes or cracks with a suitable patching compound and smooth these areas once cured.
After cleaning and repairs, vacuum and mop the surface to remove all residue and dust. Conduct a tape test to ensure no dust remains. If the concrete surface is weak or powdery, applying a bonding agent is recommended. Only once the floor is clean, dry, and properly textured can painting begin
Step-by-Step Guide: Painting Concrete Floors
Painting concrete floors transforms a space but requires careful preparation and execution.
The process, as detailed in the provided document, involves removing old adhesive, repairing cracks, etching the surface, and applying paint. Below are the steps I followed to paint my concrete basement floor.
1. Remove Old Adhesive
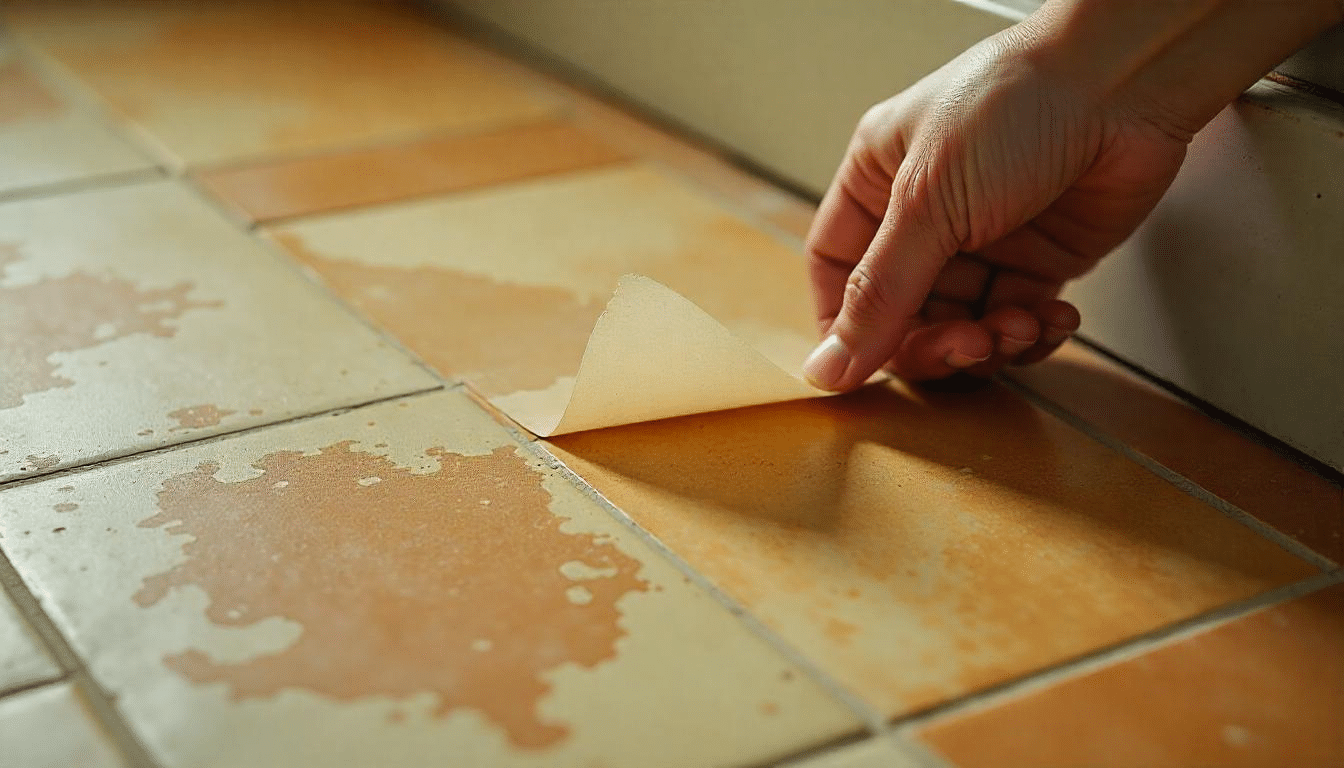
After removing the carpet, I faced stubborn adhesive on the concrete. I sprayed water to soften it, peeling it off easily. For tougher spots, I diluted cleaner with water, scrubbed with a brush, and scraped with a paint scraper.
This method effectively removed stuck-on glue, though it required patience. Some areas needed multiple attempts, but this approach ensured a clean surface, critical for the paint to adhere properly and achieve a smooth finish.
2. Extract Nails from Concrete
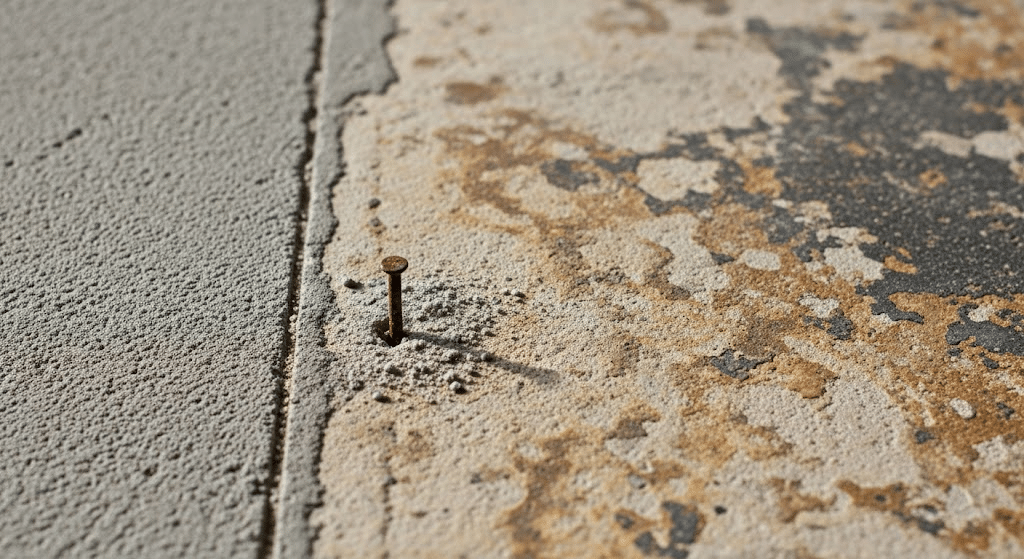
The concrete had nails that wouldn’t budge with a regular hammer.
I used a small nail remover and a rubber mallet, hammering the remover into the nail and applying pressure to pop it out. This process was labor-intensive but effective, leaving small holes behind.
The specialized tools were essential, as regular tools failed. This step ensured the surface was free of protrusions, preventing issues during patching and painting, and maintaining a uniform floor for the next steps.
3. Patch Cracks and Holes
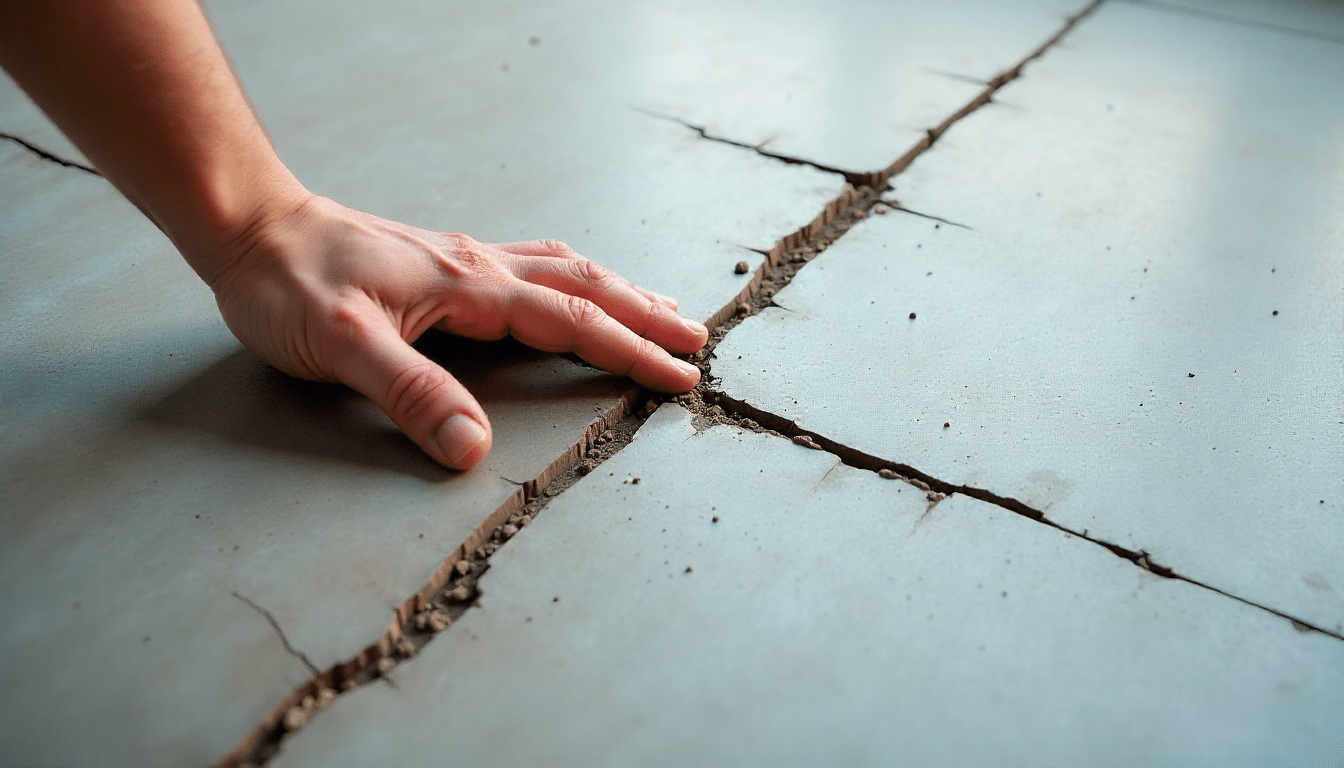
The concrete had crevices and holes from nails and wear. I used a crack and patch repair product, mixing it with water as directed. I filled all cracks and holes, following package instructions, to create a smooth surface.
This step was crucial to prevent paint pooling in imperfections, ensuring an even application and a polished final appearance for the basement floor.
4. Clean and Etch the Floor

Before painting, I cleaned and etched the floor. With windows open for ventilation, I wore gloves and safety glasses, dampened the concrete, and applied the product with a watering can.
I scrubbed it with a brush to clean and etch the surface, roughening it for better paint adhesion. After etching, I rinsed and scrubbed the floor three times with water to remove residue, preparing it for a durable paint application.
5. Paint the Floor

Use any paint according to your preference for a simple and clean look.
I trimmed edges with a paintbrush, then used a roller for the main area. Initially, I poured paint directly onto the floor, but switched to a tray to conserve paint and ensure even coverage.
This step required careful application to avoid streaks, and multiple coats were needed. The process was time-consuming, but resulted in a professional, refreshed basement floor ready for decorating.
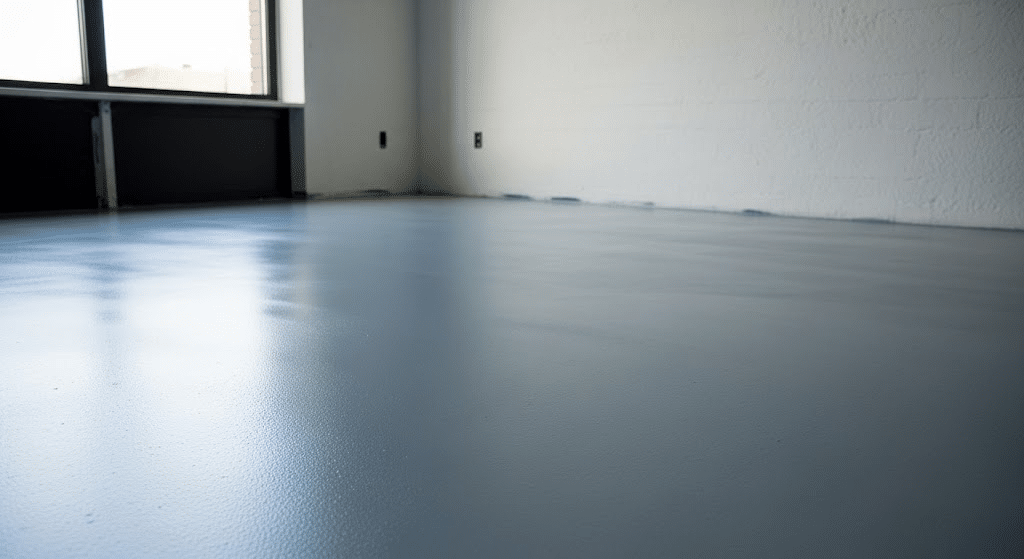
The Result
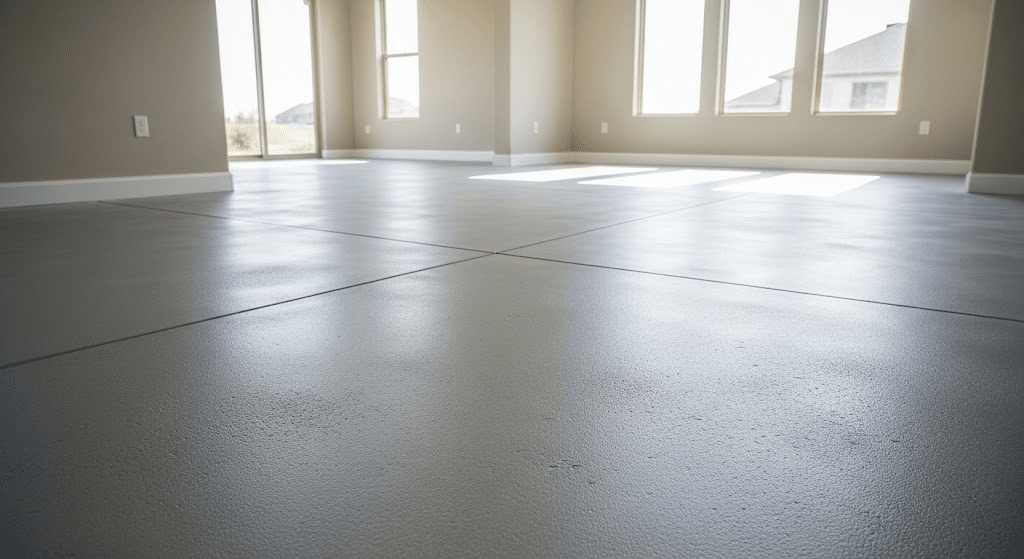
The finished, painted concrete floor looks new and clean. The smooth, clean surface catches the natural light beautifully, giving the room a fresh and modern feel. I love how the subtle texture adds character without overpowering the space.
Common Mistakes to Avoid When Preparing Concrete Floors
Proper preparation makes or breaks your concrete floor painting project. I’ve seen too many people rush through this step, only to watch their beautiful paint job peel off months later.
Let me share the biggest mistakes I see people make so you can avoid them while painting concrete floors.
- Skipping the cleaning step completely: Dust, oil, and grime will prevent paint from sticking properly. I always start with a thorough cleaning, even if the floor looks clean.
- Not testing for moisture issues: Concrete can hold water longer than you think. Paint over damp concrete and you’ll get bubbles, peeling, and a mess to fix later.
- Ignoring existing sealers or coatings: That shiny spot might be an old sealer. Paint won’t stick to it, so you need to remove it first or your new coating will fail.
- Using the wrong cleaning products: Harsh chemicals can leave residues that interfere with paint adhesion. Stick to recommended cleaners for the best results.
- Rushing the drying time: I know you want to get painting, but wet concrete will ruin everything. Give it proper time to dry completely.
- Forgetting to repair cracks and holes: Small imperfections become big problems once you paint over them. Fill and smooth everything before you start painting.
- Not etching smooth concrete surfaces: Smooth concrete is too slick for paint to grab onto. A little etching gives the paint something to hold onto for years to come
Types of Paints and Stains for Concrete Floors
Concrete floors are durable but can often look dull or unfinished. Painting or staining them not only enhances their appearance but also protects the surface from wear and stains.
Here’s a rundown of different types of paints and stains that work well on concrete floors.
1. Epoxy Paint
Epoxy paint is a popular choice for concrete floors because of its strong adhesive properties and durability.
It creates a hard, glossy surface that resists chemicals, stains, and heavy foot traffic, making it ideal for garages, basements, or industrial spaces. Application requires proper preparation for maximum adhesion.
Click here to buy Behr Premium #52 Self-Priming 1- Part Epoxy Satin Interior/Exterior Concrete and Garage
2. Water-Based Concrete Stains
Water-based stains use pigments instead of chemical reactions, offering a wider color range with consistent, uniform finishes. They are easier and safer to apply, quick drying, and low odor.
However, they don’t penetrate as deeply as acid stains, so I use top-quality sealers to protect the surface and extend lifespan
Click here to buy Direct Colors Concrete Water based stain
3. Concrete Stain
Concrete stains penetrate the surface instead of coating it, offering a natural, translucent color that enhances the texture of the floor.
Both acid-based and water-based stains are available, allowing beautiful marbled or variegated effects. Stains provide long-lasting color without peeling or flaking.
Click here to buy Valspar Solid Base Concrete Stain 1 gal
4. Polyurethane Coating
Polyurethane coatings add a tough, protective layer over painted or stained concrete floors. They provide excellent resistance to abrasion, UV damage, and moisture.
This clear or tinted finish enhances color depth and durability, often used as a topcoat after staining or painting.
Click here to buy Polyurethane HD Aliphatic Polyurethane 2K 1 Gallon Clear Gloss
5. Acetone-Borne Dyes
Acetone-borne dyes are solvent-based, offering intense, transparent colors with the ability to create artistic or detailed concrete floor designs.
They evaporate quickly and penetrate the surface well but require careful application and ventilation. These dyes are popular for decorative or custom patterns.
Click here to buy Clemons Super Dye Acetone Concrete Dye
The Bottom Line
Painting concrete floors is one of those projects that delivers a big impact for the effort you put in.
Remember, taking your time with prep work isn’t just advice – it’s the difference between a floor that looks great for years and one that starts failing in months.
Your concrete doesn’t have to stay boring forever. With the right approach, you can create a surface that’s both functional and attractive.
Start planning your project, gather your materials, and get ready to transform that plain concrete into something you’ll be happy to show off.