These days, many homeowners opt to keep a plumbing camera at home for routine DIY checks—especially when drains begin to run slowly. While a camera won’t remove the clog for you, it will show you what’s causing the blockage and where it’s forming.
If you spot a serious issue, contact a professional plumber immediately. And for everyday minor problems, you can often handle the inspection yourself with a simple DIY check.
This guide will walk you through when a plumbing camera makes sense, how to use it safely, how to diagnose issues in real situations, and how to turn what you see on the screen into the right next step.
What a Plumbing Camera Actually Does (and Doesn’t Do)
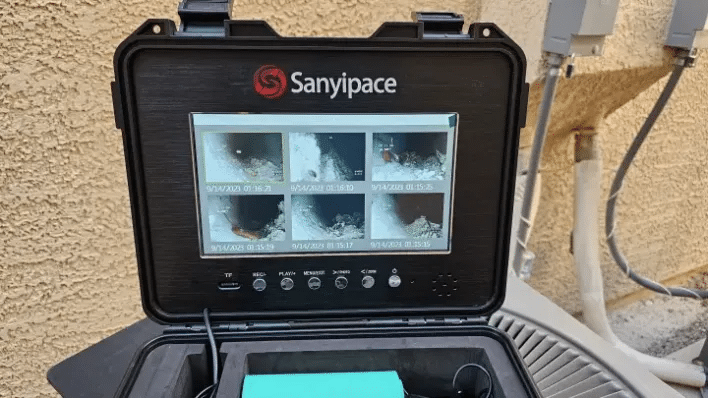
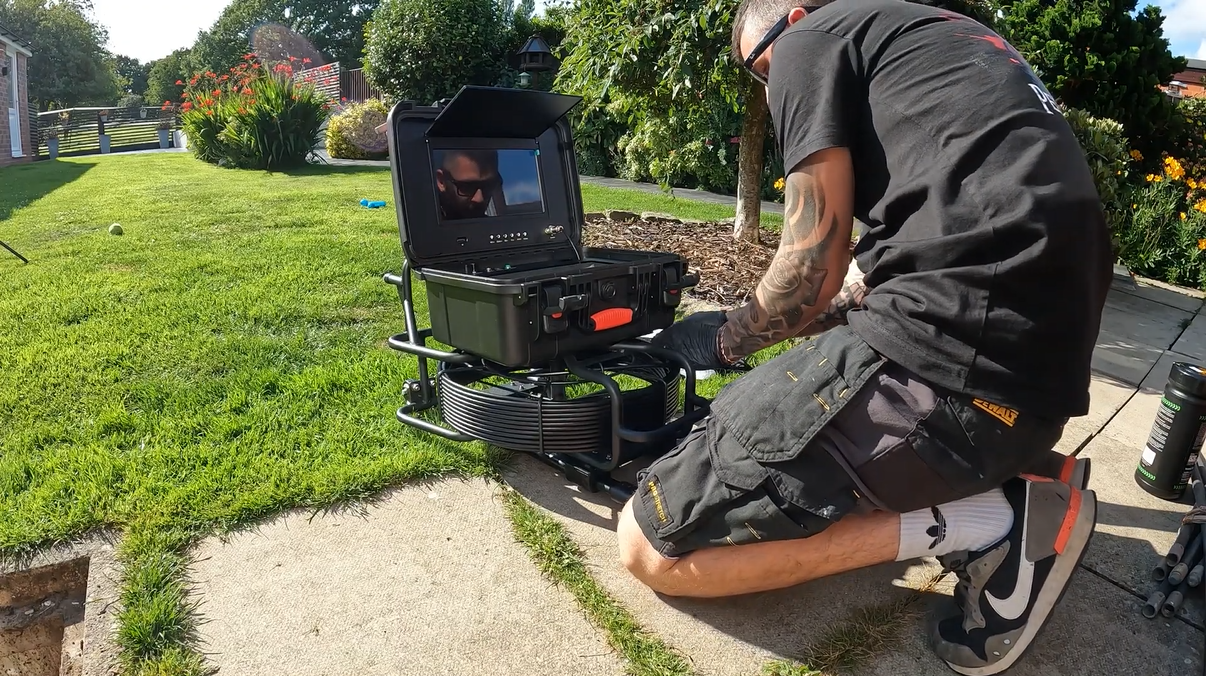
A plumbing camera is a small, waterproof camera head attached to a flexible push cable. You feed it into a drain opening or cleanout and watch live video on a screen. Most DIY-friendly units also let you record video or take photos—useful if you want to compare “before vs. after” or share footage with a plumber later.
What it does well:
- Locates where a blockage is (near the trap vs. deeper in the line)
- Identifies what the blockage likely is (hair, grease, sludge, roots, collapsed pipe)
- Reveals pipe condition (cracks, offsets, corrosion, bellies/standing water)
- Helps you choose the right fix (snaking, cleaning, jetting, or repair)
What it doesn’t do:
- Remove a clog by itself
- Guarantee the “perfect diagnosis” in every pipe (tight bends and weird layouts can limit reach)
- Replace professional cleaning for severe grease, heavy root intrusion, or collapsed lines
Think of a pipe camera as your decision tool: it tells you whether you’re dealing with a basic clog you can handle—or a bigger issue that will keep wasting your time until it’s addressed properly.
When Is a Camera Worth It for DIY Homeowners?
A plumbing camera is especially useful when:
1) The clog keeps coming back
If your kitchen sink drains fine after you snake it, then slows again two weeks later, you may be dealing with grease buildup deeper in the line, not a one-time blockage at the trap. Effective drain cleaning can involve more than just a simple DIY fix, often requiring professional tools like hydro-jetting to completely scour the interior of the pipes. By removing these stubborn deposits once and for all, you can restore full flow capacity and prevent the recurring clogs that lead to daily frustration.
2) Multiple fixtures act up
If the tub drains slowly and the toilet gurgles, the problem may be further down the branch line or main line.
3) You smell odors you can’t explain
Recurring sewer-like smells can come from biofilm, sludge, partial blockages, or even a damaged pipe—things that are hard to confirm without seeing inside.
4) You want to avoid “random fixes”
DIY drain cleaning often becomes a cycle: plunge → chemicals → snake → repeat. A camera helps you stop spending money and time on the wrong solution.
5) You live in an older home (or have trees near the line)
Older pipes and root intrusion are common reasons for repeated clogs and slow drains.
DIY Safety First (Don’t Skip This)
Before you put any camera into a drain:
- Avoid using harsh chemical drain cleaners right before a camera inspection. If chemicals are still sitting in the pipe, you could damage the camera or splash yourself when inserting it.
- Wear gloves and eye protection. Drains can spit back.
- Ventilate the area if you’re opening a cleanout or working near sewer gases.
- If you suspect a sewage backup, stop DIY work and call a pro—sewage exposure is a health hazard.
Also, if you’ve already poured chemicals, run plenty of water (if safe and the drain is not fully blocked) and give it time before you inspect.
What Kind of Camera Do You Need for Blockage Troubleshooting?
Not all “plumbing cameras” are the same. Here’s the practical breakdown:
Basic plumbing camera (cheap)
These are the small plumbing cameras used for walls, engines, and tight spaces. They can work for very short, accessible drain checks, but many struggle with:
- Getting far into a pipe
- Staying centered (image becomes messy)
- Navigating bends
Drain/sewer inspection camera (best for DIY pipe blockages)
A proper drain/sewer camera typically includes:
- A tougher push rod cable
- A waterproof camera head (often IP68)
- Strong LEDs
- A monitor and recording features
- Optional helpful upgrades like self-leveling, distance counter, or locator (512Hz)
DIY recommendation: If your goal is to troubleshoot household clogs (kitchen, bath, laundry, or even a main line via cleanout), a dedicated sewer/drain camera is the most reliable style.
Step-by-Step: How to Use a Plumbing Camera to Find a Blockage?
Step 1: Pick the best entry point
Your camera will go in easiest through:
- A cleanout (ideal for main line inspections)
- A removable trap or clean drain opening
- A toilet flange (more advanced; not always recommended for beginners)
If you’re troubleshooting one fixture (like a sink), entering from that drain is fine. If you suspect a main line issue, look for a cleanout.
Step 2: Do a quick “basic check” first
Before using the sewer camera, do a couple of quick observations:
- Is it slow draining or fully blocked?
- Does it back up elsewhere when you run water?
- Any gurgling sounds (air trapped by partial blockage)?
- Any sewage smell?
These clues help you interpret what you see.
Step 3: Prep the line (lightly)
If the drain is partially open:
- Run warm water for a minute to clear loose debris
- Remove standing water if possible (it can reduce image clarity)
If it’s fully blocked, don’t force water. Go straight to inspection.
Step 4: Feed the camera slowly—don’t muscle it
Turn on the screen, then gently feed the camera head forward. Move slowly and watch for:
- Sudden resistance (often a bend or blockage)
- Image changes (sludge, cloudy water, grease coating)
- Standing water (could suggest a belly or severe clog)
Tip: If you hit resistance, pull back slightly and rotate the cable. Many “stops” are just turns.
Step 5: Identify what you’re seeing
Here are common blockage “looks” on camera:
- Hair clogs: tangled strands, usually near bathroom drains and traps
- Soap scum/sludge: gray or cloudy coating that narrows the pipe over time
- Grease buildup: thick yellow/brown coating; often in kitchens; can look like waxy walls
- Foreign objects: wipes, toys, paper bundles—more obvious shapes
- Roots: stringy or web-like fibers entering through joints or cracks (often main line)
- Collapsed/offset pipe: camera can’t pass; you may see broken edges or a “wall.”
- Belly/standing water: consistent pooled water in a section (drain may still work but slowly)
Step 6: Mark the distance (if your camera supports it)
A distance counter helps you estimate how far the problem is from the entry. Even without a counter, you can:
- Use tape marks on the cable every few feet
- Note how much cable you’ve fed in
This is extremely helpful if you end up calling a plumber—your footage becomes actionable.
Step 7: Record what matters
Record:
- The “normal” pipe section
- The blockage area
- Any visible damage (cracks, roots, corrosion)
- The best close-up you can get without pushing too hard
A 30–60 second clip is often enough.
What to Do After You Find the Blockage
This is the part where a sewer inspection camera really saves you money. Your fix should match the problem:
If it’s hair/soap scum near the fixture
- Remove and clean the trap (sink)
- Use a small drain snake for the branch
- Consider a routine maintenance approach (hair catchers, gentle cleaning)
If it’s grease buildup in a kitchen line
- A small snake may poke a hole, but won’t remove the coating
- You may need a stronger cleaning method (and sometimes professional jetting)
- The camera helps confirm whether it’s grease vs. an object
If it’s a solid object or wipes
- Snaking may retrieve or move it—sometimes it won’t
- If it’s lodged deep, you may need a pro to avoid pipe damage
If you see roots, cracks, or a collapsed section
This is your sign to stop DIY. Roots mean the pipe is compromised somewhere, and cracks/collapse can turn into a bigger failure. You can still use the camera to document it, but repair or professional clearing is usually the correct next step.
Common DIY Mistakes (That Make Things Worse)
- Forcing the camera through resistance (can damage the head or jam it)
- Using the wrong entry point and fighting tight bends
- Assuming “I can see it, so I can fix it” (some issues require specialized equipment)
- Overusing chemicals (can damage pipes and create safety hazards)
- Skipping the real cause (like grease coatings or roots) and repeatedly snaking the symptom
When You Should Call a Pro (Even If You Have a Camera)
Call a plumber if:
- Sewage is backing up into tubs/showers
- Multiple drains are affected at once
- You see roots, a cracked pipe, or a collapse
- The camera cannot pass a point, and you suspect structural damage
- Your home has old, fragile piping, and you’re unsure about aggressive cleaning
The good news: if you have already used a camera, you’ll be calling with clear information, which often speeds up diagnosis and reduces unnecessary work.
Is Buying a Plumbing Camera Worth It for DIY?
If you’re a homeowner who:
- Deals with recurring slow drains
- Owns an older home
- Has trees near the sewer line
- Wants to avoid repeated service calls, then owning a DIY-friendly sewer camera can be a practical investment.
Even when you do hire a plumber, having your own footage helps you communicate the problem clearly and compare “before/after” results. And if you’re shopping for a camera, prioritize ease of use (clear screen, good lighting, durable cable) over overly technical specs you won’t use.
Quick FAQ
Can a camera go through a toilet?
Sometimes, yes, but it depends on the camera head size and your comfort level with removing/reinstalling the toilet. For beginners, a cleanout is usually safer and easier.
Will a camera damage my pipes?
Used gently, a camera is low risk. Damage usually happens when people force equipment past resistance or use aggressive tools incorrectly.
What pipe size can DIY cameras inspect?
Many push cameras work well in typical household drain lines (often 2–4 inches). Smaller lines can be tough if the camera head is too large.
Do I need a locator (512Hz)?
Not required for basic DIY troubleshooting. But if you’re inspecting deeper lines and want to pinpoint where a problem is (especially underground), a locator can be a big upgrade.
Final Takeaway
You absolutely can use a plumbing camera to DIY troubleshoot pipe blockages—and for many homeowners, it’s the smartest way to stop guessing. Start with safe, simple checks, use the camera to confirm what’s happening, then match your fix to the type of blockage you actually see.
And if the footage shows roots, structural damage, or anything that looks beyond a basic clog, you’ll know it’s time to bring in a pro—without wasting time or money along the way.