Let’s be honest. Most of us get sucked in by those stunning Pinterest boards. We pick the shiny tiles and the designer taps, but once the project is finished, we realize the hard way: the shower feels like a phone booth, and water splashes everywhere.
I’m sharing my real-world bathroom renovation advice based on actual DIY experience. This isn’t a high-brow design lecture; it’s a practical, “no-nonsense” guide for beginners who want a bathroom that actually works without wasting money.
This is based on my own experience during the renovation process. While it might not be technically advanced enough for an interior designer, it’s more suitable for renovation beginners and offers a more practical approach.
A beginner’s guide that’s easy for renovation novices to understand, helping them avoid common pitfalls.
1. Getting the Layout Right (The Three Essentials)
No matter how tiny your space is, it must handle three things: Washing, Using the WC, and Showering. If the dimensions are off, you’ll regret it every morning.
The Basin Area: Your vanity unit isn’t just for brushing teeth; it’s your main storage hub. Keep it practical.
The WC Zone: Think about movement. You need enough clearance to actually move around without bumping into the walls.
The Shower vs. Bath: In smaller UK homes, a walk-in shower is almost always better than a cramped bathtub.
Added Comfort: If you’re lucky with space, you can add a laundry nook or a freestanding bath. But for most of us, focusing on the “Big Three” is the priority.
2. The Golden Numbers (Sizing it Up)
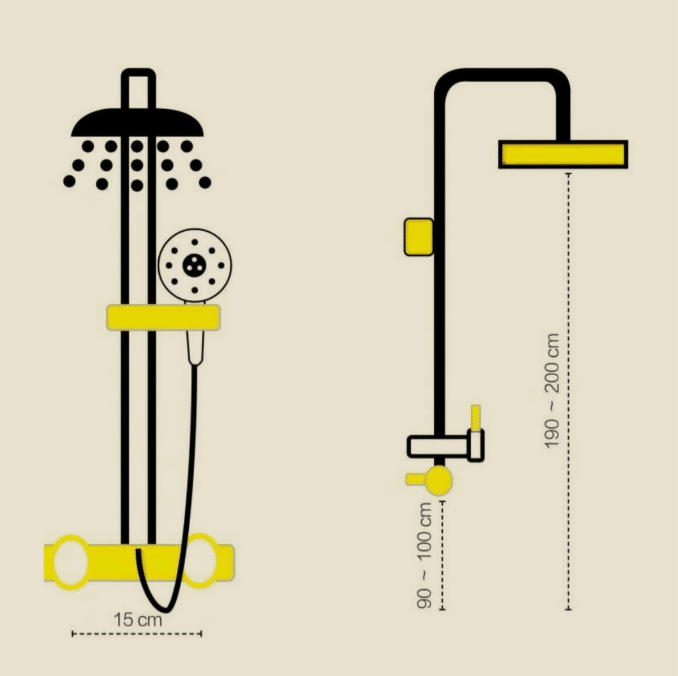
The Shower Zone
Don’t go too small. You need room to move.
Minimum Size: 80cm × 100cm.
Ideal Size: 90cm × 100cm (much more comfortable).
Shower Head: The mixer valve should be at 90-100cm height. The overhead rose should be around 200cm.
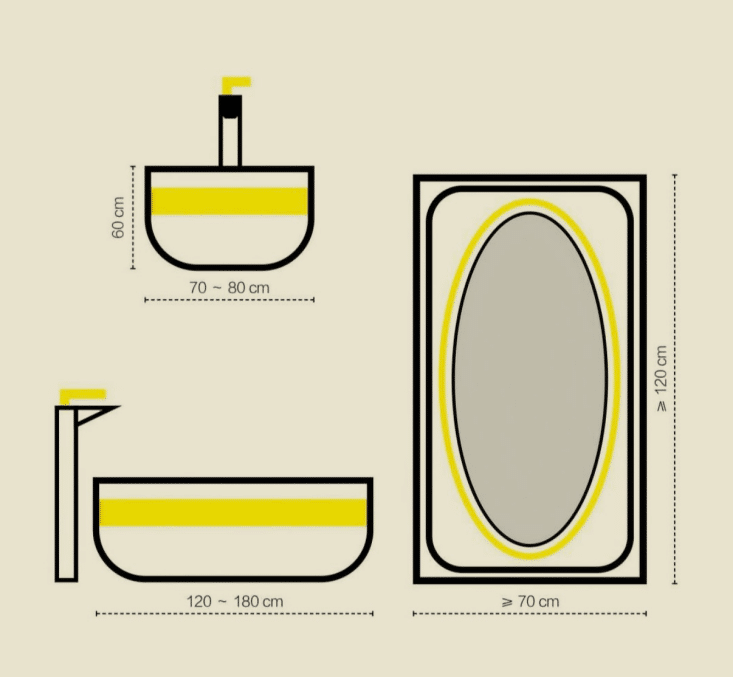
The Bath Zone
In the UK, standard baths are 70-80cm wide and 120-180cm long. Make sure you measure your floor length carefully before buying!
The Basin Area
Height: Keep the basin top between 80-85cm.
Clearance: Leave at least 70cm in front of the basin so you can stand comfortably without blocking the door.
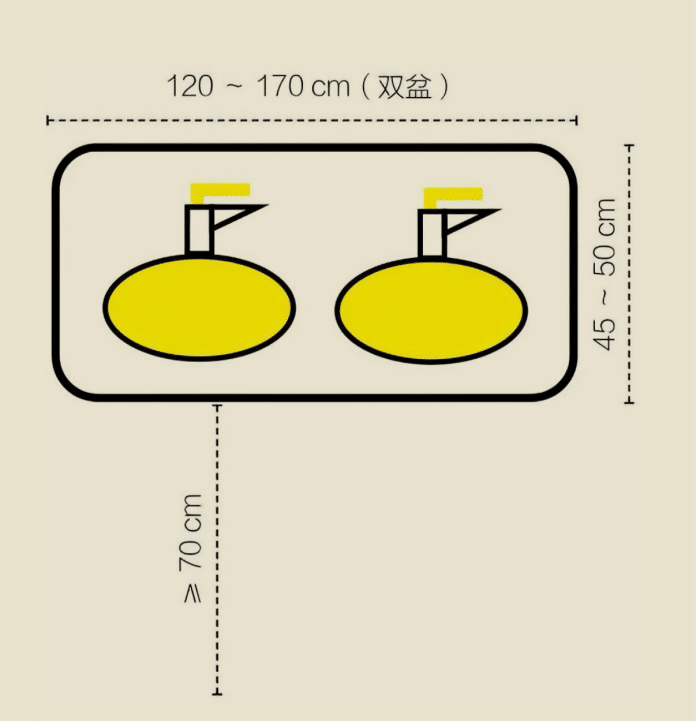
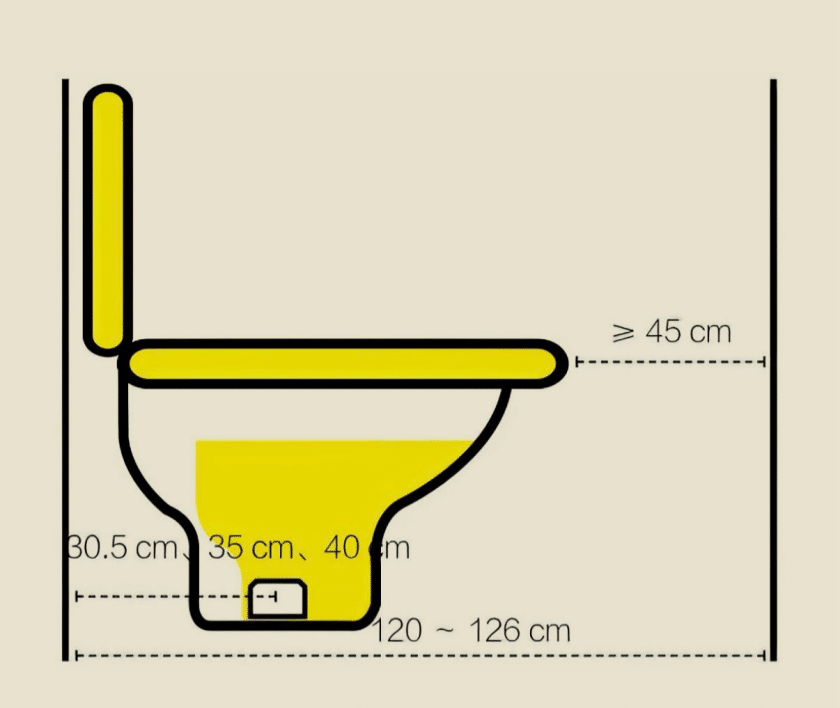
The WC (The Loo)
Space: Leave 15-20cm on both sides of the pan. This gives you elbow room and space for the loo roll holder.
Legroom: You need at least 45cm of clear space in front of the toilet for “turning room.”

3. Smart Layout Combos
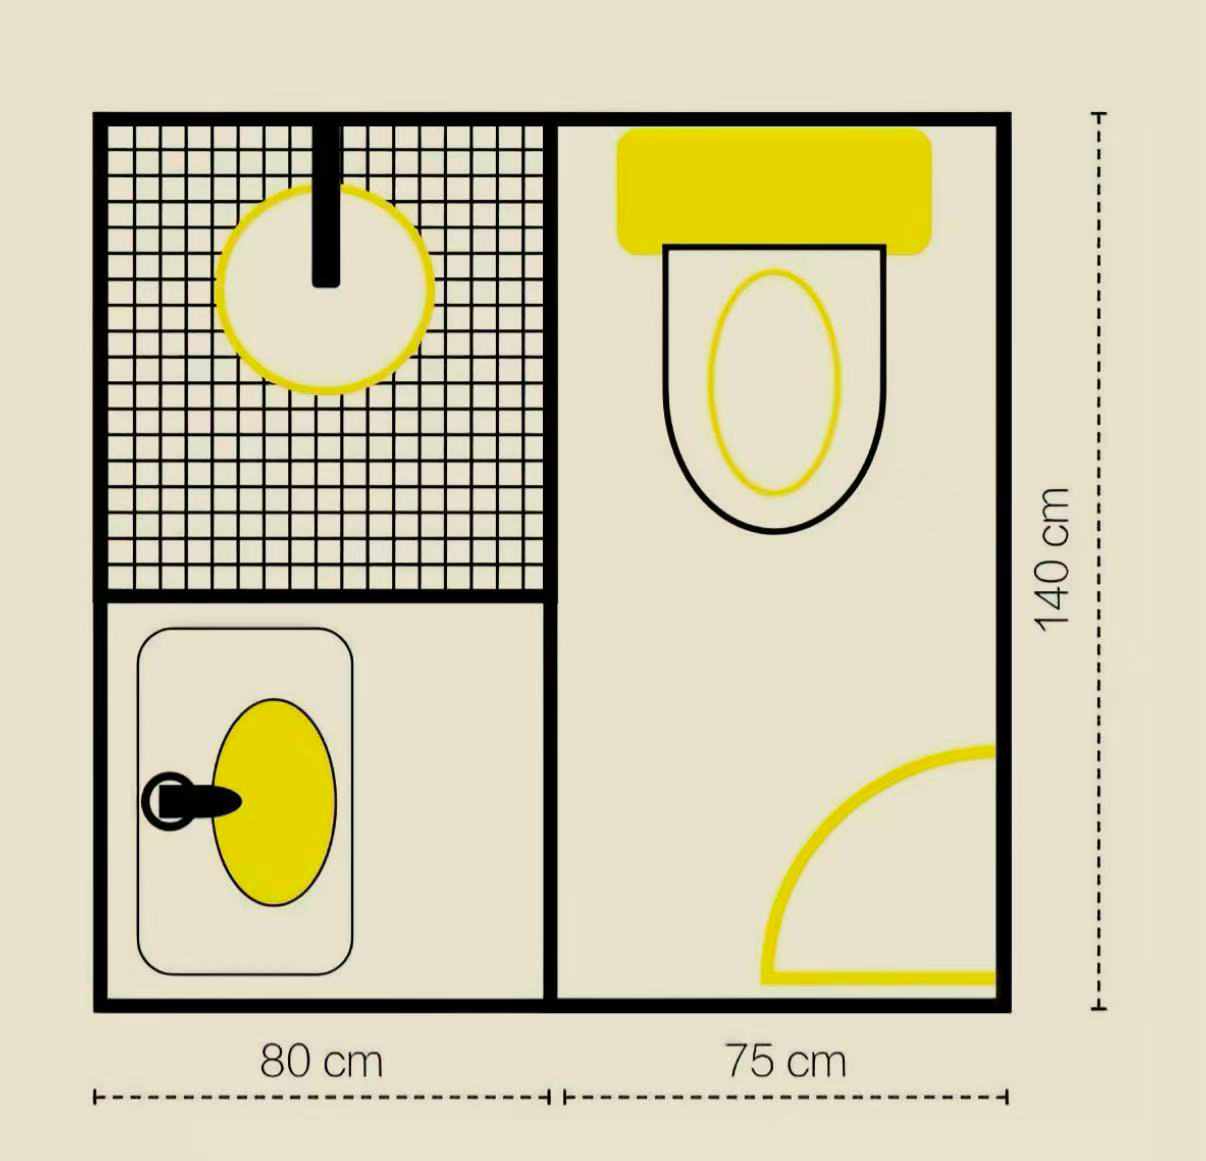
If your bathroom width is around 140cm (a common UK size), try these:
The Three-Way Split: Basin in the middle, WC and Shower on opposite sides. (Minimum length needed: 235cm).
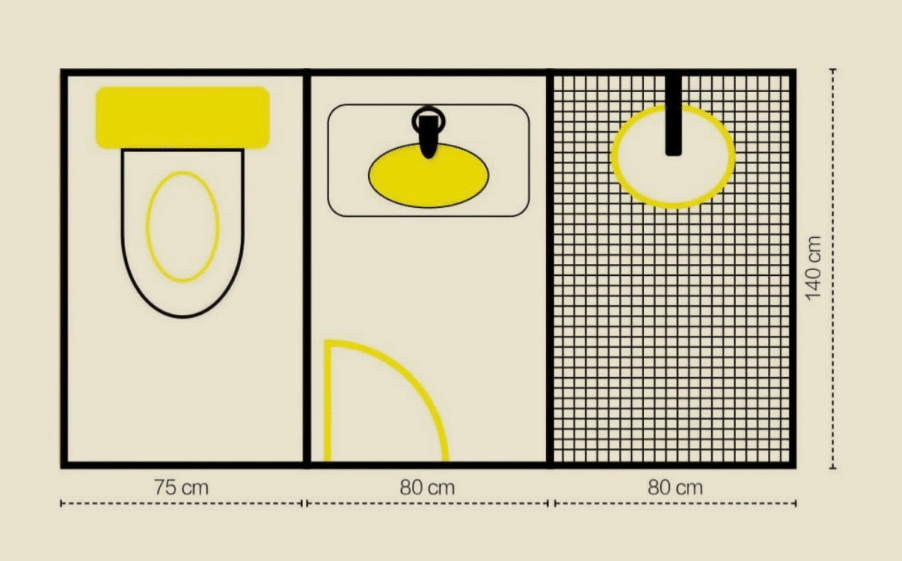
The Compact Two-Way: Separate the shower, but keep the WC and Basin in a shared area to save about 25cm of floor length.
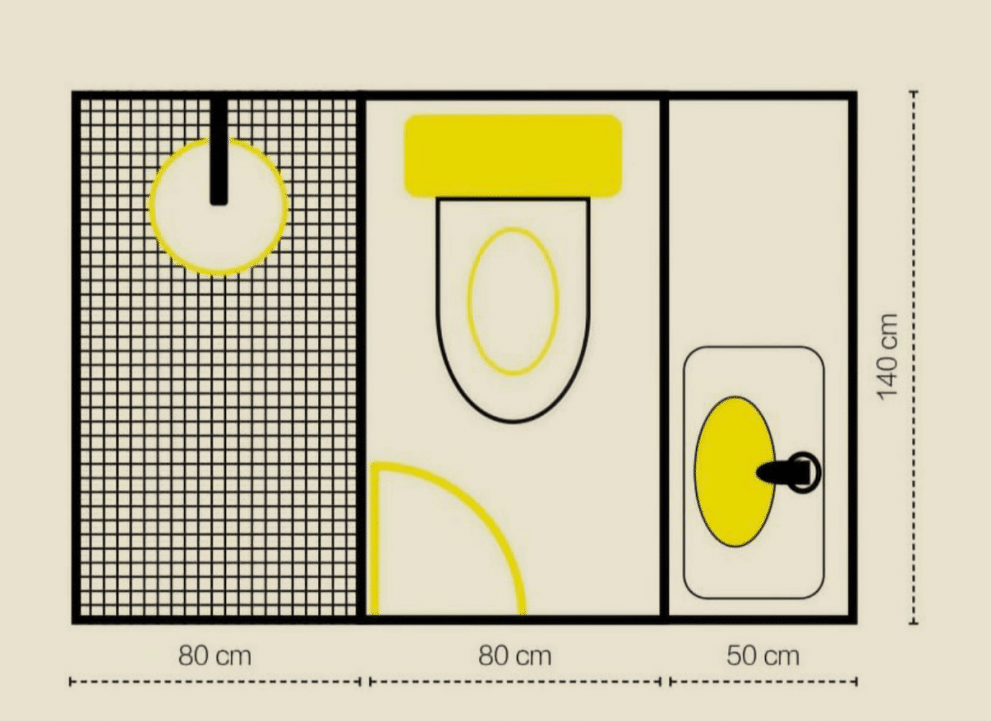
The Hotel Style: Ideal for studio apartments. Shower at one end, WC and Basin along one wall. This saves the most space.
4. Pro Tips: Avoiding the “Wet Floor” Disaster
This is where most DIYers fail.
Stop the Leaks: Forget flimsy shower curtains that get mouldy in a month. Toughened glass doors are the way to go for a modern look. But here’s the secret: glass doesn’t stop water; the seals do.
To keep your floor dry, you must install [SIMBA professional grade shower screen seals]. Most generic seals don’t fit the glass thickness perfectly, but choosing a specialized seal ensures a watertight fit that prevents water from creeping onto your subfloor.
Choose Smart Fixtures:
Toilets: Go for a rimless, back-to-wall model. They are much easier to clean than old-school pans.
Showers: Look for “Air Injection” technology. It gives you a powerful flow while actually using less water.
Drains: Use a deep-seal trap in the shower to keep smells and pests away.
5. The “Cheat Sheet” for Fixtures
Save this list for when you’re marking out your walls:
Robe Hooks: 160cm – 180cm
Storage Shelves: 140cm – 150cm
Towel Rail: 110cm – 130cm
Toilet Roll Holder: 65cm – 70cm
Final Thoughts
Your bathroom should serve your lifestyle, not just look good on Instagram. I hope this guide helps you hold your own when talking to contractors.
Got a question about waterproofing or layout? Drop a comment below – I’d love to hear about your project!