I’ve cracked the code that elite abstract artists keep secret. After years of studying the masters, I found their hidden playbook.
My breakthrough wasn’t expensive paints or fancy brushes—it was psychological triggers that make viewers stop and stare.
I’ll reveal DIY abstract canvas art and exactly how top artists manipulate visual perception using color psychology, strategic imperfection, and material contrast.
What is Abstract Canvas Art?
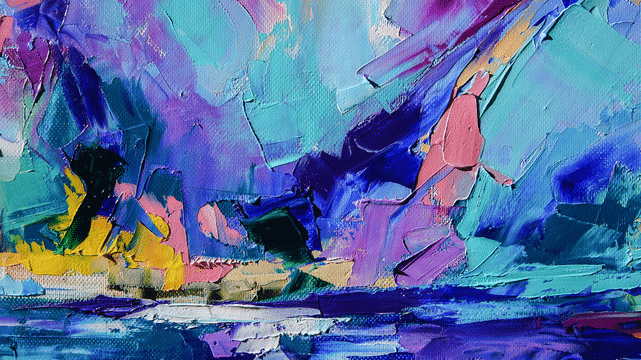
Abstract canvas art is a modern and expressive style of painting where artists use shapes, colors, textures, and lines to create artwork that doesn’t represent specific objects or people.
Unlike realistic paintings, abstract art focuses on emotion, movement, and imagination, making each piece unique and open to interpretation.
This type of art is typically created on canvas using materials like acrylic or oil paints, and is a popular choice for home décor due to its bold, eye-catching style.
If you’re an experienced painter or trying a DIY project, abstract canvas art offers a creative way to express yourself and add a personal touch to your space.
Tools & Materials Needed for Your DIY Abstract Canvas Art
| Item | Purpose |
|---|---|
| Foam-X board | Used to construct a custom paint tray |
| Hot glue or adhesive | For sealing and fixing the tray edges |
| Canvas (any size) | Base surface for painting |
| Acrylic paints | Black, white, yellow orchid, and custom-mixed blues/reds |
| Water | To dilute paints and wet the canvas |
| Floetrol | Paint conditioner for smoother flow |
| Squeegees | The main tool for dragging paint across the canvas |
| Spray bottle | Used to mist water and help paint run smoothly |
| Tissue or blotting paper | For dabbing and texture creation |
| Propane torch | To speed up drying and pop air bubbles in thick paint areas |
| Painter’s tape | For clean edges and mounting support |
Step-by-Step Guide: How to Create Your Own Abstract Canvas Art
Unearth your creative flow with this warm, practical guide to crafting striking DIY abstract canvas art pieces using layered paint, fluid motion, and simple tools like squeegees.
This step-by-step approach makes refining your skills or exploring a new technique easy and inspiring.
Step 1. Prepare Your Custom Paint Tray
Create a bespoke paint tray using a rigid material like Foam-X. Cut and glue the sides to form a shallow box. Seal the inner edges thoroughly to prevent leakage.
This allows you to tilt and angle the tray for paint flow and even mount it vertically for photography or drying.
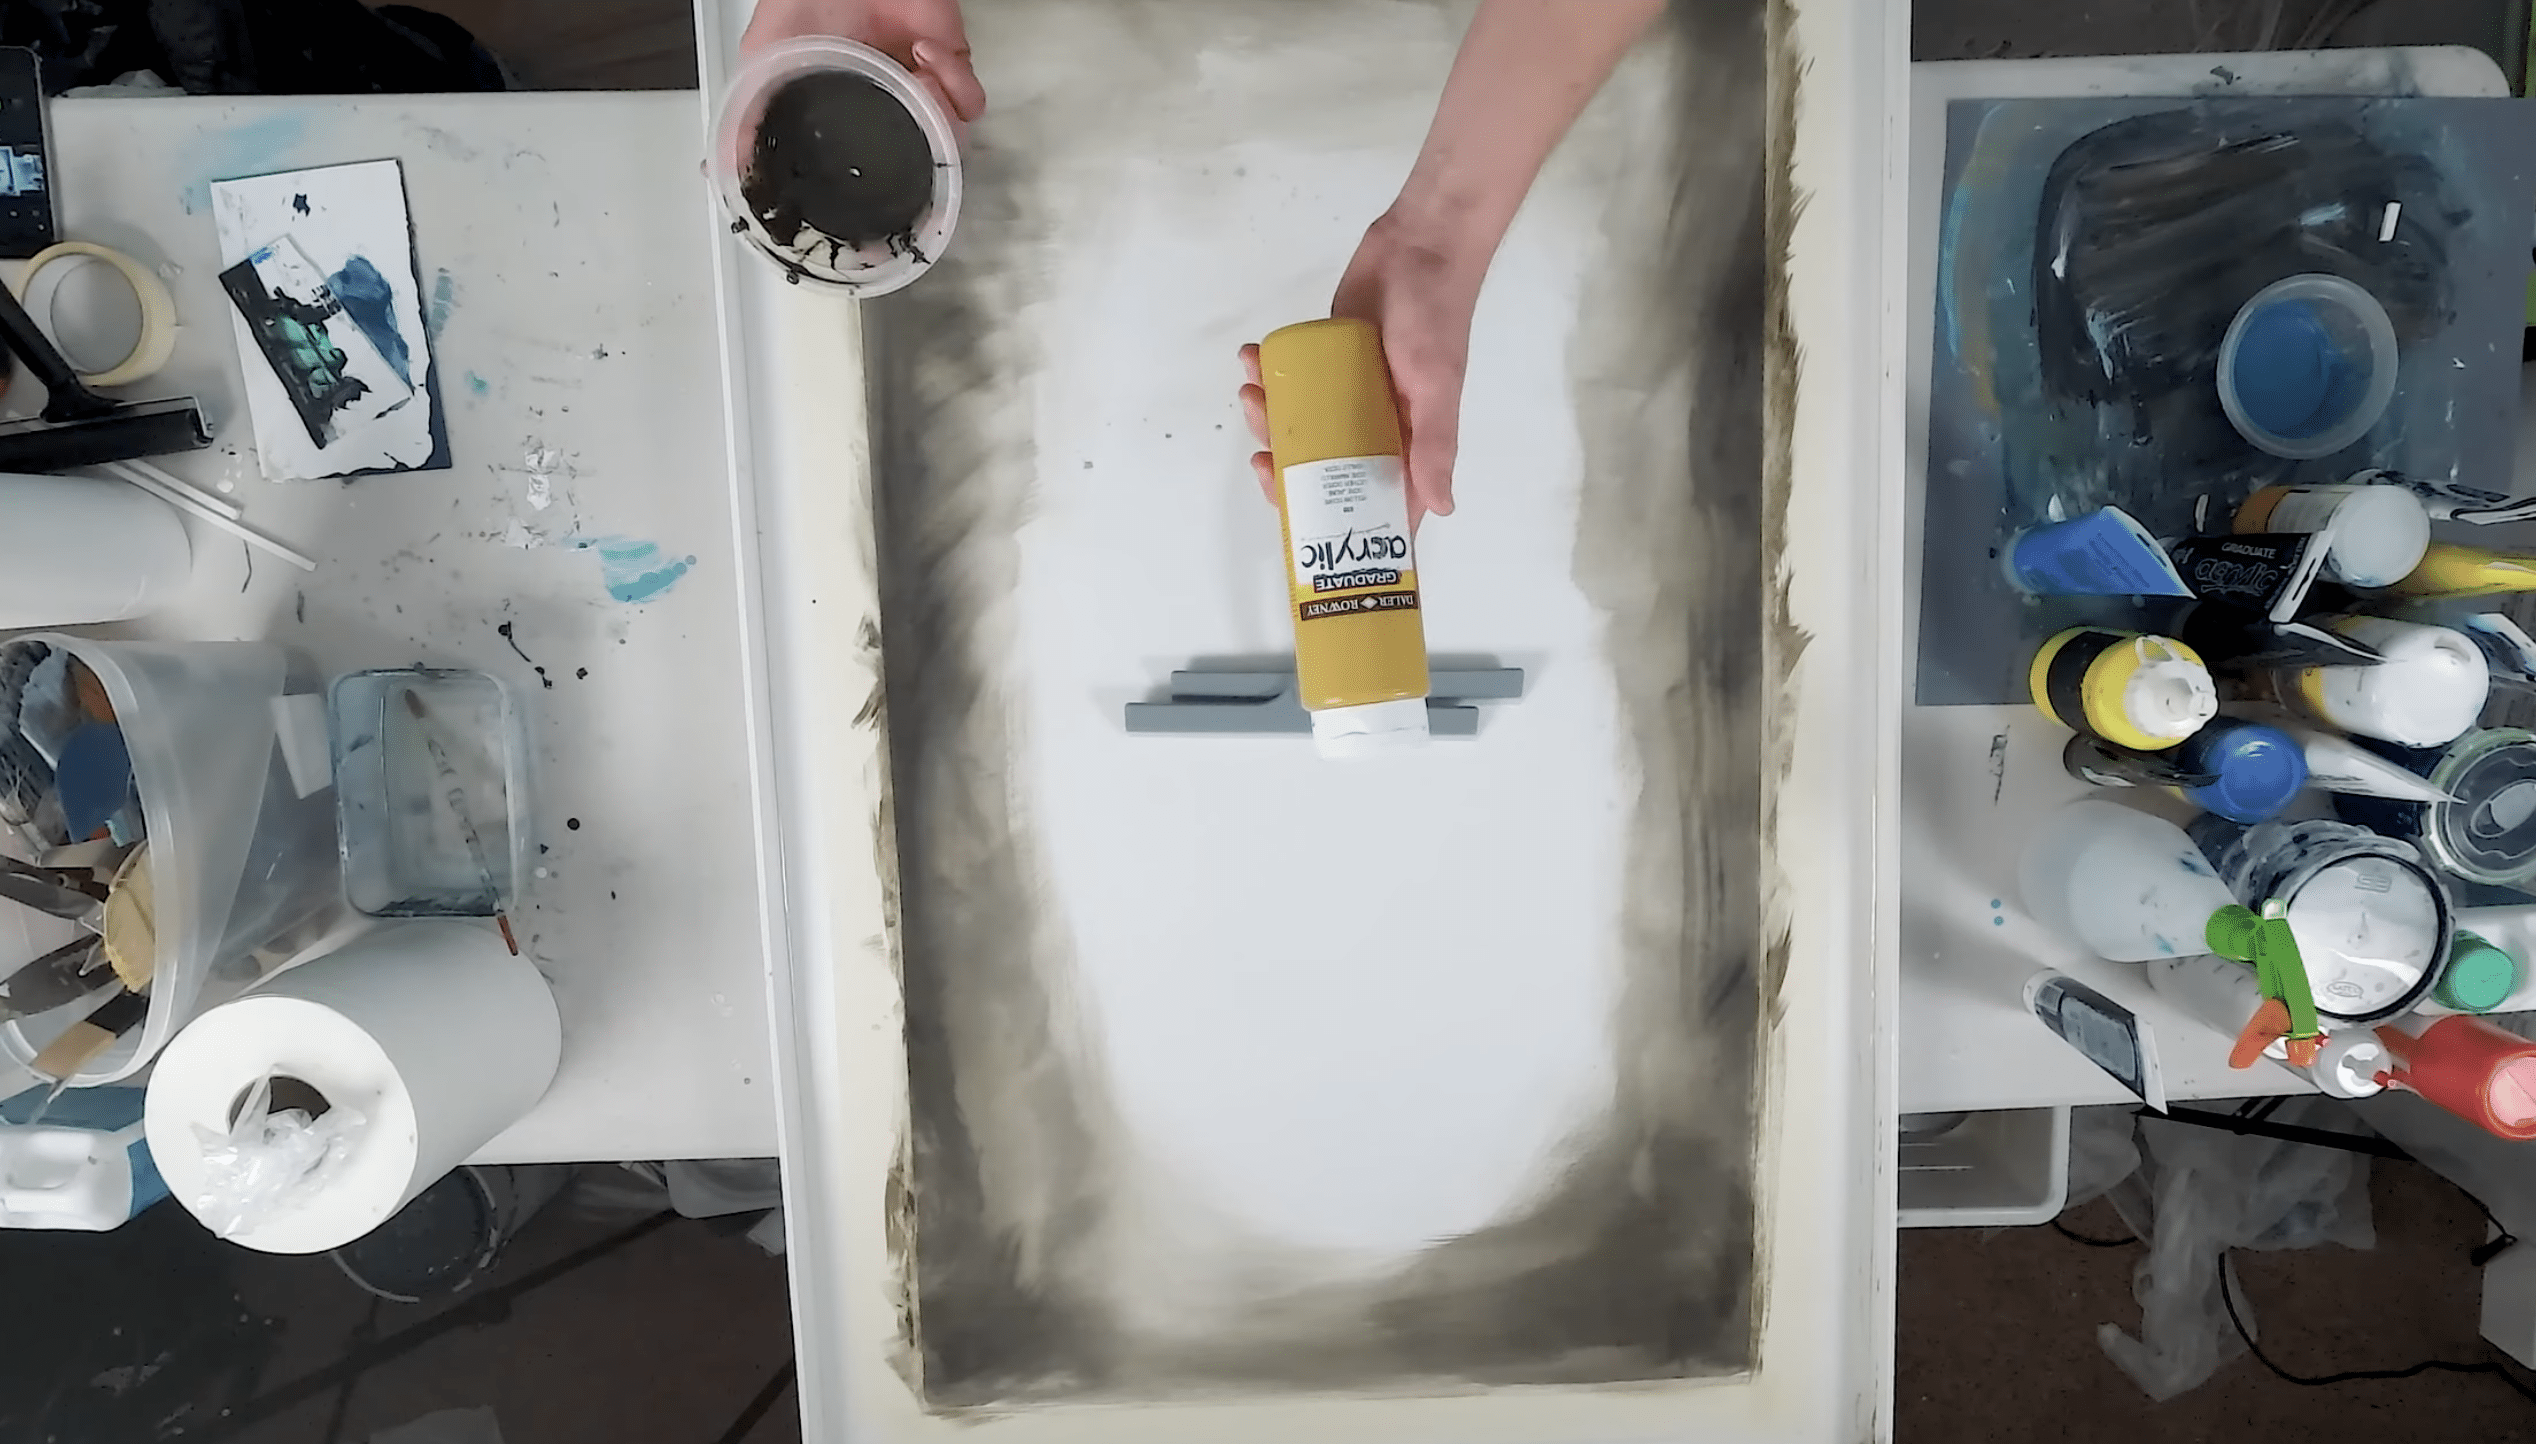
Step 2. Mix and Pre-Spread Base Colors
Begin by mixing your primary base tone, such as a custom black, with a hint of yellow orchid and a bit of white to soften.
Spread this around the perimeter of the canvas to create an underpainting or border foundation. This layer sets the tone for depth and contrast in the later layers.
Step 3. Dilute Paints for Flow and Manipulation
Prepare several paint mixes, including a black, white, and a signature color (e.g., a custom-mixed blue).
Add Floetrol and water to each to ensure fluidity and smooth flow across the canvas. This medium Improvises paint movement and helps achieve gradient effects.
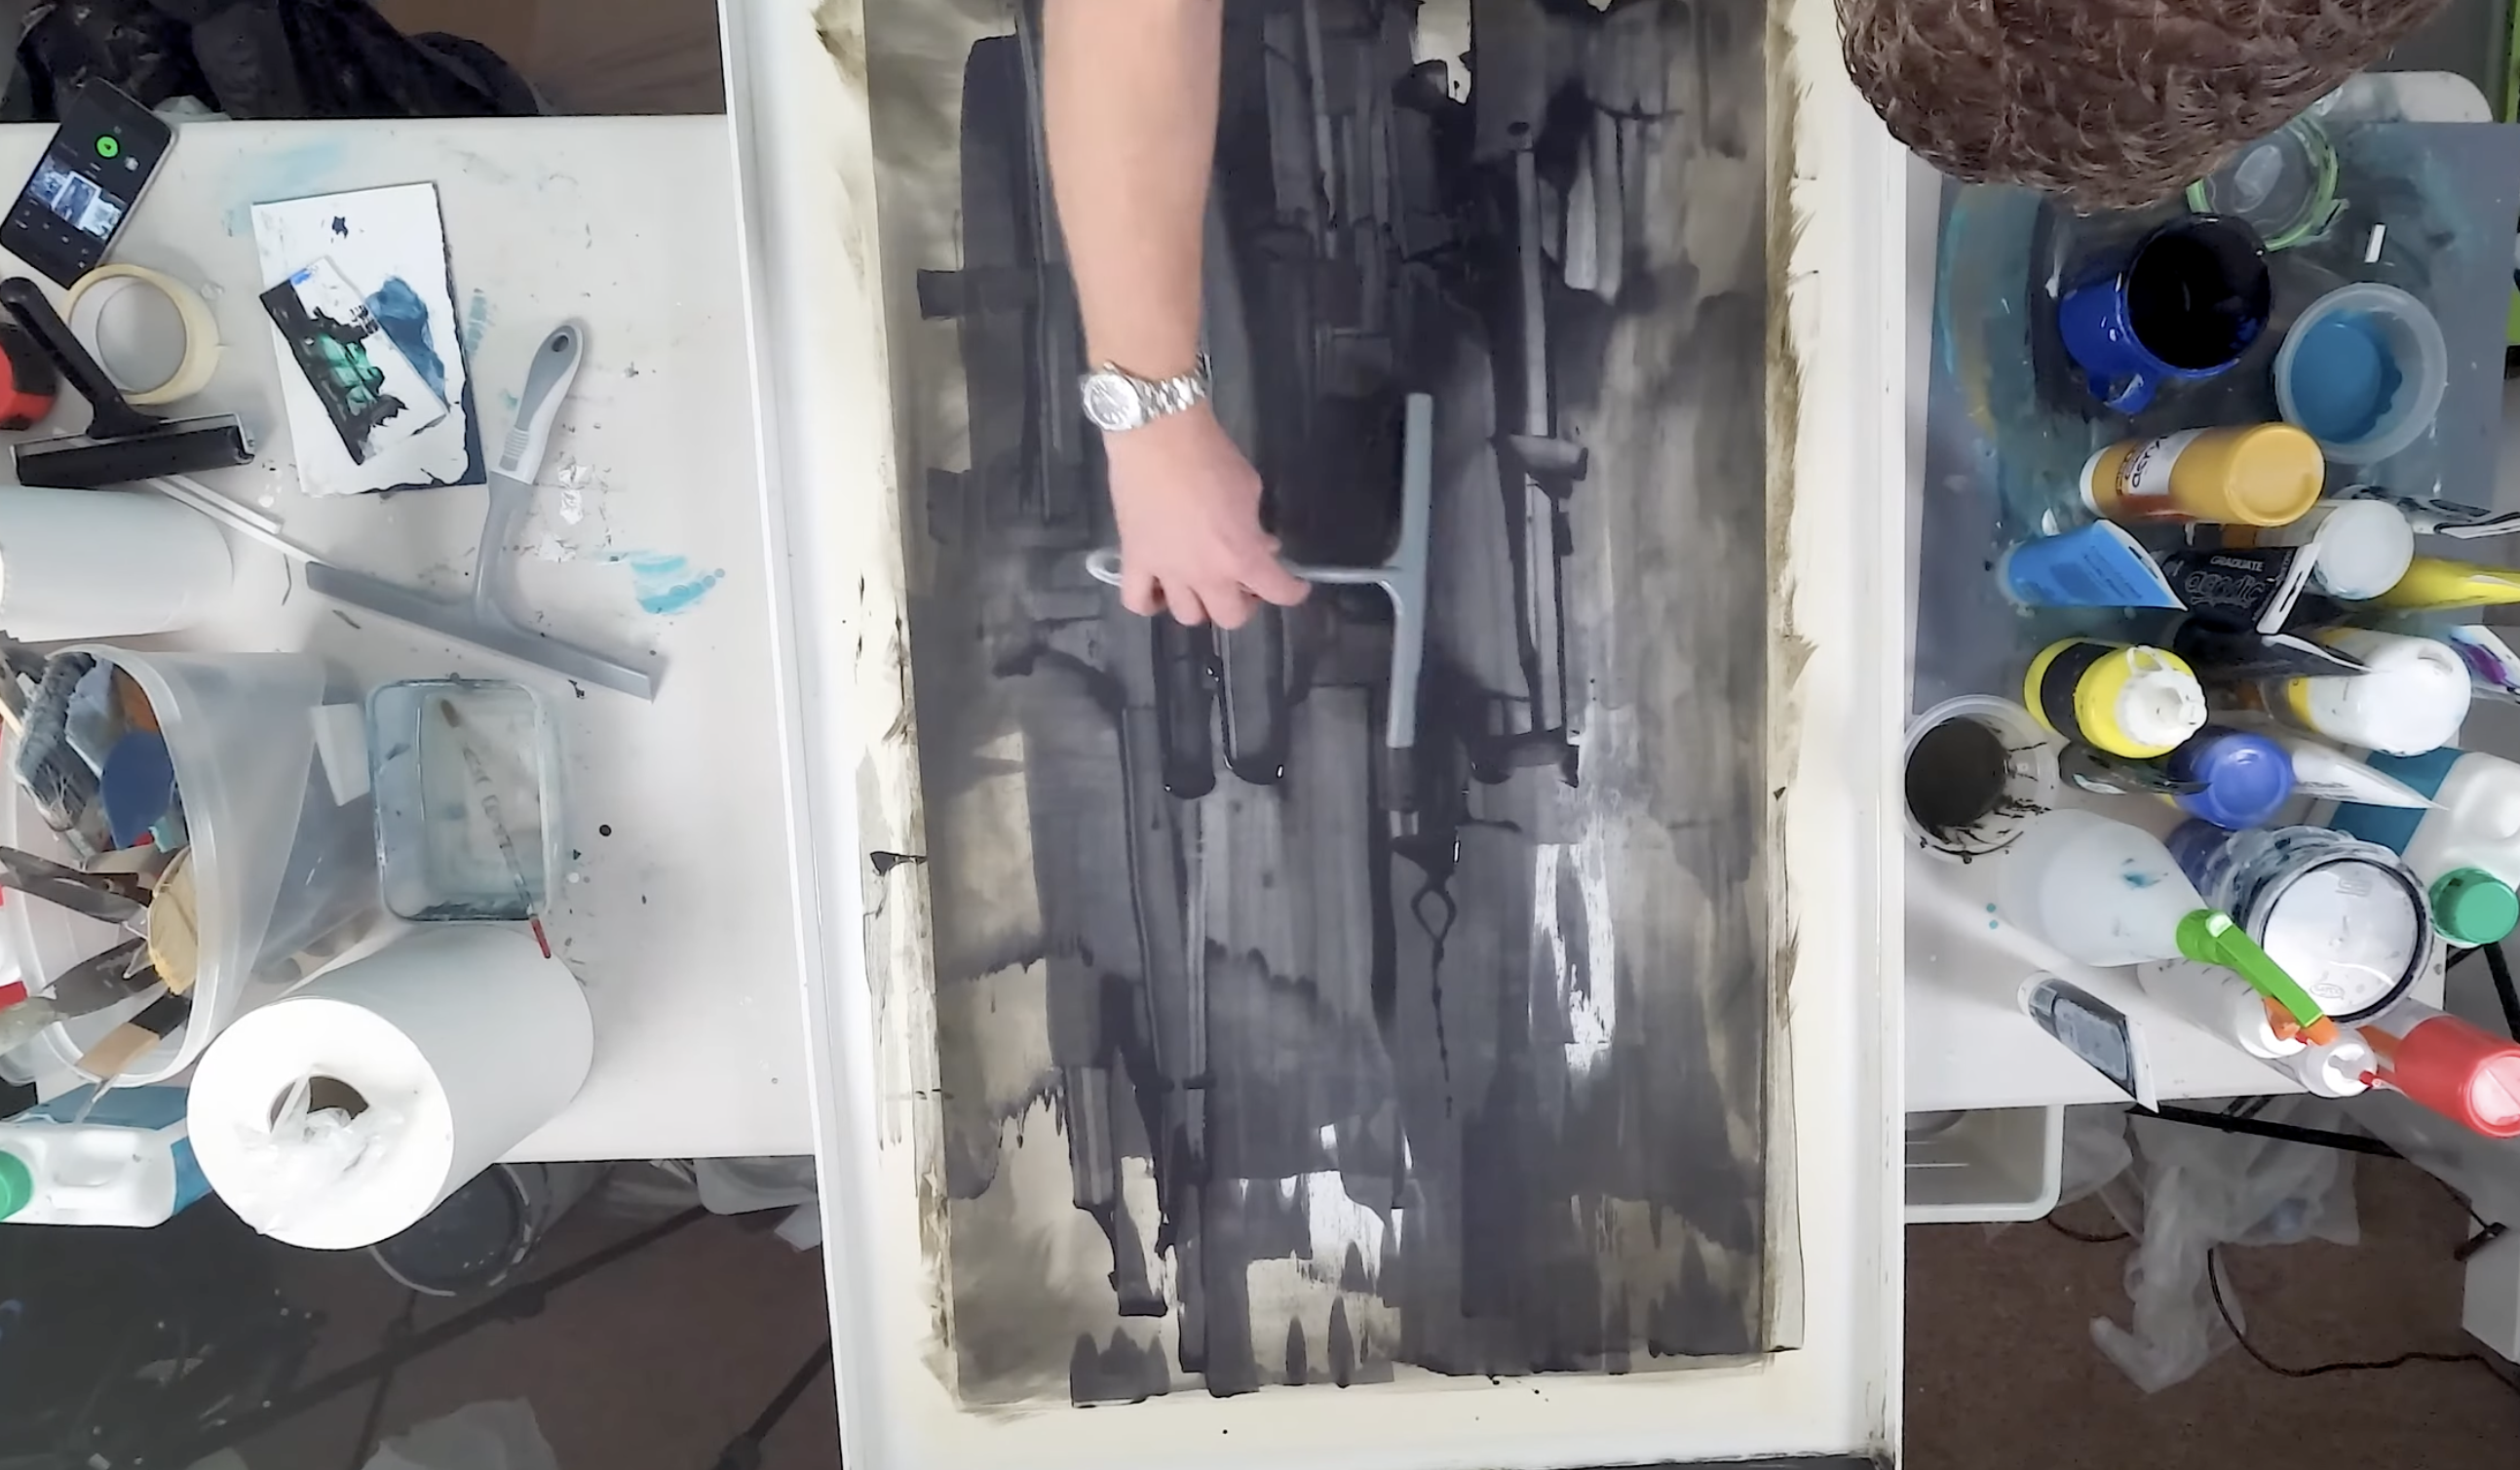
Step 4. Apply Paint and Begin Squeegee Work
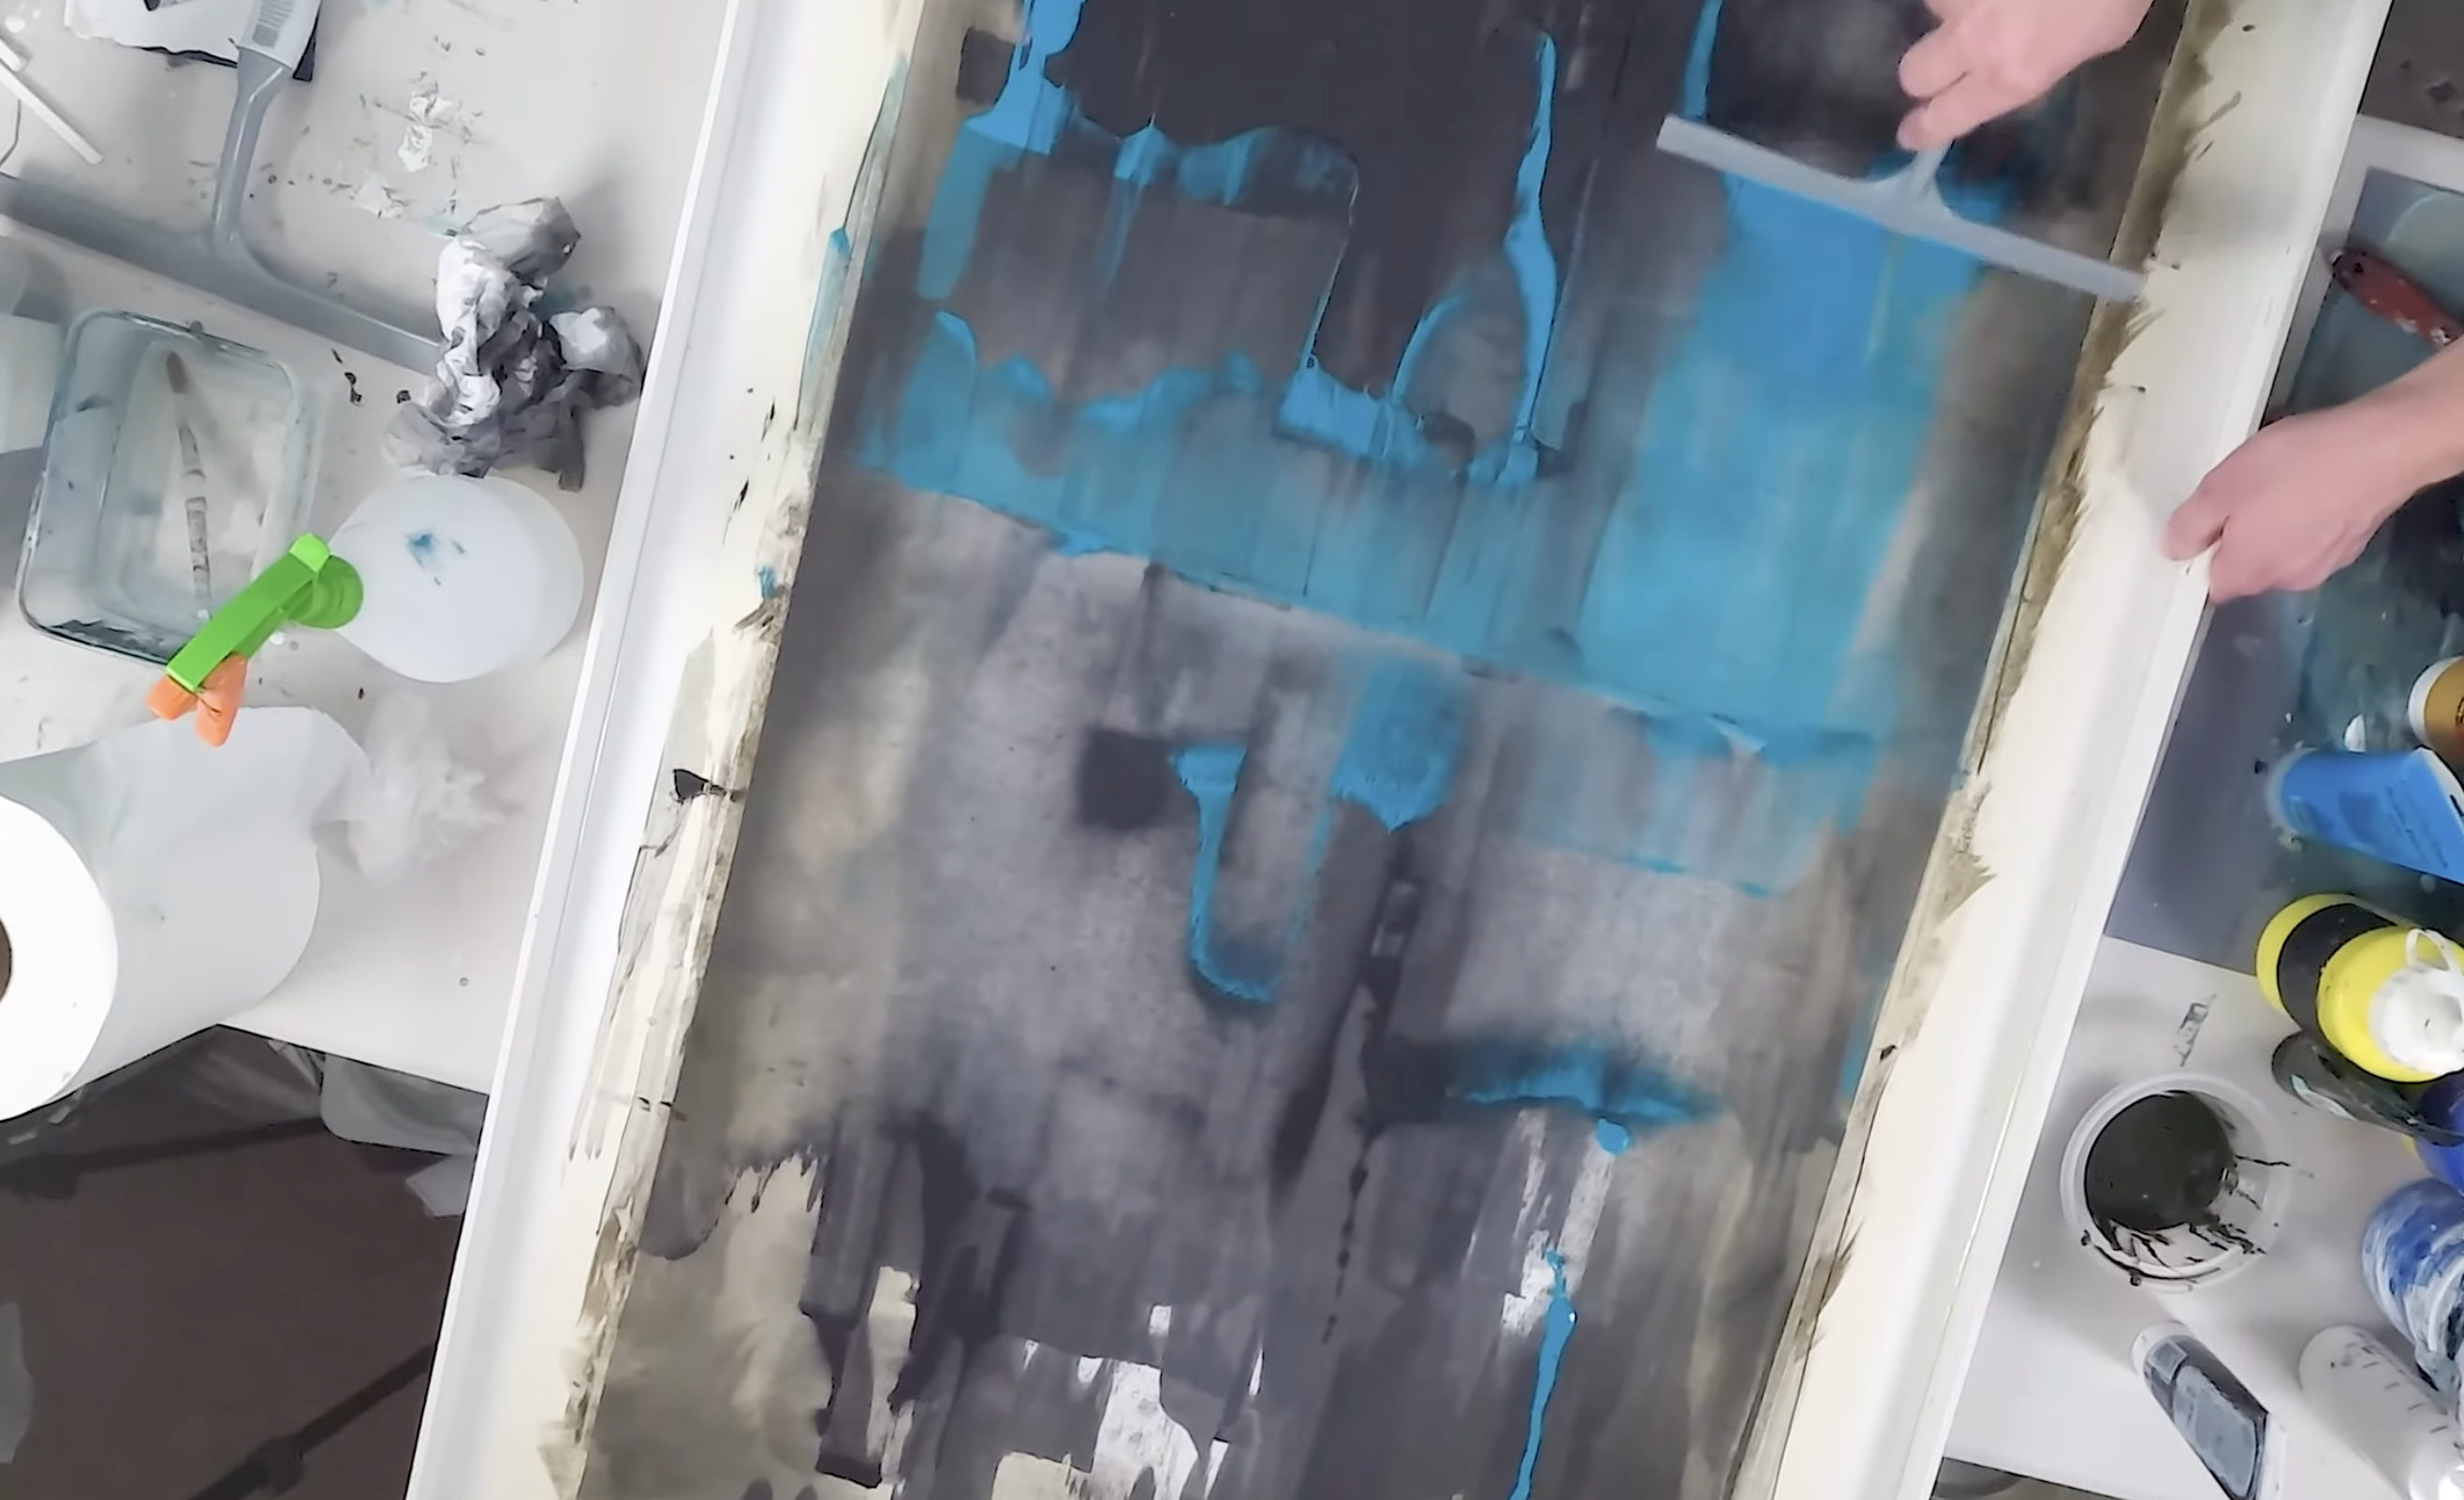
Thoroughly dampen your canvas before pouring the primary mix in the center. Using a flexible squeegee, drag the paint vertically and horizontally.
Note that pressure application matters—more pressure yields a more even spread, while lighter touches leave interesting textures and trails.
Step 5. Develop Texture with Controlled Clean-Up
To refine specific areas or remove excess paint, dab gently with tissue or blotting paper.
You may also manipulate water runs by spraying the canvas to encourage organic flow. These adjustments help shape focal points and add spontaneity to the form.
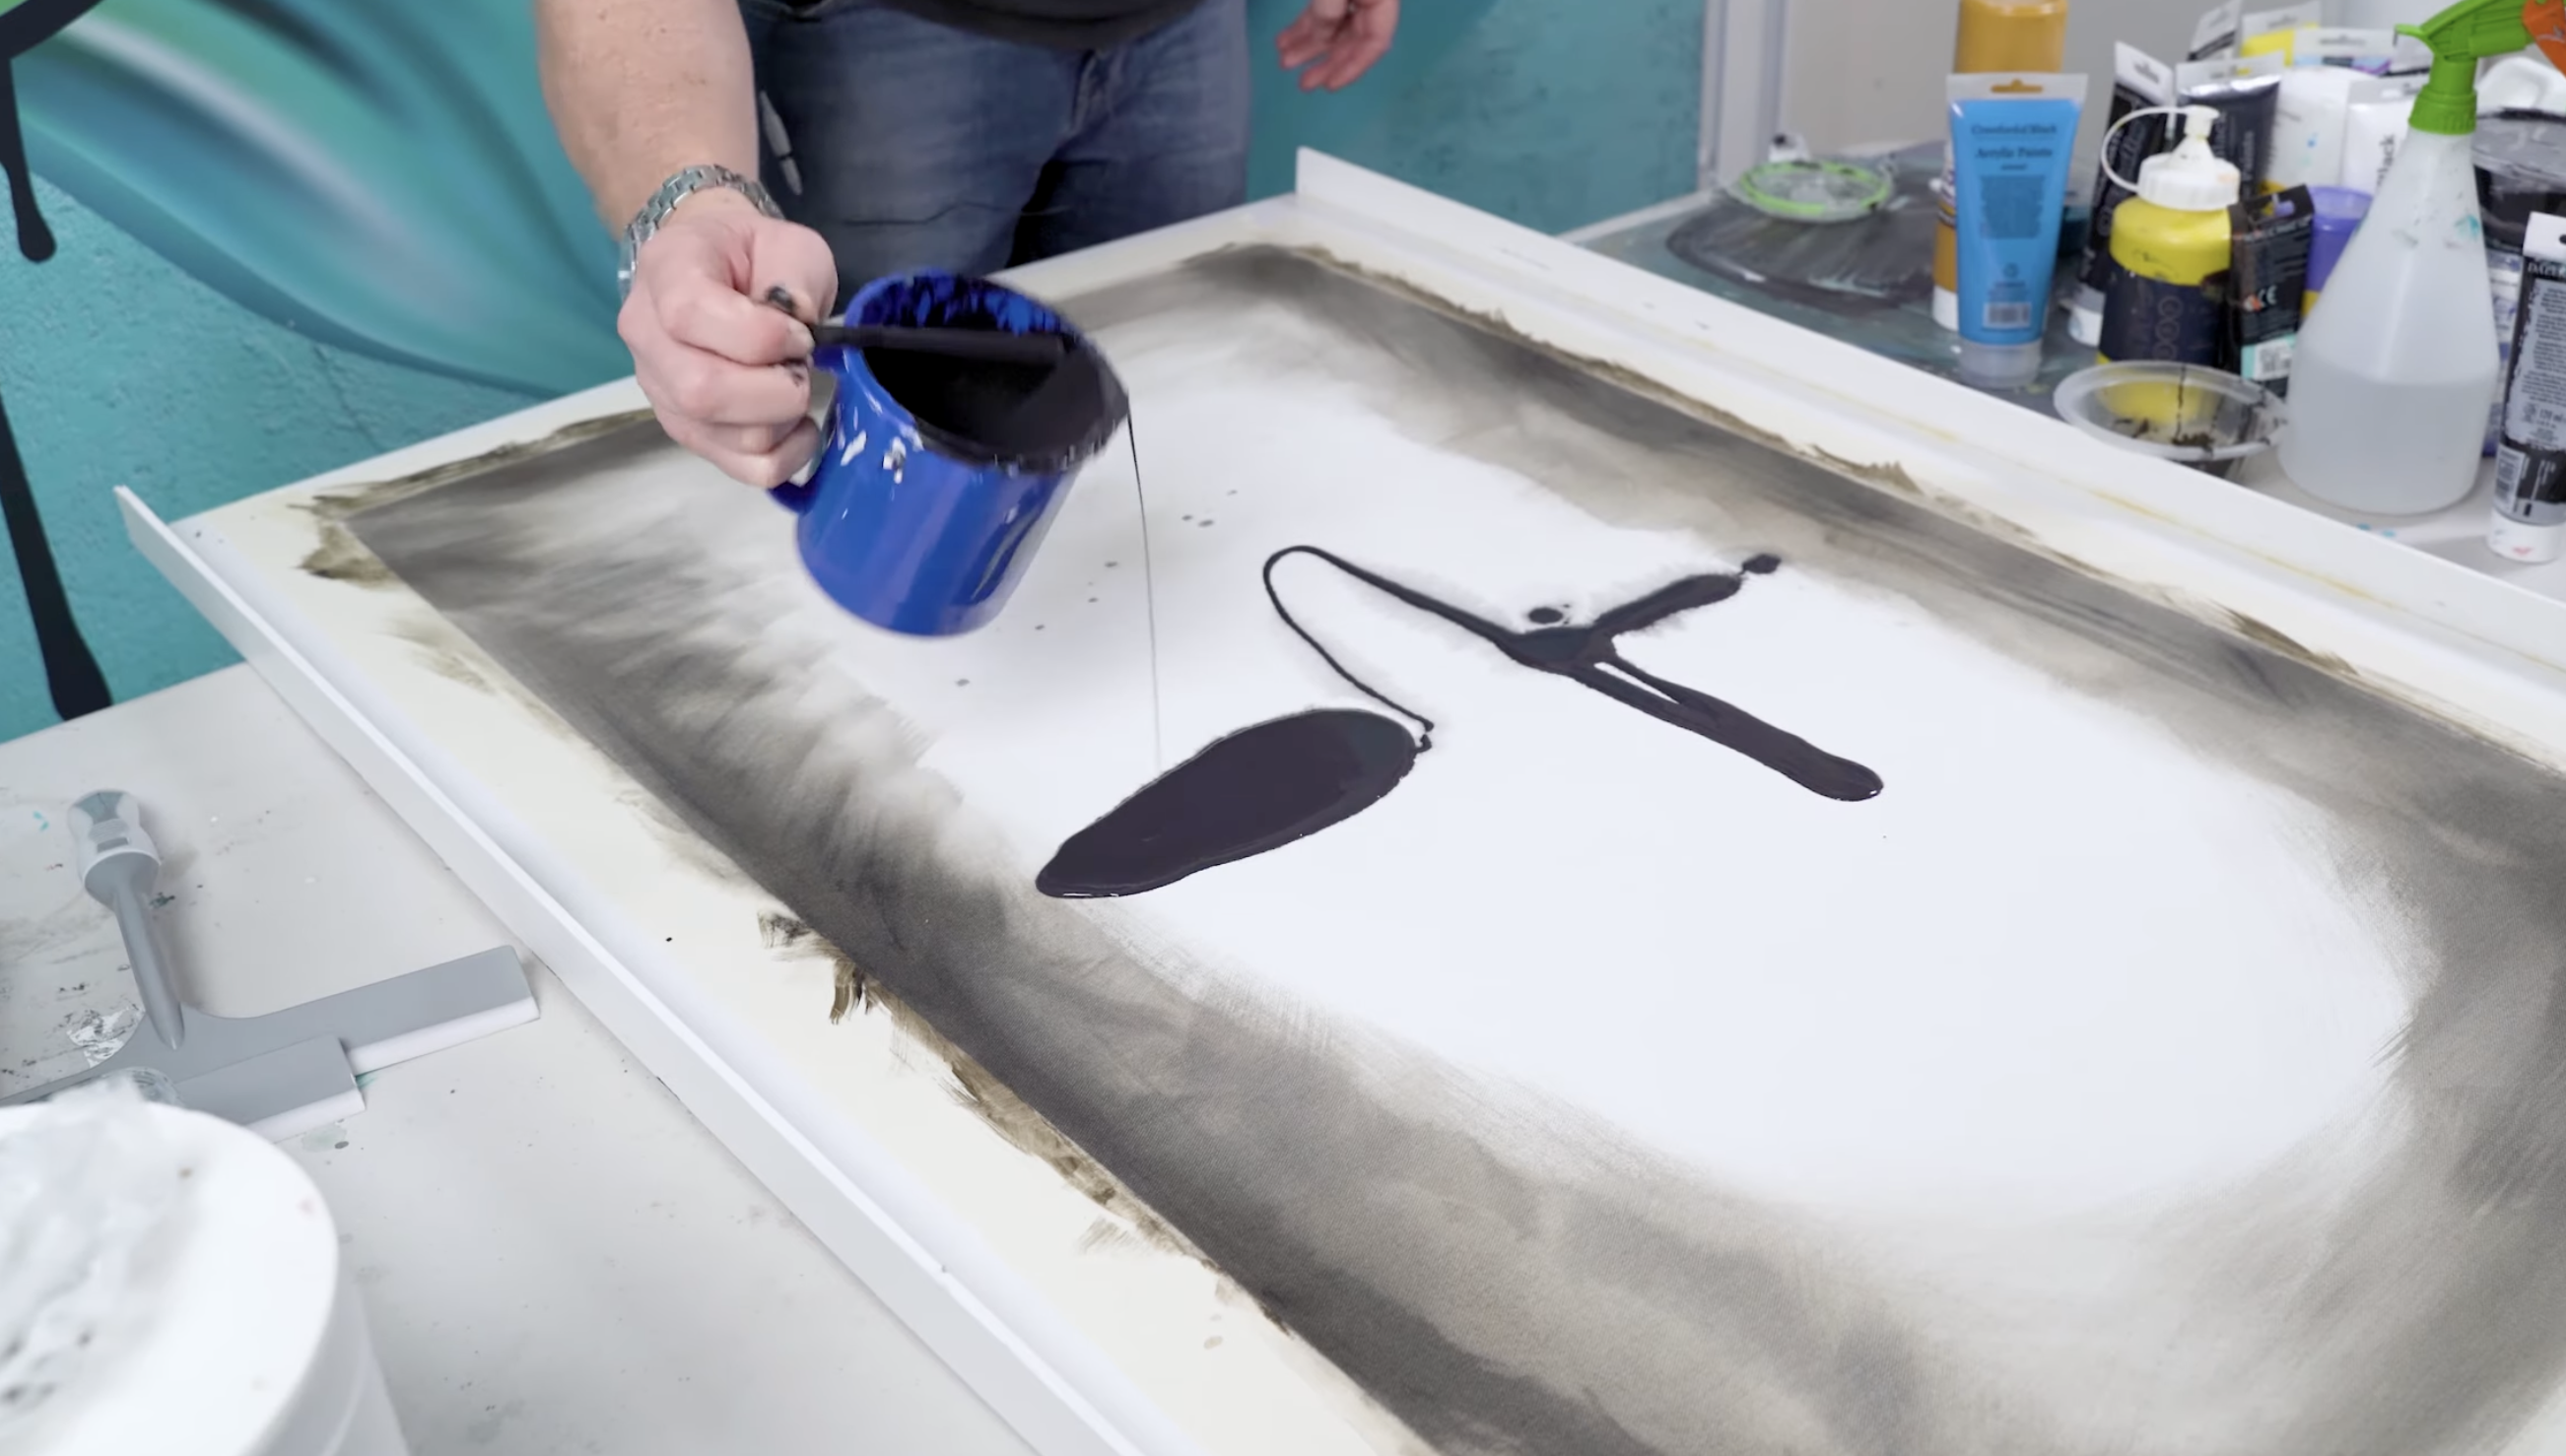
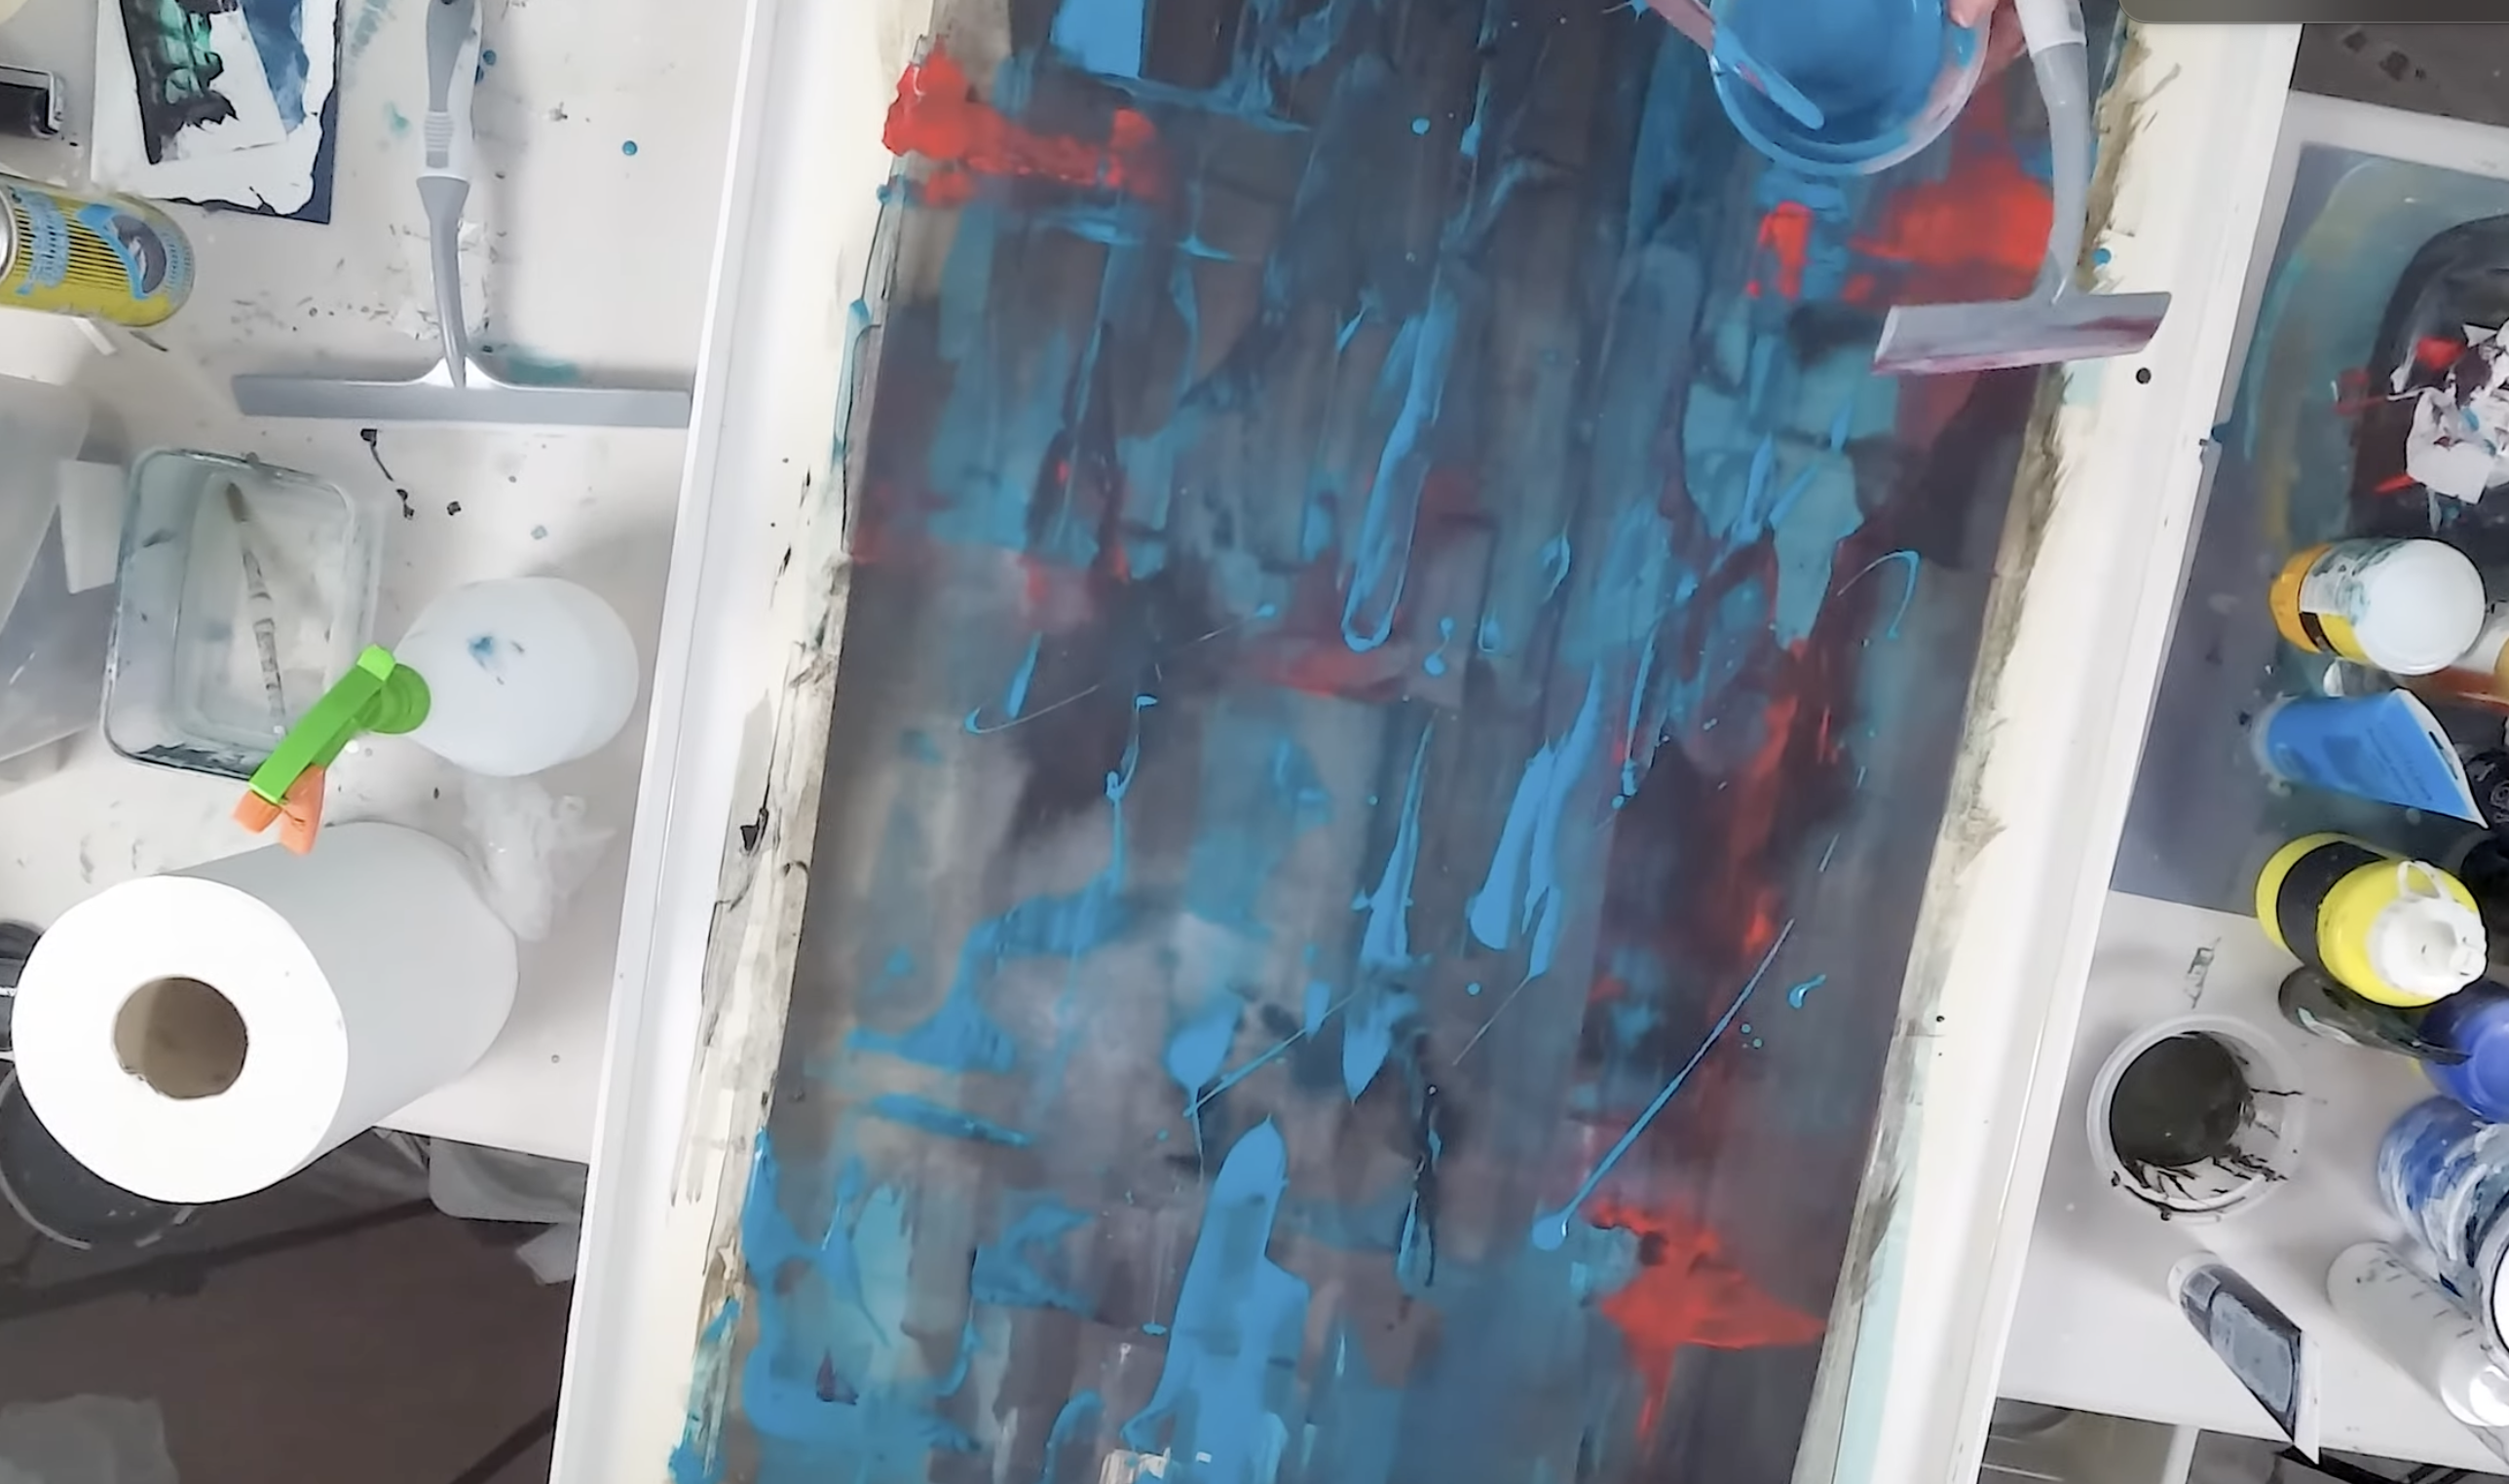
Step 6. Improvise depth with Layers and Subtle Color Introductions
Once the first layer has partially dried, introduce a third accent color subtly (e.g., hints of red or deep purple) to create hidden visual interest.
Let this layer dry before continuing. The goal is to keep it almost imperceptible unless viewed up close.
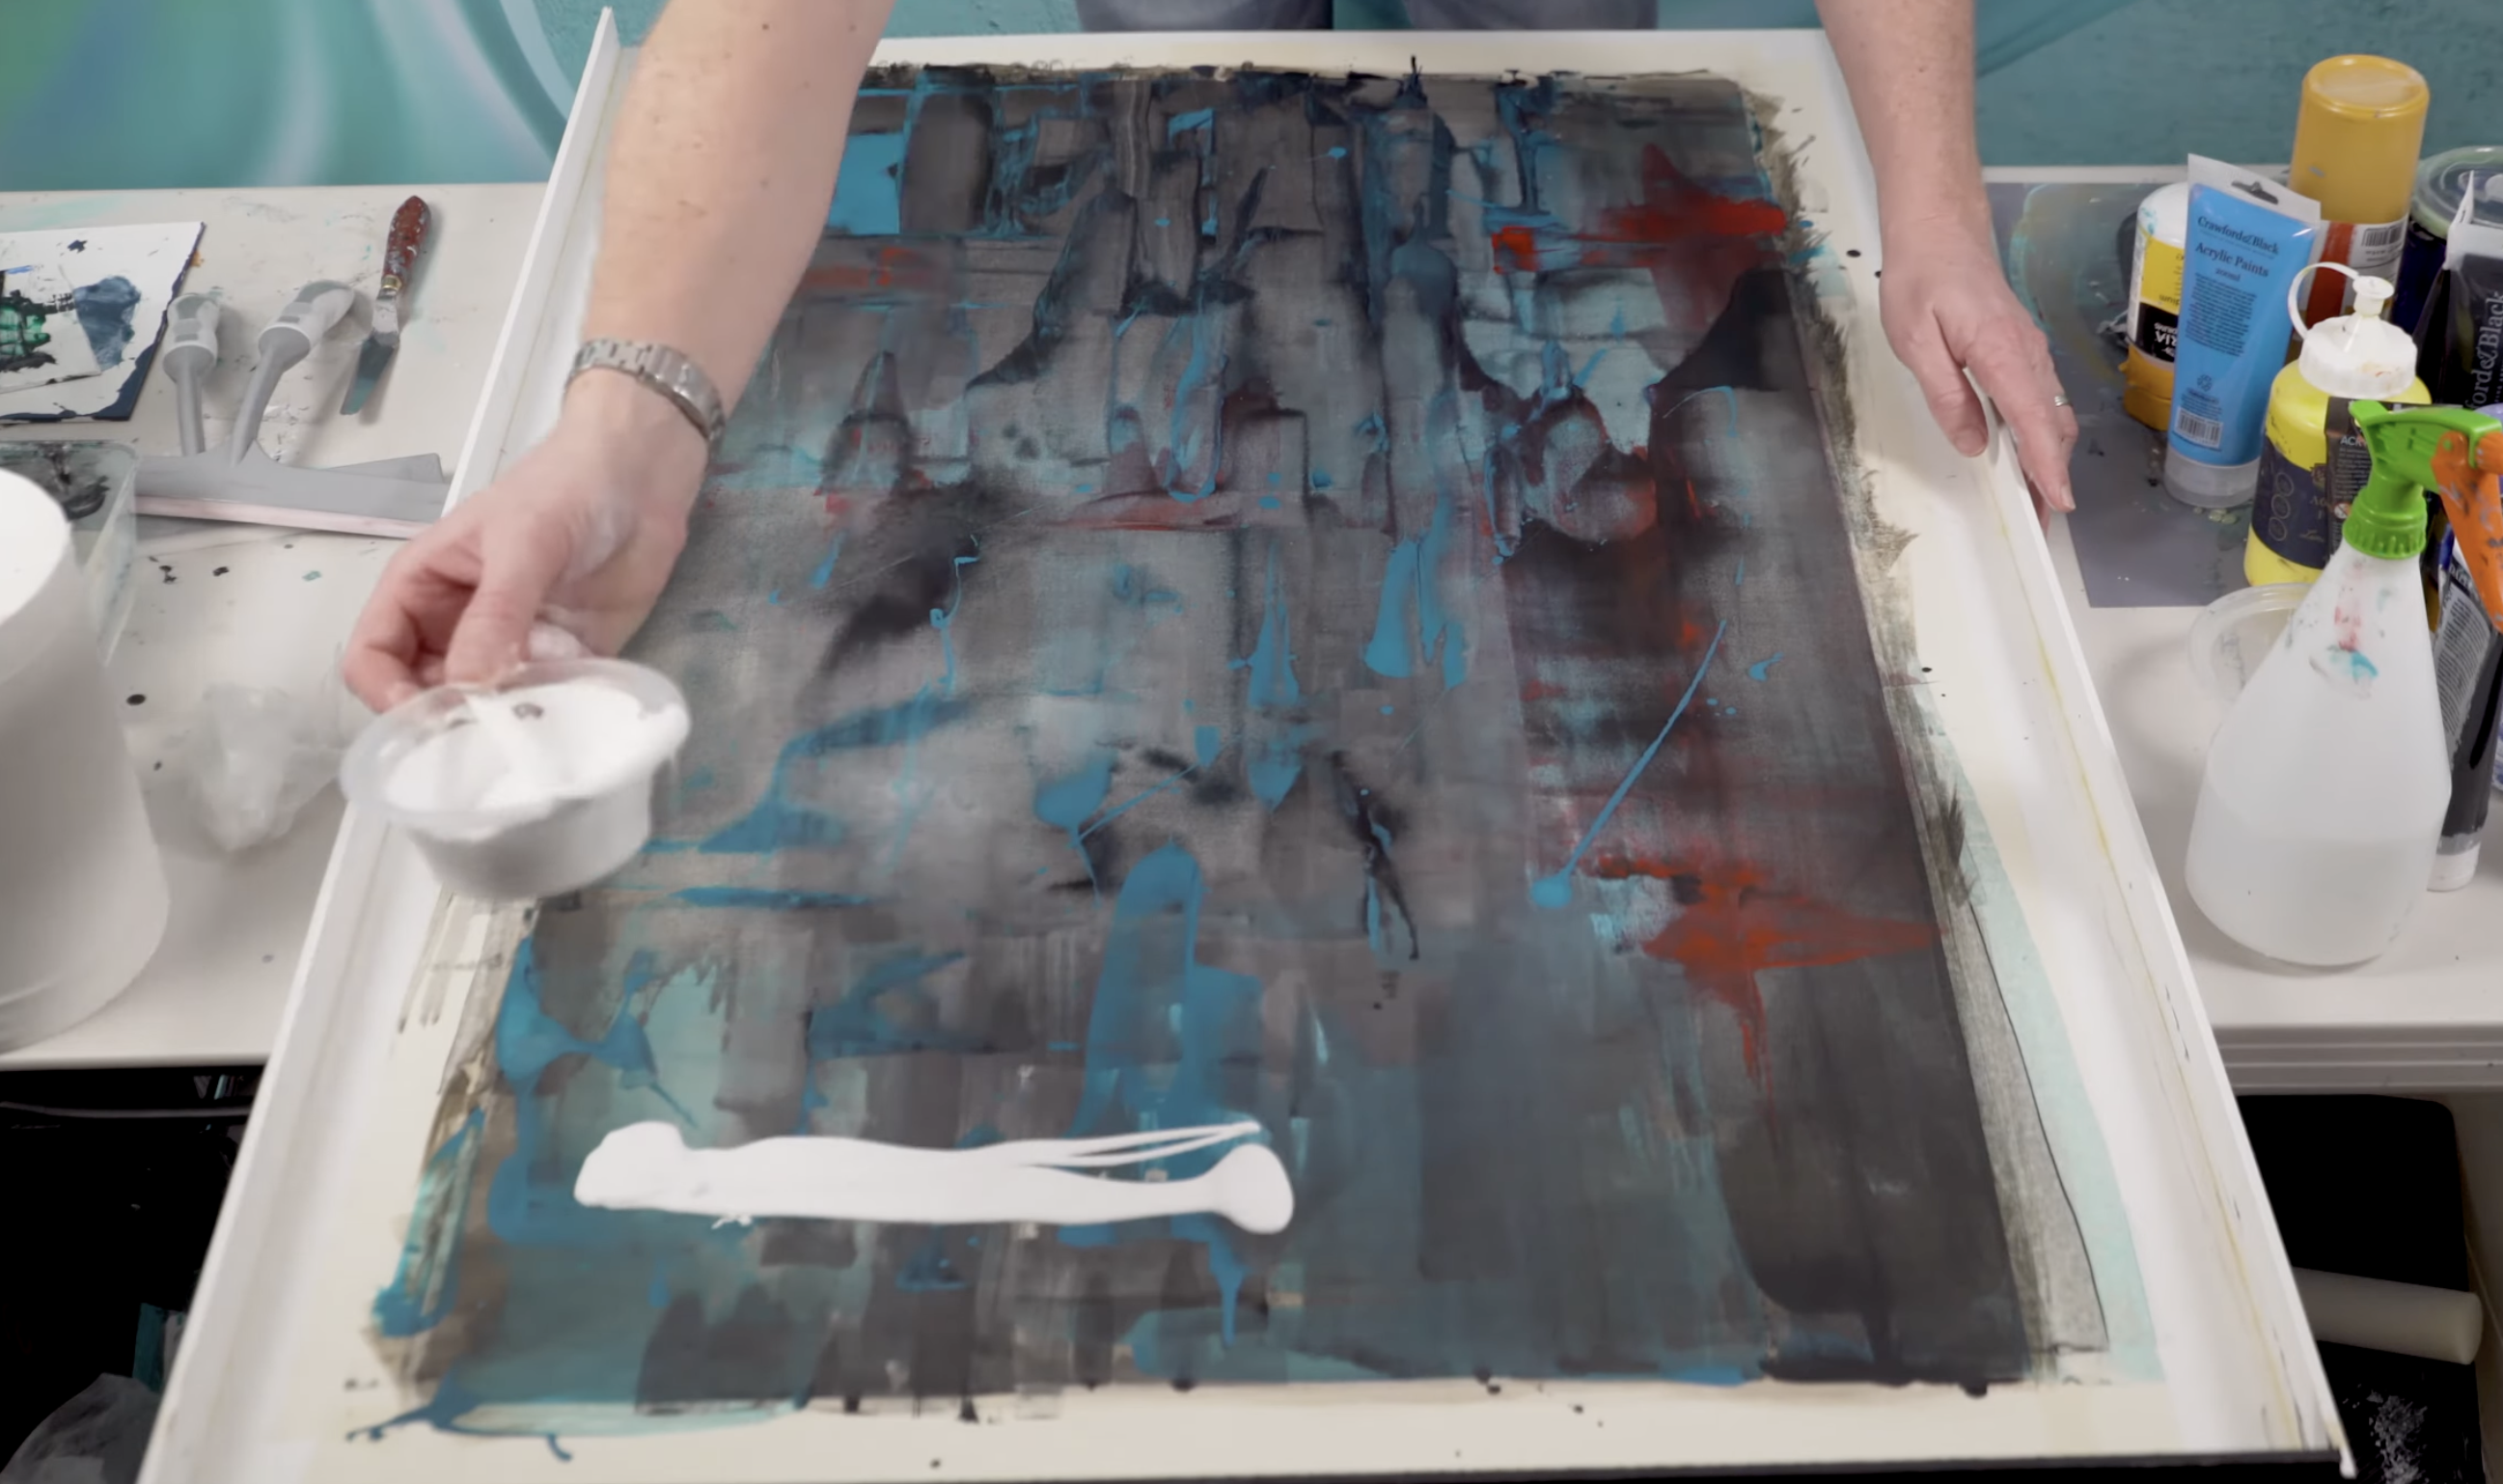
Step 7. Detail, Contrast, and Final Touches
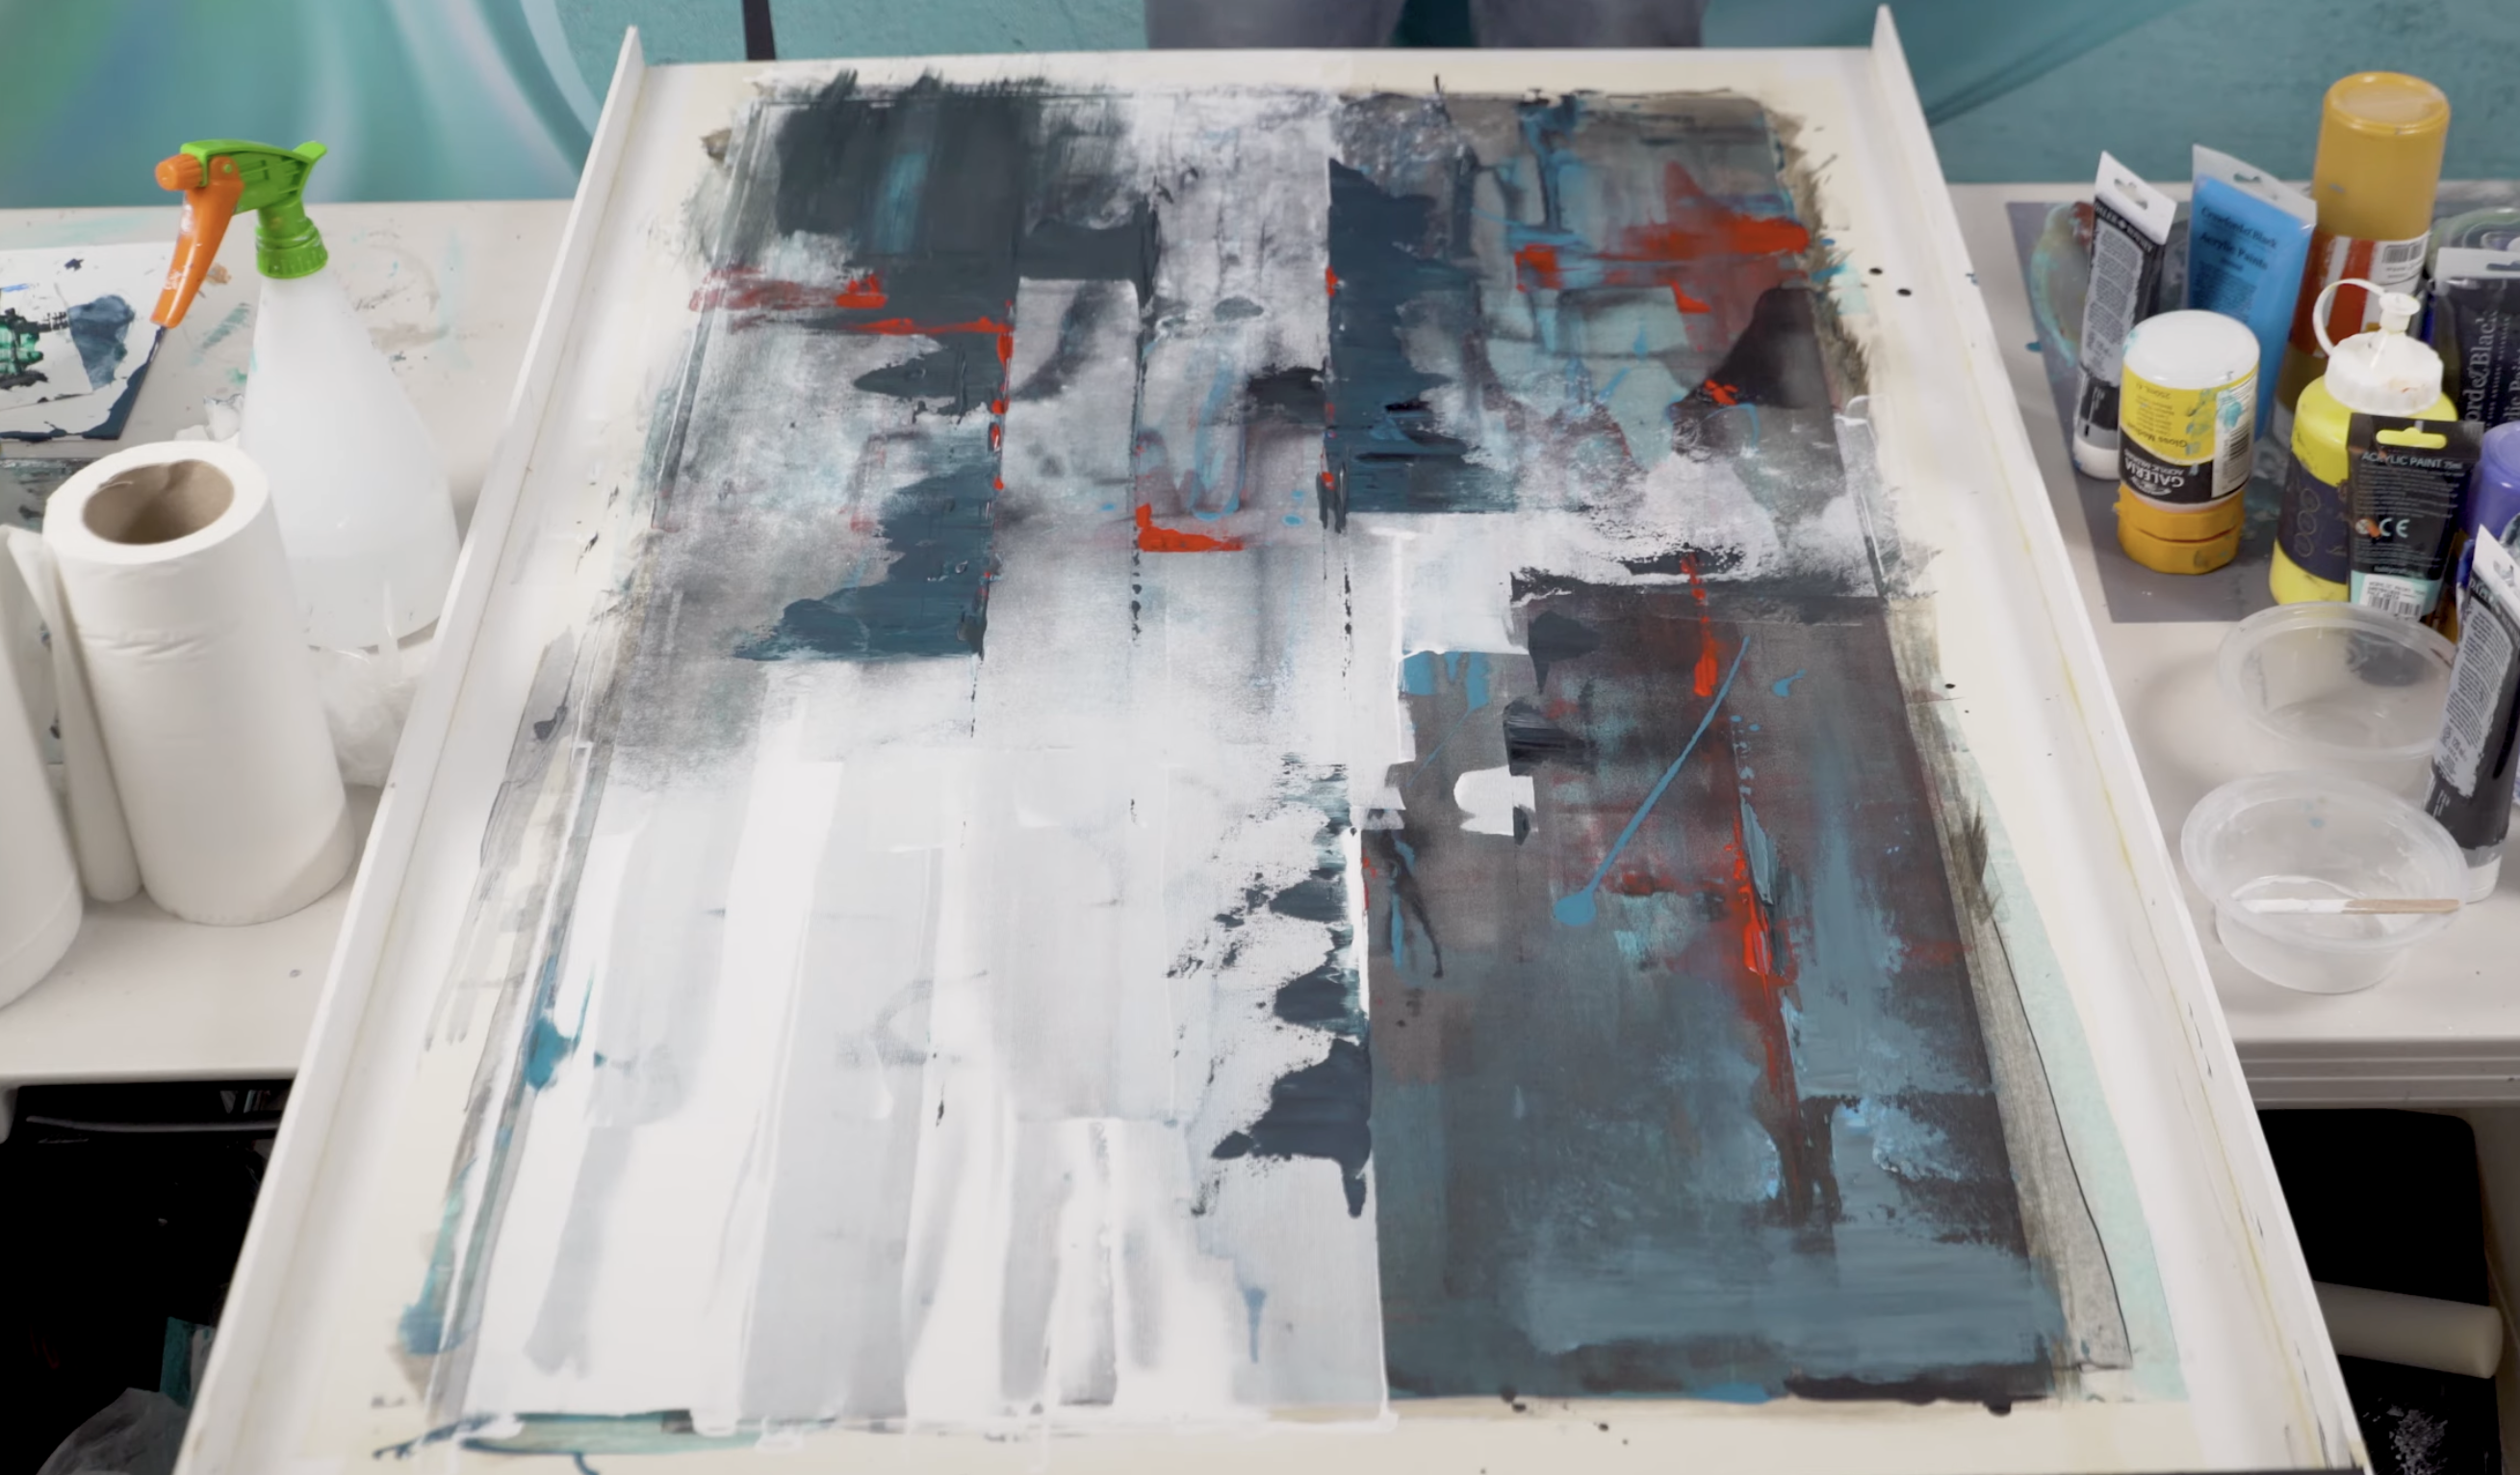
On a semi-dry canvas, apply a thin layer of runny white in chosen sections and dab to blend or lighten. Add bolder details using a thicker black or dark blue to draw eye lines or edges.
Finish by drying with a propane torch to avoid smudging, then mount, sign, and seal the piece.
For more detailed instructions on DIY abstract canvas art, check out this cool video below:
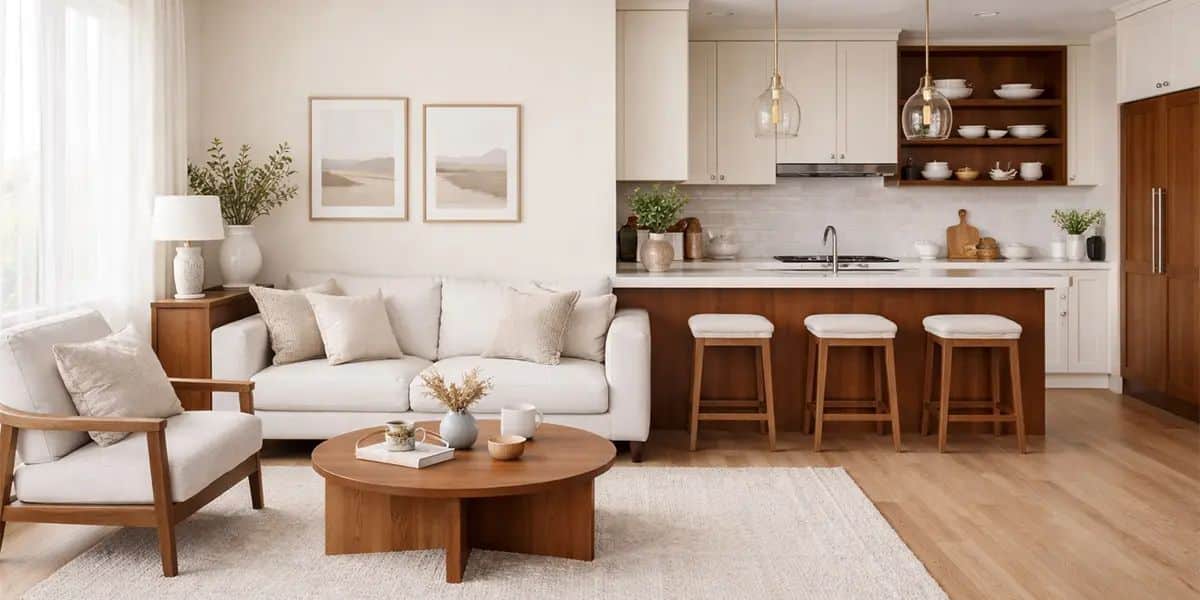
Styling Your Abstract Canvas Art in Your Home
Abstract canvas art can make your home look bright, modern, and full of personality. Here are easy ways to style your abstract art so it fits your space and shows off your style.
- Pick the Right Spot: Choose a wall where your art can be seen easily, like above a sofa, bed, or in the hallway. Make sure the wall is clean and has enough space for your canvas to stand out.
- Play with Color: Look at the colors in your abstract art and think about how they match your room. If your room is mostly neutral, a colorful painting can add energy.
- Frame to Match Your Style: Frames can change the look of your art. Use a simple frame for a modern room or a classic frame for a more traditional space. Floating frames make the art look like it’s popping off the wall.
- Hang at the Right Height: Hang your art so the middle of the canvas is at eye level. This makes it easy to enjoy. Use a level to be sure your art is straight.
- Group with Other Art: You can hang your abstract canvas with other art pieces to make a gallery wall. Mix different sizes and shapes for a fun look, but keep some space between each piece so they don’t look crowded.
- Let the Art Set the Mood: Think about how the art makes you feel. Put calm, soft pieces in bedrooms or reading corners. Use bold, lively art in living rooms or offices to boost energy and creativity.
- Use Good Lighting: Make sure your art is well lit. Natural light is great, but you can also use spotlights or lamps to highlight your canvas.
By following these tips, your DIY abstract canvas art will look great and help your home feel special and welcoming.
Advanced Techniques for Experienced Artists
If you’ve been painting for a while, it’s time to try some advanced art techniques to grow your skills.
You can use tools like squeegees, palette knives, or custom brushes to add new textures and shapes. Try layering thin and thick paints, mixing bold colors, or using unusual tools like sponges or combs.
- Use squeegees or palette knives to create bold lines and textures.
- Layer thick and thin paints for more depth in your artwork.
- Mix custom colors to make your art stand out and feel unique.
- Work in sections to focus on detail and improve control.
- Let your creativity lead—don’t be afraid to break the rules!
These methods help you create deeper, more detailed abstract art. As an experienced artist, exploring new styles keeps your work fresh and exciting—and helps your creativity shine even more.
Common Mistakes in DIY Abstract Canvas Art (and How to Avoid Them)
Creating abstract art is fun and freeing, but a few simple mistakes can affect your final piece. Here’s how to avoid them and make your painting shine:
1. Using Too Many Colors
Mistake: Overloading your canvas with too many shades can make the artwork look messy.
Fix: Pick 2–4 colors that work well together and build from there for a balanced look.
2. Overworking the Paint
Mistake: Constantly blending or reworking areas can cause muddy colors or ruin texture.
Fix: Apply layers confidently and give them time to dry before adding more.
3. Not Letting Layers Dry
Mistake: Painting over wet layers can lead to unwanted smudging and color mixing.
Fix: Allow each layer to fully dry or use a drying tool like a heat gun if you’re short on time.
4. Ignoring Composition
Mistake: Placing color or texture randomly without thinking about balance.
Fix: Step back often to view your painting as a whole and adjust where needed.
5. Skipping Canvas Prep
Mistake: Painting on raw canvas without priming can affect how paint adheres.
Fix: Use gesso to prime your canvas before painting for smoother results.
6. Using the Wrong Tools
Mistake: Brushes or tools that don’t suit the effect you want can limit your creativity.
Fix: Experiment with squeegees, palette knives, or sponges to find what works best.
7. Forgetting to Protect Your Space
Mistake: Paint spills can stain floors and surfaces.
Fix: Use drop cloths, newspaper, or old sheets to protect your workspace before starting.
By keeping these tips in mind, you can avoid frustration and enjoy the creative process of making beautiful abstract canvas art.
The Bottom Line
After years of painting mediocre canvases, I finally found out why some works command attention while others collect dust.
What converted my abstract art? Deliberate contradiction, strategic imperfection, and manipulating visual tension.
These aren’t academic theories, they’re my battle-tested methods that converted rejection letters into exhibition invitations.