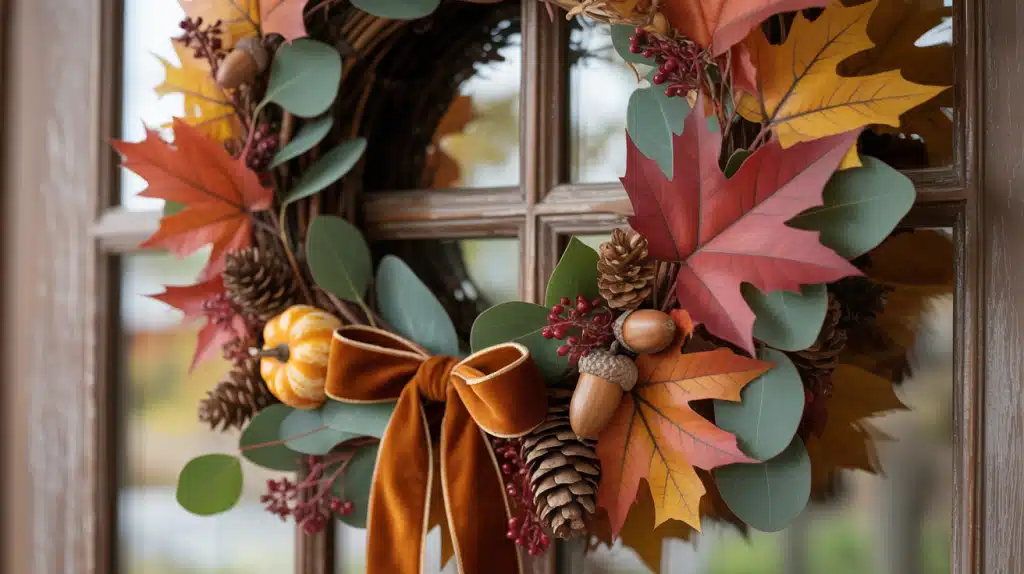
Want a gorgeous fall decor without spending a fortune?
Most people think DIY fall wreaths either look homemade and cheap or need professional skills. So they buy expensive ones instead, or skip decorating altogether.
But the truth is making a beautiful fall wreath is simple, and you can do it for under $50.
I’ll show you exactly how, step by step.
Materials You’ll Need (with Estimated Cost)
When I first started making fall wreaths, I worried it would cost a fortune.
But honestly? I found that with just a few basic supplies, I could create something beautiful without breaking the bank.
| Item | Quantity | Estimated Cost |
|---|---|---|
| Grapevine wreath form (14-18″) | 1 | $5 – $12 |
| Floral wire (green or brown) | 1 roll | $3 – $5 |
| Hot glue gun | 1 | $5 – $10 |
| Hot glue sticks | 20-30 pack | $3 – $5 |
| Artificial fall leaves | 30-50 pieces | $6 – $10 |
| Faux berries or mini pumpkins | 2-3 stems | $4 – $8 |
| Fall ribbon (burlap or plaid) | 2-3 yards | $5 – $12 |
| Pinecones | 5-8 pieces | Free – $6 |
| Wire cutters or scissors | 1 | $4 – $8 |
| Decorative sign (optional) | 1 | $3 – $8 |
| Total Budget-Friendly | $30 – $45 | |
| Total Mid-Range | $45 – $70 | |
| Total Premium | $70 – $100 |
Money-Saving Tips
Craft stores run 40-50% off sales all the time, so I never pay full price anymore.
I buy my wreath form and basic supplies early in the season when there’s still a good selection.
Walk around my yard and collect pinecones, acorns, and interesting twigs for free. Nature gives you the best decorations anyway.
Step-by-Step Tutorial: How to Make a DIY Fall Wreath
Follow these simple steps to create a stunning fall wreath that will brighten your front door all season long.
Step 1: Prepare Your Workspace and Materials
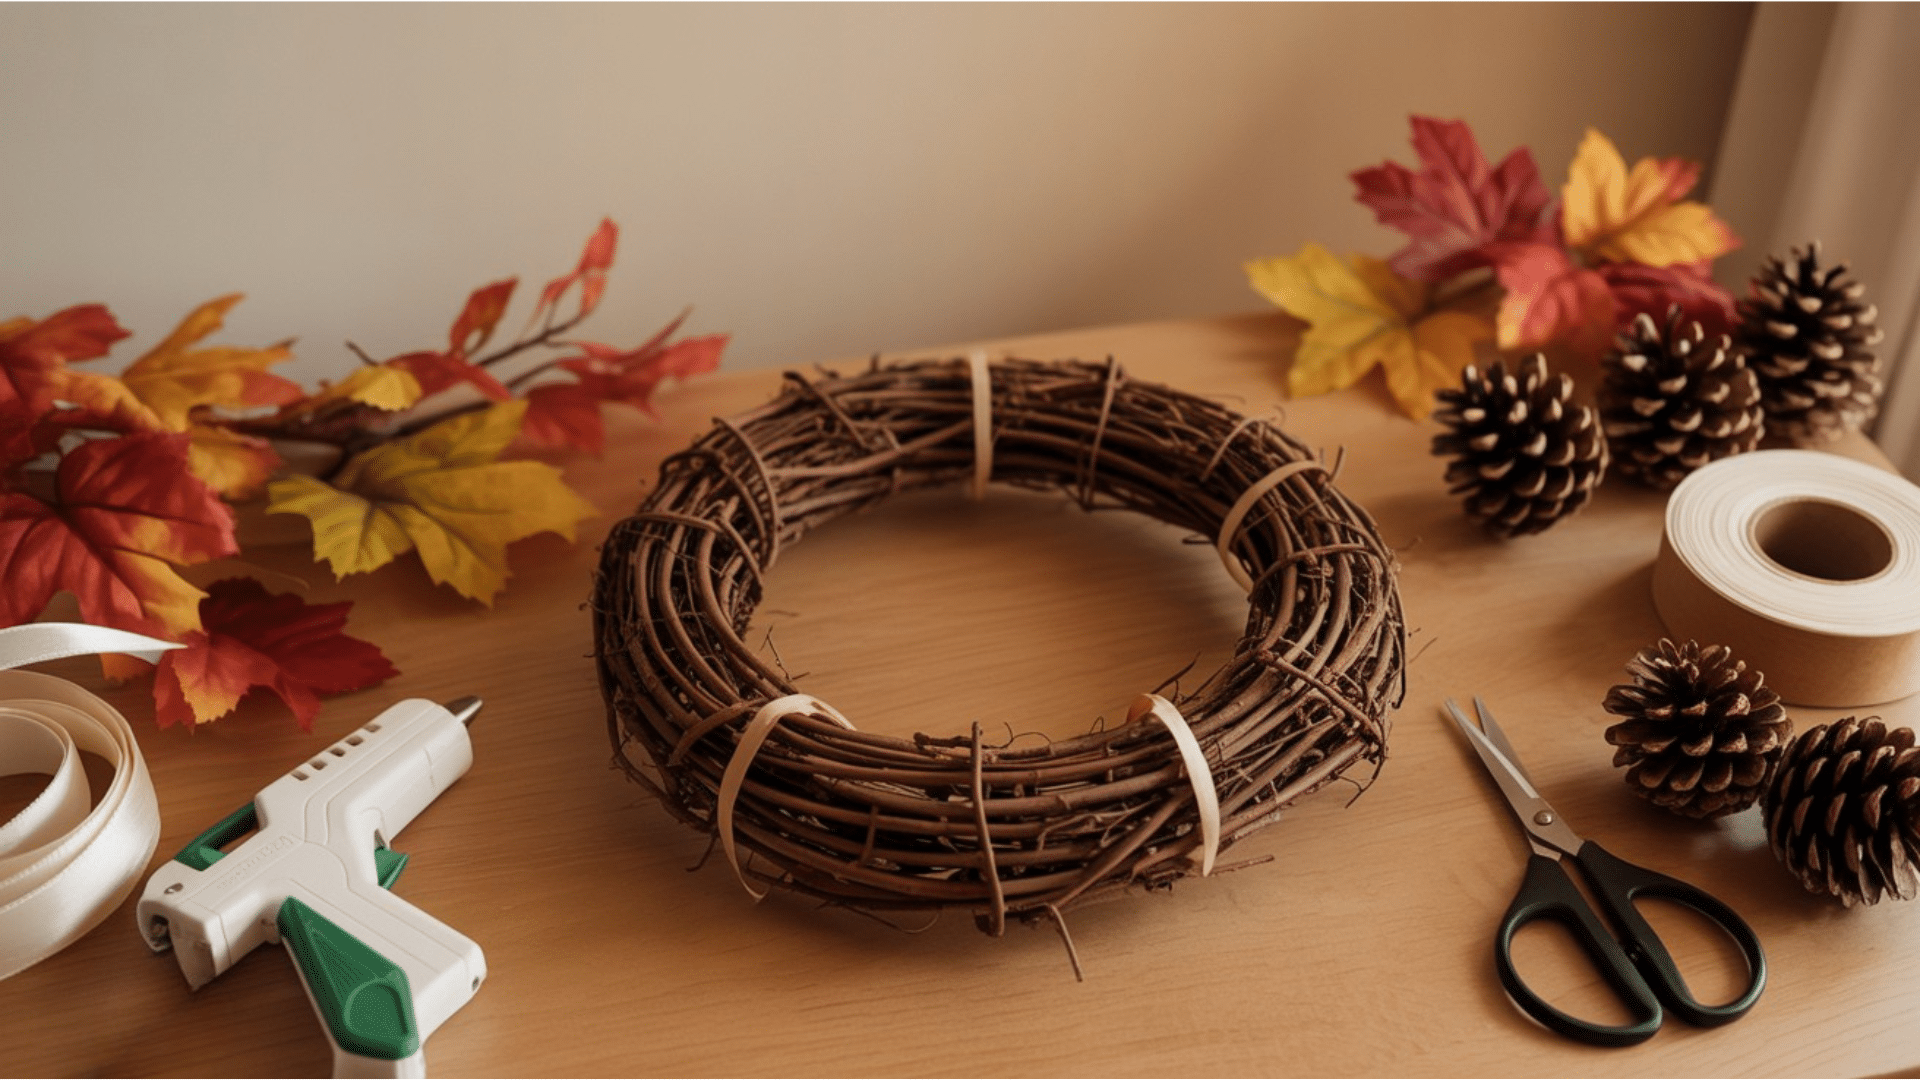
First things first: I clear off my dining table and plug in my hot glue gun. It needs about 5-10 minutes to heat up, so I use that time to lay out everything I’ll need within arm’s reach.
I always check my grapevine wreath form for any loose pieces and trim sharp ends with wire cutters.
Then I wipe off the dust with a dry cloth. Trust me, glue sticks way better to a clean surface.
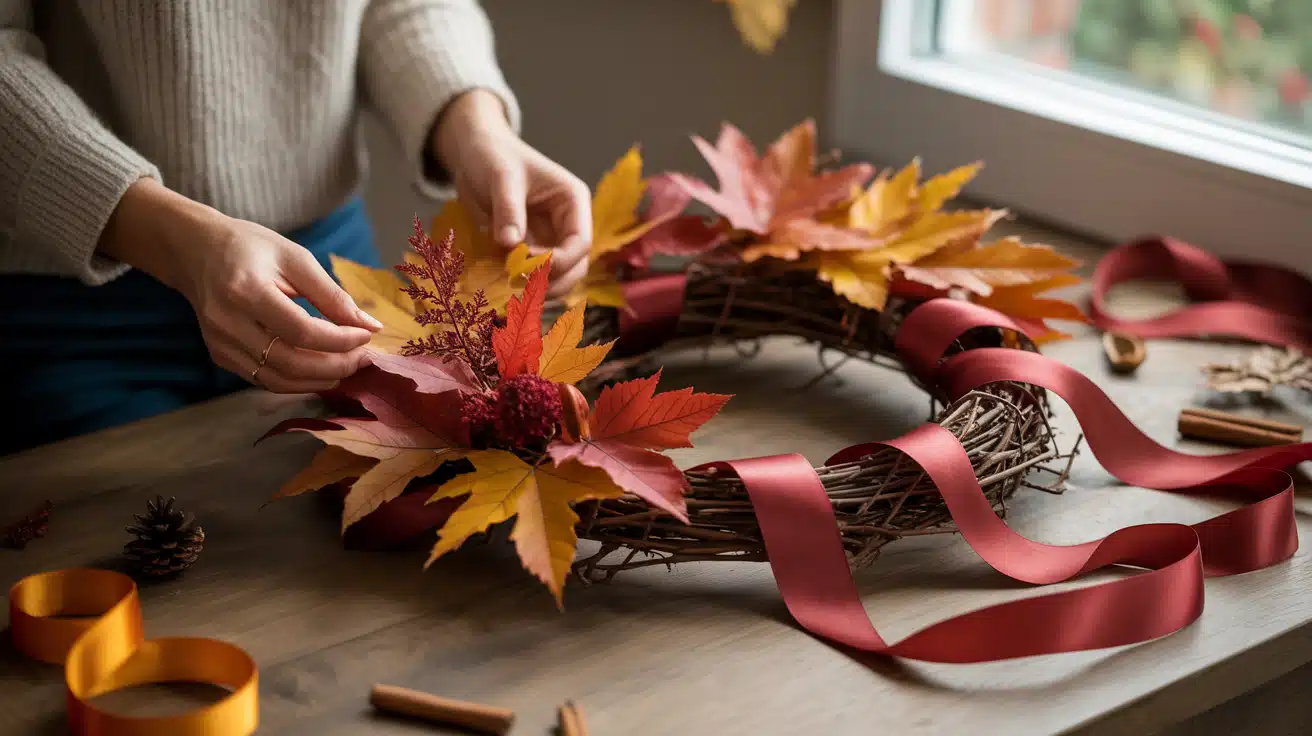
Step 2: Plan Your Design
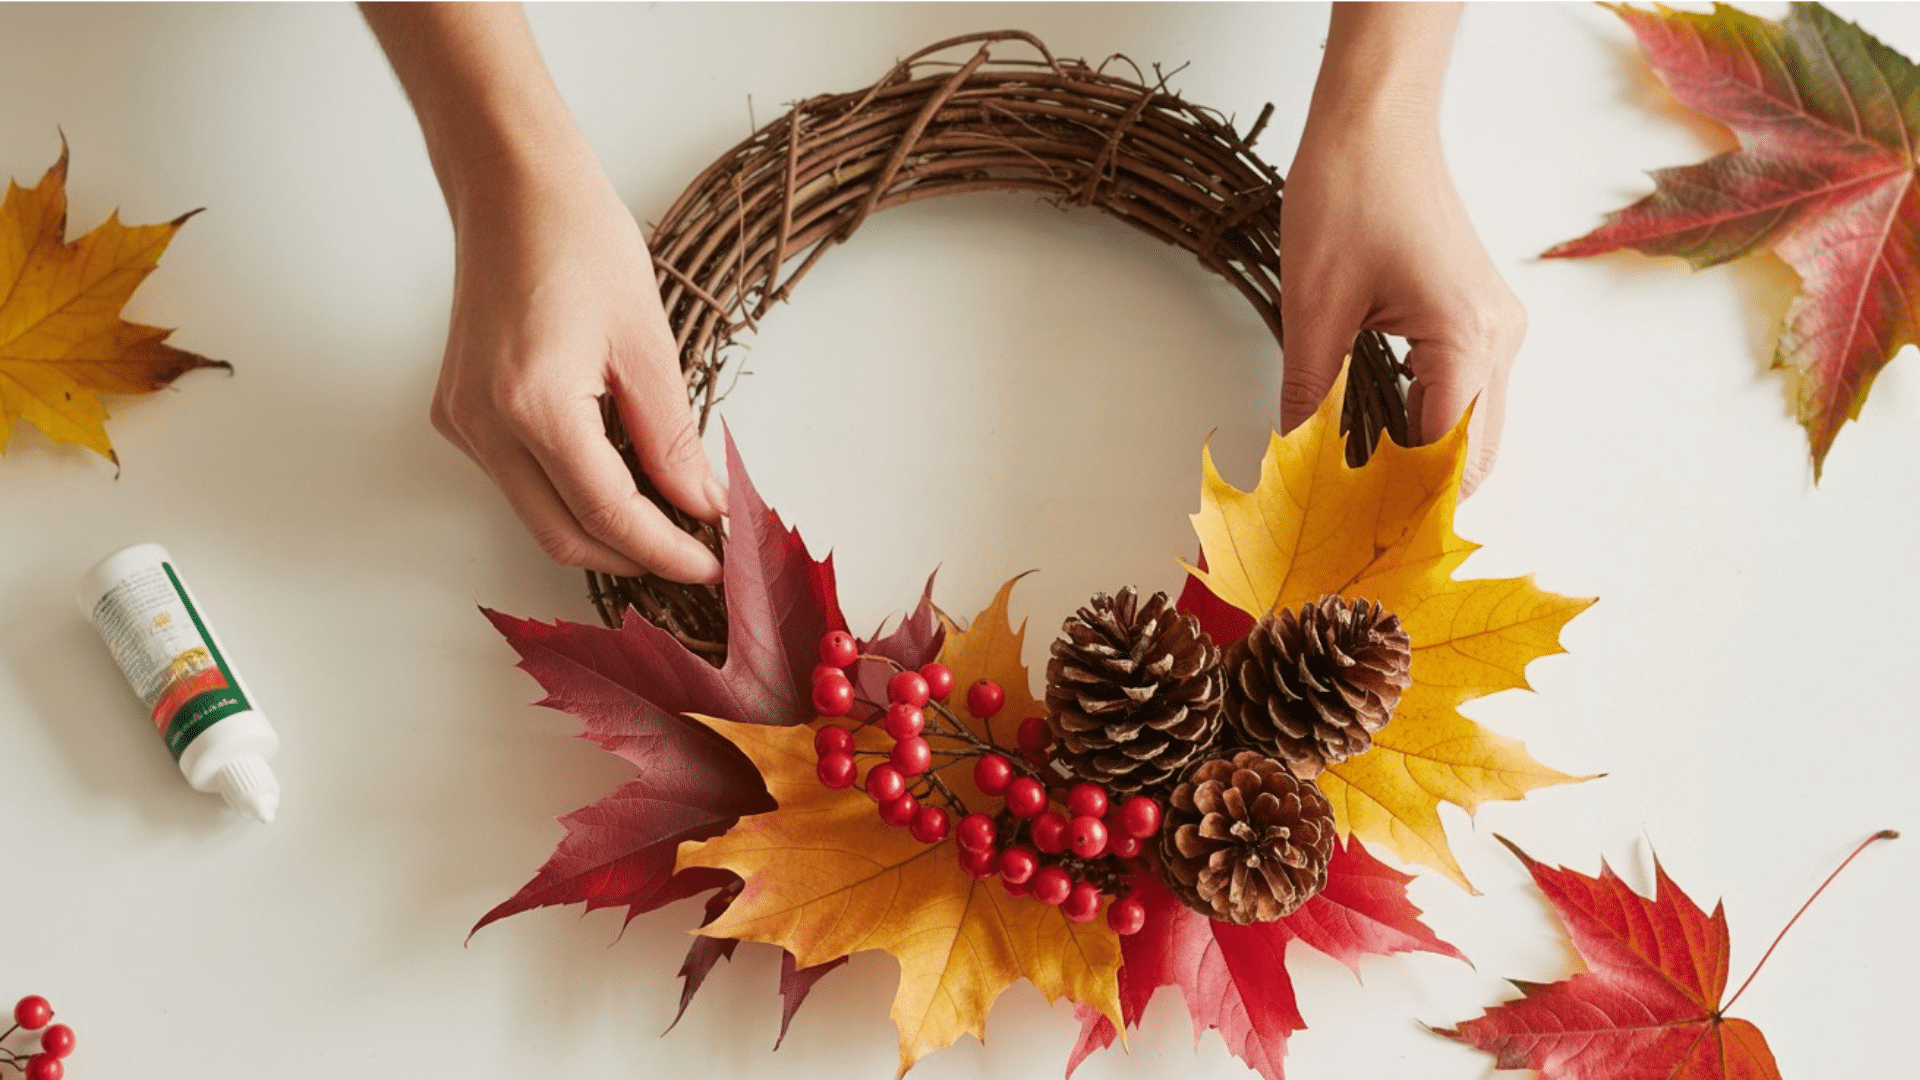
This step saved me so many times. Before I glue anything down, I arrange all my fall leaves, berries, and pinecones on the wreath just to see how it’ll look.
I put the bigger stuff down first, then fill in the gaps with smaller pieces.
Tip: I take a quick photo of my arrangement. That way, when I start gluing and forget where things go, I can just look at my phone.
Step 3: Attach the Fall Leaves
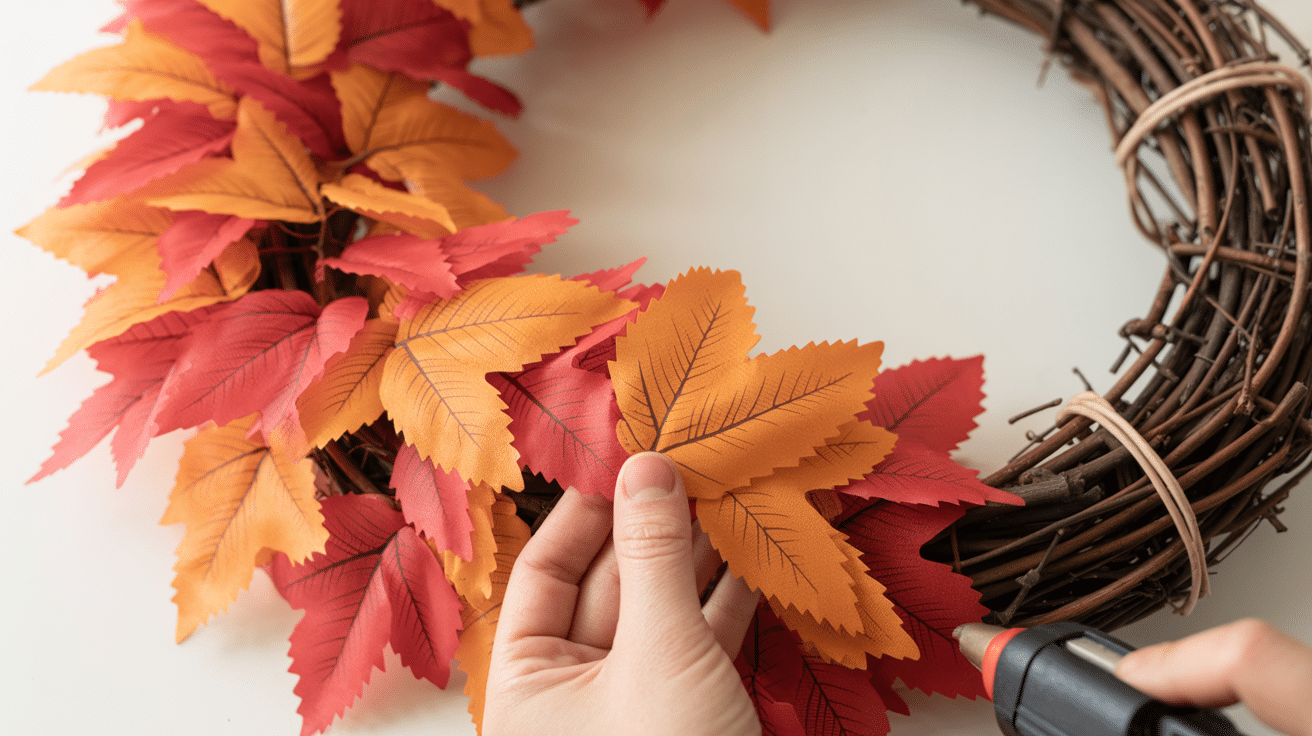
Now I grab my hot glue gun and start securing each artificial leaf stem to the grapevine wreath.
I work in one direction and overlap the leaves slightly so it looks full and natural.
If I’m using leaves without stems, I cut 4-6-inch pieces of floral wire and wrap them around both the leaf and the wreath base. I give each section about 30 seconds to dry before I move on.
Step 4: Add Berries and Pinecones
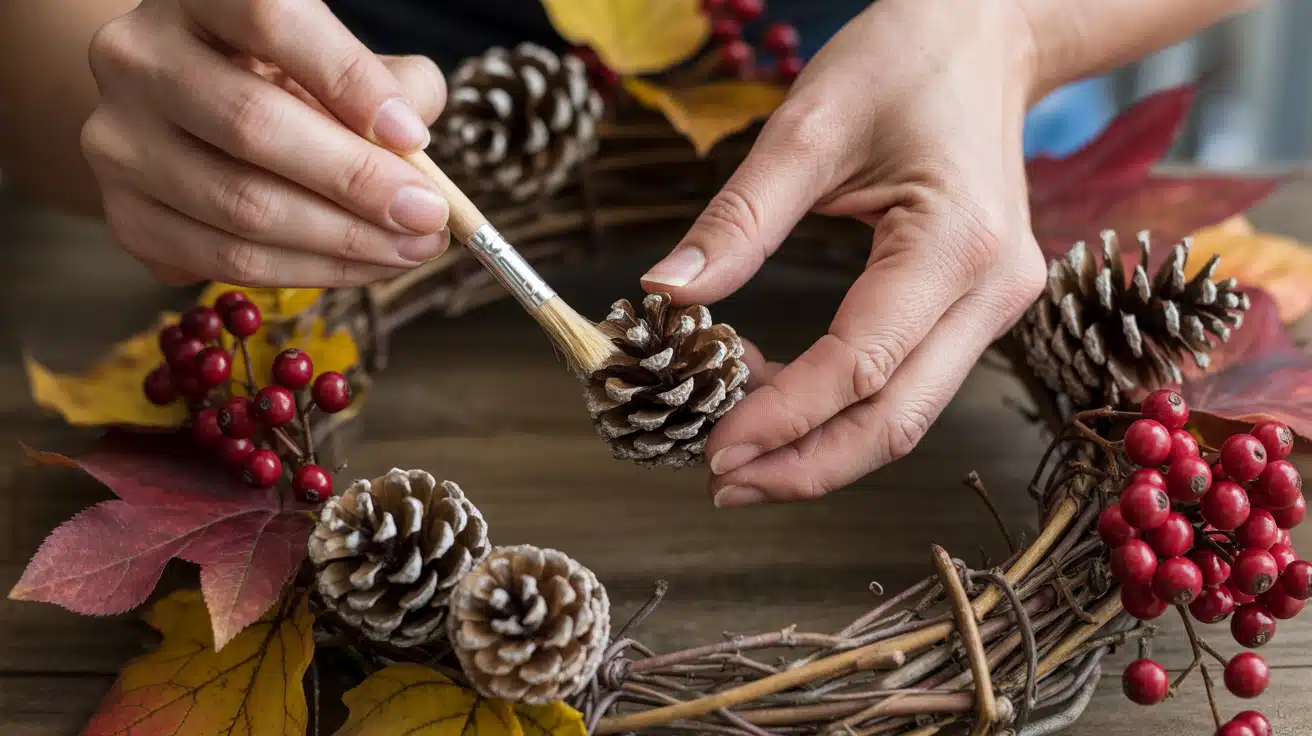
Next, I hot-glue my faux berries or mini pumpkins to any sparse areas.
I space them out evenly so the whole wreath looks balanced. I like positioning pinecones in little clusters of 2-3 because that’s how they’d naturally fall.
I put glue on the bottom of each pinecone and press down firmly for about 10-15 seconds. These are heavier, so they need extra time to set.
Step 5: Create and Attach Your Bow
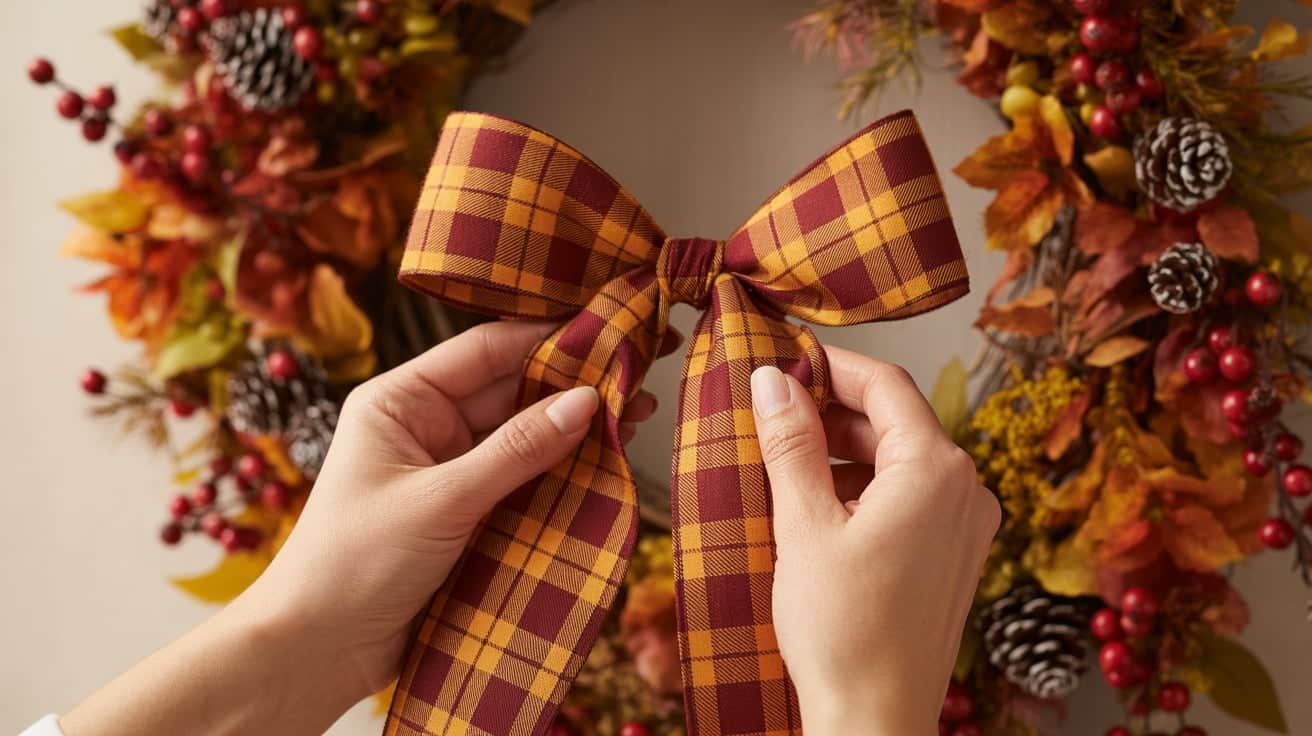
I’ll be honest, bow-making intimidated me at first. But once I got the hang of it, it’s actually pretty easy.
Cut my ribbon into one 2-yard piece for the actual bow and one 8-10 inch piece for the center.
Make 4-6 loops with the longer ribbon to form the bow shape. Then I use floral wire to cinch the center tight and wrap that shorter ribbon piece around to hide the wire.
I attach the bow to my wreath using hot glue or wire, depending on how heavy it is.
Step 6: Fill Gaps and Add Final Touches
Step back and view your wreath from a few feet away. Use leftover leaves, berries, or your optional decorative sign to fill bare spots.
Apply hot glue to secure any final elements. Check that all pieces are firmly attached and trim excess ribbon with scissors.
Step 7: Add Hanging Hardware and Display
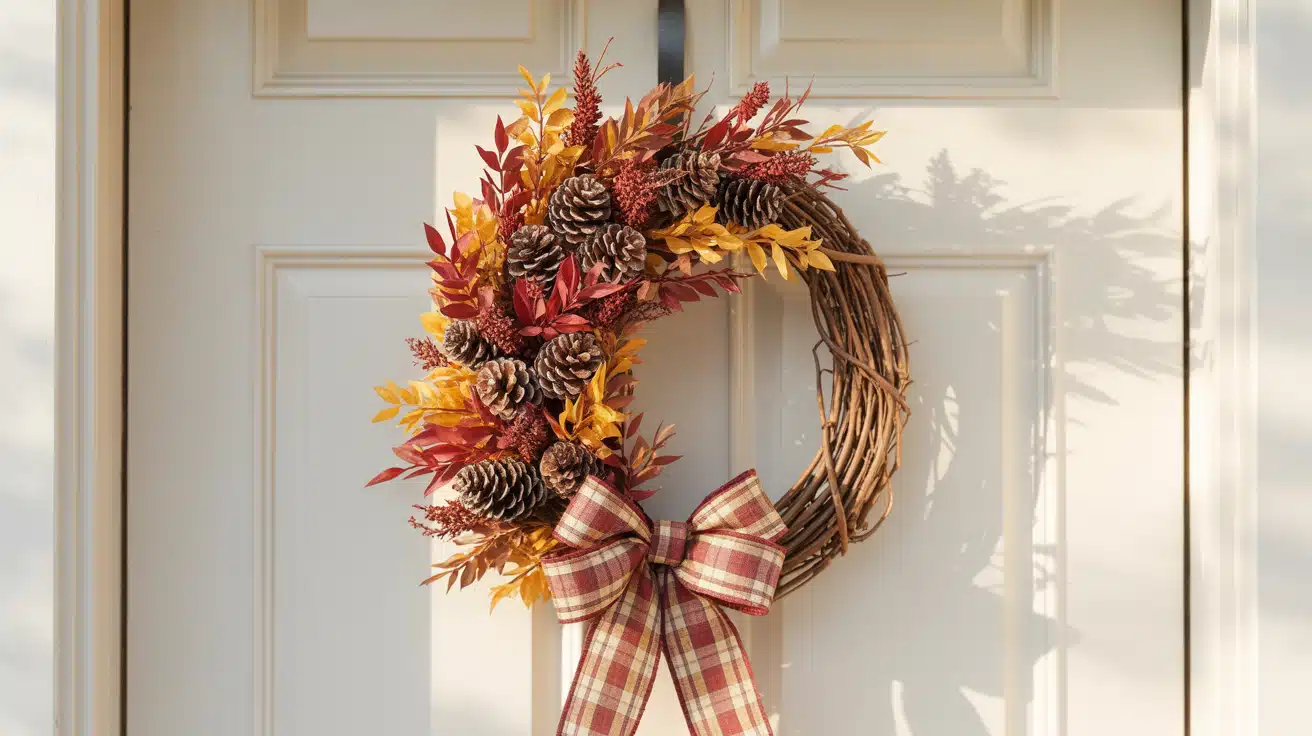
Almost done! I flip my wreath over and attach a ribbon loop or wreath hanger to the back.
Cut a 10-12-inch piece of ribbon and tie or glue the ends to the top back of the wreath form. Then I give it a gentle shake to make sure everything’s secure.
I hang mine on my front door, but you could also put it above your mantel or in a window. I use a wreath hanger or command hook so I don’t damage anything.
Care and Storage
Keep your wreath out of direct rain and harsh weather to preserve the materials. When fall ends, store it in a large plastic bag or box in a cool, dry place.
With proper storage, you can reuse your wreath next year and save money on seasonal decorations.
Click here for a proper wreath care guide.
Creative Variations
Master the basics, then try these creative twists using similar materials for completely different looks.
1. Rustic Farmhouse Wreath
Focus on neutral tones with burlap ribbon, wheat stalks, and cream-colored leaves. Add a wooden sign for authentic farmhouse charm.
You’ll need your grapevine wreath, burlap ribbon, wheat stalks, and neutral-toned leaves.
2. Vibrant Foliage-Only Wreath
Skip extras and layer colorful fall leaves in reds, oranges, and yellows for a bold, lush look.
This style uses your grapevine wreath, multiple leaf packs, and floral wire to create maximum color impact.
3. Minimalist Modern Wreath
Use just 3-5 large statement pieces with one wide velvet ribbon. Leave plenty of open space for a clean, contemporary feel.
A wire wreath form works better than grapevine for this sleek design.
4. Pumpkin Patch Wreath
Cluster 8-12 mini pumpkins in orange, white, and green on one side. Add a few leaves for a playful, asymmetrical design.
Your grapevine wreath base keeps the pumpkins secure with hot glue and floral wire.
5. Natural Harvest Wreath
Mix store-bought pinecones with foraged acorns, branches, and dried orange slices.
Use jute twine for an earthy finish. This style combines your grapevine wreath and pinecones with free natural elements from your yard.
6. Monochromatic Orange Wreath
Use only orange elements in different shades and textures for a bold, cohesive statement.
Gather orange leaves, orange berries, orange ribbon, and orange mini pumpkins for a dramatic single-color impact.
7. Elegant Gold and White Wreath
Swap traditional colors for gold-painted leaves, white pumpkins, and gold ribbon. Perfect for sophisticated spaces.
A white-painted wreath form adds extra refinement to this upscale variation.
These variations use similar basic materials; just adjust colors and quantities to match your style.
Mix Your Own Style
Combine elements from different variations to create something uniquely yours.
These styles all use similar basic materials, so you won’t need completely different supplies; just adjust your colors and quantities when shopping.
Troubleshooting Common Issues
Even the best DIY projects need a quick fix now and then. Here’s how to solve the most common fall wreath problems:
1. The wreath looks uneven
Step back and check the balance. Shift heavier items lower or to one side for symmetry, or fill empty spots with smaller leaves and accents.
2. Decorations won’t stick
Reapply hot glue to clean surfaces and hold for 10 seconds. For heavy items, use floral wire or zip ties for extra hold.
3. Bow looks flat
Use wired ribbon, fluff each loop, and secure tightly in the center. Layer ribbons for a fuller look.
4. Wreath looks sparse
Add filler like berries, smaller leaves, or wheat to fill gaps. Mix textures for a natural, full appearance.
5. Fading or damage outdoors
Use UV-protective spray and weather-safe materials. Hang in a shaded or covered area to prevent fading and warping.
Pro Tip: Take a photo mid-way; it’s the easiest way to spot uneven spots before gluing everything down.
The Bottom Line
There you have it. Making your own fall wreath is easier than you thought, and way cheaper than buying one.
You’ve got the materials list, the step-by-step process, and troubleshooting tips for when things go wrong. Now it’s time to actually make one.
Grab your supplies this weekend and give it a try.
Your front door is about to look amazing, and you’ll have bragging rights for making it yourself.