Moving out of a Melbourne rental? Your kitchen is probably the single biggest threat to your bond refund. It’s the room where grease builds up, grime hides in crevices, and property managers inspect most closely.
Cleaning-related issues appear in roughly 67% of all bond disputes in Victoria (RTBA Annual Report 2023-24. And within those disputes, the kitchen — especially the oven and rangehood — tops the list of areas that fail inspection.
This guide breaks down every kitchen surface, appliance, and hidden spot your property manager will check. Whether you’re tackling it yourself or deciding if professional help is worth the cost, you’ll know exactly what “reasonably clean” means under Victorian law. It’s part of our complete end of lease cleaning Melbourne resource library — built to help tenants protect their bond.
Kitchen cleaning causes more bond disputes than any other room in Melbourne rentals, with cleaning involved in 67% of all Victorian bond cases (RTBA 2023-24). This checklist covers every surface — oven, rangehood, stovetop, sink, cupboards, and floors — with time estimates, product recommendations, and the DIY vs professional comparison you need to make the right call.
Why Does the Kitchen Cost Melbourne Tenants the Most Bond Money?
Victoria’s Residential Tenancies Bond Authority held 732,125 bonds valued at $1.456 billion as of June 2024 (REIV Of those, 34% of tenants experienced some bond deduction — and the kitchen is the primary battleground.
Why? Because kitchens accumulate the kind of damage that’s hard to hide. Baked-on grease inside ovens. Grease film on rangehood filters. Stained grout between splashback tiles. These aren’t things a quick wipe handles.
Property managers know this. They’ll open your oven door, run a finger along the rangehood, and check behind the stove. If grease is visible, that’s a deduction.
The numbers tell the story clearly. Only 64% of Victorian bonds are returned in full to tenants. Another 26% get split between tenant and landlord, and 10% go entirely to the rental provider RTBA Annual Report 2023-24.
Don’t become a statistic. Start with this checklist — or check our end of lease cleaning checklist for the full property walkthrough.
**What most tenants miss:** The kitchen isn’t just the dirtiest room — it’s the room where inspectors spend the most time. Based on industry cleaning data, kitchens consume 1.5 to 3 hours of a full end-of-lease clean, more than any other single room MNT Cleaning.
**Bond Refund Outcomes in Victoria (2023-24):**
– Full refund to tenant: 64%
– Shared between tenant and landlord: 26%
– Full to landlord: 10%
*Source: RTBA Annual Report 2023-24*
What Does “Reasonably Clean” Actually Mean for Kitchens in Victoria?
Under the Residential Tenancies Act 1997, tenants must return the property in “reasonably clean” condition, accounting for fair wear and tear Consumer Affairs Victoria That sounds vague — because it is. But here’s how property managers interpret it for kitchens.
“Reasonably clean” means every surface should be free of grease, food residue, mould, and stains that weren’t there when you moved in. It doesn’t mean brand new. A small scratch on the benchtop from normal use? That’s fair wear and tear. A stovetop caked in burnt food? That’s a deduction.
Your condition report from move-in day is the benchmark. If you don’t have one, you’re at a disadvantage. Before you start cleaning, dig out that original report and compare every surface against it.
The key distinction
Fair wear and tear includes:
– Minor scuffs on cupboard doors from regular opening and closing
– Slight discolouration of grout from years of normal use
– Small marks on benchtops from everyday kitchen activity
Not fair wear and tear:
– Grease buildup inside the oven or on the rangehood
– Food stains on splashbacks or behind appliances
– Mould growth from poor ventilation
– Burnt or damaged stovetop surfaces
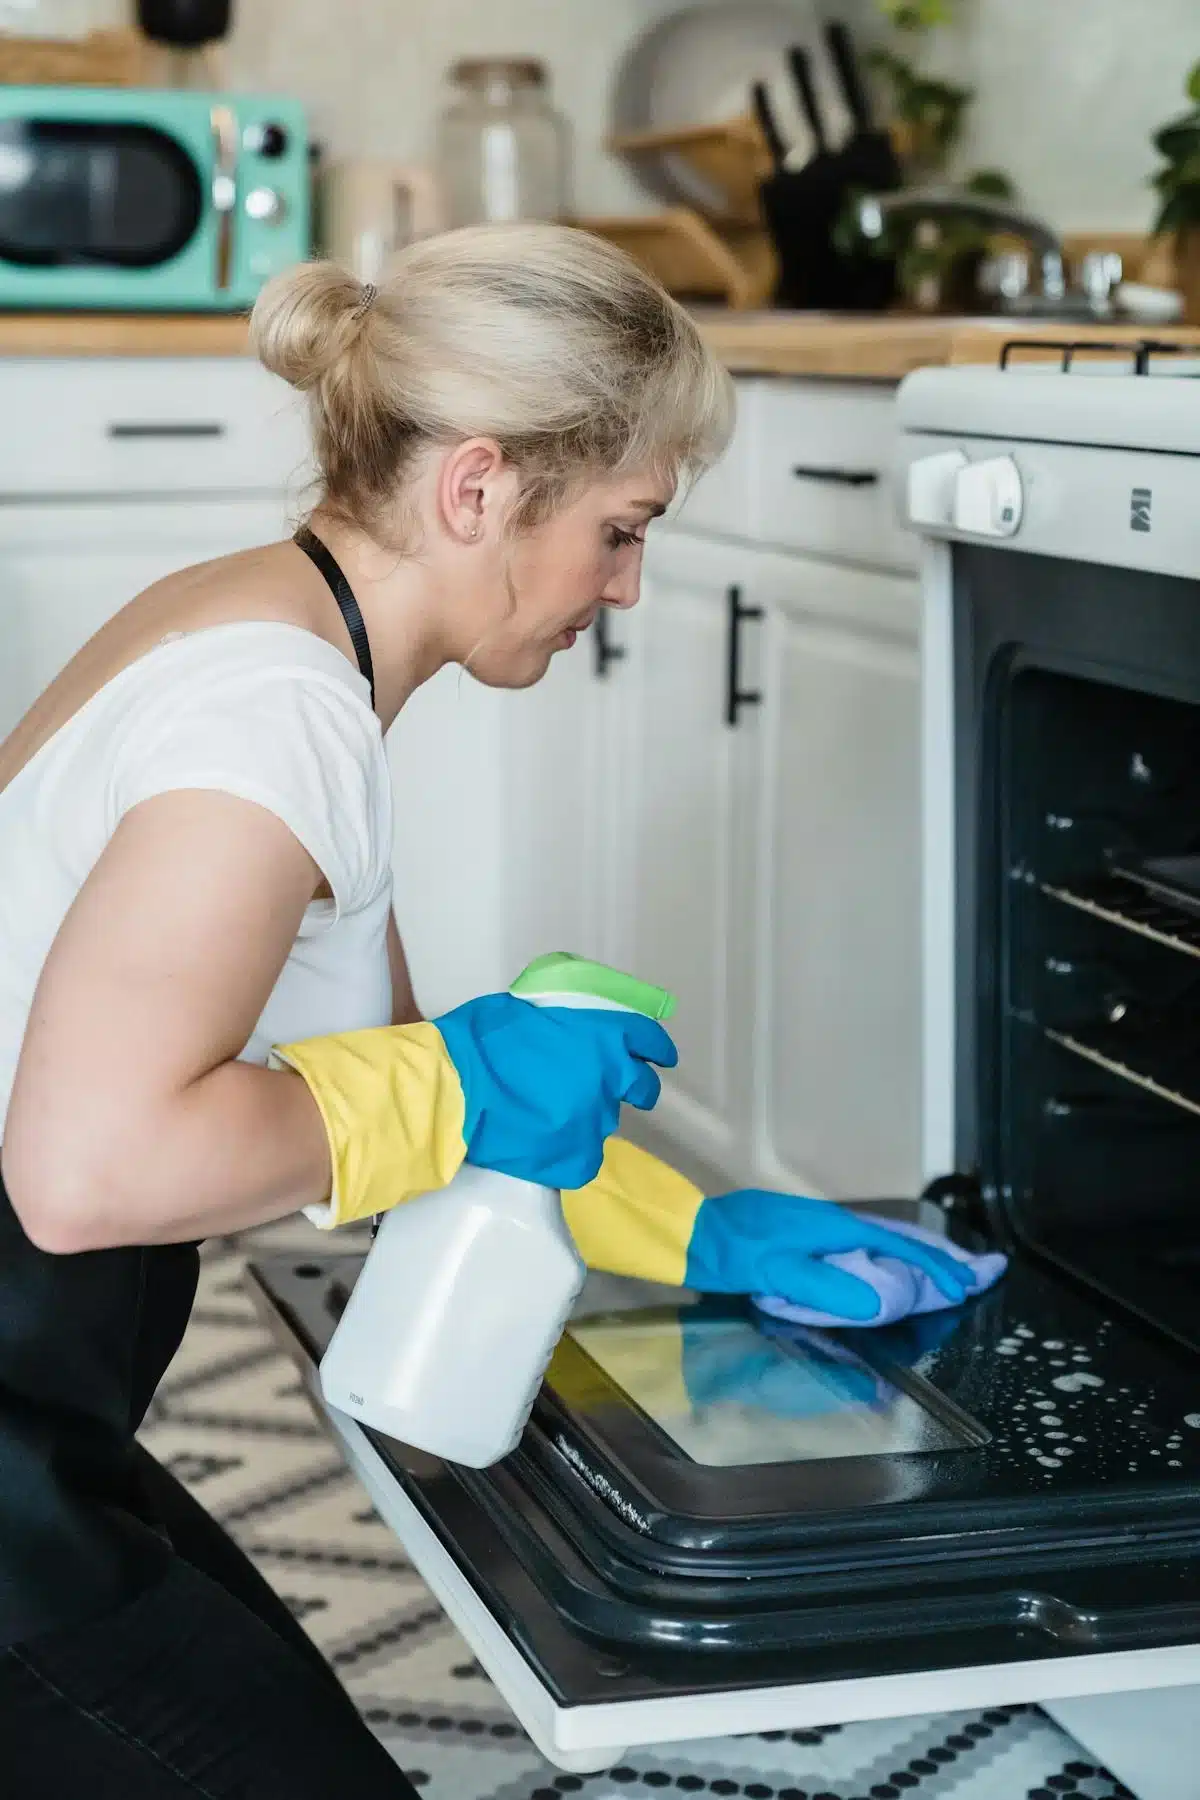
How Do You Deep Clean an Oven for a Bond Inspection?
The oven is the number one kitchen item that fails bond inspections. A 300-tenant survey found that professional cleaners achieve a 93.75% “all good” inspection result, compared to just 53.33% for DIY cleaners ([Majestic Vacate Cleaning](https://majesticvacatecleaningperth.com.au/bond-cleaning-guide-survey-based-reality-of-diy-vs-professional-cleaning/), 2024). Much of that gap comes down to oven cleaning technique.
Here’s the step-by-step process that professionals use:
Step 1: Remove everything
Pull out all racks, trays, and the oven door if removable. Soak racks in hot water with dish soap in the bathtub or laundry sink. Let them sit for at least 30 minutes.
Step 2: Apply a baking soda paste
Mix 3 tablespoons of baking soda with enough warm water to form a thick paste. Spread it across the entire oven interior — walls, floor, ceiling, door glass. Avoid the heating elements. Leave it overnight if possible, or at minimum 2 hours.
Step 3: Vinegar spray
Fill a spray bottle with equal parts white vinegar and warm water. Spray over the baking soda paste. The foaming reaction lifts grease and burnt residue. Let it fizz for 15 minutes.
Step 4: Scrub and wipe
Use a non-scratch scouring pad for stubborn spots. Wipe everything down with a damp microfibre cloth. Repeat until no residue remains. Check the oven light cover — inspectors look there too.
Step 5: Clean the door glass
Apply baking soda paste to both sides of the oven door glass. For the gap between glass panels, use a long thin brush or a cloth wrapped around a ruler. This is where most DIY cleaners miss hidden grease.
Step 6: Reassemble and check
Dry the racks thoroughly, slide them back in, and reattach the door. Run the oven empty at 100°C for 10 minutes to burn off any cleaning residue. Then do a final visual inspection with a torch.
**Time estimate:** 45-90 minutes depending on grease buildup.
> **Pro Tip:** If your oven has a self-cleaning (pyrolytic) function, don’t rely on it alone. It burns off surface grease but can leave white ash residue. You’ll still need to wipe down every surface afterward.
What About the Rangehood — How Do You Clean It Properly?
The rangehood is the second most-failed kitchen item at bond inspection. Most tenants forget it entirely. Property managers won’t. They’ll check the filters, the exterior housing, and the vent underneath.
Here’s how to handle each part:
Filters
Remove the metal mesh filters. Soak them in very hot water with a generous squirt of dish soap and 2 tablespoons of baking soda. After 20 minutes, scrub with a soft brush. Rinse and dry completely before reinstalling.
If the filters are charcoal (carbon), they can’t be washed — they need replacing. Check your lease to see if filter replacement is your responsibility.
Exterior housing
Spray a degreaser on the rangehood exterior. Let it sit for 5 minutes. Wipe with a microfibre cloth following the grain of the steel. For stainless steel, finish with a stainless steel polish to eliminate streaks.
Underside and vent
The underside collects a sticky grease film that most tenants never notice. Spray degreaser, wait, then scrub with a sponge. Wipe the vent slats individually — a cotton bud works for tight spaces.
**Time estimate:** 20-40 minutes.
What’s the Full Kitchen Cleaning Checklist for Bond Return?
Here’s your surface-by-surface checklist. Print it, tape it to the fridge, and tick off each item as you go.
Oven and stovetop
– Oven interior walls, floor, and ceiling — no grease or residue
– Oven racks — soaked, scrubbed, dried
– Oven door glass (both sides + between panels)
– Oven knobs and control panel — wiped, no grime in crevices
– Stovetop burners/elements — lifted and cleaned underneath
– Stovetop drip trays — scrubbed or replaced if damaged
– Splashback behind stove — degreased top to bottom
Rangehood
– Rangehood filters — soaked and scrubbed (or replaced if charcoal)
– Exterior housing — degreased and polished
– Underside — sticky grease film removed
– Light cover — cleaned
Sink and taps
– Sink basin — scrubbed, no water stains or food residue
– Tap/faucet — polished, no limescale
– Drain — cleared, no food buildup, no odour
– Splash area behind taps — no mould or water marks
Benchtops and surfaces
– All benchtop surfaces — wiped, no stains or sticky patches
– Tile grout on splashbacks — scrubbed white (use grout cleaner if stained)
– Window sill above sink — dusted and wiped
– Light switches and power points — wiped (no spray directly on electrics)
Cupboards and drawers
– Cupboard interiors — empty, wiped, no crumbs or shelf liner residue
– Cupboard exteriors — wiped, no fingerprints or grease
– Drawer interiors — empty, wiped, slides smoothly
– Handles — degreased, no sticky residue
– Top of overhead cupboards — dusted (inspectors check up there)
Dishwasher
– Interior — run empty cycle with dishwasher cleaner
– Door seal — wiped, no mould
– Filter — removed, rinsed, replaced
– Exterior and handle — wiped
Fridge space
– Fridge cavity/alcove — wiped walls, floor, and ceiling
– Behind the fridge — dust and debris removed
– Power point behind fridge — accessible and clean
Floors and walls
– Floor — mopped, no sticky spots, grout cleaned if tiled
– Skirting boards — wiped
– Walls — spot-cleaned any grease splashes or food marks
– Ceiling — check for grease haze above stove area
– Kickboards under cupboards — wiped
A gloved hand cleans a stainless steel kitchen sink until it shines during a bond clean
**From the field:** Professional cleaners consistently report that the three most overlooked kitchen spots are: the top of overhead cupboards (grease collects there from cooking steam), the gap between the oven door glass panels, and the kickboards under base cabinets. These are exactly where property managers look to test whether you’ve done a thorough job or a surface-level wipe.
How Long Does Kitchen End of Lease Cleaning Actually Take?
Kitchen cleaning consumes 1.5 to 3 hours of a full end-of-lease clean — more than any other room. That figure assumes moderate grease buildup. A heavily neglected kitchen can push past 4 hours.
Here’s the breakdown by task:
|
Kitchen Task |
DIY Time Estimate |
Professional Time |
|---|---|---|
|
Oven deep clean |
60–90 min |
30–45 min |
|
Rangehood and filters |
20–40 min |
15–20 min |
|
Stovetop and splashback |
20–30 min |
10–15 min |
|
Sink, taps, and drain |
15–20 min |
10 min |
|
Cupboards (inside and out) |
30–45 min |
15–25 min |
|
Dishwasher |
15–20 min |
10 min |
|
Fridge cavity and behind |
15–20 min |
10 min |
|
Floors, walls, skirting |
20–30 min |
15–20 min |
|
Total |
3–5 hours |
1.5–3 hours |
The difference comes down to commercial-grade products and technique. Professional degreasers cut through oven grime in minutes, while household baking soda paste needs hours of soaking.
**Room-by-Room End of Lease Cleaning Time:**
– Kitchen: 1.5 – 3 hours (longest)
– Bathroom: 1 – 2 hours
– Windows/Outdoor: 40 – 60 minutes
– Bedroom/Living: 30 – 45 minutes
– Hallway/Entry: 20 – 30 minutes
*Source: MNT Cleaning Room-by-Room Guide, 2024*
Should You DIY or Hire a Professional Kitchen Cleaner?
A 300-tenant survey across Australia found that 93.75% of tenants who hired professionals received an “all good” result at inspection, compared to just 53.33% of DIY cleaners Majestic Vacate Cleaning 2024). The DIY “not up to standard” rate was 28.89% — nearly four times the professional rate of 7.29%.
Here’s what those numbers mean in practice. When DIY cleaning fails an inspection, 37.5% of tenants then hire a professional anyway — effectively paying twice. The remaining 62.5% go back and clean again themselves, costing more hours but no guarantee of passing.
DIY vs Professional: Bond Inspection Outcomes
|
Outcome |
Professional Cleaning |
DIY Cleaning |
|---|---|---|
|
All Good |
93.8% |
53.3% |
|
Not Up to Standard |
7.3% |
28.9% |
|
Follow-up Needed |
22.4% |
46.7% |
*Source: Majestic Vacate Cleaning Survey (n=300), 2024*
The cost calculation
Professional end of lease cleaning in Melbourne runs $270-$380 for a 1-bedroom, $360-$520 for a 2-bedroom, and $450-$650 for a 3-bedroom (Clean Freaks, 2026). The kitchen is included in these packages.
Now compare that to a bond deduction. The average gap between what landlords claim at VCAT and what they’re actually awarded is $1,688 — meaning landlords routinely overclaim (Tenants Victoria). But even a legitimate kitchen-related deduction of $200-$400 wipes out any savings from skipping professional help.
Professional cleaning also reduces the likelihood of a bond dispute by 57%, according to data compiled from Consumer Victoria, NSW Housing, SACAT, and ACAT ([End of Lease Cleaning Melbourne]. That’s not just about the kitchen — but the kitchen is where the biggest risk sits.
When DIY makes sense
DIY kitchen cleaning can work if:
– You’ve maintained the kitchen regularly throughout your tenancy
– Your oven isn’t heavily soiled (you’ve cleaned it at least quarterly)
– You have 4+ hours to dedicate to the kitchen alone
– You can source commercial-grade degreaser (not just household products)
### When professional help is worth it
Hire a professional if:
– You haven’t cleaned the oven in 6+ months
– You can see visible grease on the rangehood filters
– Your bond is over $1,500 and you can’t afford to lose any
– You want a bond-back guarantee O2O Cleaning offers one with every end of lease booking
A person wearing rubber gloves wipes down a kitchen countertop during an end-of-lease clean
What Products Do You Need for a Bond-Standard Kitchen Clean?
You don’t need a cupboard full of specialty products. Here’s what actually works for each surface:
Essential supplies
| Product | Use | Why it works |
|—|—|—|
| Baking soda | Oven, stovetop, sink | Mild abrasive, degreaser, non-toxic |
| White vinegar | All surfaces, glass | Cuts grease, removes limescale, deodorises |
| Commercial degreaser (e.g., Sugar Soap) | Rangehood, walls, cupboards | Faster than baking soda on thick grease |
| Dish soap | General cleaning, soaking | Breaks down grease in water |
| Microfibre cloths (6-8) | All surfaces | Lint-free, better absorbency than rags |
| Non-scratch scouring pads | Oven, stovetop, sink | Removes buildup without scratching |
| Old toothbrush | Grout, crevices, knobs | Gets into tight spaces |
| Spray bottle | Vinegar solution | Even application |
| Rubber gloves | Protection | Prevents skin irritation from chemicals |
What to avoid
– **Steel wool** on stainless steel — it scratches permanently
– **Bleach** on natural stone benchtops — it etches the surface
– **Abrasive cleaners** on glass cooktops — micro-scratches that catch light
– **Oven cleaner spray** without ventilation — fumes are harmful, open windows first
What Happens If You Fail the Kitchen Inspection?
If your property manager flags kitchen issues, 95% of bond disputes in Victoria are still resolved by mutual agreement — only 5% end up at VCAT RTBA Annual Report 2023-24. So there’s room to negotiate.
Here’s the typical process:
1. **You receive a list of issues** from the property manager after the final inspection
2. **You can return and clean again** — most landlords allow 24-48 hours to rectify
3. **If disagreement continues**, either party can lodge a bond claim with the RTBA
4. **The other party has 14 days to respond** to a bond claim
5. **If unresolved**, it goes to VCAT for a hearing
The good news? In VCAT cases, 39% of landlords received nothing at all, and in 82% of cases, landlords got less than they claimed Tenants Victoria. VCAT takes a reasonable view of “fair wear and tear.”
Your strongest protection is documentation. Before you hand back keys:
– **Photograph every kitchen surface** — oven interior, rangehood, stovetop, sink, cupboard interiors, floors
– **Take photos in good lighting** with timestamps
– **Compare against your move-in condition report**
– **Keep receipts** for any cleaning products or professional services
For the full process, read our step-by-step VCAT bond dispute guide.
What’s the Best Timeline for Kitchen End of Lease Cleaning?
Don’t leave it until the day before your keys are due. Here’s a practical timeline:
7 days before move-out
– Remove all food, appliances, and personal items from the kitchen
– Run a dishwasher clean cycle
– Start soaking oven racks
3-4 days before
– Deep clean the oven (apply baking soda paste, leave overnight)
– Clean rangehood filters
– Scrub stovetop and splashback
2 days before
– Clean all cupboard interiors and exteriors
– Clean sink, taps, and drain
– Wipe walls, skirting boards, and light switches
1 day before
– Mop floors
– Final wipe of all surfaces
– Take photos of everything
Inspection day
– Quick dust and wipe of any surfaces that have settled
– Open windows for fresh air
– Make sure all surfaces are dry and streak-free
This timeline gives you a buffer. If the property manager finds something, you have time to fix it before the lease officially ends.
Need the full property checklist? See our end of lease inspection checklist for Melbourne
Frequently Asked Questions
Can a landlord deduct bond for a dirty oven in Melbourne?
Yes. Under Victorian tenancy law, landlords can claim bond for cleaning that goes beyond fair wear and tear . A dirty oven is the most common kitchen-specific deduction. In 2023-24, 34% of Victorian tenants experienced some form of bond deduction, with cleaning involved in roughly 67% of all disputes (RTBA 2023-24).
How much does professional kitchen cleaning cost in Melbourne?
Kitchen cleaning is included in standard end-of-lease packages, which range from $270-$380 for a 1-bedroom to $450-$650 for a 3-bedroom property ([Clean Freaks](https://cleanfreaks.au/blog/end-of-lease-cleaning-price-melbourne/), 2026). Standalone oven cleaning typically costs $80-$150. Given that 45% of tenants who clean themselves still lose bond money, the investment often pays for itself.
Do I need to clean behind the fridge and stove?
Yes. Property managers commonly pull out or look behind these appliances. Dust, grease, and food debris accumulate in these gaps over a tenancy. Clean the floor, walls, and power points behind both appliances. Allow 15-20 minutes for each.
What if the oven was already dirty when I moved in?
Your move-in condition report is your evidence. If it noted the oven as “not clean” or “fair” at the start of the tenancy, you only need to return it in equivalent condition. Without a condition report, VCAT tends to favour landlords — so check if you have one. In VCAT hearings, 39% of landlords receive nothing when tenants provide proper documentation.
Is steam cleaning required for kitchen floors?
Not typically. Mopping kitchen floors with a suitable cleaner (warm water with a splash of vinegar for tiles) is sufficient for most bond inspections. Steam cleaning is more commonly required for carpets. Check your lease for any specific floor cleaning requirements.
For carpet-specific guidance, see our end of lease carpet cleaning guide for Melbourne
Conclusion: Your Kitchen Doesn’t Have to Cost You Your Bond
The kitchen is the highest-risk room for bond deductions in Melbourne — but it’s also completely manageable with the right approach.
**Key takeaways:**
– Cleaning is involved in 67% of Victorian bond disputes, and the kitchen is the primary problem area
– The oven, rangehood, and stovetop are the three surfaces inspectors check most closely
– Budget 1.5-3 hours for kitchen cleaning alone (or 3-5 hours if doing it yourself)
– Professional cleaners achieve a 93.75% pass rate vs 53.33% for DIY
– Document everything with timestamped photos before handing back keys
– If disputed, know that 82% of VCAT cases result in landlords receiving less than claimed
Start early, follow the checklist above, and your bond stays where it belongs — in your bank account.