Halloween decorations fill every store, but most look exactly the same. What if you could create something truly special this year? Something that makes your neighbors stop and stare?
Painted pumpkins offer the perfect solution. They’re unique, personal, and way more fun than carving. You can make stunning designs that last longer and shine brighter than traditional jack-o’-lanterns. Plus, kids love helping with the painting process.
I’ll show you simple techniques that turn ordinary pumpkins into works of art.
Get ready to make this Halloween unforgettable with creative designs that reflect your style.
How to Paint a Pumpkin
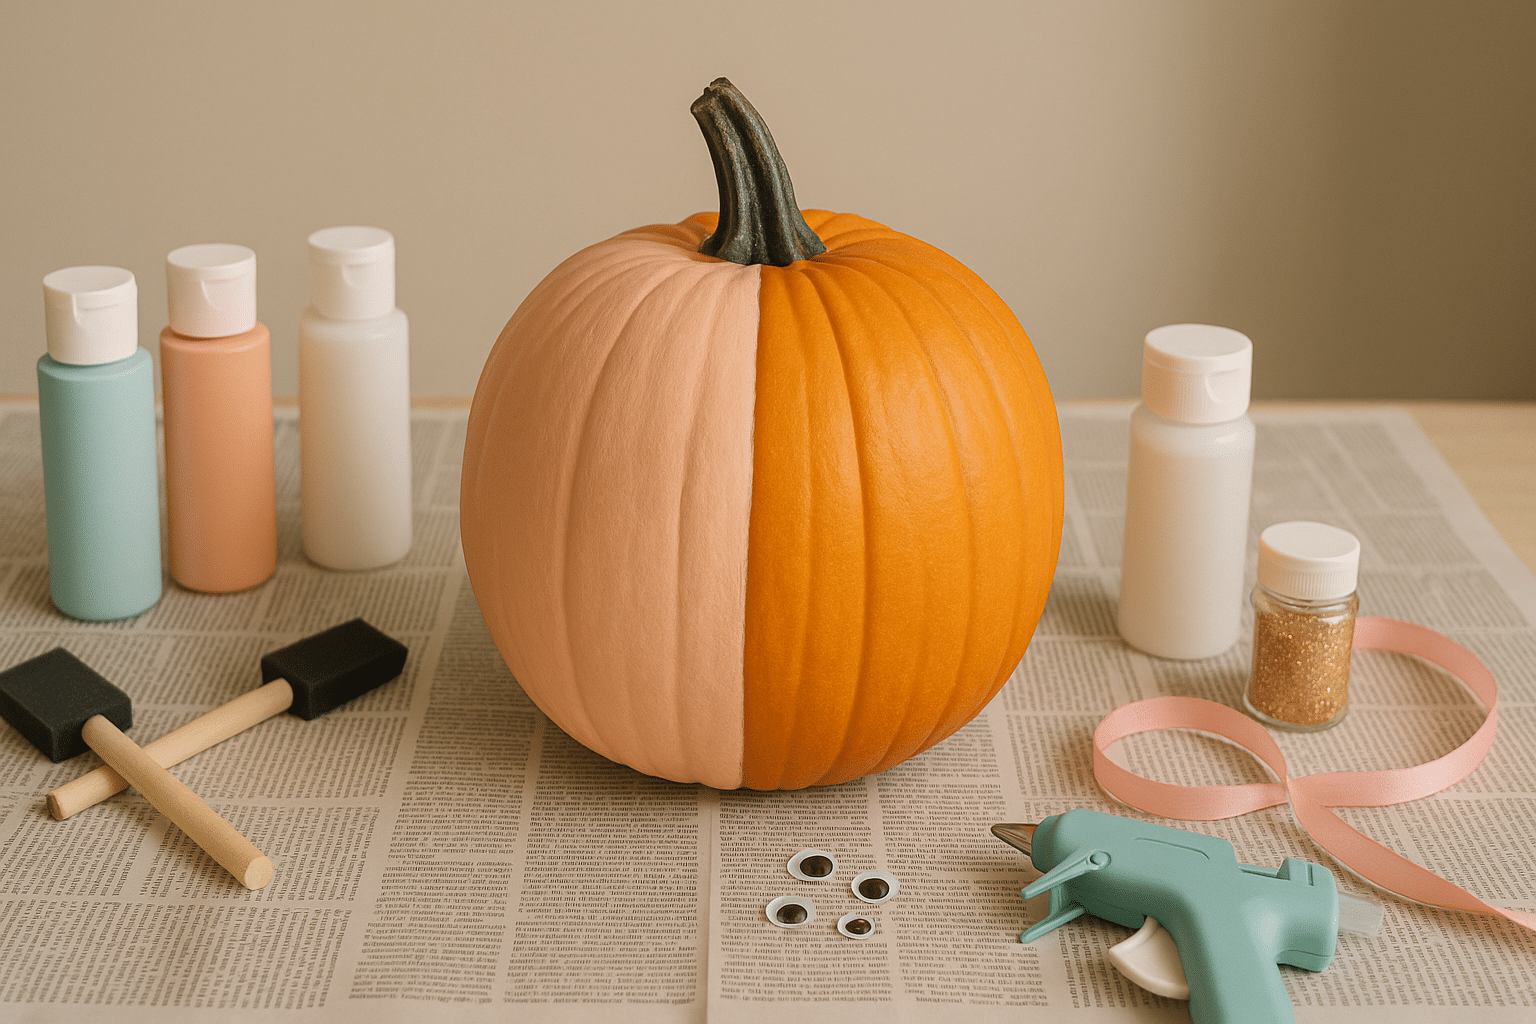
Step 1: Prepare Your Workspace and Pumpkin
Set up your work area first. Lay down a newspaper or a drop cloth to protect your surface. Pick a pumpkin that’s free of bruises and soft spots.
Use a soft cloth to gently wipe off any dirt or debris. If you have time, let your pumpkin sit in a sunny window for a week or two to cure correctly.
Step 2: Apply the Base Sealer Coat
This step is crucial for ensuring your paint adheres properly. Apply acrylic sealer to your pumpkin using a foam brush. Since the pumpkin is round, work on one half at a time.
Apply sealer to the first half and let it dry completely. Then flip and seal the second half.
Wait for it to dry before moving forward.
Step 3: Paint Your Design
Now for the fun part!
Apply your paint the same way you did the sealer. Work on one half at a time and let each section dry completely. Take a good look at your work. Do you need a second coat? Most pumpkins need two coats for even coverage.
Step 4: Apply the Top Sealer Coat
Once your paint is completely dry, apply another coat of sealer. This protects your beautiful work from chipping and weather damage. Again, work in halves and let each section dry fully.
Step 5: Add Final Details and Decorations
Time to make your pumpkin unique! You can add googly eyes, glitter, ribbons, or paint additional designs. Use hot glue for heavier items, such as craft foam pieces. For outdoor displays, make sure any paper decorations are protected from rain.
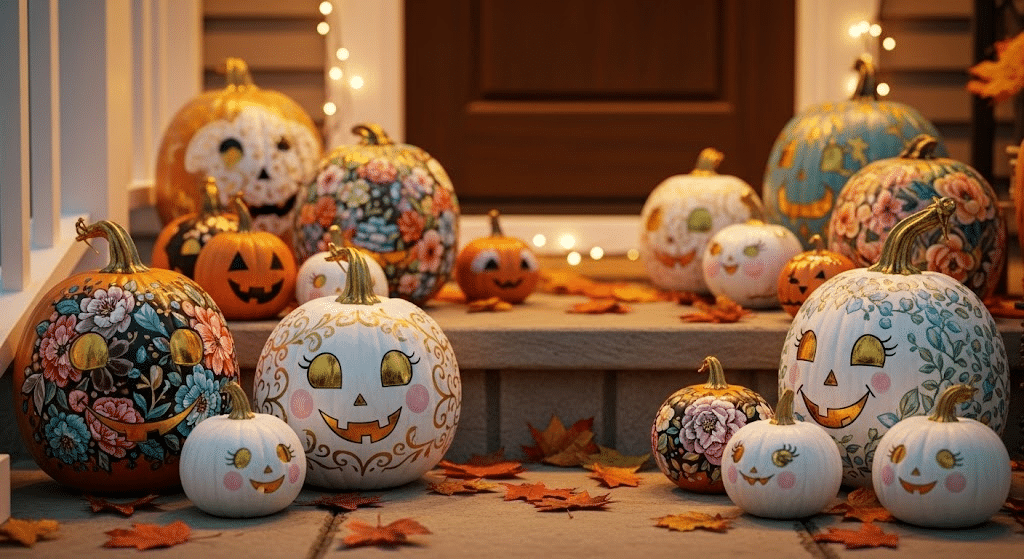
Painted Pumpkin Ideas
Looking for creative ways to decorate your pumpkins this season without the mess of carving?
Painting offers limitless possibilities to convert ordinary pumpkins into extraordinary artistic statements. From spooky to stylish, here are some unique painted pumpkin ideas to inspire your fall and Halloween decor.
Spooky and Halloween-Themed Designs
1. Painted Mummy Pumpkin
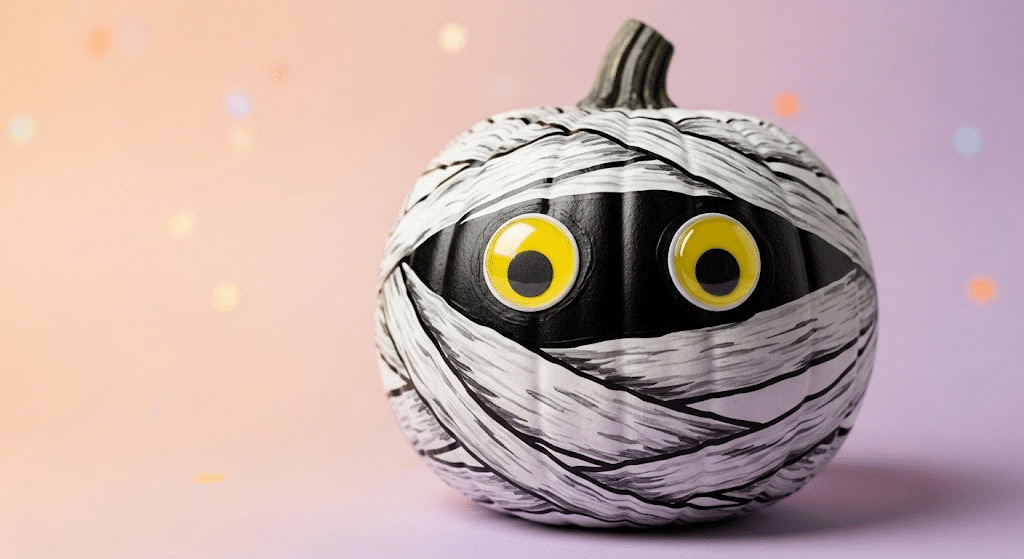
Paint the pumpkin white and draw a mummy wrap pattern with a pen. Add googly eyes on Ping-Pong balls for a spooky, textured effect that kids will love.
This design works great for families with young children who want something scary but not too frightening.
2. Spooky Spiral
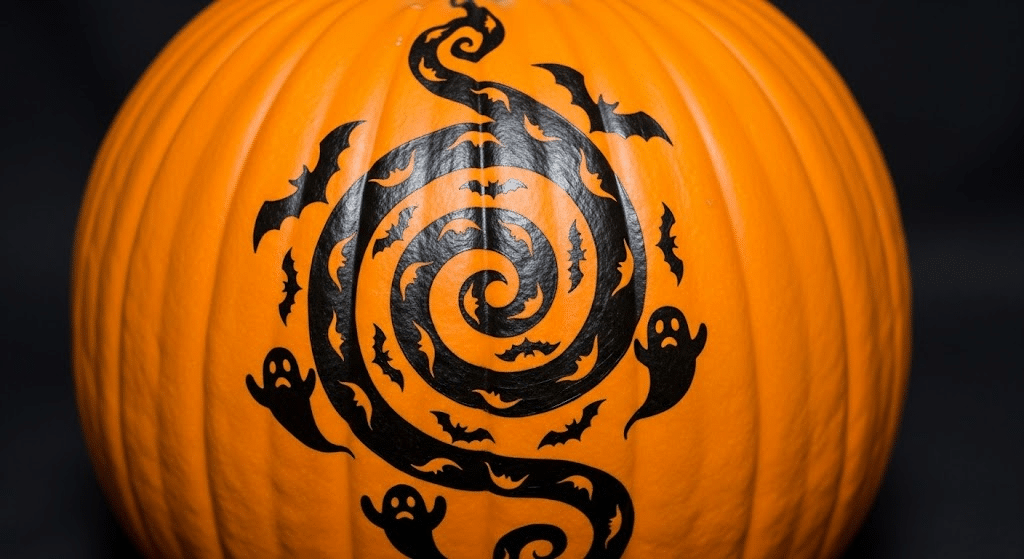
Use black paint to create a spiral from the stem downward around the entire pumpkin. Include Halloween figures or lettering for a haunting touch that draws attention from passersby.
The spiral creates an optical illusion that makes people look twice at your display.
3. Gold Spider Painted Pumpkin
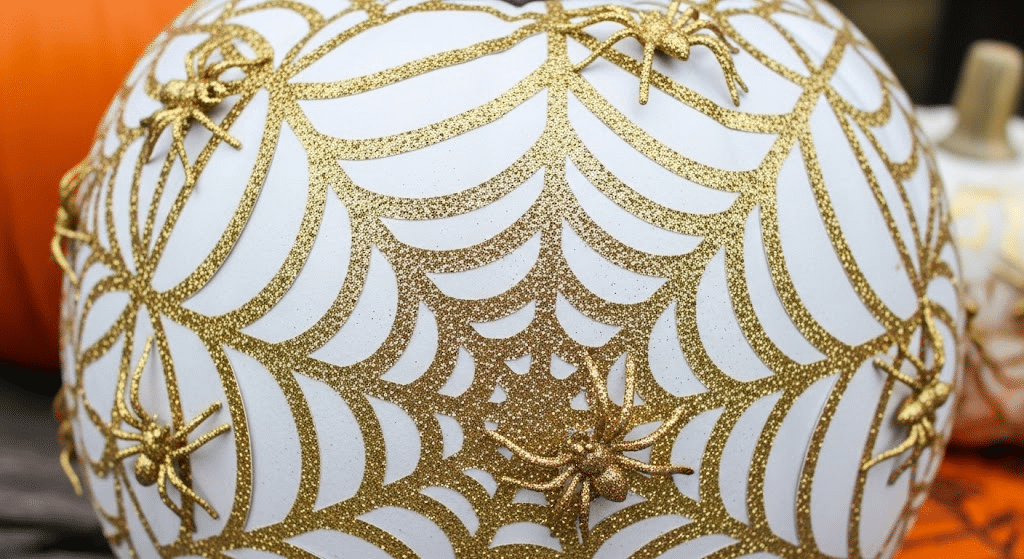
Spray paint the pumpkin white and glue glittered ribbon to form a realistic web pattern. Attach gold-painted fake spiders for a creepy accent that catches light beautifully during the day. The metallic finish makes it stand out perfectly among traditional orange decorations.
4. No-Carve Eyeball Pumpkins
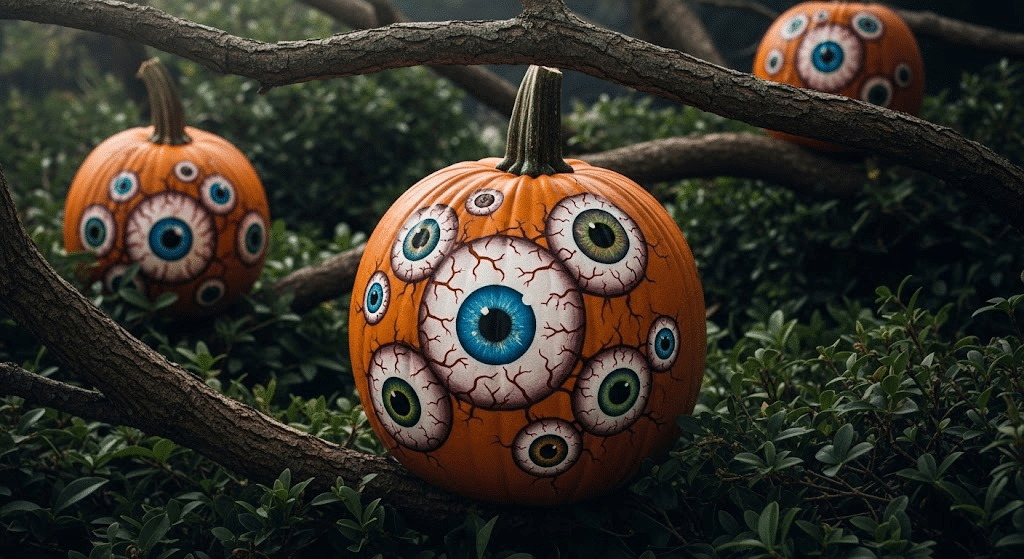
Paint eerie eyeballs directly onto the pumpkin surface with realistic details and bloodshot veins. Place in trees or bushes for a startling Halloween surprise that frightens trick-or-treaters. Use different eye colors and sizes for variety in your spooky display.
5. Skull Painted Pumpkin
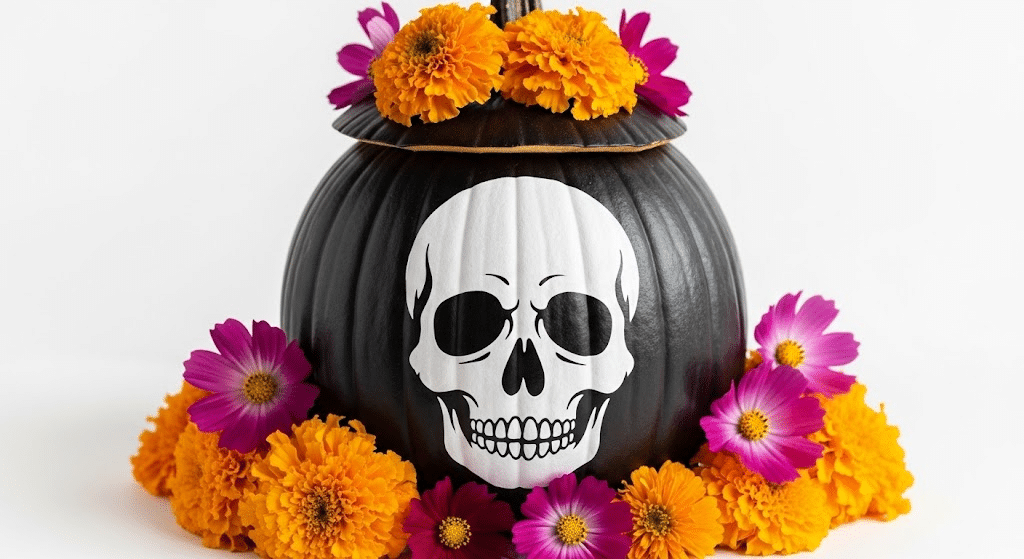
Apply a skull stencil and paint the rest black for dramatic contrast against white. Add flowers or details for a Day of the Dead-inspired look that’s both spooky and beautiful. Use bright colors for the floral elements to make them visually stand out.
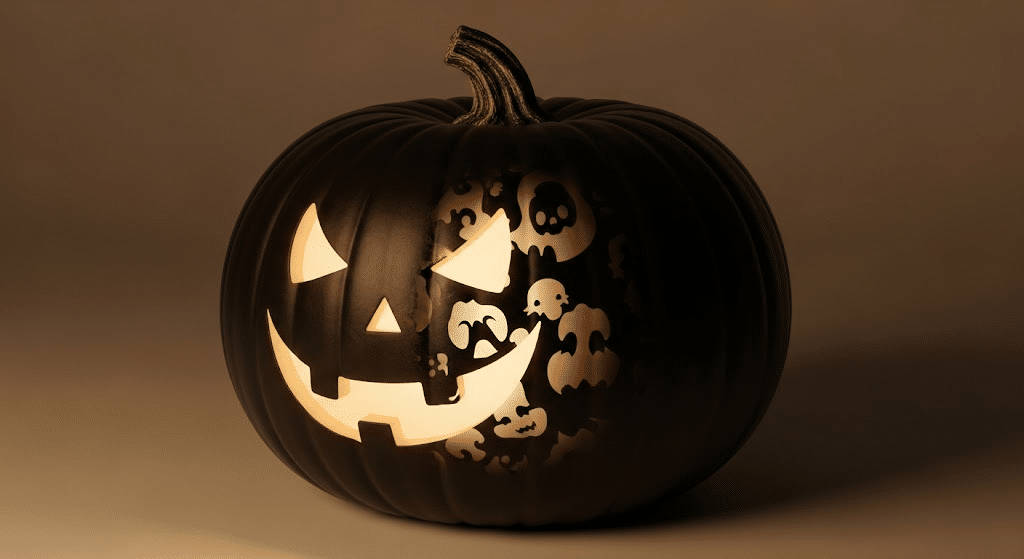
6. Scary Silhouettes Pumpkins
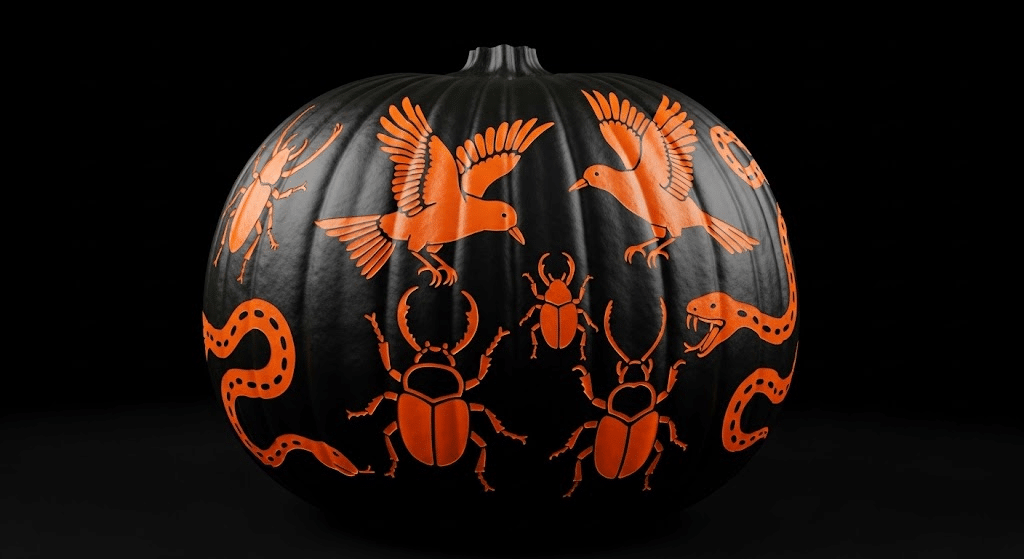
Use stencils to paint orange bugs, birds, or snakes on a matte black base. Creates a chilling Halloween display perfect for your front porch or garden area.
The contrast makes the silhouettes appear to jump dramatically off the pumpkin surface.
7. Black-and-White Delight
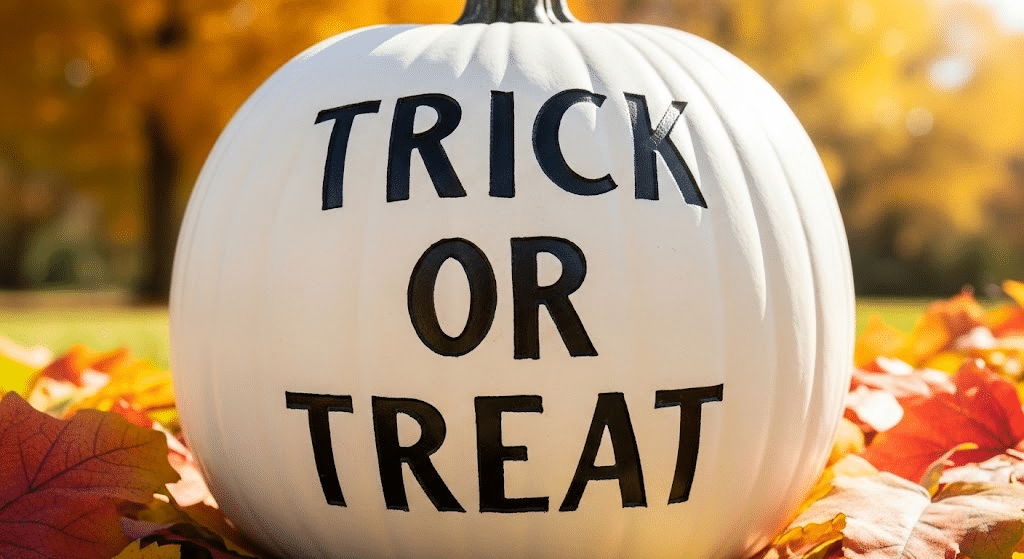
Paint the pumpkin white and carefully add “trick or treat” in black letters. Use a stencil or freehand for a welcoming Halloween vibe that greets visitors warmly. This classic design never goes out of style and works with any decor.
8. Ghost Pumpkin
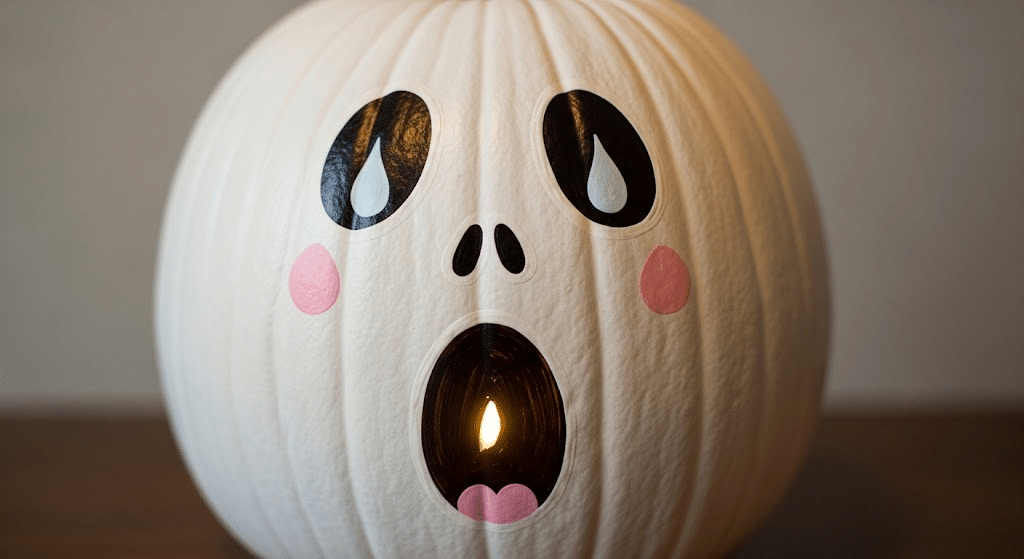
Paint tear-shaped eyes and an open mouth on white paint for classic ghost features. Add pink dots under the eyes for a friendly ghost face that’s cuter than scary. Kids especially love this design because it’s not too frightening for them.
9. Frankenstein Pumpkin
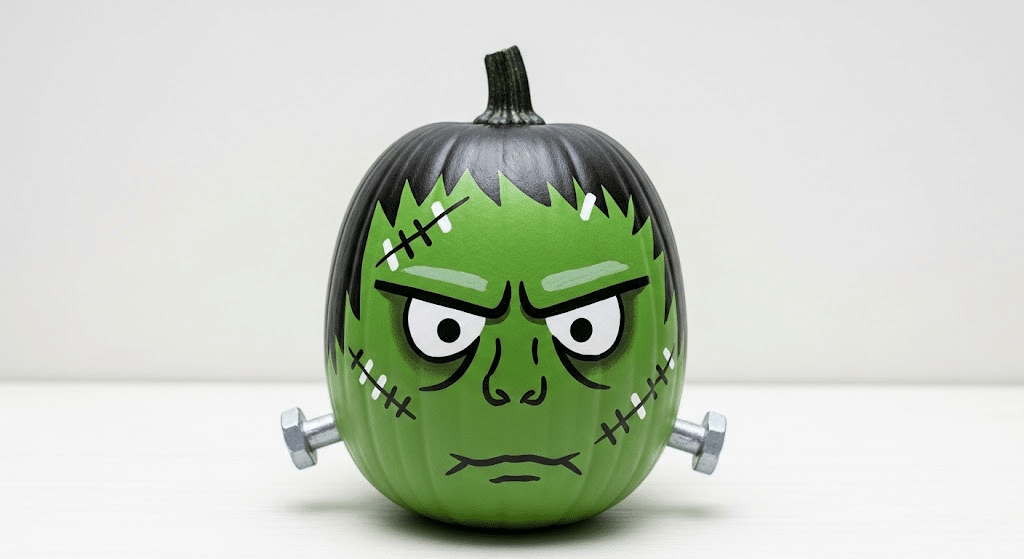
Paint most of the pumpkin green with black hair and stitches drawn on carefully. Include white dots for eyes to complete the monster look that children recognize instantly. Add bolts on the sides of the neck for authentic Frankenstein details.
10. Vampire Pumpkin
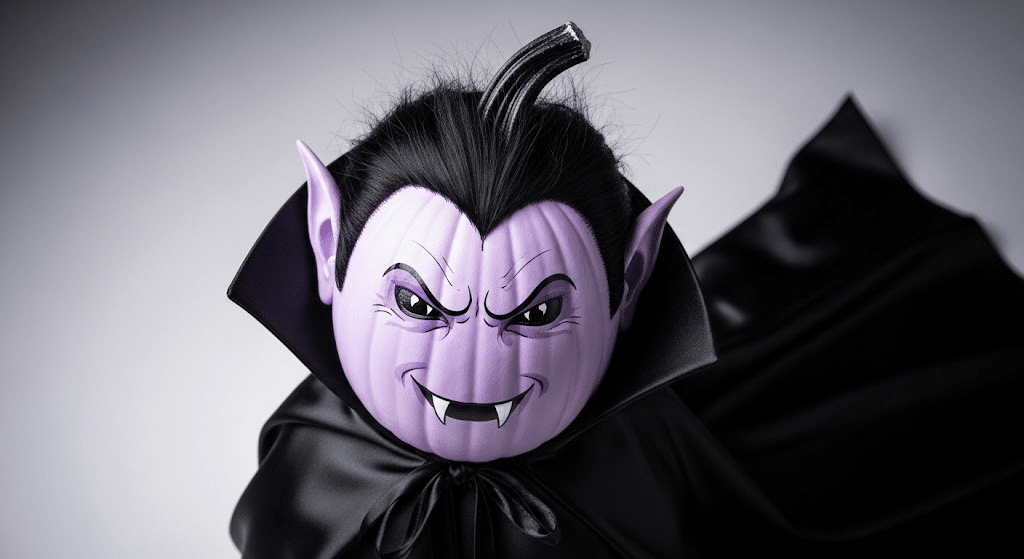
Paint light purple with black hair and pointed ears for classic vampire features. Add a small smile and triangle teeth for a vampire style that’s not too frightening.
Include a black cape made from fabric to complete the vampire transfiguration.
11. Witch Pumpkin
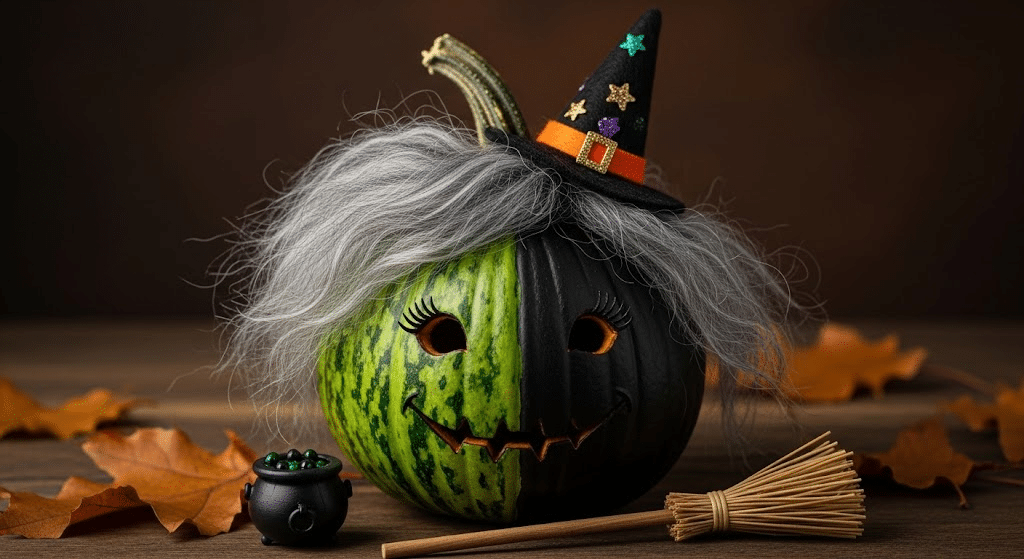
Paint half green and half black, adding grey hair and a felt cone hat. Include facial details to create a witchy charm that perfectly captures Halloween magic for viewers. Add a small broomstick or cauldron as props to complete the witch theme.
12. Zombie Pumpkin
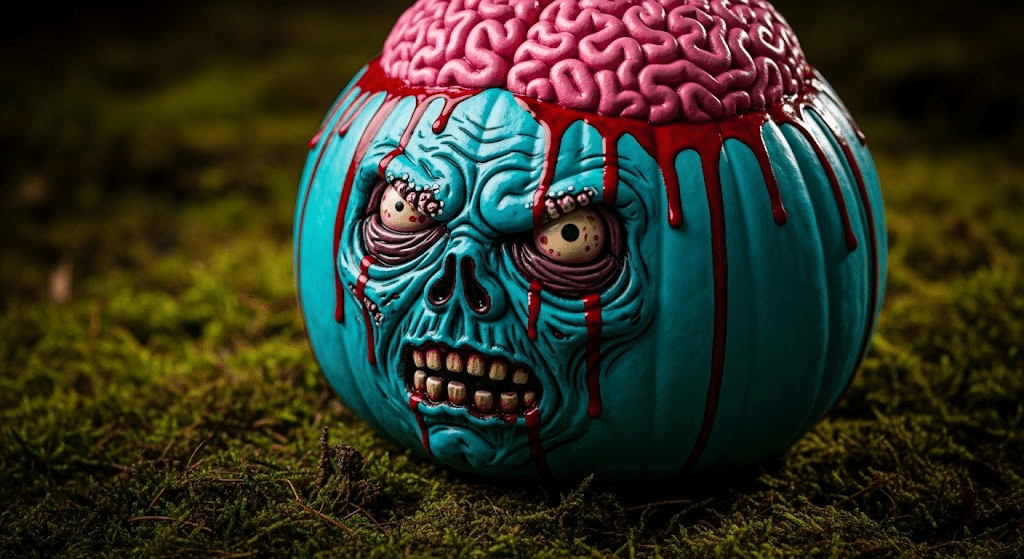
Paint a pink brain section at the top and turquoise below for zombie coloring. Add squiggly brain details and a grotesque face for true zombie appeal that’s gross. Include fake blood drips made from red paint for extra zombie realism.
13. Sugar Skull Pumpkins
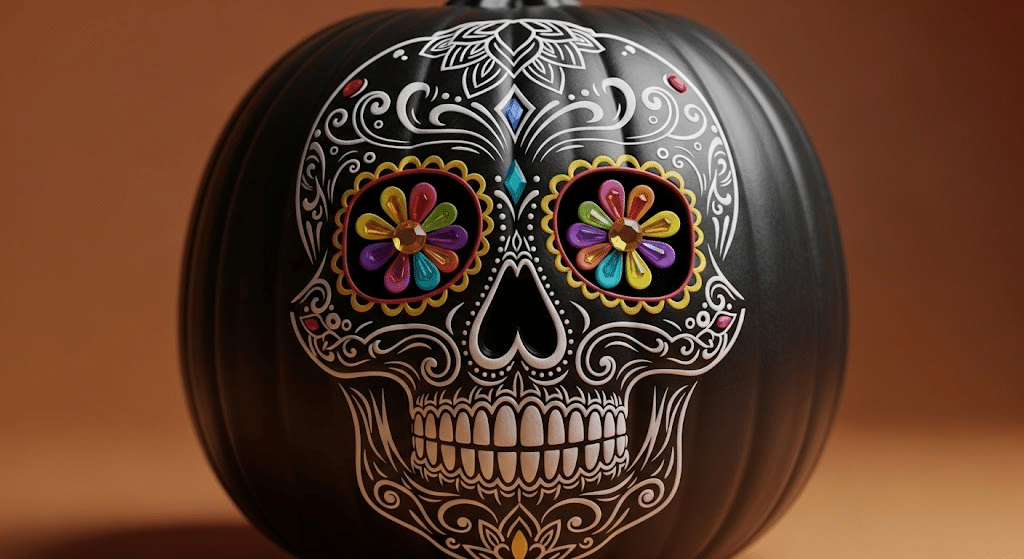
Paint black with white skull designs and colorful patterns inspired by Mexican tradition. Glue dried flowers for a vibrant Day of the Dead-style celebration that honors culture. Add gems or sequins around the eye areas for extra sparkle and beauty.
14. Dracula Pumpkin
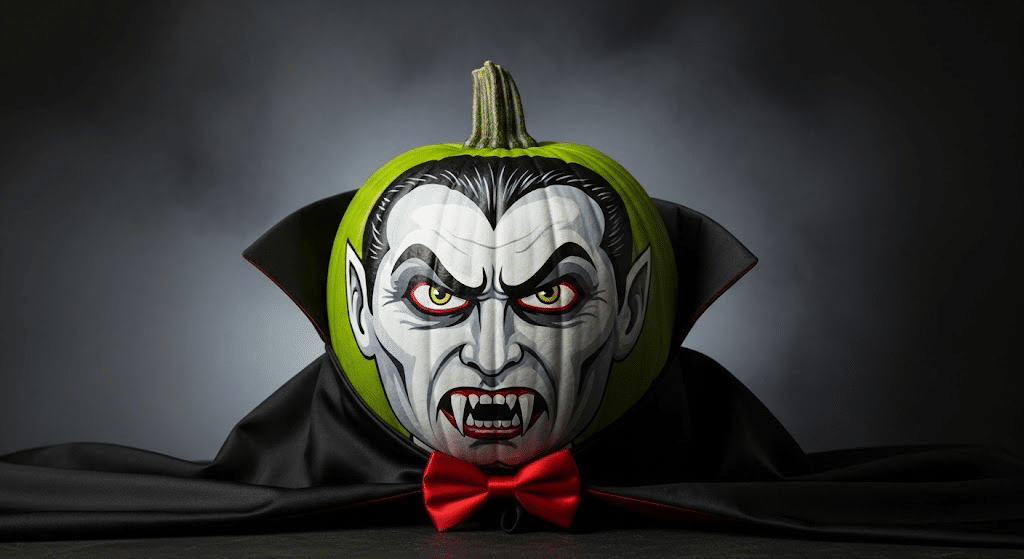
Spray paint the lime green and carefully add Dracula’s facial features with black paint. Ideal for a spooky front porch display that welcomes Halloween visitors with classic horror. Include a black cape and red bow tie for the complete Dracula look.
15. Spiderweb Pumpkin
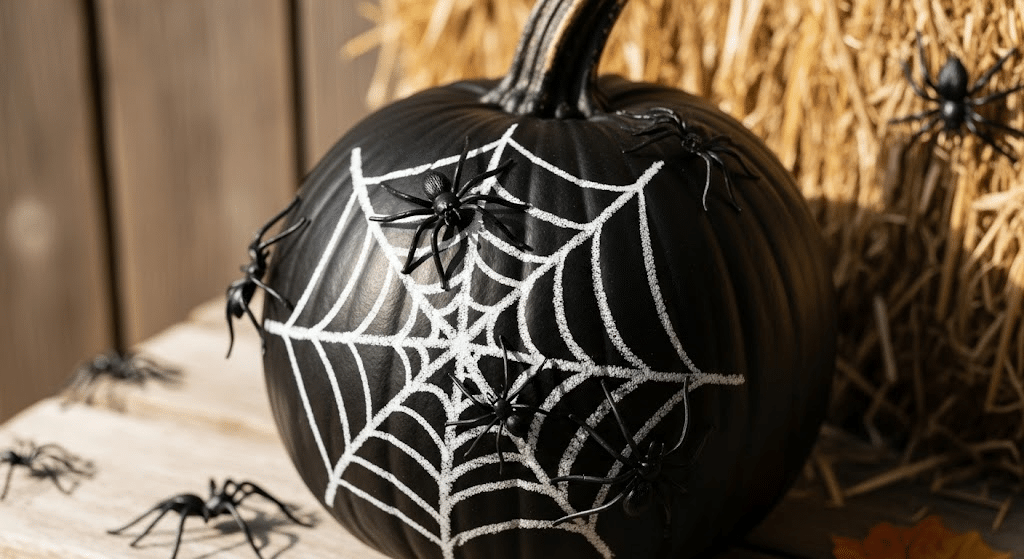
Draw spiders and webs with liquid chalk on a matte black pumpkin surface. Easy to erase for a reusable design, you can change throughout the Halloween season. Add plastic spiders in different sizes to make the web look more realistic.
16. Typography Pumpkin
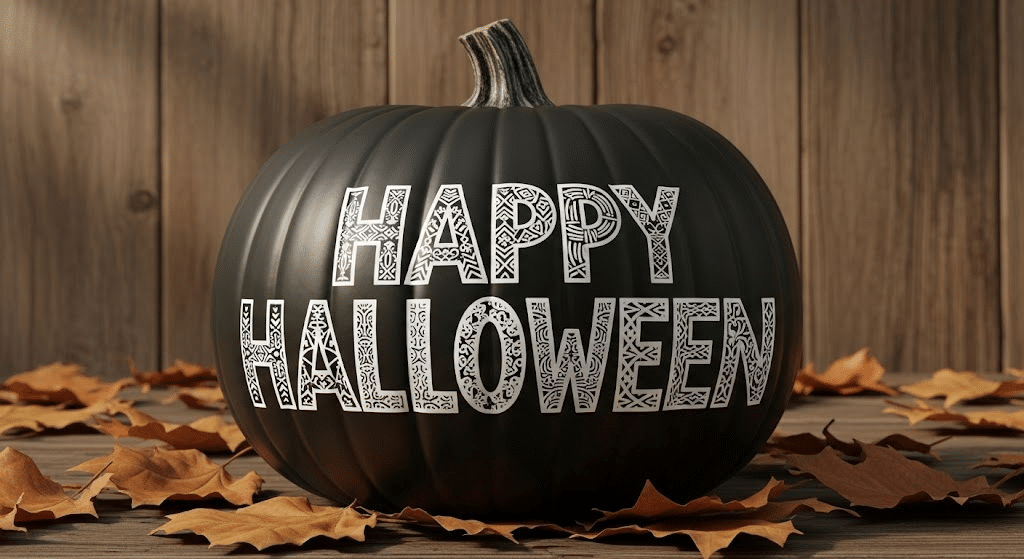
Paint dark with Halloween phrases like “Boo” or “Spooky” in white letters. Use stencils for clean, bold typography that makes a clear statement to visitors. Select fonts that complement your overall Halloween theme for the most visually impactful effect.
17. Skeleton Pumpkin
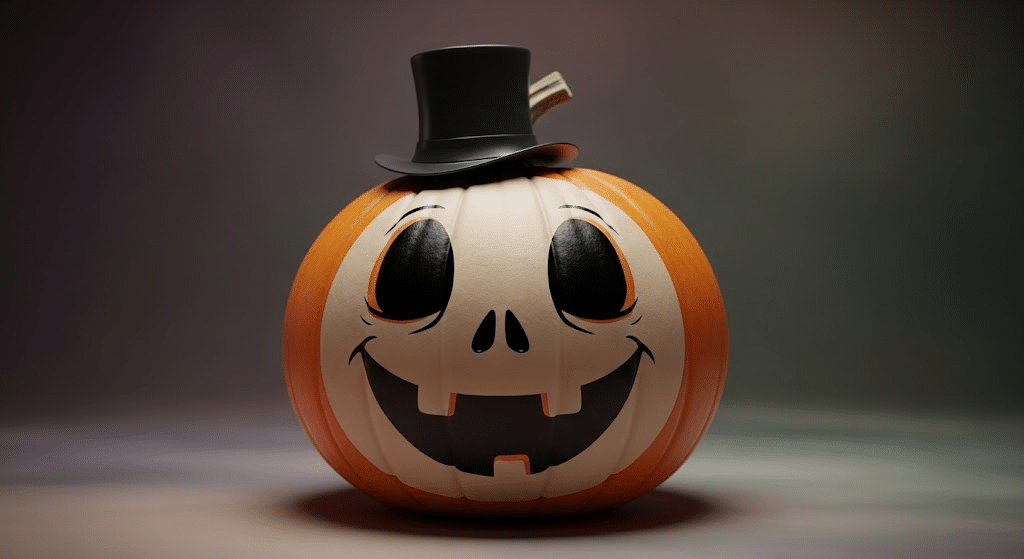
Paint a skeleton face with a mischievous grin and hollow eyes for spookiness. Kids can customize expressions for added fun and personal creativity in their designs. Add a black top hat or bow tie to give your skeleton some personality.
18. Mossy Monster Pumpkin
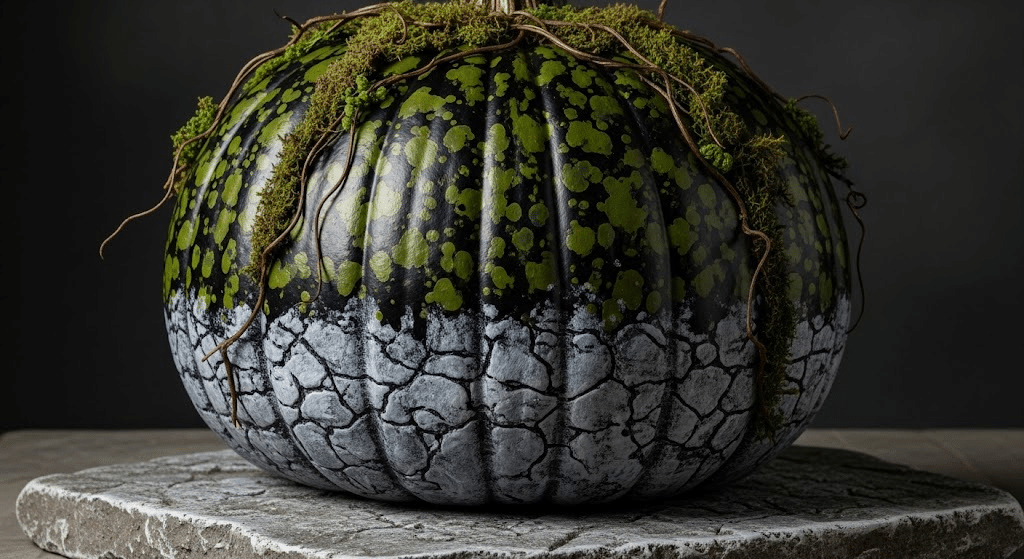
Paint mottled green and black, sponging gray at the bottom carefully for texture effects. Mimics a rotted, overgrown haunted house look that’s perfectly eerie for Halloween displays. Add fake moss or leaves glued on for extra realistic monster texture.
19. Cheshire Cat Pumpkin
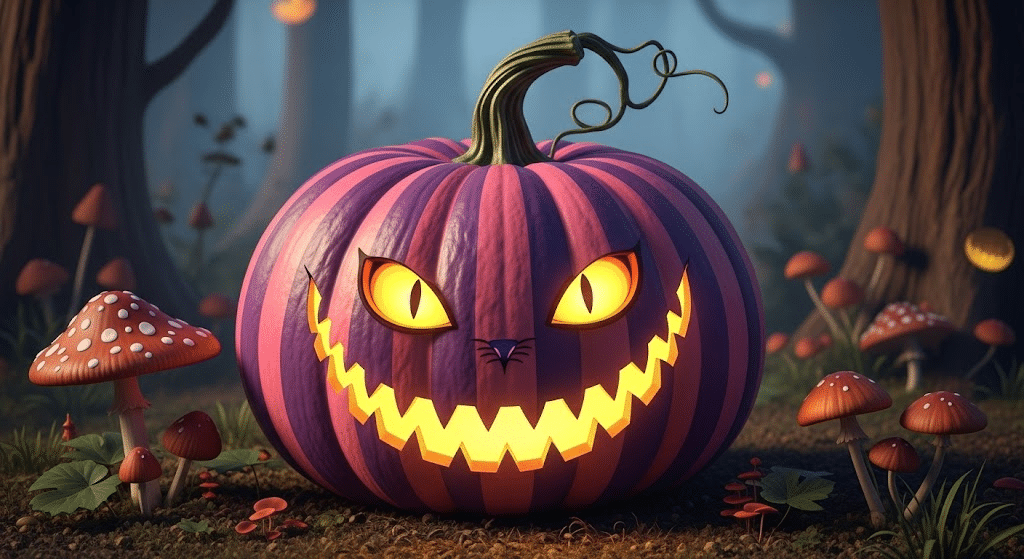
Freehand a grinning Cheshire Cat face with that famous wide, mysterious smile. Inspired by Alice in Wonderland for a whimsical Halloween twist that everyone loves and recognizes. Use purple and pink stripes on the body to match the classic character.
Artistic and Creative Designs
20. Yayoi Kusama-Inspired Dotted Pumpkin
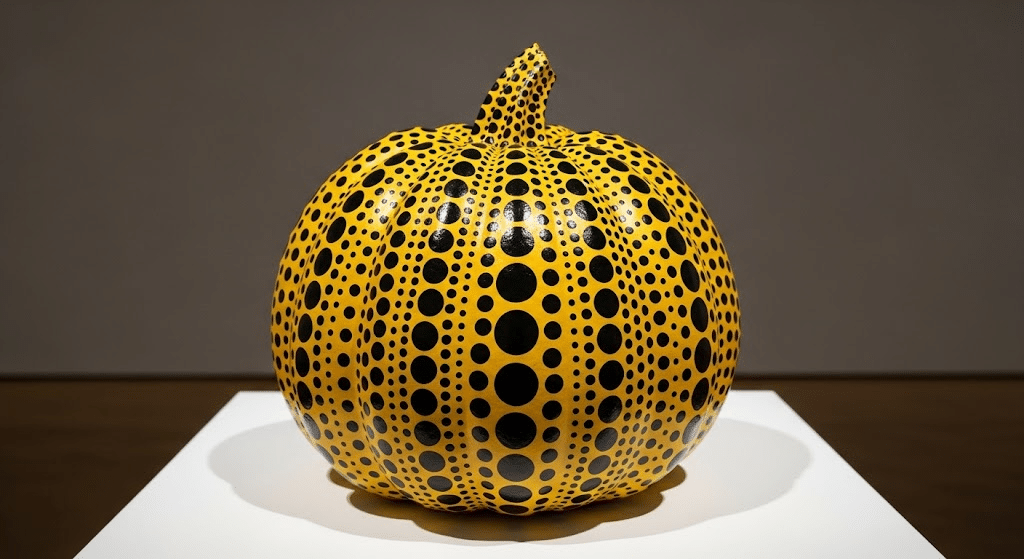
Paint black dots of varying sizes across the entire surface of the pumpkin in random patterns. Inspired by the famous artist Yayoi Kusama for a bold, artistic statement piece that’s gallery-worthy. Use different-sized brushes to create dots that range from tiny to large.
21. Galaxy Painted Pumpkin
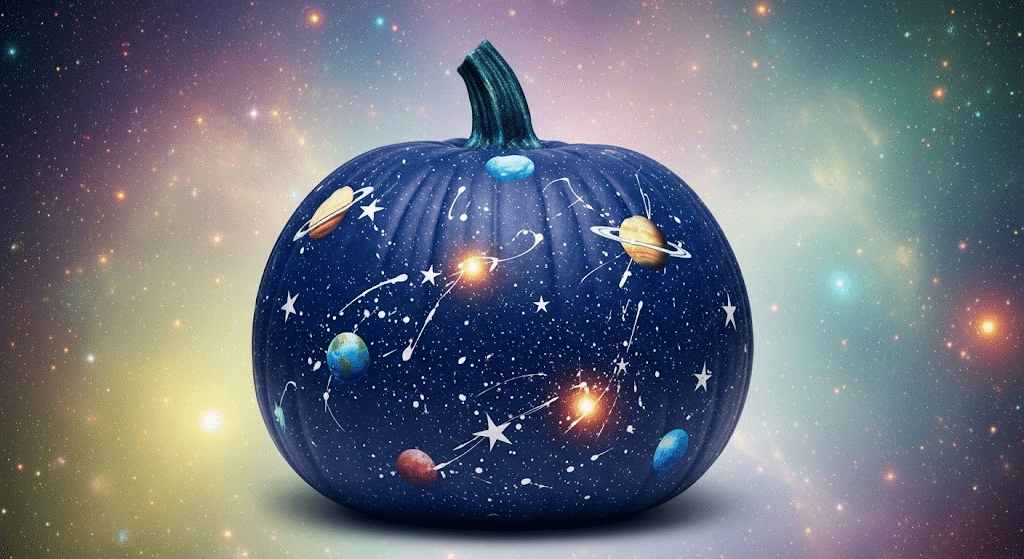
Splatter bright stars with a toothbrush on a dark base coat of deep blue. Creates a cosmic, otherworldly effect that brings space right to your doorstep display. Add planets and moons with round sponges for a complete galaxy scene.
22. DIY Pop Art Pumpkins
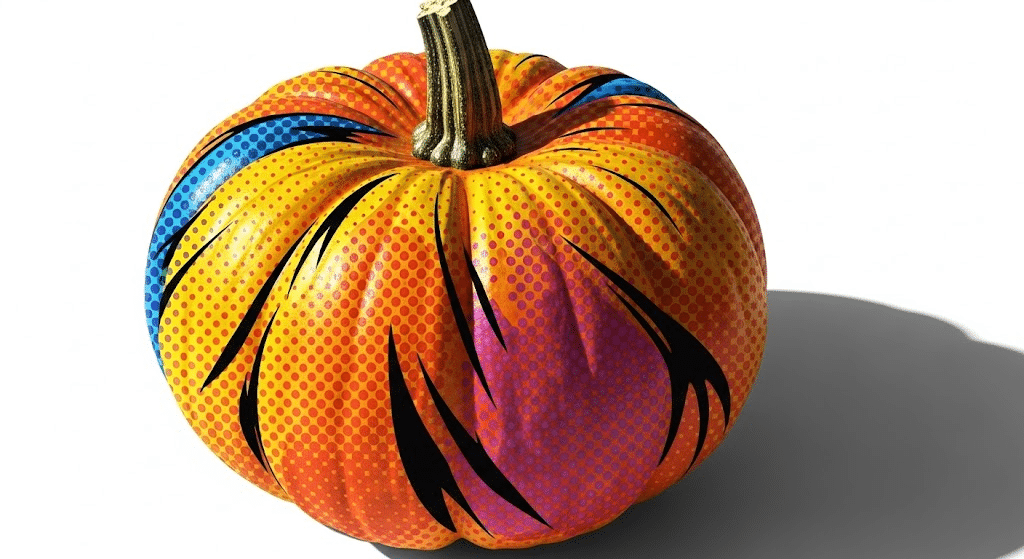
Paint animated designs with bold colors and comic-style dots throughout the entire surface. Inspired by Roy Lichtenstein, this vibrant look pops with color and energy. Add speech bubbles with Halloween words like “BOO!” for authentic comic book style.
23. Retro Painted Pumpkins
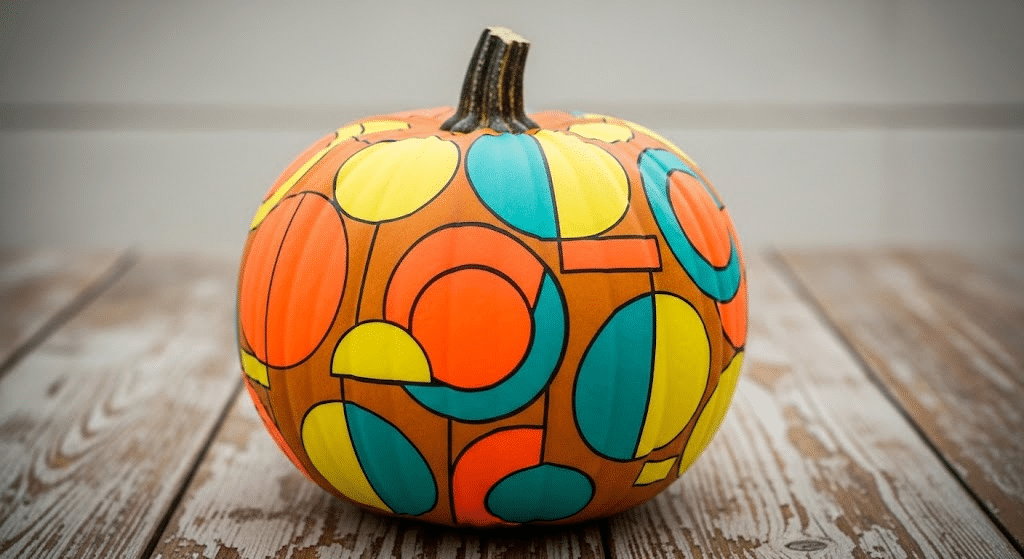
Create retro designs with bold colors and geometric shapes carefully placed in patterns. Pays homage to past decades’ styles for a nostalgic Halloween feel that’s timeless. Choose color schemes that match specific eras like the groovy ’70s or neon ’80s.
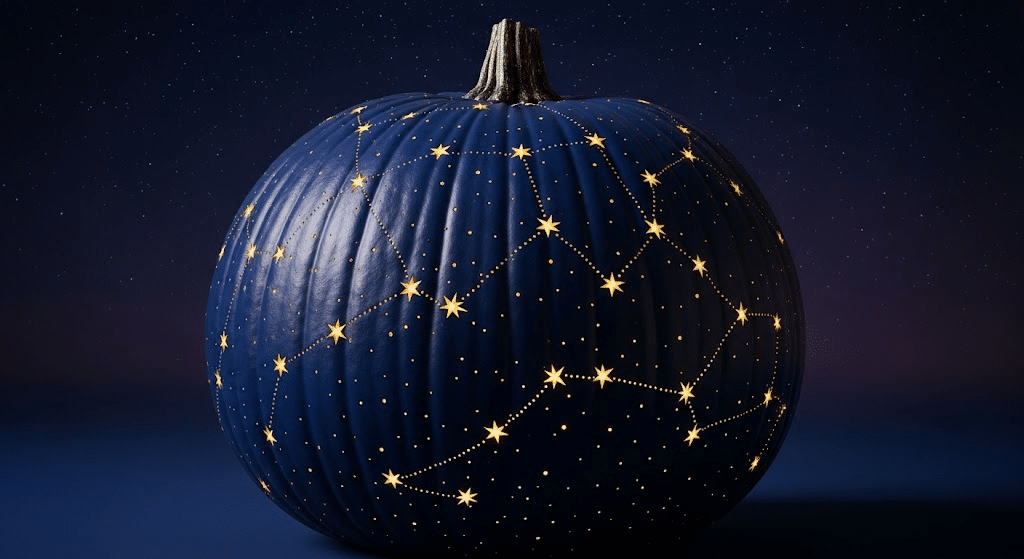
24. Zodiac Constellation Pumpkin Luminaries
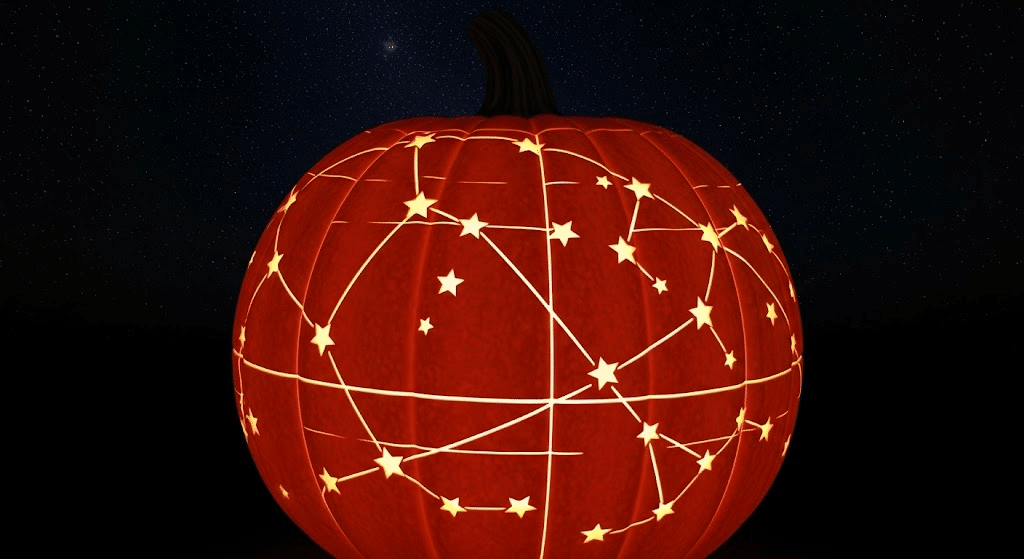
Drill holes for zodiac constellations and paint the connecting design lines between stars. Light from within for a glowing celestial effect that’s truly magical at nighttime. Research actual constellation patterns for authentic astronomical accuracy in your design.
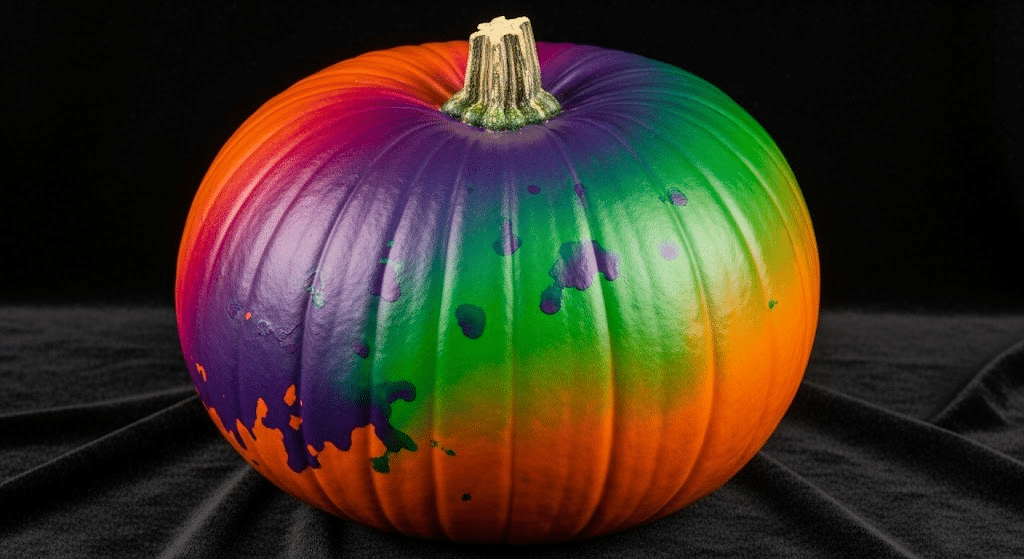
25. Pour Over Pumpkin
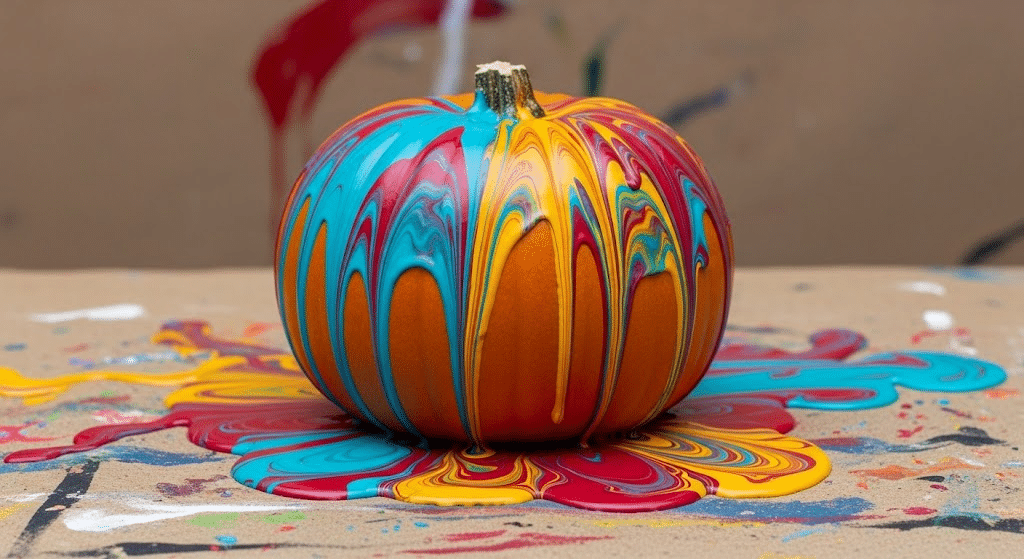
Pour paint directly onto the pumpkin for an abstract, flowing design that’s completely unique. Kid-friendly and perfect for a messy, creative process everyone can enjoy together safely. Use multiple colors that blend together as they flow down the sides of the pumpkin.
26. Geometric Painted Pumpkin
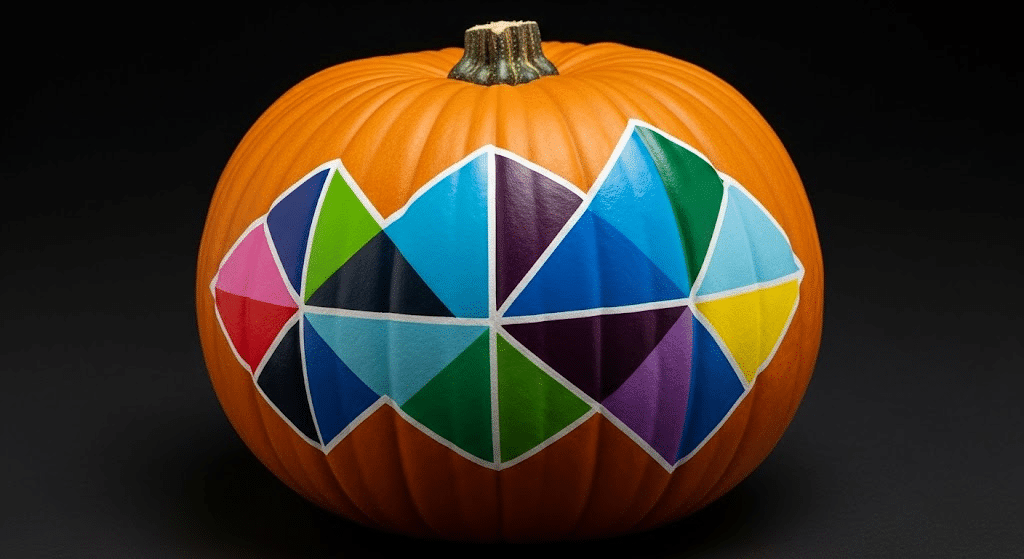
Use tape to create clean lines and paint geometric patterns in contrasting colors with care. Contrasts the pumpkin’s natural shape for maximum visual impact and a striking modern appeal. Remove tape while paint is still slightly wet for the cleanest lines.
27. Bubble Painted Pumpkin
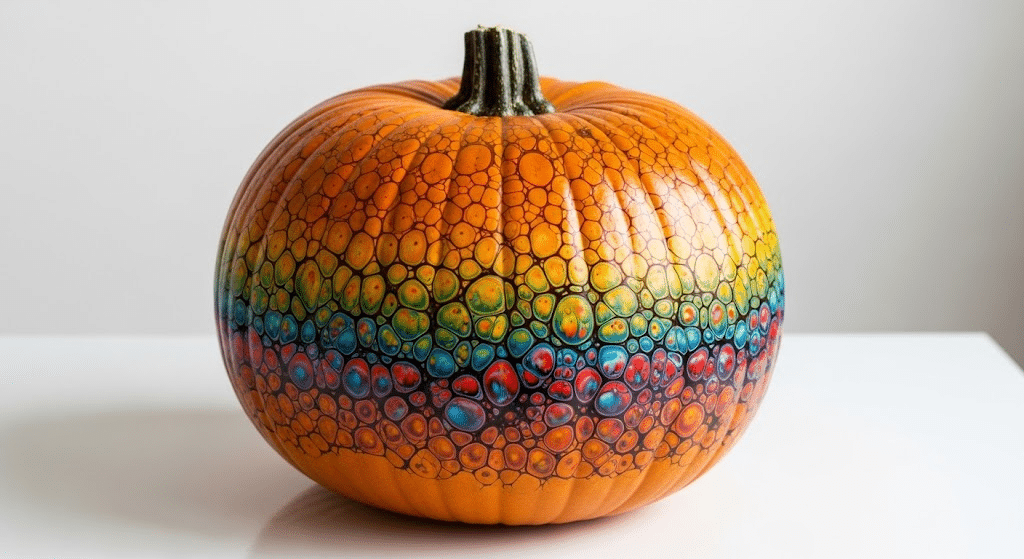
Blow bubbles with paint and dip the pumpkin for texture and interesting patterns. Results in a colorful, marbled effect that’s unique every single time you try. Use different colored bubble solutions to create layers of overlapping circular patterns.
28. Stained Glass Pumpkin
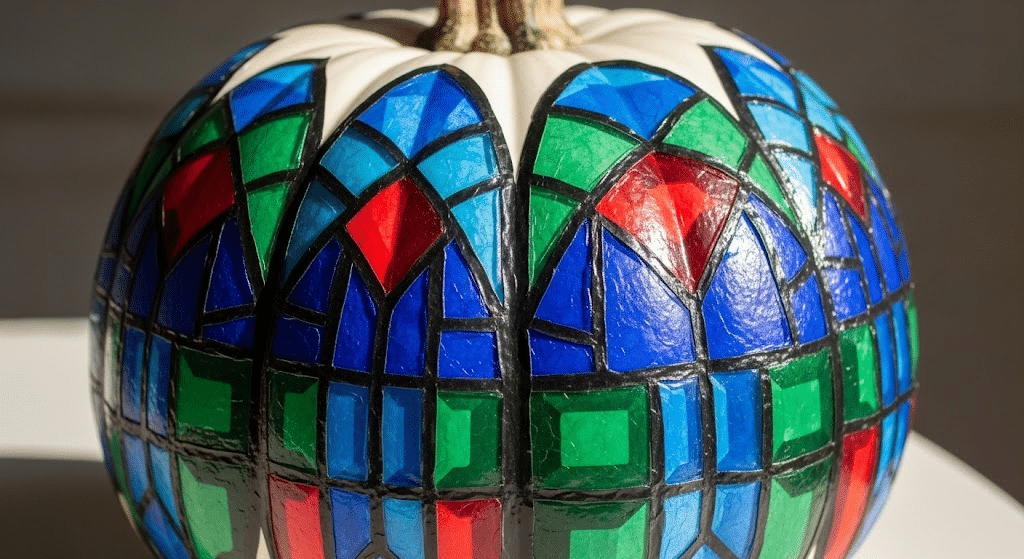
Layer tissue paper with Mod Podge on a white-painted pumpkin base for translucent effects. Mimics the look of stained glass windows for a church-like beauty that’s breathtaking. Choose jewel-toned tissue papers for the most authentic stained glass appearance.
29. Pour Paint Pumpkin
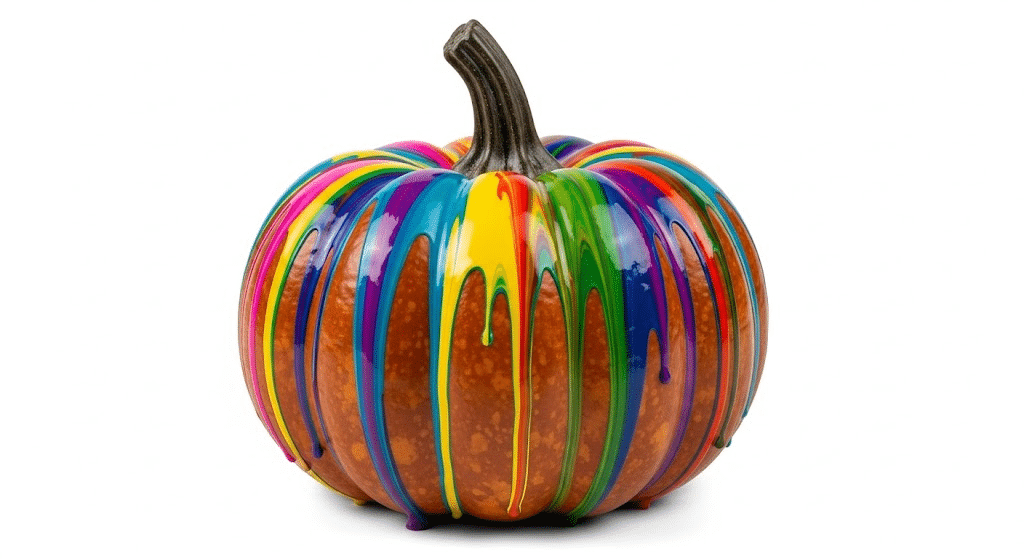
Pour craft paint onto a faux pumpkin and let it drip naturally down the sides. Creates a modern, abstract appearance that’s gallery-worthy and striking for contemporary decor. Rotate the pumpkin as paint drips to create interesting directional flow patterns.
30. Splatter Paint Pumpkins
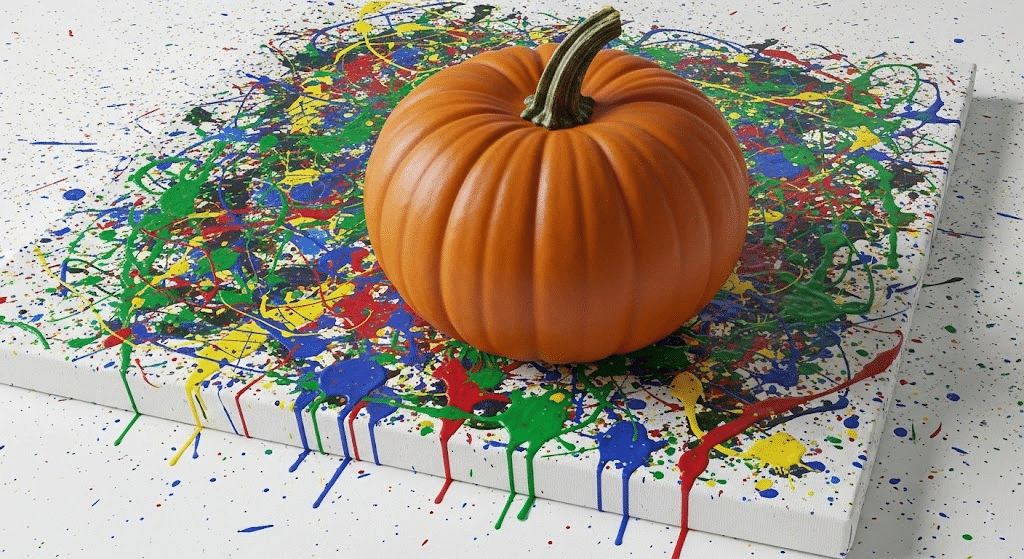
Flick colorful paint onto the pumpkin for a festive, Jackson Pollock effect that’s energetic. Fun and playful technique perfect for all skill levels and ages to enjoy. Protect your work area well, as this technique can become quite messy quickly.
31. Pattern Play Pumpkins
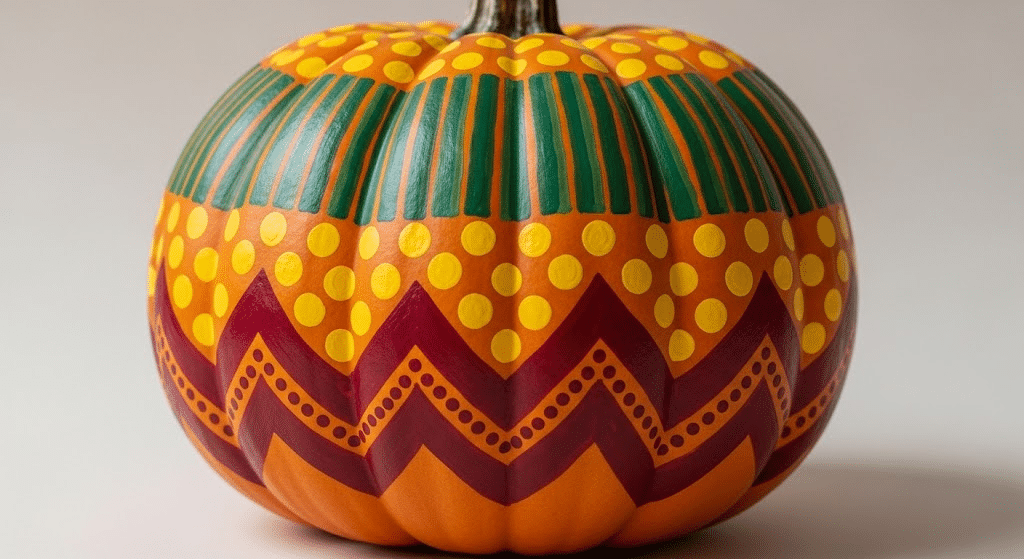
Start with a base color and add bold patterns or word art on top. Use a paint pen for precise details that make your design stand out beautifully. Combine different patterns like stripes, dots, and zigzags for maximum visual interest and appeal.
32. Nail Polish Painted Pumpkins
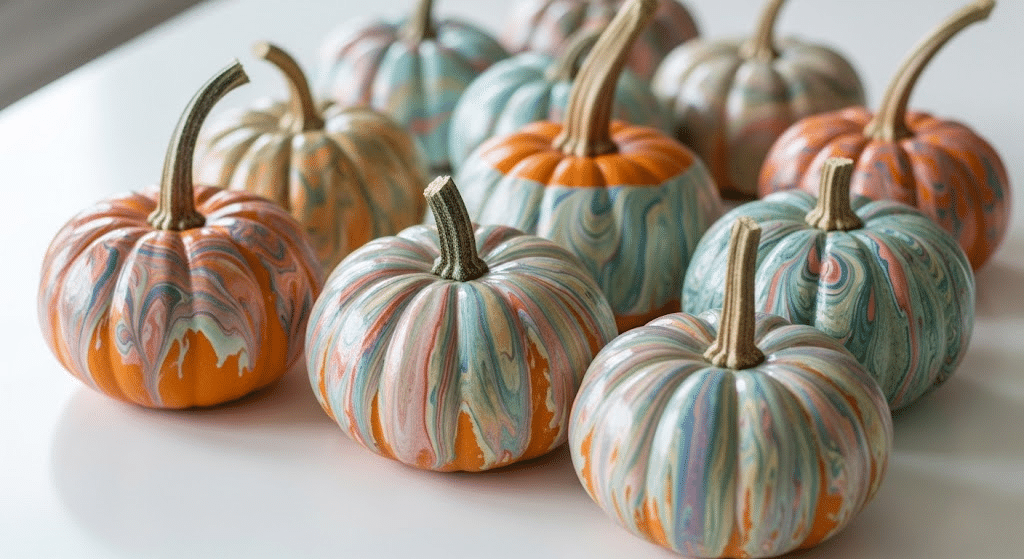
Swirl nail polish for marbleized designs on small pumpkins, perfectly sized for this technique. Shiny finish is ideal for a polished look that catches light beautifully throughout the day. Use complementary colors that blend well together for the best marbled effects.
33. Constellation Pumpkin
Paint constellations and drill holes for individual stars to shine through when lit. Add candles or lights for a magical, glowing effect at night that’s truly stunning. Map out real constellations or create your own fantasy star patterns for personalization.
34. Mood Ring Pumpkin
Apply thermal paint over a black base for color changes with temperature variations. Changes colors with temperature for an interactive design that fascinates guests of all ages. The color changes create an element of surprise that keeps people interested.
35. Color-Changing Thermochromic Pumpkin
Use a thermochromic pigment to reveal hidden designs when gently touched with warm hands. Adds a fun, interactive element that surprises and delights visitors who discover the secret.
Create base designs that only appear when the temperature-sensitive paint is activated.
36. Stained Glass Window Pumpkin
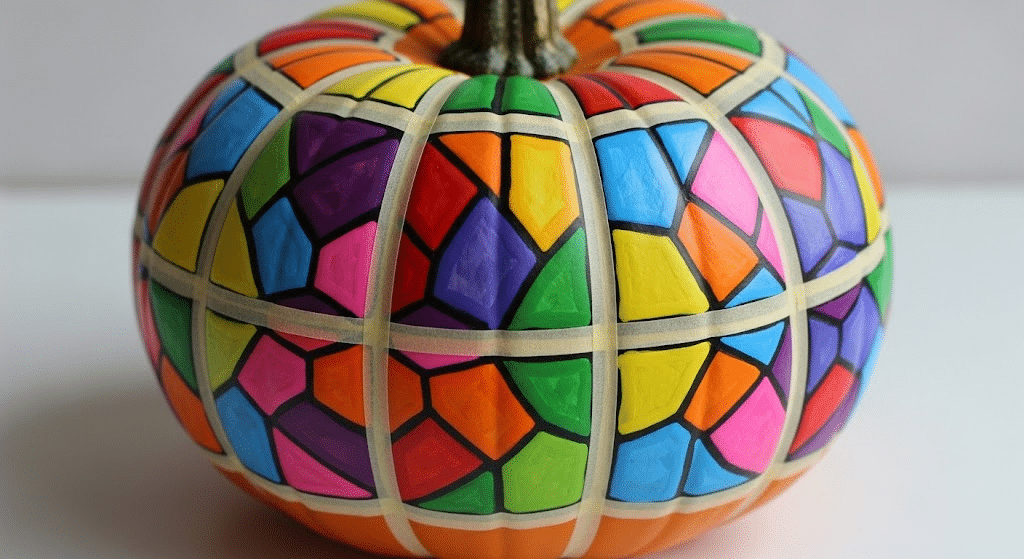
Use stenciling tape for overlapping patterns and paint each section with a different color. Reveals a vibrant stained glass effect when tape is removed carefully after painting. Plan your color scheme to ensure harmonious color combinations throughout.
37. Abstract Expressionist Art Pumpkins

Create abstract designs inspired by masterpieces from the art history of Pollock, Rothko, and Kline. Use drips and splatters for artistic flair that’s museum-quality and sophisticated for display.
Study the artists’ techniques beforehand to create authentic-looking abstract expressionist pieces.
38. The ’80s Pumpkin
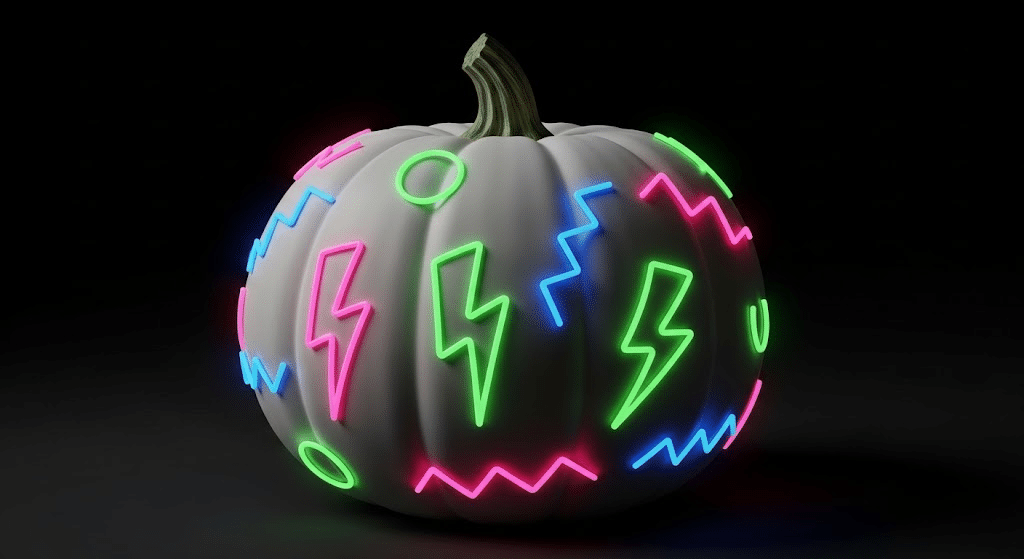
Paint white and add neon-bright geometric shapes in classic patterns from the decade. Captures the vibrant spirit of the 1980s for nostalgic retro Halloween fun. Include shapes like triangles, lightning bolts, and squiggles in hot pink and electric blue.
Decorative and Seasonal Designs
39. Spray-Painted Pumpkin (Candy Corn)
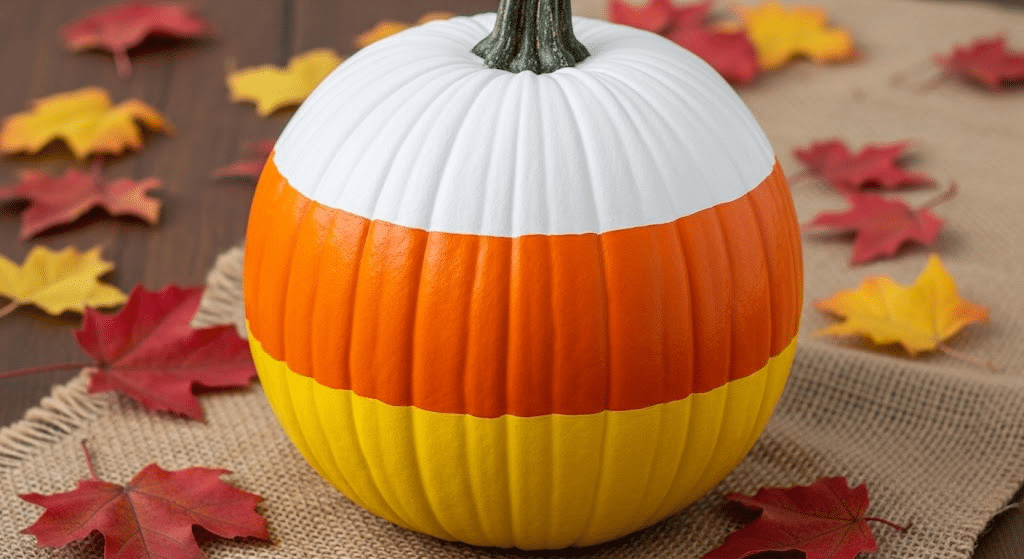
Paint a tricolor candy corn design with carefully layered white, orange, and yellow stripes. Festive and eye-catching design perfect for Halloween candy lovers everywhere who appreciate classic treats. Use painter’s tape to create clean, straight lines between each color section.
40. Glitter Decorated Pumpkin
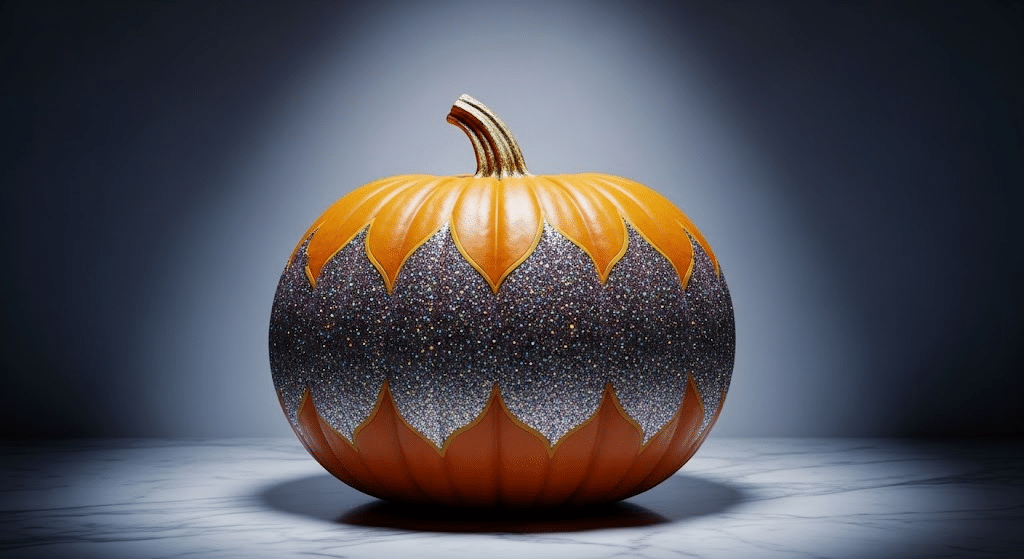
Add glitter over painted designs for a sparkling, shimmery effect that catches light beautifully.
Perfect for a festive Halloween or fall display that sparkles in any lighting condition. Apply glitter while the paint is still wet for the best adhesion and coverage.
41. Chalk It Up Pumpkin
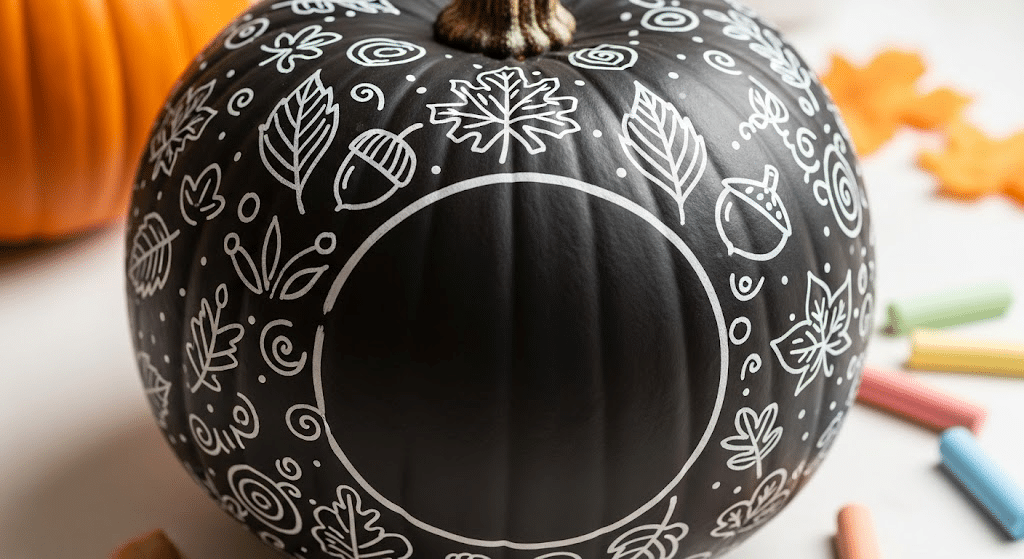
Coat with chalkboard paint for a writable surface you can change throughout the season. Use as a message board or for kids to draw on with colorful chalk. Write different messages for various occasions or let family members leave notes for one another.
42. Plaid Painted Pumpkins
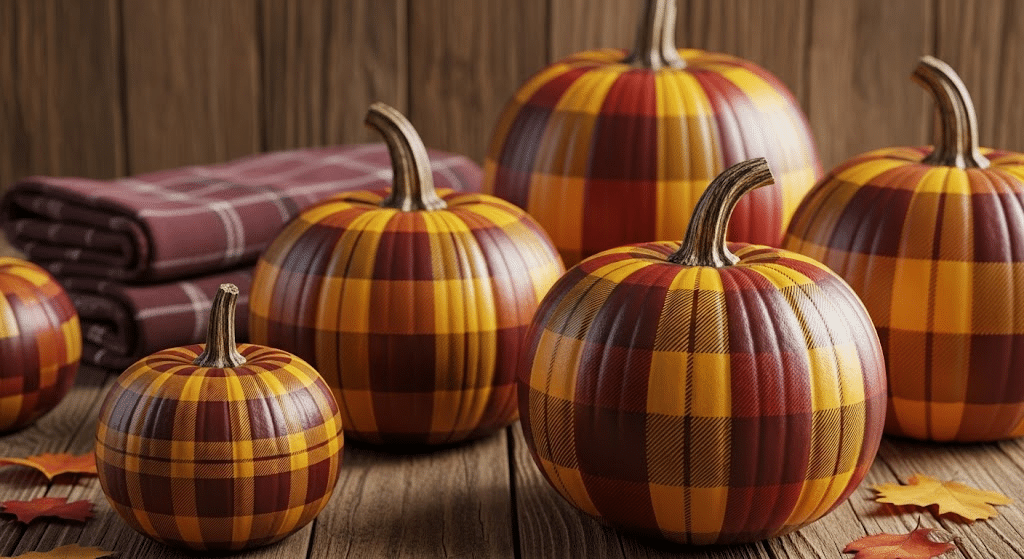
Paint a plaid pattern with fall colors using duct tape for clean, straight lines. Ideal for a cozy autumn vibe that matches your seasonal decor perfectly and warmly. Choose colors like burgundy, gold, and brown for traditional fall plaid that’s timeless.
43. Two-Toned Pumpkins
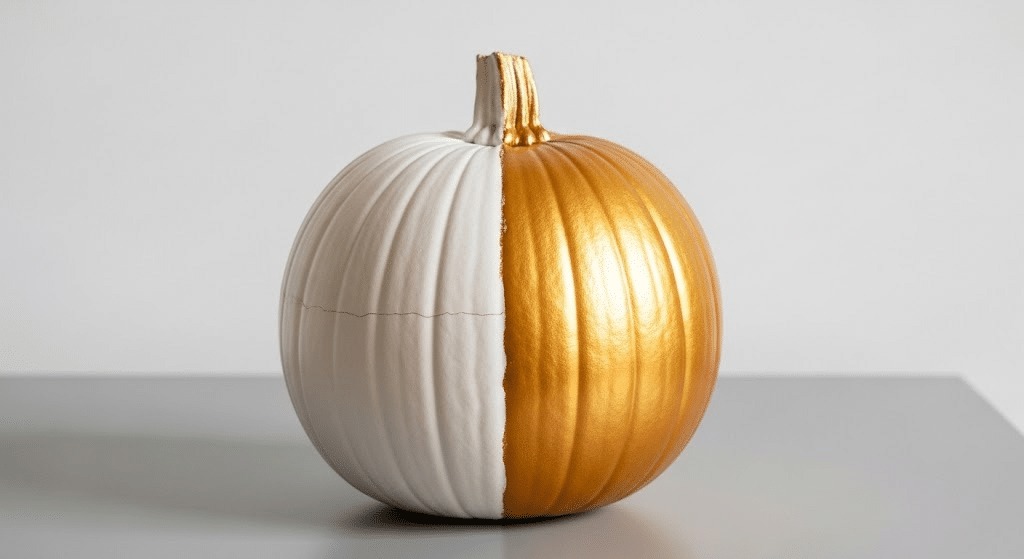
Dip in craft paint for a clean two-color effect that’s simple yet sophisticated. Minimalistic yet striking design perfect for modern fall displays and contemporary home decor. Select colors that complement each other well for the most visually pleasing result.
44. Cluster of Pumpkins
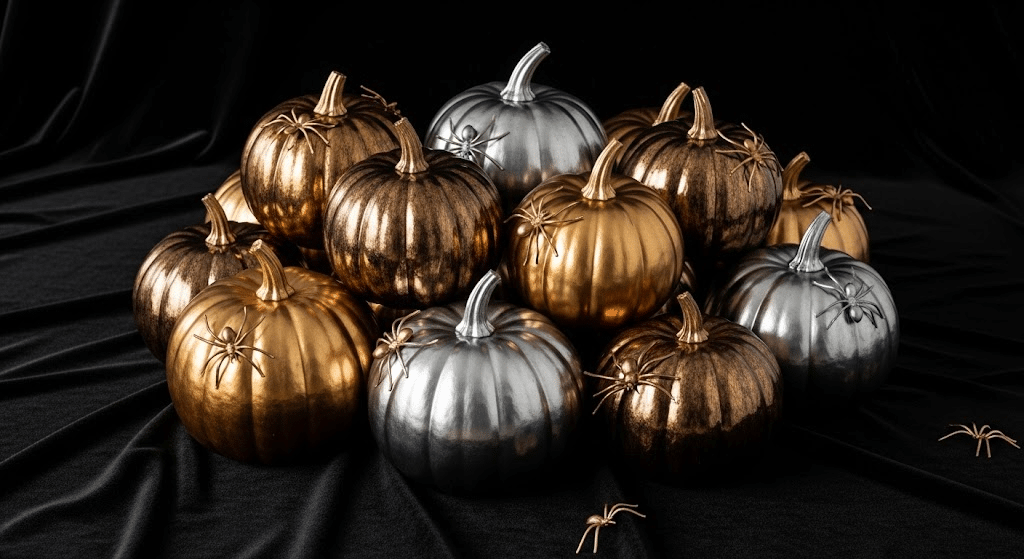
Paint faux gourds in metallic colors and arrange with decorative spiders for Halloween flair. Creates a bold, decorative centerpiece that commands attention from guests and visitors alike. Group different sizes together for visual interest and use odd numbers for better composition.
45. Rope Pumpkin
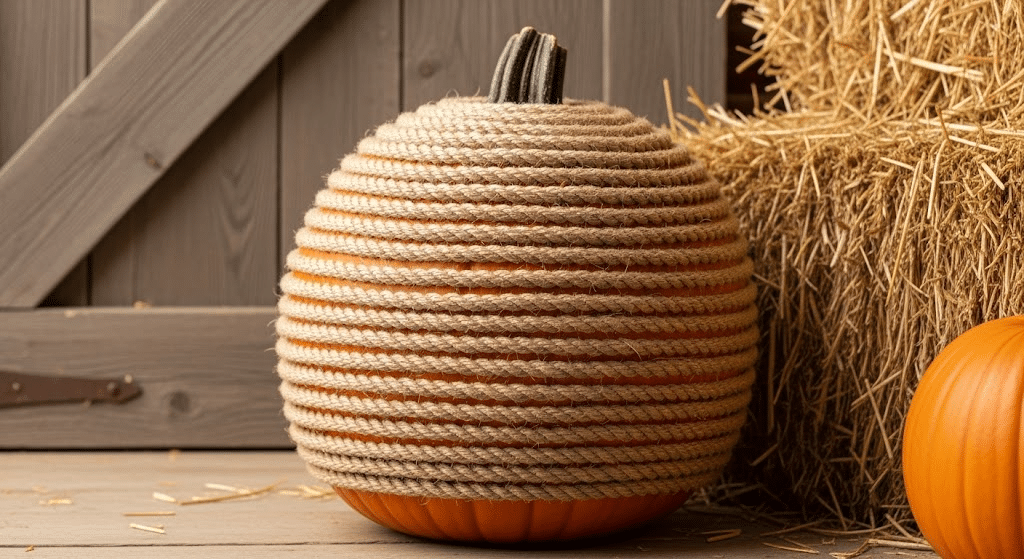
Paint a faux pumpkin and add rope lines for an extra touch of texture and rustic appeal. Dye the rope to match for a cohesive look that’s rustic and charming for a farmhouse. Start at the bottom and work your way up, securing the rope with hot glue.
Tips for Painting Pumpkins Effectively
Creating beautiful painted pumpkins requires more than just grabbing a brush and paint. I’ve learned some valuable tricks over the years that make all the difference between a masterpiece and a messy disappointment.
The key to success starts with choosing the right pumpkin. Look for one with smooth skin, no bruises, and a flat bottom that won’t roll around. Clean your pumpkin gently with a damp cloth before you begin.
Here are my essential tips for the best results:
- Always seal your pumpkin before and after painting to prevent flaking
- Use foam brushes for smooth, even coverage on curved surfaces
- Work in good lighting so you can see your colors clearly
- Let each coat dry completely before adding the next layer
- Keep a damp cloth nearby for quick cleanup of mistakes
With these simple guidelines, your painted pumpkins will look professional and last through Halloween.
Wrapping It Up
Painted pumpkins offer limitless possibilities for Halloween creativity that go far beyond traditional carving.
From spooky mummies and skulls to artistic galaxies and seasonal plaids, you now have some fantastic ideas to convert ordinary pumpkins into stunning decorations.
Remember to seal properly, choose quality materials, and most importantly, have fun with the process.
Ready to start your pumpkin painting project? Gather your supplies, pick your favorite designs from our list, and create decorations that will make your home the talk of the neighborhood this Halloween season.
Share your creations with friends and family!