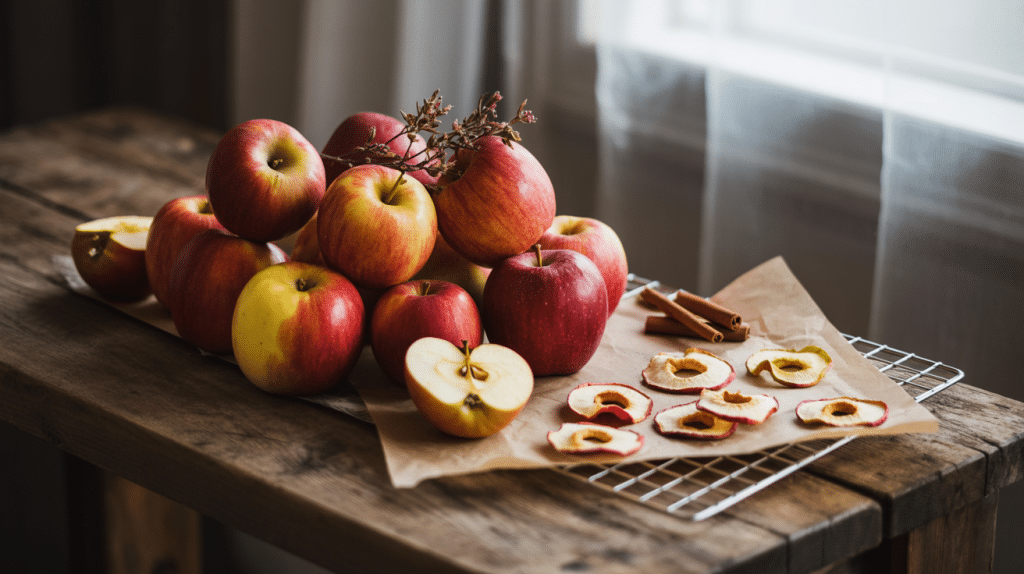
Dried apples have been gaining popularity as homeowners are moving toward sustainable natural home decorations.
Today, I will show you how to dry Apples for Decoration and what are the ways they can be used. For this, you need proper preparation to make decorations that will survive.
These organic pieces harmonize with farmhouse and traditional scheme designs alongside their capacity to bring comfort to contemporary interior settings.
Best Apple Varieties for Drying
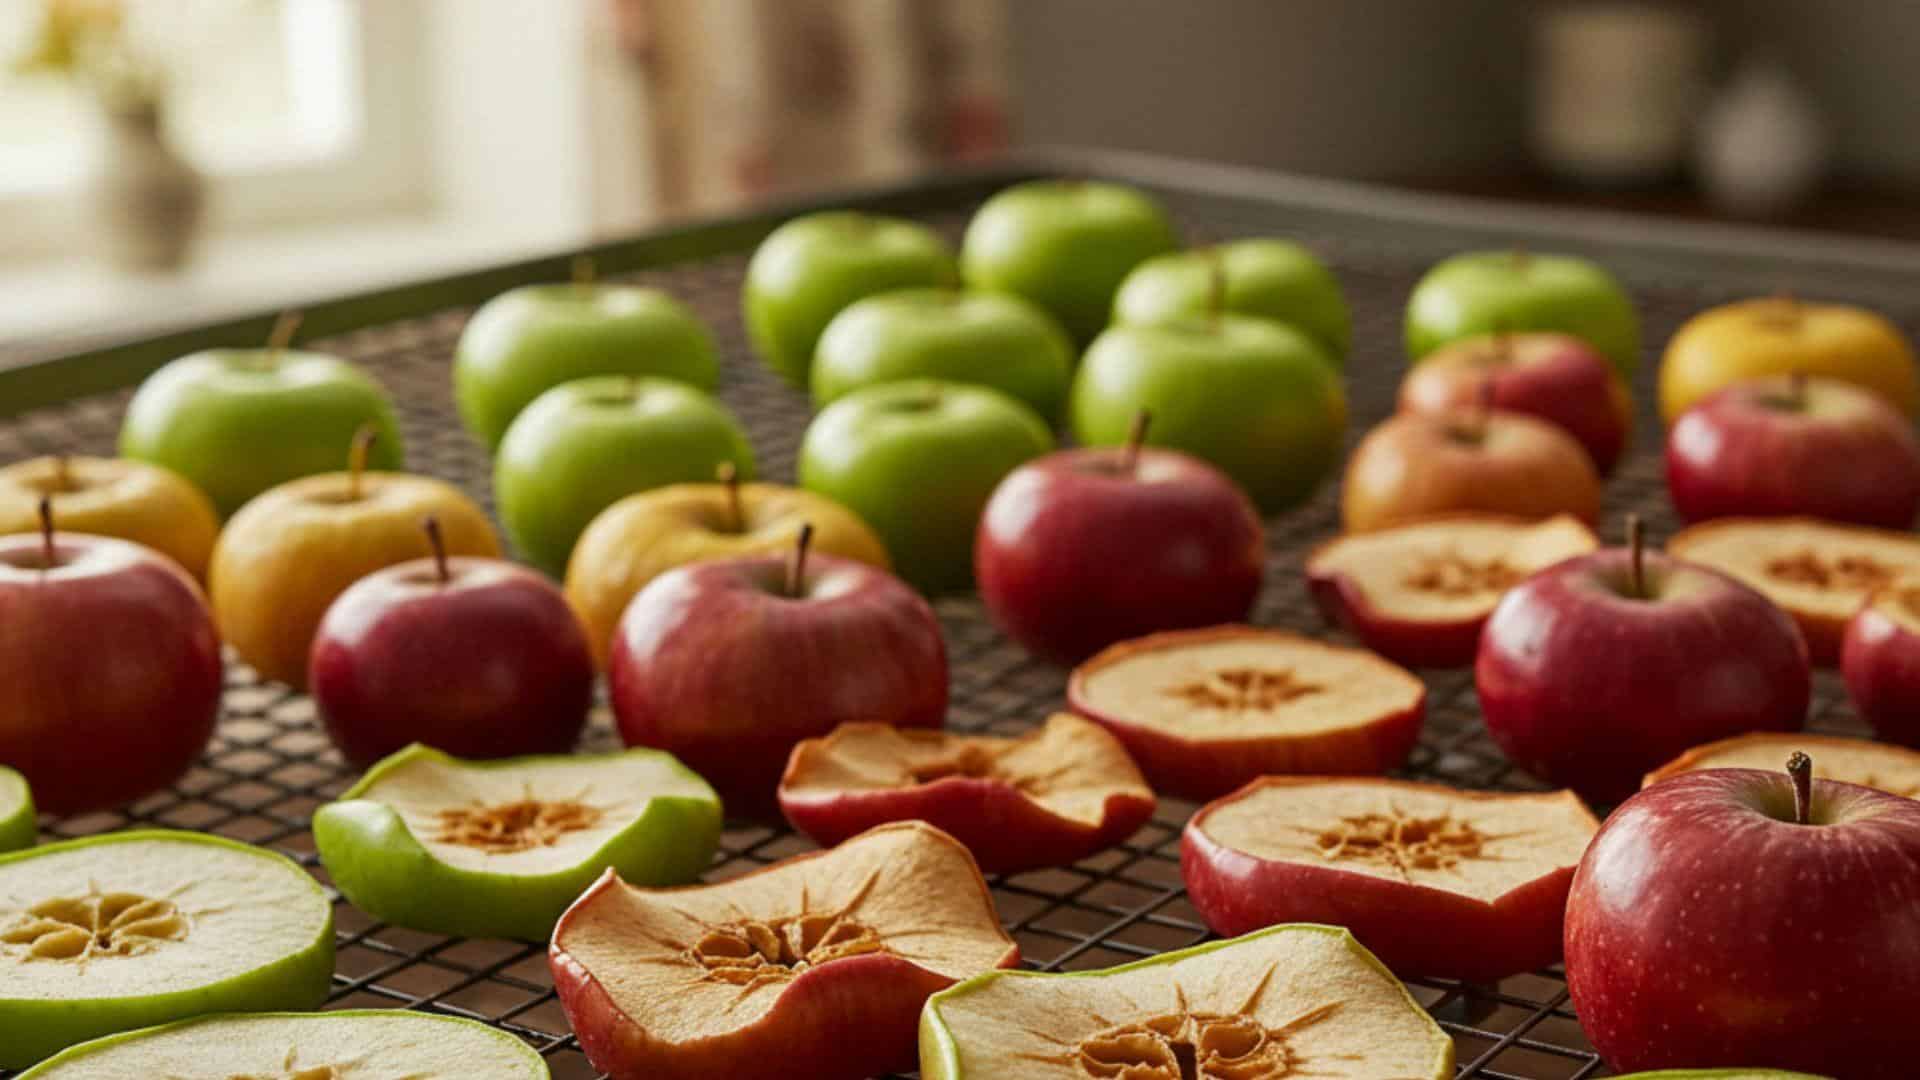
Before starting to dry, it’s important to pick which apples you should choose to get a long-lasting and beautiful deodorant. So of the varieties that I prefer are:
Granny Smith apples: Their tangy nature and robust consistency make them a wonderful option for drying apples. The green color of their peel brings visual appeal to decorations, and their organic acids keep their dried shape and vivid color intact throughout preservation. Properly dried apples can be utilized for wreath designs, garlands, and table decorations.
Honeycrisp apples: I selected them for drying at my residence. Drying these apples preserves their flavor and texture, making them suitable for both decoration and snacking.
Fuji apples: The drying process supports the shape and taste of these apples, making them a wonderful option for decorations. Thanks to this procedure, your decorations will appear attractive while releasing delightful scents.
Jonagold apples: The result from Jonathan and Golden Delicious breeding. It maintains firmness during drying and yields satisfying large shapes. The noticeable yellow-red skin color of these apples enhances fall and holiday decorations.
Rome Beauty apples: They appear aesthetically pleasing because their dense flesh structure maintains its shape after the drying process. Their shape-retaining properties are the source of their diverse uses.
Choosing these apple varieties provides you with stylish decorations that will maintain their appearance for an extended period.
Preparation of Apples Before Drying
The simplest way that I prefer to start with before drying is:
- First, slice the apples. While slicing, use an apple slicer/peeler/corer and perform the process step by step. I prefer using two pieces of equipment, which will expedite work routines and enable more efficient processing.
- After coring the apple core with the tool, each slice needs to be cut into a piece about 0.6cm thick or more.
- I don’t prefer to peel the apple, but whether you remove the skin before drying depends on the toughness of the apple skin.
- Then, a lemon juice solution made by combining 125ml of lemon juice with 1 liter of cooled water can prevent apples from browning.
- Use a sprayer to spray each apple slice with lemon juice, submerge them in a saltwater solution, or dip them into the solution when possible.
Methods for Drying Apples
Whether you are thinking of creating garlands, wreaths, or any other craft, dried apples are versatile and interesting. The process of Drying apples is fabulous and enjoyable some of which I prefer are:
1. Air Drying Apples
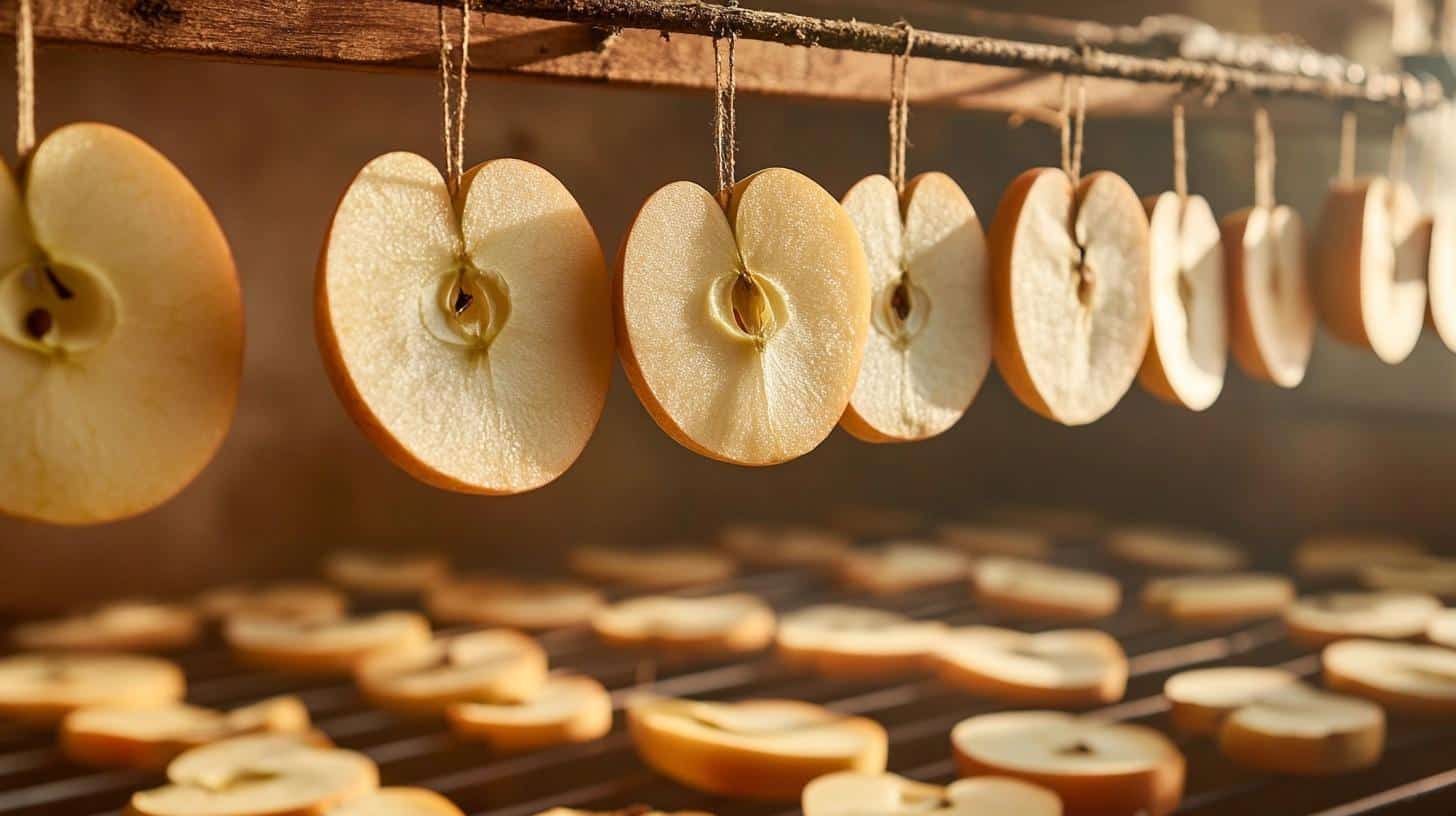
Air drying is the simplest method of drying apples, but it is also the slowest. It works best for small quantities or in a dry and warm environment.
Steps for Air Drying:
- Hang or Lay the Apples: Arrange the prepared apple slices on a drying rack or string with the slices onto a string, suspending from a well-ventilated area out of direct sunlight. If placing them on a flat, use a sheet of parchment paper or cheesecloth to catch drips.
- Drying Time: This process can take 1 to 3 weeks, depending on humidity and airflow. Keep turning the slices now and again to ensure even drying.
- Check for Dryness: If the apple is completely dry and leathery with no moisture in the center, it can be used to decorate.
2. Oven Drying
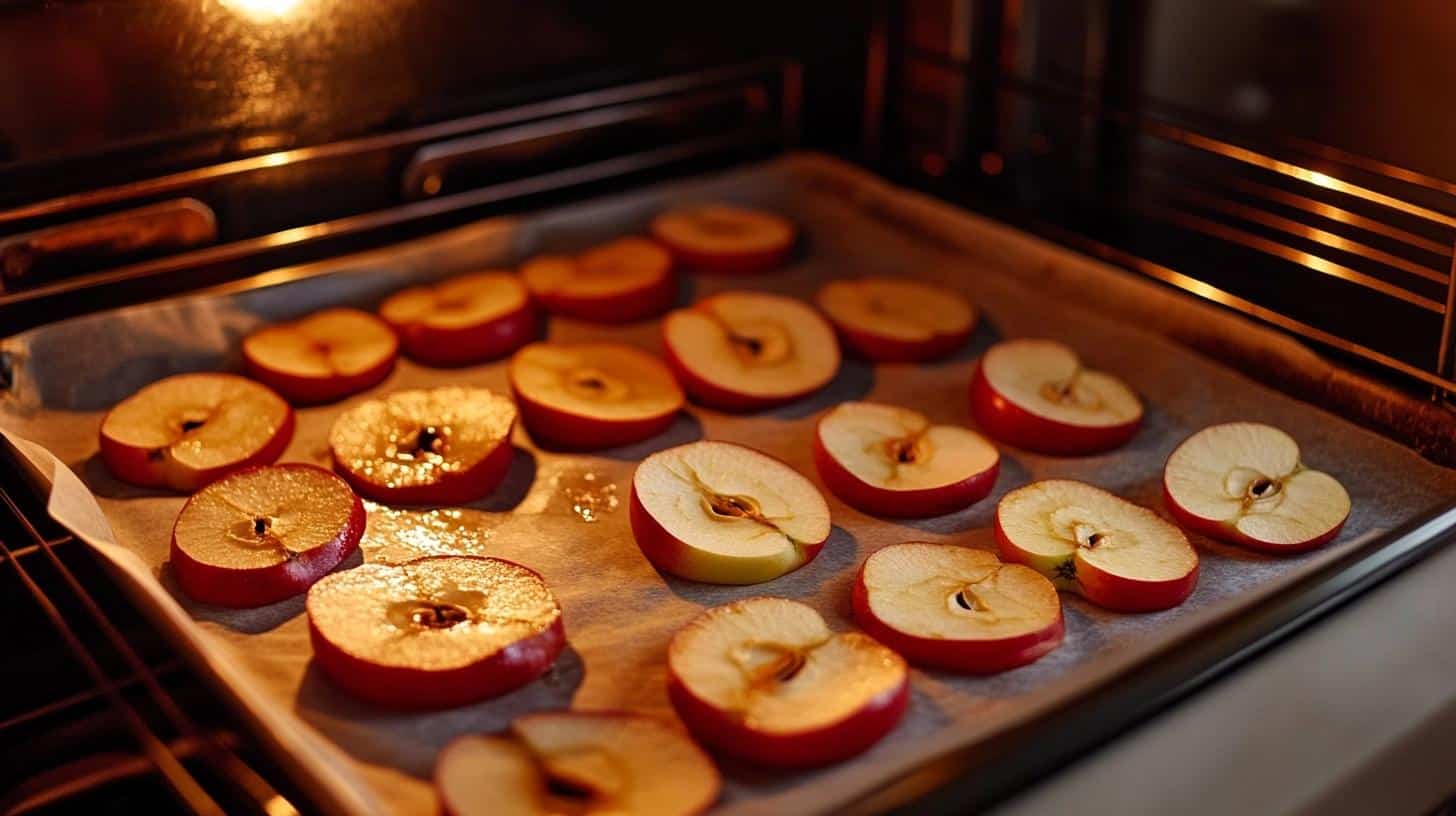
Using an oven to dry apples will greatly reduce the time, making it an ideal choice for when you are in a hurry.
Steps for Oven Drying:
- Prepare the Oven: Set your oven to a low temperature—about 140°F (60°C). If your oven won’t go that low, put it to the lowest temperature and leave the oven door open a bit to let the moisture out.
- Pile the Apples: Place the sliced apples in a single layer on a parchment-lined baking sheet. Don’t overlap slices to allow air circulation.
- Dry the Apples: Put them in the oven and dry the apples (dried) for about 6 to 8 hours. Test and turn every hour to ensure an evenly dry result. The apples should be dry to the touch but still pliable when done.
3. Dehydrator Drying
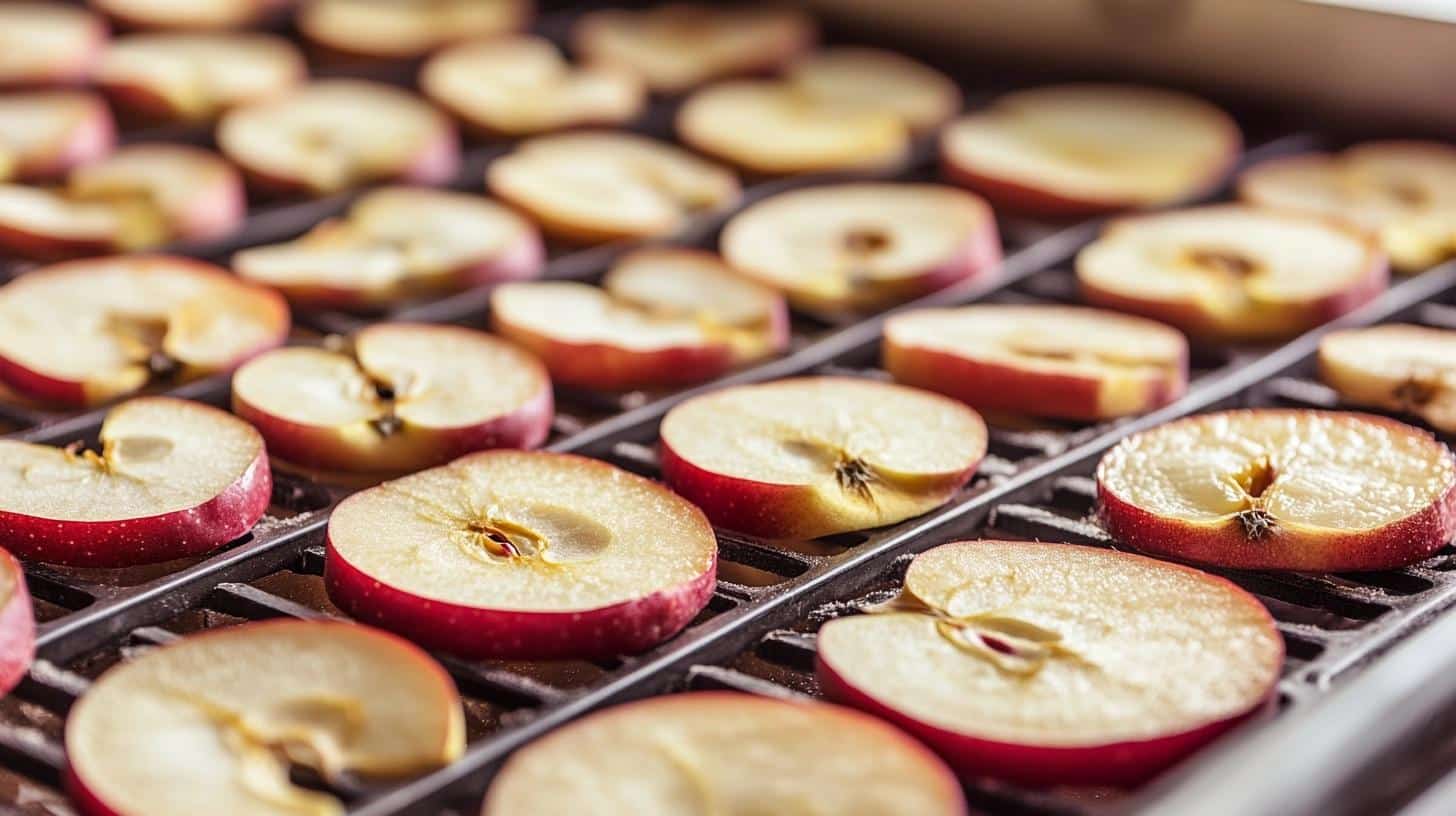
A food dehydrator is one of the best ways to dry apples, as it provides consistent heat and airflow, leading to even drying.
Steps for Dehydrator Drying:
- Insert the Apples in the Dehydrator: Place the apple slices in one layer on the dehydrator trays, making certain they don’t pile on top of each other.
- Set the Temperature. Follow the manufacturer’s directions, usually 135°F (57°C) on the dehydrator.
- Dehydrate the Apples: The dehydrating time in a dehydrator is 6 to 12 hours. Test for dryness by squeezing a slice; it should be leathery with no moisture remaining.
4. Sun Drying
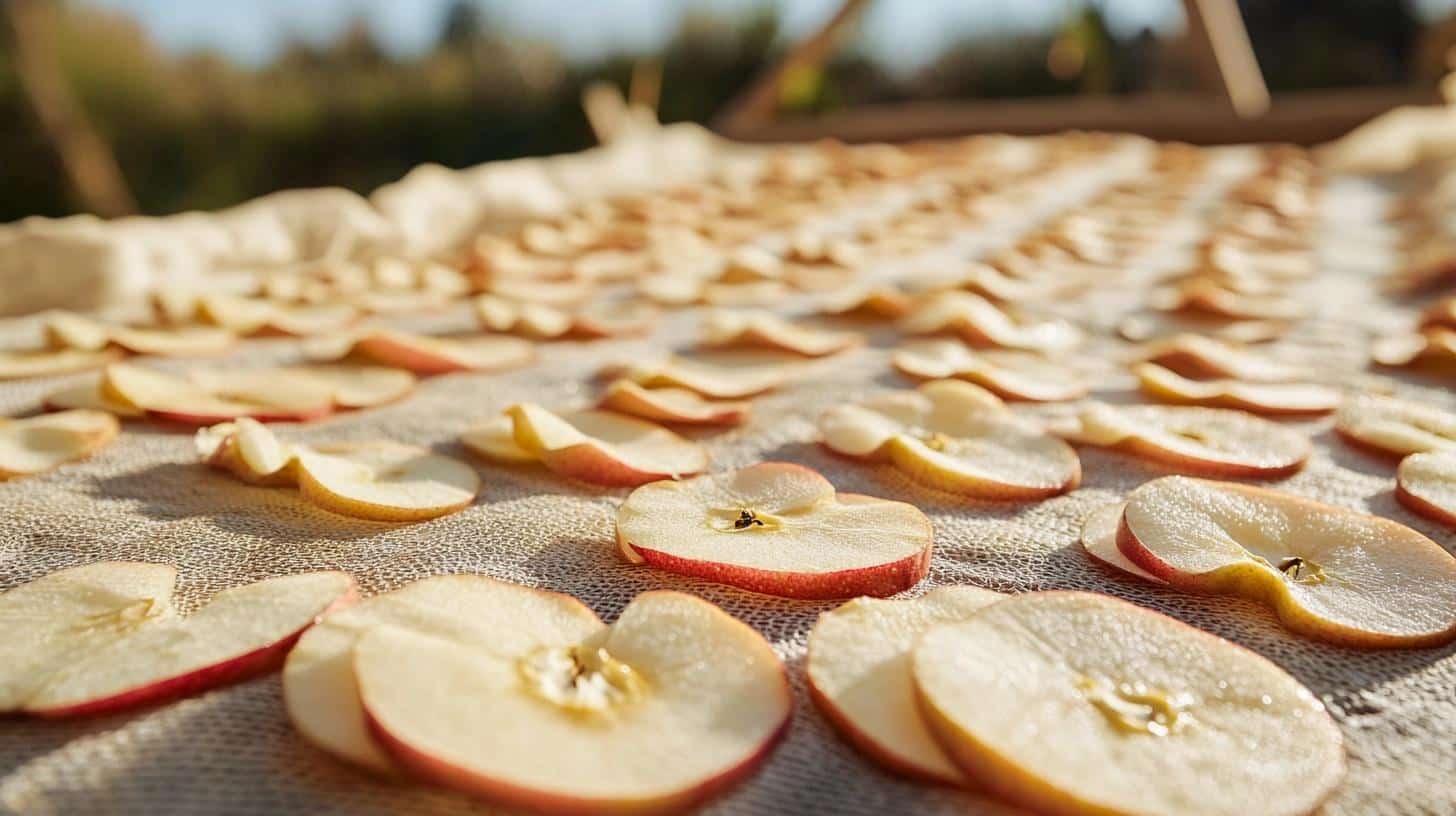
For those living in a dry, warm climate, sun drying can be a low-energy method of drying apples for decorating. However, this method works only under the right conditions like low humidity and direct sun.
Steps for Sun Drying:
- Get Ready the Apples: Lay the apple slices down on a clean, flat space, such as a baking dish, which is covered with cheesecloth to keep bugs from the apples. You can either leave them threaded up onto strings.
- Dry in the Sun: Lie apples dry in the sunshine, turning occasionally so that both sides dry readily. The drying process could be 2 days to 4 days how much is the heat and how humid is.
- Check for Dryness: The apples are completely dry when it is leathery and no moisture remains on the inside.
Follow any of these methods, but remember to cool the apples down before using them for decoration.
Trending Dry Apples for Decoration Ideas
There are several ways of tying apples for decoration, each with its own advantages and procedures. These are the most popular ones:
1. Dried Apple Garland
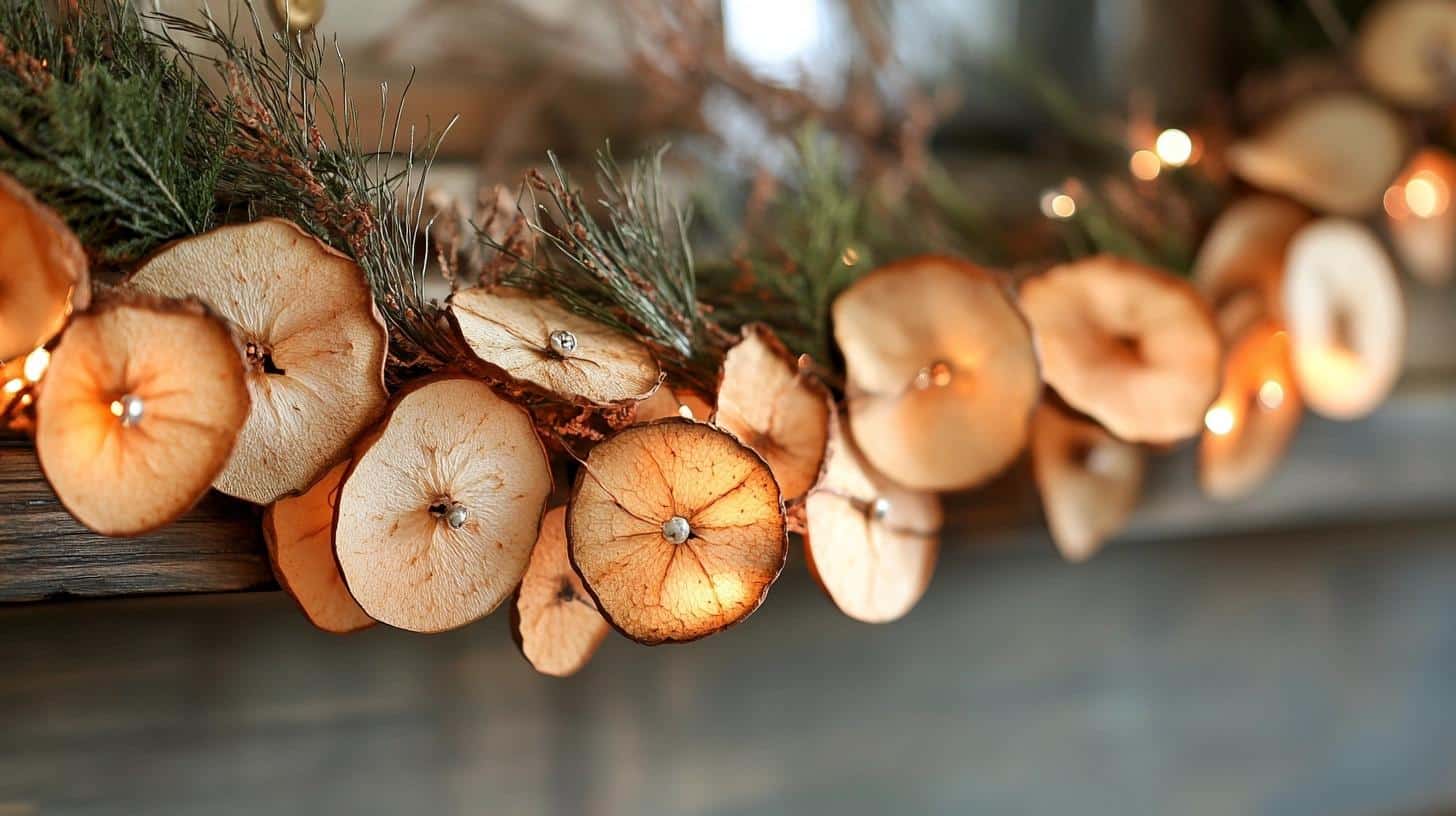
It is one of the quickest and easiest parts of the seasonal decoration that I love the most, as its easy to customize and personalize.
Steps for making the Garland:
Before starting, gather the materials: Dried Apple Slices, needles, thread, and other personalizations like bread, pine needles, and ribbon.
- Thread the dried apple slices using a needle and thread. To alleviate the task, use a sharp needle to pierce the apple slices.
- Spread out the apple slices evenly, or insert beads, or other small materials for a touch of added embellish to the apples.
- Go on stringing until your garland reaches the final length.
- Suspend your apple garland over a mantel, staircase, or any space that needs a natural, seasonal effect.
2. Dried Apple Candle Holder

Using dried apple slices, you can transform a simple candle holder into rustic fall decor. This can give warmth and an exotic ambiance to your dining table or living room.
Steps to Make the Candle Holder:
Materials Needed: Dried apple slices, hot glue gun, candlestick holder, ribbon, Cinnamon sticks, Pinecones ( Optional).
- First, attach hot glue to the candle holder edges. Then, begin gluing the dried apple slices around the holder, slightly overlapping them for a more natural layered effect.
- Add small pinecones or cinnamon sticks between apple slices for extra texture and fragrance if desired.
- When the holder covers is completely wrapped, you can tie a bow around the bottom of the candle holder to add a nice finishing touch.
3. Dried Apple Wreath
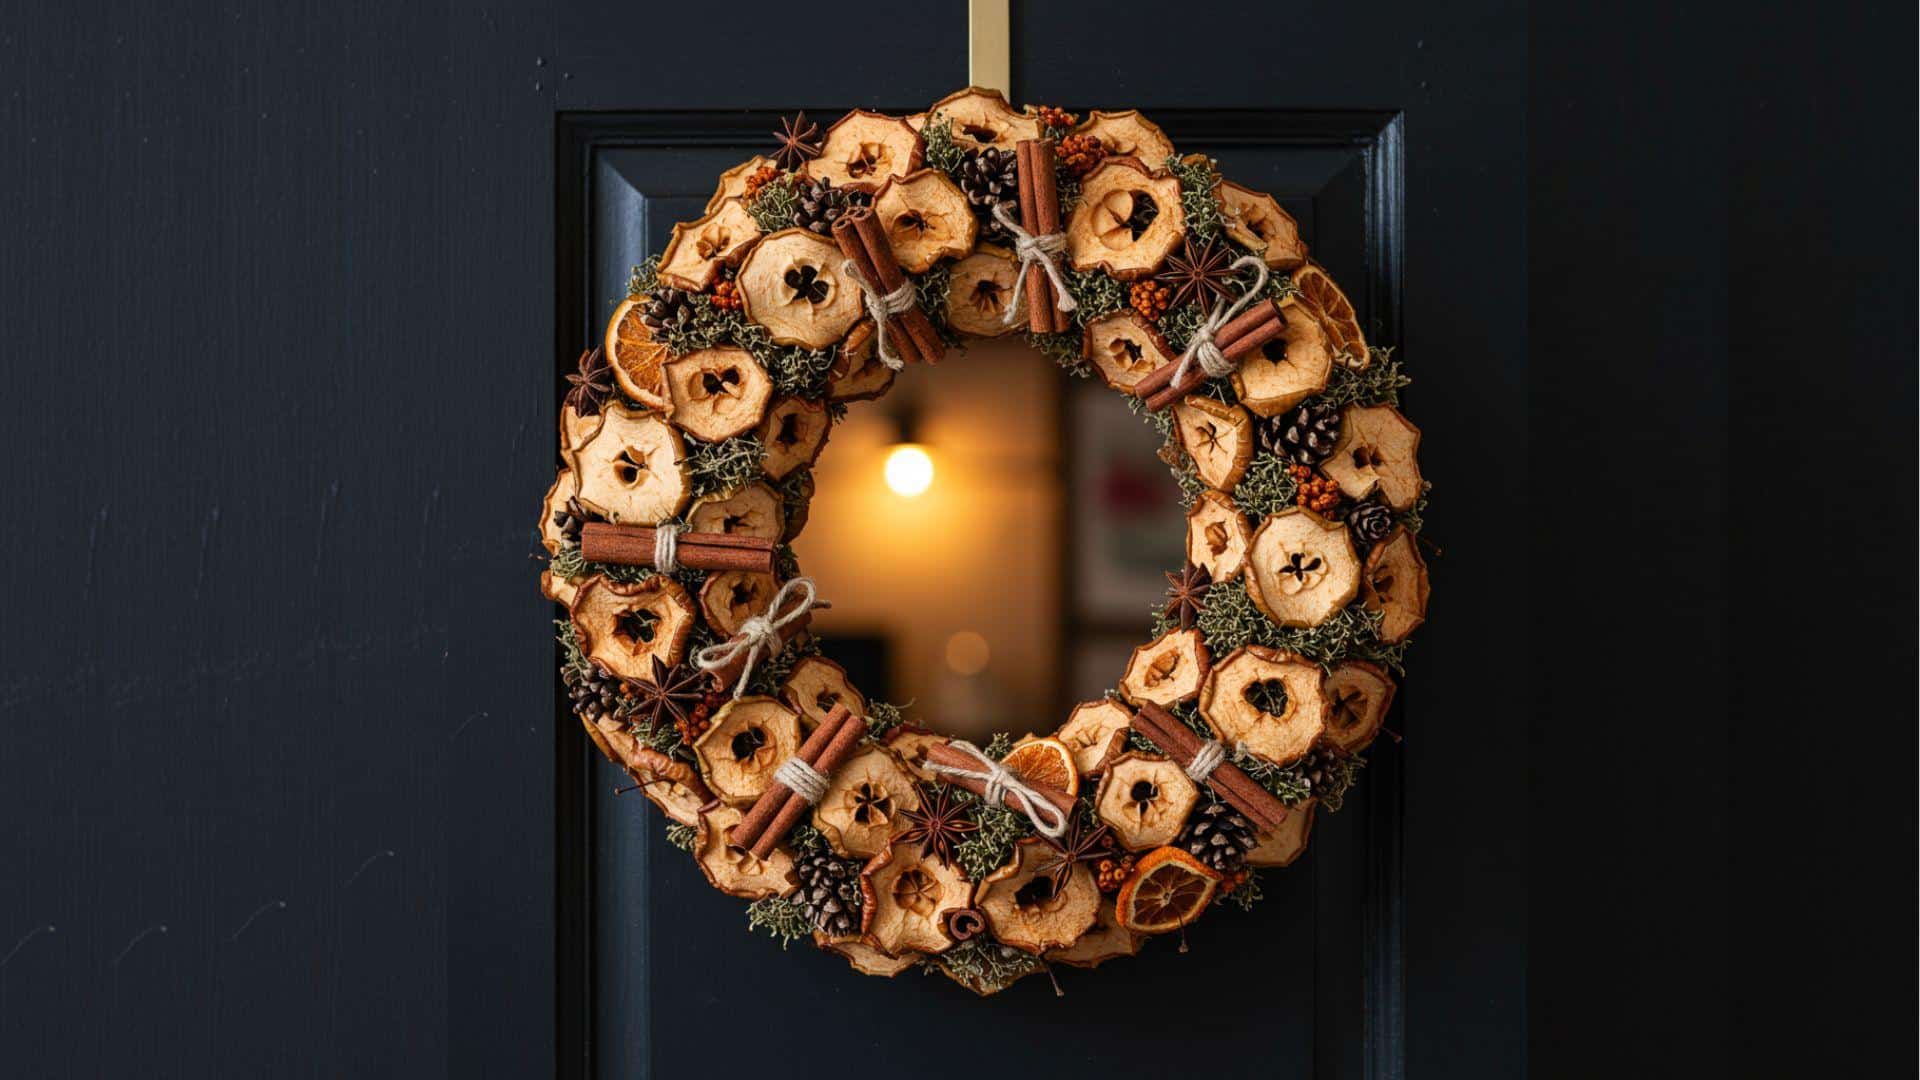
Dried Apple Wreaths are beautiful and fragrant decorations for your door or wall. They combine the charm of apples with fresh seasonal greenery and other natural elements such as cinnamon sticks and pinecones.
Steps to Make a Dried Apple Wreath:
Materials: Dried apple slices, wreath base (foam or wire or grapevine), hot glue gun, sticks of cinnamon, pinecones, twine or ribbon (optional).
- Begin by arranging your dried apple slices in preparation to make your wreath design.
Repeat on each section of the apple slices and coat all of the slices in a thin layer of cinnamon sugar. - After the apples are securely attached, fill in the empty spaces with other elements, such as cinnamon sticks and pinecones, for added texture.
- You can also attach a ribbon or twine to the top of the wreath if desired.
- Let the glue dry completely before attaching the wreath.
Conclusion
Dried Apple Decorations are the most suitable and sustainable way to increase the natural beauty of our homes.
The beauty of these decorations is that they add a rustic charm to your space, whether it is for a specific season or day-to-day decor.
If you are preparing for the holidays or simply want to style your home with nature, its are a great way to improve your interior design.
Want to get started? Get these creative dry apple decorates today and make delightful DIY ornaments.
Share your stunning creations with me, or drop a comment below with your favorite craft ideas using dried apples!