Remember those store-bought piñatas that cost a fortune? Yeah, me too. The flimsy ones that barely survive three hits before spilling candy everywhere except where you want it.
But what if I told you that crafting your piñata is pretty simple? And way more fun than you’d think!
I’m going to show you how to make a pinata that’s party-perfect using stuff you probably already have at home: no fancy tools needed, just some basic materials and a bit of creativity.
Ready to become the hero of your next celebration? Let’s get started!
Why You Should Opt for a DIY Pinata
There’s something magical about knowing how to make pinatas from scratch. Sure, you could grab one from the store, but where’s the fun in that? Making your own means you get to pick the colors, choose the size, and stuff it with whatever treats make your heart happy.
Why homemade piñatas rock:
- Cost-effective: Save money and spend it on better candy instead
- Customizable: Make it match your party theme perfectly
- Stronger build: These babies can handle some serious whacking
- Family bonding: Kids love helping with the messy, sticky parts
- Bragging rights: Everyone will ask where you bought it
Plus, there’s something satisfying about watching people struggle to break something you made with your own hands. Call it creative revenge!
How to Make a Pinata at Home Easily
Time to get your hands dirty! This step-by-step guide on how to make a pinata will walk you through creating a basic round piñata that’ll impress your guests and survive the beating it’s about to receive.
Materials required:
- Star-shaped balloon
- 5 cone-shaped party hats
- Newspaper (for papier mache)
- 1 cup flour + 1.5 cups water
- Mixing bowl & paintbrush
- Masking tape
- Assorted tissue or crepe paper
- White craft glue
- Scissors
- Exacto knife
- Wrapped candy
- String or ribbon (for hanging)
- Skewer (to poke a hole)
- Small cardboard piece
- Duct tape
- Stapler (optional, for streamers)
Step 1: Build the Base with a Balloon and Party Hats
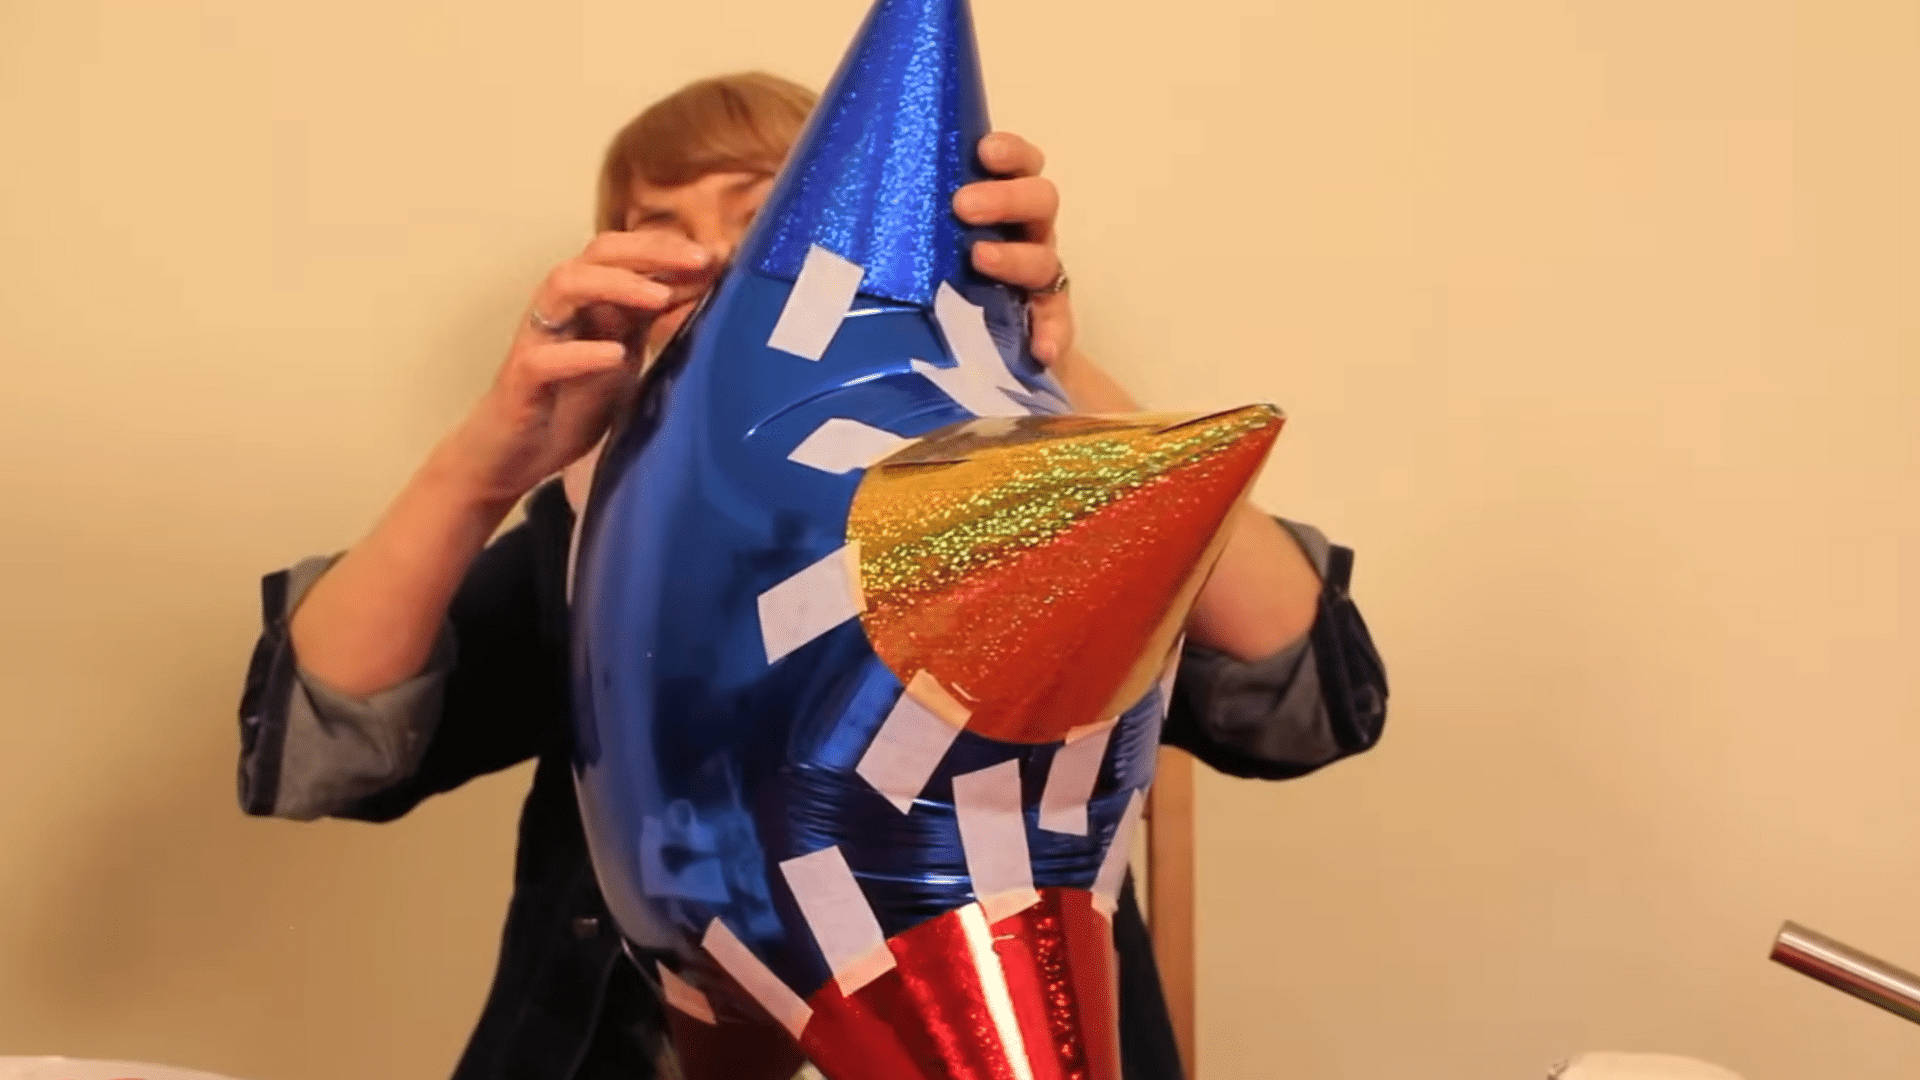
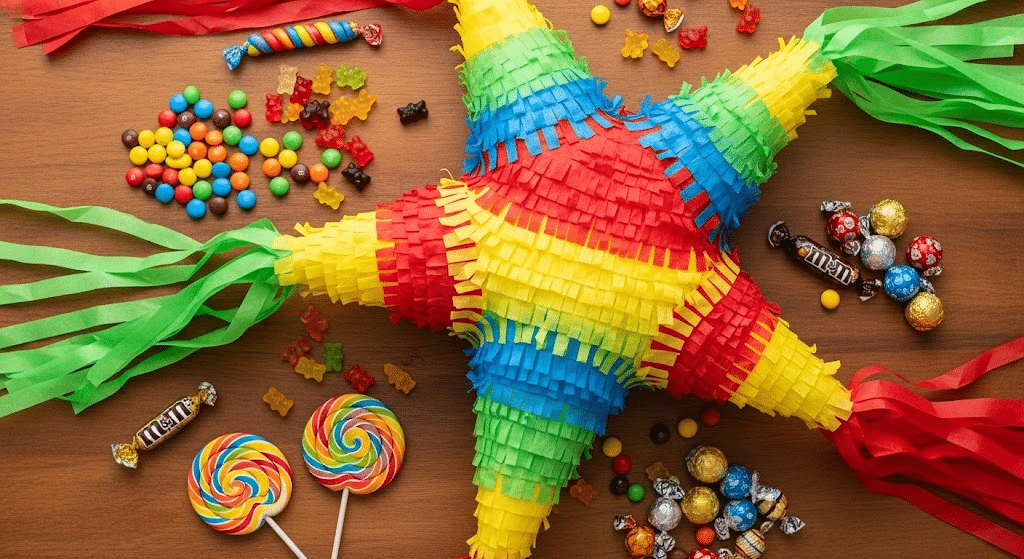
In step 1 of how to make a pinata, blow up your star-shaped or round balloon to full size. Gently tape one colorful party hat to each tip of the star using masking tape, placing the tape near the base of each hat to preserve the color.
This creates the signature star arms of the piñata.
Step 2: Make and Apply Papier Mache
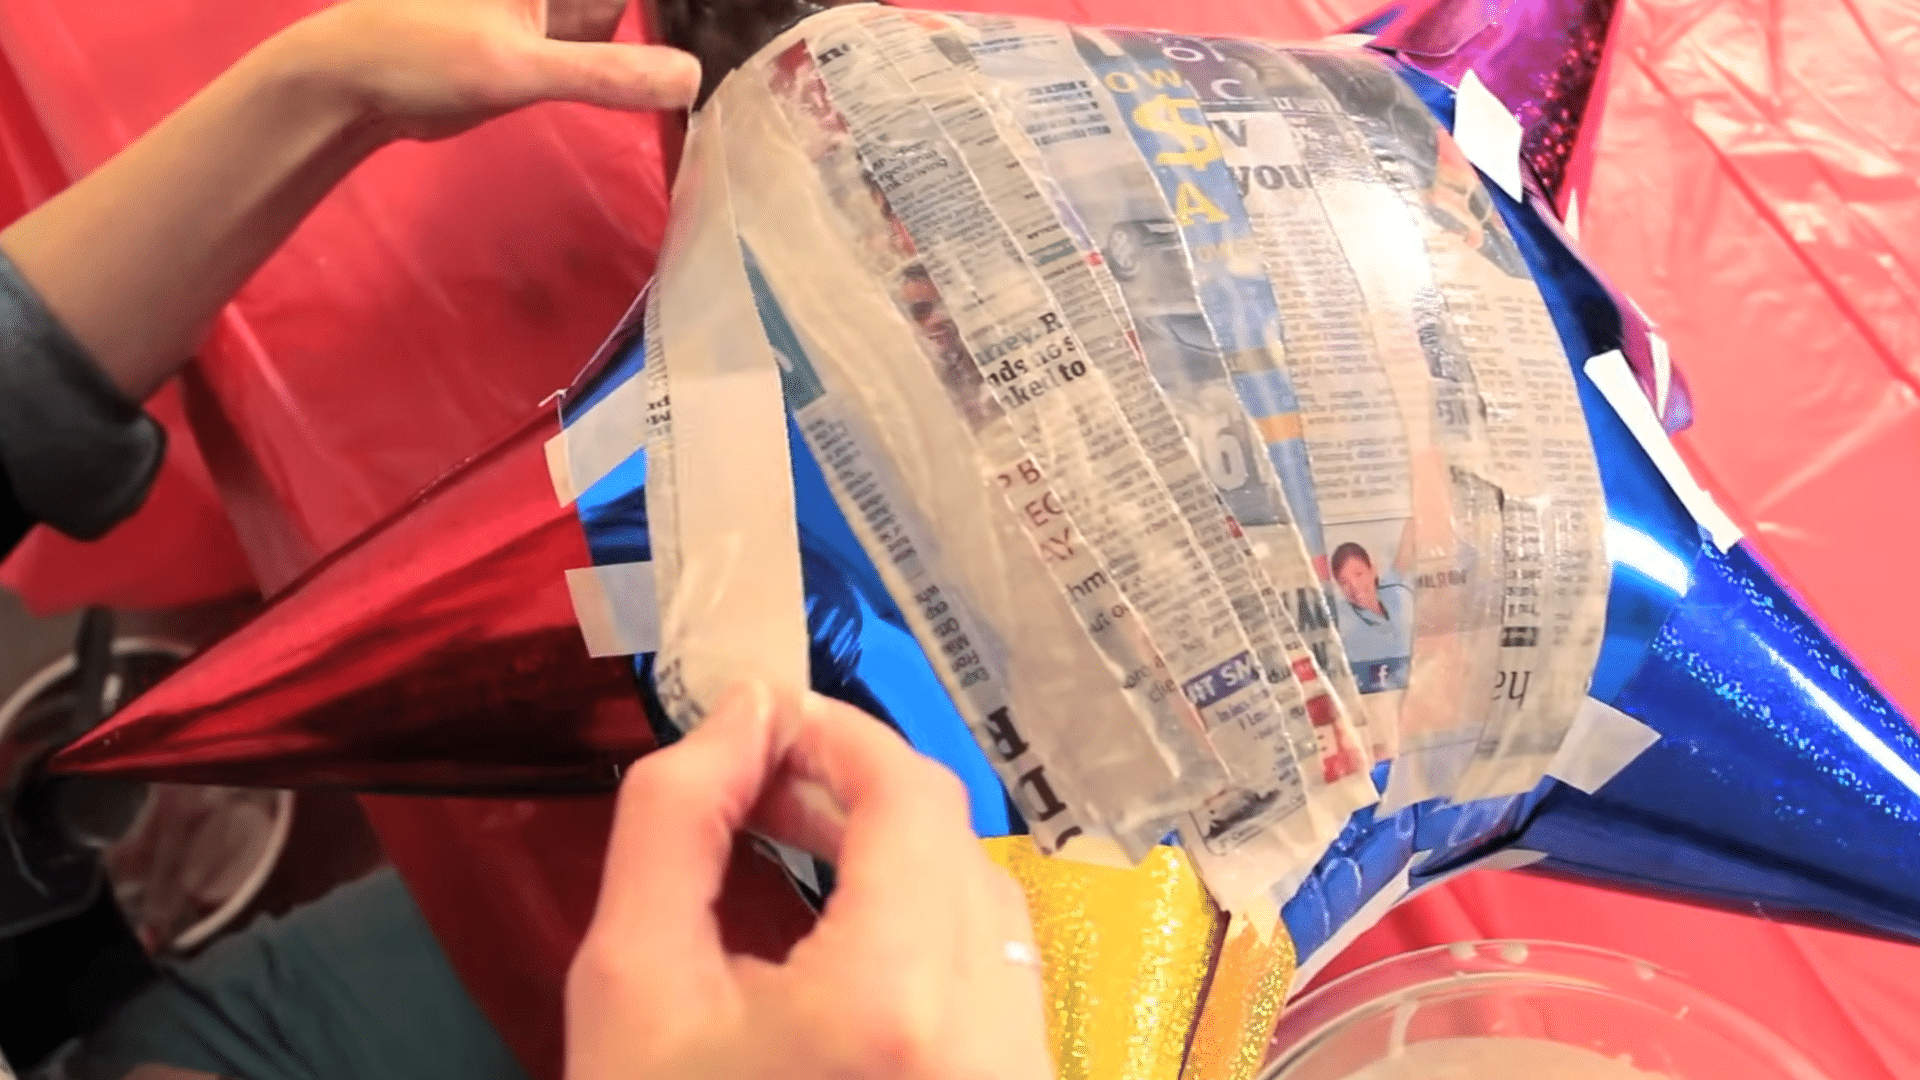
In a bowl, mix 1 cup of flour with 1.5 cups of water until a smooth mixture forms. Cut the newspaper into 2-inch strips.
Dip each strip into the mixture, gently swipe off excess with two fingers (don’t squeeze tightly), and begin laying the strips over the balloon.
Overlap the edges and go over the taped party hats as well. Apply 3–4 full layers. Allow each layer to dry thoroughly (approximately 6 hours).
Step 3: Create a Candy Opening

Once the papier mache is completely dry and firm, use an Exacto knife to cut a neat hole in the body of the piñata (preferably in a non-structural area). This is where the candy will go.
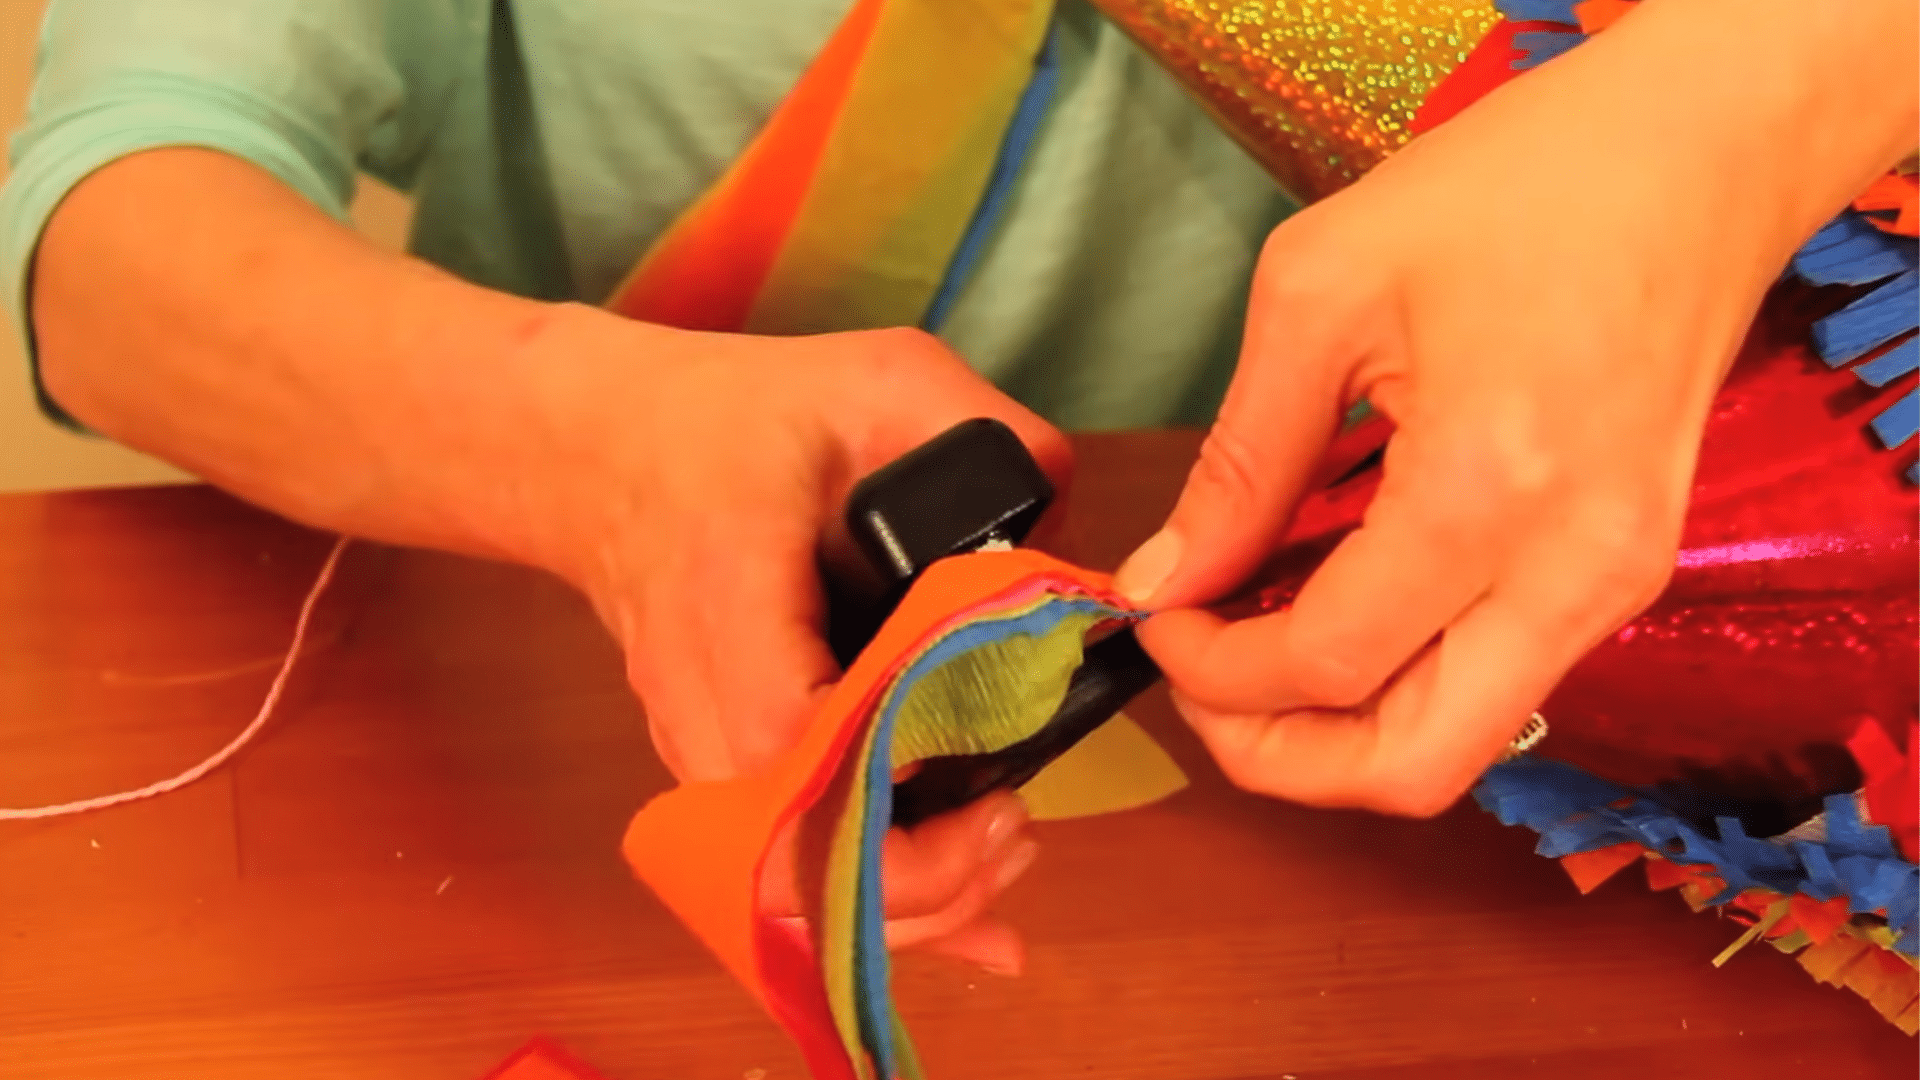
Step 4: Fringe Your Tissue Paper for Decoration
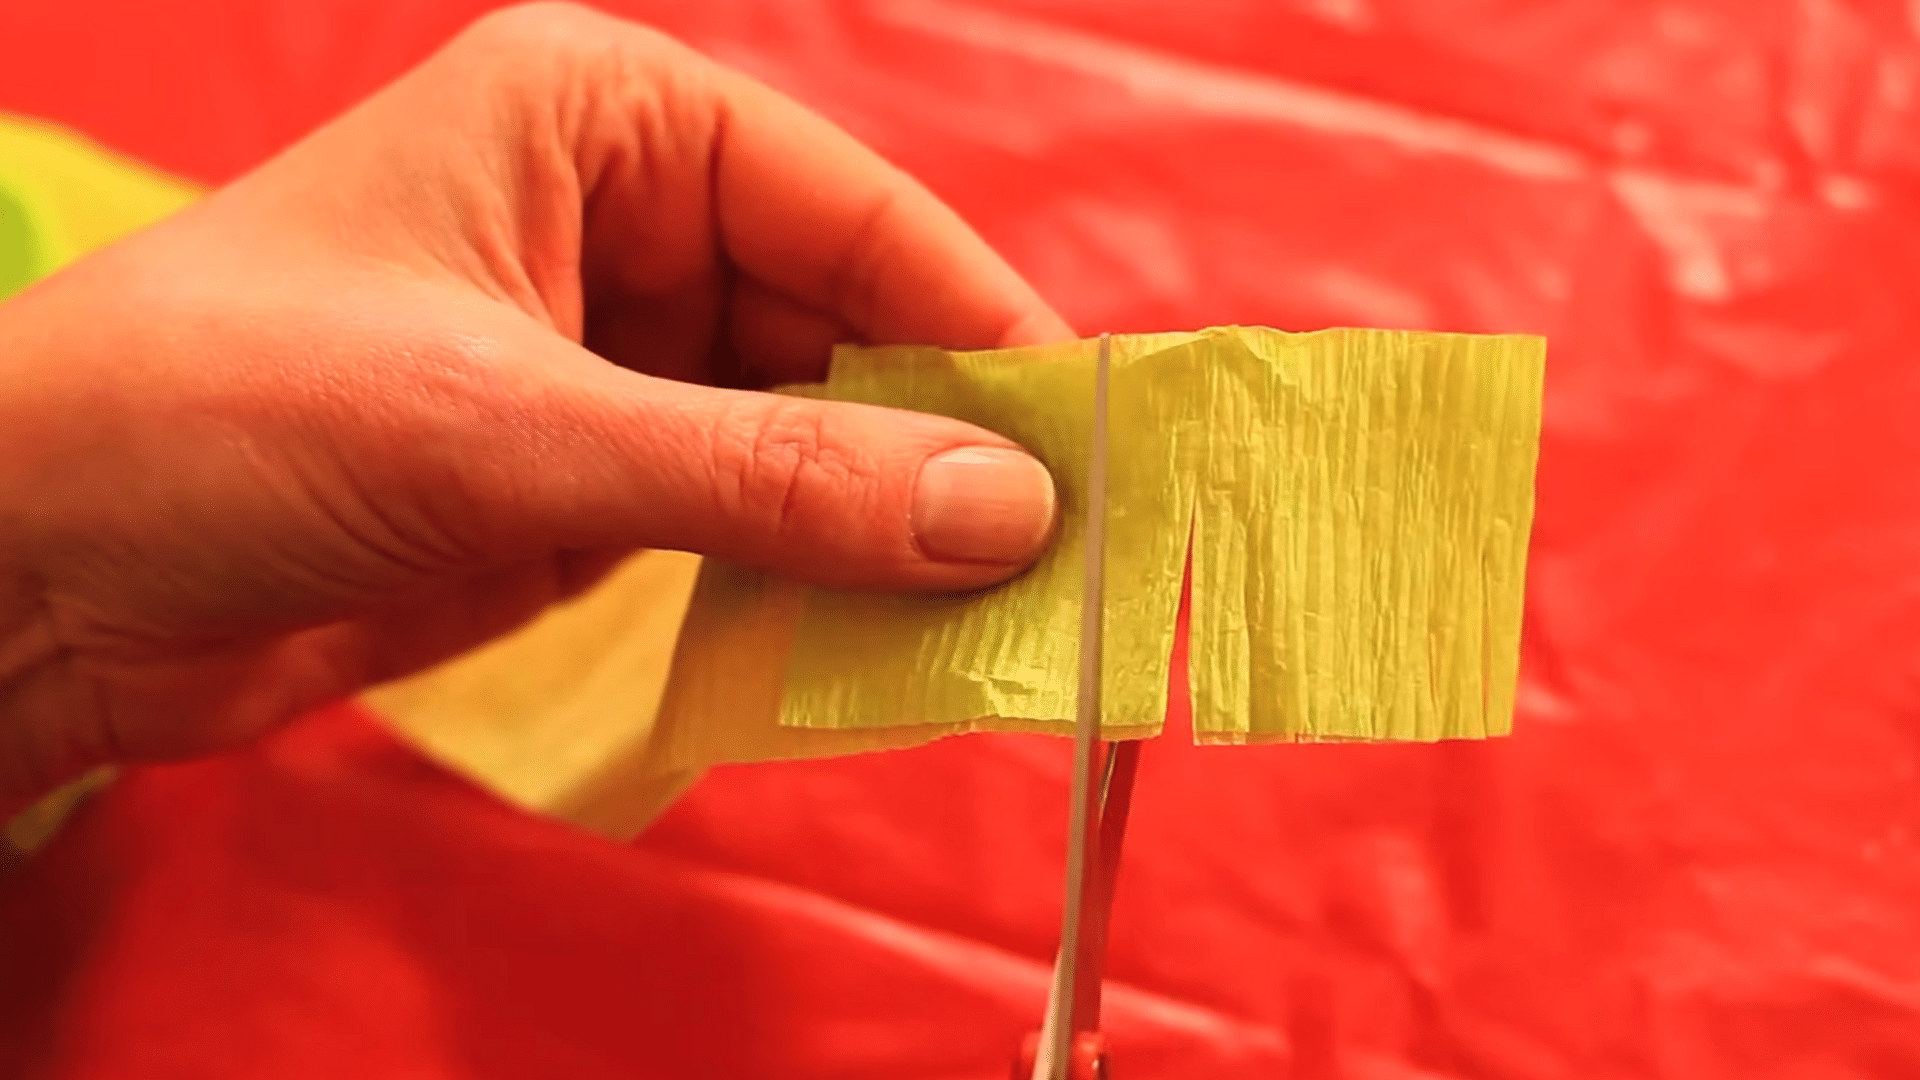
Fold each tissue or crepe paper color into 3-inch strips and snip along one edge to create fringe. Mix a small amount of glue with water in a bowl to thin it slightly.
Brush glue onto the dry piñata surface and gently press fringed strips over it, working color by color. Allow them to overlap slightly for a layered effect.
Step 5: Decorate the Party Hat Cones
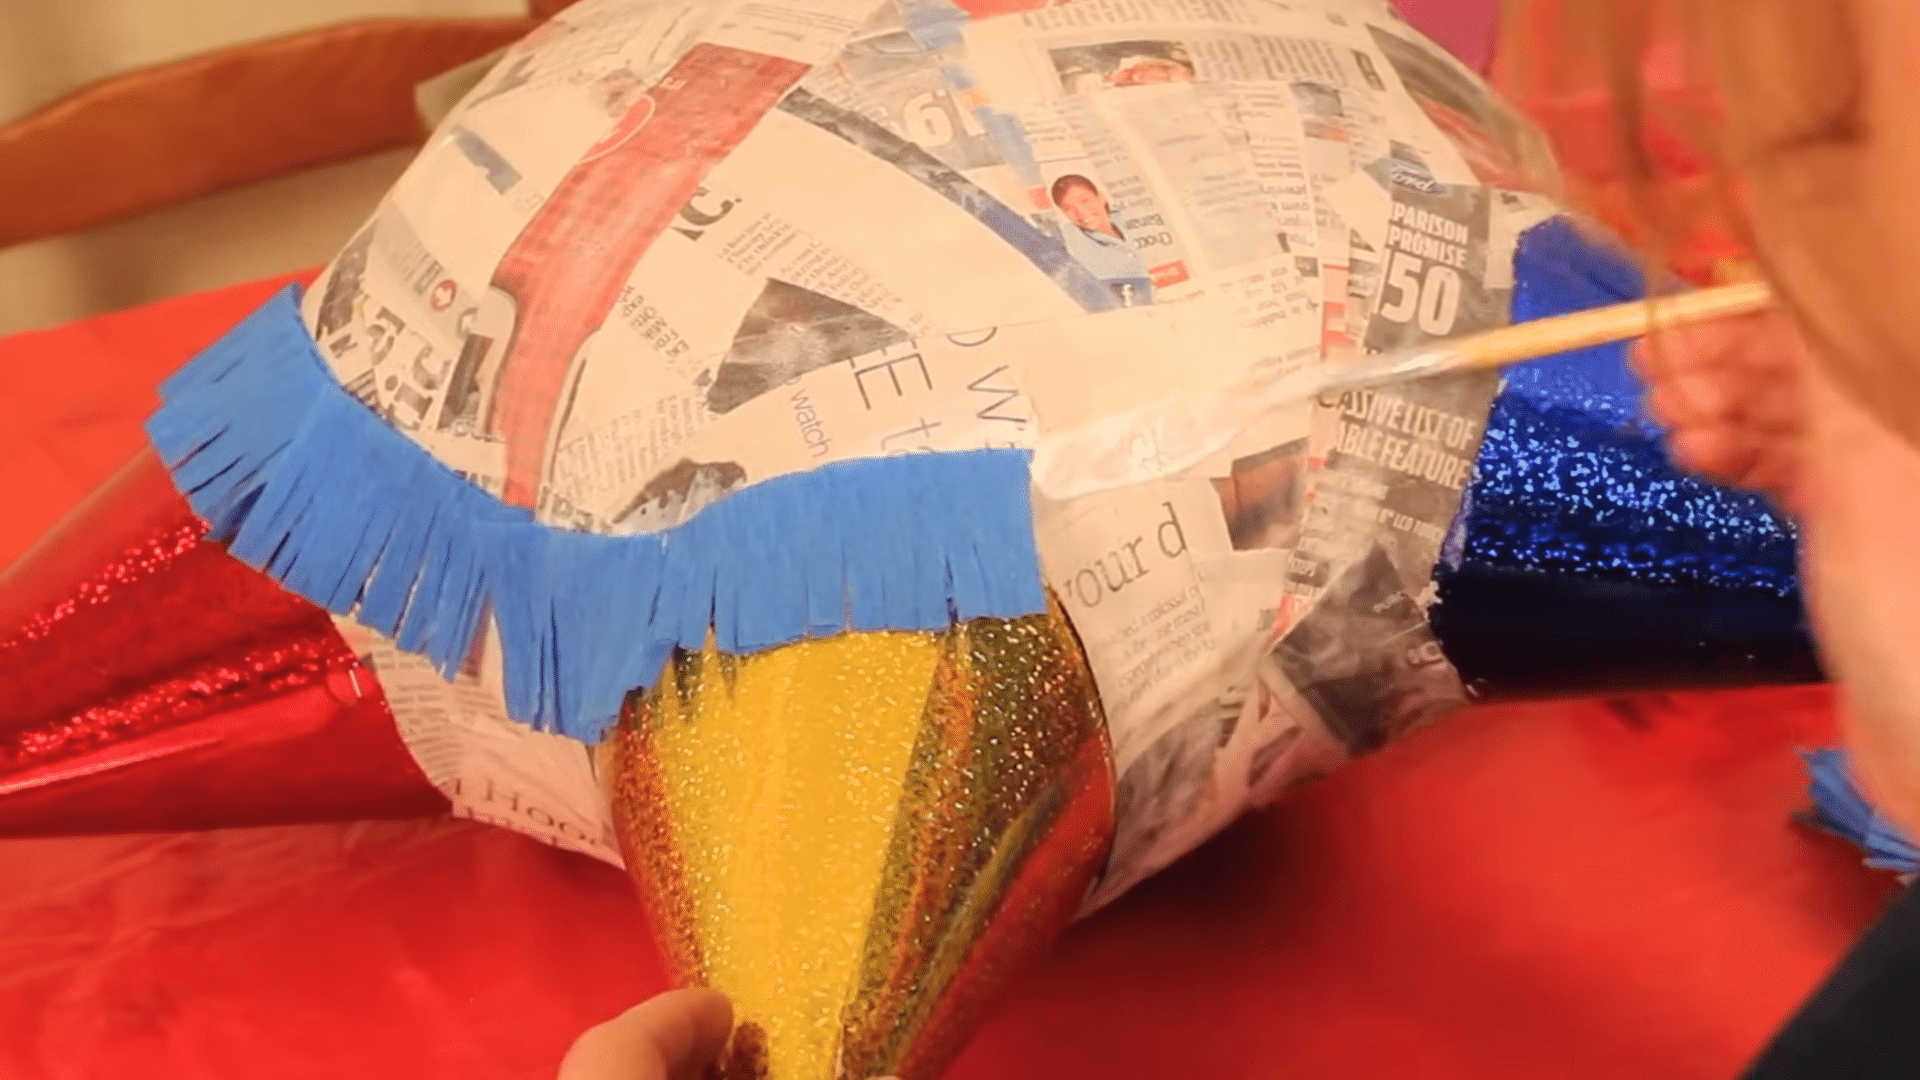
To decorate the cone-shaped party hats, apply glue and layer the tissue fringe directly onto them. Use smaller pieces for detailed coverage, and try to match or contrast colors playfully.
Fill any gaps between cones and balloons with more tissue strips for a seamless look.
Step 6: Insert Candy and Add Hanging String
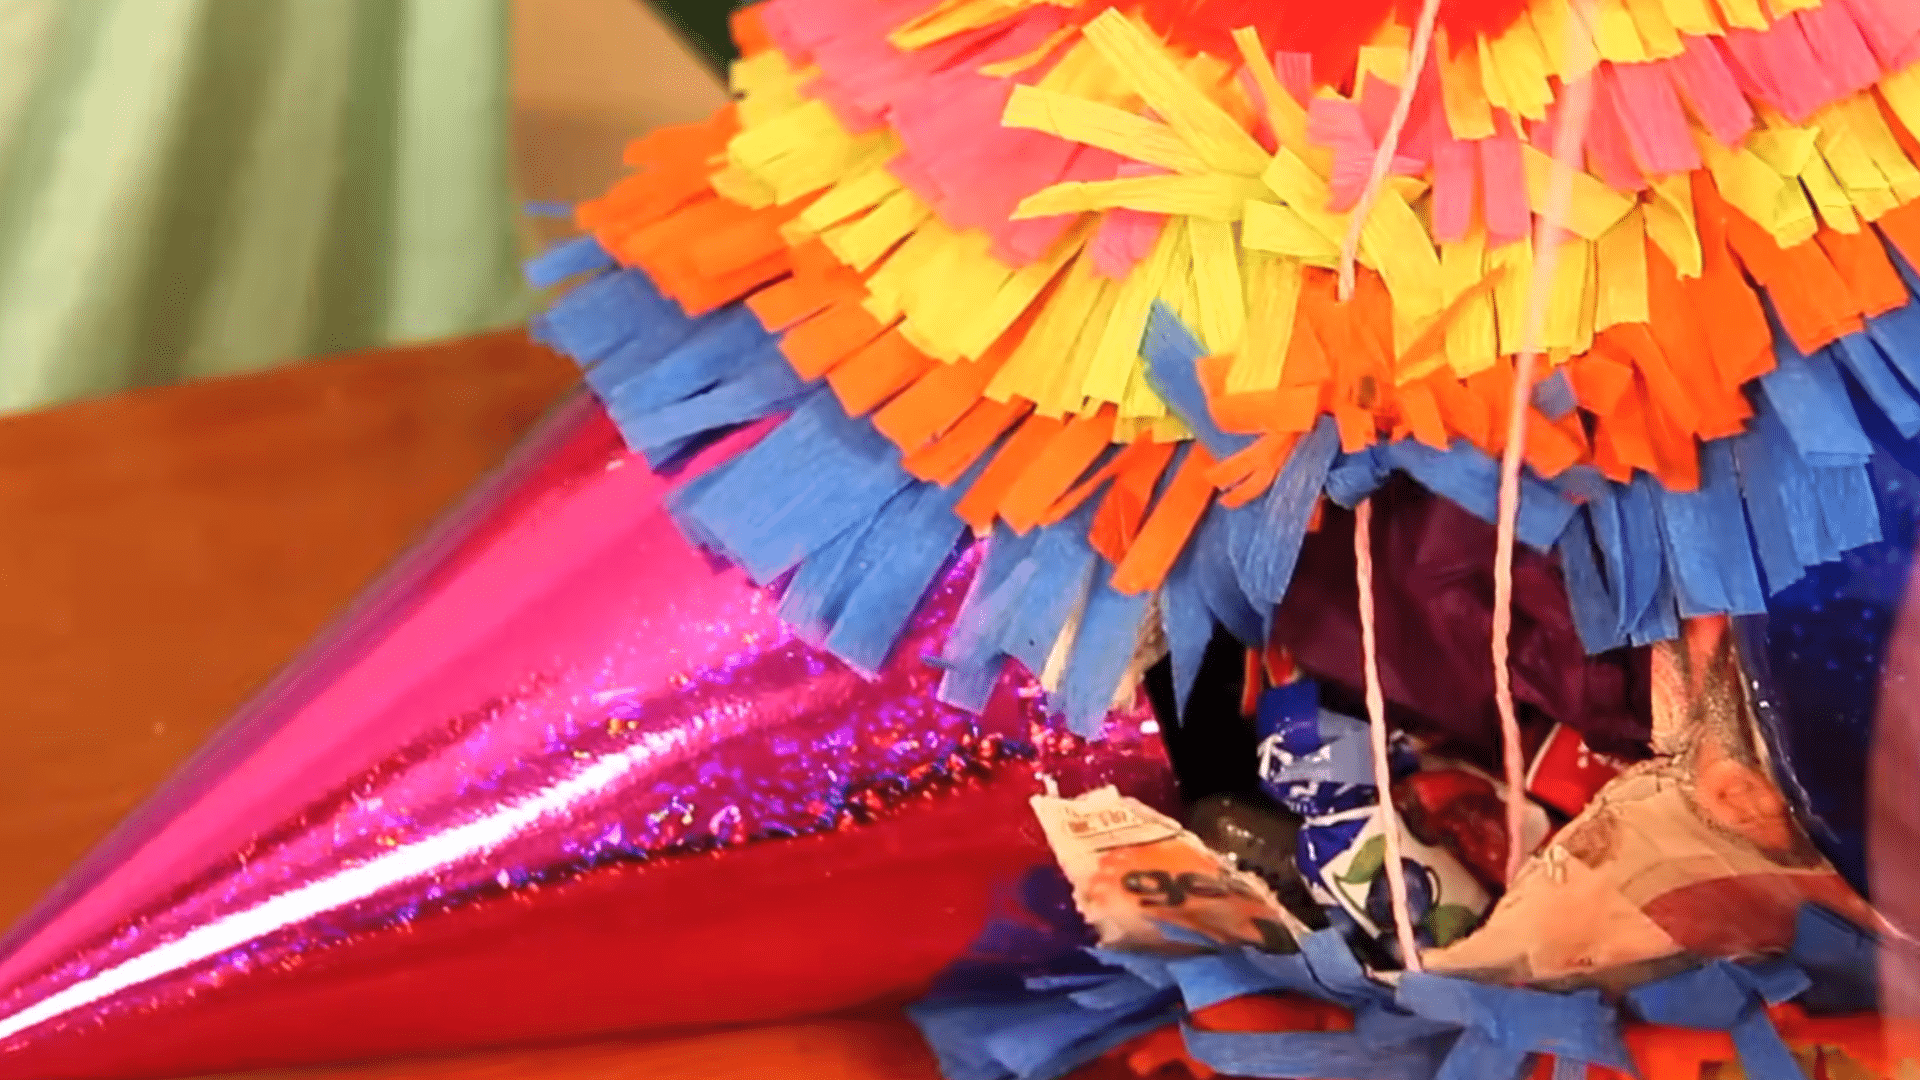
Place wrapped candy inside the hole. Use a skewer to poke two small holes through the top area of the piñata. Thread the string through these holes and tie a secure knot to hang it.
Seal the candy hole with a cardboard patch and secure it with tape. Cover with matching fringe for a clean, finished look.
Step 7: Add Final Decorative Touches (Optional)
For extra flair, gather several long strands of tissue paper in different colors, tie them together, and staple one to the tip of each cone.
These will hang like streamers and make your DIY pinata even more festive. Now it’s party-ready!
For more detailed instructions, refer to this video
Turning How to Make a Pinata Into a Fun Family Activity
Making a piñata is the perfect excuse to get the whole family involved in some quality chaos time. Kids love getting messy, and adults secretly enjoy it too.
Age-appropriate jobs for everyone:
Little ones aged 3-6 can tear newspaper strips, pick tissue paper colors, and stuff candy with help.
Older kids aged 7-12 can mix flour paste, apply layers of newspaper, and cut out decorative shapes.
Adults and teens handle balloon popping, drying time, and detailed decorations while keeping everyone on track.
Making it memorable:
Turn on music, lay down plastic sheets, and embrace the mess. Take photos of the chaotic moments because they’re usually the best memories.
Consider making it a family tradition where everyone adds their special touch.
Safety Considerations to Undertake While Making a Piñata
Look, nobody wants their fun craft session turning into a trip to the emergency room. Making a piñata should be all about laughs and memories, not accidents and tears.
A few simple safety steps will keep everyone safe and intact.
- Always supervise young children when using scissors or sharp tools
- Keep small balloon pieces away from toddlers to prevent choking hazards
- Test hanging spots to ensure they can support the piñata’s weight safely
- Use non-toxic materials only, especially around small children
- Keep the workspace clear of clutter to prevent trips and falls
What to Fill Your Piñata With?
The key is variety. Nobody wants a piñata full of just one thing, no matter how good it is.
Think about your crowd, consider the weather, and remember that some treats work better than others when they’re flying through the air.
Classic candy choices: Hard candies work best because they won’t melt or squish. Wrapped chocolates are fine for indoor parties, but skip them if it’s hot outside. Gummy bears, lollipops, and small candy bars are always crowd-pleasers.
Beyond the sweets: Toss in some small toys, bouncy balls, temporary tattoos, or stickers. Little trinkets make the experience more exciting, especially for kids who aren’t big fans of candy. Mini bubbles, small puzzles, or even fun erasers work great.
Remember: Don’t overstuff it or the piñata won’t break properly. Mix light and heavy items so everything doesn’t just fall in one corner. Avoid anything sharp, fragile, or too small for little hands. Always have extra treats on standby, because someone will inevitably ask for more!
Concluding Thoughts
Knowing how to make a pinata isn’t rocket science, but it sure feels like a victory when you’re done.
You’ve created something unique, saved some cash, and given your party guests a memorable experience they’ll talk about for weeks.
So next time you’re planning a celebration, skip the store-bought option. Grab some newspaper, fire up that creative spirit, and make something that’s genuinely yours.
Now, get out there and start crafting. Share your results in the comments below!