Have you ever noticed how your cutting boards start to warp, crack, or develop mold spots despite regular cleaning? This is a common kitchen frustration that leaves many wondering what they’re doing wrong.
Proper storage is actually the missing piece in your cutting board care routine. How you store cutting boards between uses significantly impacts their lifespan, yet it’s often overlooked in favor of focusing solely on cleaning methods.
Learning how to store cutting boards correctly can extend their life by years, saving you money while keeping these essential kitchen tools in prime condition.
The right storage techniques prevent warping, cracking, and bacterial growth-common issues that force premature replacements.
Ready to give your cutting boards the care they deserve? Let’s go through simple, effective methods for storing them that will keep them functional and beautiful for much longer.
Know Your Cutting Board Types
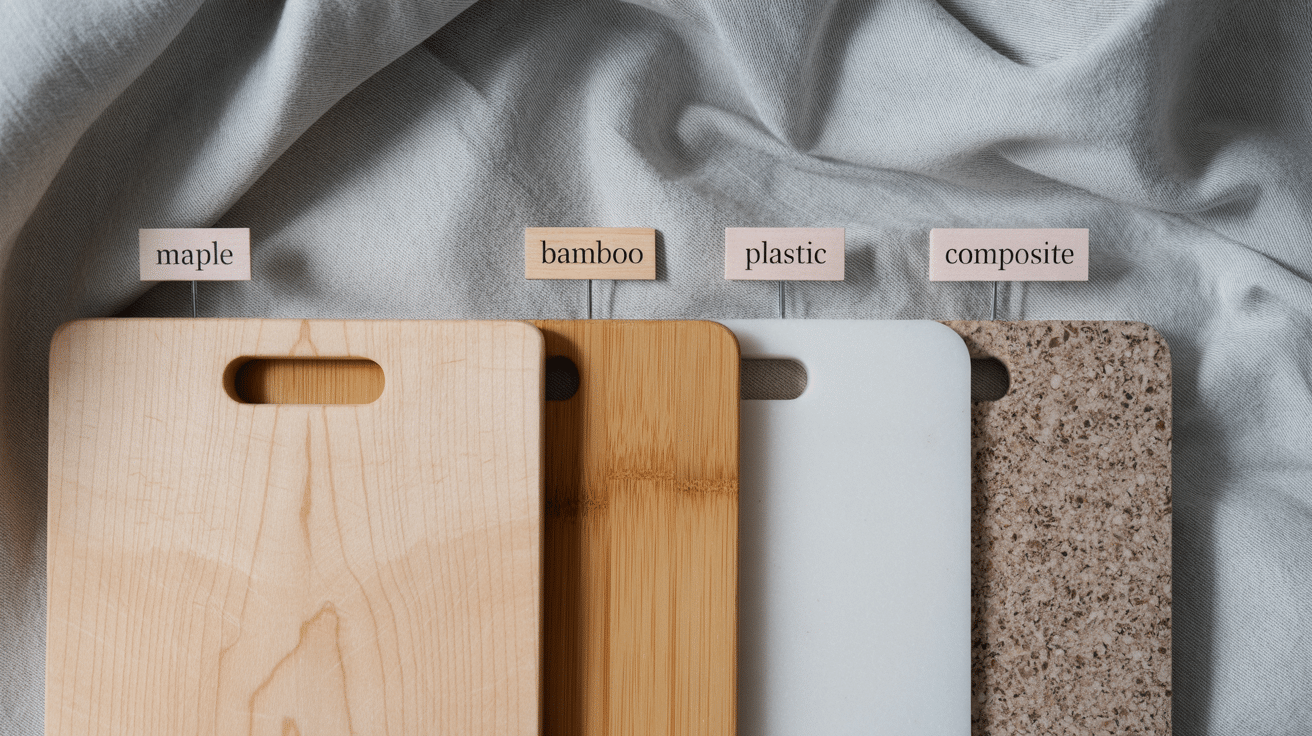
Different cutting boards need different care based on their materials. Each type has its own traits and storage needs.
Wooden boards look nice but need more care than plastic ones. They can crack if stored wrong. Plastic boards are easier to clean but can warp with heat.
Here’s what to know about each type:
- Wood boards (maple, walnut, oak) – need air flow and even support
- Bamboo boards – less water-soaking than wood, but can still split
- Plastic boards – lighter but prone to warping if stored flat in heat
- Composite boards – a mix of materials that need less special care
When you match the right storage method to your board type, you’ll see better results and longer use from your kitchen tools.
Smart Storage Solutions for Every Kitchen
Finding the right way to store your cutting boards can improve the efficiency of your kitchen. Good storage keeps your boards in top shape and makes cooking more fun.
Let’s look at some smart ways to keep your boards clean, dry, and ready to use.
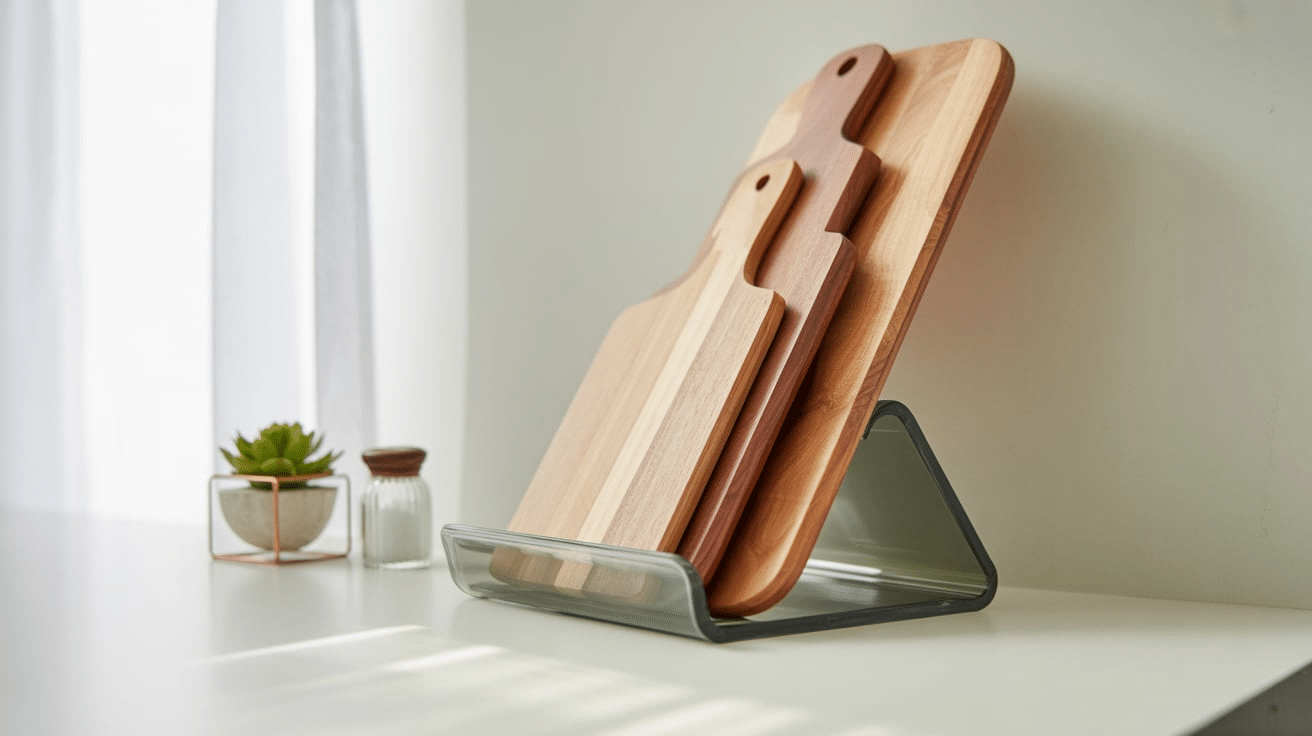
1. Vertical Cutting Board Rack
A vertical rack keeps boards upright, allowing air to flow around each one. This method helps prevent warping and mold, and makes it easy to grab the board you need.
Vertical storage is ideal for wooden boards that need to dry completely between uses. Look for racks with soft dividers to protect board edges from chips and scratches.
2. Pull-Out Drawer Organizer
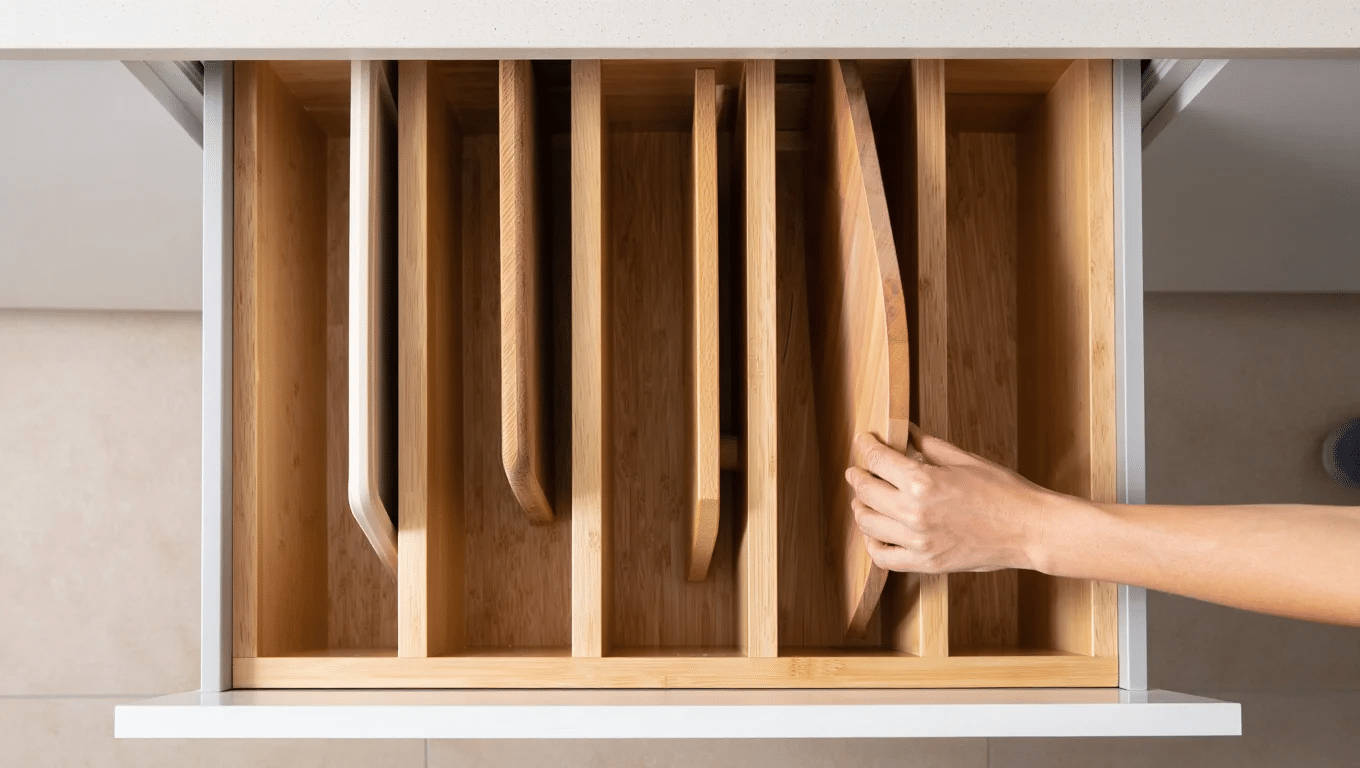
Install a pull-out drawer with dividers for your cutting boards. This keeps them separated, protected from scratches, and hidden away, making your kitchen look tidy.
The closed drawer also protects boards from excess kitchen moisture and heat that can cause damage over time. These organizers work well for homes with limited wall space.
3. Wall-Mounted Hooks
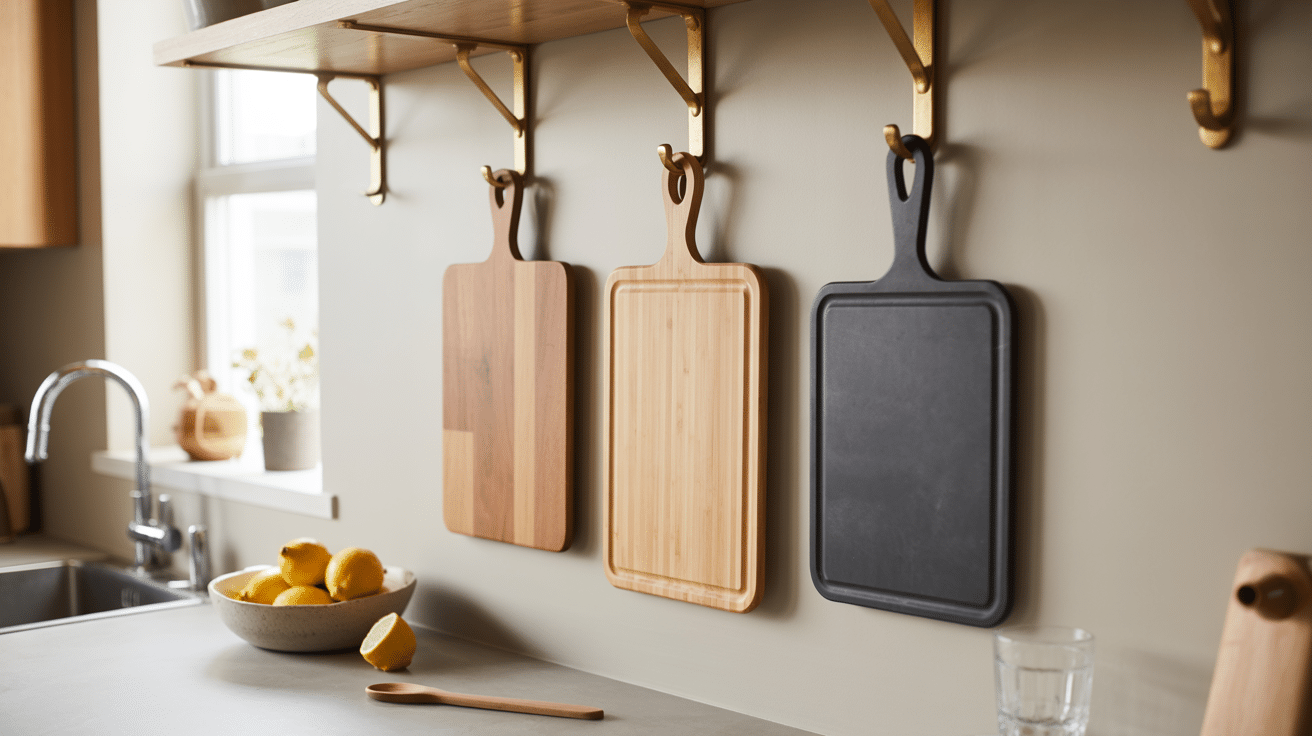
Hang boards on sturdy hooks or pegs. This saves counter space, keeps boards dry, and adds a touch of kitchen charm if you pick a visible spot. Make sure to use hooks that can handle the weight of your heavier boards.
- Choose hooks that extend far enough from the wall for good air flow
- Install at a height that’s easy to reach but won’t interfere with counter activities
- Space hooks at least 3 inches apart for proper drying
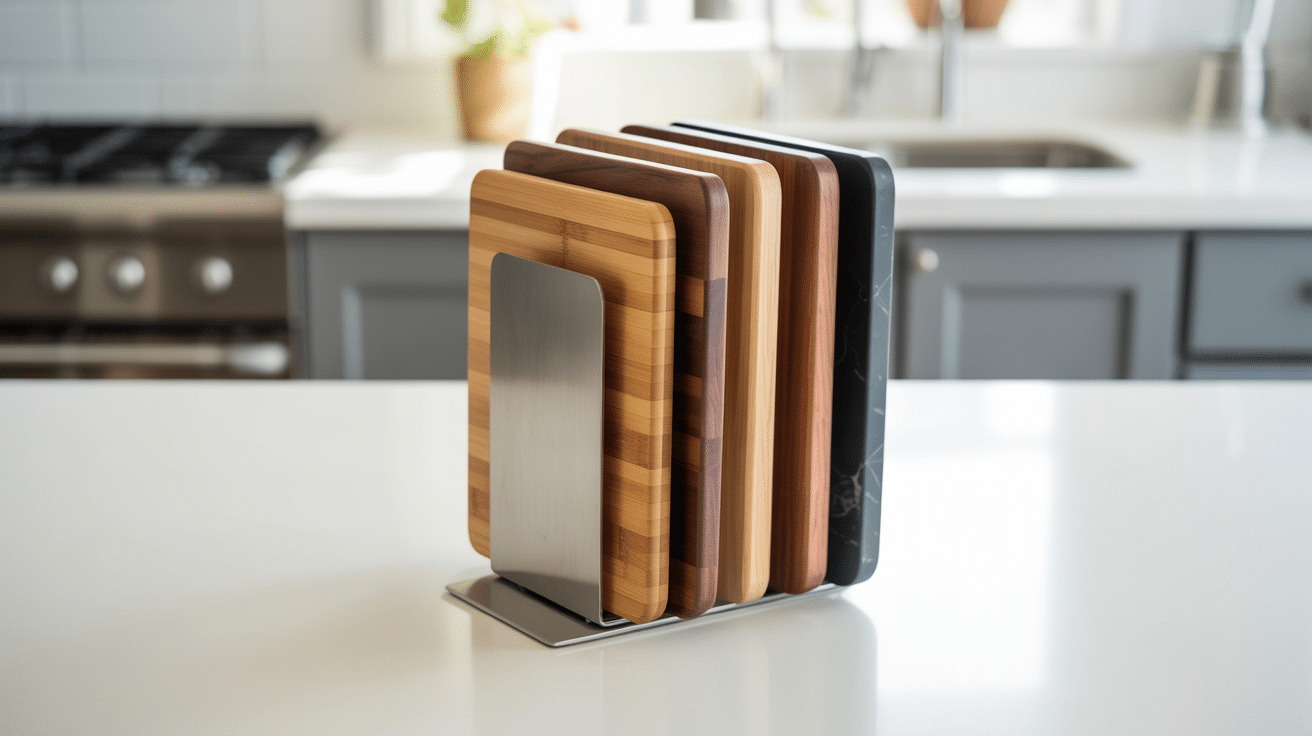
4. Countertop Stand
A simple stand on your counter holds boards vertically. It’s easy to access, keeps boards dry, and works well if you use your boards often.
These stands come in various materials, from wood to metal, to match your kitchen style. Position the stand away from heat sources and water splashes for best results.
5. Cabinet Door Rack
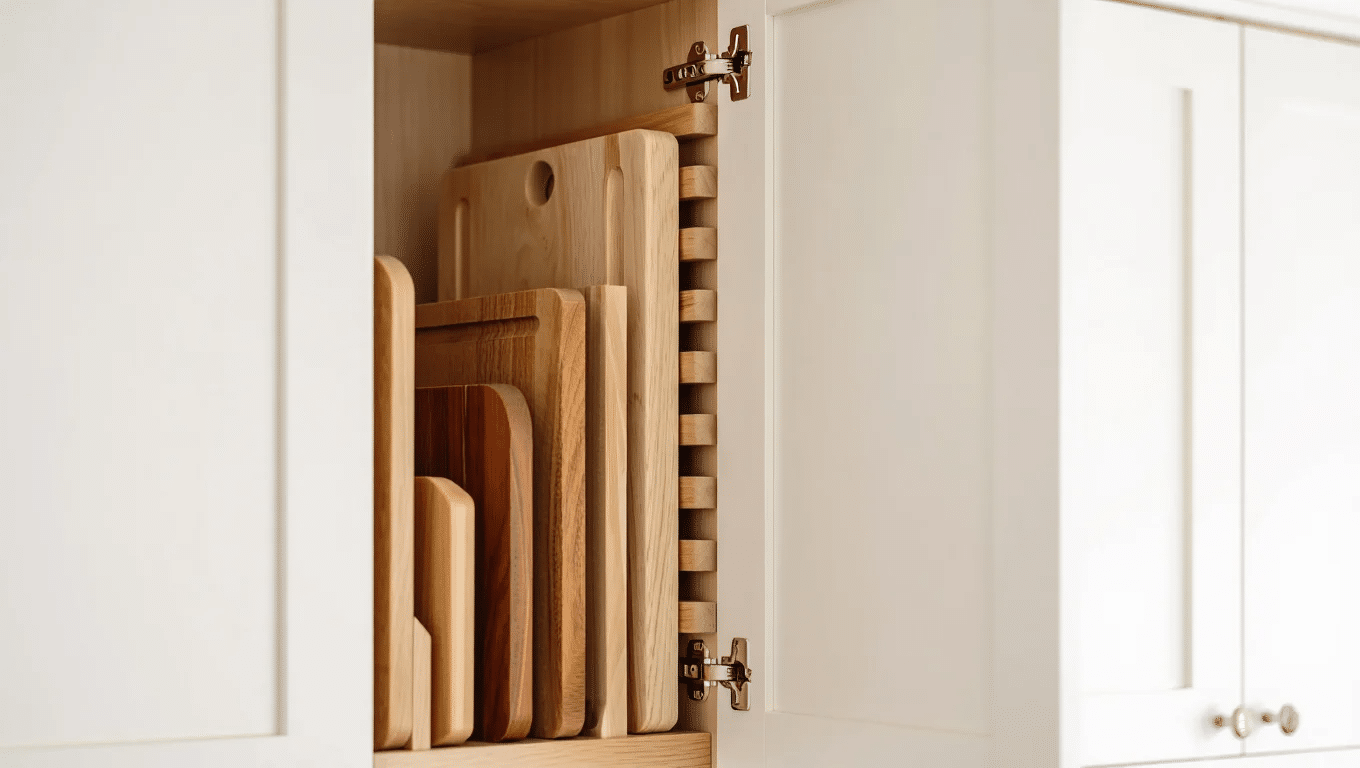
Mount a rack inside your cabinet door. This uses otherwise wasted space and keeps boards out of sight but within easy reach. The boards stay upright and get good air circulation even in closed cabinets.
Look for racks with adjustable slots to fit boards of different thicknesses.
6. Magazine Holder Hack
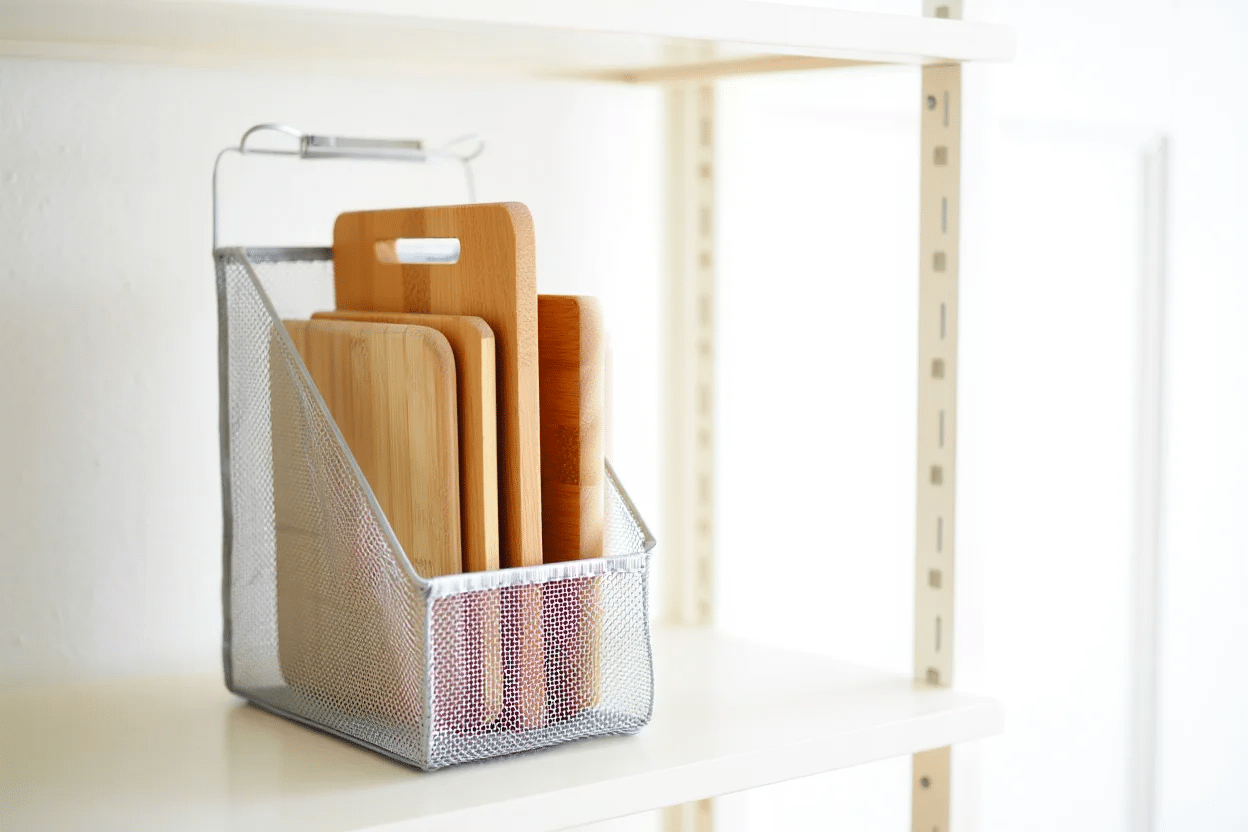
Repurpose a metal or plastic magazine holder as a cutting board rack. Place it inside a cabinet or on a shelf for a quick, affordable storage solution.
This budget-friendly option is perfect for storing smaller boards and can be moved around as needed.
- Look for sturdy holders that won’t tip over
- Line the bottom with a towel to prevent sliding
- Choose holders with open sides for better airflow
7. Pegboard Storage
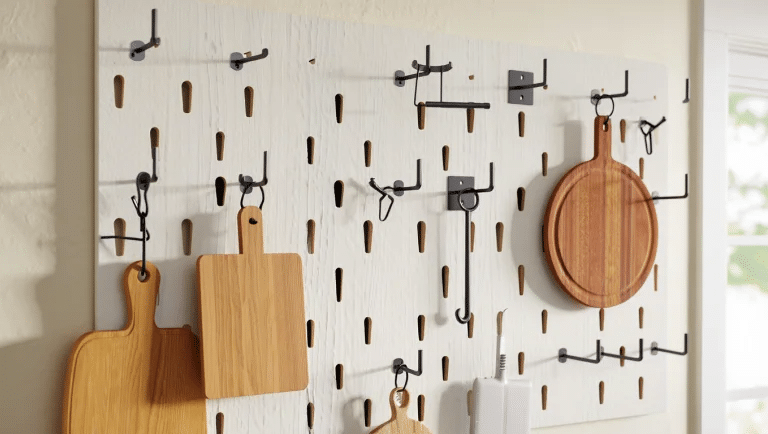
Install a pegboard on your wall and use hooks to hang boards. This method is flexible and lets you rearrange storage as your needs change.
Pegboards can hold other kitchen tools too, creating an organized cooking station. You can paint the pegboard to match your kitchen or make it a fun accent color.
8. Built-In Kitchen Island Slots

Some kitchen islands have built-in slots for boards. These keep boards upright, organized, and close to your prep area.
If you’re remodeling or building a new kitchen, consider adding this feature. The slots keep boards from touching, reducing the chance of moisture transfer between uses.
9. Under-Cabinet Hanging Rack
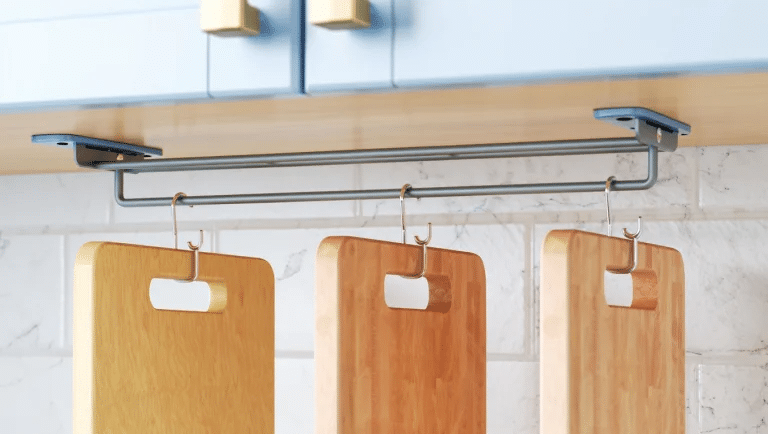
Attach a rack under your cabinets to hang boards by their handles. This saves counter space and keeps boards dry between uses.
The boards hang freely, getting maximum air circulation without taking up valuable storage area. This works best for boards with handles or holes for hanging.
10. Tension Rod Organizer
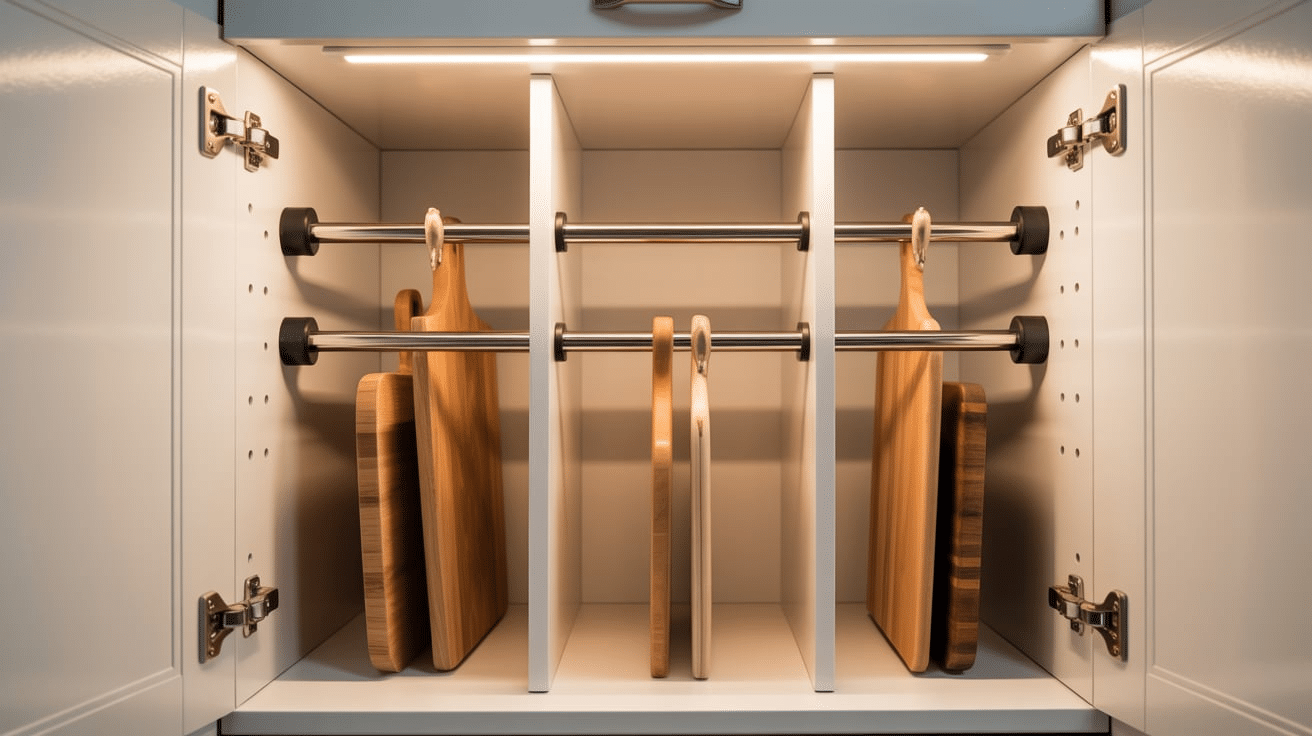
Use adjustable tension rods in a cabinet to create vertical dividers for your cutting boards. This method turns any cabinet into a custom storage space without permanent changes.
Place two or more rods parallel to each other with enough space for your boards to stand between them. The rods hold the boards upright while keeping them separated.
- Choose sturdy metal rods that can handle the weight
- Place rubber caps on rod ends to prevent cabinet damage
- Adjust the rod height based on your board sizes
This method works well for renters who can’t make permanent changes and for people who want to try different storage layouts.
The boards stay dry and organized while remaining hidden from view.
11. Slotted Shelf
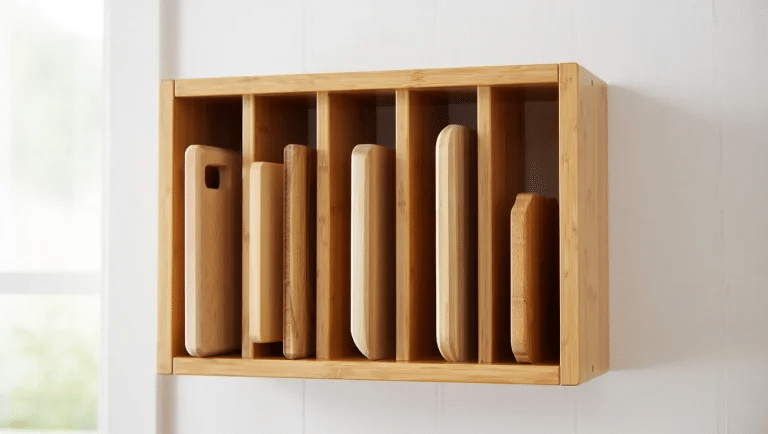
Install a shelf with slots or grooves to hold boards vertically. This method gives each board its own space, preventing them from sticking together and allowing for good airflow.
Slotted shelves can be custom-built to fit your exact board sizes and kitchen space constraints.
Display or Hide? Choosing Your Style
When it comes to cutting boards, there are two schools of thought – show them off or tuck them away. Both approaches have their benefits depending on your kitchen style and how you cook.
Here’s a quick comparison to help you decide what might work in your kitchen.
| Displaying Cutting Boards | Hiding Cutting Boards |
|---|---|
| Natural wood tones add warmth to your kitchen space. | Keeps counters clear and looking tidy. |
| Always within reach for quick meal prep. | Shields boards from dust and accidental spills. |
| Unique boards double as kitchen decor. | Frees up precious counter space. |
| Seeing boards daily reminds you to use them. | Vertical slots make grabbing the right board easy. |
| Can be layered on shelves for visual interest. | Supports a clean, streamlined kitchen look. |
Common Mistakes to Avoid
Poor storage habits can damage your cutting boards and shorten their life. These common errors happen in many kitchens. By knowing what not to do, you can keep your boards in good shape much longer.
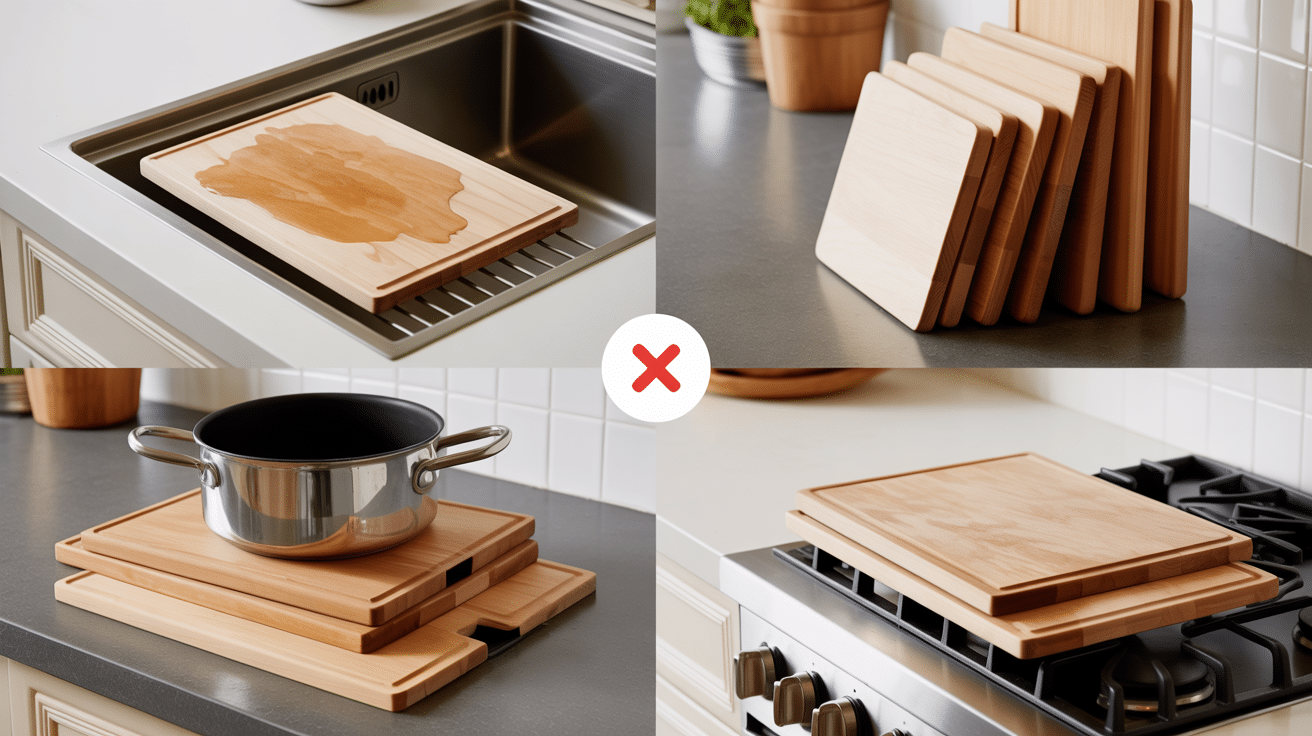
- Storing wooden boards flat in water-prone areas, like near the sink.
- Putting boards away while still wet.
- Stacking heavy items on top of boards causes warping.
- Leaning boards against each other without an air space between them.
- Storing boards directly on hot surfaces or near heat sources.
- Using boards as hot pads or trivets leads to heat damage.
- Keeping boards in drawers where they slide and bang into other items.
- Hanging boards with too much weight on one small hook.
- Forgetting to oil wooden boards before long-term storage.
- Storing in areas with big temperature changes causes the wood to expand and contract.
Final Thoughts
Now you have all the tips on how to store cutting boards for a longer life and better use.
These simple methods keep your boards in good shape and free from cracks, warps, and mold. When you follow good practices for how to store cutting boards, you save money and make cooking safer.
The right storage helps wood dry fully and prevents damage that comes from poor handling. Your kitchen will look better too! Think about which of these how to store cutting boards storage ideas fits your space and needs. Then put it into action this week.
Your future self will thank you when your boards stay flat, clean, and ready for years of meal prep.