Removing wallpaper doesn’t have to be a nightmare of endless scraping and wall damage.
With the right approach, you can get clean, smooth walls ready for paint in just a few hours. The secret is understanding that most wallpaper has two layers – the pretty top part you see and the backing paper underneath that holds the glue.
Instead of using those grading tools that poke holes everywhere, professionals know it’s much easier to peel off the top layer first, then use water to soften the backing paper.
This simple method works on both drywall and plaster walls, and it won’t leave you with a damaged mess to repair later. These six steps will get the job done right.
How to Remove Wallpaper in 6 Simple Steps
By following these proven techniques and taking time with each step, you’ll achieve clean, smooth walls ready for painting without the frustration and costly repairs that come from rushing the process.
Step 1: Test Your Wall First
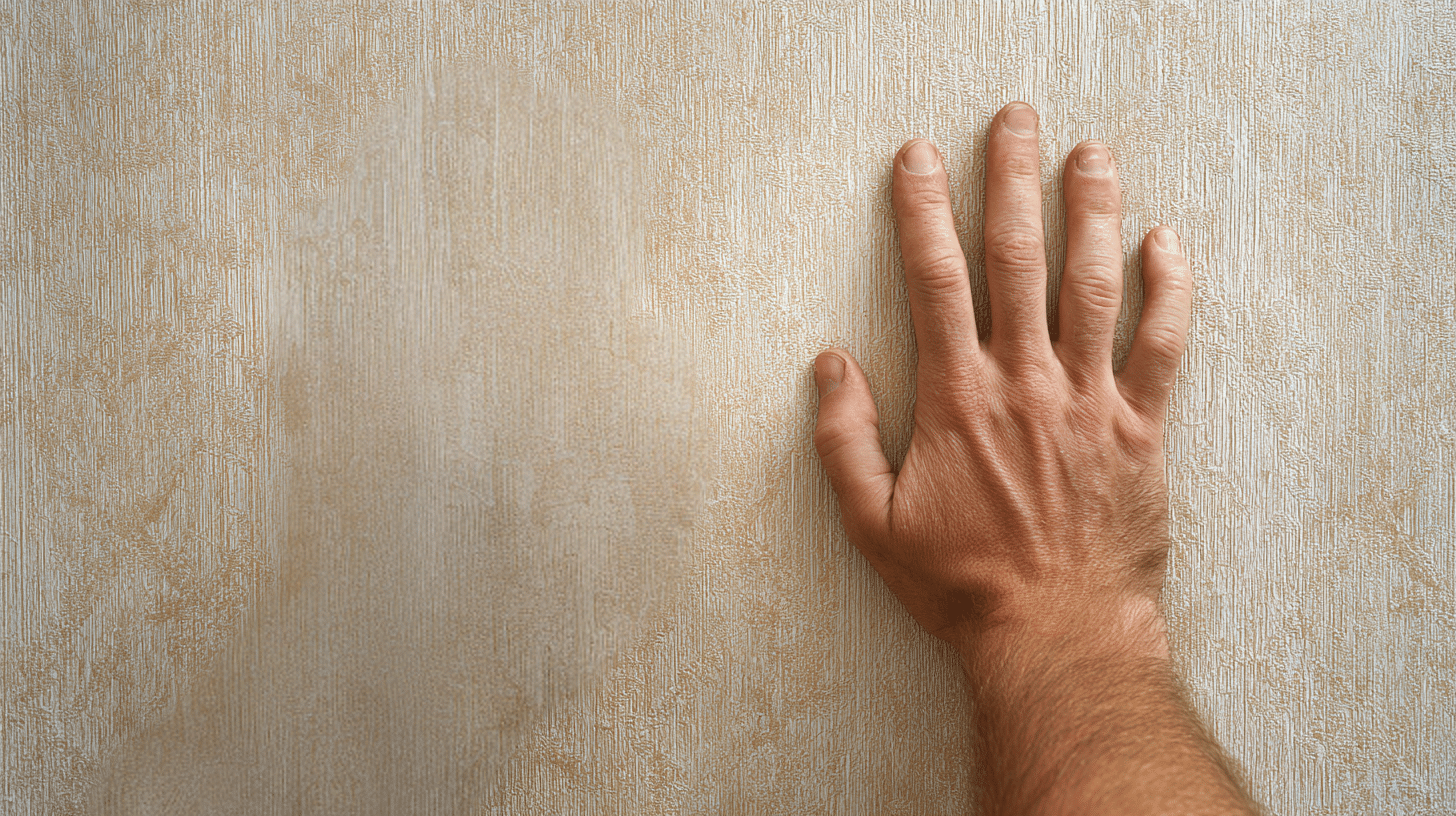
Before starting any wallpaper removal project, perform a simple but crucial wall stability test.
Place your hands flat against the wallpapered surface and apply gentle, steady pressure to check for any movement, flexing, or give in the wall structure.
If you feel the wall shift, bow, or move under pressure, the wallpaper may actually be providing structural support to weakened plaster underneath; removing it could cause chunks of plaster to fall away, creating a much bigger repair project than you bargained for.
Step 2: Remove the Top Layer
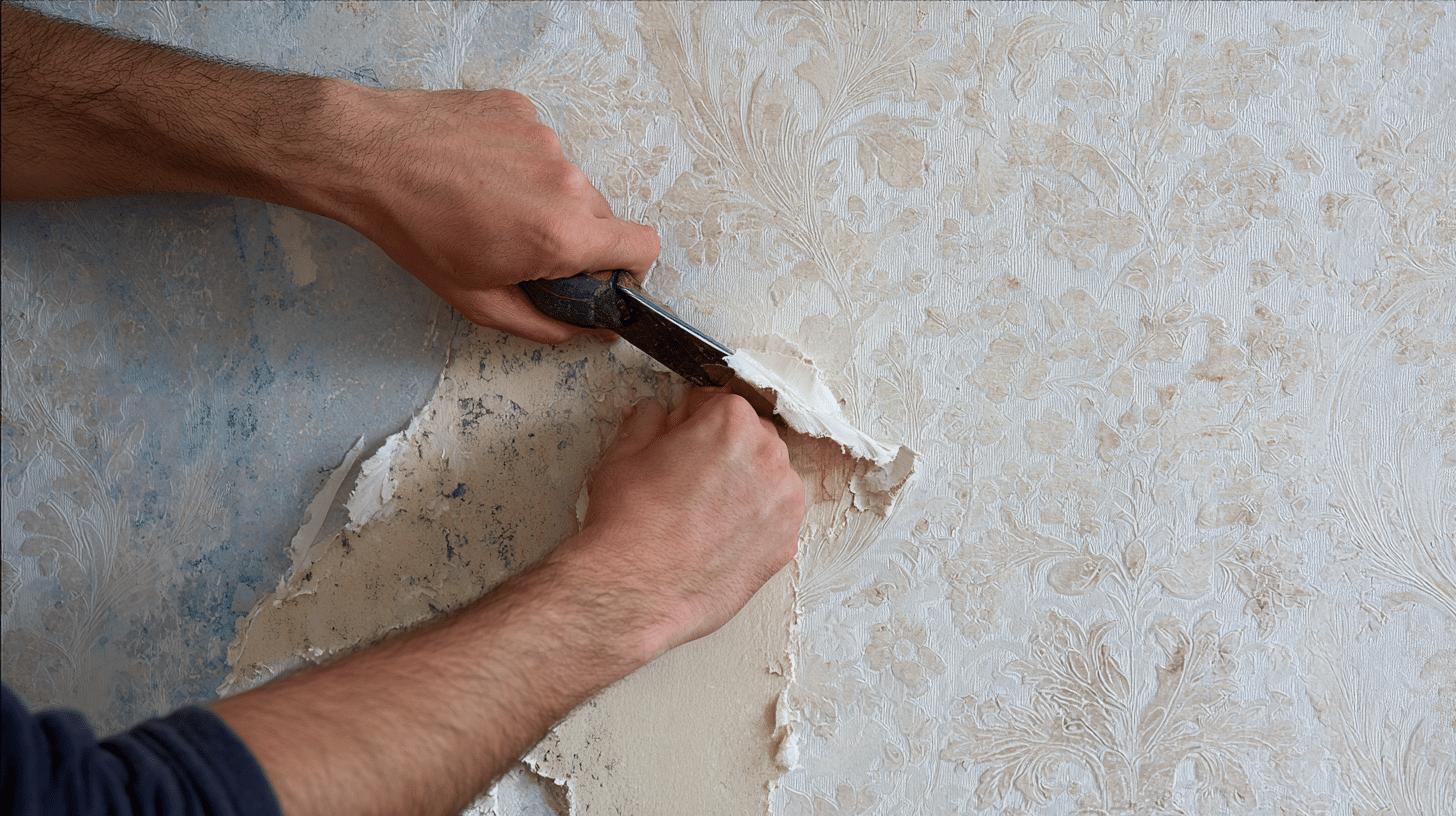
Most wallpaper consists of two distinct layers. There is the decorative face layer you see, and the backing paper that holds the adhesive.
Start your removal process by focusing solely on the top decorative layer. Find a corner or edge where you can start, then use a sharp utility knife to carefully lift a small section of the face layer.
Once you have a good grip, slowly and patiently peel away as much of this top layer as possible. The goal is to expose as much of the underlying backing paper as possible, which gives you direct access to the adhesive layer underneath.
Step 3: Wet the Backing Paper
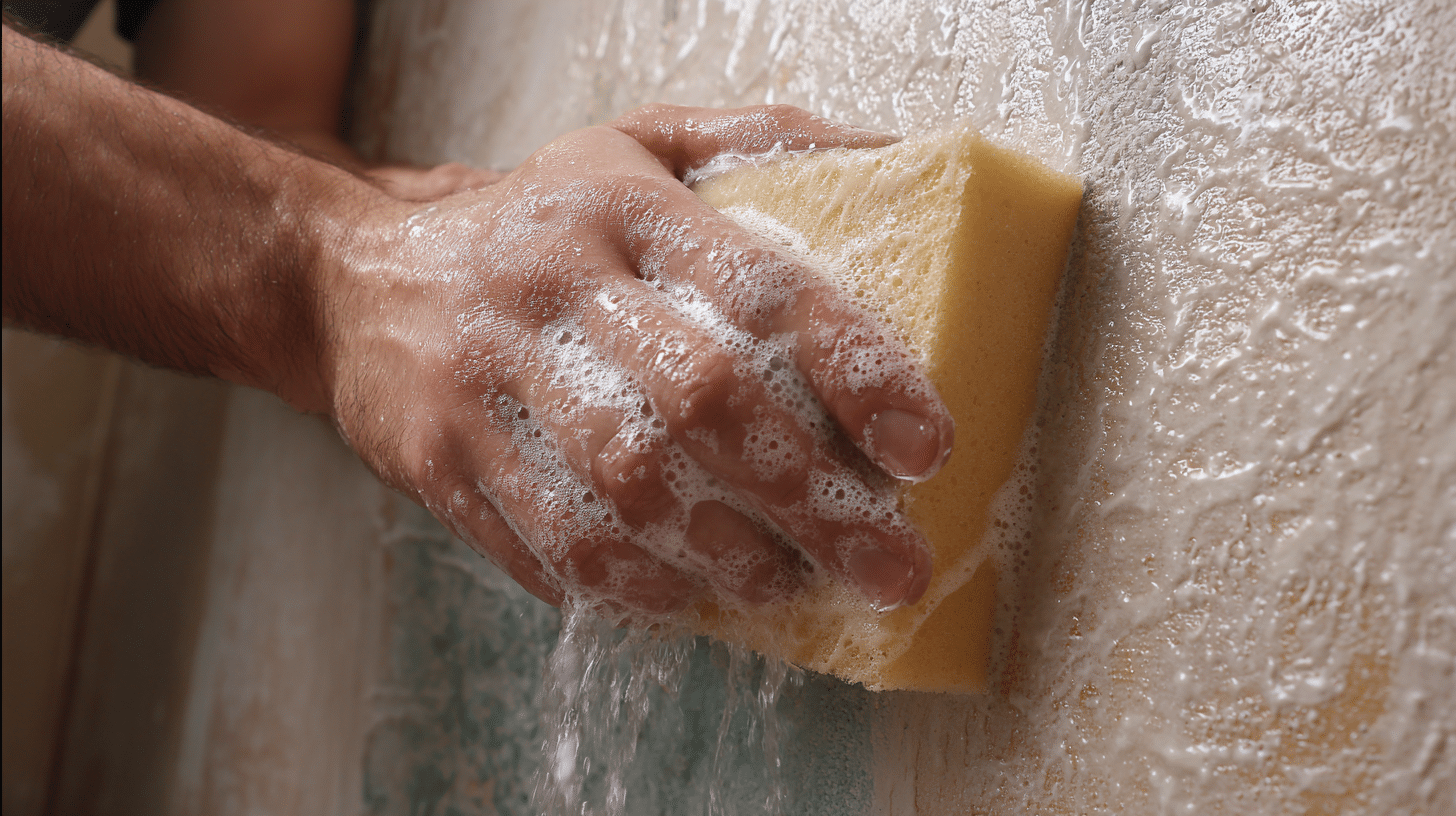
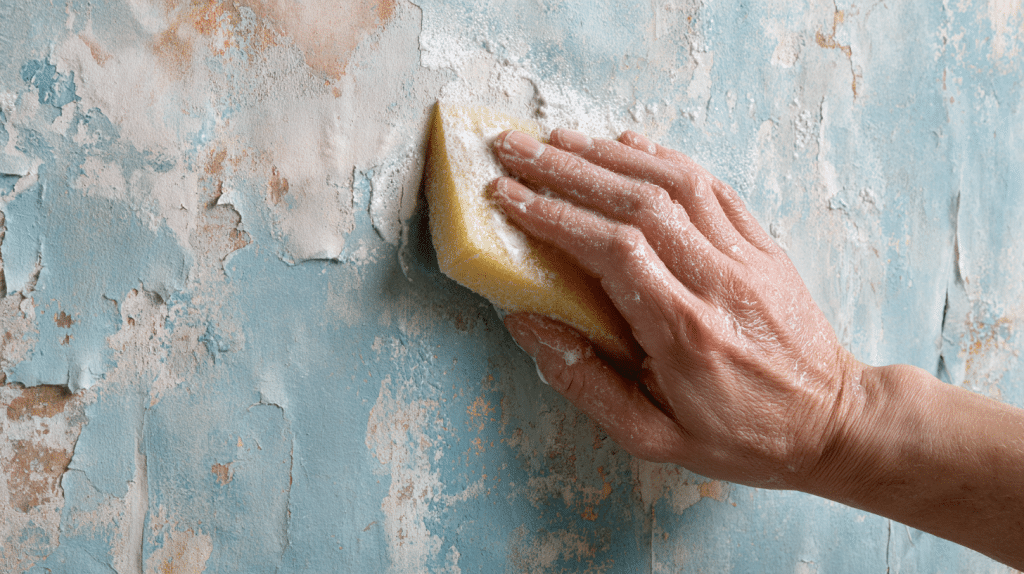
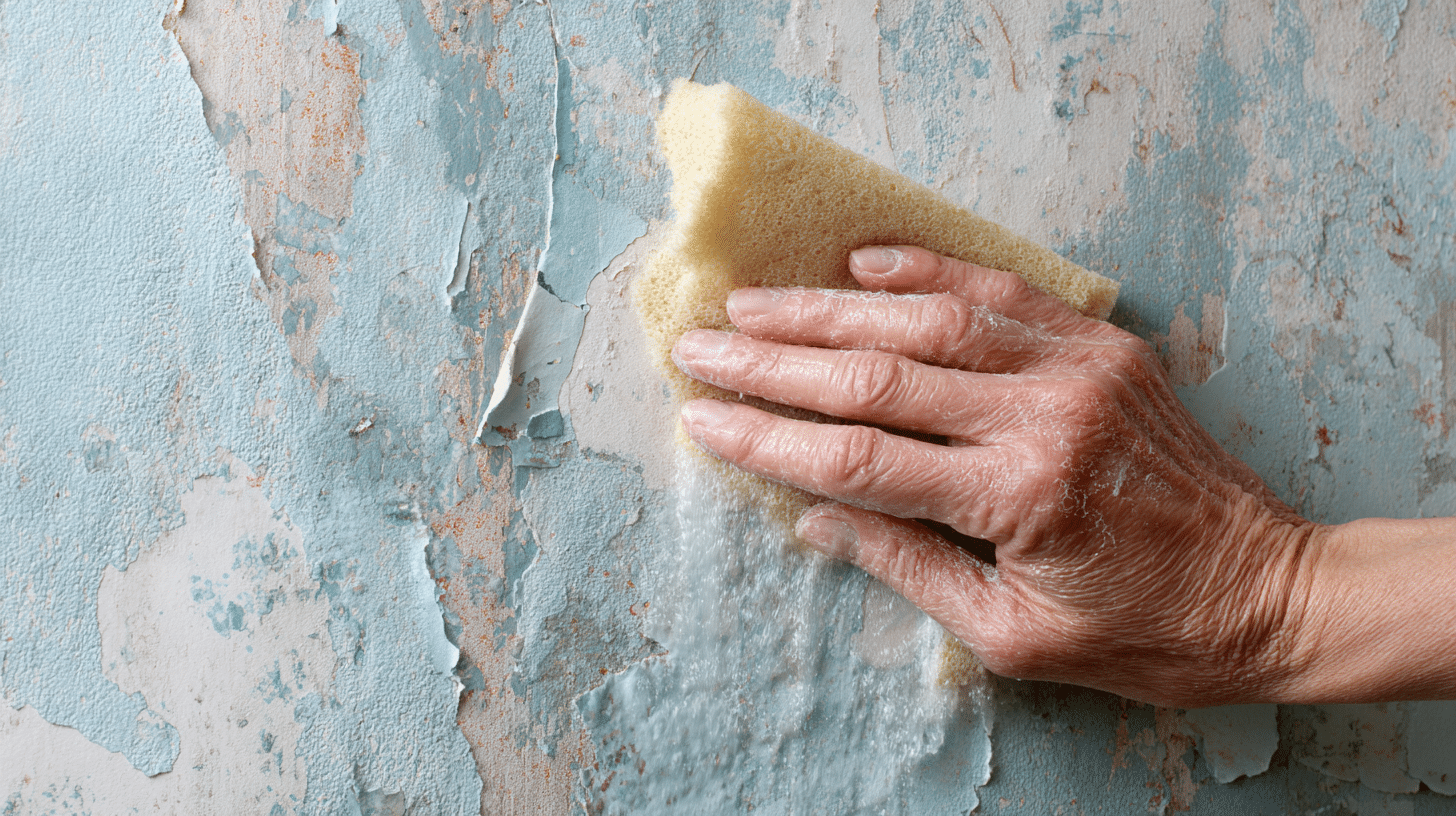
Once you have exposed the backing paper, it’s time to use water to soften the old adhesive. Get a large grouting sponge (the kind used for tile work) and a bucket of warm water.
Thoroughly soak the backing paper, applying enough water to soak through without creating puddles or allowing water to run down the wall and behind baseboards.
Work in 4- to 6-foot sections, ensuring the water soaks through the backing paper instead of just sitting on top. You’ll see the paper start to bubble and loosen when the water is working correctly.
The water must reach through to soften the old adhesive holding the wallpaper to your wall.
Step 4: Be Patient – Repeat the Wetting
Don’t rush to start scraping after just one application of water.
Instead, go over the same area with your wet sponge a minimum of 6-8 times, allowing 2-3 minutes between each pass for the water to penetrate deeper.
On previously painted walls, you may need fewer passes; however, on raw drywall or plaster surfaces, expect to wet the area 8 or more times. Keep re-wetting any areas that start to dry out during this process.
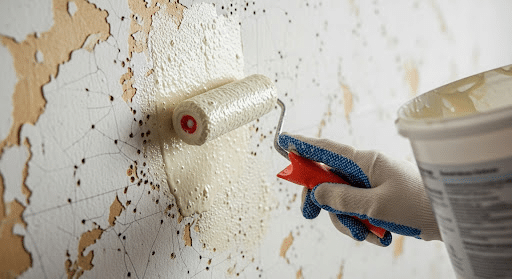
Step 5: Scrape Off the Backing
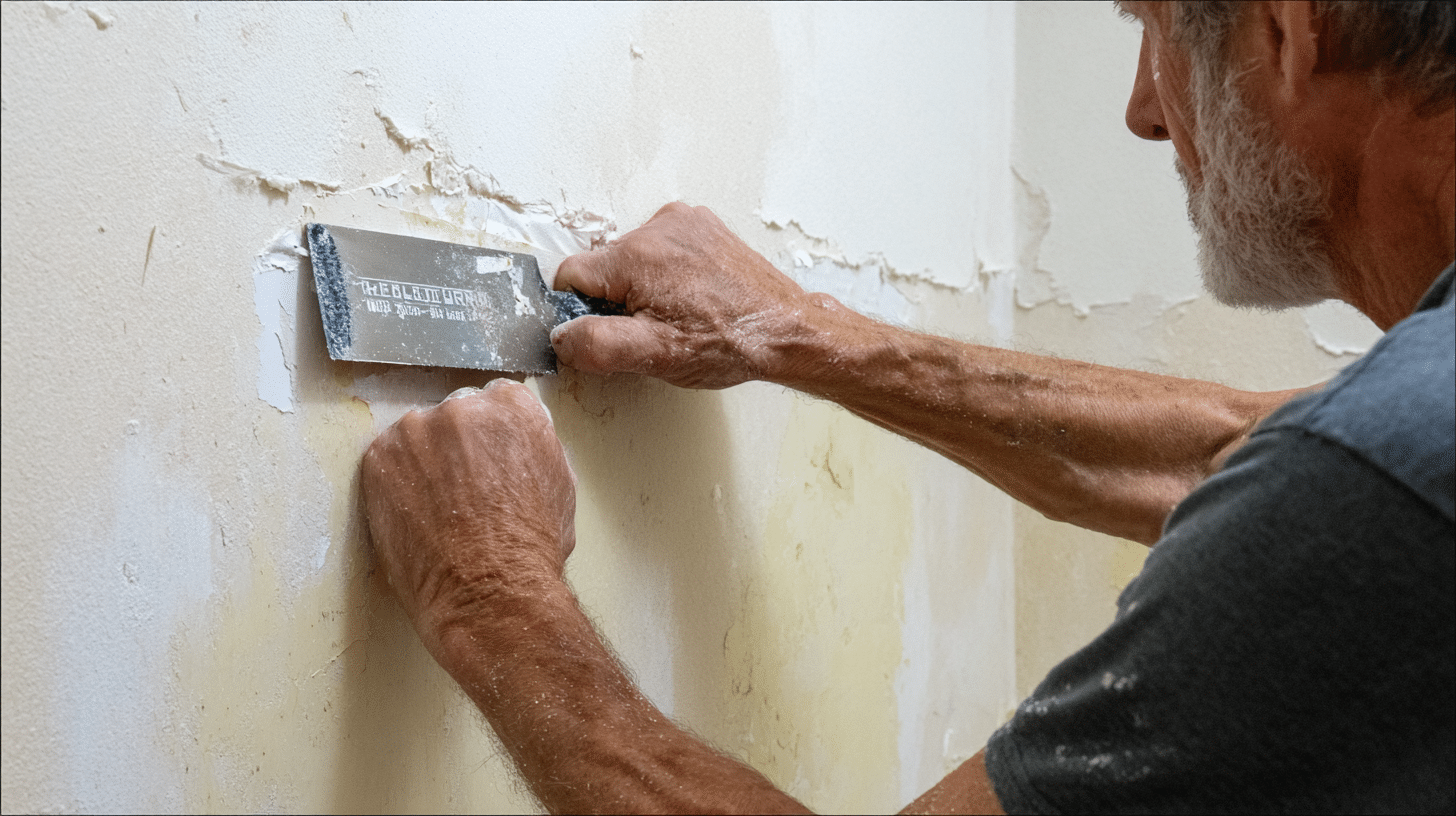
Once the backing paper feels soft and loose to the touch, it’s time to carefully remove it.
Use a 4-inch drywall knife, also known as a putty knife, as your scraping tool, holding it at a very shallow angle, almost parallel to the wall surface.
For tricky corners and edges, approach from the side rather than straight on, as drywall compound in corners often creates curves that make straight-on scraping difficult. Also, never press hard or try to force stubborn sections – this is how walls get marked and damaged.
If an area dries out while you’re working on other sections, give it another quick sponge with water.
Step 6: Clean and Prep for Next Steps
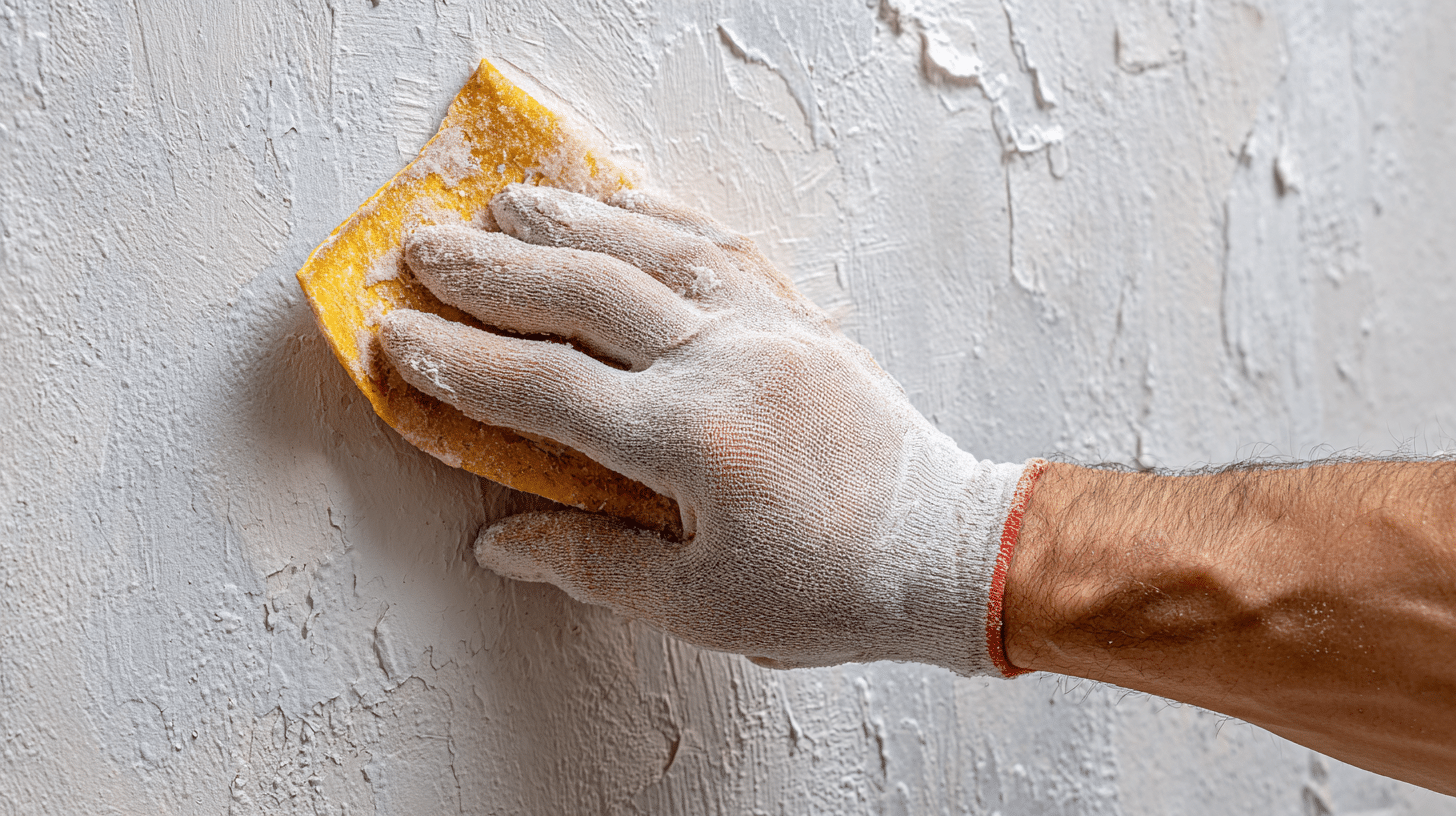
After all, the wallpaper has been successfully removed. Allow the wall to dry completely; this typically takes 24 hours, depending on the humidity and air circulation.
Once dry, inspect the entire wall surface for any remaining residue or rough spots.
Use fine-grit sandpaper to lightly sand any rough areas, and apply a foaming compound to fill small holes or gouges. Taking time with this final preparation step ensures a smooth, professional-looking result.
For more detailed instructions on how to take off wallpaper, refer to this video: How to Remove Wallpaper by Home RenoVision DIY.
Different Ways for Sturbon Wallpaper Removal
These professional-grade removal methods address the most challenging wallpaper situations when traditional water soaking is insufficient.
Learn when and how to use steam heat and chemical strippers for stubborn, multiple-layer, or vinyl wallpapers that resist standard removal techniques.
Steam Removal Process
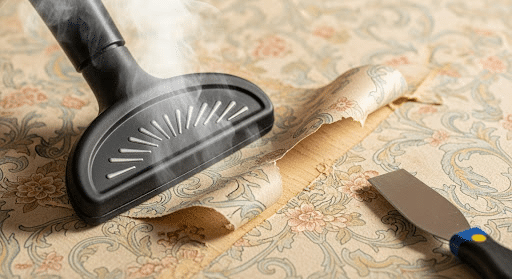
The steam removal process utilizes a specialized wallpaper steamer to apply hot, moist heat that penetrates through the wallpaper layers and softens the old adhesive for easy removal.
Step 1: Get Your Steamer Ready
Rent or buy a wallpaper steamer from your local hardware store; most rental places charge around 25-40 dollars per day.
Choose one with a large water tank to minimize frequent refilling, and ensure it includes different-sized steam plates for corners and open wall areas.
Step 2: Prepare and Heat the Equipment
Fill the steamer with clean water to the marked fill line and plug it in.
Allow 10-15 minutes for proper heating – you’ll know it’s ready when steam flows steadily from the plate. Keep extra water nearby for refilling during the project.
Step 3: Apply Steam to Wallpaper
Hold the steam plate firmly against the wallpaper for 30-60 seconds, watching for edges to start curling or lifting as the adhesive softens. Avoid holding in one spot for too long to prevent damaging the wall underneath, especially on drywall surfaces.
Step 4: Remove While Hot
Immediately use a 4-inch putty knife to remove loosened sections while the adhesive is still warm and pliable. Work quickly but carefully. If the paper doesn’t come off easily, apply more steam rather than forcing it with the scraper.
Step 5: Work Systematically
Work in manageable 2-foot sections across the wall, completing each area before moving to the next.
For stubborn areas, re-steam as needed; older wallpapers may require multiple applications. Keep the steamer moving to prevent overheating.
Step 6: Final Cleanup and Preparation
Clean the wall with warm water to remove adhesive residue, then let it dry completely for 24-48 hours. Sand rough spots and patch any damage before applying primer or new wall treatment.
Chemical Stripper Method
The chemical stripper method utilizes commercial wallpaper removal solutions applied to scored wallpaper surfaces, enabling the chemicals to penetrate and break down the adhesive.
Step 1: Score the Wallpaper Surface
Use a scoring tool to create small holes about 12 inches apart across the wallpaper surface. This allows the chemical stripper to penetrate through the top layer and reach the adhesive.
Be gentle to avoid damaging the wall underneath.
Step 2: Apply Commercial Wallpaper Remover
Apply wallpaper stripper generously using a roller, brush, or spray bottle, following the manufacturer’s directions. Work in 4-6 foot sections for manageable coverage. Wear gloves and ensure good ventilation, as these products can be strong.
Step 3: Allow Proper Dwell Time
Allow the solution to sit for 15-30 minutes, as directed on the product label. Don’t rush – the chemicals need time to break down adhesive bonds.
You may see bubbling or loosening, which shows the stripper is working.
Step 4: Test Readiness
Gently lift a corner with a putty knife. If wallpaper peels easily, it’s ready. If still firmly attached, apply more stripper and wait another 10-15 minutes before trying again.
Step 5: Remove in Large Sections
Starting from the top, peel wallpaper away in large sheets. Use a putty knife for stubborn edges. For resistant areas, reapply stripper rather than forcing removal, which can damage walls.
Step 6: Thorough Cleanup
Wash the entire wall with clean water to remove all chemical residue. This prevents interference with future primer and paint. Allow 24-48 hours drying time before proceeding with repairs or painting.
Some Tips to Keep in Mind While Removing Wallpaper
Professional contractors utilize these insider techniques to simplify how to take off wallpaper. These budget-friendly methods can save you time, money, and frustration on your next project.
- Mix 1 part liquid fabric softener with 10 parts hot water in a spray bottle.
- Breaks down adhesive bonds effectively while costing much less than commercial removers.
- Use a heat gun on a low setting, keeping it moving 6-8 inches from the wall surface.
- Heat 2-foot sections for 30-60 seconds, then follow immediately with a putty knife.
- Use a sharp single-edge razor held almost flat against the wall for corners and trim areas.
- Always cut away from your body and replace dull blades immediately for safety.
The Bottom Line
How to take off wallpaper doesn’t have to be the overwhelming task many homeowners fear.
By following these six professional steps and understanding that patience is your most excellent tool, you can achieve clean, smooth walls ready for your next decorating project.
The key lies in working with the wallpaper’s natural structure rather than fighting against it – removing the decorative layer first, then using water and time to soften the backing paper and adhesive.
When dealing with decades-old wallpaper or stubborn adhesive, these proven techniques, combined with expert tricks, will help you tackle even the most challenging removal projects.