The secret I found out that big companies don’t want you to know: creating luxury lavender spray at home is ridiculously simple.
I’ve spent years testing different methods, and I’ve found out the perfect formula that costs pennies compared to store-bought versions.
I used to throw away dried lavender or let it gather dust in decorative bowls. But then I found out it holds concentrated essential oils that are released better through a simple extraction process than fresh lavender. My method works every time.
What separates my amazing homemade spray from disappointing versions? It’s not fancy equipment or rare ingredients.
I’m revealing the exact technique professional aromatherapists use but rarely share with the public. Make a batch once, and you’ll never buy commercial lavender spray again.
How Moss Ball Topiaries Bring Nature Indoors
Moss ball topiaries add a touch of green to your home without much work. These small, round plants may look fancy, but they are easy to care for. Let’s see why so many people love them.
What are Moss Ball Topiaries?
Moss ball topiaries are round balls of moss placed on stems or in pots. They come in many sizes, from tiny ones that fit on a desk to large ones that stand on the floor.
The green moss grows around a core, making a perfect round shape. Some moss balls sit in pretty pots while others stand on thin stems like little trees.
Benefits of Moss Ball Topiaries
- Easy to Care For: Most moss balls need water just once a week. You can mist them or dip them in water. They don’t need much light and grow slowly, so you won’t need to trim them often.
- Look Good Year-Round: Unlike flowers that die, moss stays green all year. This means your home looks fresh in every season.
- Clean the Air: Like other plants, moss helps clean the air in your home. It takes in bad stuff and puts out clean air.
- Fit in Small Spaces: Moss balls don’t need much room. You can put them on small tables, shelves, or even in tiny corners where other plants won’t fit.
Types of Moss Ball Topiaries
Moss ball topiaries bring a touch of green to any home. They come in many kinds, and each has its own look and needs. Here are the main types you can find in stores or make yourself.
- Japanese Kokedama Moss Balls: These moss balls come from Japan. They have plants growing out of them and don’t need pots. The moss holds the soil and plant roots inside like a natural pot.
- Preserved Moss Balls: These moss balls stay green without water. They are made from real moss that has been treated with plant-safe stuff to keep its color.
- Live Moss Balls: Live moss balls grow slowly over time. You need to mist them with water about once a week to keep them happy. They feel springy and very soft when you touch them.
- Fake Moss Balls: These look like moss but are made from other stuff, like fabric or plastic. They never need water and keep their shape forever. You can put them in sunny spots where real moss would die.
- Small, Medium, and Large Moss Balls: Moss balls come in many sizes. Small ones (1-2 inches) fit on shelves and window sills. Medium balls (3-5 inches) look good on tables and desks. Large ones (6-12 inches) make a big statement on floors or large tables.
- Ways to Show Your Moss Balls: Some moss balls sit on thin stems like little trees. Others rest in pretty pots or bowls. You can hang some from the ceiling to save space.
Moss ball topiaries add green to your home without much work. Whether you pick real, preserved, or fake ones, they bring a calm, natural feel to any room.
Tools & Materials You’ll Need
| Item | Purpose |
|---|---|
| Planter (small, $1) | Holds the foam and completes the base of the topiary |
| Round foam ball | Forms the shape of the moss ball |
| Sheet moss | Covers the foam ball for a natural look |
| Loose decorative moss | Adds fullness and hides foam inside the planter |
| Small foam block/piece | Sits inside the planter to hold the stick securely |
| Willow wreath (or twigs) | Used to create the topiary “stem” |
| Hot glue gun + glue sticks | To attach all elements securely |
| Scissors or garden shears | To cut the willow branches or wreath strands |
Create a charming moss ball topiary with just a few budget-friendly supplies and simple steps. This DIY project adds a natural, stylish touch to any indoor space in no time!
Easy Steps to Make Your Own Moss Ball Topiary
Bring a touch of organic charm into your home with this easy, budget-friendly moss ball topiary.
Using supplies from the dollar store and a little crafting magic, you’ll create a piece that looks high-end but takes just minutes to make. Here’s how:
Step 1. Prep Your Planter Base
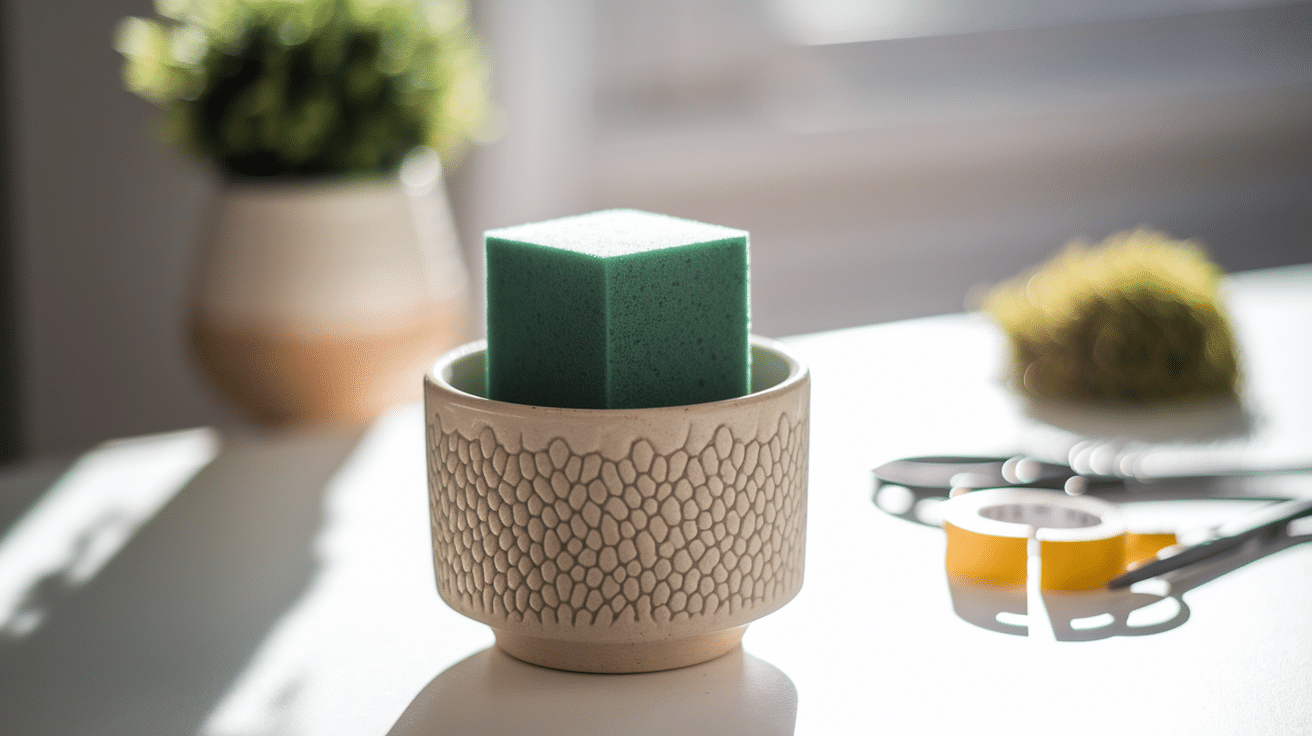
Place the small foam block snugly into the bottom of your planter. This will act as the foundation for your topiary’s “stem” and keep everything steady.
Step 2. Conceal the Foam with Moss
Layer a bit of loose decorative moss over the foam block in the planter. This step gives it a finished look and hides the mechanics underneath.
Step 3. Shape Your Willow Stem
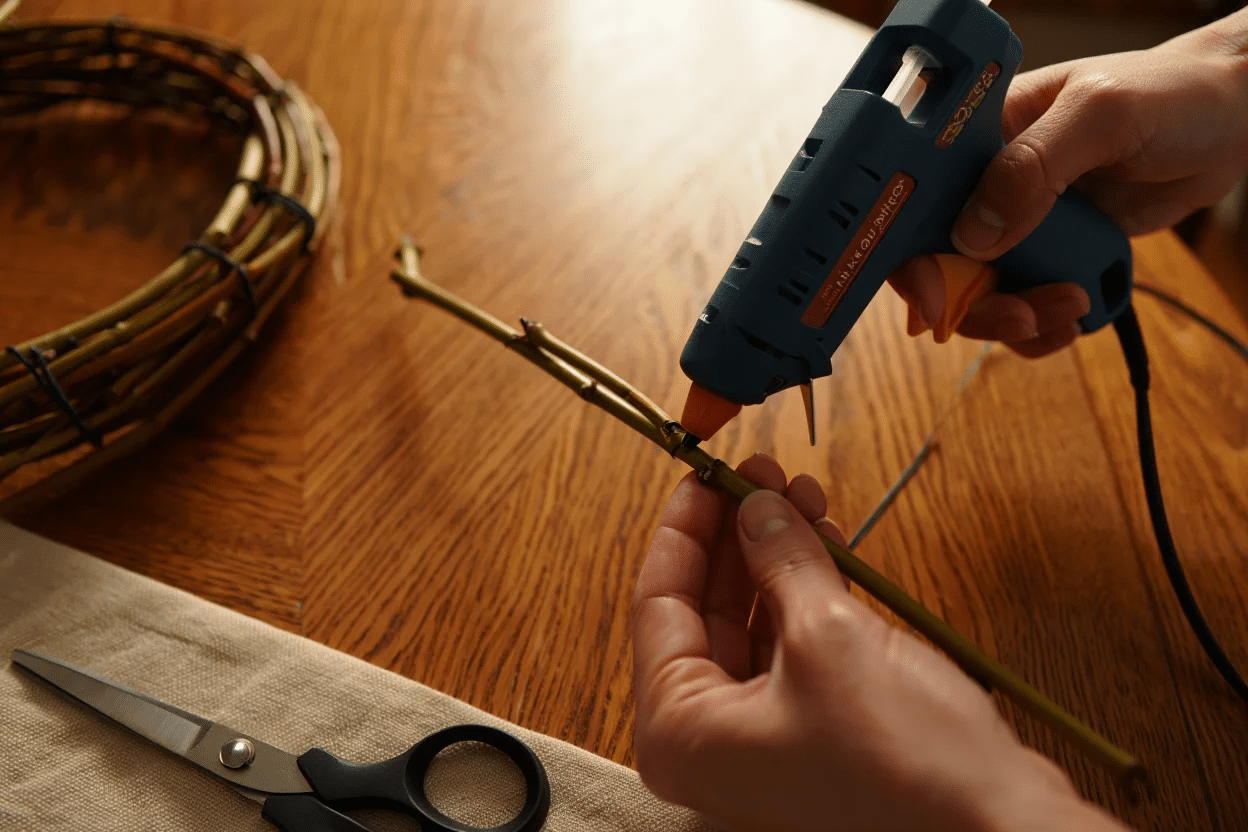
Take your willow wreath (available at most dollar stores) and gently unravel it. Use scissors to trim a few flexible branches. Hot glue the cut branches together at the ends to form a sturdy stem that looks rustic and organic.
Step 4. Create the Moss Ball Foundation
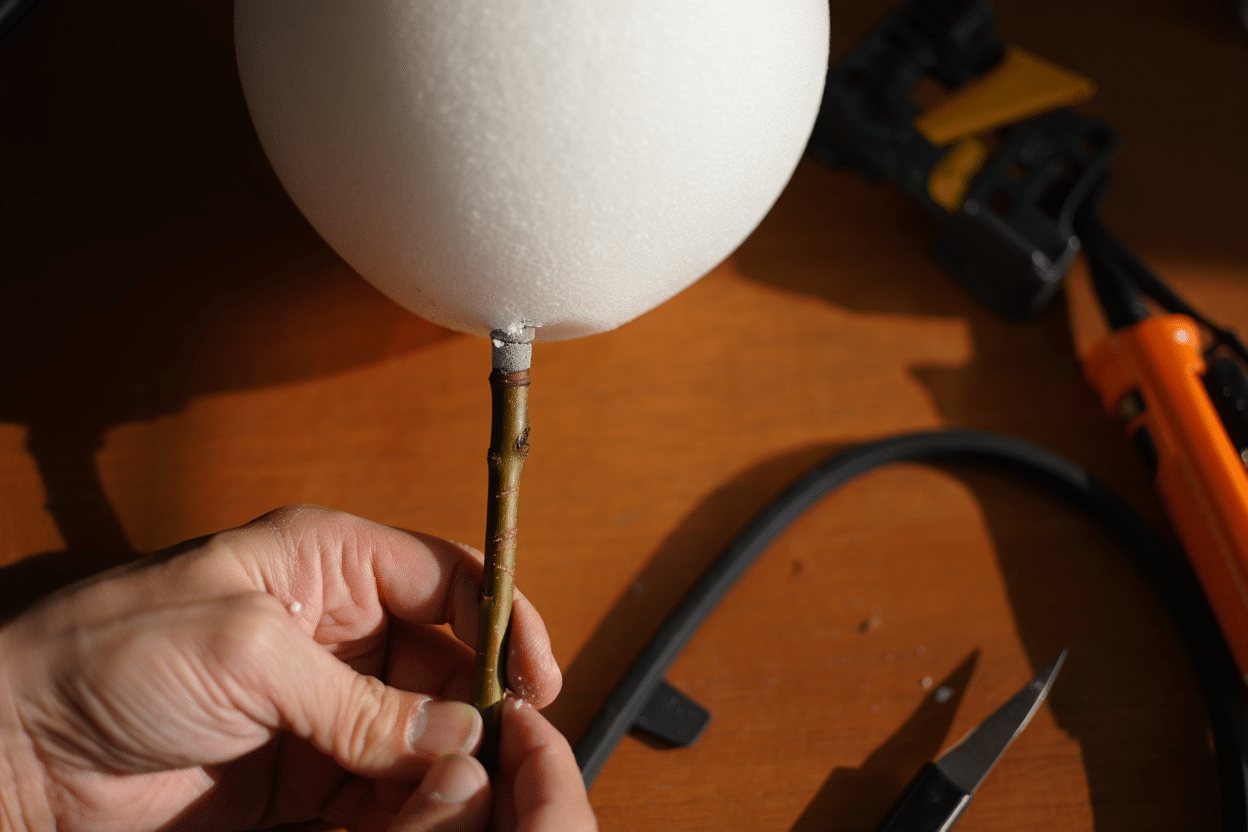
Take your round foam ball and press the bottom of your willow stem into it. This creates the classic topiary shape. Add a dab of hot glue at the base where the stick enters the foam for extra security.
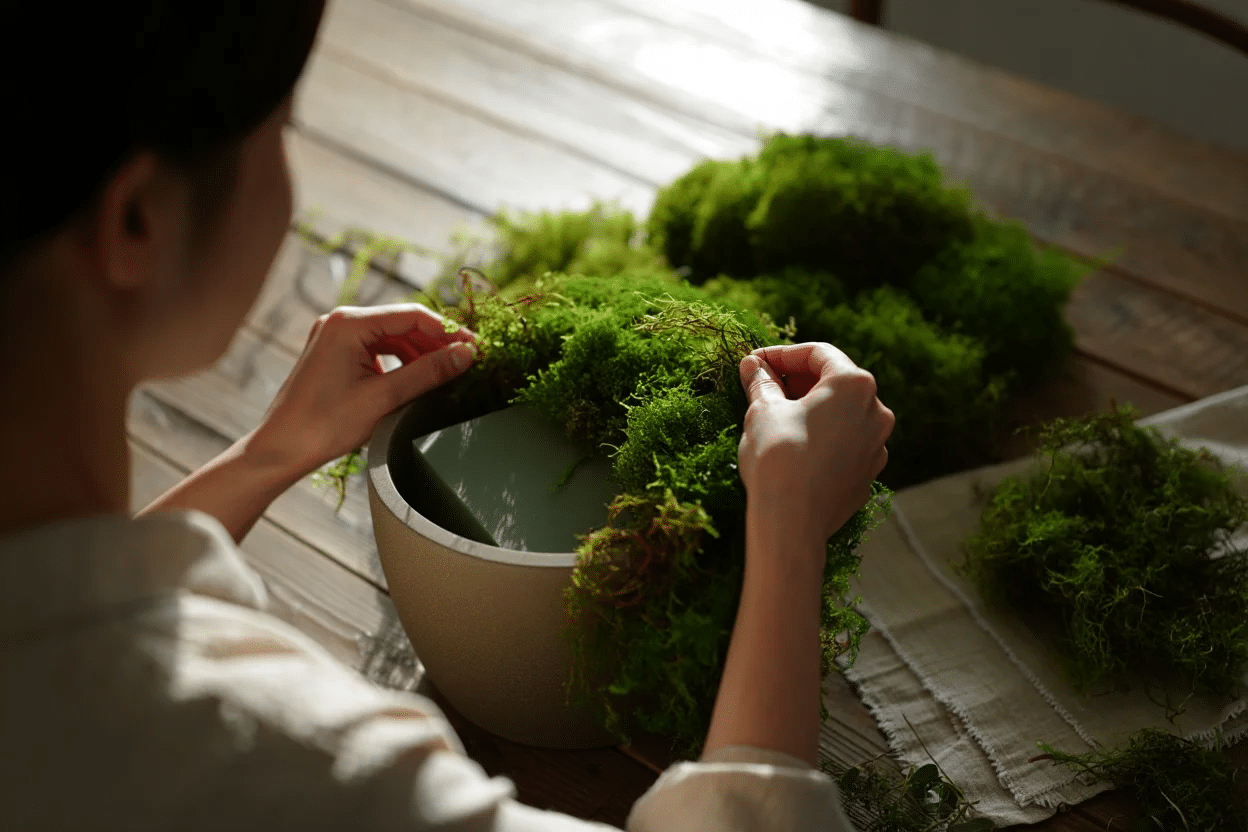
Step 5. Apply Moss to the Foam Ball
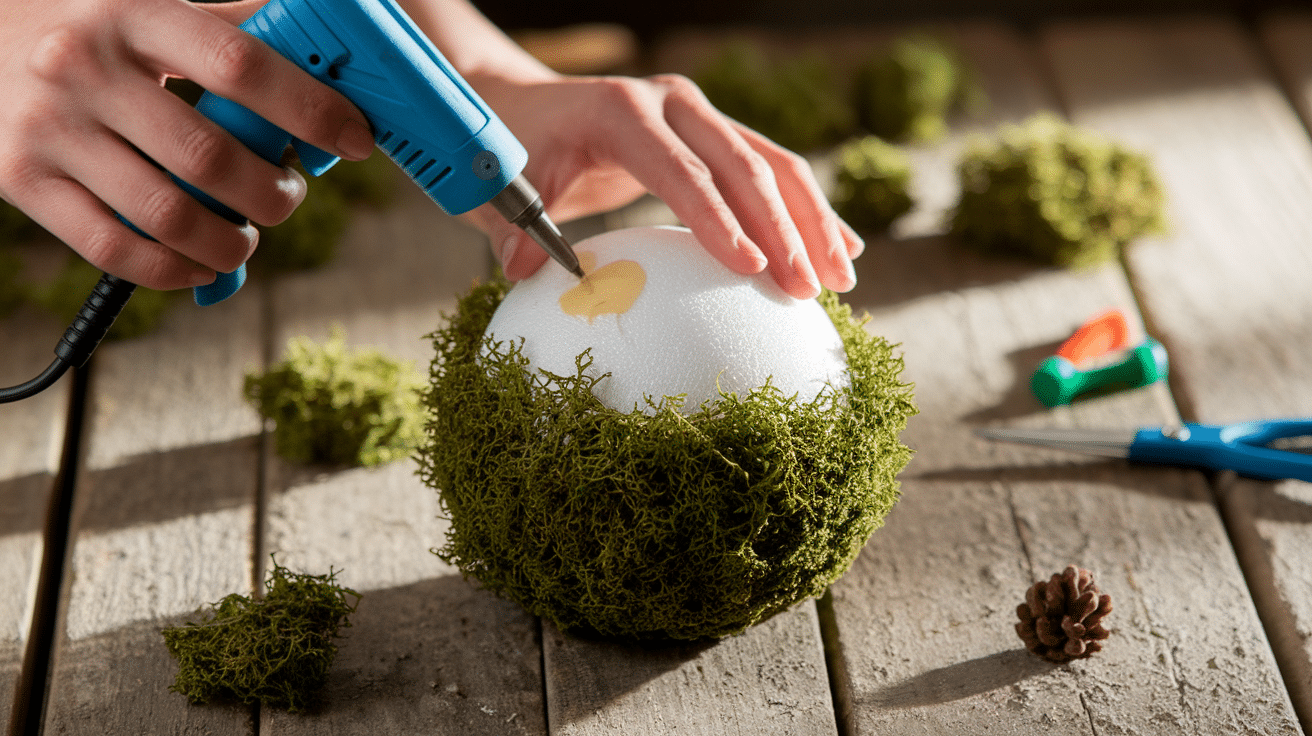
Using your hot glue gun, begin attaching sheet moss to the surface of the foam ball. Work in small sections, gently pressing the moss down to ensure full coverage. Layer pieces naturally to give it a full, lush appearance.
Step 6. Final Touches
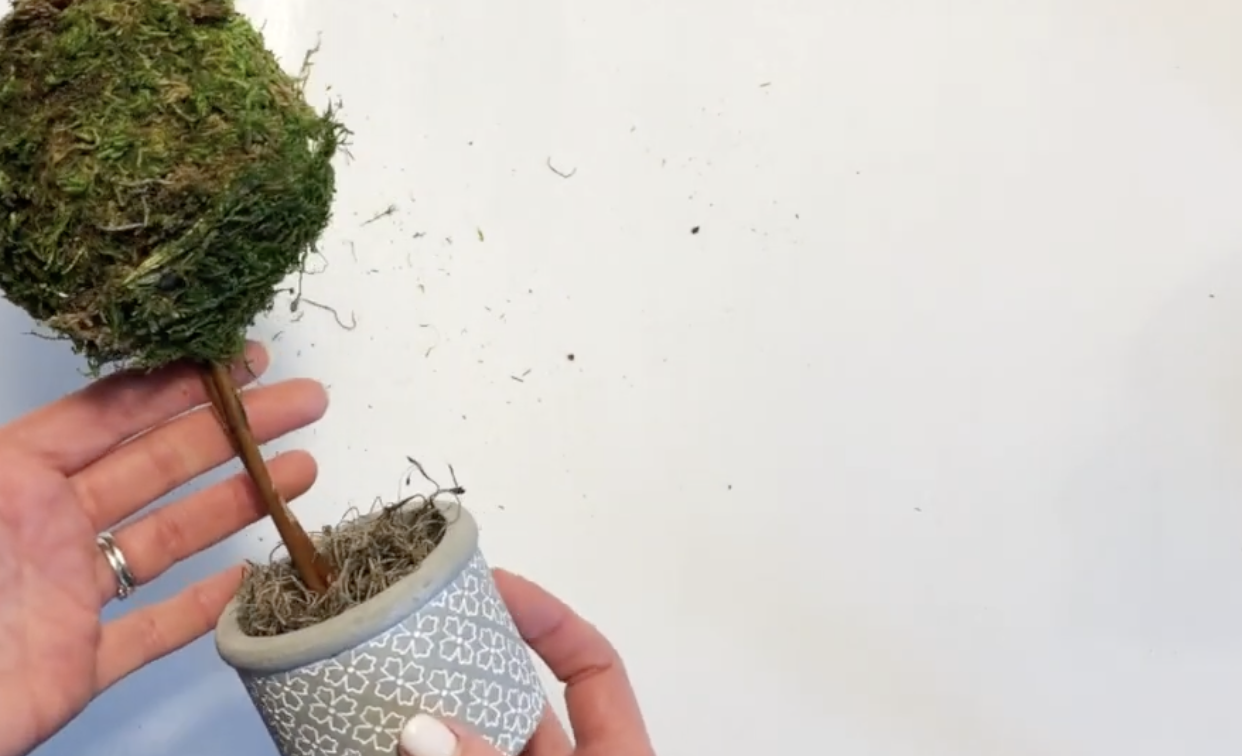
Fluff the moss at the base, adjust the branches if needed, and trim any excess moss from the ball. Your adorable DIY topiary is now ready to bring a cozy, garden-inspired vibe to any room!
For More Detailed Instructions:
Fresh Decorating Ideas Using Moss Ball Topiaries
Moss ball topiaries offer a versatile, nature-inspired accent that can elevate any room or event with minimal effort. Here are some fresh, creative ways to decorate with them:
- Centerpieces with a Twist: Place a moss ball topiary in a vintage pot or urn and surround it with candles or floral sprigs for an eye-catching dining table or coffee table centerpiece.
- Bookshelf & Mantel Accents: Tuck small topiaries between books, vases, or photo frames on a bookshelf or fireplace mantel to bring an earthy balance to hard lines and flat surfaces.
- Wedding or Party Decor: Use a group of moss ball topiaries in varying heights as stylish aisle markers or reception table décor. Add fairy lights or ribbons for extra charm.
- Seasonal Displays: Swap out accessories like base pots, decorative elements, or ribbons seasonally—pastels in spring, rustic tones in fall, and metallics for the holidays.
- Entryway Welcome: Greet guests with a welcoming display of tall moss ball topiaries flanking your front door or entry console, setting a green and serene tone.
How to Care for Moss Ball Topiaries
Taking care of moss ball topiaries is easy and fun. Follow these simple steps to keep your moss balls healthy and green.
Use the Right Water
Use clean, dechlorinated tap water or spring water. Avoid distilled water because it doesn’t have the minerals moss balls need. Change the water every one to two weeks to keep it fresh.
Give Indirect Light
Place your moss ball topiary in a spot with low or indirect sunlight. Too much direct sunlight can turn the moss brown or cause it to lose its shape.
Keep the Water Cool
Moss balls like cool water, between 65–75°F (18–24°C). Don’t let the water get too hot or too cold. Sudden temperature changes can stress the moss ball.
Roll the Moss Ball
Gently roll the moss ball in your hands every couple of weeks. This helps it keep its round shape and lets all sides get some light.
Clean the Moss Ball
When you change the water, you can gently squeeze the moss ball to remove old water and dirt. Rinse it under cool water if needed.
Avoid Overcrowding
If you have more than one moss ball, make sure they have space to move a little in the water. This helps them stay around and healthy.
Add a Little Fertilizer (Optional)
If your moss ball looks pale, you can add a tiny pinch of aquarium plant fertilizer to the water once in a while. Don’t use too much.
With these easy steps, your moss ball topiary will stay healthy and look great in your home!
Eco-Friendly & Sustainable Moss Decor Tips
- Use preserved or sustainably harvested moss for your decor.
- Avoid chemical sprays, pesticides, or fertilizers.
- Use recycled or natural materials for frames and bases.
- Dust moss gently with a soft brush or cloth.
- Pair moss with stones, wood, or dried flowers for a natural look.
- Share and teach others about eco-friendly moss decor choices.
By following these tips, you can enjoy beautiful moss decor that’s gentle on the environment, easy to care for, and helps create a healthier home.
The Bottom Line
I’ve found out that moss ball topiaries offer a simple way to bring natural beauty indoors, even for those without green thumbs. In my experience, these versatile decorations come in many styles to match any home.
So what’s my takeaway? I’ve found that starting with moss balls gives me the joy of greenery without the typical houseplant challenges I faced with other plants.
Ready to try moss ball topiaries yourself?
I recommend starting with one style that matches your care level, then expanding your collection as you gain confidence.