Your kitchen cabinets look outdated, and you’re tired of staring at those dark, worn surfaces every day. I get it. Most homeowners feel the same way when their cabinets start showing their age.
You can change your entire kitchen without breaking the bank. Painting your cabinets white is one of the most cost-effective ways to give your kitchen a fresh, modern look.
In this tutorial, I’ll walk you through every step of painting cabinets white of your kitchen. You’ll learn how to prep the surfaces properly, choose the right paint, and apply it like a pro.
By the end, you’ll have beautiful white cabinets that look professionally done. Let’s get started on your kitchen makeover.
Painting Cabinets without Sanding: To Do or Not to Do
Yes, it’s possible to paint kitchen cabinets without traditional sanding, but the approach requires careful preparation.
Instead of sanding, homeowners can use a deglosser or liquid sandpaper to remove the existing finish’s shine. This chemical solution etches the surface and creates a texture that paint can grip.
However, this method works best on cabinets in good condition. If the existing finish is peeling, cracked, or heavily damaged, light sanding becomes necessary. The key is thorough cleaning first, then applying the deglosser according to the manufacturer’s instructions.
While skipping sandpaper saves time, proper surface preparation remains critical for long-lasting results that won’t chip or peel.
How Much Will Painting Cabinets Cost?
Painting kitchen cabinets can be a budget-friendly way to give your kitchen a fresh, updated look without a full remodel. The cost mainly depends on the type of paint, preparation materials, and tools you use.
- Typically, you can expect to spend about $300 to $500 on paint and supplies if doing it yourself.
- A dark primer transitioning to white requires a dark primer that would generally cost around $20-$40 per quart.
- Paint supplies like brushes, rollers, steam cleaner, caulk, sprayer rental or purchase, these can add to the cost depending on what you already own; total additional supplies could be within $50 to $150.
- A multi-purpose sealer to add durability would cost around $20-$40.
How to Paint Kitchen Cabinets Without Sanding
Painting kitchen cabinets without sanding is entirely possible using the right prep products and techniques. You’ll save time and effort while still achieving a smooth, durable finish, perfect for a quick kitchen makeover that skips the mess of sanding dust.
The following are steps to painting cabinets without sanding.
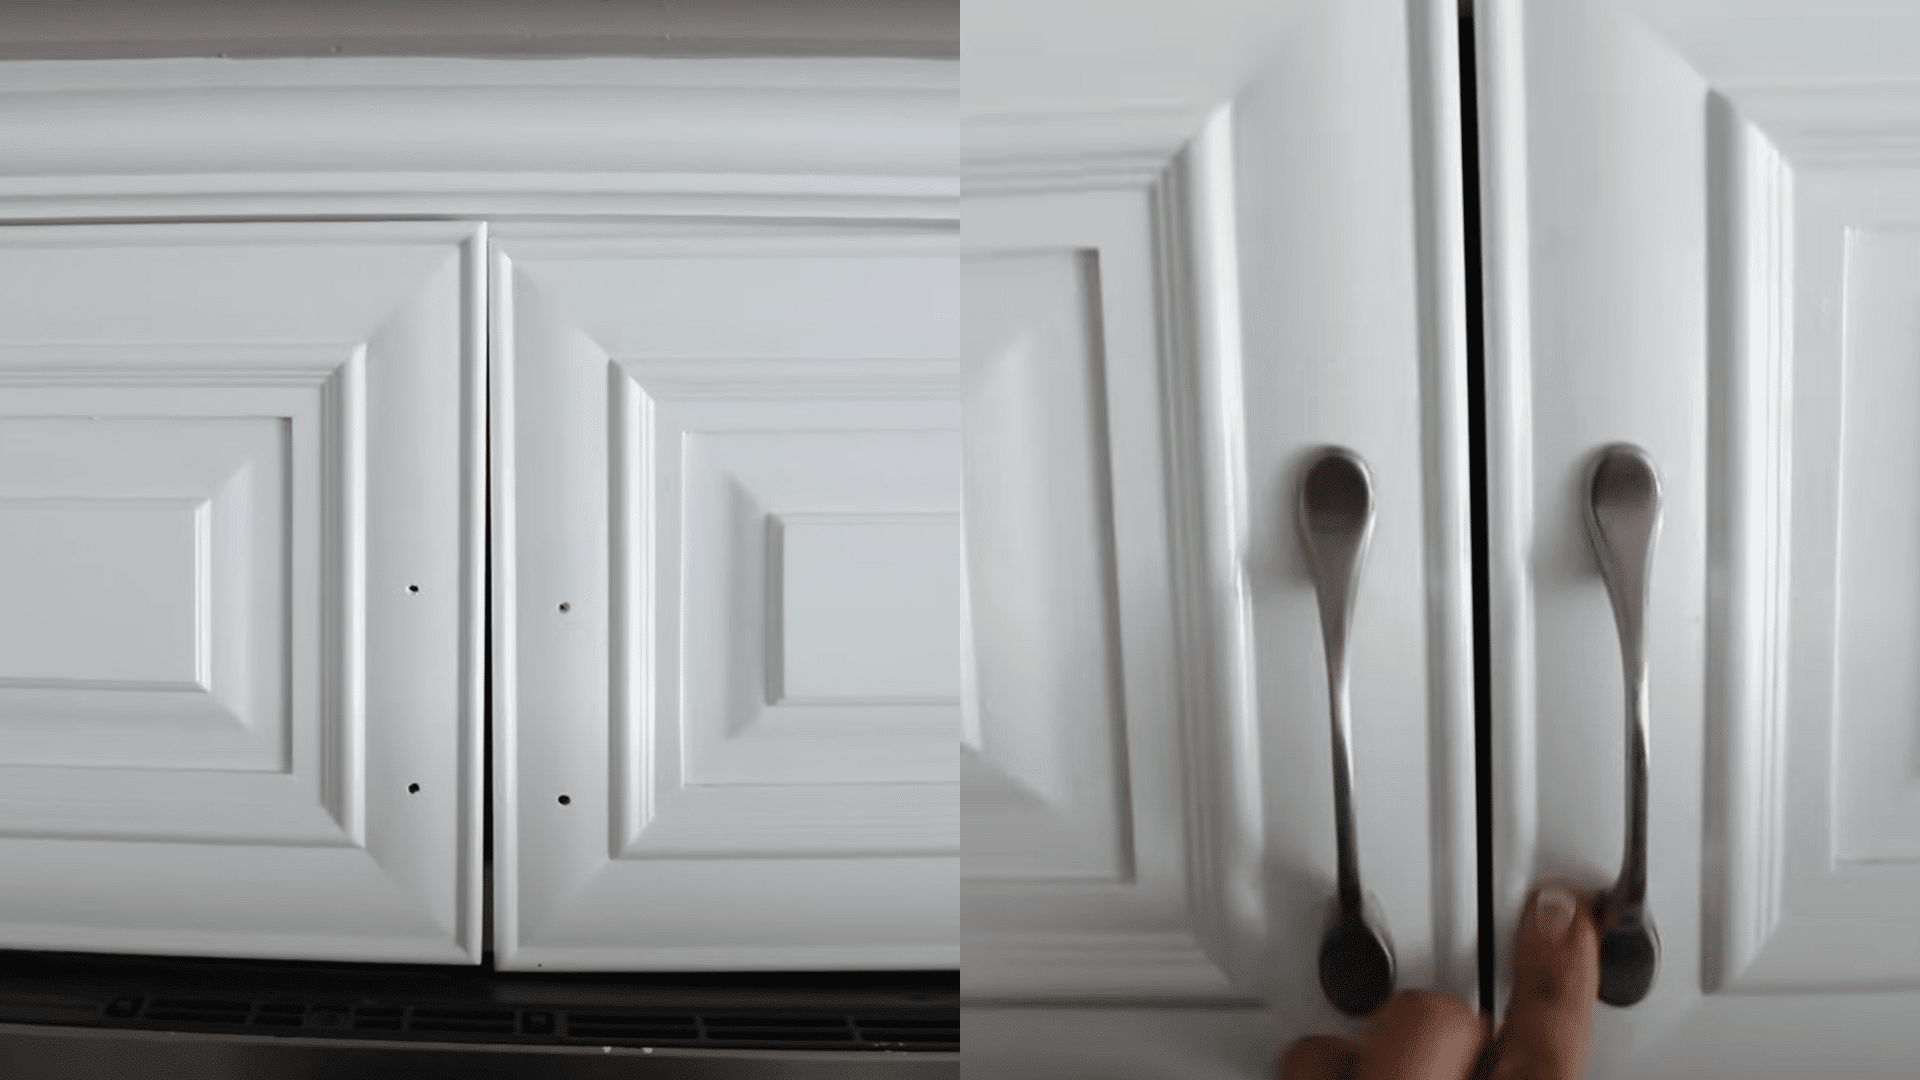
1. Remove Hardware and Prepare Cabinets
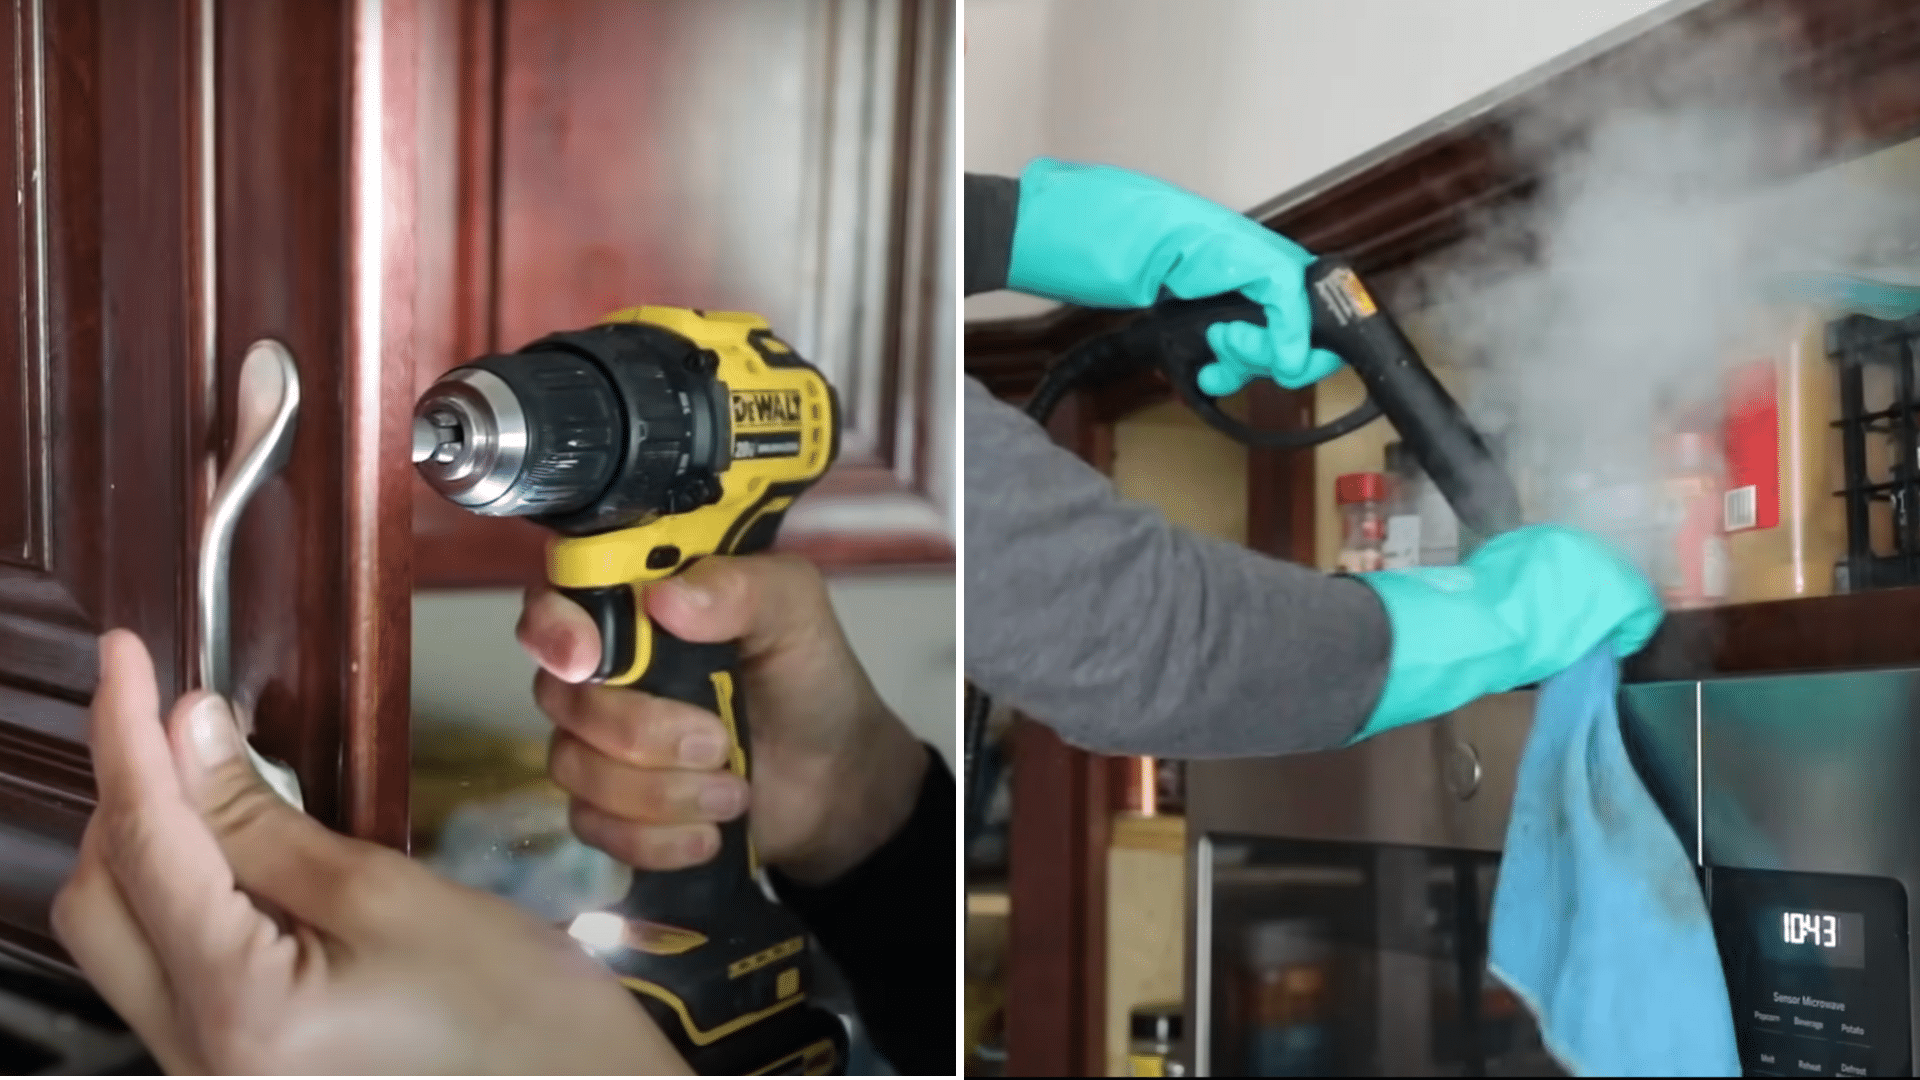
Start by removing all hardware, including knobs, hinges, and screws, from the cabinet doors. This ensures that nothing gets damaged and provides a smooth surface for painting. Store the hardware in a safe place to avoid losing it.
I used a steam cleaner to clean the cabinet doors and frames thoroughly, removing grease and debris. This step is crucial for good paint adhesion. Proper cleaning will prevent paint chips later, so don’t skip this step!
2. Priming the Cabinets
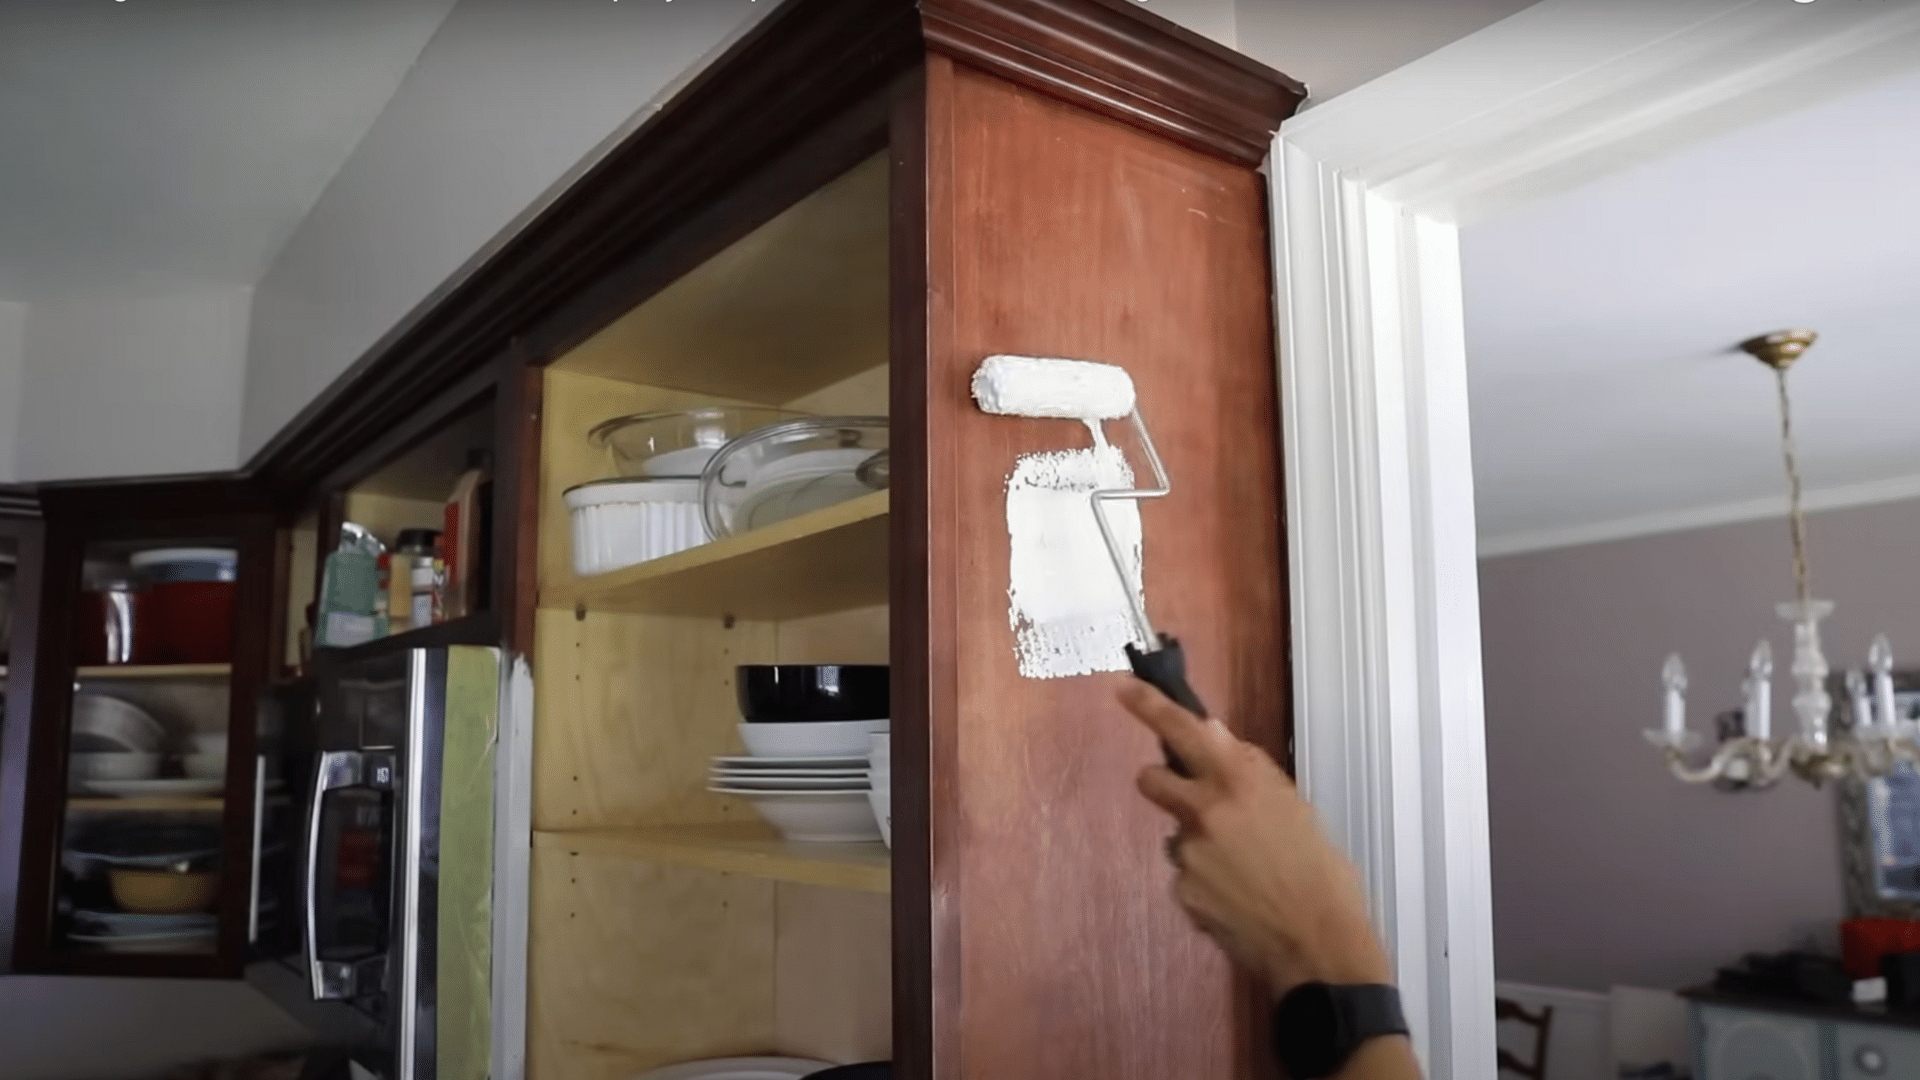
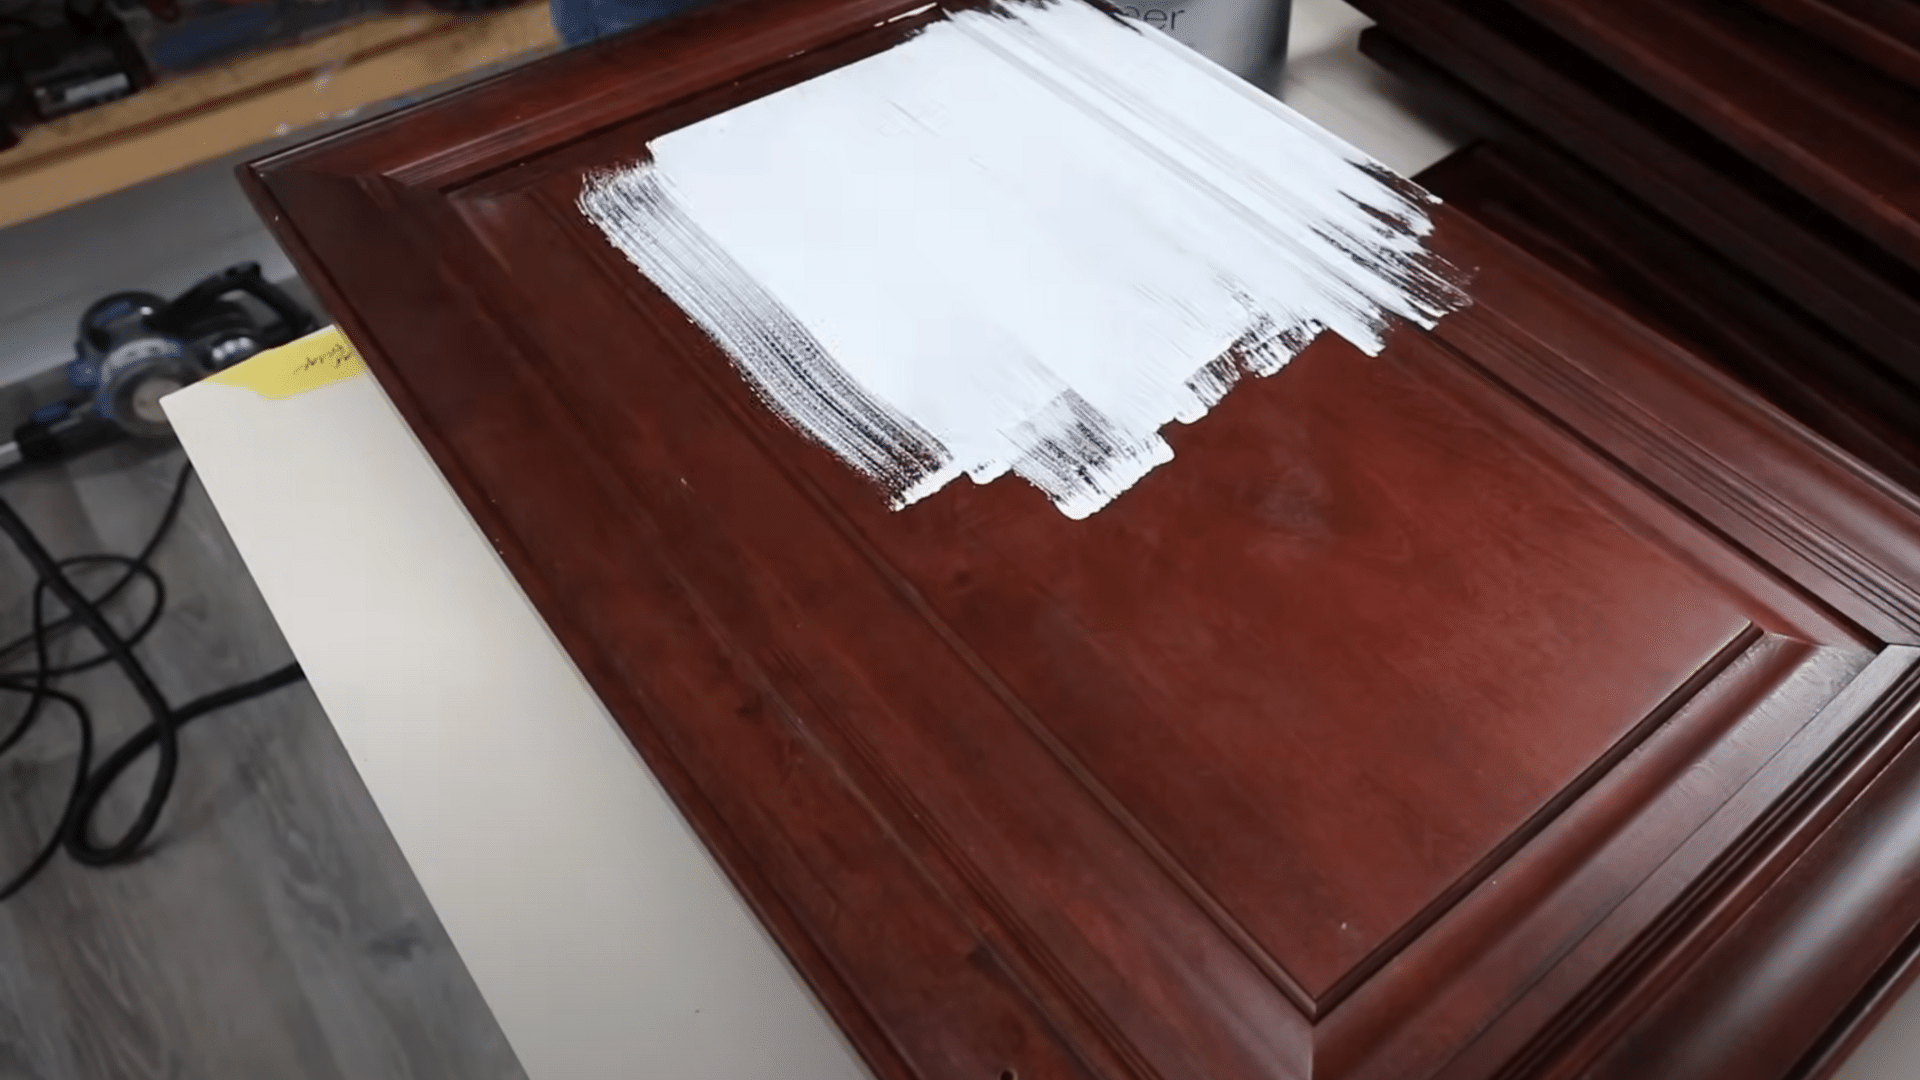
While sanding is an option, I opted to skip it to avoid excessive dust. Instead, I used an extreme bond primer that worked without sanding. If your cabinets are dark, you’ll need more primer coats to fully cover the dark wood.
Apply the primer with a roller and with a brush on the area where the roller might miss. Be patient with the priming process; at least two to three coats may be necessary, depending on the color and texture of your cabinets.
3. Choosing the Right Paint for a Smooth Finish
For a beautiful and durable finish that provides great coverage, even on dark wood. Since I didn’t want a perfectly smooth finish, I used a 4-inch nap roller for a subtle texture.
I started by applying a thin coat with a brush in hard-to-reach areas and followed up with the roller for an even look. The paint is thick, so applying a thin coat first with a brush is important to prevent streaking or uneven texture.
4. Use a Paint Sprayer for Faster Application
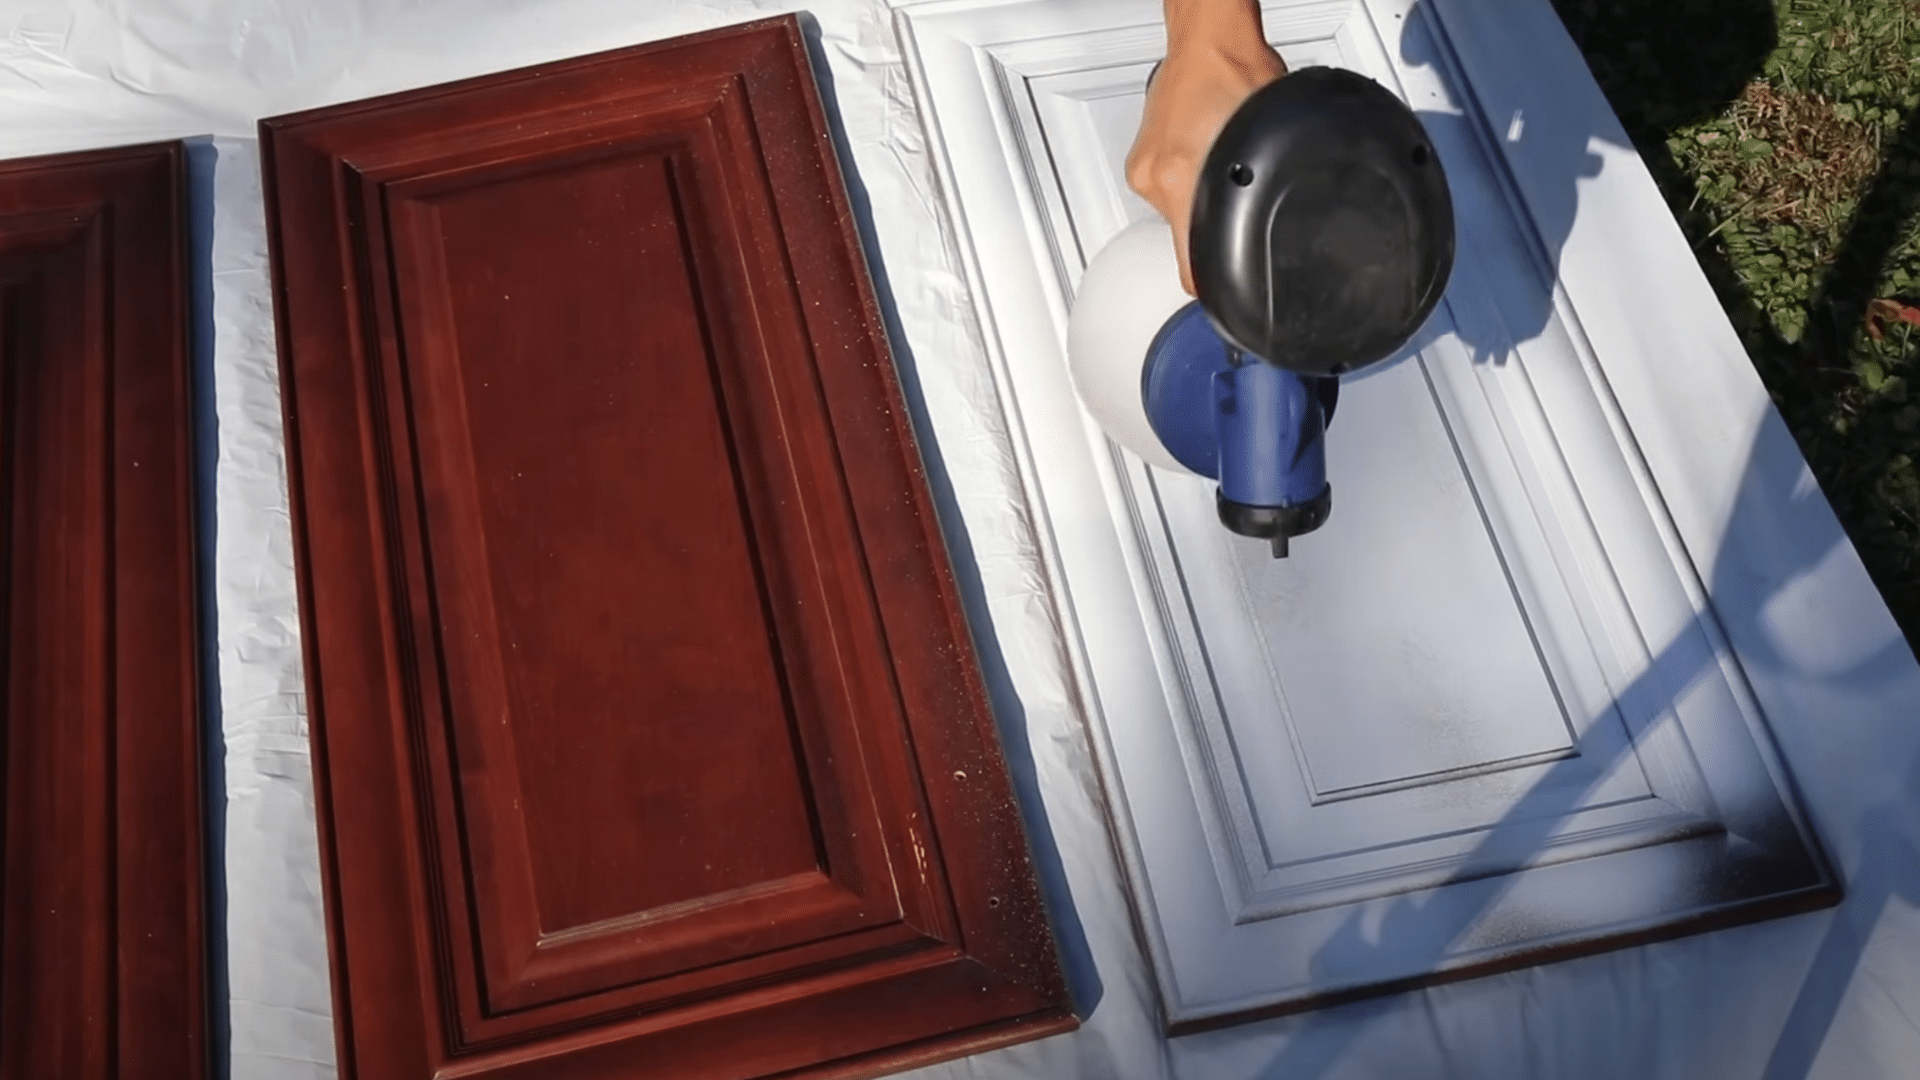
For larger cabinet doors, I recommend using a paint sprayer. Before spraying, test the paint consistency by adding some water to the paint to achieve the right viscosity. This allows the sprayer to apply an even coat.
Spraying is much faster and can cover large areas with less effort, but make sure you’re working in an area with good ventilation. Outdoor spaces are ideal for avoiding overspray inside your home. Remember, you’ll need multiple coats for complete coverage.
5. Apply Multiple Coats of Paint
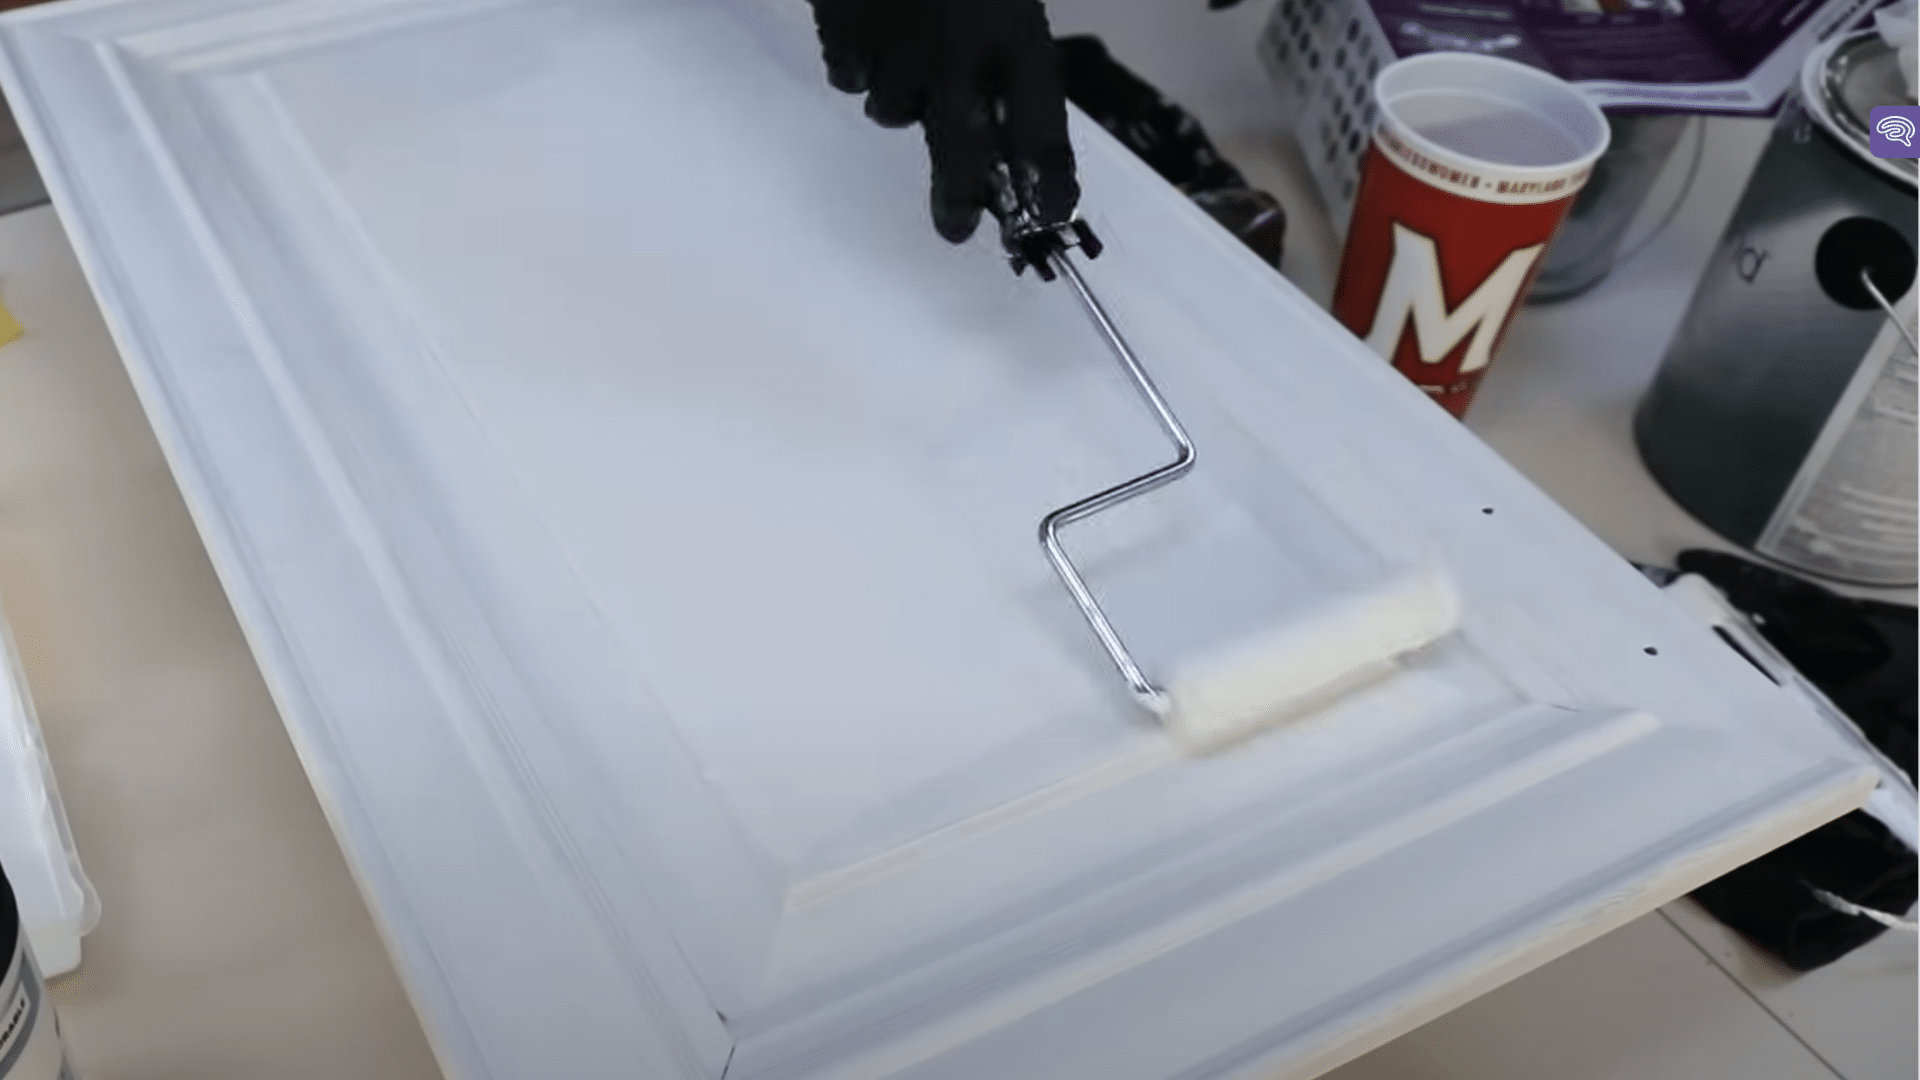
I applied two coats of the paint using a brush and a roller. This helps to avoid visible brush strokes while keeping a light texture. If you’re going for a flawless finish, consider using a paint sprayer.
I found that using the brush first in corners and crevices, then smoothing with the roller, worked best. Allow two hours of drying time between each coat, and be sure to flip the cabinet doors to paint the other side.
6. Seal the Cabinets for Durability

To add extra durability, I used a multi-purpose sealer. This is important, especially in high-traffic areas like kitchen cabinets, where they’ll be frequently touched. The sealer goes on milky but dries clear, ensuring a smooth finish.
I applied it with a brush, working the sealer into all the nooks and crannies, and followed up with a roller to even it out. Allow 24 hours for the paint to dry before applying the sealer.
7. Reassemble and Final Touches
Once everything is dry, carefully reassemble the cabinets. Make sure the doors are aligned properly. You can adjust the hinges using a screwdriver to get the perfect fit.
Don’t forget to check for any gaps or cracks along the edges of the doors or frames. If you notice any, use caulk to fill them before doing the final touch-ups. Reinstall the hardware, and your cabinets should look fantastic, bright, and refreshed.
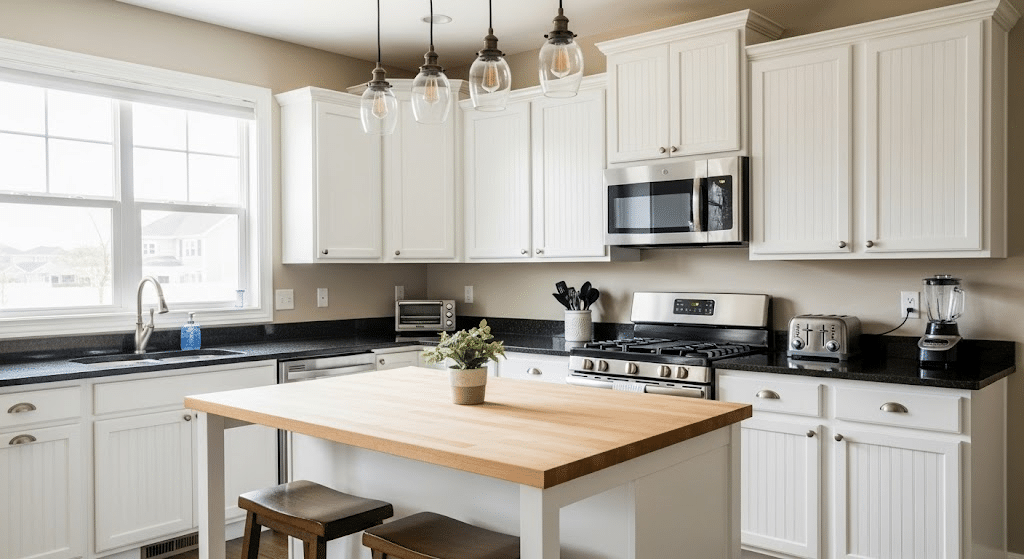
The Result
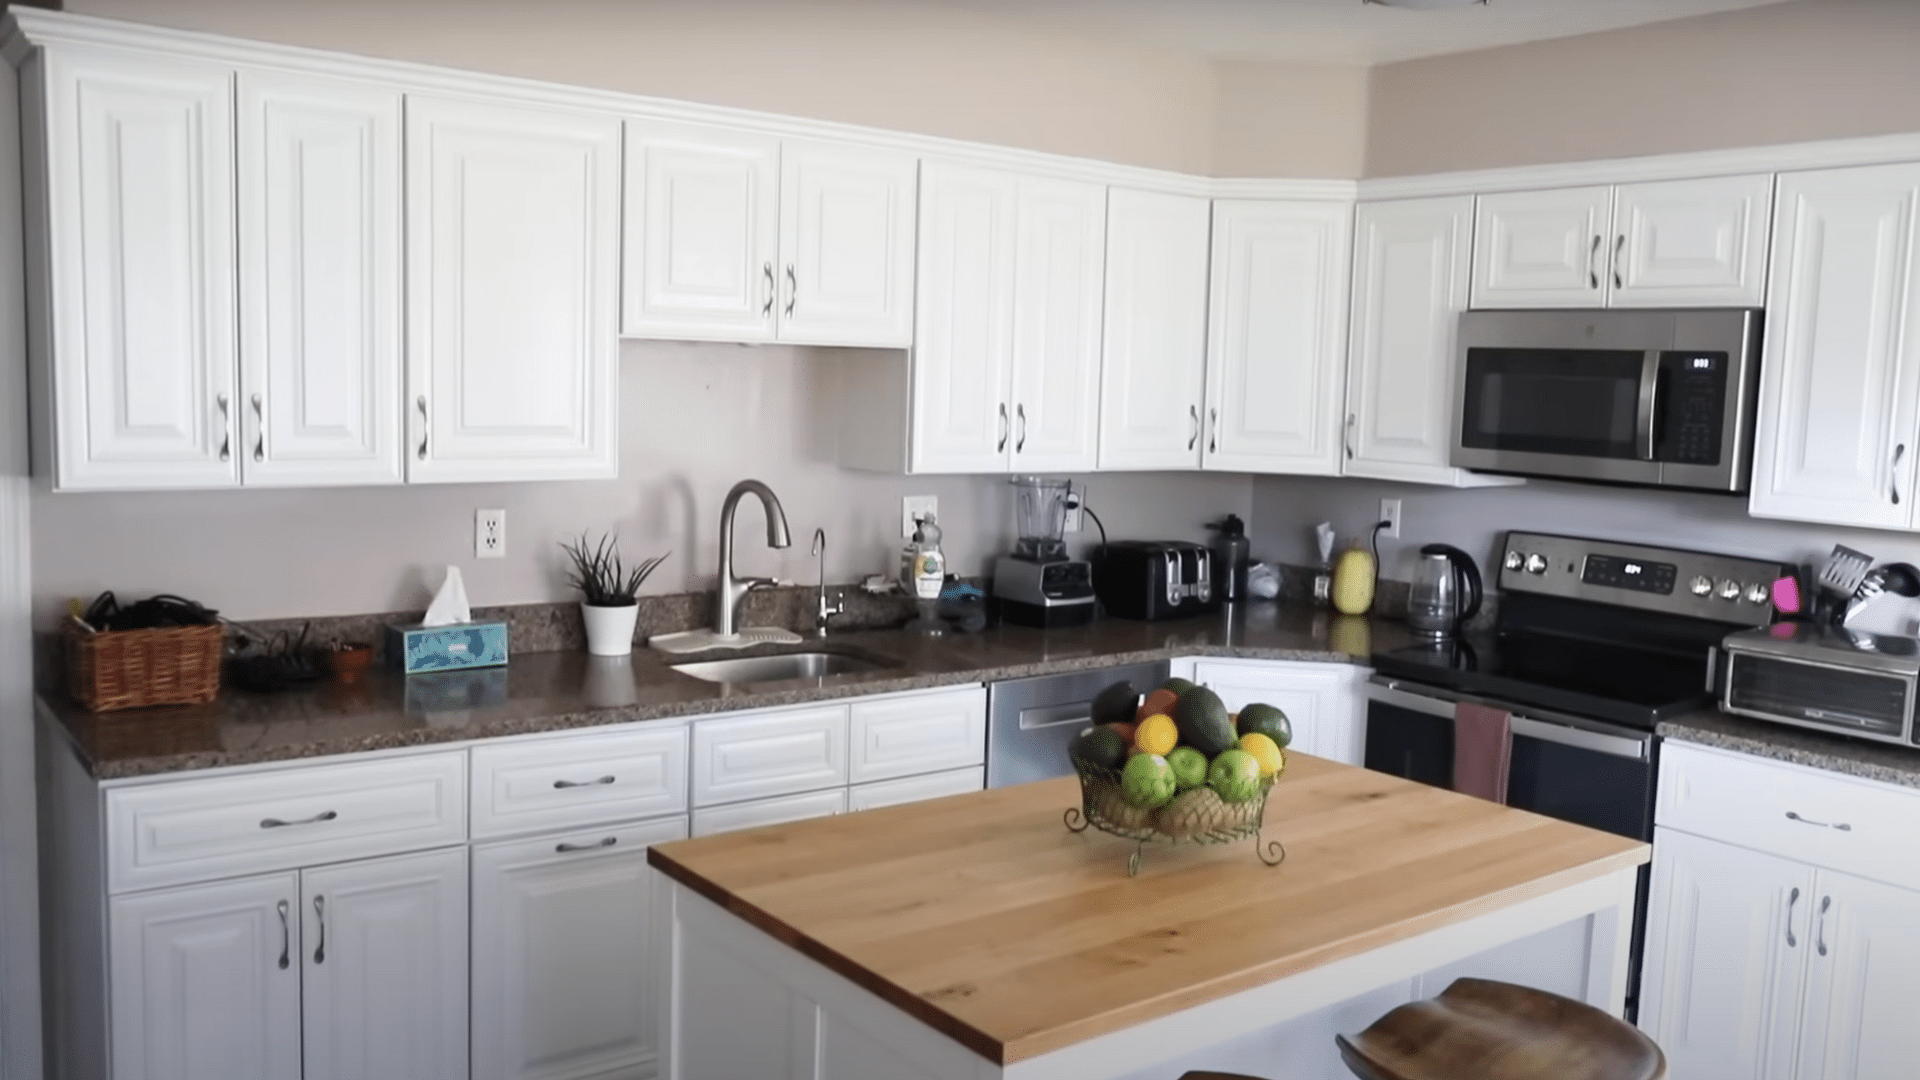
The finished painting my kitchen cabinets a fresh, bright white. The clean, crisp look instantly brightened the entire space, making it feel more open and modern.
I love how the white increases all the natural light and complements the wooden countertops perfectly.
Steps to Paint Cabinets With Sanding
To paint kitchen cabinets with sanding, start by thoroughly cleaning and removing hardware. Next, sand the surfaces to remove old finishes and create a smooth base for paint adherence. Sanding is key to a durable, professional finish.
Clean, Label, Remove, and Repair
Clean your cabinets with soapy water. Once dry, remove cabinet doors and number each on the hinge area using a sticker or marker.
Store hinges and screws inside the matching cabinet for easy reassembly. If changing hardware, use wood filler to patch old holes.
Smooth filler into holes with a putty knife and let it dry overnight for best adhesion before sanding.
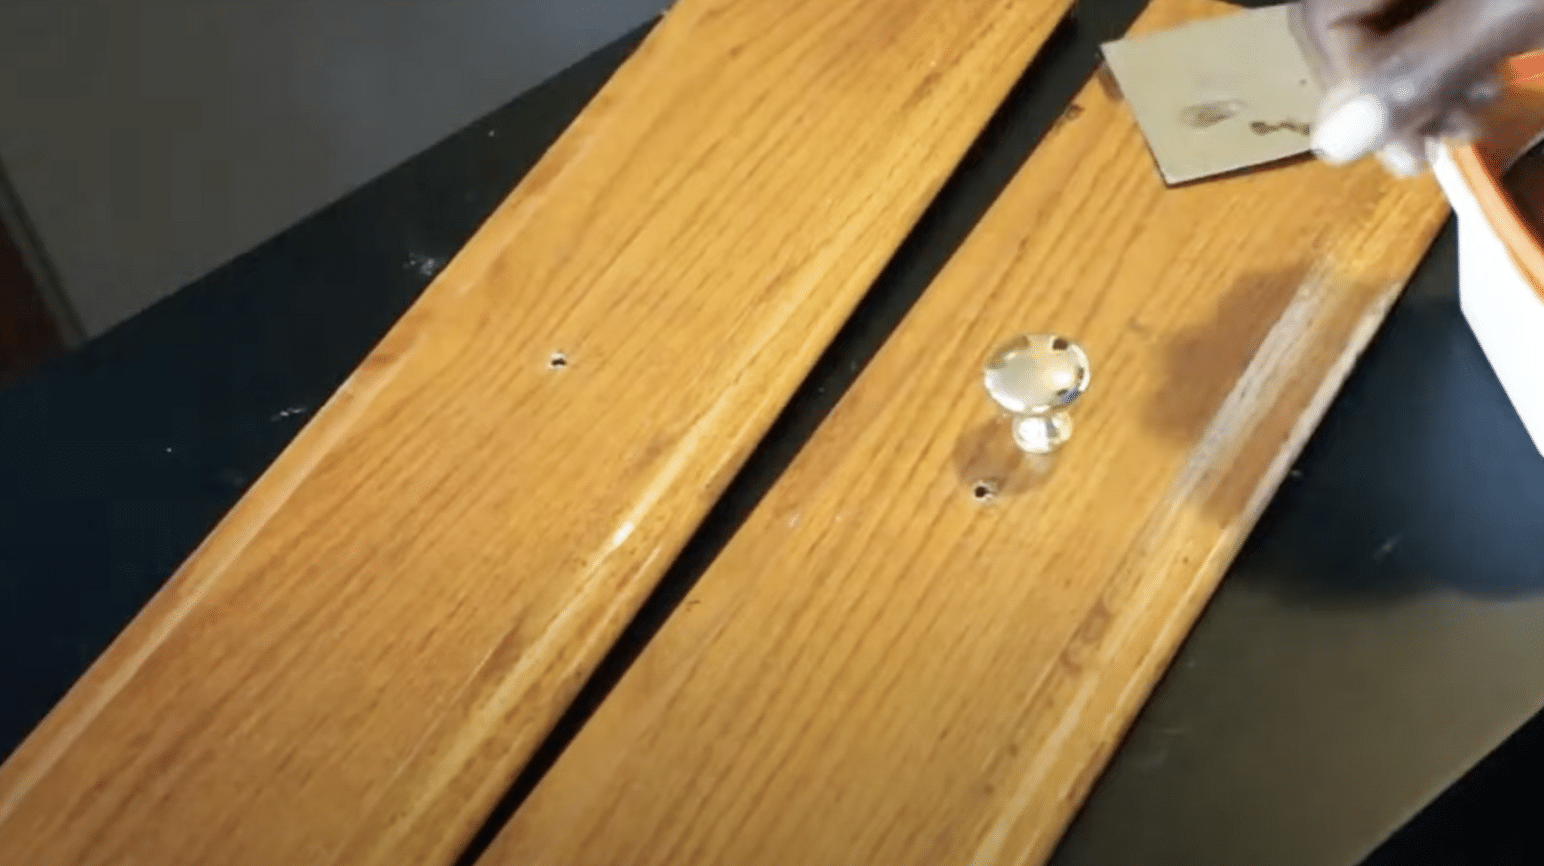
Sand and Degloss
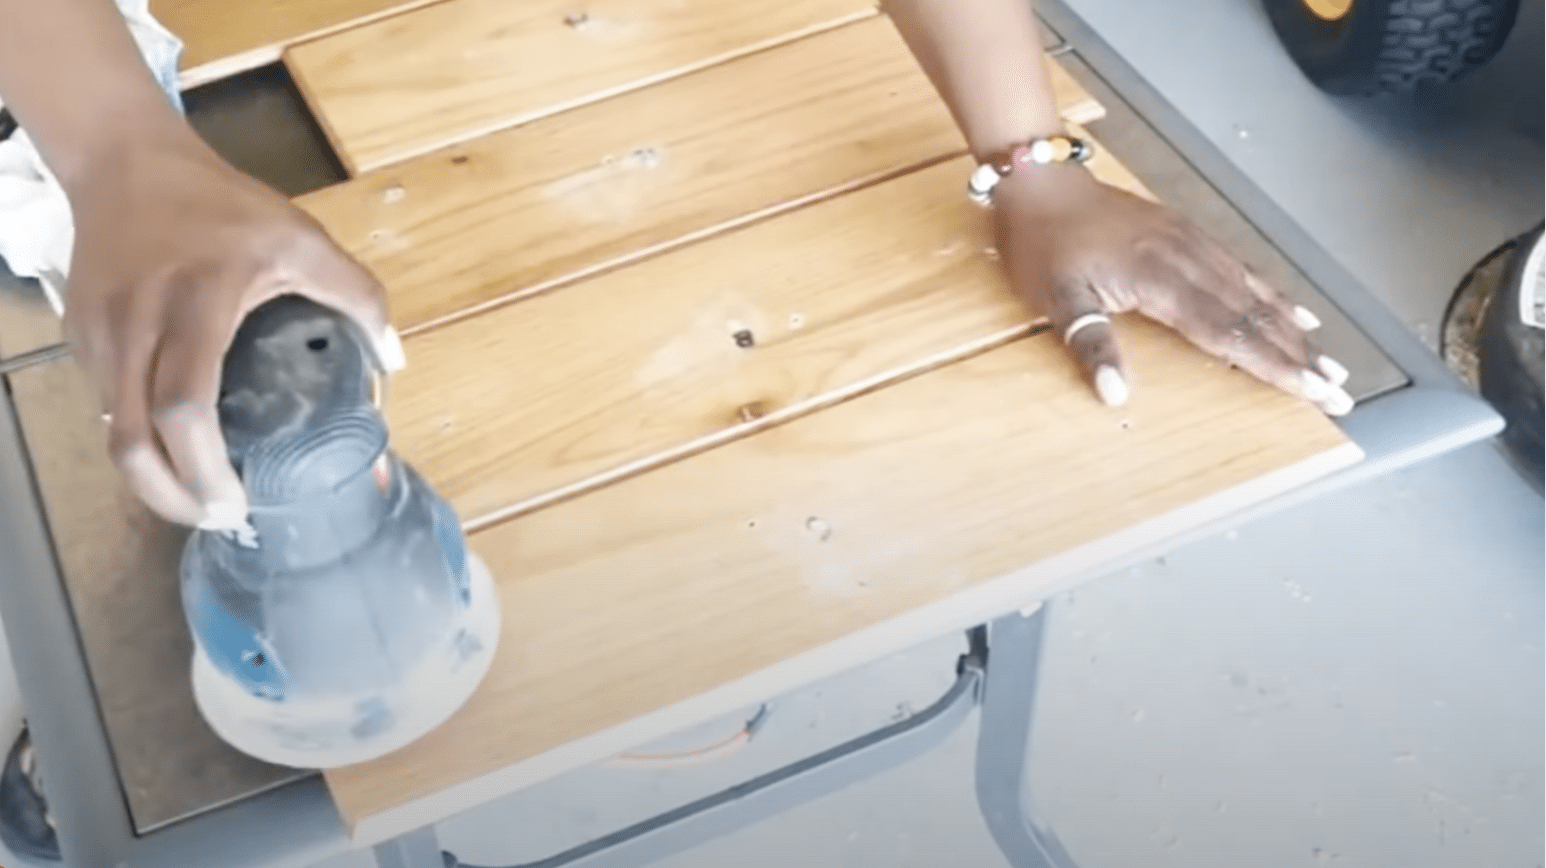
Put on your safety gear and use 80-grit sandpaper for the back and 100-grit for the front. Sand with the grain to remove the old finish. Use an angled sander for grooves.
After sanding, apply a deglosser with gloves on, getting into hard-to-reach areas. This step ensures a clean surface for the primer to adhere well.
Prime Thoroughly
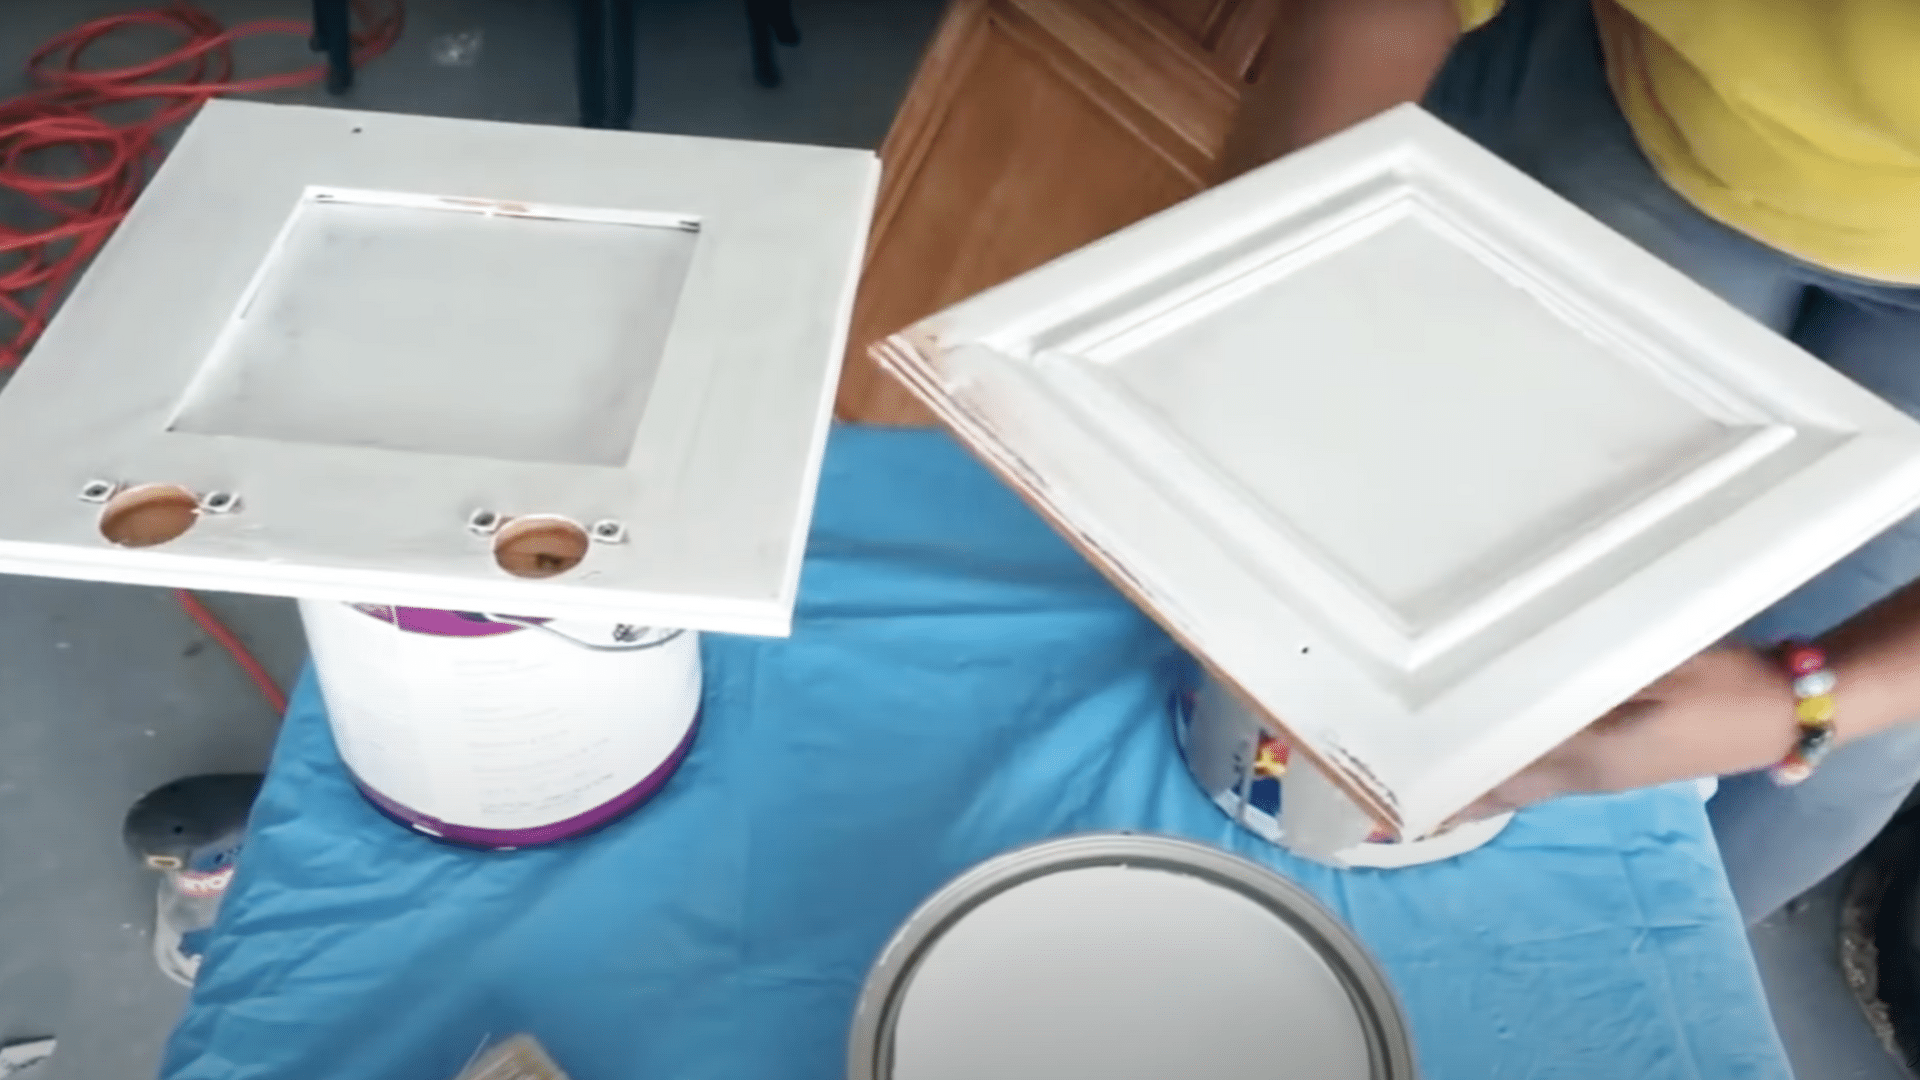
Set doors on paint cans for elevation and airflow. Use a quality bonding primer and apply in the direction of the grain, reaching into all grooves.
Don’t overdo it; thin, even layers are better. Let dry overnight, then flip and repeat on the other side. Two coats of primer help block stains and improve paint coverage.
Sand Lightly and Fill Gaps
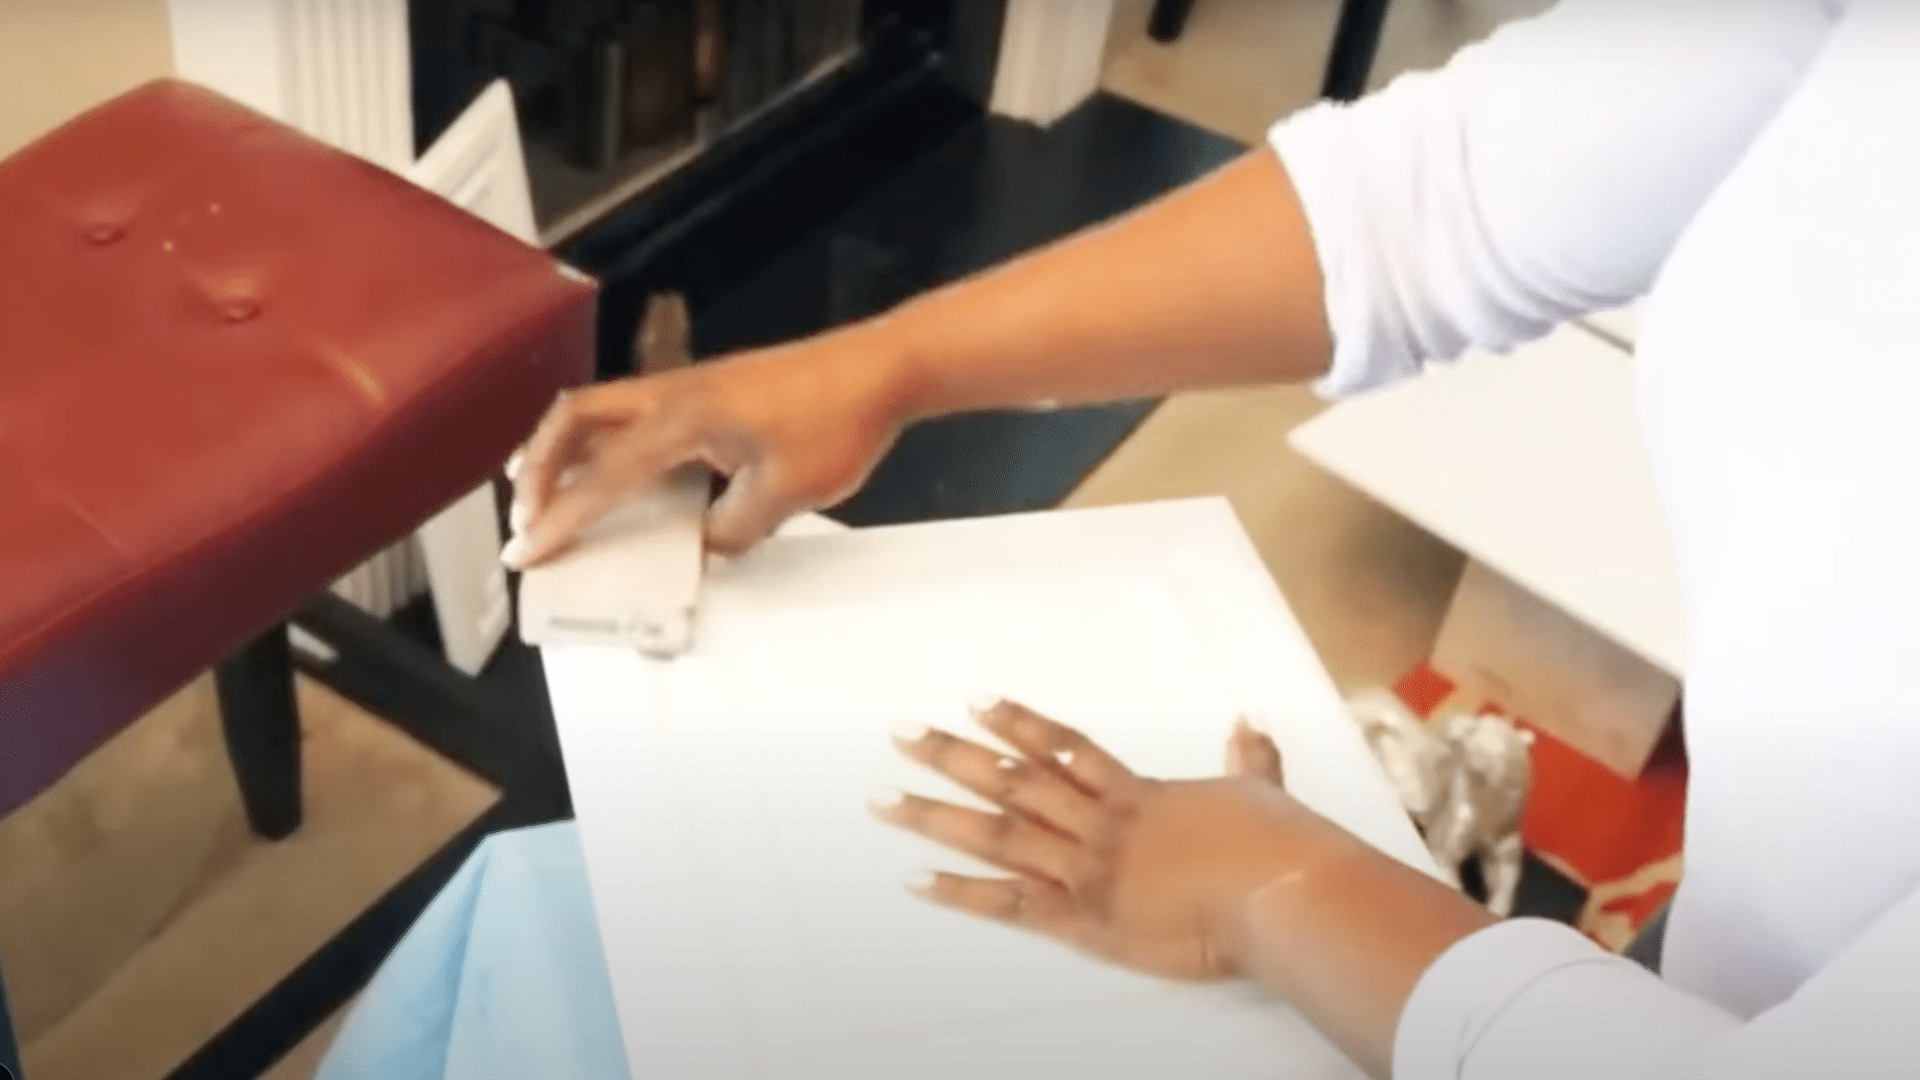
After priming, lightly sand with a fine-grade block to remove any roughness. Dust off with a dry brush. Fill visible gaps or seams with paintable acrylic latex caulk using your finger to smooth it out.
Wipe any excess with a damp rag. Addressing these flaws now ensures a seamless and professional-looking finish after painting.
Paint with Care
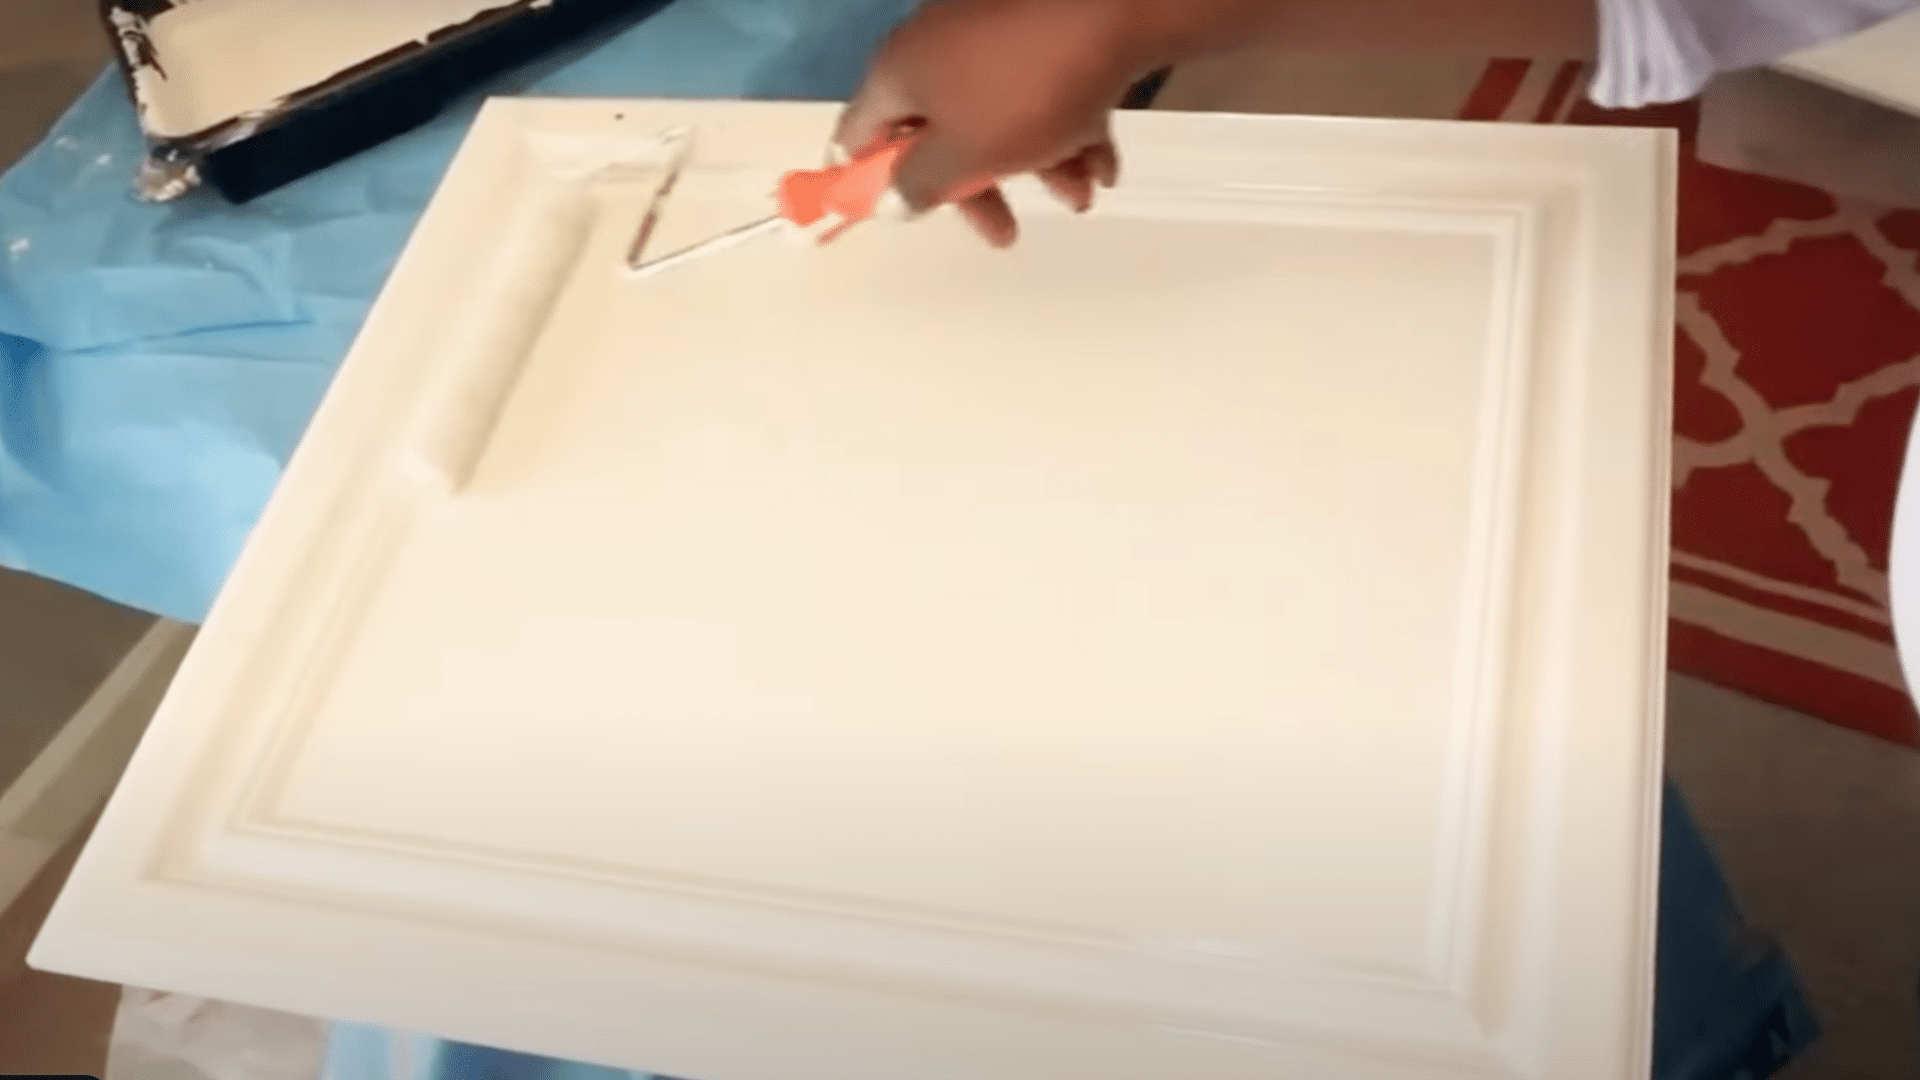
Start painting backs first. Roll on paint in the grain direction, then touch grooves with a detail brush. If needed, roll cross-grain to work paint into ridges, then smooth it back with the grain.
Check for drips and smooth out excess paint. Let one side dry overnight before flipping and painting the other side.
Reassemble and Cure

Reattach hardware and hinges, matching numbers for proper placement. Install doors, leaving them slightly open to allow paint to cure without sticking.
Add clear rubber bumpers to high spots on each door to prevent sticking and marring. Wait a few days before heavy use so your cabinets fully cure and stay flawless longer
The Result
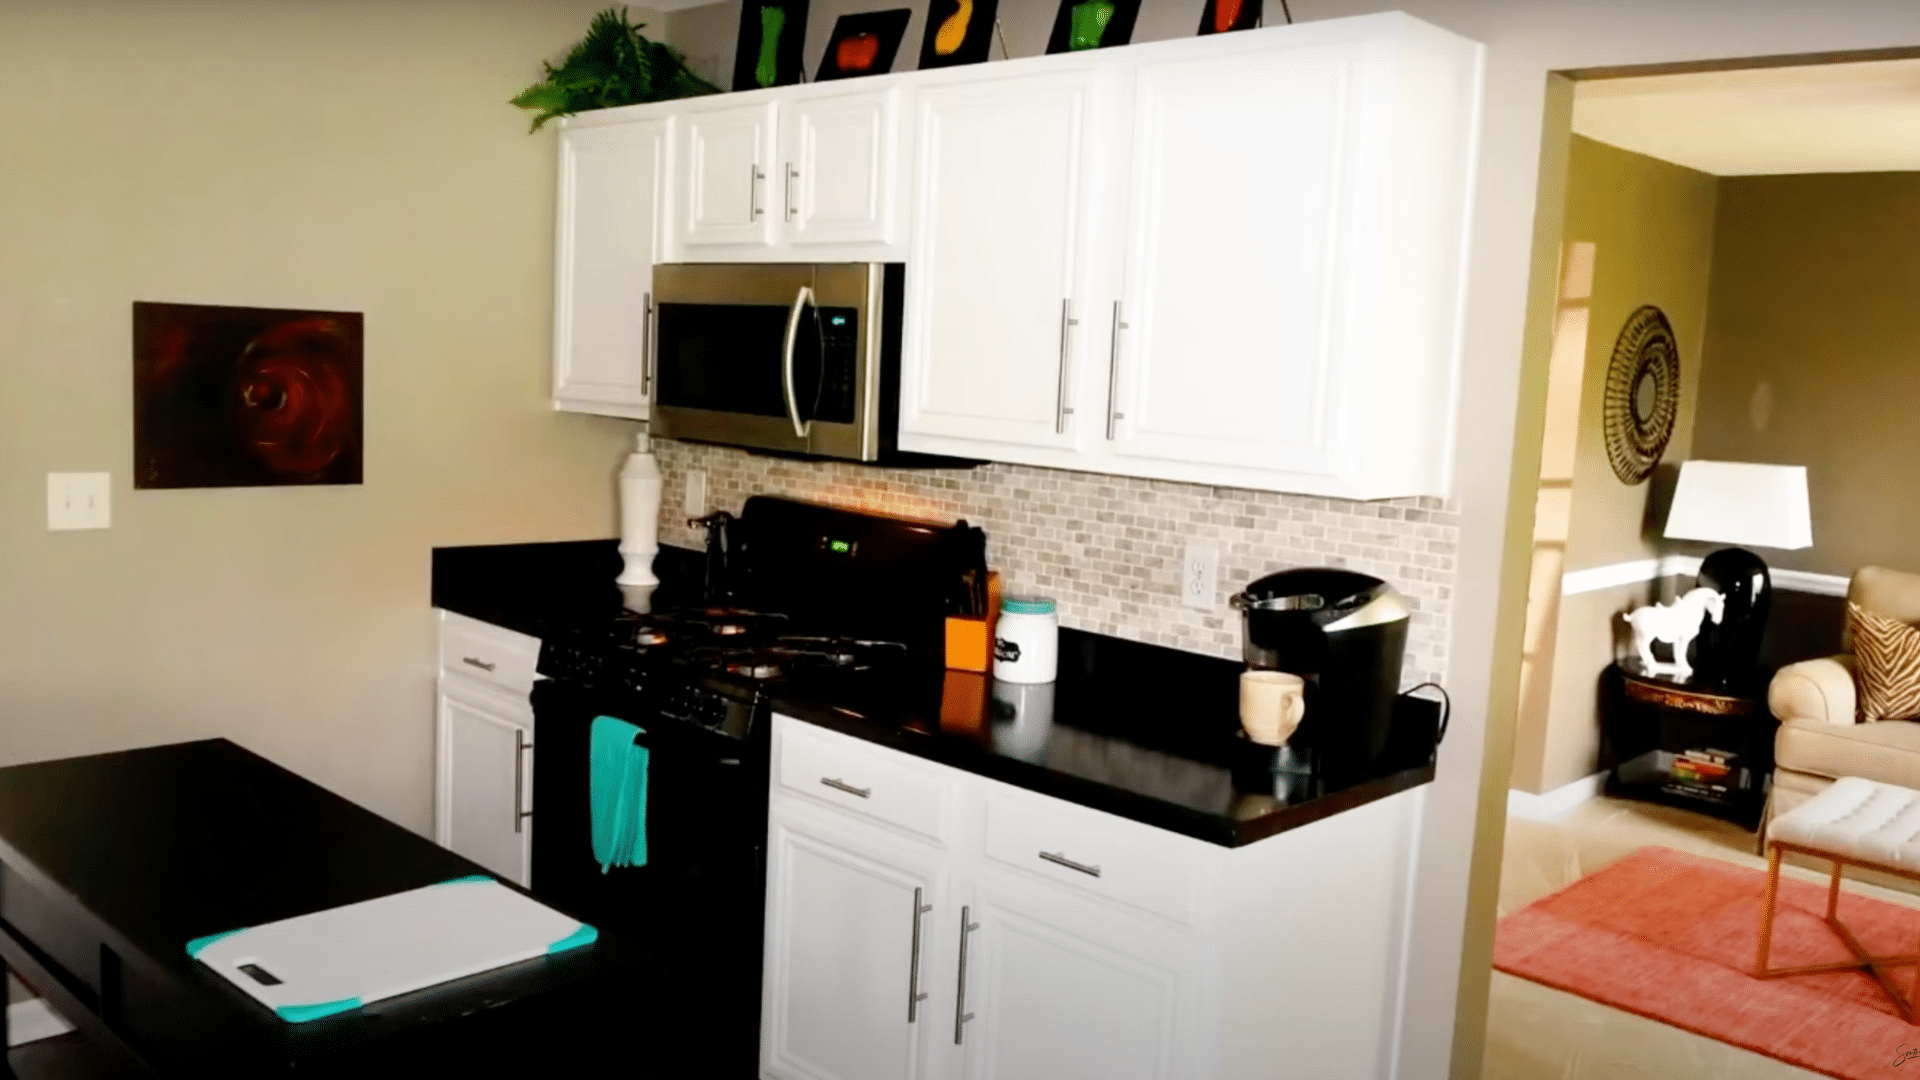
The freshly painted kitchen cabinets showcase a clean, elegant look with a crisp white finish. The smooth sanding has created a flawless surface, increasing the cabinets’ brightness and modern appeal. The contrast with sleek black countertops adds sophistication, making the kitchen feel fresh, contemporary, and inviting.
Pros and Cons of Painting Cabinets White
Painting cabinets white is a popular choice to refresh and brighten kitchens, offering a timeless and versatile look that can enhance the overall space. However, it also comes with maintenance considerations due to its tendency to show dirt and wear more prominently.
| Pros of Painting Cabinets White | Cons of Painting Cabinets White |
| Creates a bright, light-reflective space that seems larger | Shows fingerprints, smudges, stains, and dirt very easily |
| Offers a timeless, classic aesthetic that suits many styles | Requires frequent cleaning and upkeep to maintain appearance |
| Affordable way to freshen up the kitchen without replacing cabinets | Paint can chip, scratch, or yellow over time, especially in sunlight |
| Neutral color that coordinates with many décor schemes | May feel too stark or lacking warmth for some kitchen styles |
| Can increase home resale value due to broad appeal | Professional prep needed for a smooth, durable finish |
| Makes damage like scratches more visible, aiding early repair | White paint may discolor or fade, requiring touch-ups over time |
Maintaining White Cabinets
Maintaining white kitchen cabinets requires consistent care to keep them looking fresh and bright. Their light color makes dirt, grease, and stains more visible, so timely cleaning and proper upkeep are essential.
The following are points to keep in mind to maintain white cabinets:
- Wipe cabinets regularly with a soft, damp microfiber cloth to remove dust and prevent dirt buildup.
- Clean spills or stains immediately to avoid permanent marks, using mild soap or a vinegar-water solution.
- Use a gentle cleaning mixture like mild dish soap and warm water; avoid harsh chemicals or abrasive scrubbers.
- Vacuum or dust cabinet crevices weekly to prevent dust accumulation in grooves and handles.
- Prevent grease buildup by using your range hood while cooking, especially when frying.
- For tough stains, apply a baking soda and water paste, let sit for a few minutes, then gently scrub.
- Always dry cabinets thoroughly after cleaning to avoid moisture damage and yellowing over time.
Best Whites for Painting Cabinets

Choosing the right white for painting cabinets is essential for creating a bright, timeless, and inviting kitchen. Whites vary in tone from warm to cool, influencing the ambiance and coordination with other kitchen elements.
The following are 13 of the best white paints perfect for cabinets, each described in about 80 words to help you make an informed choice.
1. Benjamin Moore Simply White (OC-117)
Simply White is a bright, clean white with slight warm undertones, making it versatile and inviting. It reflects light beautifully, brightening kitchen spaces without feeling sterile. Perfect for both modern and traditional styles, its subtle warmth adds softness that complements various countertop materials.
Click to know more: Benjamin Moore Simply White (OC-117)
2. Sherwin-Williams Alabaster (SW 7008)
Alabaster is a warm, creamy white that brings a soft, cozy feel to kitchen cabinets. It balances neutrality with warmth, avoiding stark whiteness, which creates an inviting atmosphere. This shade works well in both bright and low-light kitchens.
Click to know more: Sherwin-Williams Alabaster (SW 7008)
3. Benjamin Moore White Dove (OC-17)
White Dove is a soft white with a hint of warmth, making it a favorite for cabinetry that needs a timeless and refined appearance. It offers a clean finish without feeling cold or overly bright, creating a cozy yet elegant kitchen space.
Click to know more: Benjamin Moore White Dove (OC-17)
4. Sherwin-Williams Shoji White (SW 7042)
Shoji White is a warm white with soft beige undertones, giving cabinets a natural, understated elegance. This creamy shade adds warmth without being too yellow, making it ideal for kitchens aiming for a tranquil, inviting vibe.
Click to know more: Sherwin-Williams Shoji White (SW 7042)
5. Benjamin Moore Chantilly Lace (OC-65)
Chantilly Lace is a pure, bright white with minimal undertones, perfect for those seeking a crisp, modern look. It crisply defines cabinetry and works well with bold, contrasting colors in countertops or backsplashes. It’s clean brightness refreshes any kitchen, giving an equal effect depending on surrounding colors.
Click to know more: Benjamin Moore Chantilly Lace (OC-65)
6. Sherwin-Williams Pure White (SW 7005)
Pure White is a balanced white that is neither too warm nor too cool, making it highly adaptable. It has soft undertones that prevent it from appearing stark, ensuring cabinets maintain classic brightness. This paint is favored for its ability to blend with virtually any kitchen style or color palette.
Click to know more: Sherwin-Williams Pure White (SW 7005)
7. Benjamin Moore Cotton Balls (OC-122)
Cotton Balls is a warm, creamy white with a touch of yellow undertones, creating a soft and welcoming feel in kitchen spaces. It enhances warmth without overwhelming the senses, making it a great choice for kitchens with natural wood tones and warm-colored countertops.
Click to know more: Benjamin Moore Cotton Balls (OC-122)
8. Sherwin-Williams Snowbound (SW 7004)
Snowbound is a soft, neutral white with subtle gray undertones. It offers a cooler tone than warm whites but retains warmth enough to avoid a sterile look. This shade complements both modern and transitional kitchens, working well with stainless steel appliances and darker counters.
Click to know more: Sherwin-Williams Snowbound (SW 7004)
9. Benjamin Moore Cloud White (OC-130)
Cloud White is a warm, creamy white that imparts a gentle softness to kitchen cabinets. It has subtle yellow undertones that provide warmth without feeling too bold. This shade works well in traditional kitchens or those with vintage elements.
Click to know more: Benjamin Moore Cloud White (OC-130)
10. Sherwin-Williams Greek Villa (SW 7551)
Greek Villa is a creamy, warm white that gives cabinets a rich, inviting tone. It balances brightness with softness, perfect for kitchens aiming at classic elegance. This paint pairs beautifully with marble countertops and brass fixtures, lending a luxurious yet welcoming feel.
Click to know more: Sherwin-Williams Greek Villa (SW 7551)
11. Benjamin Moore Decorator’s White (CC-20)
Decorator’s White is a clean white with cool undertones, offering a crisp finish without harshness. It is excellent for modern kitchens wanting a bright, neutral backdrop. This shade accentuates details like paneling and trim while providing a fresh, airy look.
Click to know more: Benjamin Moore Decorator’s White (CC-20)
12. Sherwin-Williams Extra White (SW 7006)
Extra White is a bright, crisp white with cool undertones, admired for its clean and contemporary look. It creates a striking contrast when paired with darker countertops or flooring. This white amplifies brightness and makes kitchens feel expansive and airy.
Click to know more: Sherwin-Williams Extra White (SW 7006)
13. Benjamin Moore Snowfall White (OC-118)
Snowfall White is a soft white with subtle warmth that adds grace to kitchen cabinetry. It strikes a balance between creamy and bright, creating an inviting atmosphere without coldness. This paint is excellent for kitchens aiming for a light, calm feel while maintaining visual interest.
Click to know more: Benjamin Moore Snowfall White (OC-118)
Common Mistakes to Avoid When Painting Cabinets White
When I first started painting cabinets, I made every mistake in the book. Trust me, learning from my errors will save you time, money, and a lot of frustration. The following are the most common mistakes you need to avoid:
- Skipping the cleaning step: Grease and grime will prevent paint from sticking properly. I always clean with degreaser first.
- Not removing cabinet doors: Painting doors while they’re still attached creates drip marks and uneven coverage.
- Using the wrong primer: Regular primer won’t work on glossy surfaces. You need a bonding primer for cabinets.
- Rushing between coats: I learned this the hard way. Each coat needs to dry completely before applying the next one.
- Ignoring the brush marks: Cheap brushes leave streaks. Invest in quality brushes or use a foam roller for smooth results.
- Painting over hardware: Remove all knobs and hinges before painting. It looks much cleaner and more professional.
The Bottom Line
Painting your kitchen cabinets white might seem like a big project, but it’s totally doable when you break it down into steps. I’ve seen so many homeowners transform their kitchens with just a weekend of work and some quality paint.
The key is taking your time with prep work. Don’t rush the cleaning, sanding, or priming stages. These steps make all the difference between a paint job that lasts years versus one that chips in months.
Your white cabinets will brighten up the entire space and give your kitchen that clean, timeless look everyone loves. Plus, you’ll have saved thousands compared to a full kitchen remodel.
Ready to start your cabinet makeover? Grab your supplies and take them one door at a time. You’ve got this