If you’ve ever started a DIY “quick weekend project” that somehow turned into three store runs, a cart full of extras, and a finish line that keeps moving… you’re not alone. Most DIY regrets aren’t about the color you picked or the pattern you tried. They’re about the moment you realize the budget quietly doubled while you were focused on the fun part.
The good news: you don’t need a complicated spreadsheet or a contractor brain to keep costs under control. You just need a simple plan that accounts for what DIY projects actually cost, materials, prep, tools, and the sneaky “oops” expenses that show up right when you’re tired and ready to be done.
Here’s a repeatable blueprint you can use for everything from a small room refresh to a bigger makeover.
1) Start with A “project Snapshot” (your Plan in 5 Minutes)
Before you price a single thing, get clear on what you’re truly doing. A little clarity upfront saves a lot of money later.
Write one sentence:
- “I’m painting the kitchen cabinets and swapping hardware before hosting next month.”
- “I’m adding a board and batten wall in the entry and repainting the trim.”
Then define two quick lists:
Must-haves
- The items that make the project “done” (paint, primer, wood, adhesive, screws, brackets)
Nice-to-haves
- The things that make it extra pretty (new decor, upgraded lighting, that perfect rug you found)
And finally, set your constraints:
- Timeline: Is this a true weekend project, or do you have room for drying time and delays?
- Skill level: Are you doing this for the first time or the fifth?
- Help: Are you solo or do you have a second set of hands?
- Mess tolerance: Are you working around kids/pets/life?
This snapshot becomes your filter. Every time you’re tempted to add one more thing, you can ask: Is that a must-have or a nice-to-have?
2) the Real Cost Formula: Materials + Tools + Prep + Finish
DIY budgets blow up when you only price the “materials I’m excited about.” The trick is pricing the whole reality of the project.
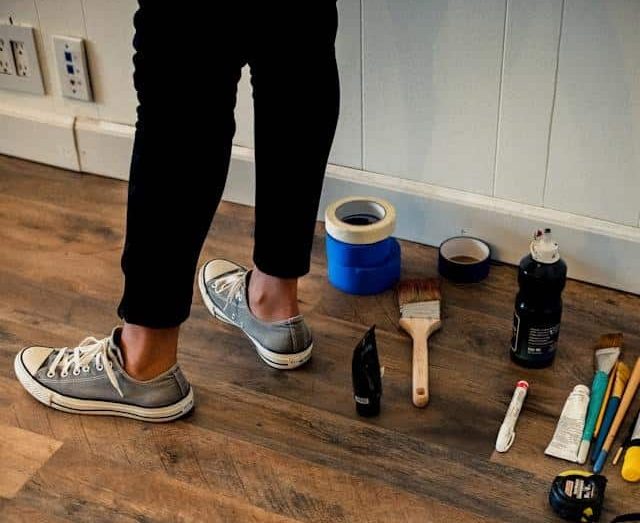
Materials (the obvious costs)
Start with what you think you need, then remember the “little things.”
- Paint, primer, stain, caulk, wood, trim, panels
- Screws, nails, anchors, adhesive
- Drop cloths, painter’s tape, plastic sheeting
- Sandpaper, wood filler, spackle, rags, tack cloths
Pro tip: Most projects require at least one “I forgot that” store run. Your goal is to make that store run tiny, not a full cart.
Also include delivery fees, minimum order thresholds, and tax. Those little add-ons add up fast.
Tools (the sneaky costs)
Tools are where DIY feels “expensive” even when materials were reasonable.
Before you buy anything new, decide:
- Buy if you’ll use it again (quality brush, drill bits, sander, level)
- Borrow if it’s a one-time tool (nail gun, specialty saw)
- Rent if you need power for a short window (floor sander, paint sprayer)
And don’t skip safety basics:
- Gloves, masks/respirators, eye protection
- Hearing protection for louder tools
It’s not glamorous, but it’s part of doing the project well, and not paying for mistakes later.
Prep work (where budgets go to die)
Prep is the least exciting part of DIY, but it’s where the quality comes from, and where costs sneak in when you didn’t plan for them.
Common prep supplies:
- Degreaser/cleaner (especially for kitchens)
- Patching materials and sanding supplies
- Primer (often required even when you wish it wasn’t)
- Replacement trim pieces or repair materials
Prep also costs time, which can turn into money if you end up buying a last-minute shortcut (like a rushed replacement or overpriced substitute) because you’re behind schedule.
Finishing touches (the “I forgot that” category)
Finishing touches are where the project suddenly looks designer… and where the budget can quietly creep.
These include:
- Hardware (hinges, pulls, knobs)
- Touch-up paint, topcoat/sealer
- Outlet covers, switch plates, doorstops
- And yes, styling (art, baskets, rugs)
Finishing touches are not “bad.” They’re just best purchased at the end when you know what room you have left.
3) Price It out Fast (without Overthinking)
You don’t need a perfect estimate. You need a useful estimate.
Make a quick list with four columns in a notes app:
- Line item
- Quantity
- Estimated cost
- Notes (brand, finish, store, or size)
Then:
- Price the big items first (paint, lumber, panels, hardware)
- Add the smaller consumables (tape, sandpaper, filler)
- Round up slightly on the tiny stuff because you will forget something
If it helps, add a simple rule: assume one extra of small items you always underestimate, sandpaper, rollers, brushes, caulk.
That tiny buffer often prevents the “I’m out of tape at 9pm” problem.
4) the “oops Fund” Checklist: Surprise Costs to Plan For
Almost every DIY project has at least one moment where something isn’t what you expected. The goal is to plan for that possibility so you don’t feel like the project is “failing” when it happens, it’s just normal DIY life.
Common surprise costs include:
- Measurements being slightly off (or buying the wrong size)
- Needing more paint/primer than expected (porous walls, dark-to-light changes)
- Warped boards, damaged pieces, or imperfect cuts
- Returns/restocking fees or “can’t return this” mistakes
- Tool issues (dead batteries, broken blades, dull bits)
- Extra anchors/screws because drywall is… drywall
- Disposal fees, contractor bags, or dump runs
- Delivery delays that force higher-priced substitutions
If you’ve ever thought, “How did I spend $40 on random supplies?”, that’s your oops category.
5) Add Your Cushion (the Part that Makes the Whole Plan Work)
Here’s the truth: the difference between a stressful project and a satisfying one is often a realistic cushion. When you have a buffer, a surprise doesn’t derail you. It becomes a hiccup.
A simple guideline:
- Small DIY (paint, shelves, decor build): plan a modest cushion
- Medium DIY (accent wall, trim, cabinet refresh): plan a bigger cushion
- Large DIY (multiple rooms, flooring, bathrooms): plan the largest cushion, because the unknowns multiply
Older homes, uneven walls, and “I’m not sure what’s behind this” areas deserve extra cushion.
If you want to sanity-check what a buffer could look like alongside your savings goals, you can plug your numbers into an emergency savings calculator and see what feels realistic for your timeline, without turning your whole project into a math problem.
(Then stop there. One check is enough. The project is still the point.)
6) Keep Spending Under Control While You Work (simple Systems)
A budget is most useful when you can actually stick to it mid-project, when you’re tired, busy, and tempted to “just fix it with money.”
Try these simple systems:
Use phase gates
- Buy prep supplies first
- Then buy materials
- Save finishing touches for last
This prevents buying decor and upgrades before you even know if the base project is going smoothly.
Use a “cart rule”
Don’t buy decor until the project is at least 90% complete. It keeps the “pretty stuff” from eating the functional budget.
Track as you go
Keep receipts in one envelope, or screenshot totals into a note. You don’t need accounting, just awareness.
The Bottom Line
DIY projects feel fun when you’re in control, and control starts with a budget that reflects real life: materials, tools, prep, finishing touches, and a cushion for surprises.
Take five minutes to create a project snapshot. Price it out quickly. Add an “oops” buffer. Then shop in phases so you don’t blow your budget before you’ve even started.
You don’t need to DIY like a contractor. You just need a plan like one, so you can enjoy the process and love the finished space without that “how did I spend that much?” feeling at the end.