If you’ve ever looked at a wreath and thought, “I could make that,” you’re not alone.
Projects like this DIY moss wreath bring nature’s beauty straight into your home, and they’re easier to create than you might think.
In this blog, we’ll show you how to craft a moss wreath that will give your space a fresh, earthy vibe.
By the end, you’ll have all the tips and tricks to create your stunning wreath—regardless it’s for a seasonal decor update or to add a little greenery. We promise you’ll feel more confident in your crafting abilities and enjoy the process. Ready to get started? Let’s leap in!
Why are DIY Moss Wreaths a Popular Choice for Home Decor?
DIY moss wreaths have quickly become a popular choice in home decor, and it’s easy to see why. The lush, earthy appeal of moss adds a touch of nature to any space, creating a calming and inviting atmosphere. Moss wreaths fit into almost any event.
Here are a few reasons why moss wreaths are so beloved:
- Versatility: You can customize them to suit any style, from rustic with twigs and burlap to minimalist with just moss and a simple wreath form.
- Natural charm: The green hues and textured layers of moss bring serenity and balance to any room, complementing a wide range of color palettes.
- Seasonal appeal: Perfect for any season, moss wreaths can easily be dressed up with seasonal touches like flowers, ribbons, or small decorative elements.
When creating your moss wreath, you can experiment with different types of moss to achieve various looks—everything from vibrant green to muted shades. Adding small flowers or decorative items lets you personalize it and make it uniquely yours.
Tools and Materials Required for a DIY Moss Wreath
|
Tool/Material |
Description |
|
Moss wreath form |
18-inch form with moss covering; available at craft stores. |
|
Hot glue gun |
Essential for securing greenery and flowers. |
|
Hot glue sticks |
Make sure you have enough to complete the project. |
|
Wire cutters |
For cutting flower stems and greenery. |
|
The greenery (e.g., maidenhair fern) |
To create a lush, textured base. |
|
Spring flowers (e.g., pansies, tulips) |
For color and beauty in your wreath. |
|
Florist pins (optional) |
To add extra security to fragile flowers and greenery. |
|
Decorative ribbon (optional) |
To add a finishing touch. |
|
Steel picks (optional) |
For stems that aren’t strong enough to secure with glue. |
Let’s Create Our Moss Wreath
Step 1: Prepare the Moss Wreath Form

Start by selecting a moss wreath form. An 18-inch moss wreath form is a great choice and can be found at most craft stores like Michael’s.
These forms often have a natural moss covering, making them perfect for this project. The back of the wreath may be a bit rough, but the front will be beautifully covered in moss, which is the part that will show.
Some wreath forms come with a tie, making them easier to hold while you work, but if yours doesn’t, you can always add some wire yourself.
Tip: If you don’t have an 18-inch form, smaller or larger sizes will work just as well. The process will be the same, and you can adjust the size of your flowers accordingly.
Step 2: Create the Greenery Base
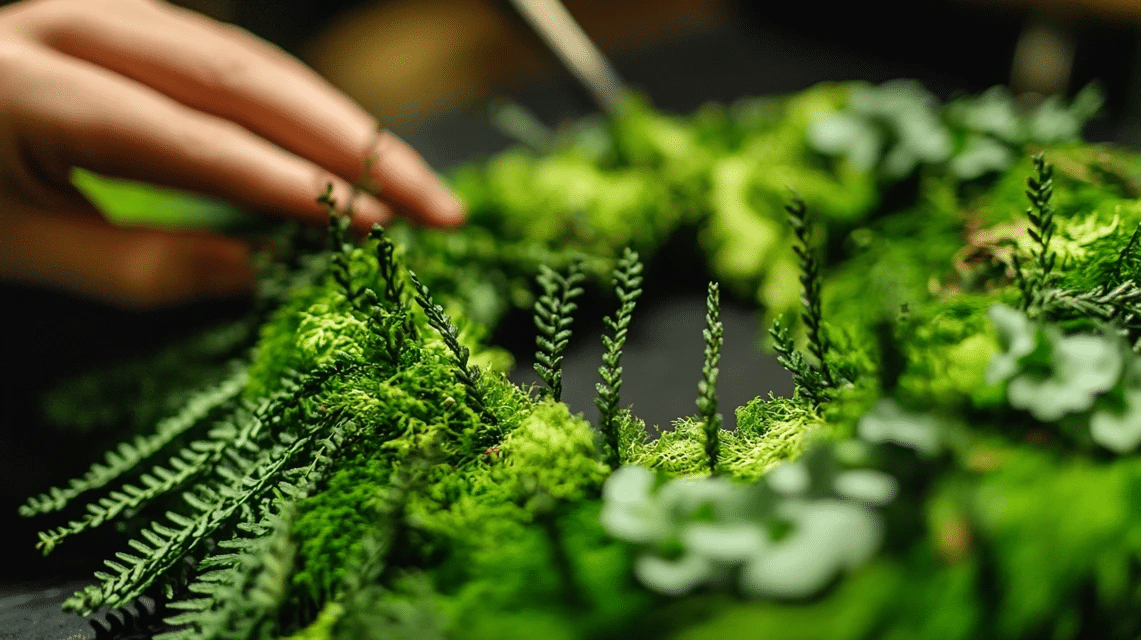
Next, you’ll add the greenery. Maidenhair ferns are a popular choice because they have a soft, intricate texture.
Cut the fern stems into smaller pieces, making sure they are long enough to stick into the wreath form but not so long that they overwhelm the wreath. You want them to be firm enough to stay in place once glued.
Use a hot glue gun to apply glue to the ends of the stems. Press the glued stems into the bottom part of the wreath form. Place the stems at an angle to create a natural flow.
It’s important to start with the greenery, as it will serve as the foundation for your wreath.
Tip: If the stems aren’t strong enough to stick into the foam, you can secure them with florist pins or steel picks. Otherwise, glue the stems to the pins and then insert the pins into the wreath.
Step 3: Add Spring Flowers for Color

Now that the greenery is in place, it’s time to add flowers. Choose vibrant, in-season flowers such as pansies, tulips, or any spring flowers you love.
Start by arranging the larger flowers evenly around the wreath, keeping in mind its overall balance. The flowers should be placed in a way that adds both color and texture to the wreath.
Use your hot glue gun to secure each flower in place.
Alternative: If you don’t have pansies, daffodils or crocuses are beautiful alternatives. The goal is to capture the fresh, bright colors of spring. Choose flowers that make you smile!
Step 4: Layer the Flowers and Greenery

To make the wreath look full and lush, it’s important to layer your flowers and greenery.
Place flowers of different sizes and textures on top of each other, building layers to add depth and richness to the wreath. Focus on filling in any spaces between the larger flowers with smaller blooms, such as violas or mini daisies.
Be creative with your arrangements, and don’t be afraid to mix colors and textures.
Step 5: Fill in Gaps and Add Texture

As you place your flowers, gaps may start to appear. Don’t worry—this is completely normal! Fill in these gaps with smaller greenery or accent flowers. Wildflowers or thistles are great choices for adding texture.
You can also use different types of leaves to enhance the wreath’s natural look. For example, ferns or waxy leaves will add an interesting contrast to the softer moss.
Tip: To add more texture, try bending the stems in different directions. This will create visual depth and make the wreath look even more spirited.
Step 6: Secure Everything Firmly

Once you’re happy with the placement of the flowers and greenery, it’s time to secure everything in place. Go over the wreath and add extra hot glue wherever necessary, especially along the edges and to the stems that might still be loose.
It’s important to make sure the wreath holds up well once it’s displayed.
Step 7: Add Final Touches and Display

Your moss wreath is almost finished! At this point, you can add any final touches you like. A decorative ribbon tied to the top of the wreath can give it a personal touch.
You could also add a sign in the middle for a more customized look. Make sure to let the glue set completely before hanging your wreath.
Once the glue has dried, you can hang your wreath on a door or wall or as a centerpiece for a table.
Tip: If you want your wreath to be adaptable for different seasons, add a removable bow or change out the flowers to match the season. You can even try a holiday-themed wreath by adding festive decorations.
Different Styles of Moss Wreaths
There’s something truly magical about moss wreaths. These lush, verdant creations bring a touch of woodland charm into our homes, connecting us with nature’s timeless beauty. It doesn’t matter if you’re a seasoned crafter or just beginning your creative trek; moss wreaths offer infinite possibilities for expression.
Classic Round Moss Wreaths

The traditional round moss wreath serves as the foundation of moss wreath artistry. Using a wire or foam wreath form as your base, you can create a stunning natural display that works in any season. Sheet moss provides excellent coverage, while reindeer moss adds wonderful texture and dimension.
What makes round moss wreaths special:
- They fit perfectly on doors and walls
- Their symmetrical shape creates a sense of harmony
- They work beautifully with seasonal decorative elements
- They can be as simple or elaborate as you desire
Square and Rectangular Moss Wreaths

Breaking from tradition, geometric moss wreaths have gained popularity in recent years. These modern interpretations bring a contemporary edge to the natural beauty of moss.
Square and rectangular frames covered in vibrant moss create striking visual statements for modern homes. The clean lines contrast beautifully with the organic texture of the moss, creating an appealing juxtaposition that draws the eye.
Asymmetrical Moss Wreaths

For those with an artistic flair, asymmetrical moss wreaths provide a canvas for creative expression. These free-form designs might feature a partial wreath base with moss concentrated on one section, gradually tapering around the form.
Asymmetrical designs work wonderfully with the following:
- Cascading elements like air plants or trailing vines
- Focal points of preserved flowers or botanical elements
- Mixed media additions like copper wire or natural wood pieces
Moss Letters and Monograms

Personalized moss creations add a special touch to home decor or events. Cardboard or wooden letter forms covered in various moss varieties create meaningful wall art or wedding decor.
Initial wreaths make thoughtful housewarming gifts, especially when crafted with care using preserved moss that will maintain its beauty for months or even years.
Mini Moss Wreaths

Don’t overlook the charm of small-scale moss wreaths! These delightful creations work wonderfully as:
- Place settings for nature-inspired dinner parties
- Christmas tree ornaments during the holiday season
- Decorative elements for picture frames or mirrors
- Sweet gifts, when attached to packages or gift bags
Caring for Your DIY Moss Wreath
A handcrafted moss wreath brings natural beauty into your home, but to keep it looking its best, it needs a little tender loving care.
With the right attention, your moss creation can remain vibrant and beautiful for months or even years.
Location Matters
Your moss wreath will thrive in spaces with indirect light. Direct sunlight can dry out and fade your moss, causing it to lose its lush green color.
Indoor locations away from heating vents and fireplaces are ideal, as these heat sources can quickly dehydrate your natural creation.
If you’ve hung your wreath outdoors, choose a sheltered spot under an eave or porch ceiling where it’s protected from harsh weather and direct sun.
Tip: Remember that outdoor wreaths generally require more frequent care than their indoor counterparts.
Moisture is Key
Most moss varieties appreciate regular misting to maintain their vibrant appearance. When your wreath begins to look dry, use a spray bottle with room-temperature water to lightly mist it. The frequency depends on your home’s humidity levels—drier environments may require weekly misting, while more humid areas might need it less often.
When misting your wreath, remember:
- Use a fine mist setting to avoid over-saturating
- Mist until the moss feels slightly damp but not soaking wet
- Allow air circulation after misting to prevent mold
- Never submerge your entire wreath in water
Seasonal Refreshes
Even the most well-maintained moss wreaths benefit from occasional refreshing.
Every few months, gently remove any dust with a soft brush or blow it away with canned air on a low setting. This simple step brings back the wreath’s natural luster.
If small sections of moss begin to loosen, use a dab of craft glue to secure them back in place. For wreaths that incorporate dried flowers or other elements, replace any faded components to keep your creation looking its best.
Long-Term Preservation
- Use glycerin solution to preserve moss (1 part vegetable glycerin to 2 parts warm water)
- Lightly mist the glycerin solution over your moss
- This treatment helps moss retain moisture and stay supple longer
- Preserved moss wreaths need less watering than living moss
- Still dust preserves moss wreaths occasionally
- Handle preserved moss wreaths gently
Where to Display Your Moss Wreath
Finding the perfect spot to showcase your moss wreath can enhance both the wreath’s longevity and its visual impact in your space.
These verdant creations bring natural charm to nearly any area, but some locations will truly let their beauty shine.
Front Door Welcome
Of course, the classic placement for any wreath is the front door.
A moss wreath creates a warm, natural welcome for guests while setting a tone of rustic grace.
For an outdoor display, choose a spot with some protection from the elements—under a porch roof or within a covered entryway works beautifully. This placement connects your indoor style with the natural world outside.
Interior Doors and Windows
Don’t limit wreaths to your home’s entrance! Interior doors provide wonderful display opportunities for moss creations. A moss wreath hanging on a pantry door brings unexpected charm to your kitchen, while bathroom and bedroom doors become more inviting with this touch of green.
Windows also offers lovely hanging spaces, especially when you use suction cup hooks that won’t damage frames.
The natural light filtering through and around a moss wreath creates a magical effect that changes throughout the day.
Wall Galleries
Moss wreaths make stunning additions to wall galleries and collections. Consider these approaches:
- Center a moss wreath among framed botanical prints
- Use a moss wreath as the anchor piece in a collection of wooden decor
- Create a seasonal display wall where your moss wreath remains constant while surrounding elements change
- Pair multiple moss wreaths in different sizes for a dramatic impact
Tabletop and Horizontal Surfaces
Your moss wreath needn’t hang at all!
Laying a wreath flat creates a beautiful centerpiece for dining tables or coffee tables. Add pillar candles in the center for a deft tablescape, or nestle small potted plants within the wreath’s circle for a living garden display.
Mantels and bookshelves also provide perfect perches for moss wreaths.
Prop smaller wreaths against walls or mirrors or lay them flat with decorative objects nestled in their centers.
Unexpected Spots
Some of the most delightful moss wreath placements are in unexpected locations:
- Above the bed as a natural “headboard”.
- Focal point: In the bathroom, humidity often helps maintain the moss’s appearance.
- Hanging from exposed beams or stair railings.
- Embellishing garden gates or potting shed doors.
To Sum it Up
Creating your DIY moss wreath is not only a fun and rewarding project but also a beautiful way to add a touch of nature to your home.
If you are looking to refresh your decor or personalize a space, Moss wreaths offer many possibilities for creativity. From choosing the perfect moss to adding decorative touches, the process is simple yet fulfilling.
What’s great about moss wreaths is their timeless appeal, making them a perfect addition to any room all year round.
By crafting one yourself, you get not only a unique piece of decor but also a sense of accomplishment.
So grab your supplies, let your imagination run wild, and reinvent your space with a stunning DIY moss wreath!
For another eye-catching wreath, check out our blog on “DIY Dollar Tree Egg Wreath: A Complete Tutorial.”


