Do you crave a sweet treat that’s quick to make but still feels special?
Most store-bought desserts lack that homemade touch, and many recipes take too much time and effort.
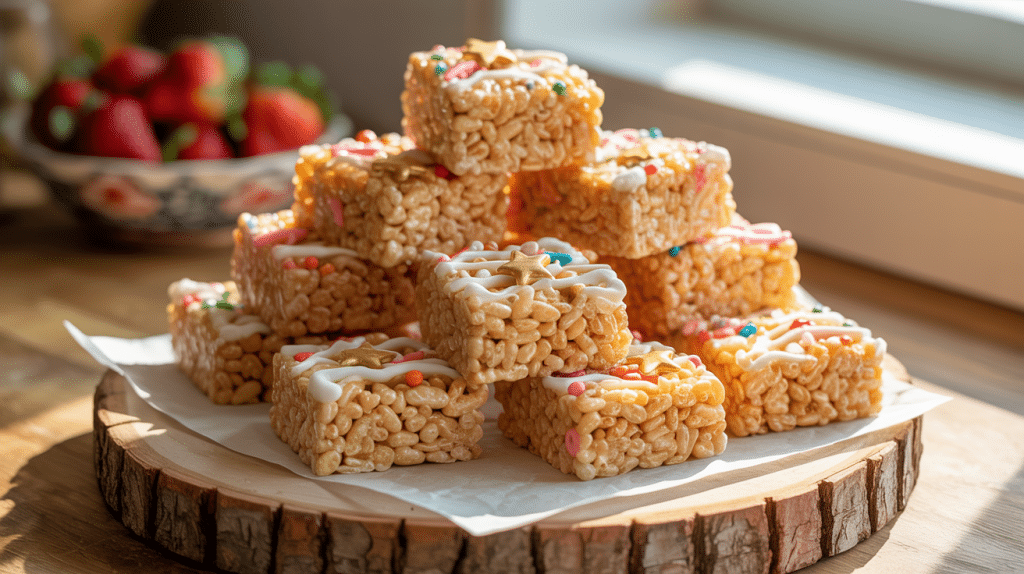
These white chocolate dipped rice krispie treats are the perfect solution. With just a few simple steps, you can create a fancy-looking dessert that everyone will love.
In this post, I’ll show you how to make these mouth-watering treats that combine the classic crunch of rice krispies with a smooth white chocolate coating.
Let’s get started!
Why You’ll Love These White Chocolate Dipped Rice Krispie Treats?
I promise these treats will become your new go-to dessert!
They’re super quick to make, taking just minutes to put together. The basic recipe needs only three main items: butter, marshmallows, and rice krispies. That’s all!
What makes these extra special is the white chocolate coating. It adds a rich, sweet layer that takes these simple squares to a whole new level. Plus, kids absolutely love helping with the dipping part!
These treats work for any occasion – from birthday parties to just-because days when you need something sweet. Also, you don’t need any special baking skills. If you can stir things in a pot, you can make these delicious treats!
List of Ingredients and Tools Required
Ingredients
- 3 tablespoons butter
- 1 package (10 oz) regular marshmallows
- 6 cups rice krispies cereal
- 1 package (12 oz) white chocolate chips
- Optional: sprinkles for decoration
Tools
- Large pot for melting marshmallows
- Wooden spoon for stirring
- 9×13 inch baking pan
- Parchment paper or non-stick spray
- Microwave-safe bowl for melting chocolate
- Knife for cutting treats into squares
- Cooling rack (optional)
- Baking sheet for setting dipped treats
Step-by-Step Instructions to Make White Chocolate Dipped Rice Krispie Treats
Making these treats is really simple!
I’ve broken down the process into six easy steps that anyone can follow. Even if you’re not much of a baker, you’ll find this recipe straightforward and fun.
The magic happens when you dip them in white chocolate – that’s what takes them from ordinary to extraordinary!
Step 1: Prepare Your Pan
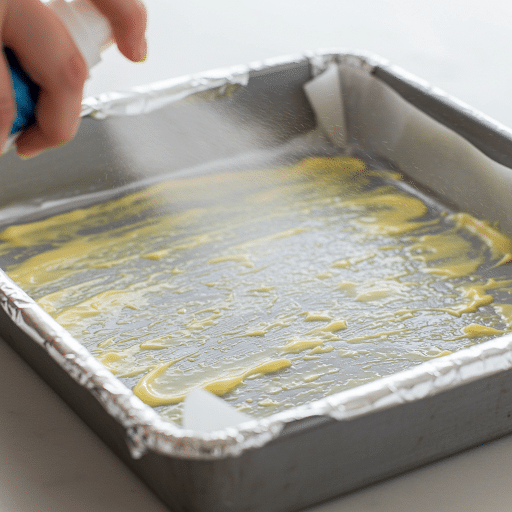
Line your 9×13 inch pan with parchment paper or coat it with non-stick spray. This step is super important because rice krispie treats can be very sticky!
The parchment paper makes it much easier to lift the finished treats out of the pan later and prevents any frustrating moments of treats stuck to the bottom.
Step 2: Melt the Butter and Marshmallows
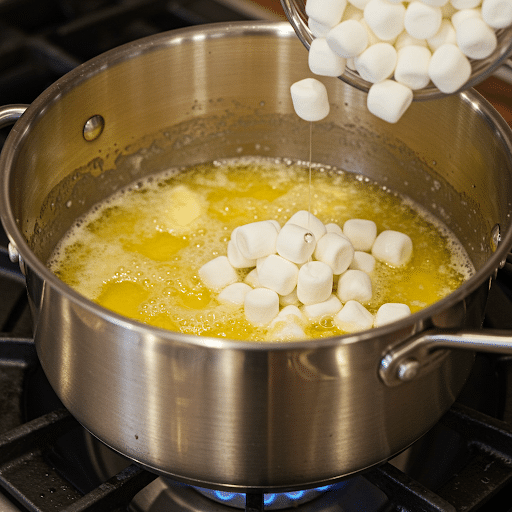
In a large pot, melt the butter over low heat. Once it’s completely melted, add the marshmallows.
Keep stirring until the marshmallows are fully melted and the mixture is smooth. Make sure to keep the heat low – if it’s too high, your treats might end up hard instead of soft and chewy.
Step 3: Mix in the Rice Krispies
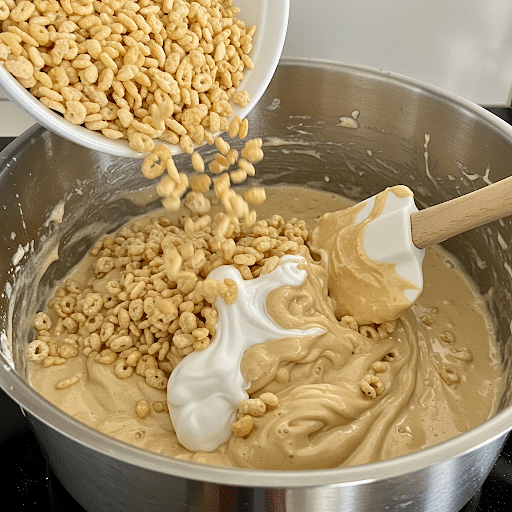
Remove the pot from heat and quickly stir in the rice krispies cereal.
Mix everything together until all the cereal is coated with the marshmallow mixture. This part needs to be done quickly before the mixture starts to set.
Don’t worry if your arm gets tired – the stirring only takes about a minute!
Step 4: Press into Pan
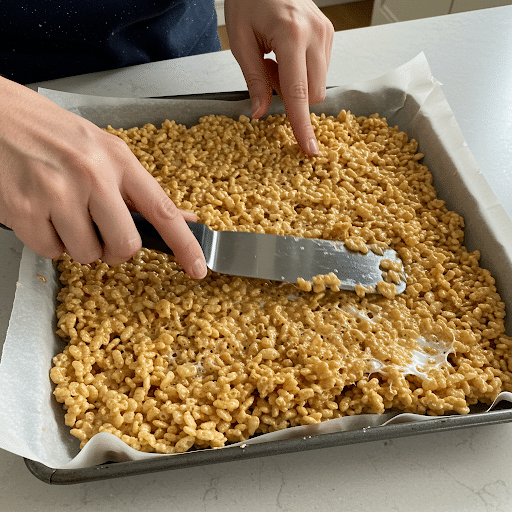
Pour the mixture into your prepared pan. Using a piece of wax paper or a spatula coated with non-stick spray, gently press the mixture evenly into the pan.
Don’t press too hard or your treats will become dense and tough. Just enough pressure to make them hold together is perfect!
Step 5: Cool and Cut
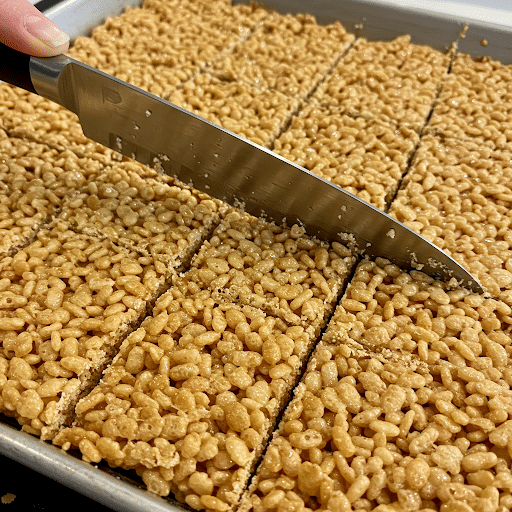
Let the treats cool completely at room temperature, which usually takes about 30 minutes. Once cooled, cut them into squares. I find that 16 squares (4 rows by 4 columns) works well, but you can make them larger or smaller based on your preference.
Clean your knife between cuts for smoother edges.
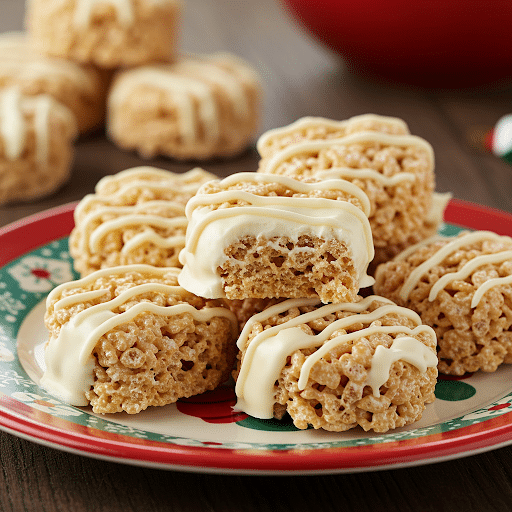
Step 6: Dip in White Chocolate
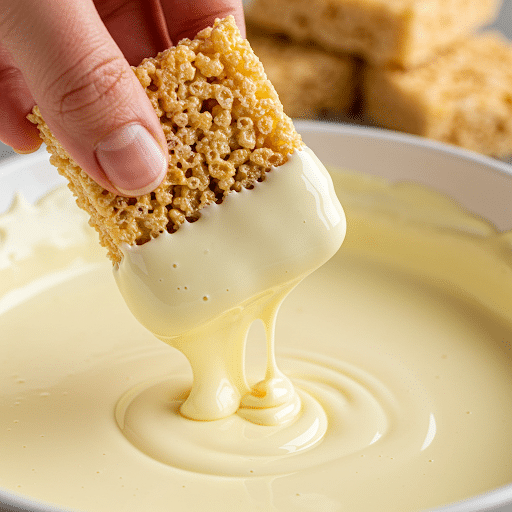
Melt the white chocolate chips in a microwave-safe bowl in 30-second intervals, stirring between each interval until smooth and melted. Dip each square halfway into the melted white chocolate, then place on parchment paper to set.
Add sprinkles right away if using, as the chocolate hardens quickly. Let them set completely before serving.
Common Mistakes and How to Fix Them
When making white chocolate-dipped Rice Krispies treats, a few simple mistakes can affect your results.
Here’s how to fix the most common issues:
| Common Mistake | How to Fix It |
|---|---|
| 1. Treats turn out too hard | Use low heat when melting marshmallows. High heat makes the sugar crystallize and creates hard treats. Also, avoid pressing the mixture too firmly into the pan. |
| 2. White chocolate seizes or clumps | Melt chocolate slowly in 30-second microwave bursts, stirring between each interval. If water gets into your chocolate, it will seize. Make sure all utensils are completely dry. |
| 3. Treats stick to the pan | Always line your pan with parchment paper or use non-stick spray. For extra insurance, you can do both. This makes removal much easier and cleanup a breeze. |
| 4. Treats fall apart when dipping | Make sure treats are completely cool before cutting and dipping. If they’re still warm, they’ll fall apart. You can also place them in the fridge for 15 minutes before dipping. |
| 5. Chocolate coating doesn’t set properly | If your kitchen is warm, place dipped treats in the refrigerator for 10-15 minutes to help the chocolate set. Don’t leave them too long or the treats themselves will get hard. |
Creative Variations and Flavor Ideas
When it comes to white chocolate dipped rice krispie treats, there are so many fun ways to change them up!
I love trying different flavors and add-ins to make each batch special. These ideas are simple enough for everyday baking but can make your treats feel extra fancy when you want something different.
Here are some tasty ways to customize your white chocolate dipped rice krispie treats:
Add Different Mix-ins
Try stirring in mini chocolate chips, chopped nuts, or dried fruit to the basic mix. M&Ms, crushed Oreos, or even a handful of sprinkles mixed right into the marshmallow mixture can add color and texture.
Just fold these in when you add the cereal, using about 1/2 cup of mix-ins for the standard recipe.
Play with Flavors
Add a teaspoon of vanilla extract to your marshmallow mixture for a richer taste.
During holidays, try adding peppermint extract with some crushed candy canes as a topping. You can also use almond or orange extract for unique flavor twists that will surprise your family and friends.
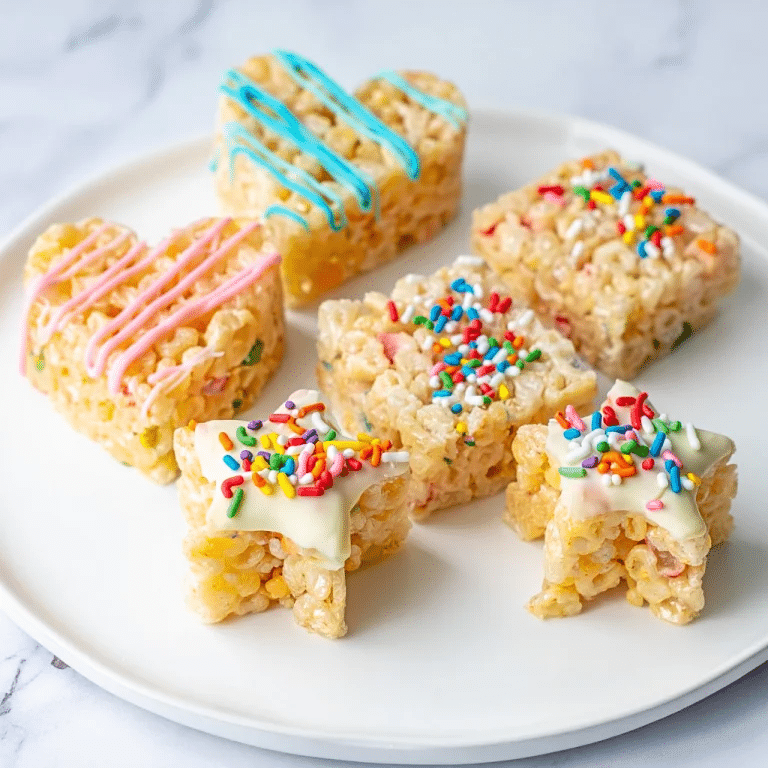
Try Colored Chocolate
While white chocolate is lovely, you can use colored candy melts instead. Pink for Valentine’s Day, green for St. Patrick’s, or blue for baby showers – the options are endless!
You can even drizzle a second color over the first coating for a fancy finish that looks like it came from a bakery.
Make Them Seasonal
Top with themed sprinkles for holidays – red and green for Christmas, orange and black for Halloween, or pastels for Easter.
You can also cut them with cookie cutters into shapes instead of squares for special occasions, though this works best when they’re still slightly warm.
Wrapping Up
Ready to try these white chocolate dipped rice krispie treats? They’re the perfect mix of simple and special – easy enough for beginners but tasty enough to impress everyone.
Remember that the key to perfect treats is using low heat for your marshmallows and not pressing the mixture too firmly into the pan. The white chocolate coating adds that extra touch that makes these treats stand out.
Why not make a batch this weekend? They store well in an airtight container for up to three days (if they last that long!).
I’d love to know how your treats turn out! Leave a comment below with your favorite way to customize these treats, or share a photo of your creation. Happy baking!