Beaches make my heart happy. But I can’t visit the shore every day, no matter how much I want to.
The cost of beach decor in stores can be shocking. Those pretty coastal wreaths often come with price tags that make me wince. And most look too perfect, like they’ve never seen actual sand or salt water.
You can bring the beach home without breaking the bank!
I’ve found a way to create my own beach wreath DIY, using things I already had plus a few low-cost items. This project lets me enjoy ocean vibes year-round, and it’s way more personal than anything from a store.
Plus, it’s so simple that even craft beginners can make one in an afternoon.
What Is a Beach Wreath?
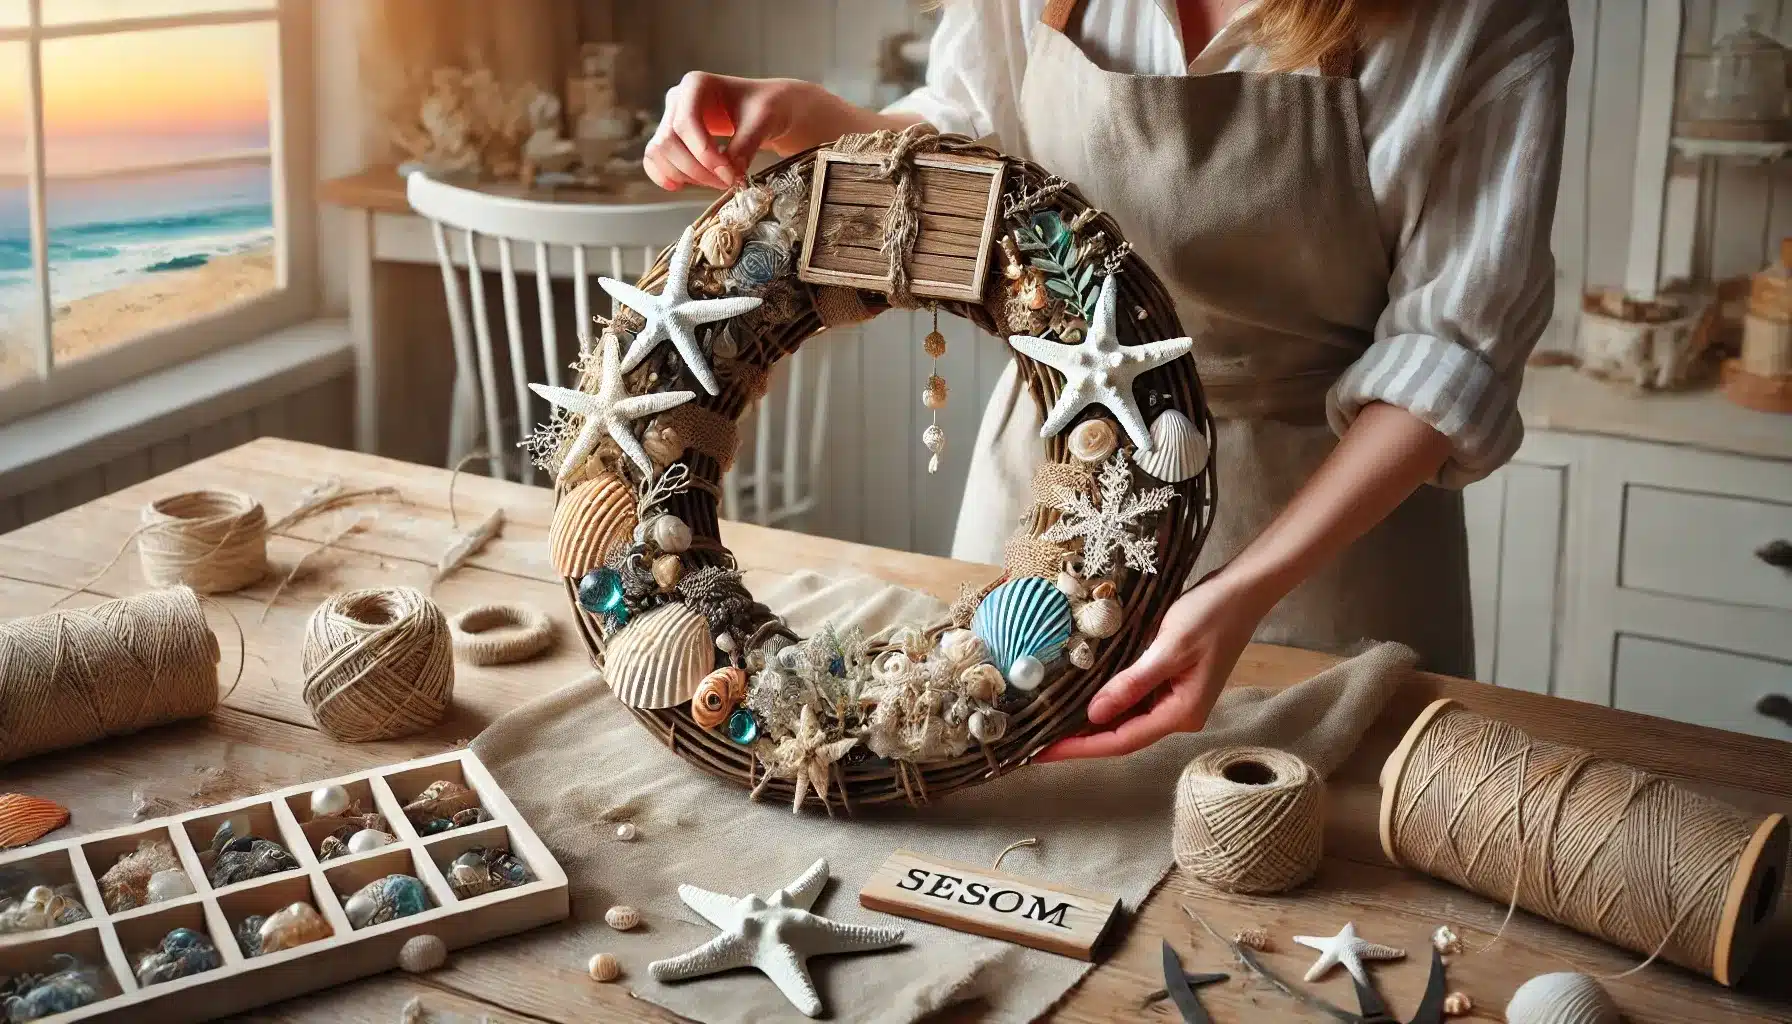
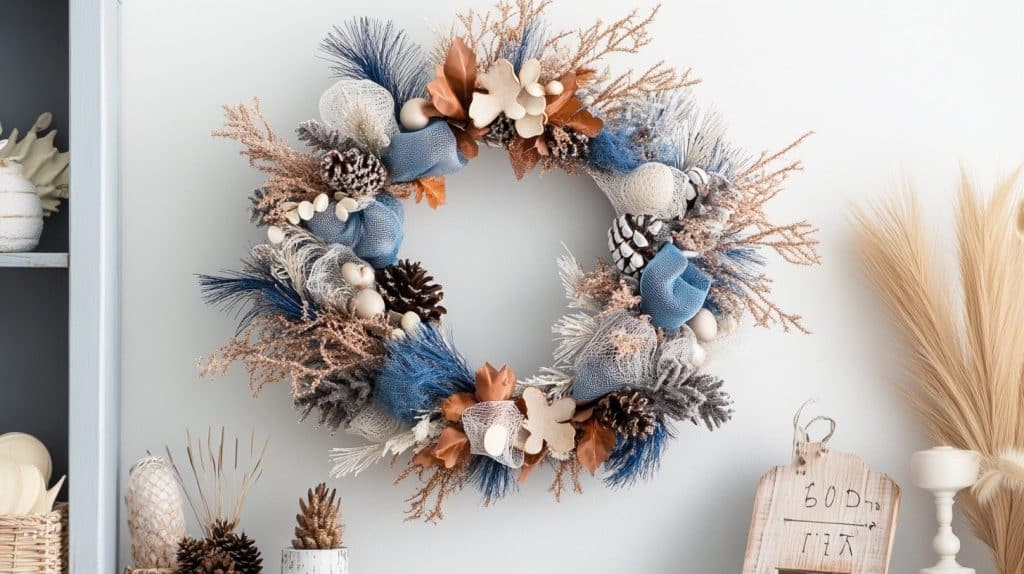
A beach wreath is a decorative ring made with items you’d find at the shore or that remind you of coastal settings. It brings the relaxed, breezy feeling of beach days into your home all year round.
Regular wreaths use flowers or seasonal items; beach wreaths feature ocean-inspired elements.
When I made my first one, I used shells collected during family vacations, bits of rope that looked like they had washed up on shore, and colors that reminded me of sand and water.
Of course, these wreaths work well on front doors, but I’ve also hung them in bathrooms, over beds in guest rooms, and even as wall art in my kitchen.
Some of my friends use them as table centerpieces with candles in the middle.
Beach wreaths stay in style all year, not just during the summer months. They add a light, casual touch to any room and bring back happy memories of days spent by the water. Every time I walk past mine, I feel a bit more relaxed.
How Long Does It Take for a Beach Wreath DIY?
Beach wreath diy is a quick project that fits easily into your schedule. From my experience, the entire process takes about 1-2 hours from start to finish. The time varies based on a few factors:
- If you’re new to crafting, you might need closer to 2 hours as you learn the techniques. As someone who made her first wreath last year, I found that taking my time helped me avoid mistakes.
- The design complexity matters, too. A simple wreath with fewer items might take just 45 minutes. When I added more shells and details to my second wreath, it took me about 30 minutes longer.
- The drying time for glue depends on your climate. In humid areas, allow extra time for proper setting. I live in a damp coastal area, so I usually let my wreaths sit overnight before hanging them.
The good news is that you can finish this project in one sitting while watching your favorite TV show!
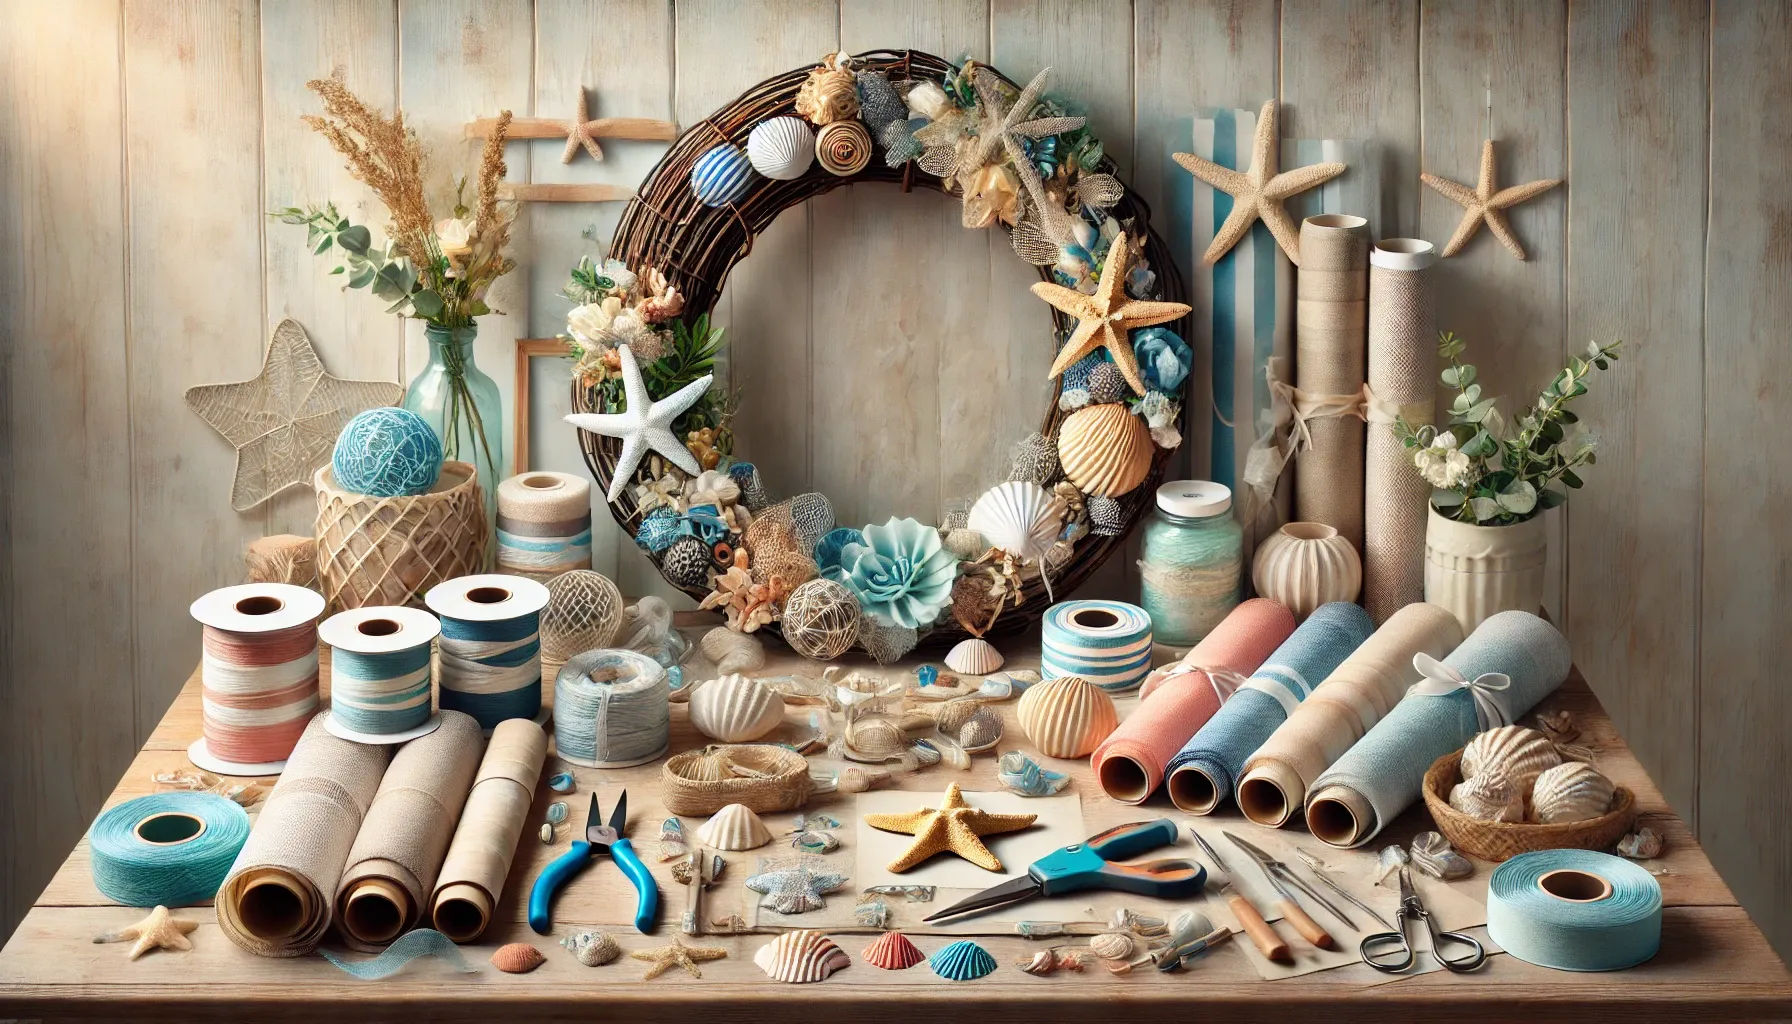
Choosing the Perfect Wreath Base
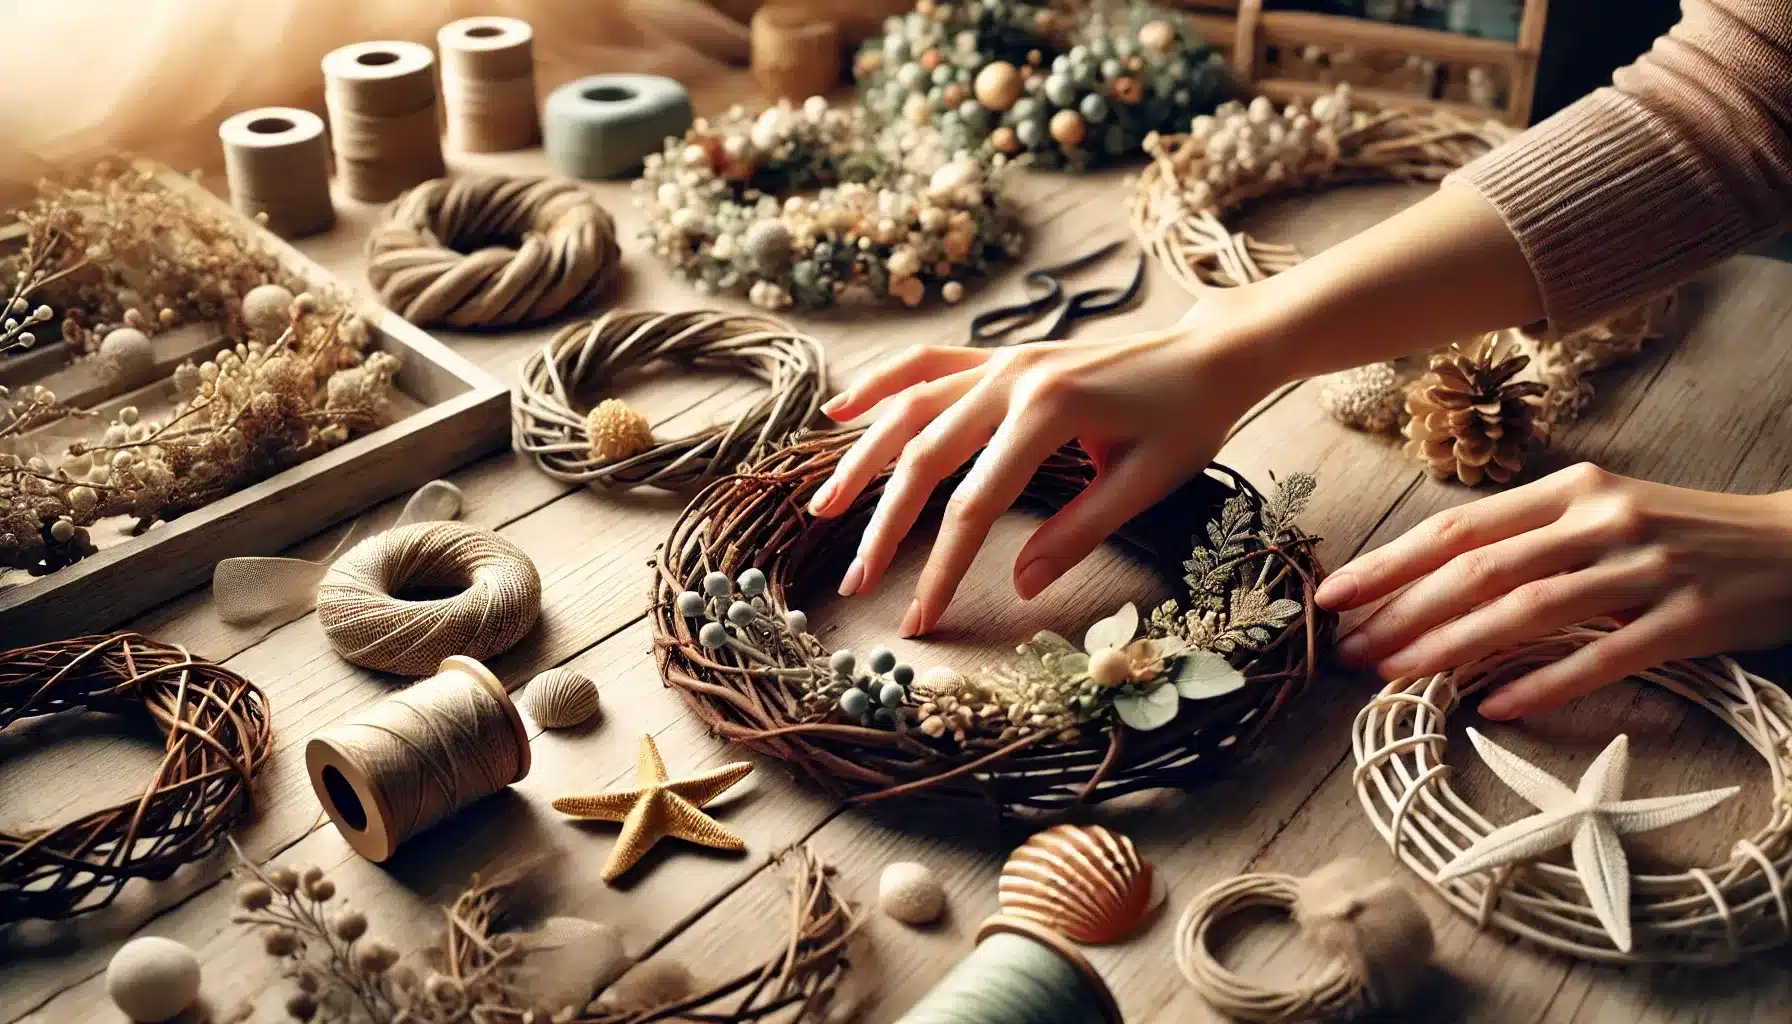
The base of your beach wreath sets the foundation for your entire creation. Here’s what I’ve found works best after making several wreaths:
Grapevine Wreath
This natural base gives your beach wreath a rustic, organic feel. I like how the twisted vines create small gaps where I can tuck in smaller shells without glue. The brown color works well with beach themes and mimics driftwood.
When I made my first wreath, I found the sturdy structure held heavier items like large shells without sagging.
Foam Wreath
Foam bases are light and easy to work with. You can push pins directly into them, which makes adding items quick. I wrapped my foam wreath with burlap first to give it texture.
The foam accepts hot glue very well, and items stay put. Its light weight makes it perfect for doors you open often.
Wire Wreath
For a more open, modern look, wire frames work wonderfully. They allow you to create a see-through effect with spaced-out elements.
I used a wire base last summer and wrapped it with a thin rope for a nautical touch. The spaces between wires let light pass through, creating nice shadows on the wall.
Which base should you pick? I find grapevine works for most beach wreaths, but your choice depends on the items you want to add and where you’ll hang your finished wreath.
Step-by-Step Guide to Crafting a Beach Wreath
Let me walk you through exactly how to make your own beach wreath from start to finish. These simple steps make the process easy for anyone, even if this is your first craft project.
Step 1: Gather Your Tools & Materials
Before you begin, make sure you have all the supplies ready. Here’s a handy table to keep things organized:
-
Hot glue gun & glue sticks
-
14-inch wire wreath frame
-
Scissors or wire cutters
-
24 chenille stems (pipe cleaners)
-
Ruler or measuring tape
-
3 white fabric table runners
-
Clips or clothespins
-
3 rolls of 6-inch mesh (brown, blue, white)
-
Floral wire (12-inch pieces)
-
Assorted ribbons (various textures & widths)
-
Cardboard (for measuring cuts)
-
Decorative sign (coastal or nautical theme)
Step 2: Prepare the Wreath Base
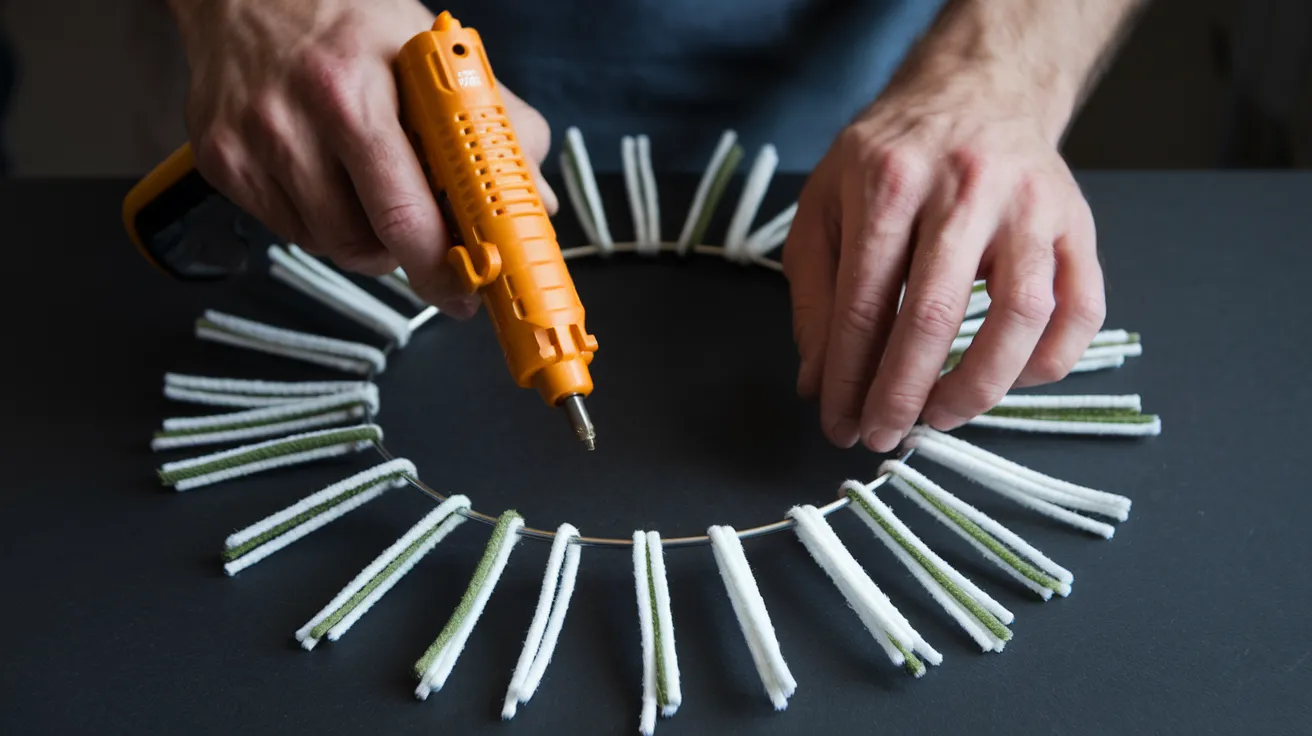
- Take your 14-inch wire wreath frame and attach 24 chenille stems evenly across the frame.
- Place 12 stems on the outer ring, spacing them evenly (about two per section).
- Secure the remaining 12 in the center, positioning them in between the outer stems.
- Twist each chenille stem tightly around the frame, ensuring they stay in place.
- For extra hold, apply a small dot of hot glue under each twist to prevent movement.
Step 3: Attach the Fabric Base
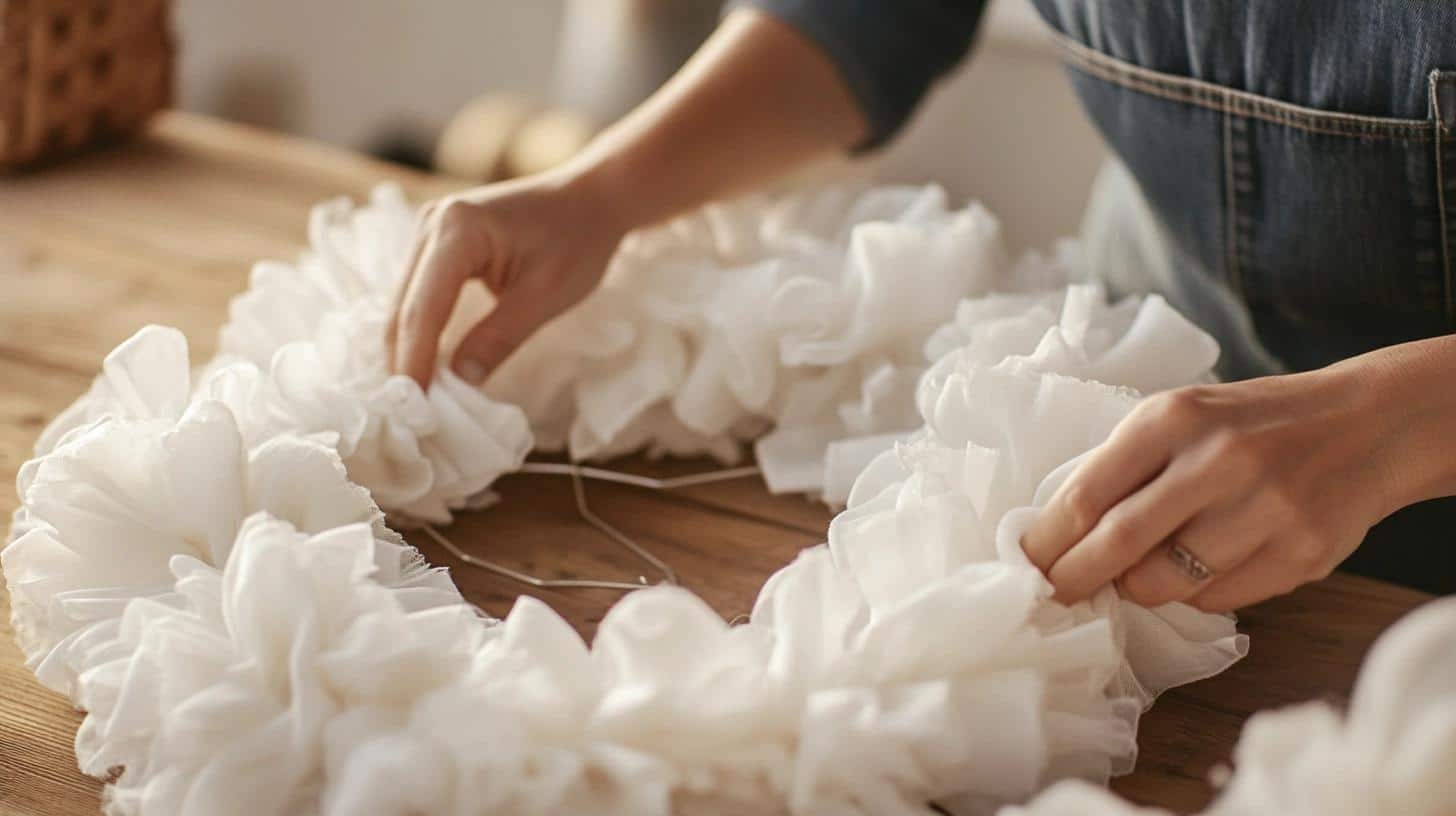
- Unroll your fabric table runners and remove any creases by lightly smoothing them out.
- Gather one pointed end (about 3 inches) and tuck it under a wire support on the outer ring.
- Place it between two chenille stems and twist the stems securely to hold it in place.
- Now, create soft, puffy loops by measuring out 5-inch sections of fabric.
- Tuck the fabric edges under each other before securing them to the next chenille stem.
- Continue around the wreath, fluffing the fabric as you go.
- When you reach the end of a fabric runner, tuck its tail under the frame and begin the next runner.
- Once the outer ring is covered, repeat the process for the inner ring using the same method.
Step 4: Add Mesh Ruffles for Texture
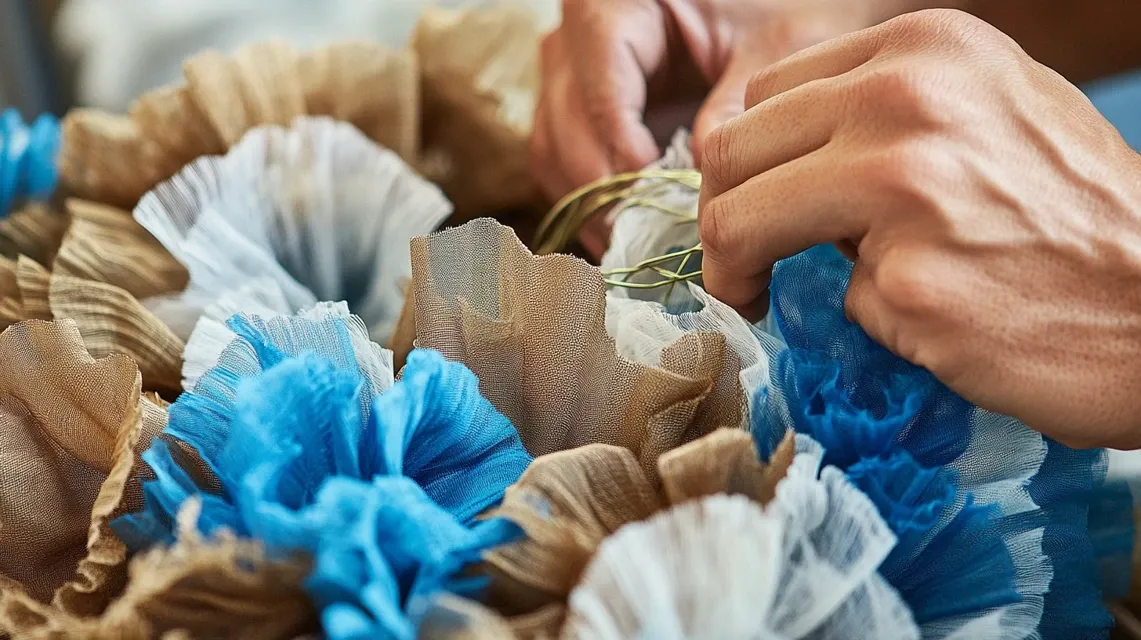
- Take your brown, blue, and white mesh rolls and cut them into 12-inch strips using scissors or a cutting board.
- You will need 8 strips of each color (total: 24 pieces).
- To create ruffles, lay one strip flat and roll each end inward about 4 times to create two curls. Then, scrunch the center together and clip it to hold.
- Repeat this with all colors, then layer them.
- Secure each bundle with floral wire and twist tightly.
- Attach the ruffle bundles to the wreath by placing them between the chenille stems and securing them tightly to the frame.
- Fluff the ruffles to create a full, airy effect.
Step 5: Create & Attach Ribbon Clusters
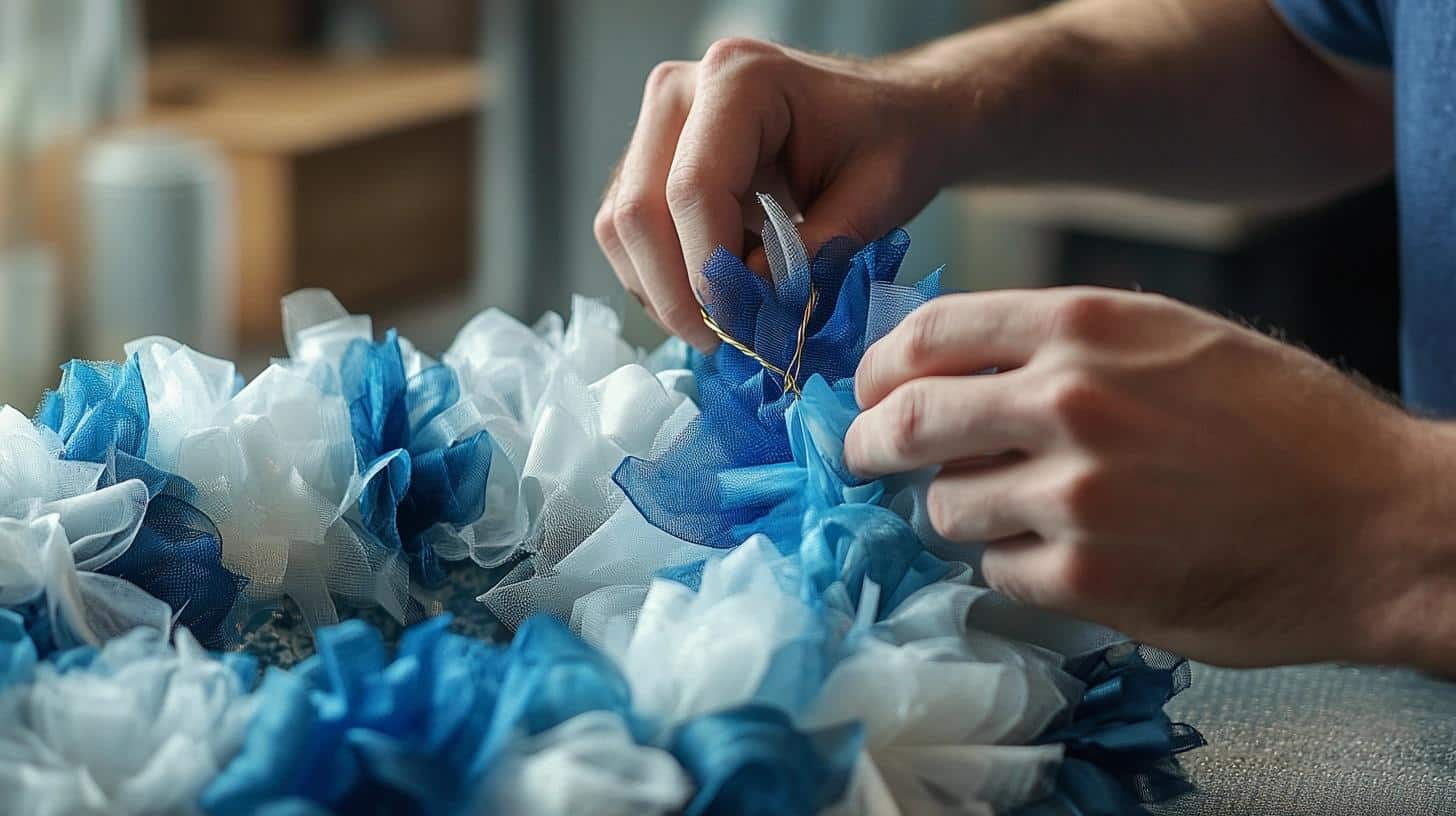
- Cut 35 ribbon strips into 10-inch lengths using a ruler and scissors.
- Dovetail the ends by folding each ribbon in half and cutting at an angle.
- To make seven ribbon clusters, layer them one by one.
- Find the center of each bundle, pinch it, and secure it with floral wire.
- Attach the clusters between the mesh ruffles, securing them to the frame.
- Fluff and spread the ribbon tails for a full, elegant look.
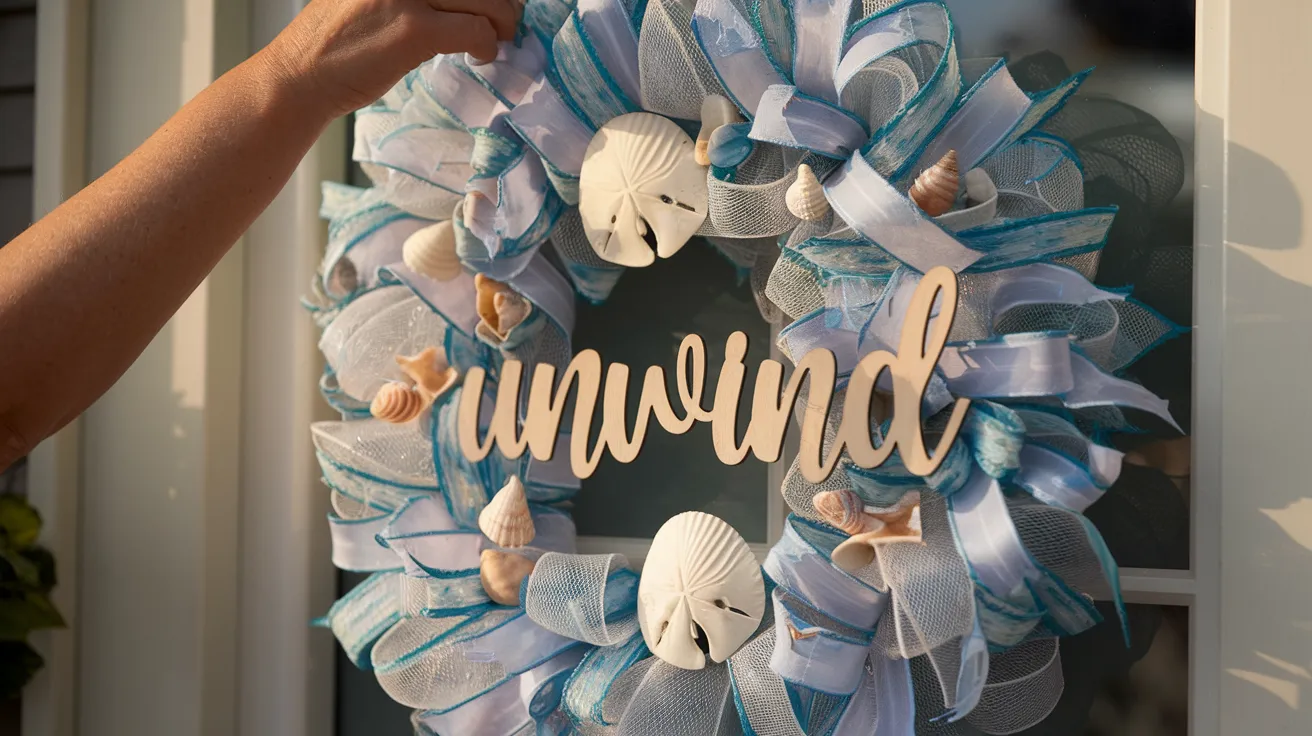
Step 6: Add the Decorative Centerpiece
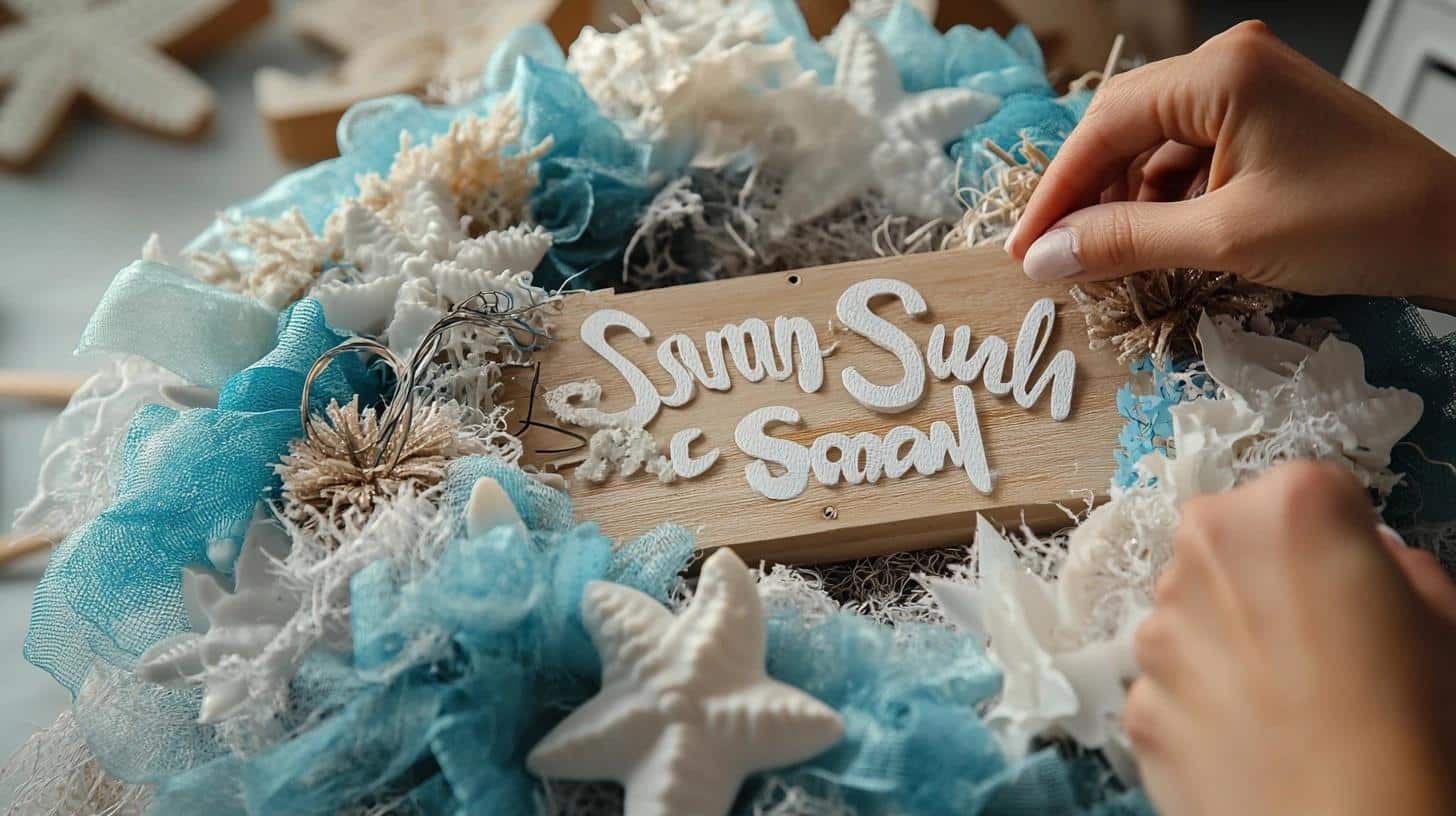
- Choose a coastal-themed wooden sign (e.g., “Surf, Sun & Sand” or “Welcome to the Beach”).
- Cut two 12-inch pieces of floral wire, fold them in half, and hot glue them to the back of the sign.
- Once dry, center the sign on your wreath and twist the wire ends onto the frame to hold it securely.
Step 7: Final Touches & Embellishments
- If desired, add a nautical rope accent by looping it between the ribbon clusters and hot-gluing it in place.
- Using a hot glue gun, attach seashells and starfish to the ribbon clusters for extra coastal charm.
- (Optional) Create a coordinating bow. For this, use the remaining ribbon to make a bow with 6-inch tails and 4-inch loops. Along this, Secure it with floral wire and attach it to the upper left side of the wreath.
- Once everything is secure, fluff up the ribbons and mesh for a polished, full-bodied wreath.
For a more detailed tutorial on how to make a beach wreath at home, check out the video below:
Tips for Perfecting Your Beach Wreath DIY
After making several beach wreaths, I’ve picked up a few helpful tricks that make the process smoother.
Here are my top tips for creating a wreath you’ll love:
Start with a plan, but stay flexible – Lay out all items on the table and roughly position them before gluing. This helps me see what works best together. Sometimes, my final design looks different from what I first imagined.
Mix textures for visual interest – On my favorite wreath, I combined smooth shells, rough starfish, and soft rope. The contrast makes the wreath more eye-catching and gives it depth.
Secure items properly – For heavy shells, I use both hot glue and thin wire for backup. Nothing is worse than finding your favorite shell on the floor a week later! I learned this the hard way when my large conch shell fell off during a windy day.
Work in sections – I finish one small area completely before moving to the next. This method helps keep the wreath balanced and gives me time to step back and check my progress.
Leave some empty space – Not every inch needs decoration. When I crammed too many items on my first wreath, it looked busy and lost its beach charm. Some open areas create a more natural, relaxed look.
Consider your door color – My blue door looks best with lighter-colored shells and accents, while my friend’s red door pairs well with darker, more neutral beach items.
Personalize Beach Wreath Designs, Making Them Unique
Yes, you can make your beach wreath truly yours! Personal touches make homemade wreaths special. Here are ways I’ve added my own flair to beach wreaths:
- Add items from your own beach trips. I stuck small shells I found with my kids in Florida into my wreath. Now, every time I look at it, I remember our fun day collecting treasures by the shore.
- Play with colors that match your home. While natural beach colors work well, I added bits of blue ribbon to match my porch furniture. You could use any colors that fit your style.
- Include unexpected items. On one wreath, I added a small wooden sailing boat my grandfather gave me. These unique pieces start conversations when guests visit.
- Try different shapes. Not all wreaths need to be round. I made an oval one that stands out from the typical circle designs everyone expects.
- Mix themes that matter to you. I combined beach elements with small fishing lure decorations because my family loves fishing at the coast. Think about what the beach means to you.
- Add seasonal touches. For summer, I wove in some fake sunflowers. In December, I clip on tiny red bows for a holiday feel without making a whole new wreath.
The best part of making your own beach wreath is that it tells your story. When people ask where I bought mine, I love sharing how I made it with items that have meaning to me.
Wrapping Up Your Beach Wreath
Beach Wreath DIY isn’t just about making a decoration – it’s about bringing a bit of coastal joy into your home.
Throughout this guide, I’ve shared tips on timing, bases, techniques, and personalization that will help you craft a wreath that feels uniquely yours.
Remember that the best beach wreaths come from mixing good techniques with personal touches. The shells from your family vacation, colors that match your home, or items that tell your beach story all make your creation special.
I hope this guide gives you the confidence to start your own beach wreath today. In just a couple of hours, you’ll have a beautiful piece that brings the relaxed coastal feeling home – no matter how far you live from the shore.
What beach memories will you include in your wreath?