Ever stared at a crumpled dollar bill and wished it could be something more magical? Halloween’s around the corner, and those store-bought decorations cost a fortune.
You already have everything needed for one of the coolest witch hat decorating ideas right in your wallet.
This simple money origami transforms any bill into a whimsical witch hat in just five minutes.
No special skills required, and it costs exactly one dollar. Ready to turn pocket change into Halloween magic?
What You’ll Need
Honestly, this might be the simplest craft supply list you’ll ever see.
| Required | Optional |
|---|---|
| One crisp dollar bill (any denomination works) | Flat surface for better control |
| Bone folder or ruler for sharp creases |
That’s it. No glue, no scissors, no fancy tools. Just grab whatever bill’s in your pocket and let’s get folding.
Step-by-Step Instructions
Now comes the fun part, transforming that ordinary bill into something magical. Each fold builds on the last, so don’t rush through them.
Step 1: Create the Foundation
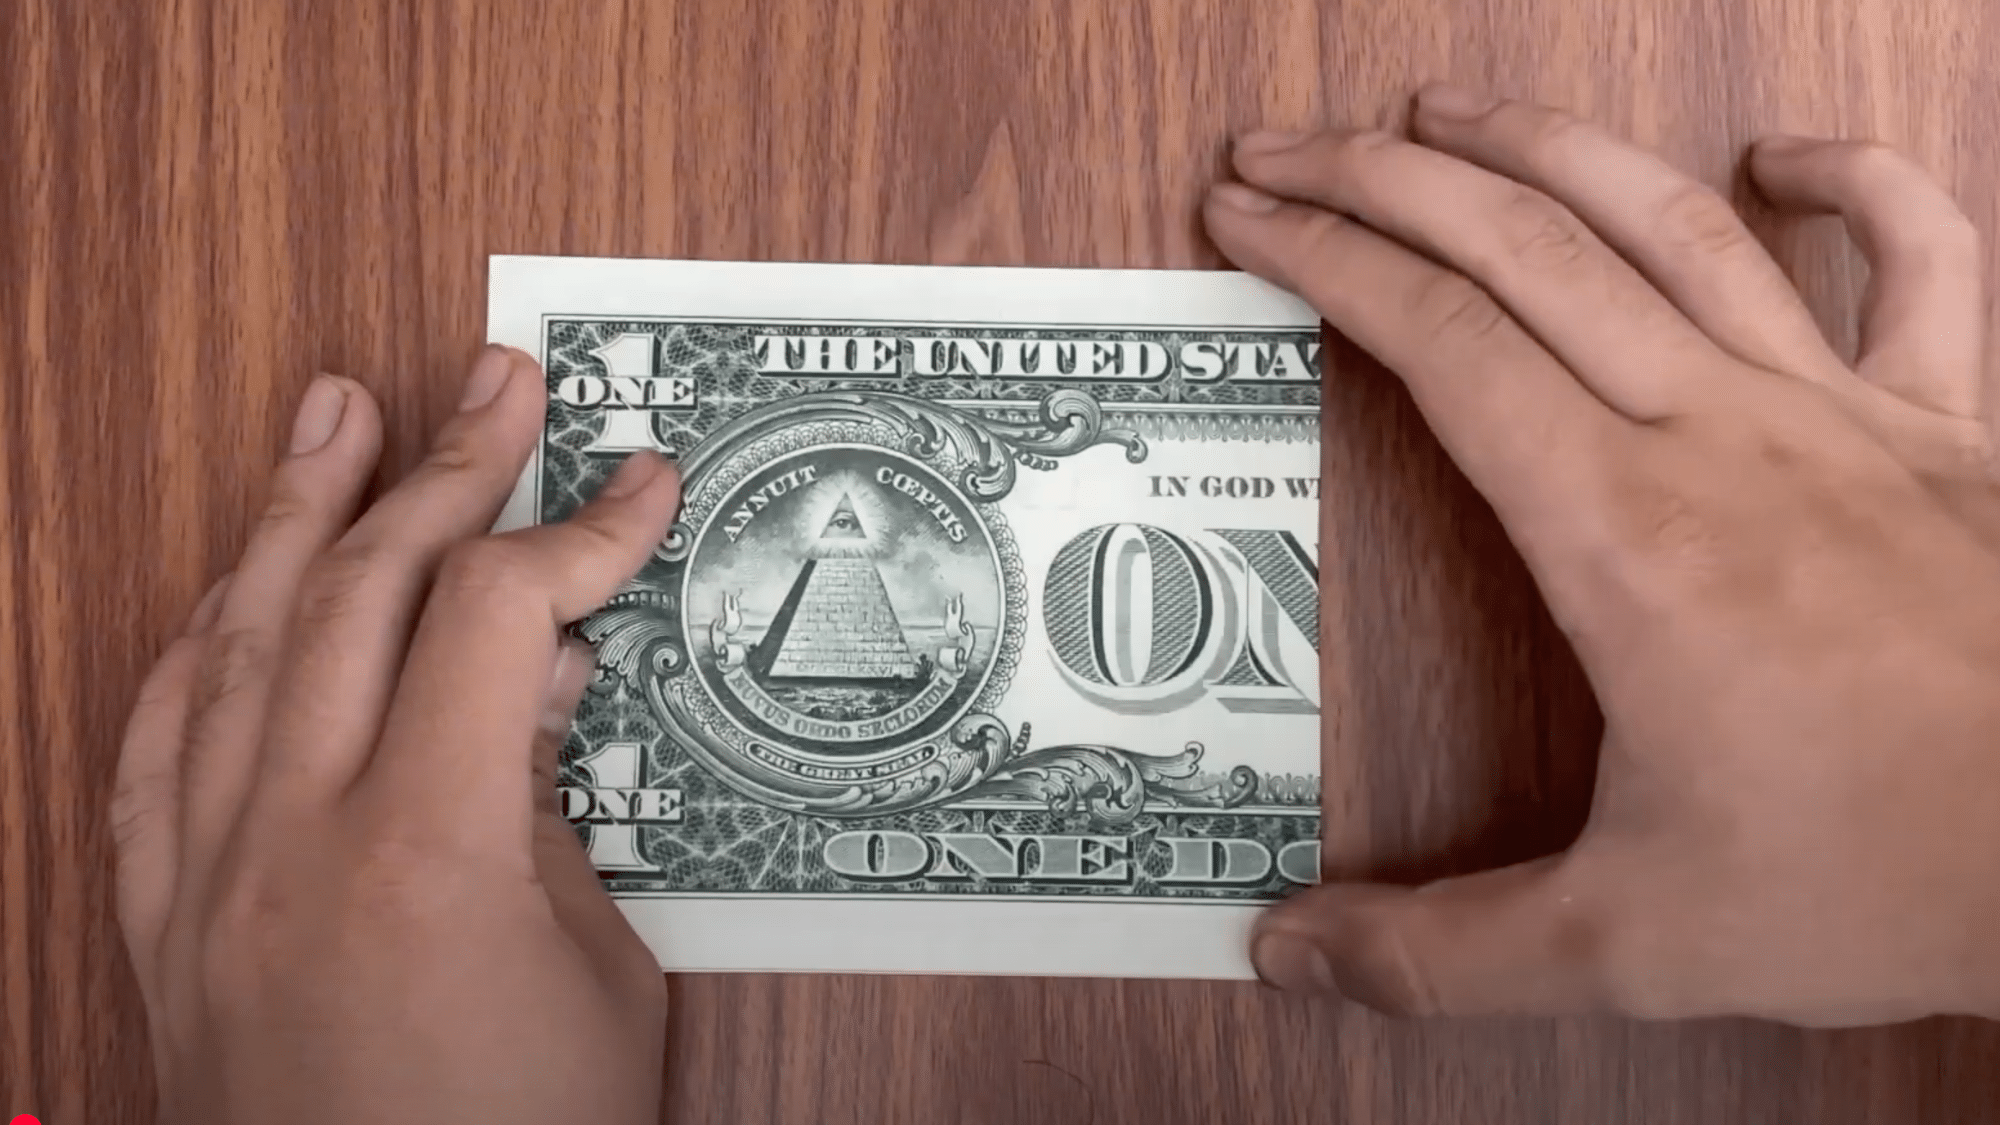
Fold your dollar bill in half lengthwise, bringing the long edges together to form a neat rectangle. Press firmly along the crease to create a solid foundation that will support your witch hat’s structure.
Step 2: Form the Basic Shape
Fold your rectangle in half again, this time bringing the shorter ends together. This creates a compact square shape and establishes the proportions needed for your witch hat’s distinctive silhouette.
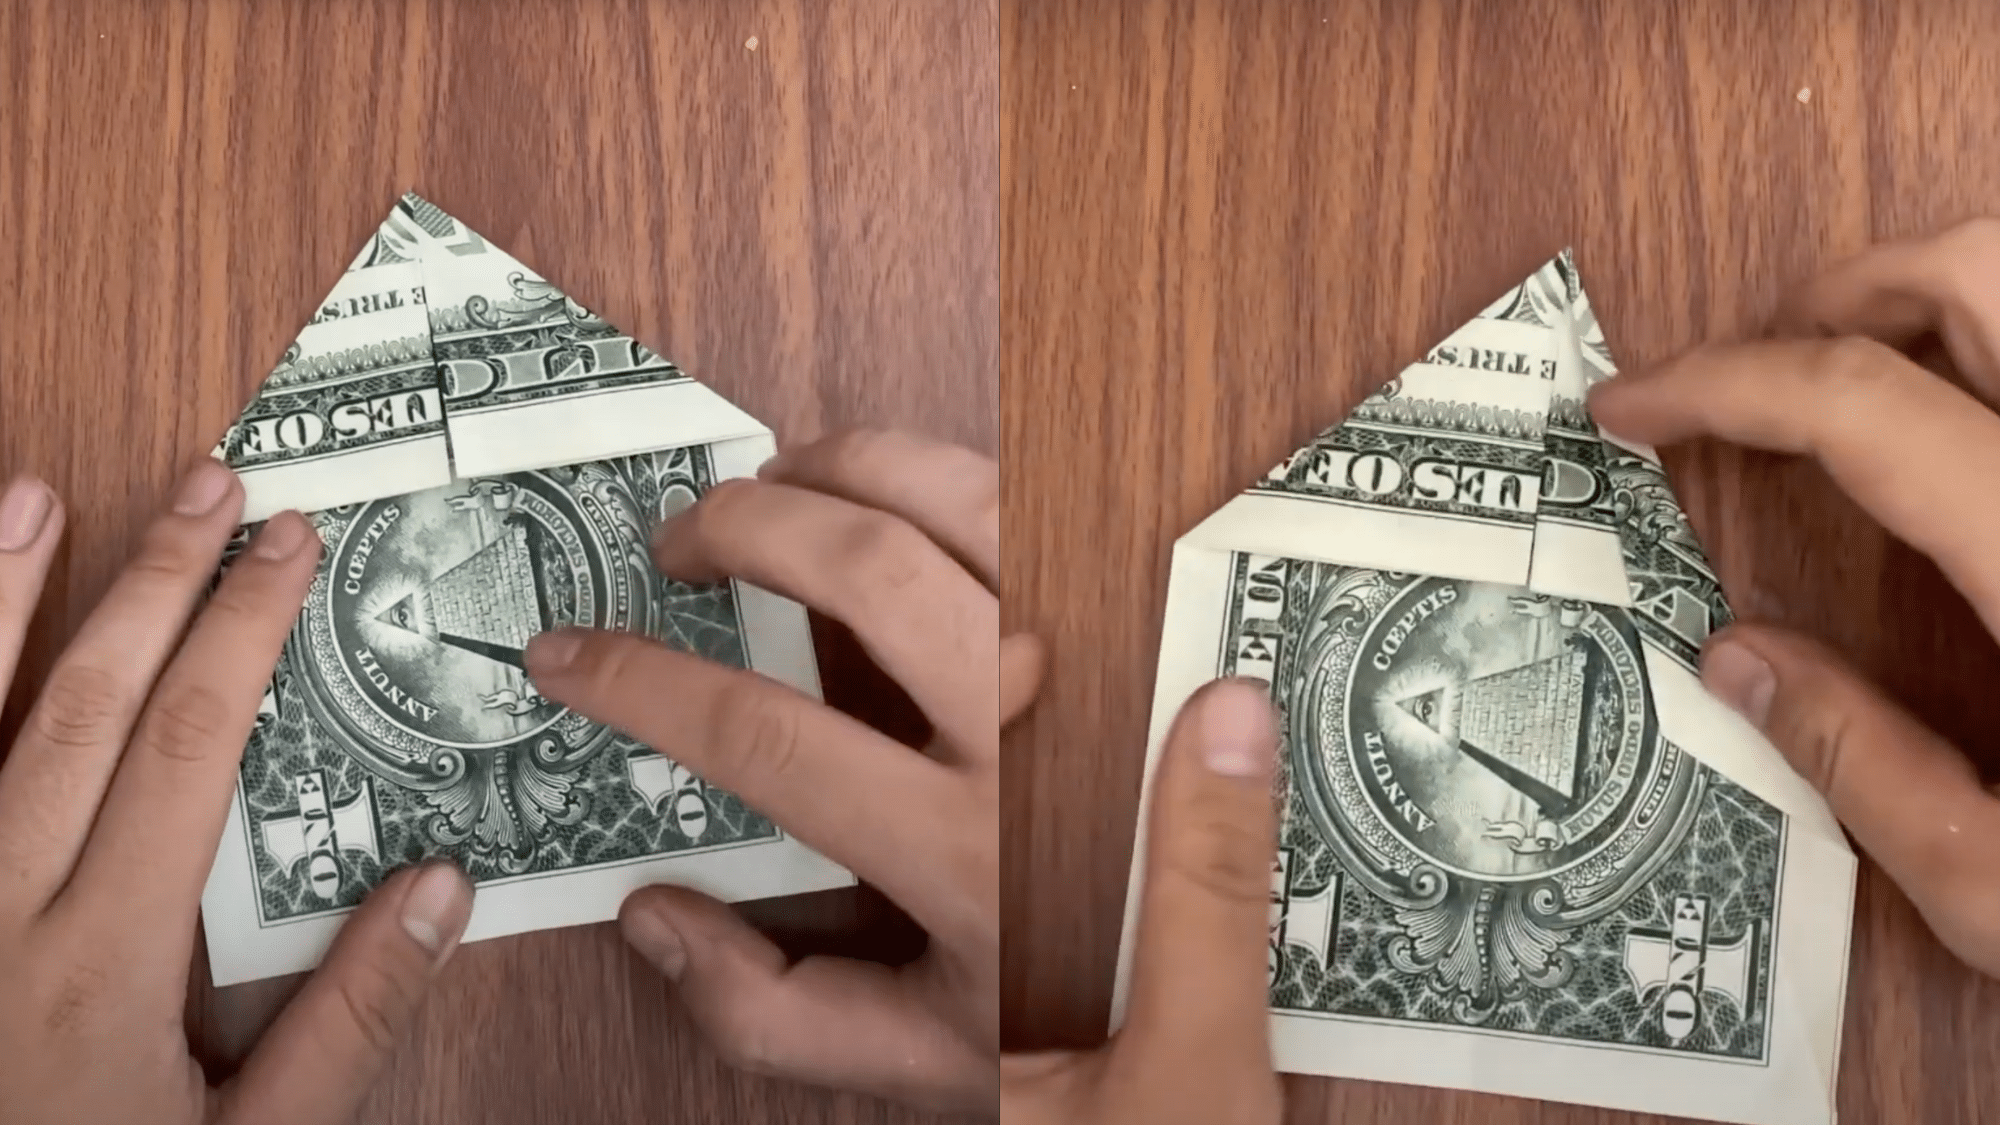
Step 3: Shape the Pointed Top
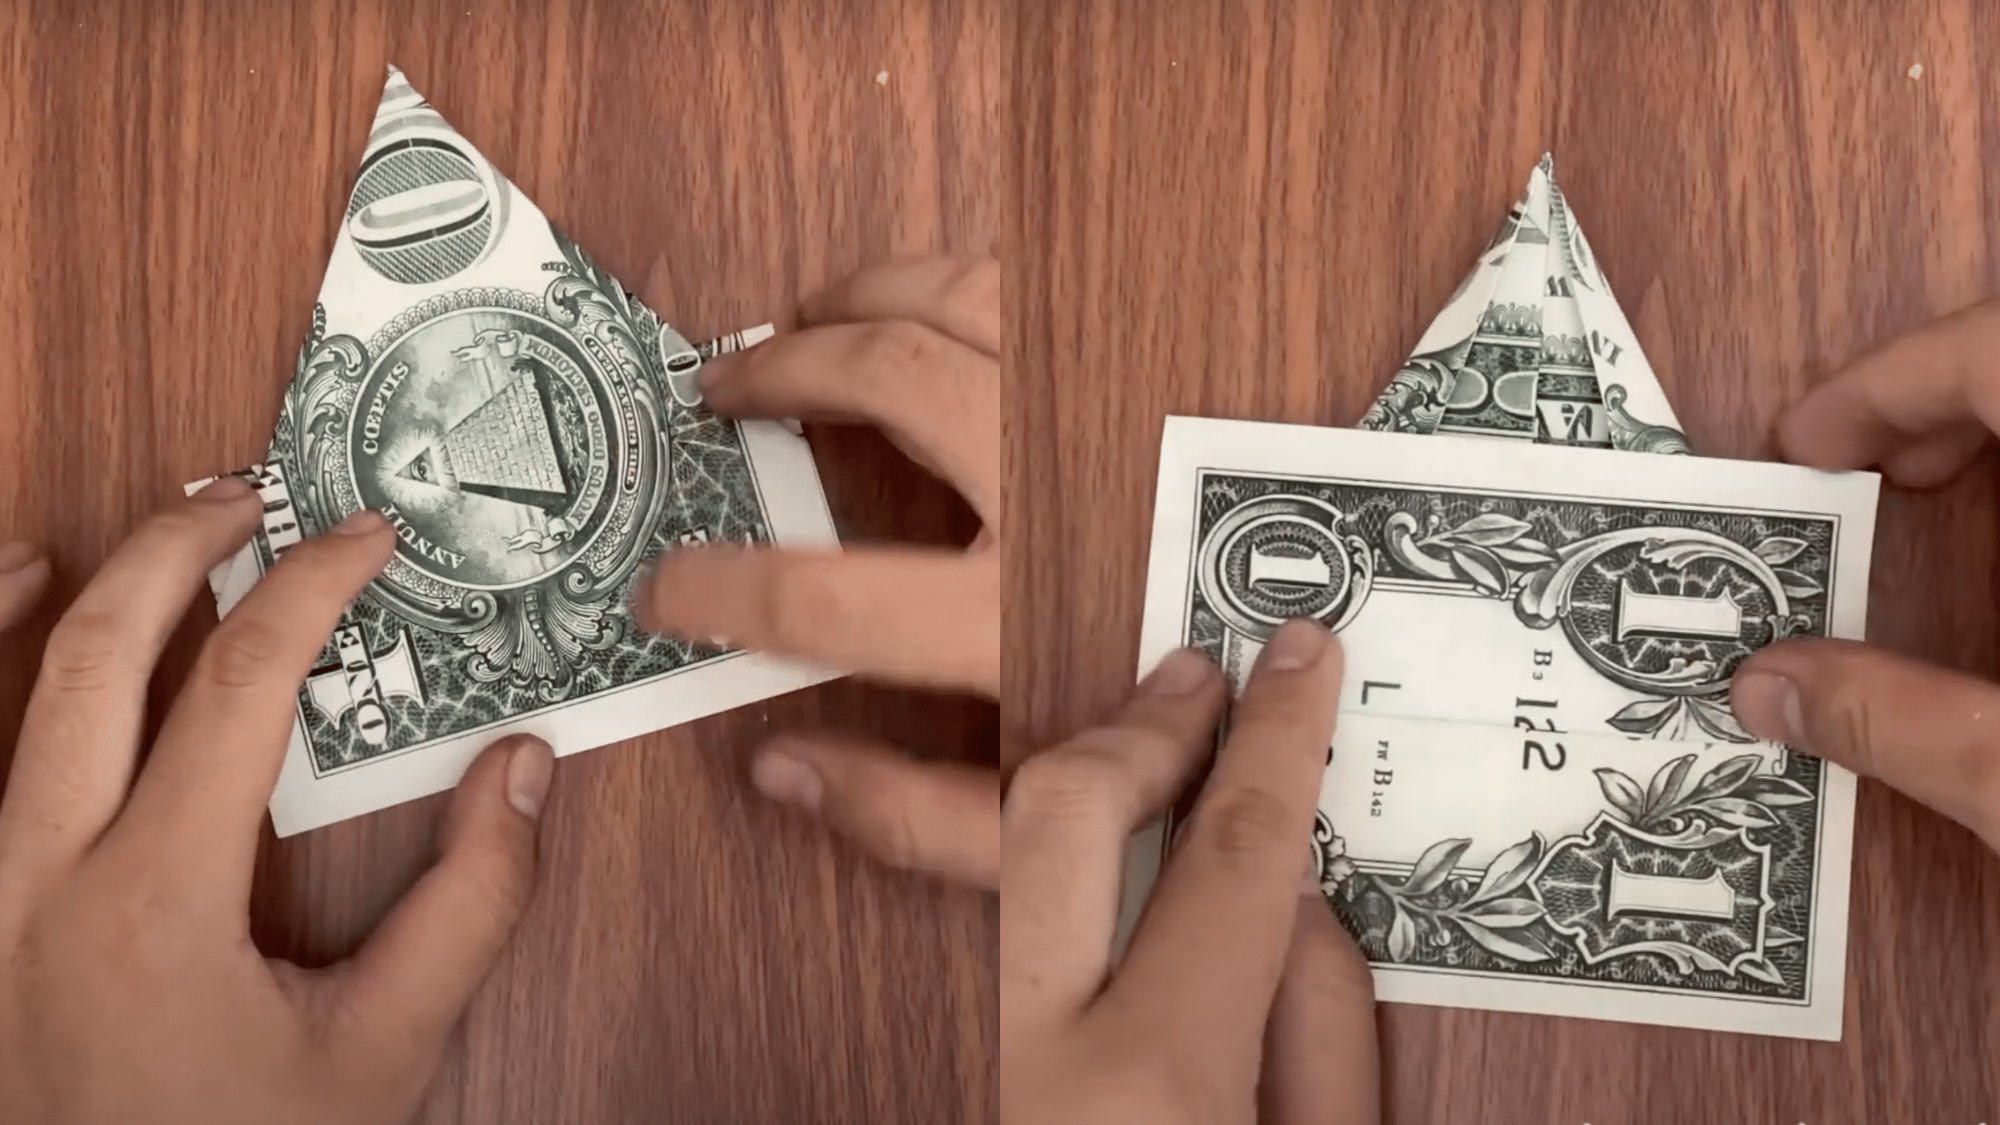
Open the last fold, then bring both top corners down to meet at the center crease. Press these diagonal folds firmly to create the characteristic pointed peak that gives your witch hat its magical appearance.
Step 4: Create the Hat Brim
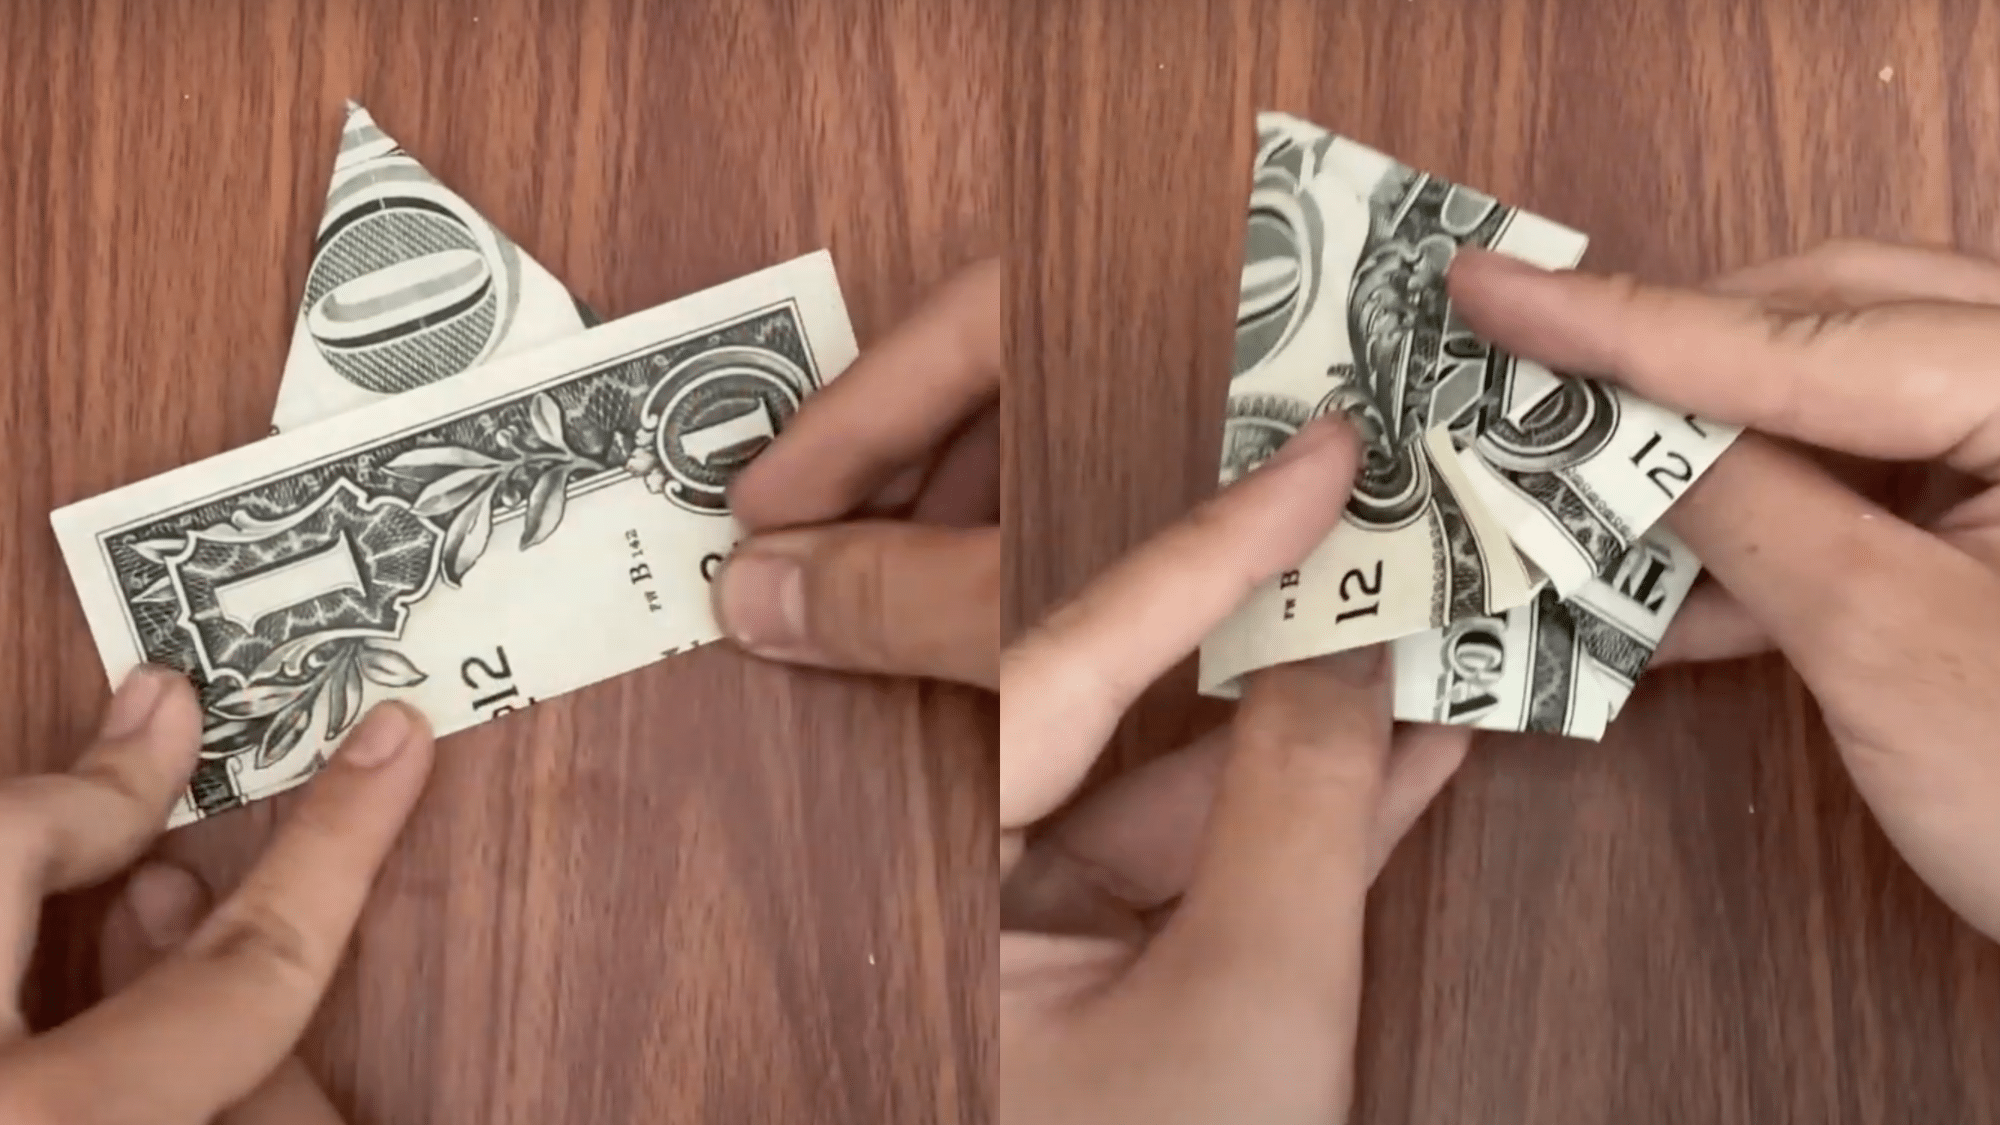
Fold the bottom edge up about one-third of the way to form the hat’s brim. Adjust the width to your preference, a wider brim creates a more dramatic look, while a narrower one appears more subtle.
Step 5: Final Touches and Display
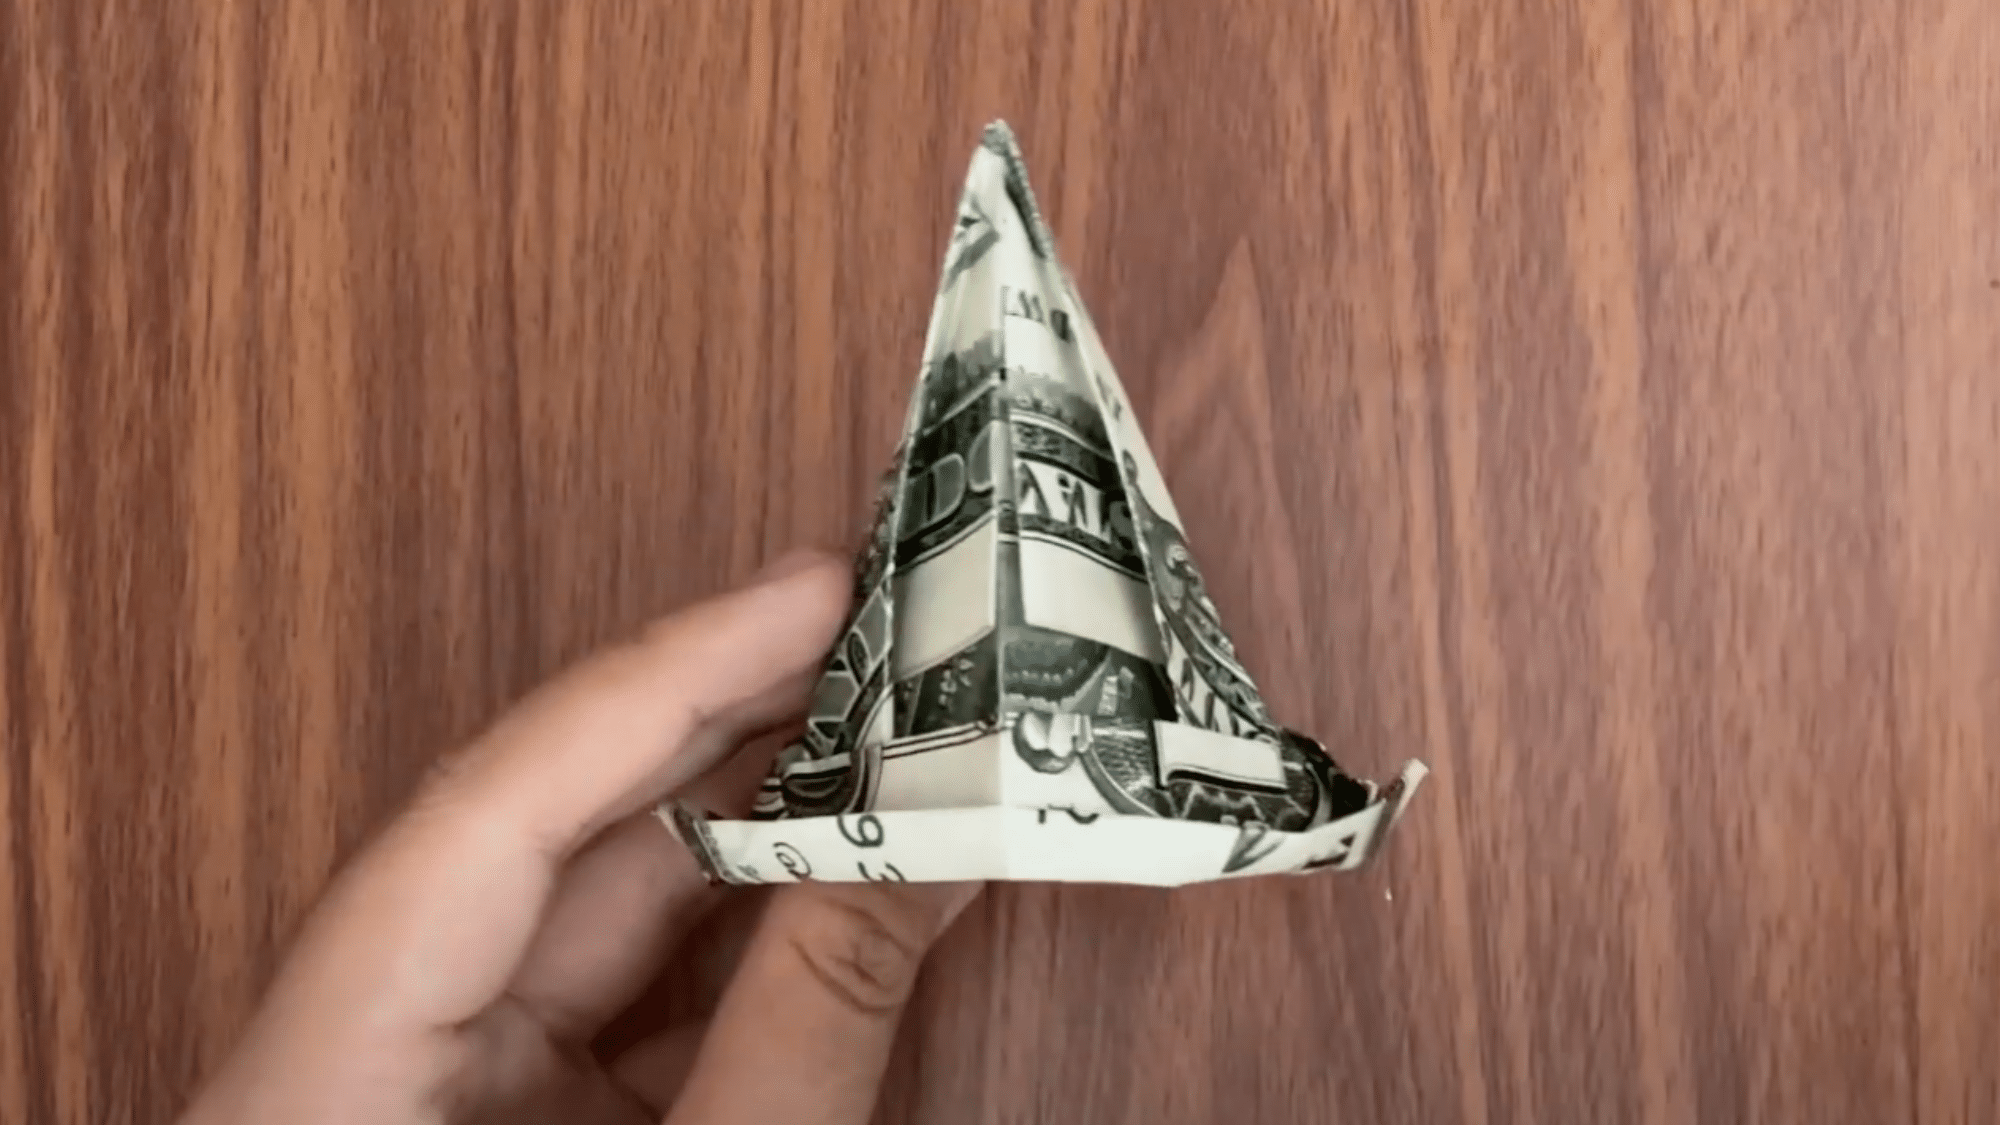
Gently curve the brim for a natural look and ensure all creases are sharp and clean. Your eye-catching witch hat is now ready to cast its spell as a festive decoration or conversation starter!
Tips for Success
A few simple tricks can make your witch hat look absolutely perfect, and save you from any frustrating do-overs.
- Start with a newer bill if you’ve got one lying around. Crisp money holds creases way better than wrinkled bills, and your final hat will look much cleaner.
- Practice on regular paper first if you’re feeling nervous about folding actual money. Copy paper works great for getting the hang of each step.
- Take your time with the creases, pressing firmly makes all the difference between a wobbly hat and one that actually stands up proud.
- Don’t stress about perfection on your first try. Even slightly lopsided witch hats have their own quirky charm.
Pro Tip: Make a bunch of these in advance and have them ready, you’ll be amazed at how many chances you get to give a little witch hat gift during Halloween.
Creative Uses and Gift Ideas
Once you’ve mastered the basic fold, these little witch hats can pop up everywhere during spooky season.
| Use Case | How It Works | Why It’s Great |
|---|---|---|
| Halloween table decor | Scatter several around your dinner table or mantle | Adds instant spooky charm without breaking the bank |
| Creative cash gifts | Fold birthday or tip money into hat form | Way more memorable than handing over a plain bill |
| Treat toppers | Place on cupcakes or candy bags | Tiny hats make everything more festive |
| DIY garland | String multiple hats together | Creates unique party decoration for pennies |
| Party favors | Make mini versions for guests | Everyone loves a quirky takeaway |
For hat wall displays, try mounting several witch hats on a piece of foam board or directly on your wall using removable adhesive strips.
Arrange them in odd numbers and vary the heights to create visual interest without damaging your walls.
Wrapping It Up
There’s something oddly satisfying about turning everyday cash into tiny art.
This witch hat proves you don’t need expensive supplies or complicated techniques to create something genuinely appealing.
The traditional black color that witches wear has always symbolized mystery and power in folklore, which makes these dark-hued origami creations even more ideal for your Halloween decorating.
Plus, it’s one of those rare crafts that actually gets easier with practice.