Do you want fresh greens all year?
Many people think indoor plant growing means big spaces and fancy tools. Not true! Growing microgreens indoors is actually simple and fun.
I was once just like you – curious but unsure where to start. Those tiny green shoots seemed too hard to grow. But guess what? They’re some of the easiest plants to raise at home.
My guide will show you how to create a basic setup, which varieties work best, the health perks they offer, and tasty ways to use them in your cooking.
Let’s get started!
Why Microgreens Grow so well Indoors
These small plants grow in indoor settings for some very basic reasons. Unlike full-sized veggies, microgreens need just a few key things to do well:
- They need very little light compared to mature plants
- A short growth cycle means less time for pests or diseases
- Small root systems don’t need deep soil or pots
- They use minimal water and nutrients
- Most varieties grow in normal room temps (65-75°F)
- No pollination needed as they’re harvested before flowering
They put all their early energy into making those first leaves, which happen to be the exact part we want to eat!
This makes them perfect for small spaces like apartments, kitchens, or windowsills where other garden plants might struggle.
Items Needed for Growing Microgreens Indoors
Growing microgreens indoors requires just a few basic supplies that won’t break the bank. I’ll show you exactly what you need to get started without any fancy equipment:
| Item | Purpose |
|---|---|
| Microgreen Seeds | Choose from radishes, salad greens, kale, and more. |
| Potting Soil | Provides a nutrient-rich base for growth |
| 444 Fertilizer (optional) | Promotes healthier microgreens (if desired) |
| Planting Trays | For holding the growing medium and seeds |
| Spray Bottle | For misting and keeping seeds moist |
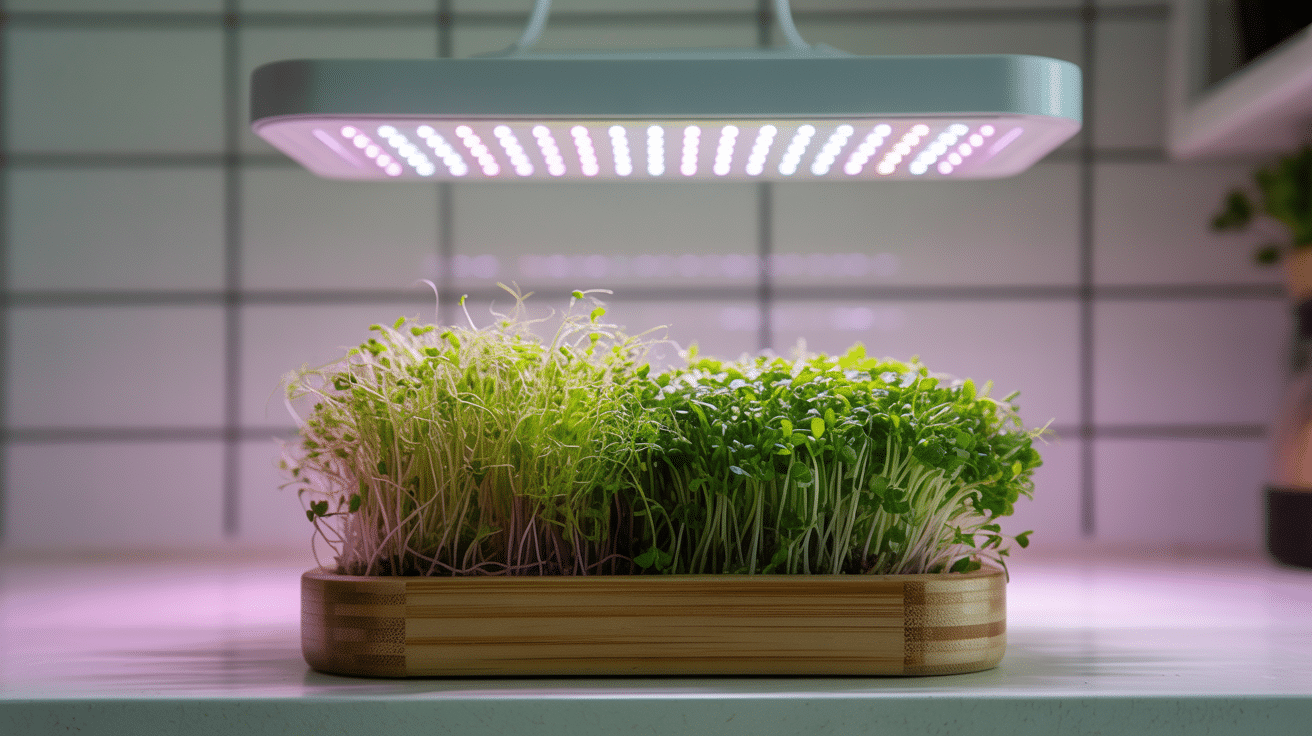
| Grow Light or Natural Light | Essential for the plants to grow and survive |
| Weights (e.g., rocks or bricks) | Helps simulate underground conditions |
| Scissors or a Sharp Knife | For harvesting the microgreens cleanly |
Once you gather these simple items, you’ll be all set for growing microgreens indoors with minimal fuss and maximum results. Most of these things may already be in your home!
Easy Instructions to Growing Microgreens Indoors
Setting up your own system for growing microgreens indoors is easier than you might think. I’ll walk you through the steps that have worked well for me over many harvests.
Step 1: Prepare the Growing Medium
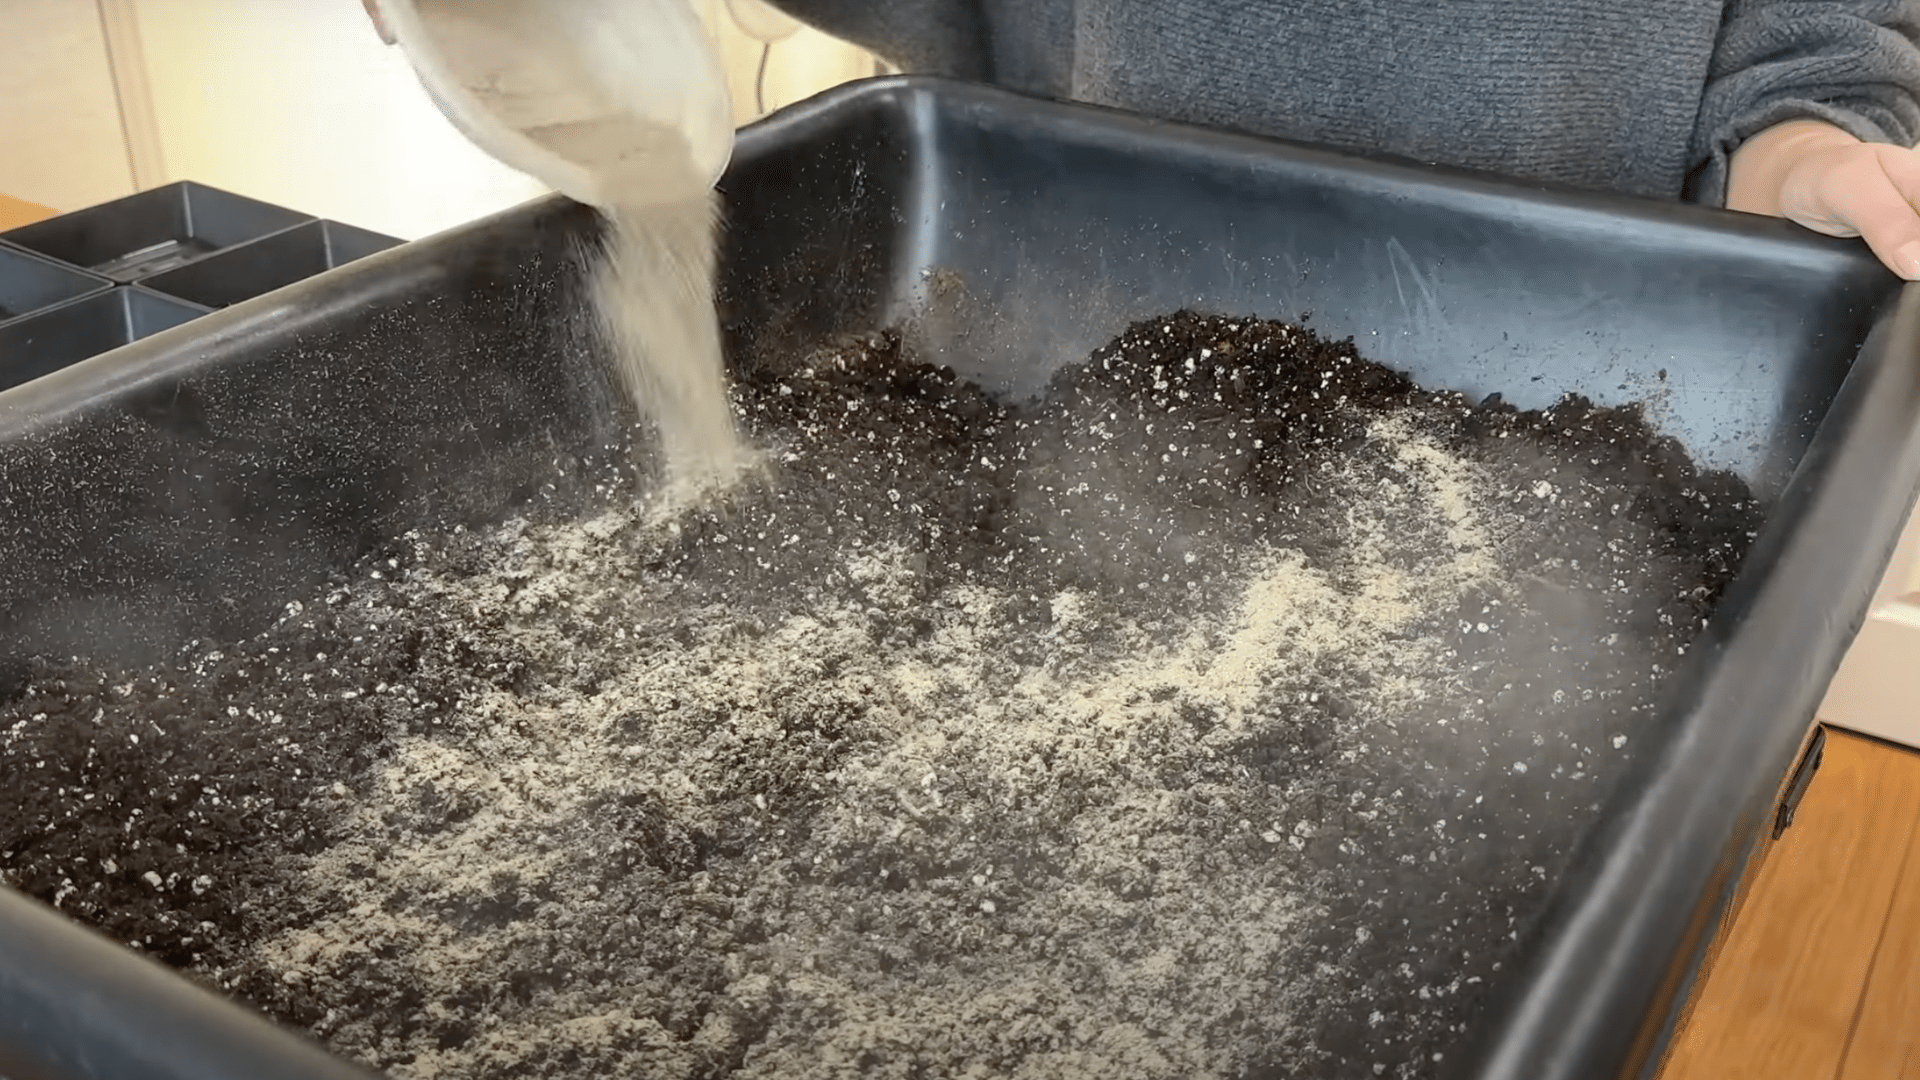
Start by selecting a good quality potting soil, such as Promix or Black Gold Potting Mix, which will provide the right texture and drainage for microgreens. If you’re feeling audacious, mix in a bit of 444 fertilizer to boost growth, but microgreens don’t have to grow.
Fill your trays with the prepared potting mix. Be sure not to compact the soil too tightly, as air circulation is key to healthy root development.
Gently level the surface with your hands or a small tool to create a smooth, even base for planting your seeds.
Step 2: Plant Your Seeds
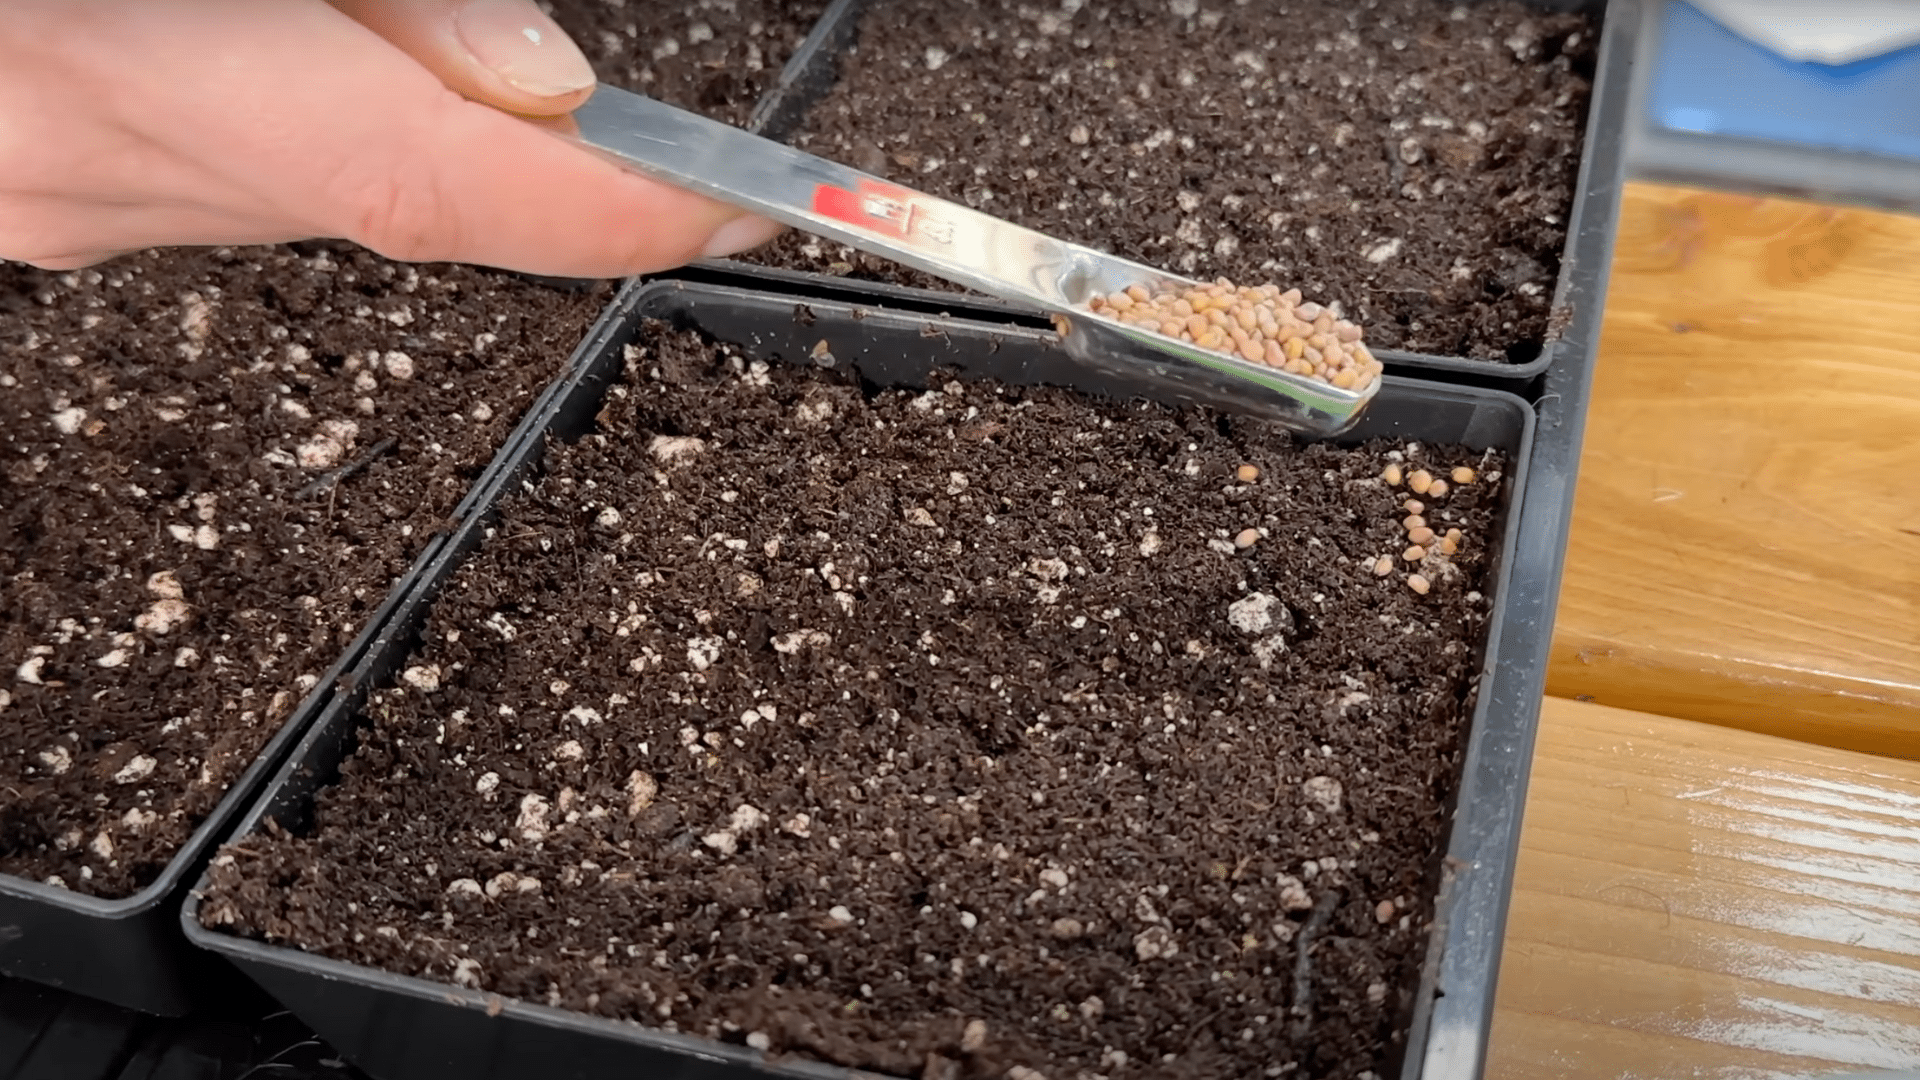
Once the soil is prepped, it’s time to plant your seeds. Here’s how to do it:
- Choose Your Seeds: Opt for fast-growing varieties like radish, kale, or salad greens.
- Spread the Seeds: Gently sprinkle the seeds over the soil, ensuring they are evenly distributed.
- Avoid Overcrowding: Leave some space between seeds for ventilation and healthy growth.
- Check the Seed Packet: Follow the packet’s instructions for precise seed quantities.
Planting the right way ensures your microgreens grow strong and healthy.
Step 3: Water the Seeds
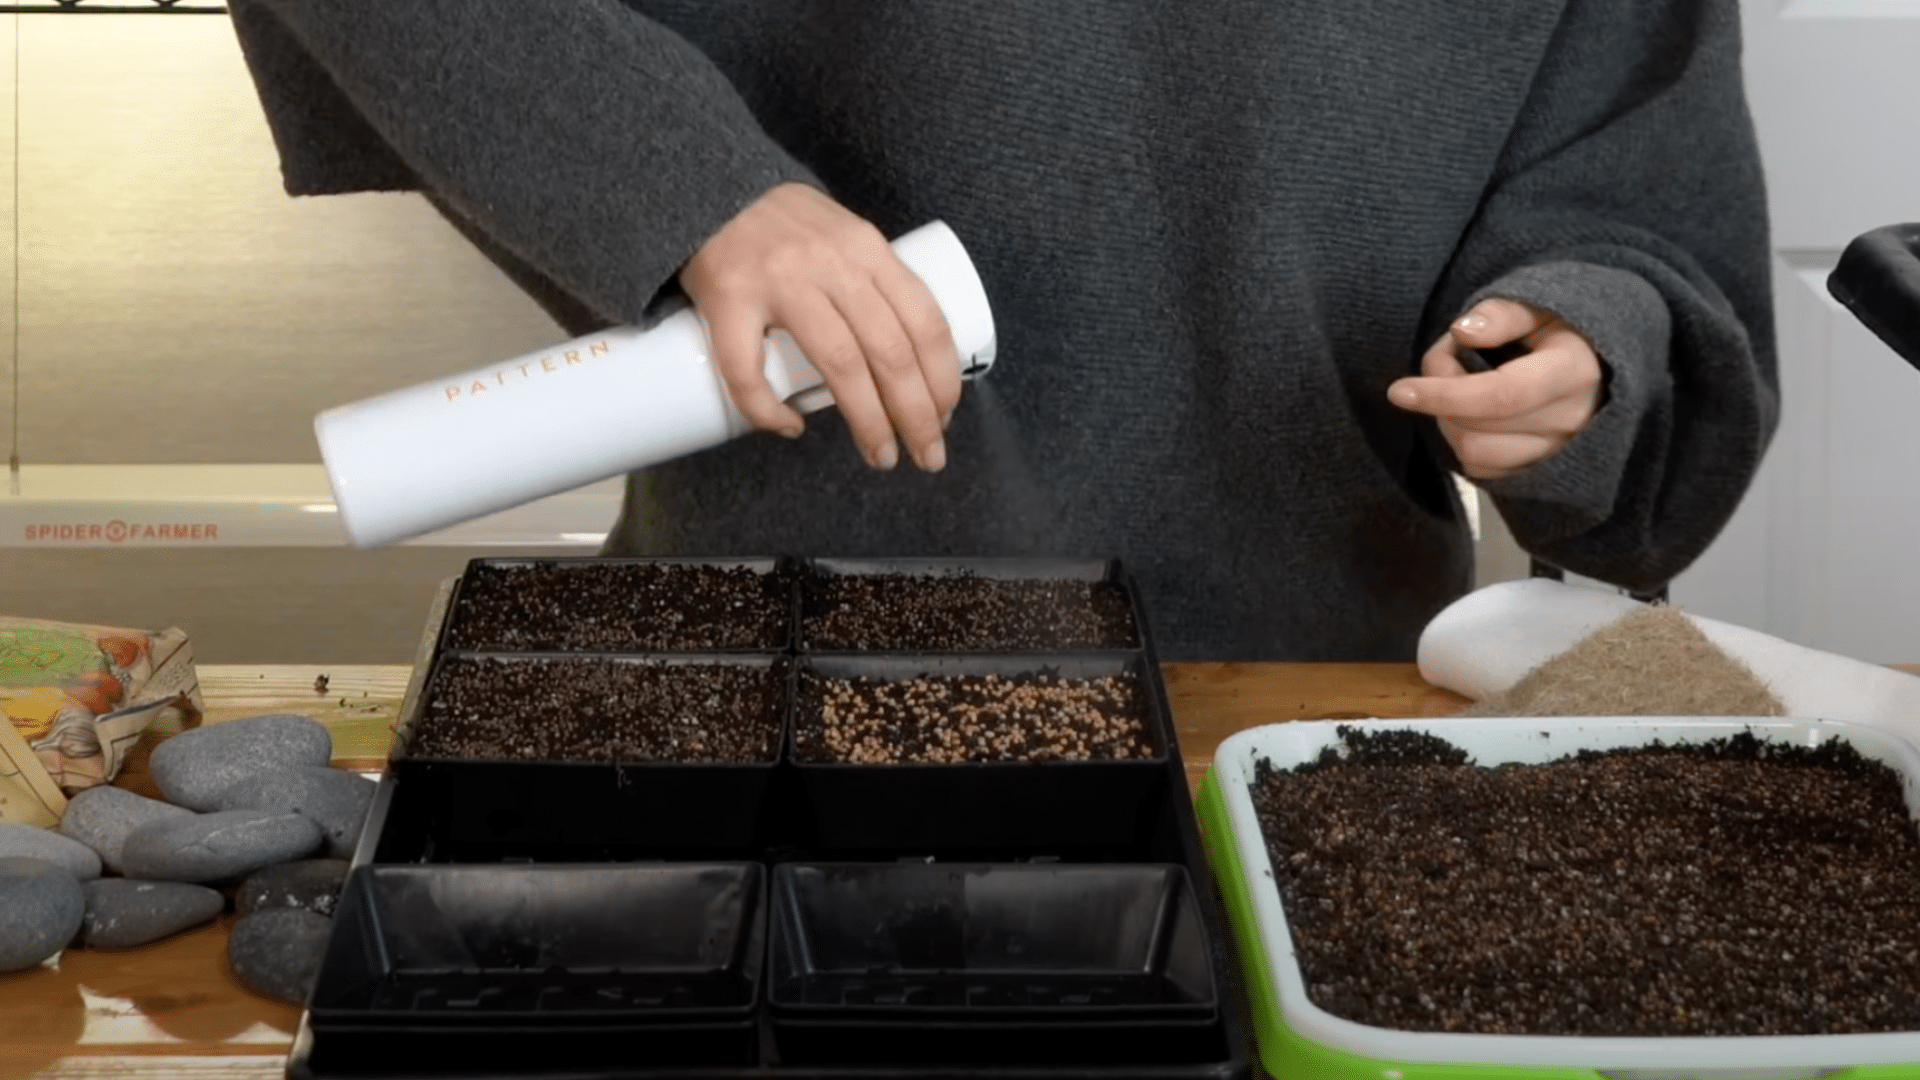
After planting the seeds, it’s essential to water them correctly for successful germination. Use a fine mist spray bottle to moisten the seeds.
A gentle mist will prevent the seeds from being washed away or soaking in too much water. The goal is to keep the seeds moist, not wet.
Check your seeds daily to ensure they’re not drying out. If necessary, mist them again to maintain moisture. Proper watering is vital to kickstart the germination process, so keep the soil damp, not soggy, for the best results.
Step 4: Create a Dark Germination Environment
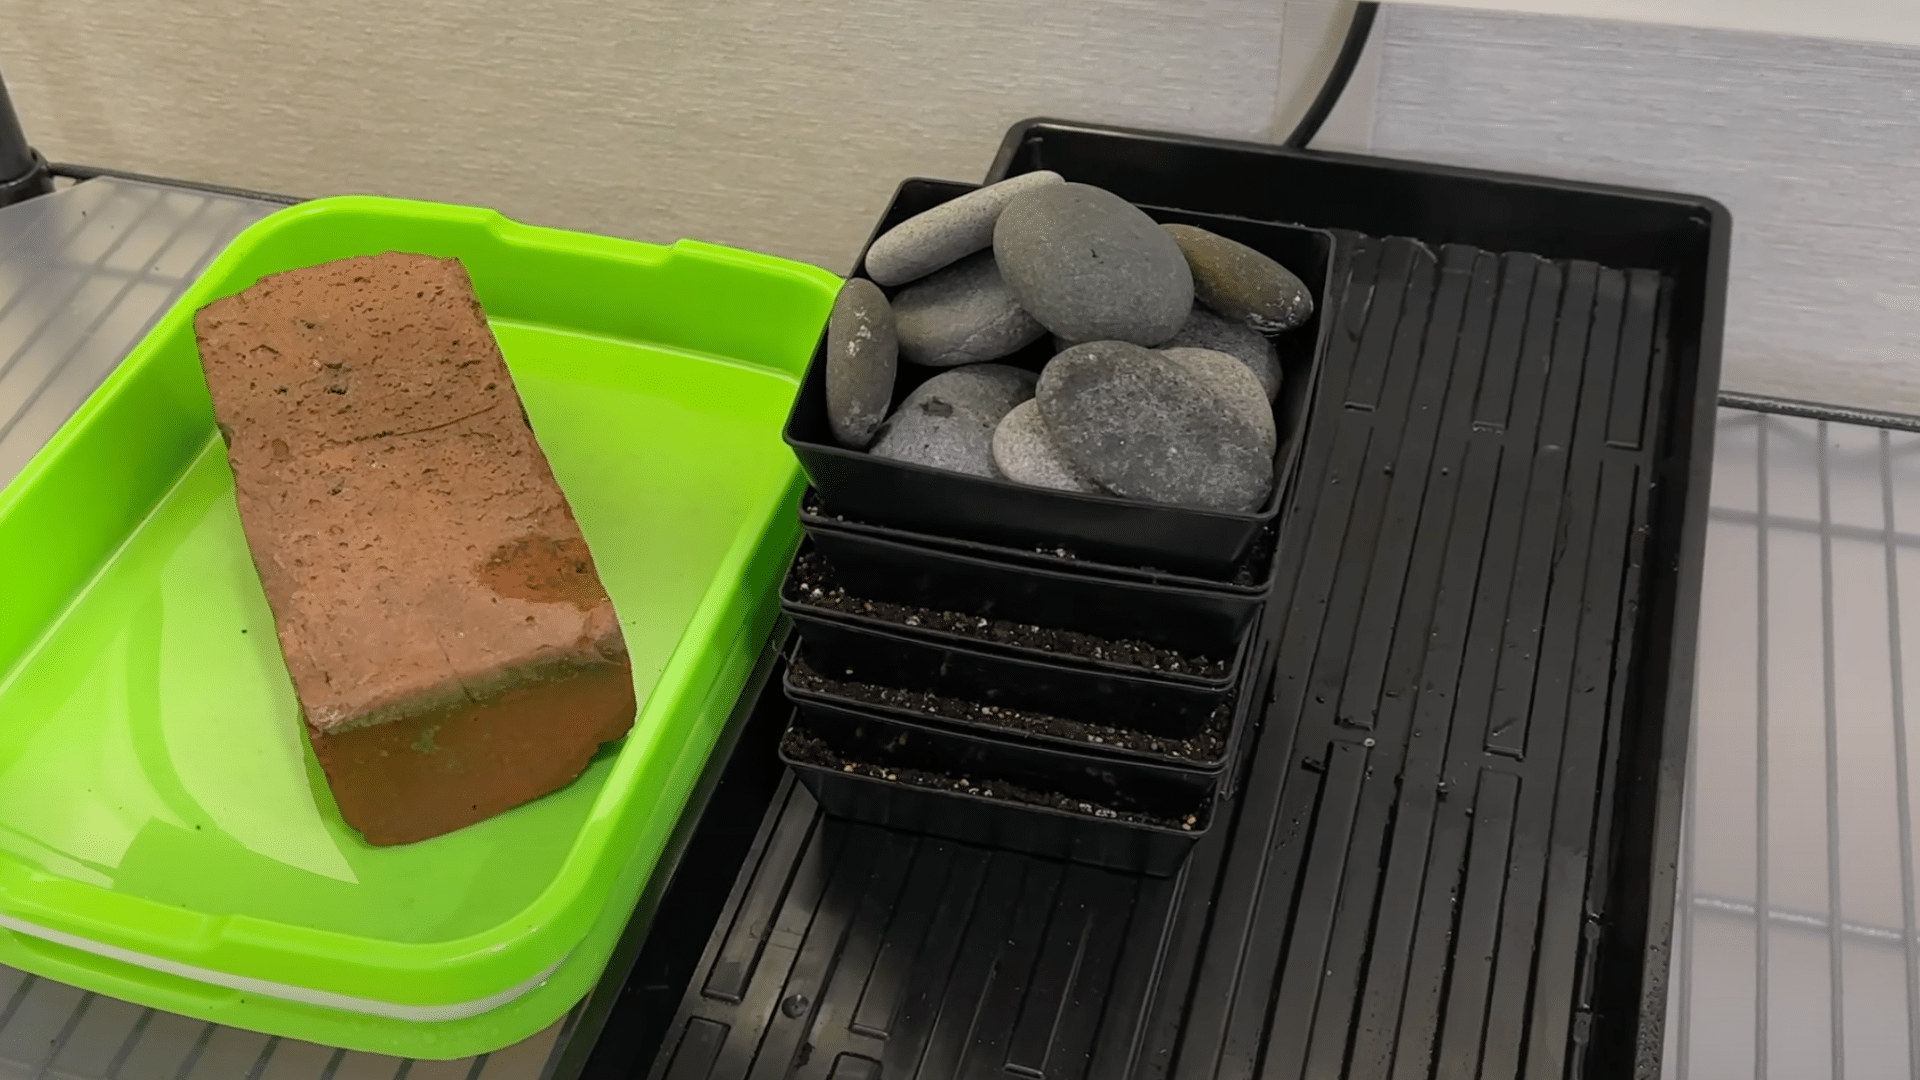
Now it’s time to help your seeds start sprouting. The germination process requires a warm, dark environment. Stack the trays on top of each other or place them in a separate, enclosed space to keep the light away.
Weighing down the trays with rocks or small bricks mimics the natural pressure seeds feel underground, encouraging strong roots. The seeds will germinate in the dark, preparing them for the light phase ahead.
Step 5: Introduce Light and Care
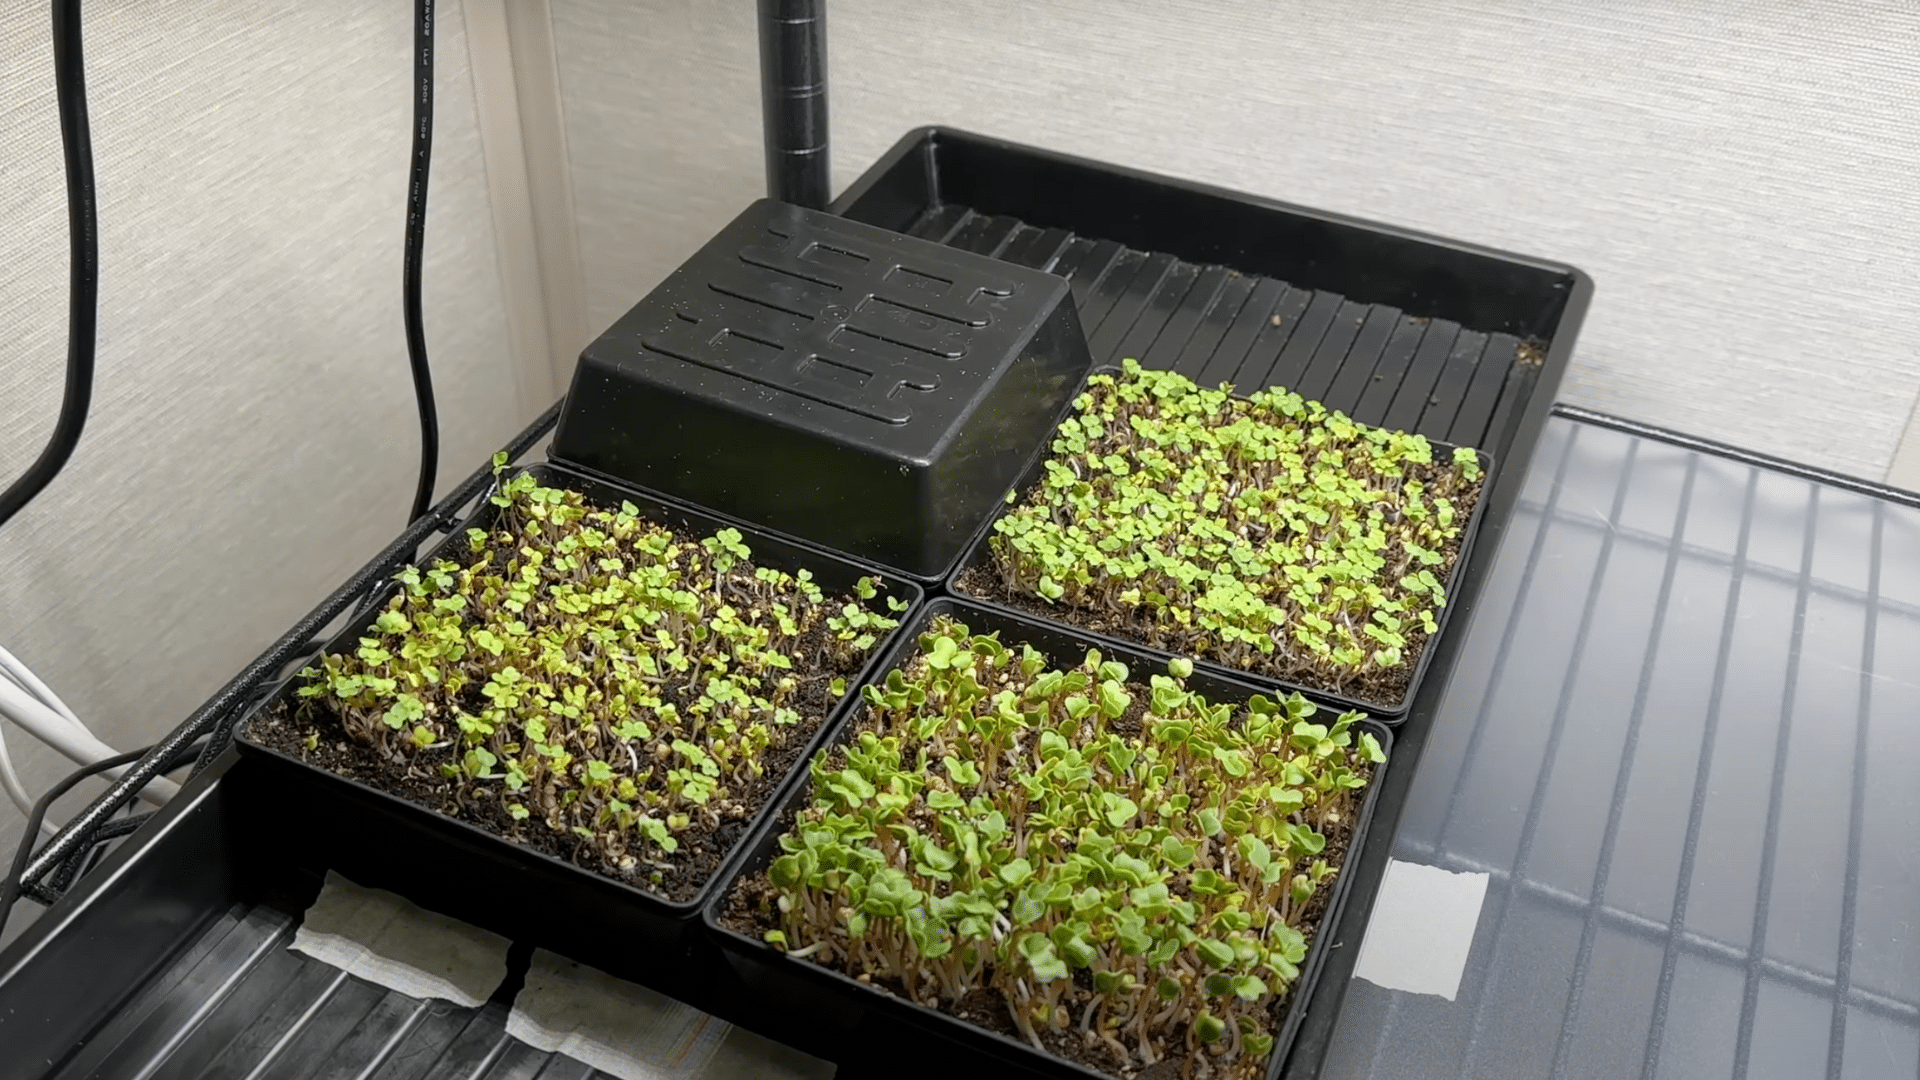
Once your seeds have sprouted, it’s time to introduce them to light. Place them under a grow light, set on a 12-hour on/off cycle, or on a south-facing window. Light exposure encourages healthy growth and lively colors in your microgreens.
- Set Light Cycle: Provide 12 hours of light each day.
- Water from the Bottom: Ensure the soil stays moist by bottom-watering.
- Check for Stretching: Adjust the light if microgreens seem to stretch too much.
Giving the right amount of light at the right time helps them grow strong and healthy.
Step 6: Harvest Your Microgreens
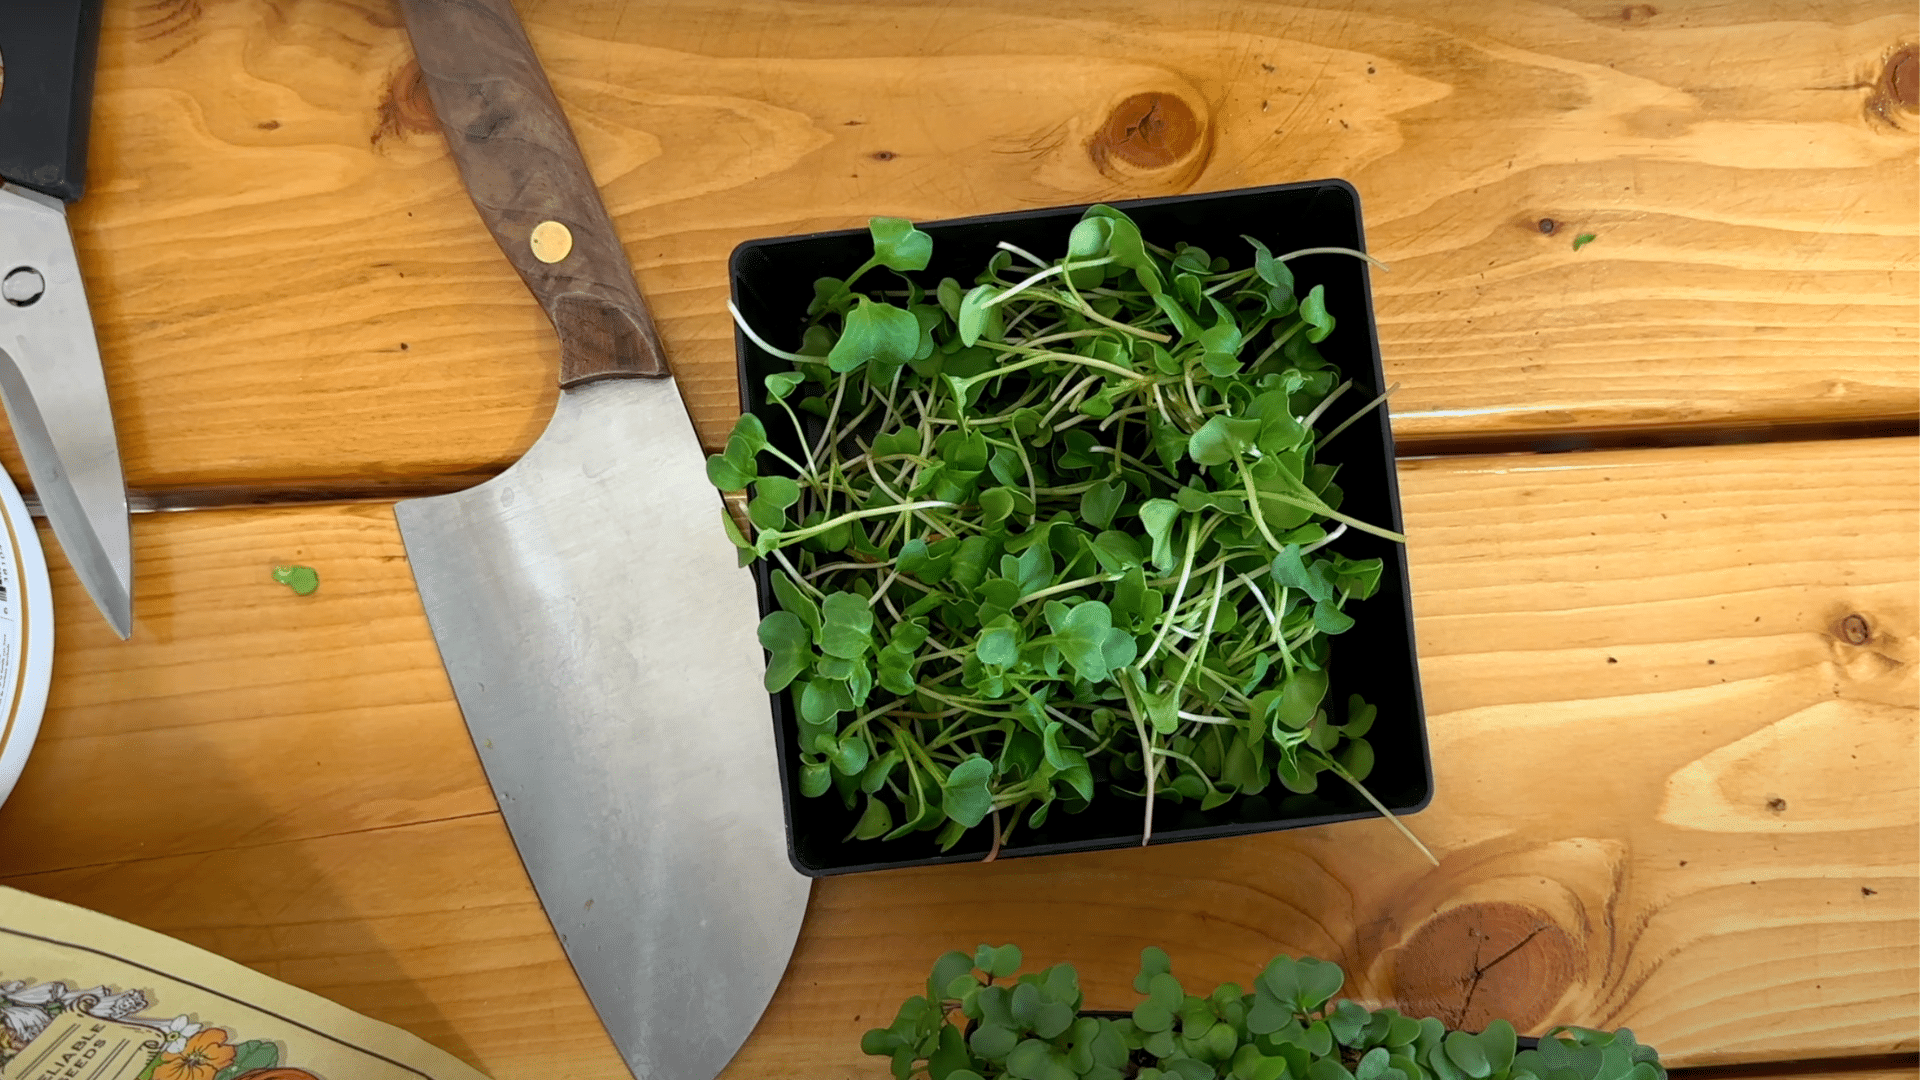
After about 7–14 days, your microgreens will be ready for harvest. The best time to pick them is when they’ve grown to a height of 2–3 inches and developed true leaves.
At this point, they’ll be nutrient-packed and perfect for consumption. Harvesting too early may result in less flavor, so wait for that ideal moment.
To harvest, gently snip the greens with clean scissors or a sharp knife. For the freshest flavor, consume your microgreens within 3–5 days, storing them in an airtight container lined with a paper towel to absorb moisture.
With this method of growing microgreens indoors, you’ll see results within days. The joy of watching those first green shoots emerge makes all the small effort worthwhile.
For a more detailed tutorial on how to grow microgreens indoors, check out the video below:
The Best Microgreens to Grow Indoors
Not all microgreens are created equal when it comes to indoor growing. Some grow faster, taste better, or offer more health benefits than others. Growing microgreens indoors is most successful when you pick the right varieties.
Easiest Starters for Beginners
These options grow quickly with minimal fuss, perfect if you’re just starting out:
- Radish: Ready in 5-7 days with a spicy kick and pretty pink stems.
- Sunflower: Large seeds that sprout easily with nutty, crunchy results.
- Pea Shoots: Sweet flavor, very forgiving, and they regrow after cutting.
My Go-To Choices
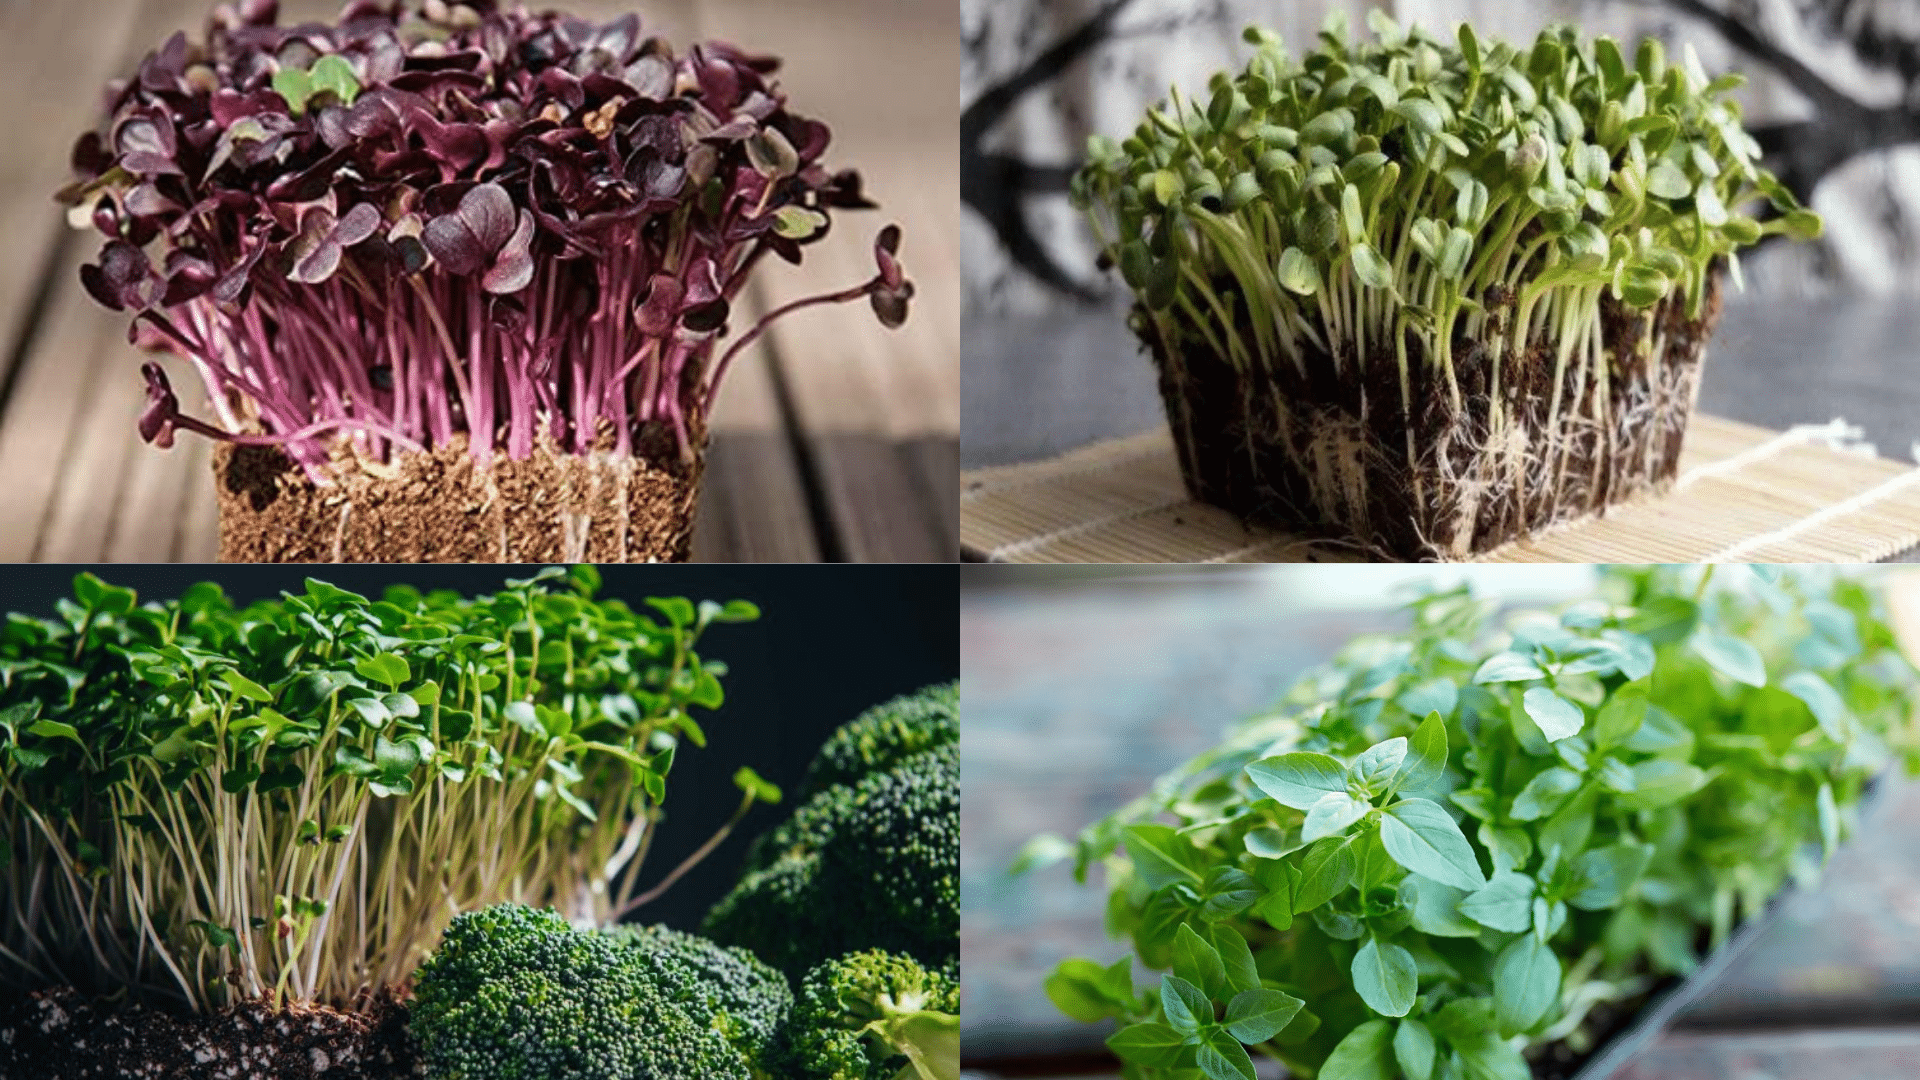
After trying many types, these consistently impress me with their flavor and growth:
- Broccoli: Mild taste with exceptional nutrition and fast growth.
- Mustard: Adds a wasabi-like zing to sandwiches and takes little space.
- Cilantro: Slow-growing but worth the wait for its distinctive flavor.
- Basil: Sweet aroma fills the room and makes homemade pesto shine.
I grow at least two of these varieties at all times for my daily meals. All these options will grow in a simple setup with basic care and attention.
Health Benefits of Adding Microgreens to Your Diet

Growing microgreens indoors gives you access to these tiny nutritional powerhouses year-round, making it easier to boost your daily meals with their many health perks.
- Higher Nutrient Content: These baby plants contain up to 40 times more nutrients than their mature counterparts, packing vitamins C, E, and K along with many minerals into each tiny leaf.
- Antioxidant Rich: The young leaves help fight harmful free radicals in your body, which may reduce risk of some common health issues as you age.
- Easier Digestion: Their tender structure makes them gentler on your stomach compared to full-grown veggies, perfect for those with sensitive systems.
- Heart Healthy: Many varieties contain compounds that support good blood pressure and cholesterol levels, making them helpful additions to heart-conscious diets.
- Mood Boosting: The act of growing and tending to plants can reduce stress, while eating fresh greens provides nutrients linked to better brain function.
Add just a handful to your daily meals to enjoy these benefits without making major diet changes.
Creative Ways to Use Fresh Microgreens in Your Meals

When you’re growing microgreens indoors, you’ll soon have steady harvests ready for your kitchen – here are my favorite ways to enjoy them beyond the basic salad:
1. Morning Egg Boost
Sprinkle a small handful on scrambled eggs, omelets, or avocado toast right before serving to add color, texture, and nutrients to start your day. The slight heat wilts them just enough while keeping their fresh flavor.
2. Sandwich Layer
Place them between other ingredients in wraps and sandwiches instead of regular lettuce. They add a fresh crunch and bright taste that modifies even basic lunch options into something special.
3. Soup Topper
Add them to hot soups right at the table rather than during cooking. The contrast of the warm soup and cool, crisp greens creates an interesting mix of temperatures and adds visual appeal to bowls of comfort food.
4. Blend into Dips
Mix chopped microgreens into hummus, guacamole, or yogurt-based dips for extra nutrition and subtle flavor changes. This trick helps picky eaters get their greens without even noticing.
These tiny greens work in almost any dish where you want to add freshness, color, and a nutritional boost with minimal prep work.
Wrapping It Up
Now you understand why these tiny plants deserve a spot in your home.
Growing microgreens indoors connects you to your food in a way grocery shopping never can.
The best part? You don’t need a green thumb or perfect conditions to succeed. Even the smallest space can become a productive garden with just a little care.
Which microgreen variety are you most excited to try first? Have you already started growing some? Share your successes, challenges, or questions with me in the comments below, and let’s learn from each other.
Happy growing!