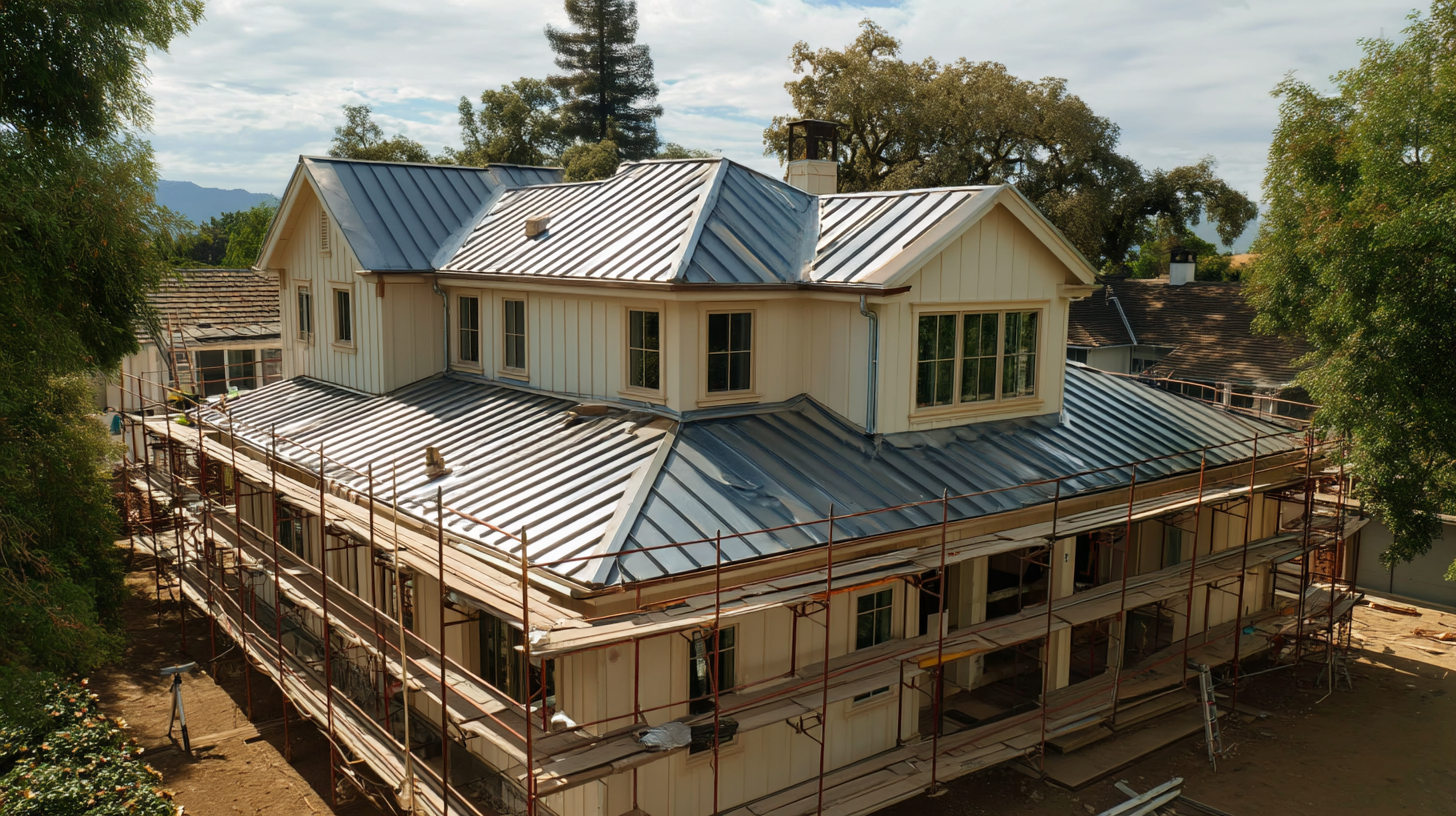
Metal roofing has become a popular choice for homeowners because it is durable, long-lasting, energy efficient, and visually clean. It can work well on traditional homes, modern remodels, detached garages, small structures, and ADUs. But learning how to install metal roofing is not the same as installing standard shingles. Metal roofing requires careful planning, proper fasteners, accurate panel alignment, strong flashing, and attention to manufacturer instructions.
For experienced DIYers, understanding the installation process can help with planning and budgeting. For full residential roofs, steep roofs, standing seam systems, and complex flashing conditions, professional installation is usually the safer and more reliable option. The quality of the installation has a major impact on whether the roof performs well or develops leaks over time.
Before You Install Metal Roofing
Check the Roof Structure
Before installing metal roofing, the roof structure needs to be inspected. The roof deck should be solid, dry, and free from rot, sagging, soft spots, or water damage. Metal panels may be durable, but they still need a strong foundation underneath them.
If the decking is damaged, it should be repaired or replaced before installation begins. Covering bad decking with new metal panels can lead to long-term problems, including leaks, uneven panels, fastener failure, and structural concerns.
Review Local Codes and Manufacturer Instructions
Metal roofing must follow local building codes and product-specific installation instructions. Code requirements may affect roof slope, underlayment, ventilation, fasteners, fire ratings, and how the roof connects to other parts of the home.
Manufacturer instructions are equally important. Metal roofing systems are designed to work as a complete system, and warranty coverage may depend on proper installation. Fasteners, sealants, clips, trim, underlayment, and panels should be compatible.
Prioritize Safety
Roofing work can be dangerous. Fall protection, stable ladders, gloves, eye protection, and proper footwear are essential. Metal panels can have sharp edges, and roofs can become slippery, especially in wet, windy, or dusty conditions.
Steep roofs, tall homes, multi-story buildings, or roofs with complex shapes are usually not ideal for DIY installation. Safety should always come before speed or savings.
Choose the Right Metal Roofing System
Exposed-Fastener Metal Panels
Exposed-fastener panels are common on residential, agricultural, garage, and accessory structures. They are usually more affordable than standing seam systems and are relatively straightforward for simple rooflines.
The key is fastening them correctly. Screws must be placed in the right locations, tightened properly, and installed with washers that seal against water. Over-tightened screws can damage washers, while under-tightened screws can allow leaks.
Standing Seam Metal Roofing
Standing seam metal roofing has raised seams and concealed fasteners. This creates a clean appearance and strong weather performance because the fasteners are not exposed directly to the elements.
This system often requires specialized tools and experience. Because of that, standing seam installation is commonly handled by professional roofers.
Metal Shingles or Tiles
Metal shingles and tiles are designed to look like traditional shingles, slate, or tile while providing the durability of metal. These systems vary by manufacturer and often have specific installation requirements for underlayment, fastening, flashing, and trim.
Before choosing a product, homeowners should compare appearance, cost, lifespan, maintenance, and installation complexity.
Tools and Materials Needed
Common tools for metal roofing include a tape measure, chalk line, drill or impact driver, metal snips or shears, roofing square, utility knife, caulk gun, ladder, and safety equipment.
Materials may include metal panels, underlayment, drip edge, closure strips, roofing screws or clips, flashing, ridge caps, sealant, and trim pieces.
Product compatibility matters. Using the wrong fastener, sealant, or flashing material can lead to corrosion, leaks, or warranty issues. Metal roofing performs best when all parts are designed to work together.
Step-by-Step Guide: How to Install Metal Roofing
Step 1: Remove Old Roofing or Prepare the Existing Roof
Some metal roofing projects start by removing old shingles down to the roof deck. In some cases, installation over existing shingles may be allowed, depending on local code, roof condition, and manufacturer guidance.
Even if old roofing remains, the surface must be clean, stable, and properly prepared. Any damaged sheathing, moisture issues, or structural problems should be corrected before the new roof is installed.
Step 2: Install Underlayment
Underlayment provides an added layer of protection beneath the metal panels. It helps protect the roof deck from moisture that may get past the metal roof system during wind-driven rain, condensation, or ice-related conditions.
The underlayment should be rolled out smoothly, overlapped correctly, and secured according to product instructions. The type of underlayment may depend on the climate, roof slope, and local code requirements.
Step 3: Install Drip Edge and Trim
Drip edge helps direct water away from the roof deck and fascia. It is installed along the eaves and rakes before or during panel installation, depending on the roof system.
Trim details matter because edges are common areas for water intrusion. Properly installed drip edge and trim help protect the roof from moisture damage.
Step 4: Plan Panel Layout
Panel layout should be planned before cutting or fastening anything. Measure the roof carefully and snap chalk lines to keep panels straight.
The first panel is especially important because it affects the alignment of every panel after it. Take time to account for roof edges, valleys, vents, chimneys, skylights, dormers, and other penetrations.
Step 5: Cut and Place Metal Panels
Panels should be cut according to manufacturer recommendations. Avoid tools that damage protective coatings or leave rough edges. Scratches and exposed metal can increase the risk of corrosion.
Place the first panel carefully, making sure it is square to the roof edge. Small mistakes in the first panel can become more noticeable as the roof continues.
Step 6: Fasten Panels Correctly
Fastening is one of the most important parts of metal roof installation. Use approved screws, clips, or fasteners for the selected system. Follow the recommended spacing and fastening pattern.
For exposed-fastener panels, screws should be driven straight and tightened enough to compress the washer without crushing it. Incorrect fastener placement can create leaks, panel movement, or long-term maintenance problems.
Step 7: Install Closure Strips and Flashing
Closure strips help seal gaps where panels meet ridge caps, eaves, and trim. Flashing protects vulnerable areas such as valleys, chimneys, vents, skylights, sidewalls, and endwalls.
Flashing errors are one of the most common causes of roof leaks. This is one reason many homeowners choose professional installation for full roof replacements or complicated rooflines.
Step 8: Install Ridge Caps and Final Trim
After panels and closure strips are installed, ridge caps and final trim pieces can be added. These components protect the top of the roof, transitions, and exposed edges.
They should be sealed and fastened according to the roofing system requirements. Clean, secure trim helps the finished roof look professional and perform properly.
Step 9: Inspect and Clean the Roof
After installation, inspect fasteners, seams, flashing, trim, panels, and penetrations. Remove metal shavings, extra screws, packaging, and debris from the roof.
Metal shavings left on panels can rust and stain the roof surface. Final cleaning is a small step that helps protect the finish.
Metal Roofing for ADUs and Small Homes
Metal roofing can be a strong option for ADUs, backyard units, small homes, garages, and secondary structures. It offers a long lifespan, low maintenance, and a modern appearance that works well with compact rooflines.
For ADUs, roof design should be planned alongside the overall structure. Slope, drainage, gutters, ventilation, insulation, sound control, and visual compatibility with the main home all matter.
For homeowners planning a backyard unit or secondary dwelling, Golden State ADUs has helped many homeowners with roof design, materials, and construction planning fit into a complete ADU project.
Common Metal Roofing Installation Mistakes
Common mistakes include skipping the roof deck inspection, using the wrong underlayment, misaligning the first panel, over-tightening screws, placing fasteners incorrectly, and ignoring metal expansion and contraction.
Other issues include cutting panels with tools that damage coatings, installing poor flashing around roof penetrations, failing to use closure strips, and not cleaning metal shavings after installation.
Another major mistake is assuming all metal roofing systems install the same way. Exposed-fastener panels, standing seam roofing, and metal shingles each have different requirements.
DIY vs. Professional Metal Roof Installation
DIY installation may be realistic for small sheds, simple low-slope accessory structures, or small outbuildings when the homeowner has roofing experience, safety equipment, and clear manufacturer instructions.
Professional installation is recommended for full home roof replacements, standing seam systems, steep roofs, tall structures, complex flashing, skylights, chimneys, valleys, dormers, or homes with existing water damage.
For homeowners who want metal roofing installed correctly, Symplify Roofing specializes in roof replacement, flashing details, and professional installation that protects the home from leaks and long-term performance issues.
How to Maintain a Metal Roof After Installation
Metal roofs are low maintenance, but they are not maintenance-free. Exposed fasteners and sealants should be checked periodically. Look for cracked sealant, loose screws, lifted trim, or areas where panels may have shifted.
Keep the roof clear of leaves, branches, and debris. Gutters and valleys should remain open so water can drain properly. If scratches or coating damage appear, address them early to reduce the risk of corrosion.
Avoid walking on the roof unless necessary and safe. If roof access is needed, follow manufacturer guidance for where to step and how to protect the panels.
Conclusion
Learning how to install metal roofing starts with understanding the full process: roof inspection, product selection, underlayment, trim, panel layout, fastening, flashing, ridge caps, cleaning, and final inspection. Each detail affects how well the roof performs.
Metal roofing can be an excellent choice for homes, ADUs, and roof replacement projects, but it requires careful installation. Simple projects may be manageable for experienced DIYers, but full residential roofs often benefit from professional roofing expertise. When installed correctly, a metal roof can provide long-term durability, weather protection, and a clean finished look for years to come.