A plate wall can look visually appealing, but the fear of plates slipping, breaking, or damaging the paint often makes the project feel risky.
The safest method depends on each plate’s weight, size, value, and the type of wall supporting it.
Knowing how to hang plates on the wall correctly makes it easier to choose between adhesive discs, wire hangers, hooks, screws, and wall anchors.
This blog explains how to plan the layout, measure the spacing, attach the right hanger, and secure each plate.
What to Check Before Hanging Plates?
Start by measuring the plate’s diameter and checking its weight, since both affect the type and size of hanger needed.
Note whether the plate is ceramic, glass, metal, or another material, as some surfaces need extra care.
Inspect the rim and back for cracks, chips, or weak edges before attaching any hardware. Identify whether the wall is drywall, plaster, brick, tile, or wood so the correct fixing can be used.
Also decide whether the display is temporary or permanent. Valuable plates should not be placed above beds, seating areas, doorways, or busy walkways.
Products Needed to Hang Plates Safely
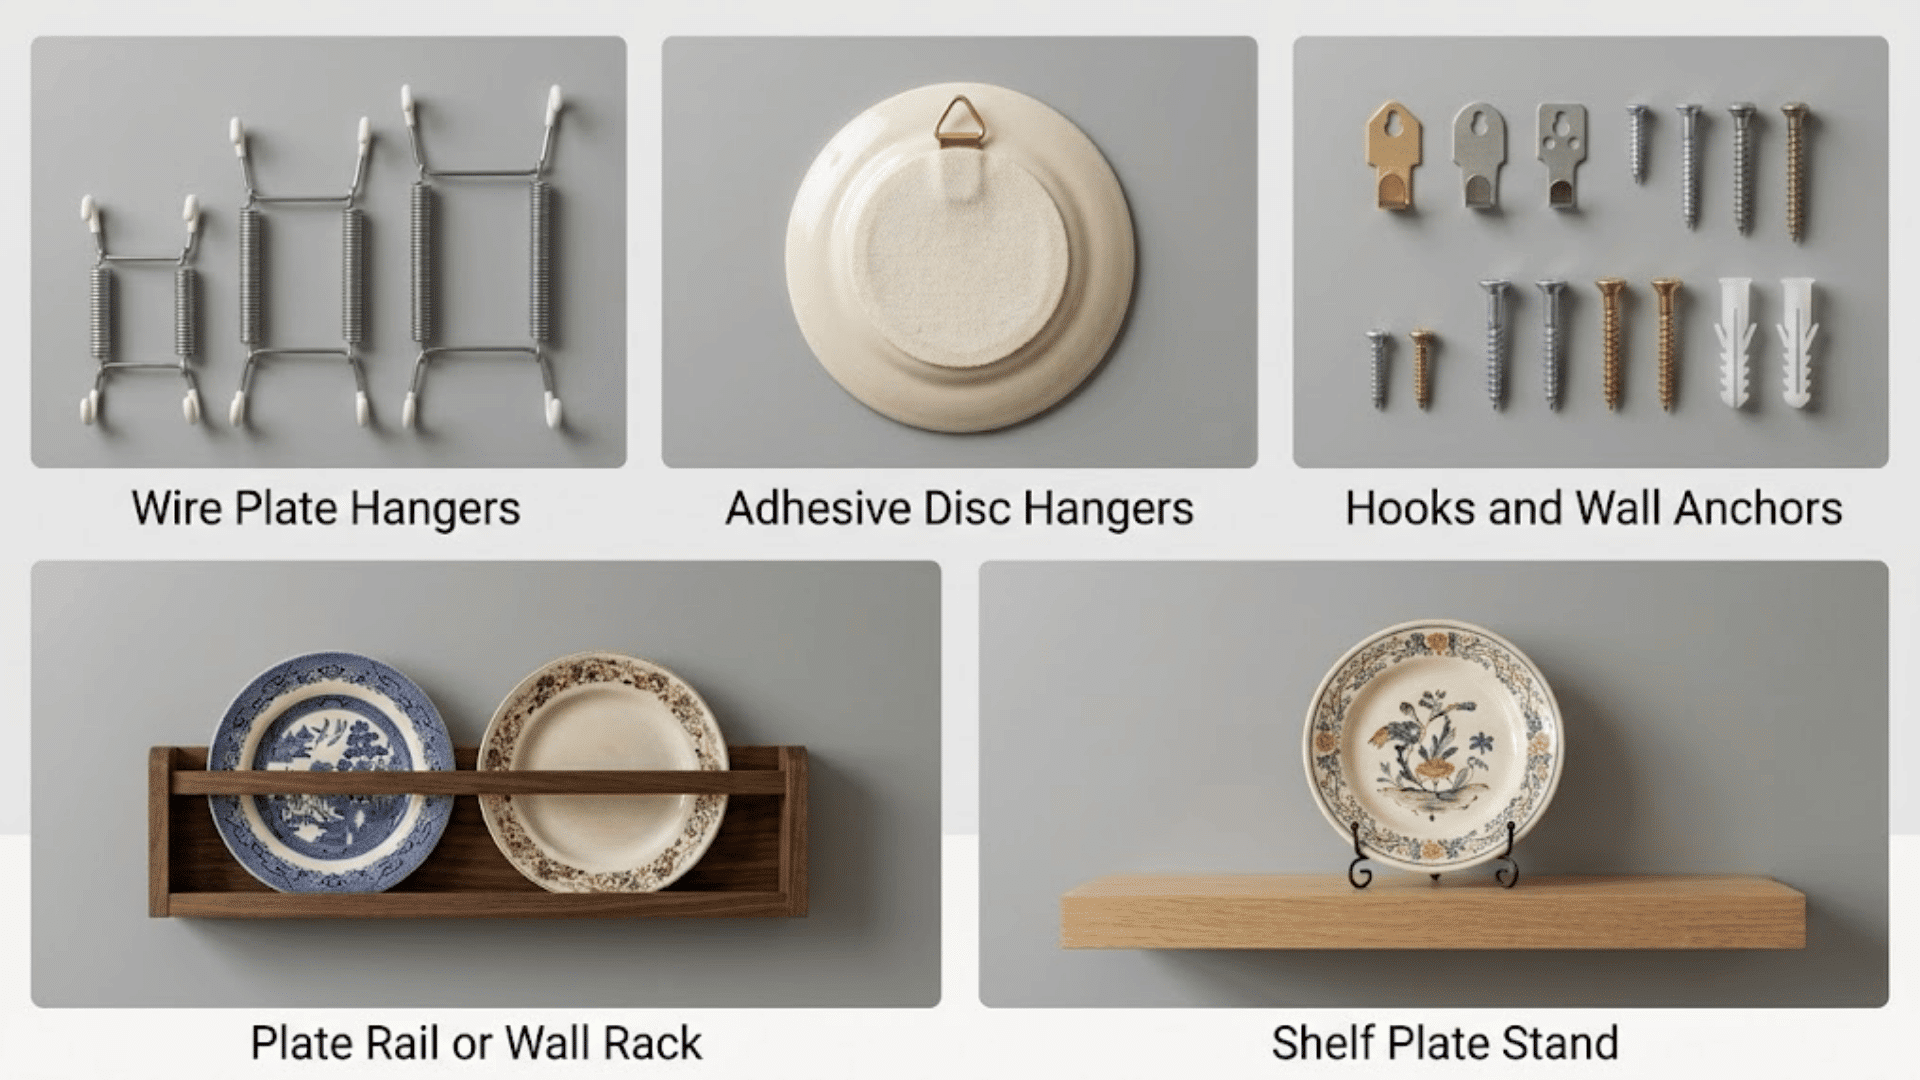
The right tools make plate hanging safer, easier, and more accurate while reducing the risk of slipping, uneven spacing, or wall damage.
| Product | Best For | Recommendation |
|---|---|---|
| Adhesive disc hanger | Hidden mounting | Flatirons Disc Plate Hanger |
| Spring wire hanger | Secure edge grip | Creative Hobbies Deluxe Spring-Style Plate Hangers |
| Picture hook | Light plates | Command 5 lb Universal Picture Hanger |
| Screw and anchor | Heavy plates | Hillman Soft Tip Metal Plate Hanger |
| Plate rail | Multiple plates | AS Hanging Classic Wall Track |
| Felt pads | Wall protection | Scotch Self-Stick Felt Pads |
| Measuring tape | Accurate placement | Stanley PowerLock 25 ft Tape Measure |
| Spirit level | Straight displays | Craftsman 9″ Box Torpedo Level |
How to Hang Plates on the Wall Safely?
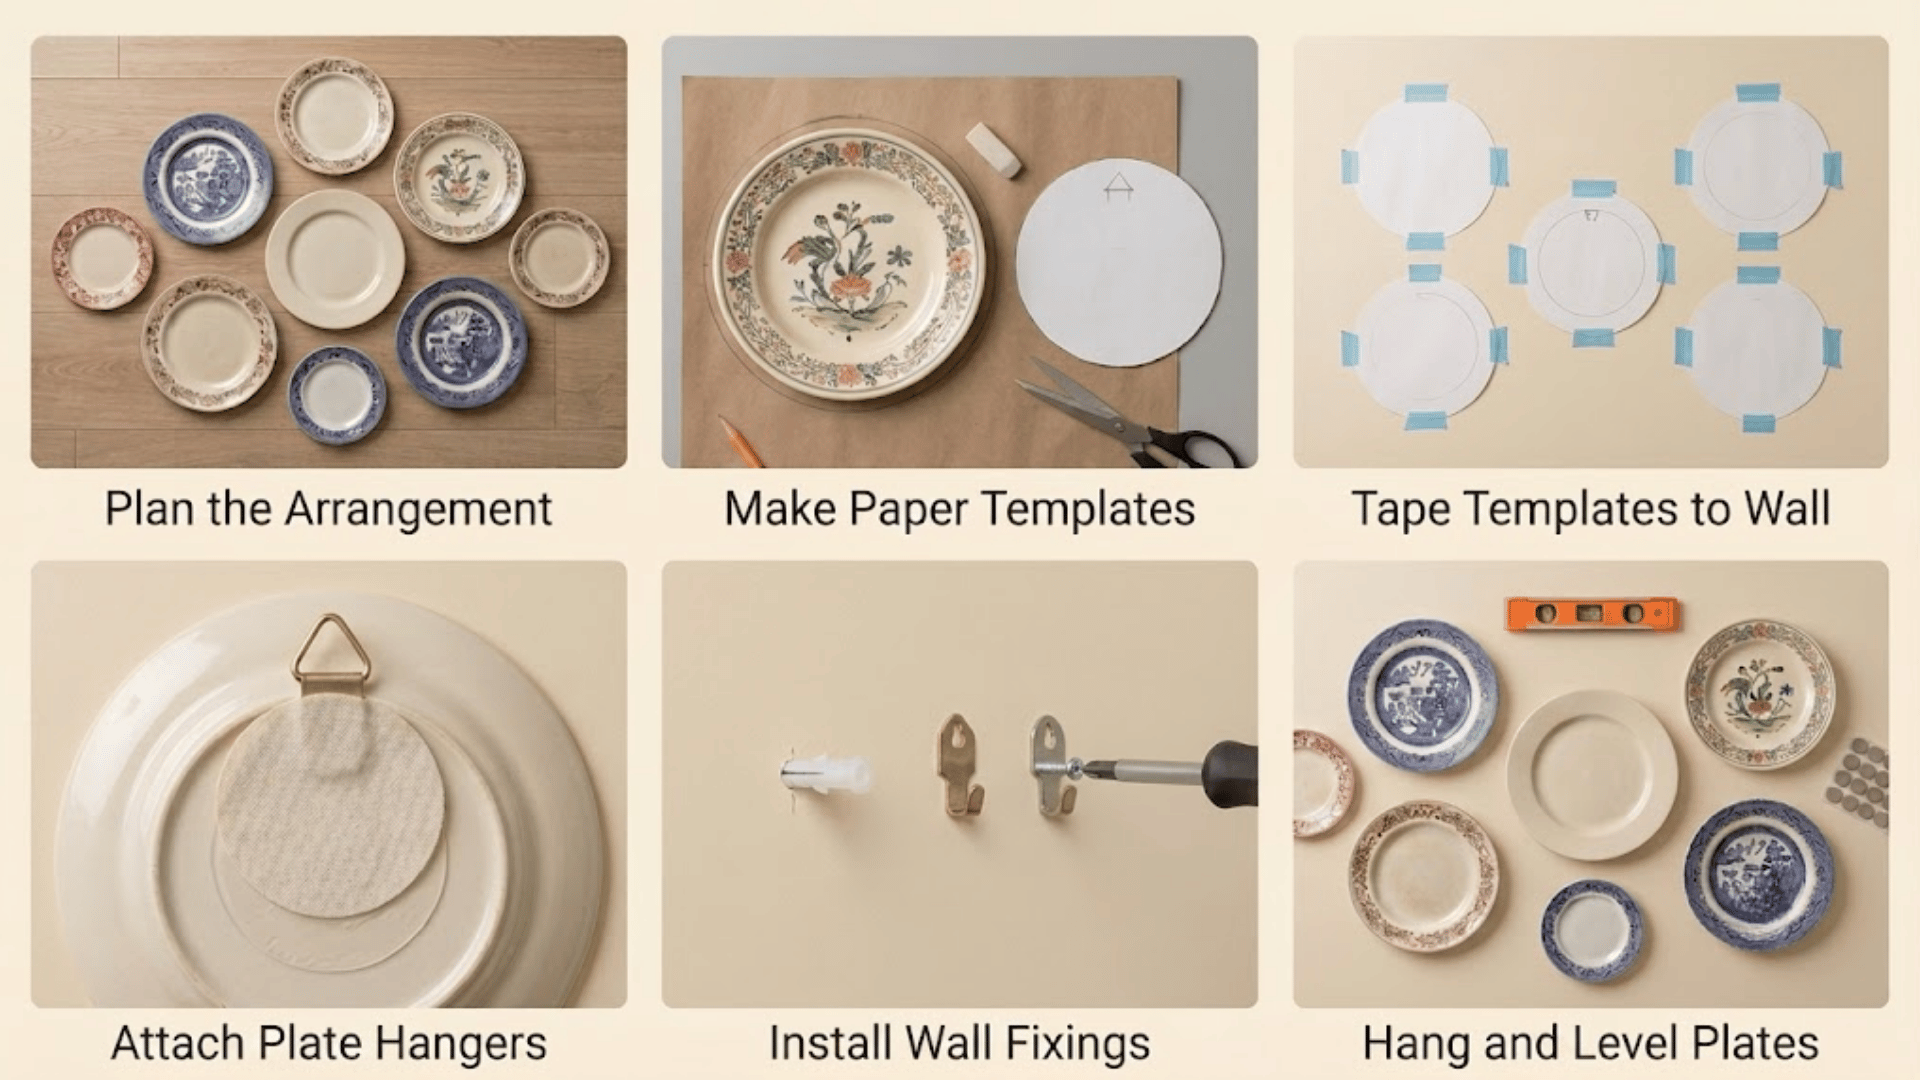
A careful setup helps prevent broken plates, uneven spacing, and wall damage. Follow these steps to create a secure, neat, and balanced display.
Step 1: Plan the Arrangement
Lay all the plates on the floor and try a few different layouts before making any marks on the wall. Test the spacing between large and small plates until the display feels balanced.
Once the arrangement looks right, take a clear photo so the same layout can be recreated accurately on the wall.
Step 2: Make Paper Templates
Place each plate on a sheet of paper and trace carefully around the outer edge. Cut out every shape, then mark the exact position of the hanger on the back of each plate.
These marks help show where the wall hooks or fixings should go, making placement easier and reducing measuring errors.
Step 3: Tape the Templates to the Wall
Start by placing the template for the main or largest plate on the wall. Add the remaining templates around it while keeping the gaps even.
Use removable tape so the paper can be adjusted easily. Step back several times to check the full layout and make changes before adding any hardware.
Step 4: Attach the Plate Hangers
Follow the instructions provided with the chosen plate hanger. Center the hanger carefully on the back so the plate does not tilt once displayed.
Press adhesive hangers firmly against a clean surface and allow the full curing time. Wire hangers should fit securely without placing too much pressure on fragile edges.
Step 5: Install the Wall Fixings
Select a picture hook, screw, or wall anchor that matches the plate’s weight and the wall material.
Mark the fixing point through each paper template before removing it.
Install the hardware at the correct angle when required. Test every fixing with light pressure to confirm it feels stable before hanging the plate.
Step 6: Hang and Level the Plates
Lower each plate onto its wall fixing slowly and check that the hanger is fully seated. Use a small spirit level or view the plate from a distance to confirm it looks straight.
Add felt pads behind the lower edges to reduce movement, protect the wall surface, and prevent marks or scratches.
Matching the Fixing to Your Wall Type
The hanger holds the plate. The wall holds the hanger. Get the second part wrong, and the first part will not save you.
| Wall | Use | Watch out for |
|---|---|---|
| Drywall | Picture hook for light plates, threaded anchor for heavier | Find a stud for anything over a few pounds |
| Plaster and lath | Fine screw into lath, or a toggle anchor | Crumbling. Drill slowly, use masking tape over the spot |
| Brick or masonry | Masonry screw or sleeve anchor with a masonry bit | Drill into the mortar joint, not the brick face |
| Tile | Tile bit plus a suitable anchor, or adhesive on light plates only | Cracking. Never drill near a tile edge or corner |
| Wood panelling | Screw directly, no anchor needed | Pre-drill to avoid splitting |
Our guide on how to tell plaster from drywall walks through the other tests if the pushpin test is inconclusive.
Ways to Arrange a Plate Wall Layout
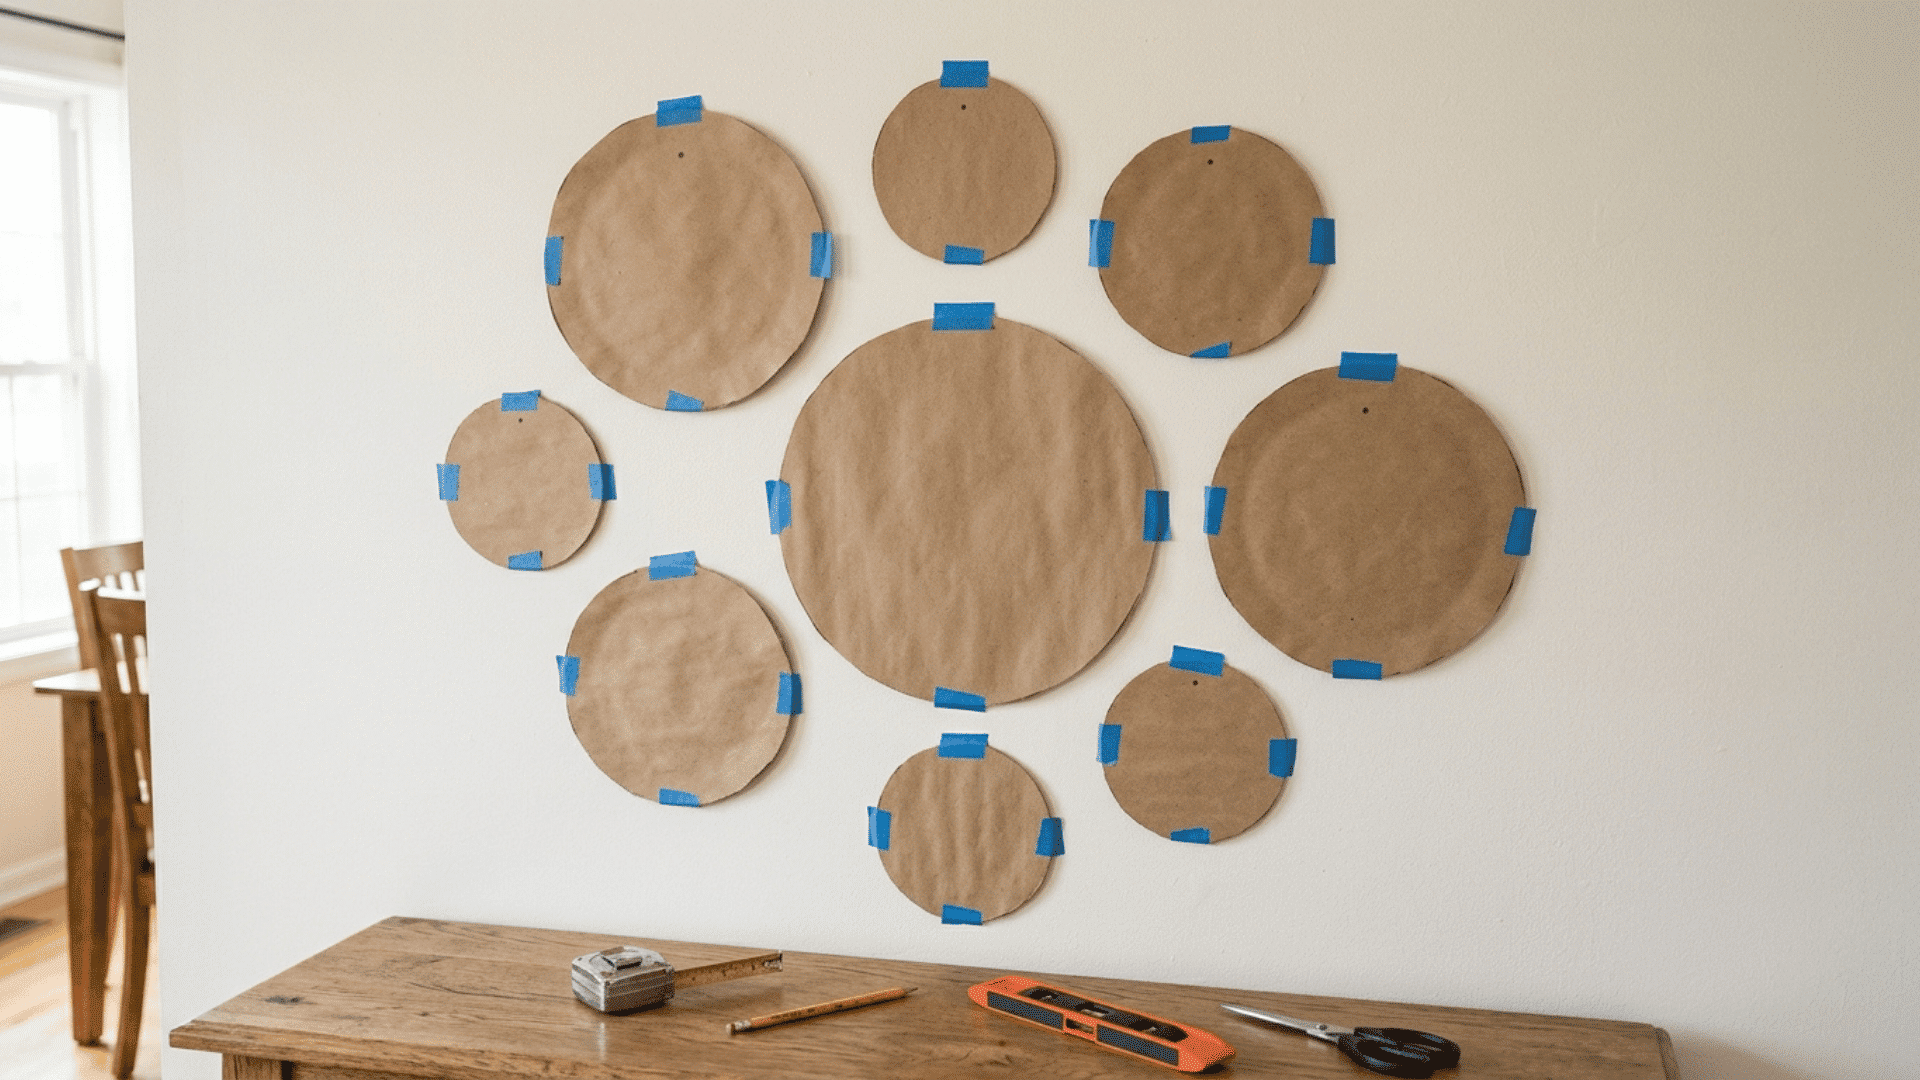
Trace each plate onto kraft paper, cut out the shapes, and tape them to your wall.
Do this before you drill or hammer anything. You can rearrange the whole layout as many times as you want, with zero marks on the wall.
- Start with your largest or most decorative plate as the focal point and build the rest around it
- Keep gaps between plates around two to three inches for a balanced, uncluttered look
- Mark the hanging point on each paper template, then transfer that mark to the wall through the paper
- Step back and check the arrangement from across the room before you commit
You can rearrange a wall thirty times with zero holes, and the same trick works for a hat wall or any other collection you are grouping.
Tips for Hanging Antique or Valuable Plates
Older and valuable plates need extra care during mounting. The right hanger should support the piece without harming its surface, rim, or finish.
- Choose Reversible Mounting Methods: Use hardware that can be removed without leaving permanent marks or changing the plate. Reversible options make future cleaning, storage, or professional restoration easier.
- Avoid Adhesive on Painted Surfaces: Adhesive discs and stickers may lift paint, glaze, or decorative details. Fragile, hand-painted, or aged surfaces should not come into direct contact with strong adhesives.
- Inspect for Damage First: Check the front, back, and rim for hairline cracks, chips, or signs of old repairs. Weak areas may break under pressure from a tight hanger.
- Use Padded Wire Hangers: Select coated or padded wire hangers that grip the plate gently. The covering helps protect delicate edges from scratches, pressure marks, and metal contact.
- Consult a Conservator: Rare, valuable, or historically important plates should be checked by a professional conservator before mounting. They can suggest a safer method based on the plate’s age and condition.
It’s a Wrap
A safe plate display starts with matching each plate to the right hanger and wall fixing. Weight, size, material, and wall type all affect which method will hold the plate securely.
Learning how to hang plates on the wall also means knowing when to use hidden adhesive discs and when stronger support is needed.
Wire hangers, hooks, screws, and anchors often work better for heavier or valuable plates.
Careful planning, accurate spacing, and felt pads can help protect both the plates and the wall.
Frequently Asked Questions
Can You Hang Heavy Plates on a Wall Without Nails?
Heavy plates should not rely on standard adhesive strips alone. A strong plate rail, shelf, or mounting system rated for the plate’s weight offers safer support without using nails.
How Do You Hang Small Plates on the Wall?
Small plates can be displayed with mini adhesive disc hangers or lightweight spring hangers. Check the product’s size range and weight limit before attaching it to the plate.
Can You Hang Plates on a Wall With Command Strips?
Command Strips may hold very light plates when paired with a suitable plate hanger. They should only be used on approved wall surfaces and within the stated weight limit.