A white gazebo instantly elevates any outdoor event, offering a crisp, elegant focal point for weddings, corporate gatherings, garden parties, and festivals alike. Its clean aesthetic pairs effortlessly with virtually any décor theme, making it a go-to choice for event planners who want sophistication without complexity. Yet beneath that polished appearance lies a common frustration: setup delays that eat into precious preparation time, and the nagging worry that a sudden gust of wind or downpour could turn your beautiful structure into a liability.
So how do you achieve a quick, rock-solid setup that holds up flawlessly regardless of what the forecast throws your way? Whether you’re working with a traditional pole-and-frame structure or a modern pop-up model, the answer lies in a disciplined approach from the moment you unpack. This guide walks you through every stage—from organized preparation and efficient assembly to weatherproof securing techniques—giving you the confidence to host any outdoor event knowing your white gazebo will stand tall, look stunning, and keep guests safe from start to finish.
1. Preparation Is Key: Unpacking Your White Gazebo
Before you touch a single pole, spend five minutes with the manufacturer’s manual. Even experienced crews benefit from reviewing the specific assembly sequence, as designs vary between brands and overlooking one step can cost you twenty minutes of backtracking. Once you’re familiar with the instructions, select a flat, debris-free area that gives you at least two meters of clearance beyond the gazebo’s footprint—this extra space lets you work comfortably and prevents tripping hazards during assembly.
Unpack every component and lay them out in groups: leg poles together, roof frame sections nearby, canopy folded to one side, and all hardware (bolts, pins, brackets) collected in a single container. Run a quick visual inspection for dents, bent connectors, or torn fabric—catching damage now saves you from a mid-assembly surprise. Gather your tools in advance: a rubber mallet for stubborn joints, an adjustable wrench, and work gloves to protect your hands from pinch points.
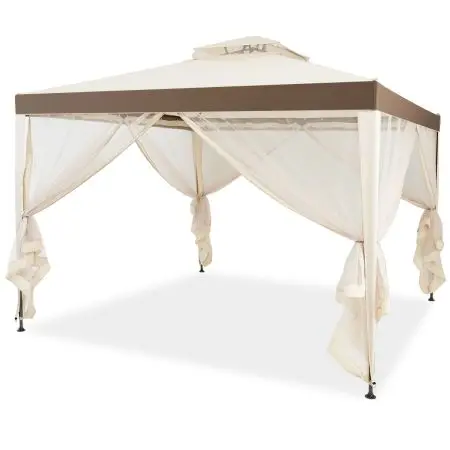
If you’re working with a traditional pole-and-frame white gazebo, expect more individual pieces and a longer layout phase. For a pop-up or foldable gazebo—such as those available from retailers like Costway-AU—preparation is faster since the frame arrives pre-connected, but you should still extend it partially on the ground to confirm all hinges move freely and no locking mechanisms are jammed before you attempt a full raise.
2. A Step-by-Step Guide to Easy Assembly
With everything laid out and inspected, you’re ready to build. The key principle throughout assembly is patience with precision—rushing a connection or forcing a joint inevitably leads to rework. Follow these stages in order, and you’ll have your white gazebo standing within minutes rather than wrestling with it for an hour.
Stage One: Frame Construction
Begin with the leg poles, connecting each section from bottom to top using push-button pins or twist-lock mechanisms depending on your model. Once all legs are assembled individually, attach them to the roof frame’s corner brackets. Here’s where discipline matters: tighten each bolt or clamp only to finger-tight at this stage.
Leaving joints slightly loose allows you to square the entire frame before committing, preventing the frustrating scenario where one misaligned corner forces you to disassemble half the structure. Once all legs and roof struts are connected, stand back and eyeball the frame from multiple angles. Adjust until everything sits level and symmetrical, then go around systematically and fully tighten every connection point. If part labels have worn off or your manual’s diagrams are unclear, look for subtle diameter differences between poles—roof struts are typically thinner than legs—and check for pre-drilled hole alignment as your guide.
Stage Two: Canopy Attachment
Draping the canopy works best with two people, one on each side, to prevent the fabric from dragging across frame edges and snagging. Position the canopy so its peak aligns with the frame’s highest point, then pull it evenly down each side. Most white gazebo canopies secure through a combination of velcro straps that wrap around the frame poles, hook-and-loop tabs at the corners, and elastic toggles along the valance. Start by fastening the peak or center attachment, then work outward to the corners, pulling the fabric taut as you go. Wrinkles aren’t just an aesthetic issue—loose fabric flaps violently in wind, accelerating wear and creating noise. Ensure every attachment point is engaged and the canopy sits smooth across the entire roof surface before moving on.
Pro Tip for Pop-Up and Foldable Gazebos
A pop-up gazebo simplifies everything into a three-beat rhythm: unfold, lock, raise. Start by standing the collapsed frame upright with legs together, then walk opposite corners apart until the scissor mechanism extends roughly halfway. At this midpoint, engage any intermediate locking sliders on the legs—these prevent the frame from collapsing back on you.
Now push the frame fully open until the roof peak rises and the top locking joints click into place. Finally, extend each telescoping leg to full height and lock them individually. The most common pitfall is attempting to fully extend the frame in one aggressive motion, which can bend hinges or skip lock points entirely. Controlled, staged expansion keeps everything aligned and ensures every mechanism seats properly for a secure structure.
3. Essential Steps for Securing Your Gazebo Against Wind and Rain
Assembly is only half the job. A white gazebo that looks perfect on a calm morning can become a dangerous projectile by afternoon if it isn’t properly anchored. This section transforms your structure from merely standing to genuinely event-ready—capable of handling gusts, rain, and everything in between without requiring constant attention from your crew.
The Non-Negotiable: Using Proper Weights and Anchors
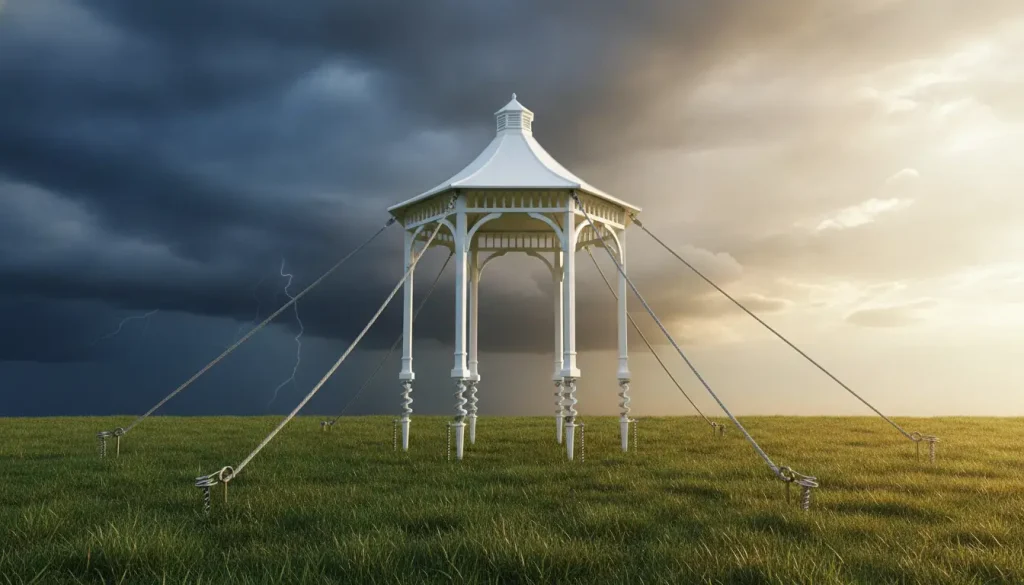
Guylines alone will not save your gazebo in serious wind. They manage lateral sway, but without downward force holding each leg firmly to the ground, uplift remains your primary threat. The anchoring method you choose depends entirely on your surface. For grass or soft soil, spiral ground stakes driven at least 30 centimeters deep provide excellent holding power—far superior to the short pin stakes often included in the box. Drive them at a slight outward angle to resist upward pull more effectively. On concrete, asphalt, or paved venues where you cannot penetrate the surface, weighted plates or sandbags become essential. Aim for a minimum of 15 to 20 kilograms per leg as a baseline, increasing to 25 or more if your site is exposed or elevated. Attach weights directly to the leg base using ratchet straps or heavy-duty bungee cords threaded through the weight’s handle and around the frame’s lowest cross-point. Never simply rest weights against the legs—they must be physically connected so that uplift force transfers into the weight rather than lifting the leg free of it. For maximum security on high-profile events, combine both methods: stake the legs and add weight plates as redundancy.
Advanced Guyline Strategies for High Winds
When wind speeds are forecast above 30 kilometers per hour, guylines become your second line of defense working in concert with your anchors. The critical detail most people miss is angle: each guyline should extend from its attachment point on the frame down to the ground stake at approximately 45 degrees.
Steeper angles reduce the line’s ability to counteract lateral force, while shallower angles require stakes placed impractically far from the structure. For enhanced stability, use a crossing pattern where lines from opposite corners overlap in an X configuration—this prevents the gazebo from rocking in any single direction. Attach guylines at the roofline or upper leg junction rather than at the base, since wind loads concentrate at the canopy level. Use weather-resistant braided rope or ratchet-style tensioners that won’t stretch or slip when wet. After initial tensioning, revisit each line after thirty minutes; synthetic ropes can settle slightly under load, and retensioning ensures consistent pressure across all points.
Water Management and Safety in Rain
Rain creates a deceptively dangerous situation for gazebos. Water pooling on a flat or poorly pitched canopy can accumulate dozens of kilograms of weight within minutes, stressing the frame beyond its design limits and risking sudden collapse. Prevent this by confirming your canopy maintains a proper peak angle—the steeper the pitch, the faster water sheds. If your model has an adjustable center pole or peak height, maximize it.
During setup, run your hand across the canopy surface to identify any sagging sections between support struts and correct them by tightening the fabric attachment points in those areas. For events expecting sustained heavy rain, position one side of the gazebo slightly lower than the others to create a deliberate runoff direction, guiding water away from guest areas and electrical equipment. At ground level, a shallow trench dug along the drip line on the low side channels water away from the gazebo’s footprint, preventing muddy conditions underneath that make the floor slippery and can soften the soil around your stakes, reducing their holding power.
4. Advanced Tips for Event Planners Using Gazebos at Outdoor Events
Moving beyond basic assembly and anchoring, professional event execution demands a broader perspective. Your white gazebo isn’t just a structure—it’s a guest experience element that needs to function seamlessly within a larger operational plan. These advanced considerations separate amateur setups from polished, professional events.
Pre-Event Site Setup and Logistics
Never debut your assembly process on event day. Schedule a dry run at least a week before, allowing your crew to practice the full sequence and identify any missing or damaged components while there’s still time to source replacements. During this rehearsal, time the process and assign specific roles—one person on frame connections, another managing canopy attachment, a third handling anchoring.
On event day itself, arrive early enough to conduct a thorough site inspection: look overhead for tree branches that could drop debris or power lines that pose safety risks, check the ground for irrigation covers or uneven patches that could destabilize legs, and perform a final weather check within the hour before setup begins. Keep a contingency kit packed with extra stakes, additional sandbags beyond your calculated minimum, spare bungee cords, duct tape for emergency fabric repairs, and a basic first-aid kit for the crew.
Aesthetics and Function for a Flawless Event
Decorating your white gazebo requires balancing visual impact with structural integrity. Choose lightweight drapery fabrics like chiffon or organza that add movement without adding wind load—heavy curtains act as sails and dramatically increase lateral force on the frame. Attach all decorations to the frame using soft ties or zip ties rather than clips that could scratch the finish or create stress points. Sidewalls serve a dual purpose: they provide privacy and branding opportunities while also acting as wind barriers that protect seated guests. However, install them selectively—enclosing all sides in gusty conditions traps wind pressure inside the structure, so leave the downwind side open to allow air to pass through. Ensure at least two unobstructed access points for guests, positioned away from guylines and weight plates to prevent tripping.
Safety First: Monitor and Maintain During the Event
Assign a dedicated crew member to perform anchor checks every 45 minutes throughout the event, paying particular attention during weather transitions when wind direction often shifts. They should verify that stakes haven’t loosened in softening soil, weights remain securely strapped, and guyline tension hasn’t slackened. If conditions deteriorate beyond what your setup can safely handle—sustained winds above 50 kilometers per hour or lightning in the vicinity—have a predetermined evacuation plan that moves guests to a hard structure before you begin takedown. When the event concludes, reverse your assembly sequence methodically: remove decorations first, detach the canopy, release guylines, then disassemble the frame from top to bottom. Clean and dry every component before storage to prevent mildew on fabric and corrosion on metal joints, ensuring your white gazebo is ready to perform flawlessly at the next event.
Master Your Setup for a Weather-Ready White Gazebo
A beautiful white gazebo is only as impressive as the preparation and security behind it. Without disciplined setup practices and robust anchoring, even the most elegant structure becomes a risk rather than an asset. The three pillars covered in this guide—thorough preparation with organized unpacking and inspection, methodical assembly that prioritizes precision over speed, and robust securing through proper weights, strategic guylines, and proactive water management—form a complete system that eliminates the guesswork from outdoor event infrastructure.
Armed with this knowledge, event planners can approach any venue and any forecast with genuine confidence. Whether you’re deploying a traditional frame structure for a formal wedding or raising a pop-up gazebo for a weekend market, the fundamentals remain the same: prepare deliberately, build systematically, and anchor decisively. Master these principles, and your white gazebo transforms from a simple shelter into a reliable event centerpiece—one that stands tall through shifting winds, sheds rain without hesitation, and lets you focus on what truly matters: delivering an exceptional experience for every guest beneath it.