How to clean a blender is the question keeping kitchen owners up at night, and you’re not alone if thick smoothie residue or stubborn soup stains have left you staring at messy blades.
A dirty blender doesn’t just look bad; it spreads bacteria, ruins the flavor of your next batch, and can even damage your machine’s motor over time.
By the end of this blog, you’ll master seven proven cleaning methods: from a 30-second self-clean to deep soaks with baking soda, vinegar, and lemon.
No matter if you own a $30 personal blender or a $500 professional model, these techniques work every time.
Why Does Cleaning Your Blender Matter?
Cleaning your blender right after use keeps food residue from hardening into stubborn buildup, removes lingering odors, and helps your motor run smoothly.
The rubber seal and blades create tight spots that trap moisture. Without washing, bacteria and mold grow there. Raw ingredients like garlic, dairy, or protein can spread harmful bacteria if the blender isn’t cleaned properly.
Leftover particles harden, forcing the motor to work harder and causing overheating or premature failure. Acidic foods and sugars damage rubber gaskets, leading to leaks into the motor.
Oils from spices, garlic, or protein powders stick to plastic and rubber, ruining the taste of your next blend. Dark ingredients like berries, spinach, or turmeric permanently stain plastic pitchers if residue sits too long.
The Quick Clean Method
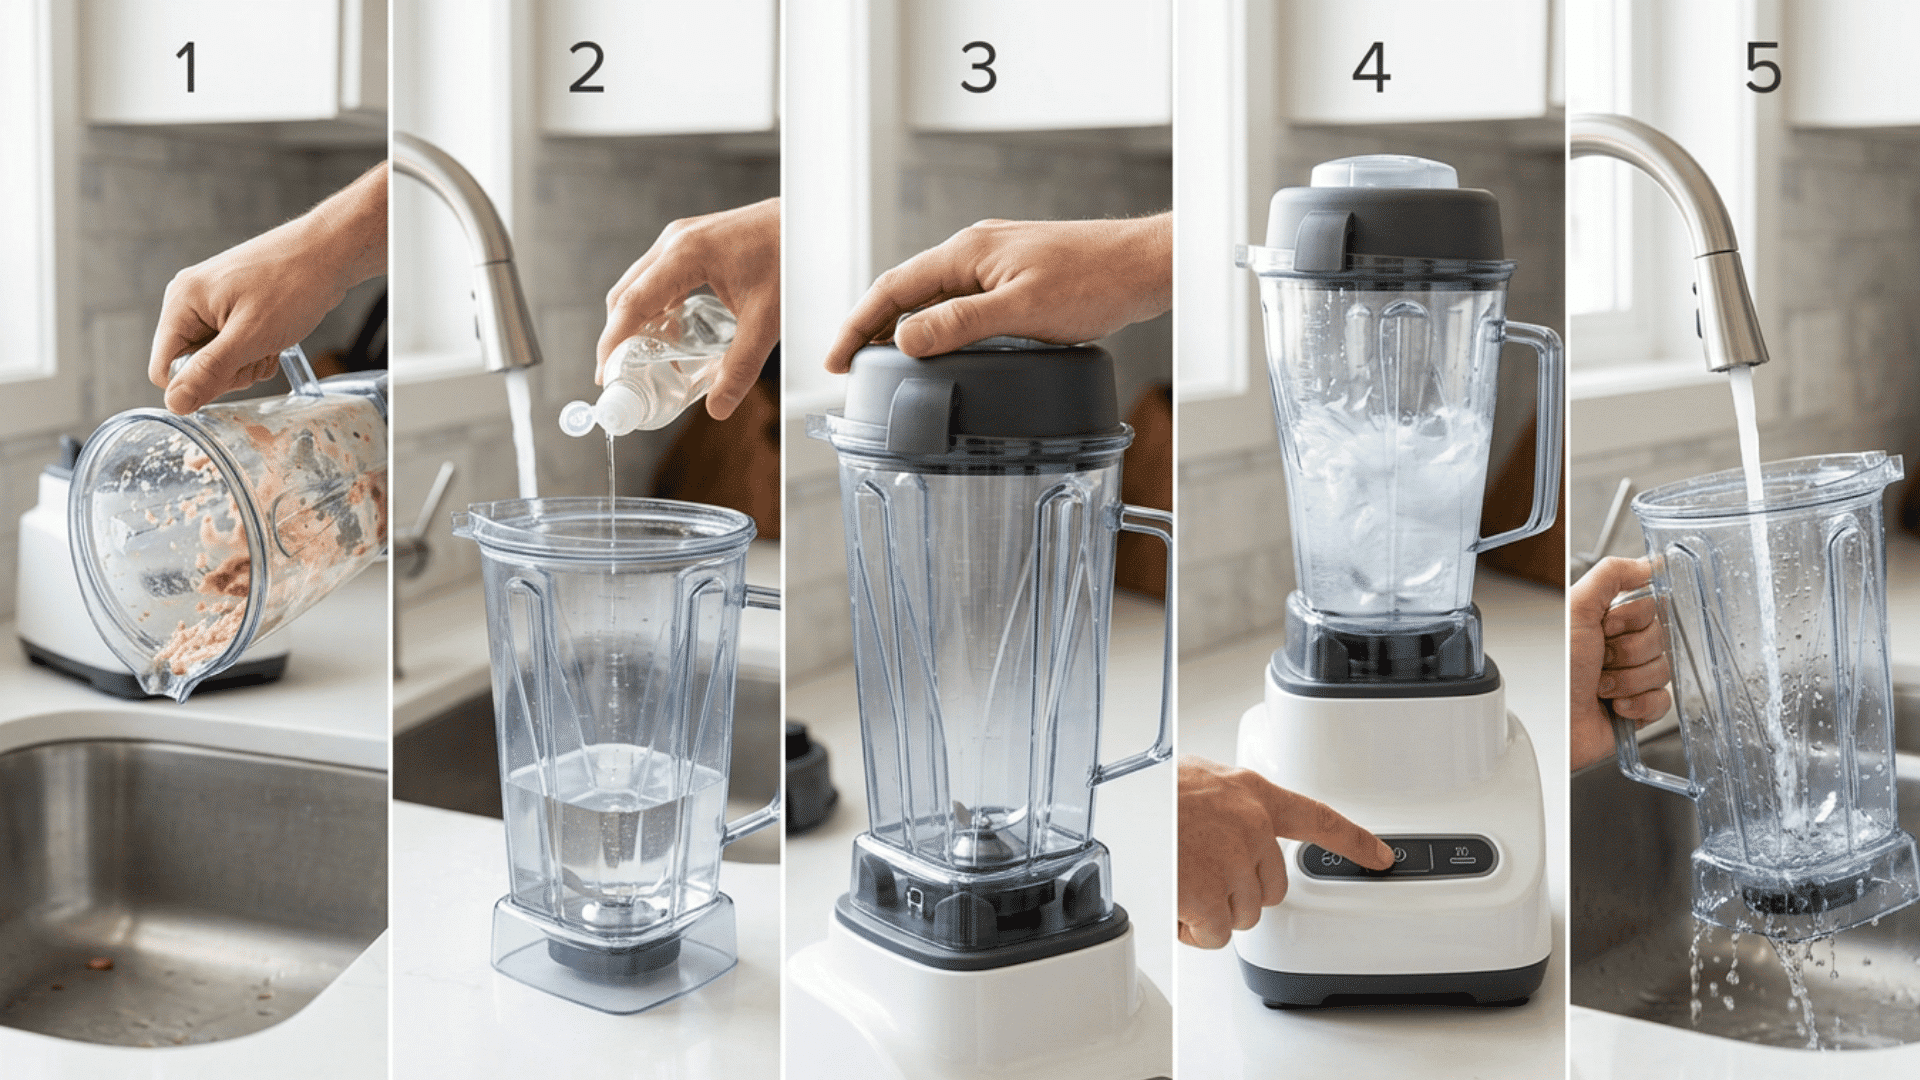
This fast method cleans your blender right after use with minimal effort.
What You’ll Need:
- 1–2 cups warm water
- 1 squirt dish soap
Steps:
- Dump out any leftover food from the blender
- Fill the jar with warm water and add dish soap
- Attach the blade base and secure the lid
- Blend on high speed for 30 seconds
- Rinse with clean water and dry
Pro Tip: Add a drop of lemon juice for extra freshness
Safety Note: Unplug before handling sharp blades
Deep Cleaning Methods
These are the best deep cleaning methods to keep your blender spotless and working like new!
Method 1: Deep Cleaning with Baking Soda
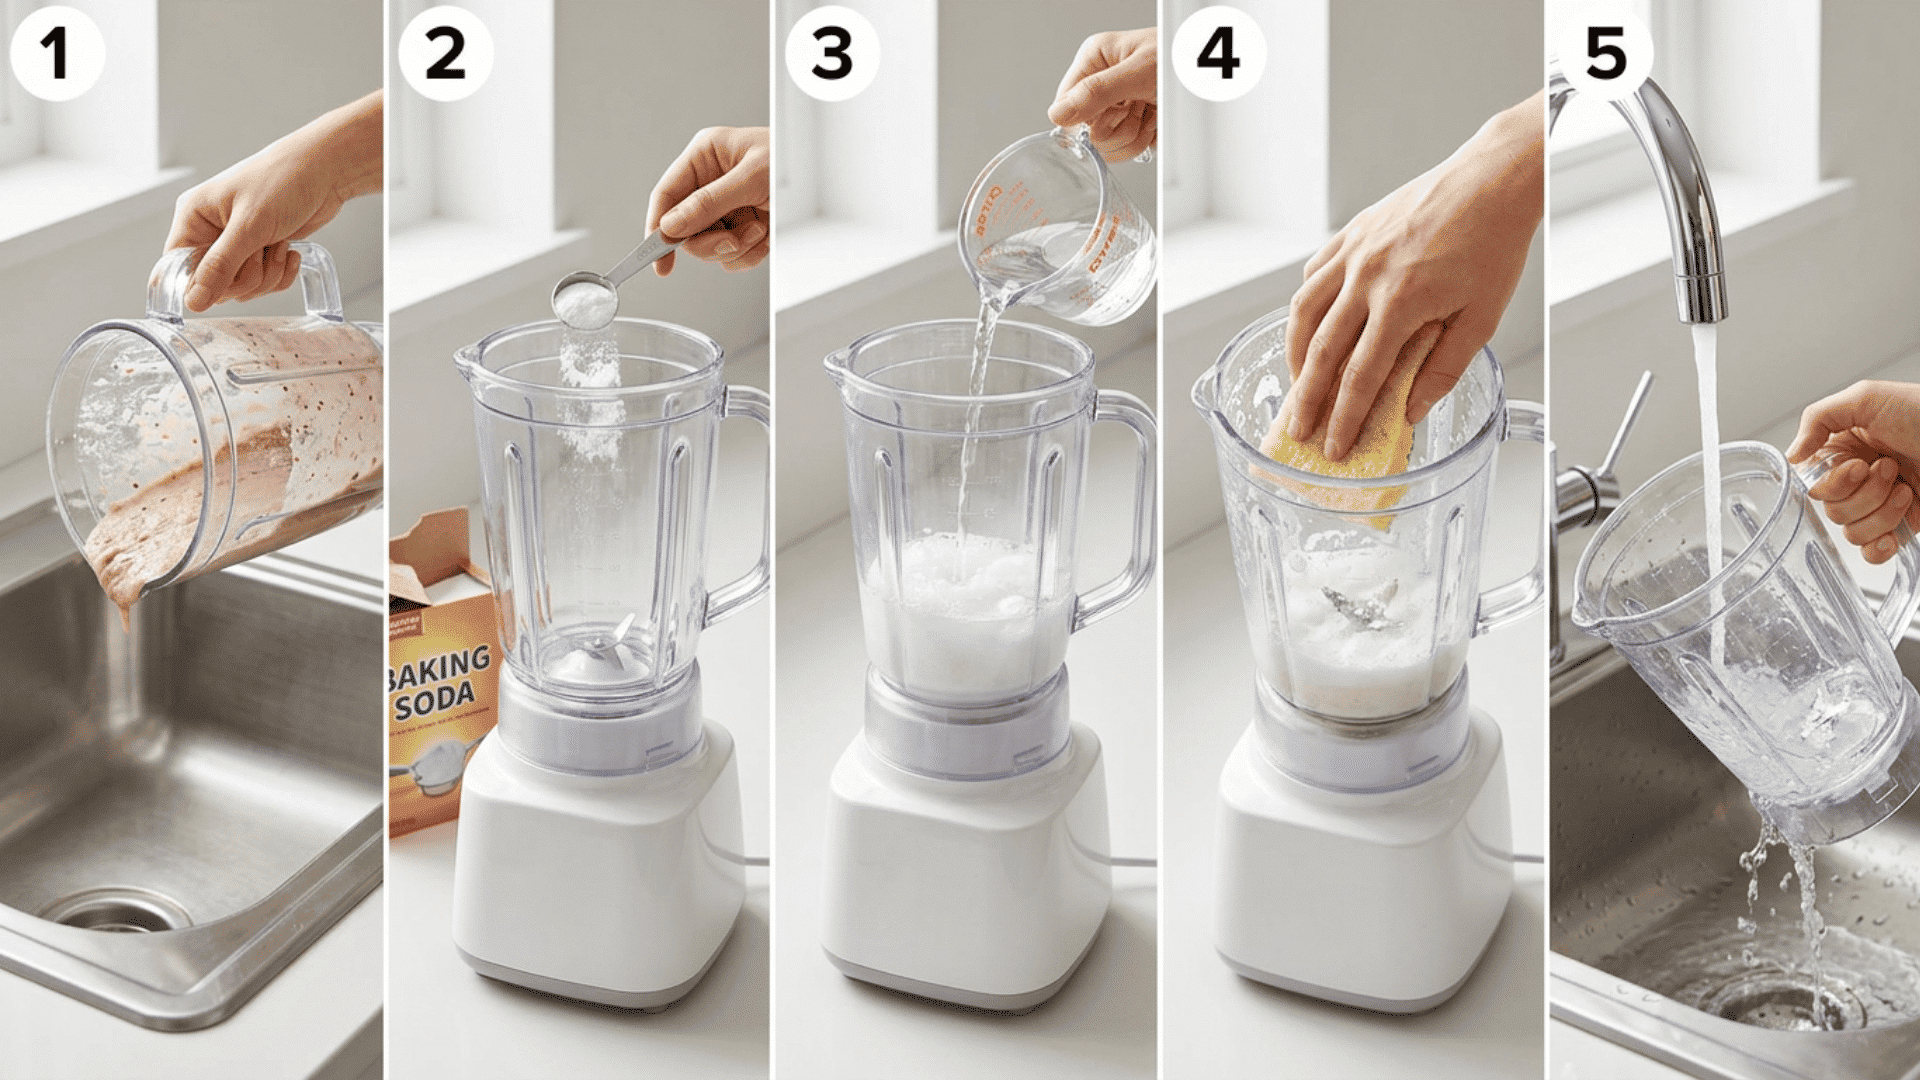
Baking soda breaks down tough stains and removes buildup effectively.
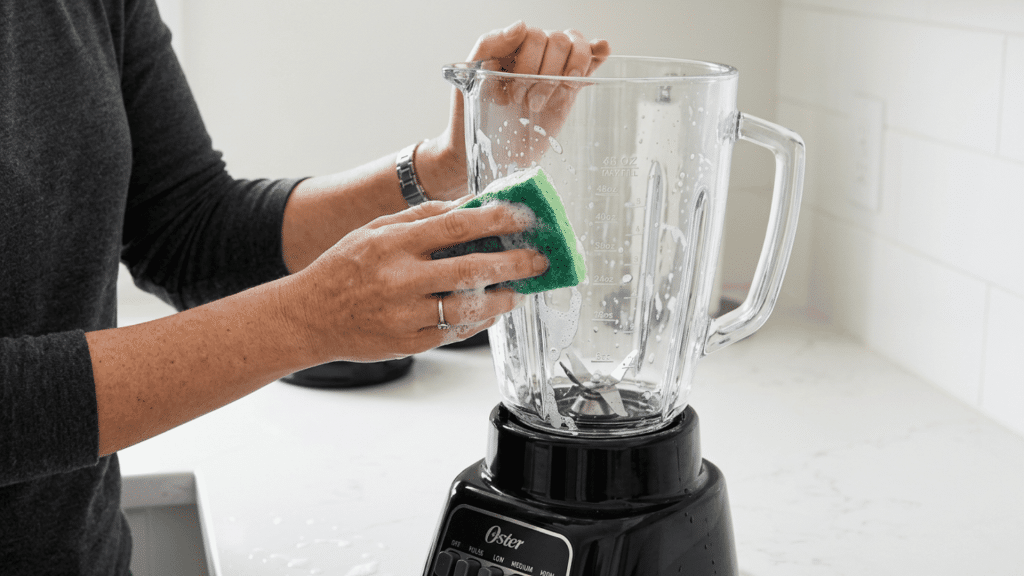
Baking soda is your best friend for a stained blender jar. Add 2 tablespoons of baking soda and 1 cup of warm water.
Blend on high for 30–45 seconds. Scrub gently with a soft sponge, then rinse well and air dry.
- Pro Tip: Add extra baking soda for heavy stains.
- Safety Note: Skip abrasive scrubbers; they damage the blades.
Method 2: Deep Cleaning with White Vinegar
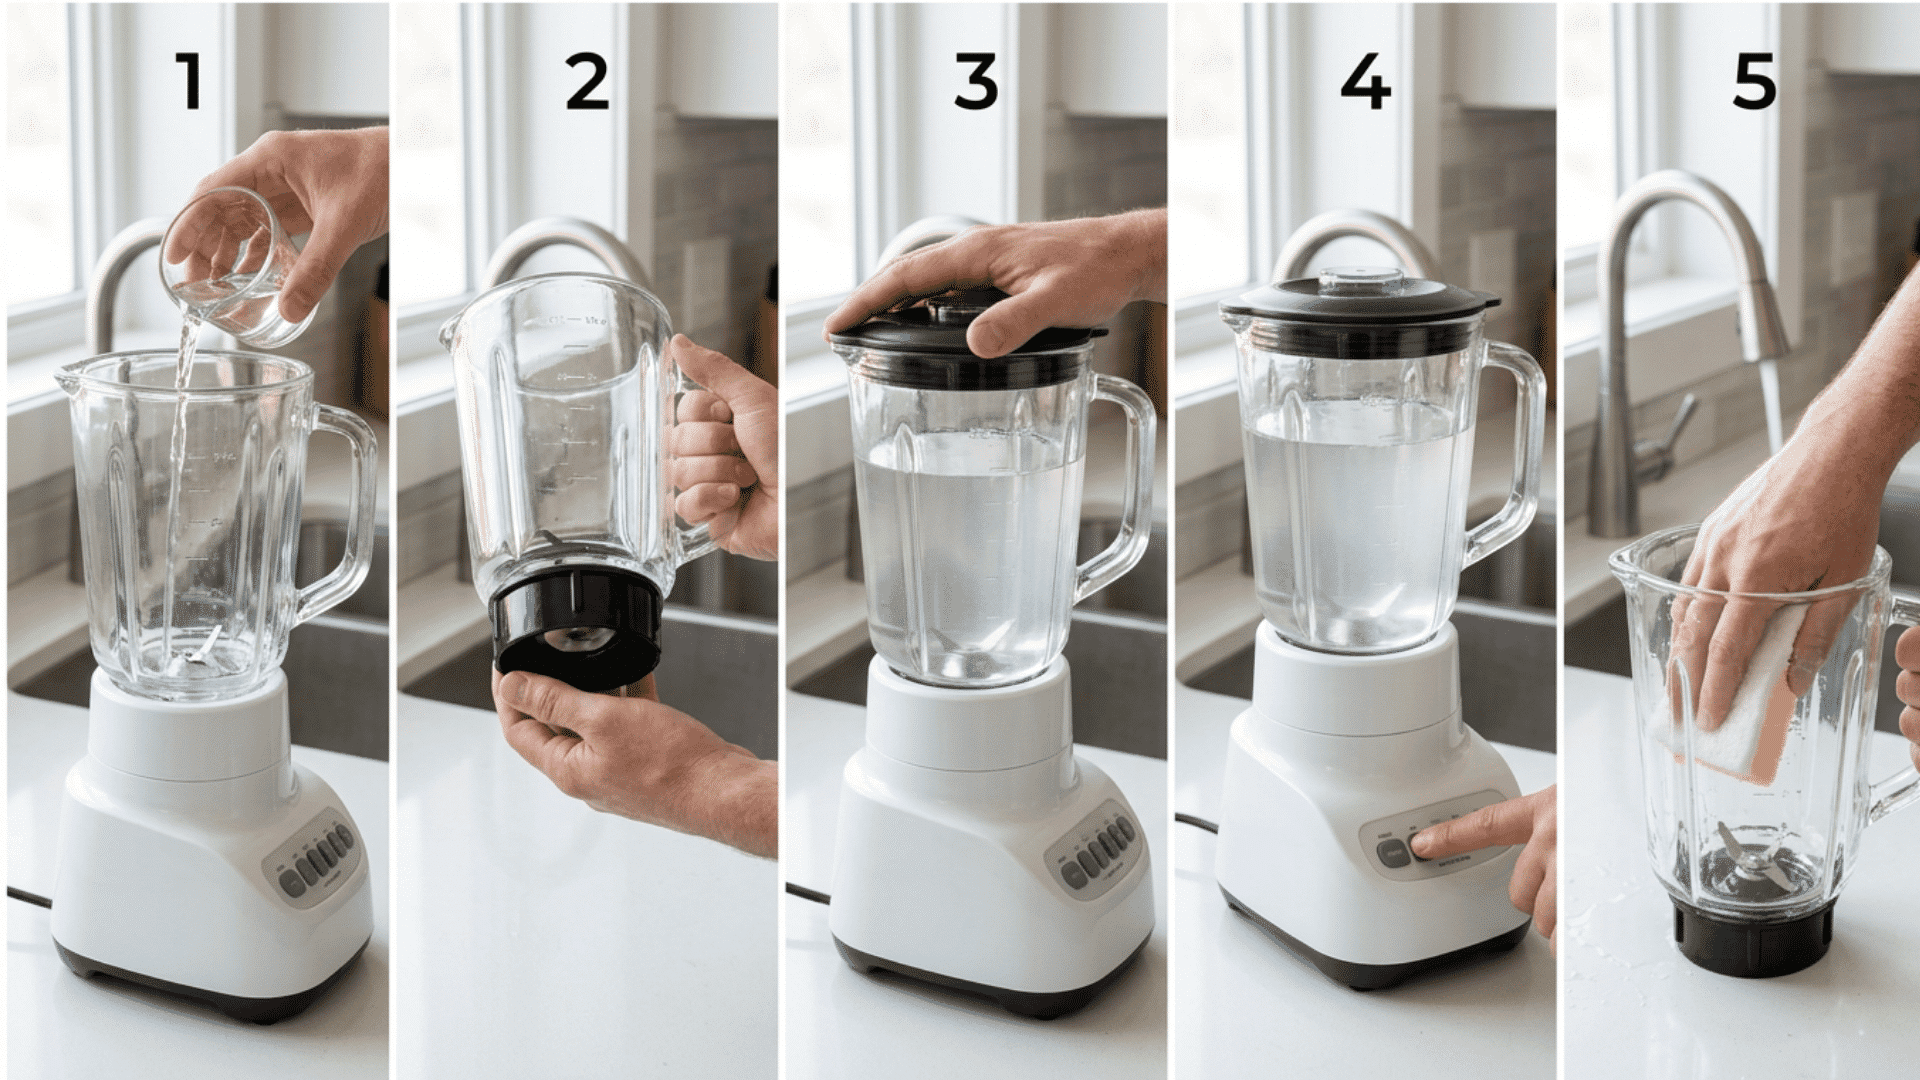
White vinegar tackles odors and dissolves mineral deposits.
White vinegar is great for smells and hard water buildup. Mix ¾ cup white vinegar with ¼ cup warm water in the jar. Blend on high for 45 seconds. Scrub gently with a soft sponge, then rinse well and dry completely.
- Pro Tip: Works especially well on garlic or spice smells.
- Safety Note: Open a window; vinegar has a strong smell
Method 3: Lemon Cleaning for Odor Removal
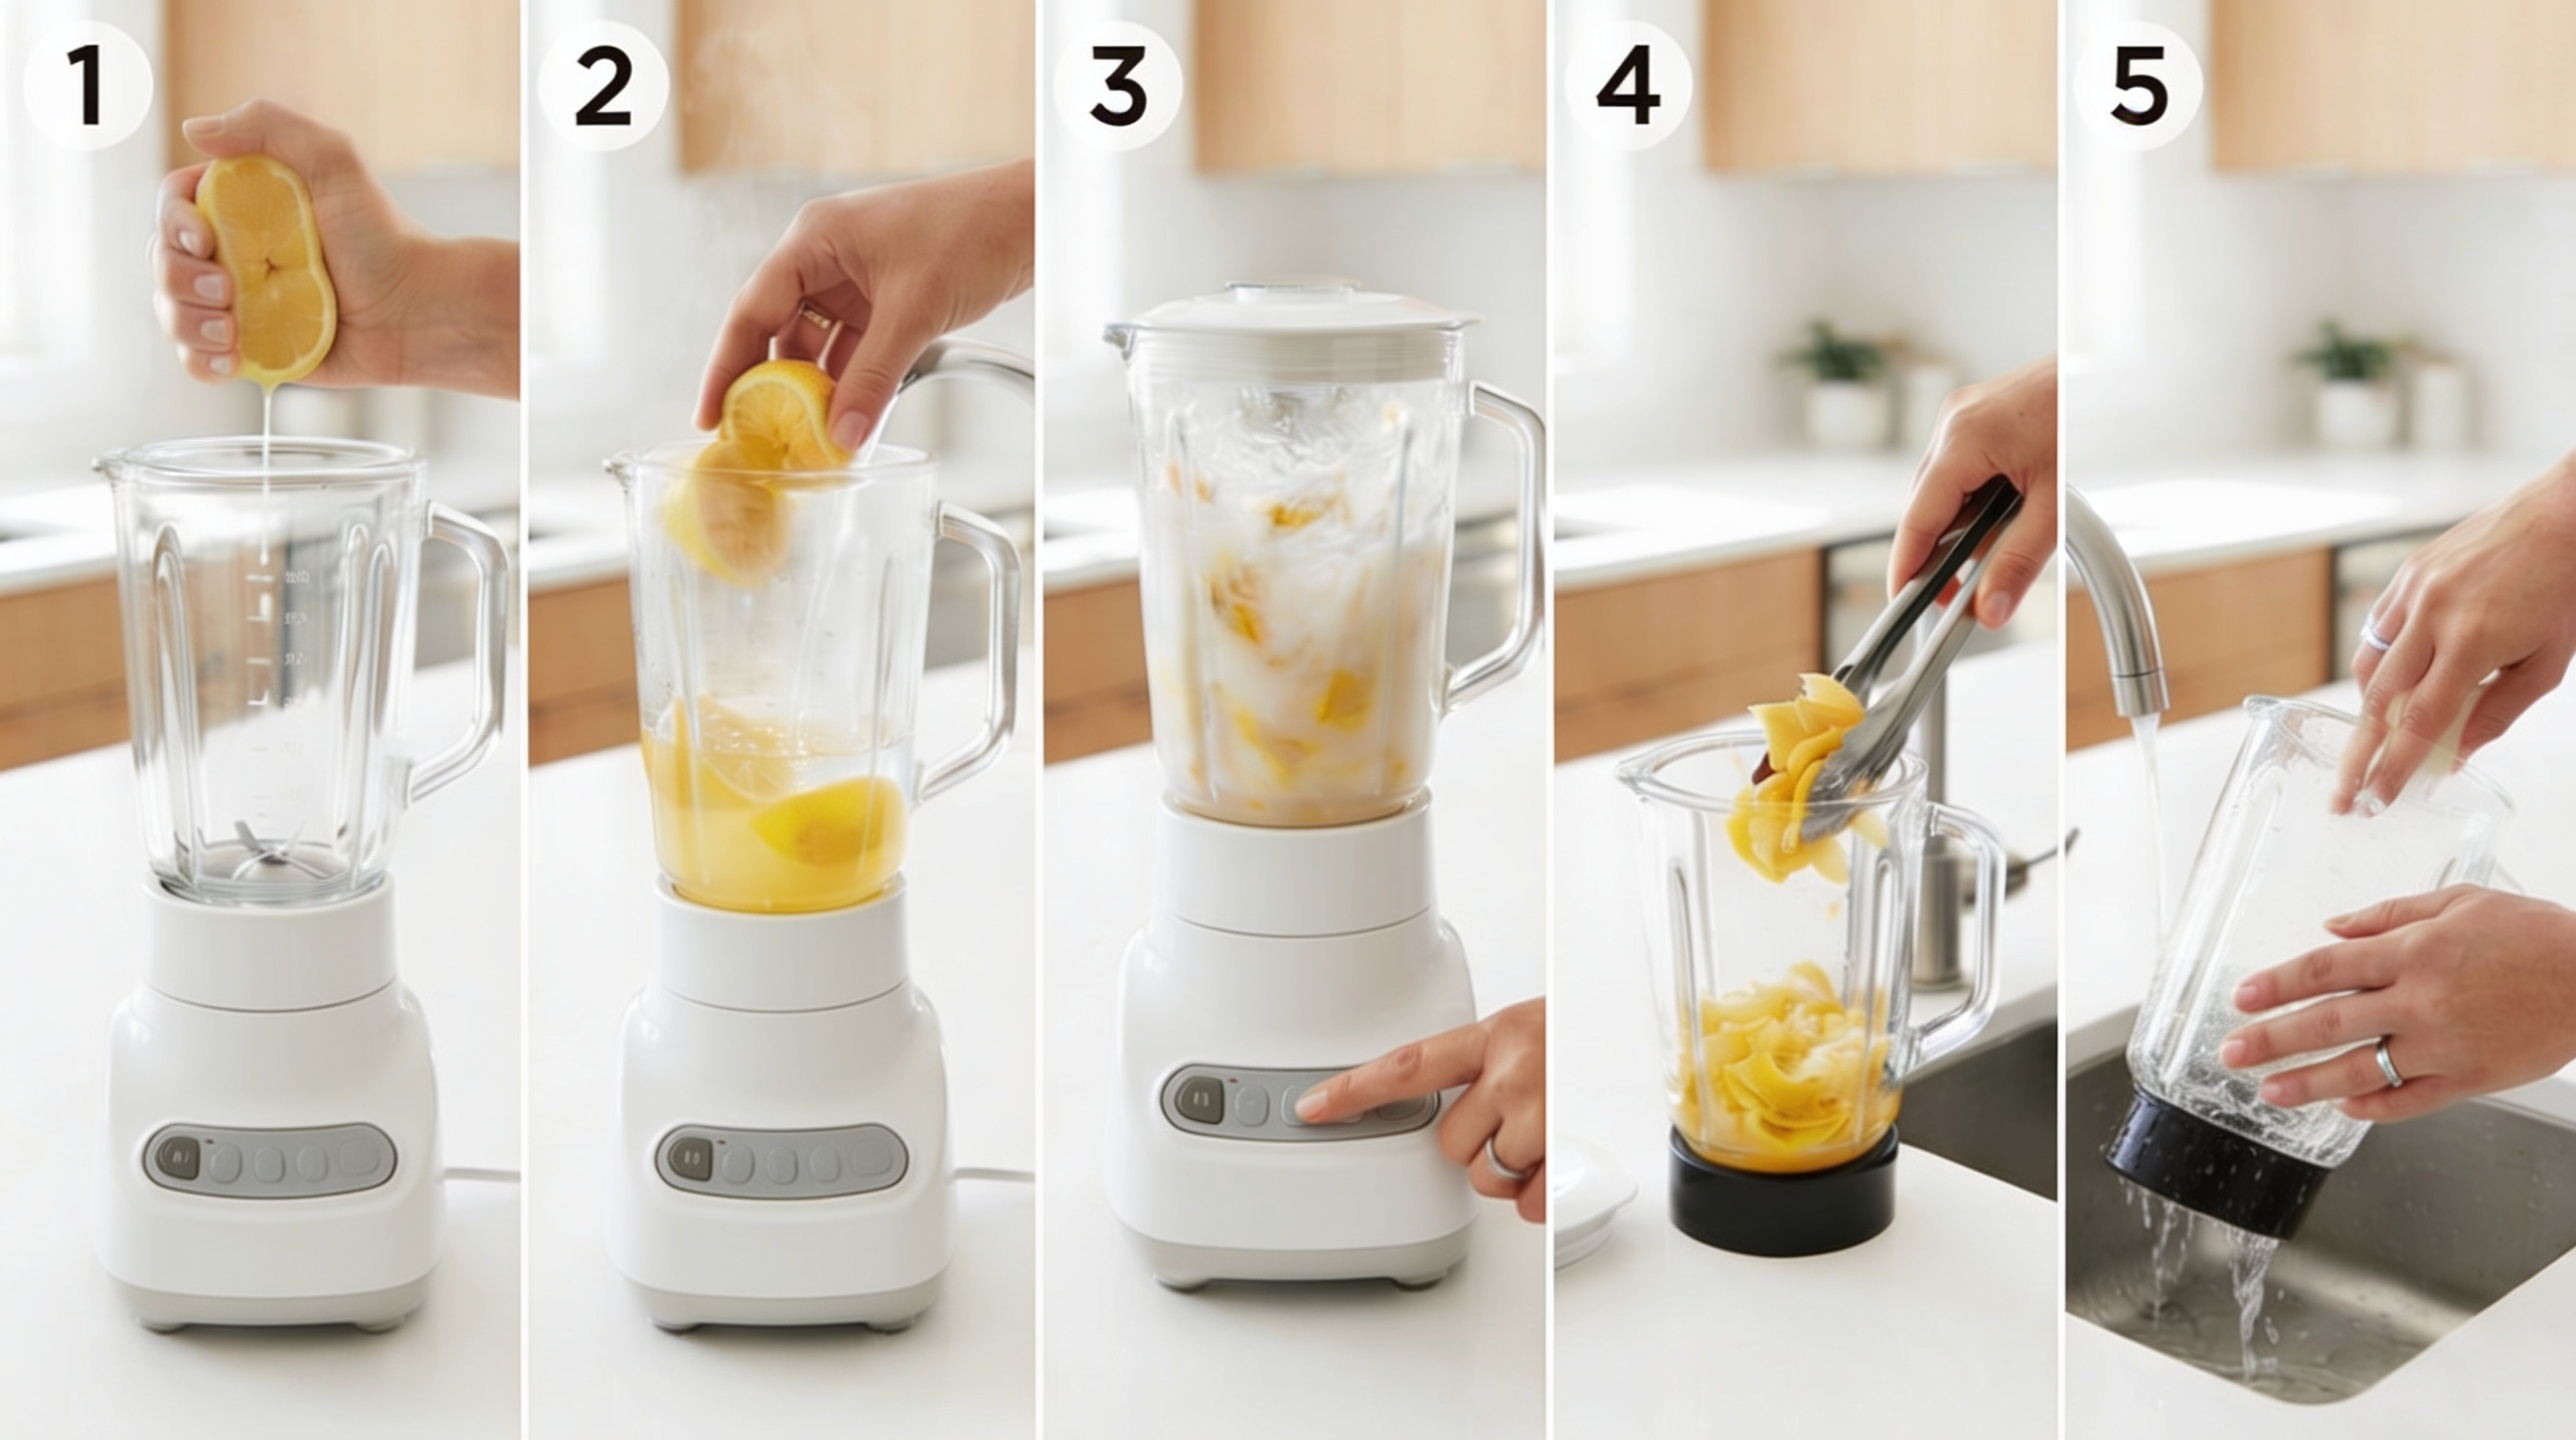
Lemon cuts through oily residue and leaves a fresh scent.
Squeeze one lemon into the jar, drop in the halves, and add 1 cup of warm water. Blend on high for 30 seconds. Remove the lemon pieces, scrub with a sponge, then rinse and dry well.
- Pro Tip: Great for cleaning up after protein shakes or oily smoothies.
- Safety Note: Use tongs to pull out lemon halves; keep fingers away from the blade.
Method 4: Soaking Blades for Stubborn Residue
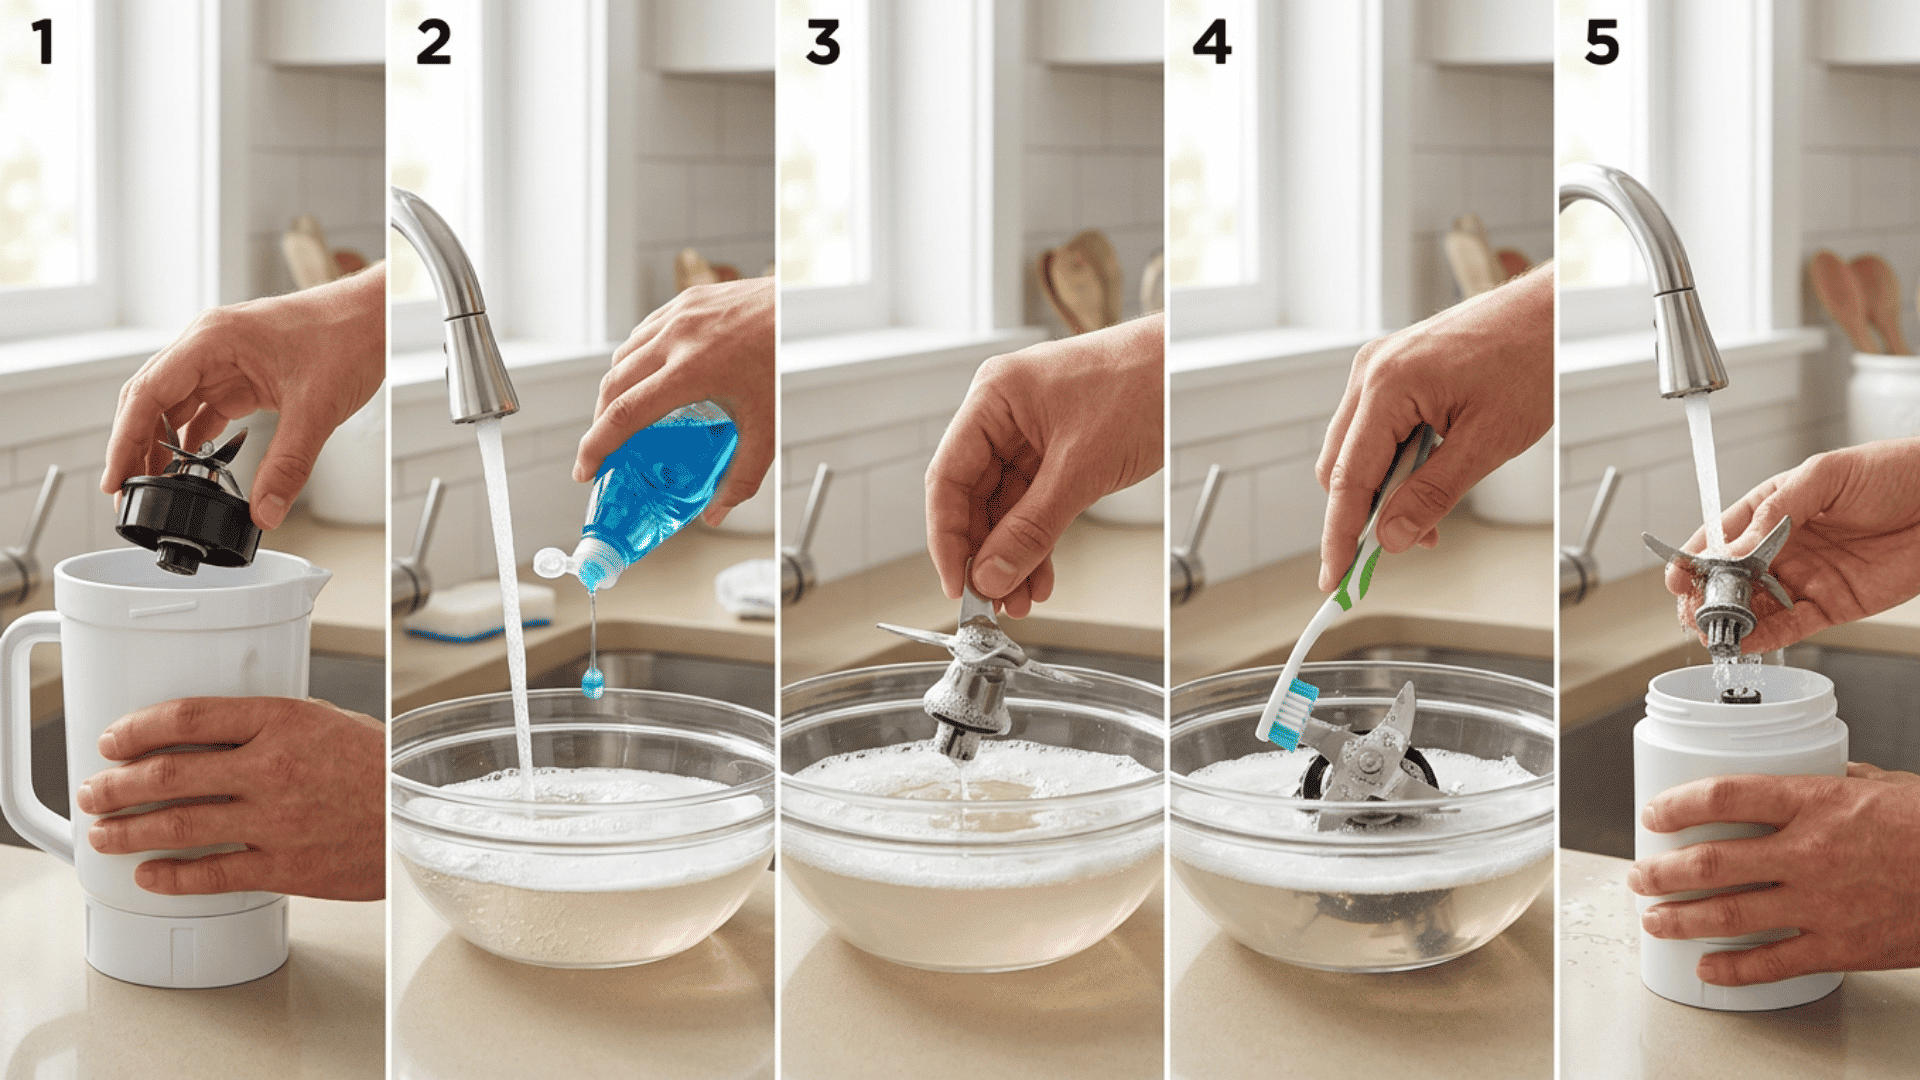
Soaking loosens hardened food that won’t come off with regular cleaning.
For stuck-on food, soaking works best. Remove the blade assembly and place it in a bowl of warm soapy water.
Let it sit for 15–20 minutes, then scrub the tight spots with a soft brush or old toothbrush. Rinse, clean, and reattach.
- Pro Tip: A toothbrush gets into the seal area perfectly.
- Safety Note: Hold blades by the base; never grab the edges directly.
Let the Dishwasher Do the Hard Work for You
Most blender jars and lids are top-rack dishwasher-safe, but hand-washing is better.
High heat and harsh detergents can warp plastic, wear out rubber gaskets, and dull the blades over time. Never put the motor base in the dishwasher or submerge it in water.
Quick Clean Method:
- Fill the jar one-third with warm water.
- Add a drop of dish soap.
- Blend on high for 30–60 seconds.
- Rinse thoroughly and dry.
For Deep Cleaning:
- Blend warm water with two teaspoons of baking soda to remove odors.
- Pry out the rubber gasket and hand-wash it separately.
- Detach the blade assembly and wash all parts individually to stop bacteria buildup.
Stain Removal from Blender
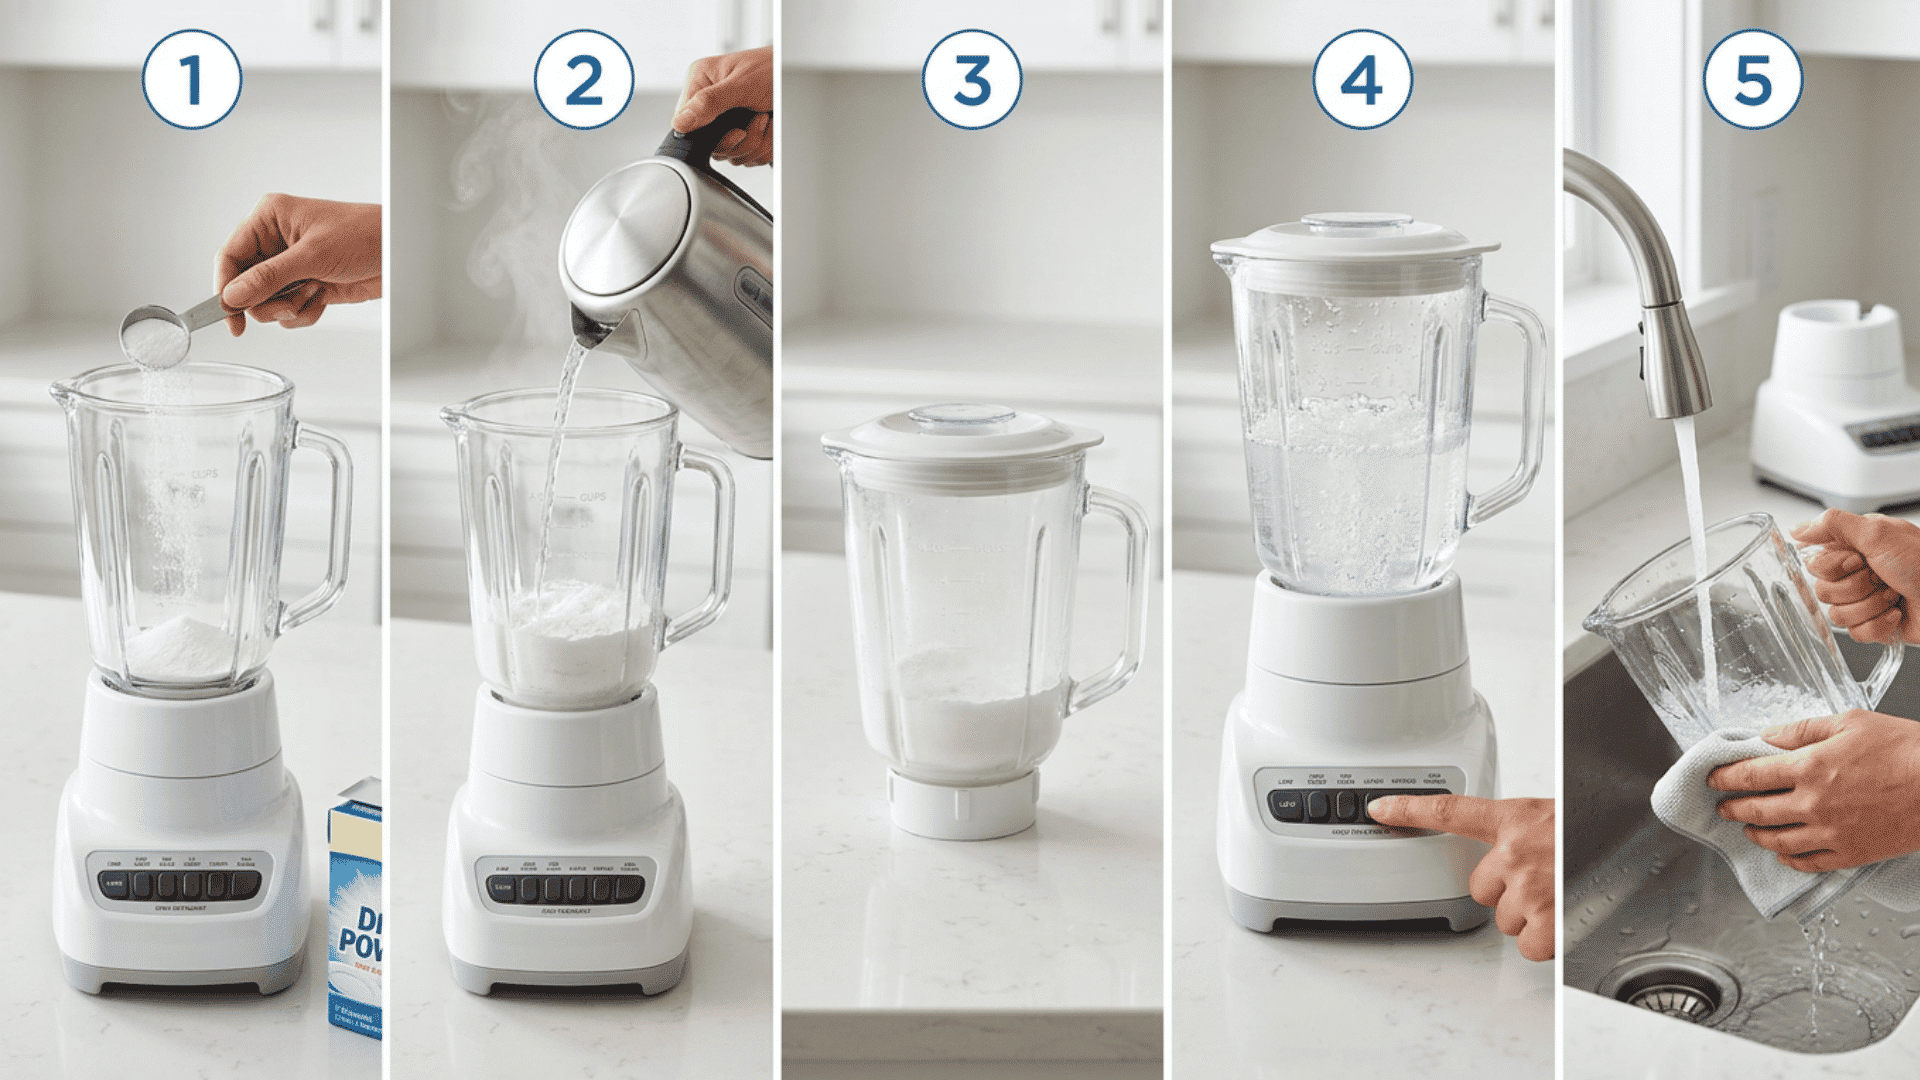
Dish detergent powder works well for deep-cleaning heavily stained blenders. Got turmeric stains or berry marks that just won’t go away? Dish detergent powder is the fix.
What to Do:
- Add 2 tablespoons of dish detergent powder to the jar
- Fill with hot water and let it sit for 2–3 hours
- Blend on low for 1 minute to loosen remaining residue
- Pour out, rinse well, and dry completely
The long soak does most of the work for you. No hard scrubbing needed.
Pro Tip: Use an extra tablespoon for really dark, set-in stains.
Safety Note: Always use hot water, not boiling water. Boiling water warps and cracks the plastic jar.
Daily & Weekly Blender Maintenance Schedule
Keep your blender in top condition with these simple daily and weekly tasks
| Maintenance | Task | What to Do |
|---|---|---|
| Daily | Self-Clean Cycle | Fill the jar with warm water and soap. Run 30–60 sec, then rinse. |
| Daily | Wipe Base | Unplug and wipe the base with a damp cloth. |
| Daily | Air Dry | Place the pitcher and lid upside down to dry. |
| Weekly | Deep Clean | Remove blades and gasket. Soak and scrub. |
| Weekly | Check Blades | Inspect blades for dullness, chips, or wear. |
| Weekly | Inspect Clutch | Check the clutch for sticking or wear. |
| Weekly | Clean Vents | Wipe vents and air inlets to remove dust. |
| Weekly | Inspect Cord | Look for frays, cracks, or loose connections. |
Common Blender Cleaning Mistakes to Avoid
Keep your blender clean and safe with these simple tips:
- Never submerge the motor base; wipe with a damp cloth.
- Wash blades immediately; avoid long soaks to prevent rust.
- Remove and clean the gasket to stop hidden mold and bacteria.
- Clean food residue immediately; avoid letting it sit overnight.
- Use only a small drop of soap for self-cleaning.
Conclusion
How to clean a blender effectively is now clear with proven methods at your disposal.
A dirty blender cross-contaminates food, leaves lingering flavors in fresh smoothies, breeds mold around the seals, and strains your motor, leading to early replacements and costing you money.
Clean blenders taste better, last longer, and keep your family safe. This isn’t just about one appliance. It’s about building kitchen habits that protect health and save money.
Try the method today with your next smoothie. For blenders with self-cleaning features, check out our “Share your cleaning hack” in the comments.
Frequently Asked Questions
Should You Wash the Blender Before First Use?
Yes. Clean all removable parts before first use. The motor unit stays dry. Dishwasher-safe parts can be washed there for convenience.
How Early is Too Early to Use a Blender?
Avoid blending before 7:00 AM. In apartments, noise above 85 decibels can disturb neighbors. Limit use to 30 seconds if earlier.
Do Eggshells Really Sharpen Blender Blades?
No. Eggshells are abrasive and act like sandpaper, which gradually dulls the blades rather than sharpening them over time.