You finally decided to paint that popcorn ceiling, but have no idea where to start.
Most people who try doing so without knowing exactly what to do next often end up with a patchy mess or chunks of texture falling off.
The first time I tried, I pressed too hard with the roller and scraped off a chunk right in the middle of the ceiling. Not a great look.
And that’s why learning how to paint a popcorn ceiling becomes important. Let’s get into it – one step at a time.
What is a Popcorn Ceiling and Why Does it Need Special Care?
Popcorn ceilings are those bumpy, textured ceilings common in homes built between the 1950s and 1980s.
Back then, it was used for two main reasons.
First, it helped hide imperfections on the ceiling. Second, it absorbed sound pretty well.
But the tricky part is that the bumpy texture makes painting it a lot harder than a flat ceiling.
A regular paint roller can scrape off the texture if you press too hard. And too much paint in one go can make the bumps fall off completely.
That is why painting a popcorn ceiling needs a gentler approach. The right tools and the right technique make all the difference.
Things You Need Before Getting Started
Before you pick up a brush, make sure you have everything ready.
Here is what you will need:
For painting:
- A thick-nap paint roller (a 3/4-inch or 1-inch nap works best)
- A paint tray
- A paintbrush for edges and corners
- Ceiling paint (flat or matte finish works best)
For protection:
- Drop cloths or plastic sheets for the floor and furniture
- Painter’s tape for edges and walls
- Safety goggles to protect your eyes
- Old clothes you don’t mind getting dirty
For prep:
- A vacuum with a brush attachment
- A spray bottle with water
- A ladder tall enough to reach the ceiling comfortably
Do not use a thin-nap roller on a popcorn ceiling. It will not hold enough paint and you will end up pressing too hard, which can damage the texture.
Preparing Your Room to Paint a Popcorn Ceiling
Skipping prep is how you end up with paint on the furniture, texture chunks on the floor, and ragged edges on the walls.
These steps take maybe 20 minutes and save you a lot of cleanup.
So let’s do this right.
Step 1: Clear the Room
Move as much furniture out as you can.
For the pieces that are too heavy to move, push them to the center of the room and cover them with drop cloths.
The more open space you have, the easier it is to move around and paint without knocking anything over.
Step 2: Cover the Floor
Lay drop cloths or plastic sheets across the entire floor. Do not leave any gaps near the edges. Popcorn ceilings shed a lot during painting. You do not want that mess on your floors.
Step 3: Tape the Edges
Run painter’s tape along the tops of your walls where they meet the ceiling.
Rushing the tape is usually what causes those jagged lines where the ceiling meets the wall. Slow down on this one step, and you’ll save yourself from repainting the top inch of every wall.
Neat tape lines mean cleaner edges later and save you from doing touch-up work on your walls afterward.
Step 4: Vacuum the Ceiling
This step surprises most people.
Use a vacuum with a soft brush attachment to gently clean the ceiling.
Dust and cobwebs on a popcorn ceiling can ruin your paint job by stopping the paint from sticking properly.
Step 5: Check for Water Stains
Look for any yellow or brown stains on the ceiling.
If you see any, apply a stain-blocking primer on those spots first.
Painting over stains without primer will make them bleed through the fresh paint, no matter how many coats you apply.
Do not wet the ceiling to clean it. Water can soften the texture and cause chunks to fall off. Always use a dry vacuum instead.
So Now Comes the Main Task: How to Paint Popcorn Ceiling?
Alright, the room is prepped, and everything is in place. Now comes the part you have been waiting for.
One thing to keep in mind: always work in small sections. Do not try to paint the whole ceiling in one go. Work in 3- to 4-foot sections at a time.
Applying the First Coat Without Damaging the Texture
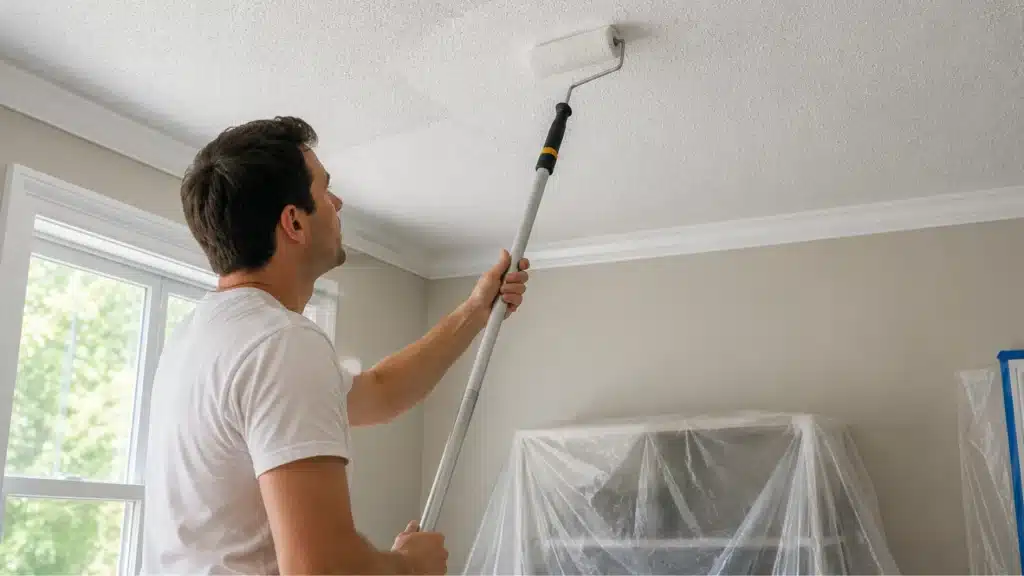
Start by cutting in the edges with a paintbrush first. Then load your thick-nap roller lightly with paint.
Here is how to roll it on:
- Place the roller gently against the ceiling
- Use slow, light strokes in one direction
- Do not press hard; let the roller do the work
Let the first coat dry fully before adding another. In most homes, that takes about 2 hours, though humid rooms or thicker coats may need closer to 4.
Never go back over a wet section. Wait for it to dry completely before adding more paint.
Getting Even Coverage With the Second Coat
Follow the same steps as the first coat. The second coat is what brings everything together and evens out any thin spots.
Once dry, slowly pull off the painter’s tape at a low angle for clean edges.
Do not apply a third coat. Too many coats can cause the texture to sag or fall off over time.
Cleaning Up Without the Hassle
The painting is done. Now let’s wrap up cleanly.
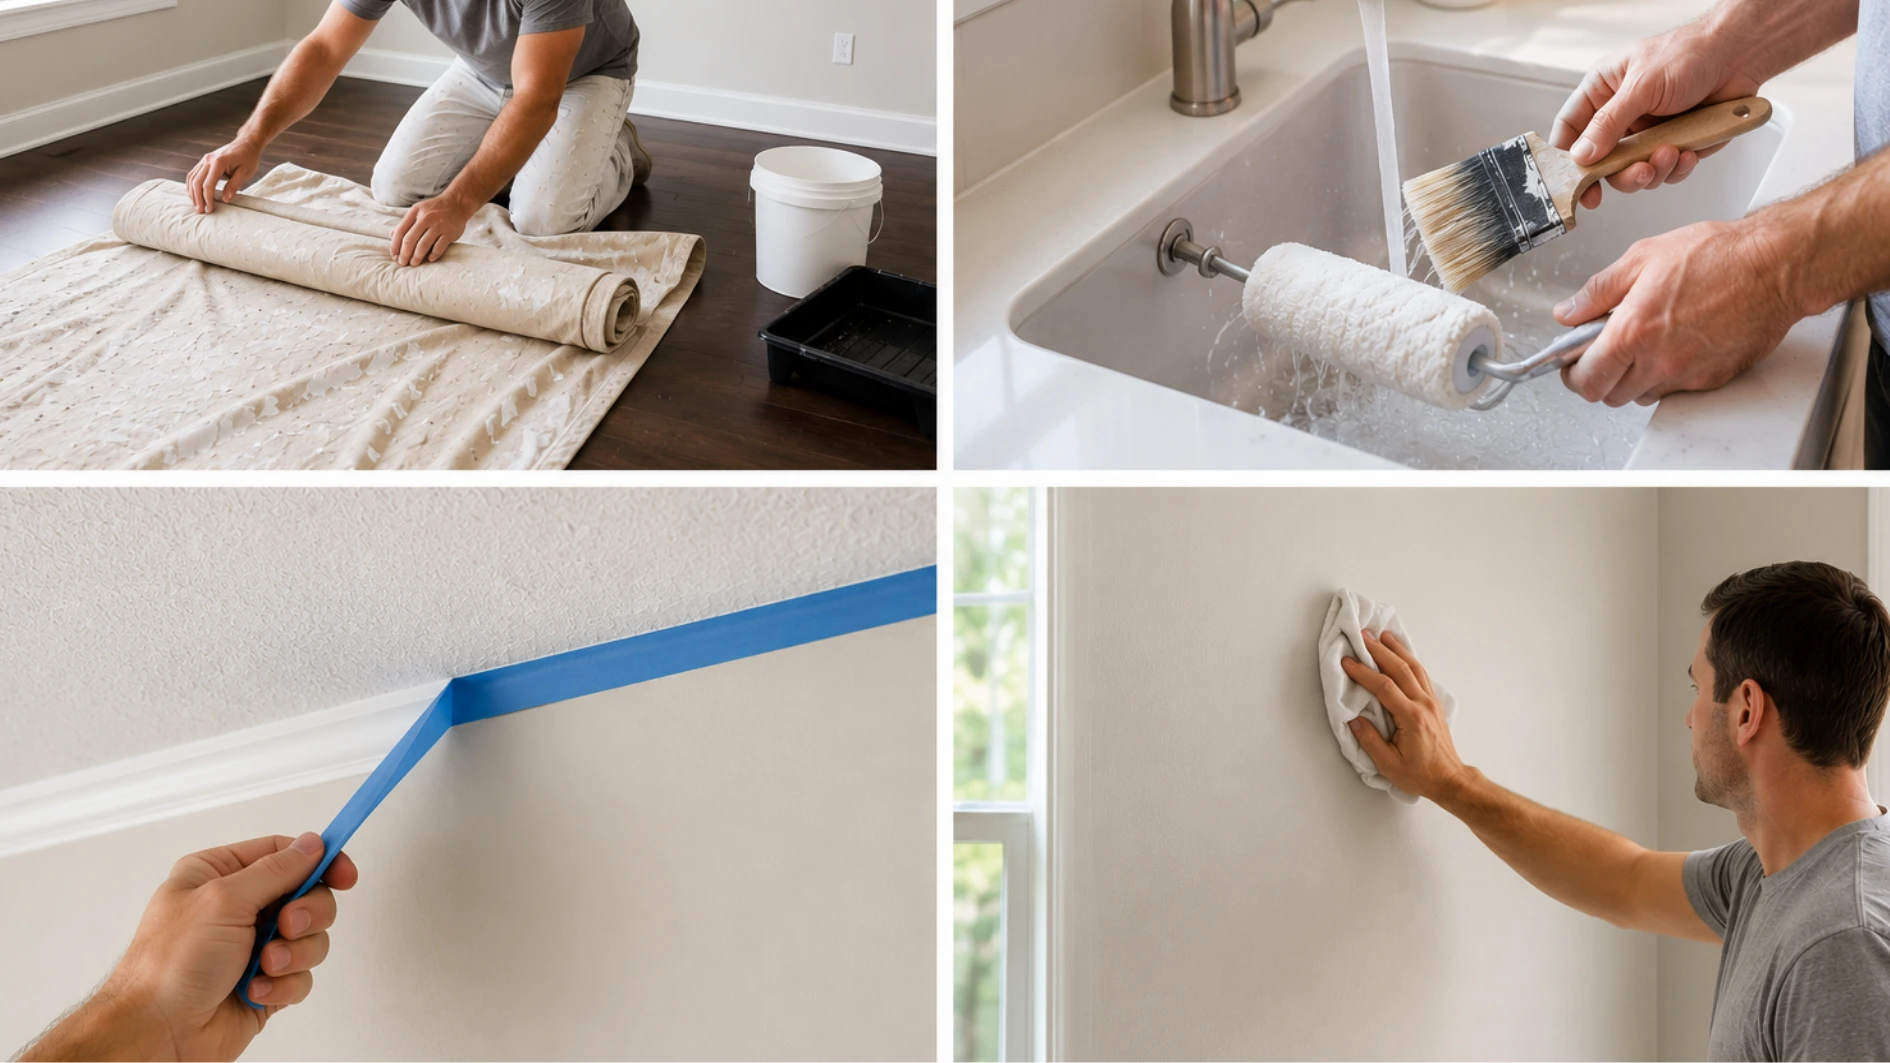
Fold the drop cloths inward before picking them up. Popcorn texture sheds a lot during painting, and folding inward keeps all those flakes and dried paint bits from scattering across the floor you just protected.
Then rinse your rollers and brushes with warm water right away. Do not let the paint dry on them.
Pull the painter’s tape off slowly at a low angle.
Then wipe any paint spots off the walls with a damp cloth.
Do not throw wet rollers or brushes in the trash. Rinse them fully first.
Should You Remove or Repaint the Popcorn Ceiling?
This is a question a lot of people ask before picking up a roller. And the answer depends on a couple of things.
Repainting is the easier and cheaper option.
If your ceiling is in decent shape with no major cracks or water damage, a fresh coat of paint is all it needs.
Removing is a bigger job. It is messy, time-consuming, and can get expensive.
Popcorn ceilings in homes built before 1980 may contain asbestos. Before painting or removing anything, hire a licensed asbestos inspector to test a sample. It is not expensive, and it is not worth skipping.
For most people, repainting is the way to go. It is quicker and easier, and gets the job done without tearing your ceiling apart.
Time to Get That Ceiling Done
Learning how to paint popcorn ceiling is really not that bad once you know what you are doing. The right tools, a bit of prep, and a light touch are all it takes.
Take it slow. Work in small sections. And let the roller do the work.
Now you have everything you need to get started.
Go give that ceiling the fresh coat it deserves.
Frequently Asked Questions (FAQ’s)
1. What Kind of Paint do You Use for Popcorn Ceilings?
Always use flat or matte ceiling paint. It hides imperfections well and does not reflect light, which makes uneven spots less noticeable.
2. Is it Better to Spray or Roll Paint on a Popcorn Ceiling?
Rolling is safer and easier. A thick-nap roller gives good coverage without damaging the texture. Spraying works too, but requires more prep and skill.
3. Do I Need to Prime a Popcorn Ceiling Before Painting?
Yes! Always prime first. It helps the paint stick better and gives you a more even finish.