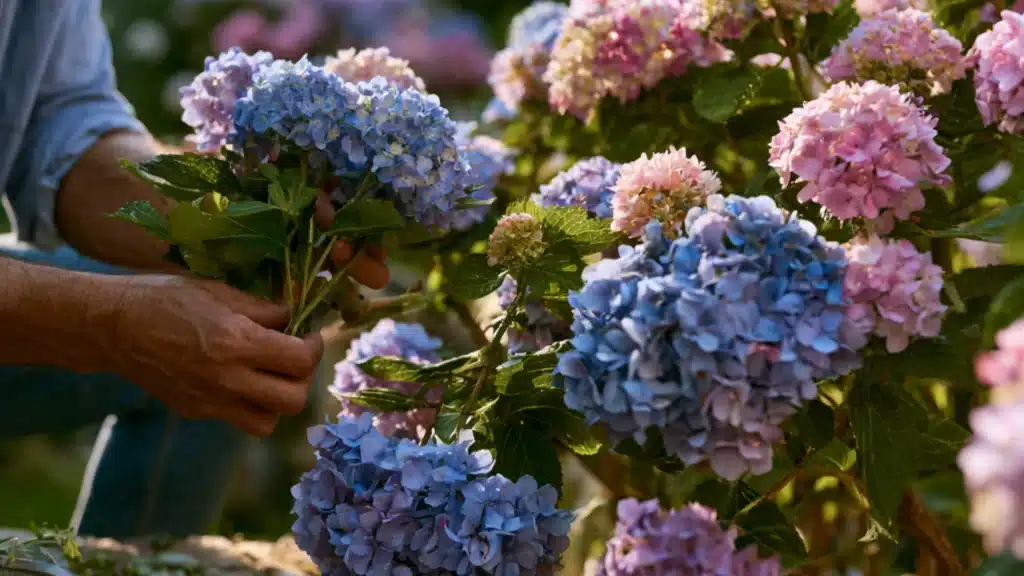
You stared at a gorgeous hydrangea and wished you could multiply it for free.
It sparked my interest years ago, and now I crave those extra blooms every summer.
I’ll guide you through propagating hydrangeas and growing fresh plants fast. I’ve done it multiple times with great results.
What Does it Mean to Propagate Hydrangeas?
Propagating hydrangeas simply means growing new plants from an existing one.
Instead of buying a new plant, you take a small piece of your current hydrangea, a stem, a branch, or even a root section. Then you help it grow into a brand-new plant on its own.
It’s like making a copy of something you already love. You don’t need to be an expert gardener. I’ll show you exactly how each method works, step by step.
What You Need Before You Start
You don’t need many tools. Just a few basic things you may already have at home.
Items that I use are:
- Sharp, clean pruning shears: A clean cut gives the stem the best chance to root
- Rooting hormone powder: This speeds up root growth. It’s optional, but I always recommend it
- Small pots or containers: One per cutting works best
- Potting mix: Use a light, well-draining mix. Avoid heavy garden soil
- A plastic bag or plastic cover: This keeps moisture in and acts like a mini greenhouse
- A watering can: For keeping the soil consistently damp
Always clean your shears before you start. Dirty tools can spread disease to your cutting. A quick wipe with rubbing alcohol does the job.
How to Propagate Hydrangeas from Stem Cuttings?
Stem cuttings are the most popular way to propagate hydrangeas. It works well for almost every type of hydrangea.
And honestly, it’s the method I always go back to.
Step 1: Pick the Right Stem
Look for a healthy, non-flowering stem with two to three sets of leaves. It should be from this year’s new growth.
Avoid any stem that looks weak, damaged, or diseased.
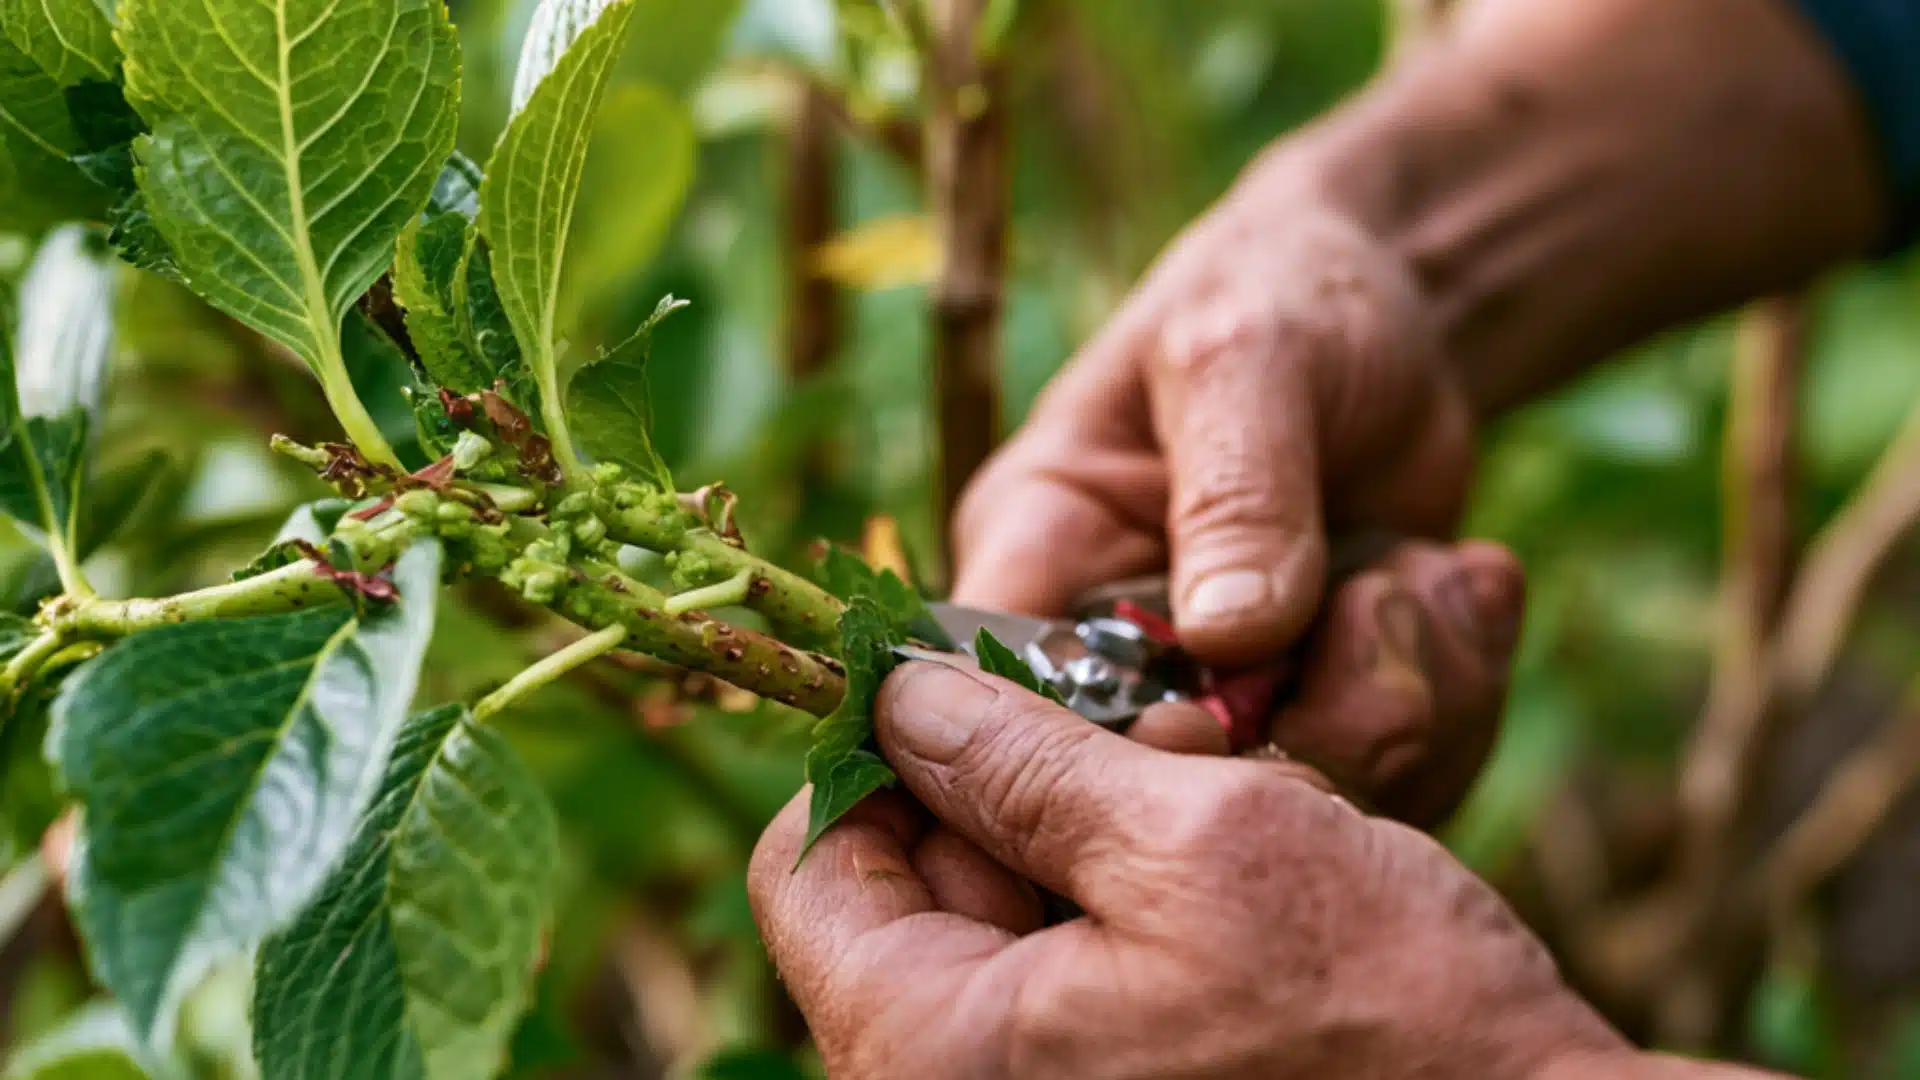
Step 2: Take Your Cutting
Use your clean, sharp shears. Cut a 4 to 6-inch piece just below a leaf node.
A leaf node is the spot where a leaf meets the stem. That’s where the roots will grow from.
Step 3: Prep the Cutting
Strip off all the leaves from the bottom of the stem. Leave only one or two sets at the top. If those remaining leaves are large, cut them in half.
This helps the cutting hold onto moisture while it roots. Then dip the cut end into rooting hormone powder.
Step 4: Plant it in Soil
Fill a small pot with damp potting mix. Push the cutting about two inches into the soil.
Pack the soil gently around it. Then cover the pot loosely with a plastic bag. This creates a warm, humid space for the cutting to root in.
Step 5: Keep It Moist and Wait
Place it in bright, indirect light. Keep the soil damp but not soggy.
Mist the cutting regularly to stop it from drying out. Roots form in two to four weeks. Give the stem a gentle tug; if it resists, it worked!
Soon, you will have new hydrangeas, decorate your home, make bouquets for gifting, or make anything you want from them.
Can You Grow Hydrangea Cuttings in Water?
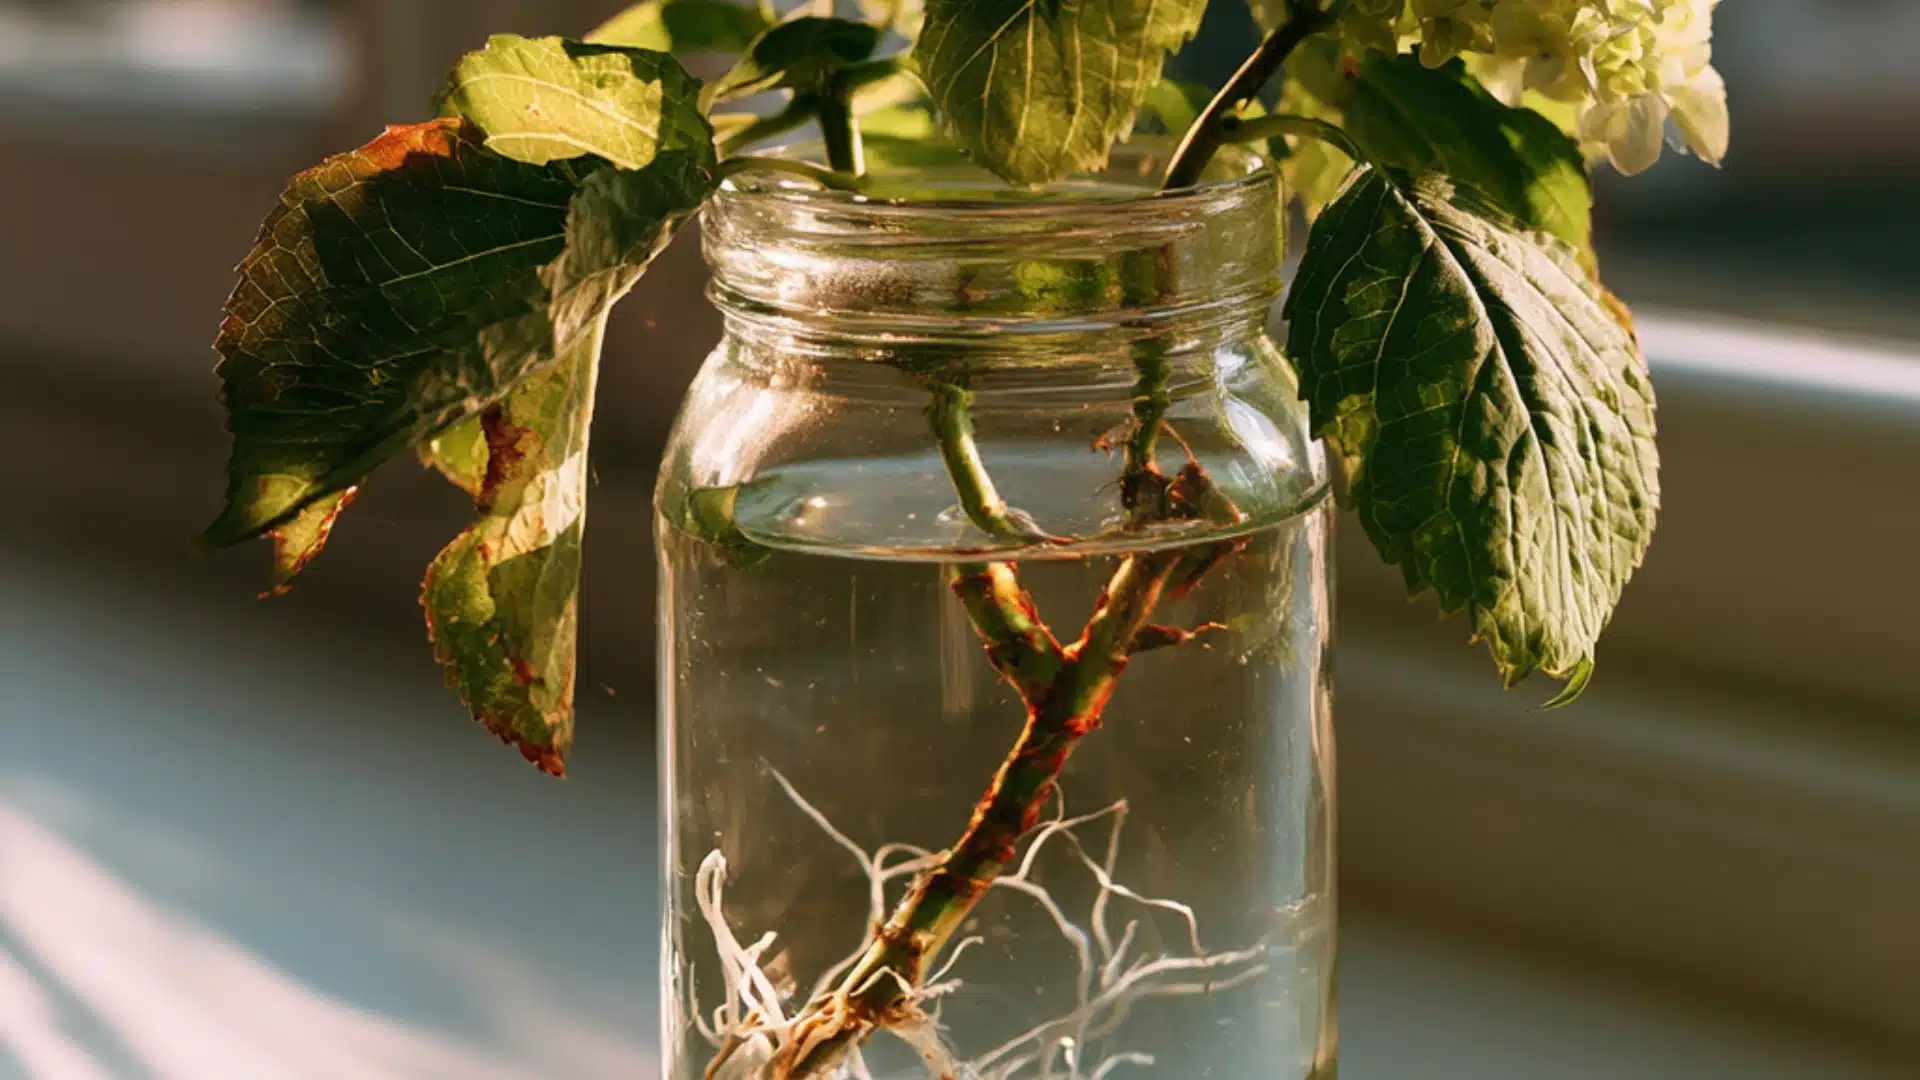
Yes, you can! Growing hydrangea cuttings in water is one of the easiest methods to try at home.
Take a 4 to 6-inch cutting from a healthy, non-flowering stem. Remove all the bottom leaves. Keep one or two sets at the top and cut them in half to reduce moisture loss.
Put the cutting in a clean glass or jar filled with room-temperature water. Make sure no leaves are sitting in the water, only the bare stem.
Leaves in water will rot quickly, ruining the cutting. Place the jar in a spot with bright, indirect light.
Change the water every two to three days to keep it fresh. You should start to see small white roots forming within two to three weeks.
Once the roots are about 1 to 2 inches long, move the cutting into a pot filled with damp potting mix. At this point, treat it just like any other new cutting.
How to Propagate Hydrangeas by Layering?
Layering is a great method; the stem stays attached to the parent plant while it grows roots.
This means it never runs out of food or water during the process.
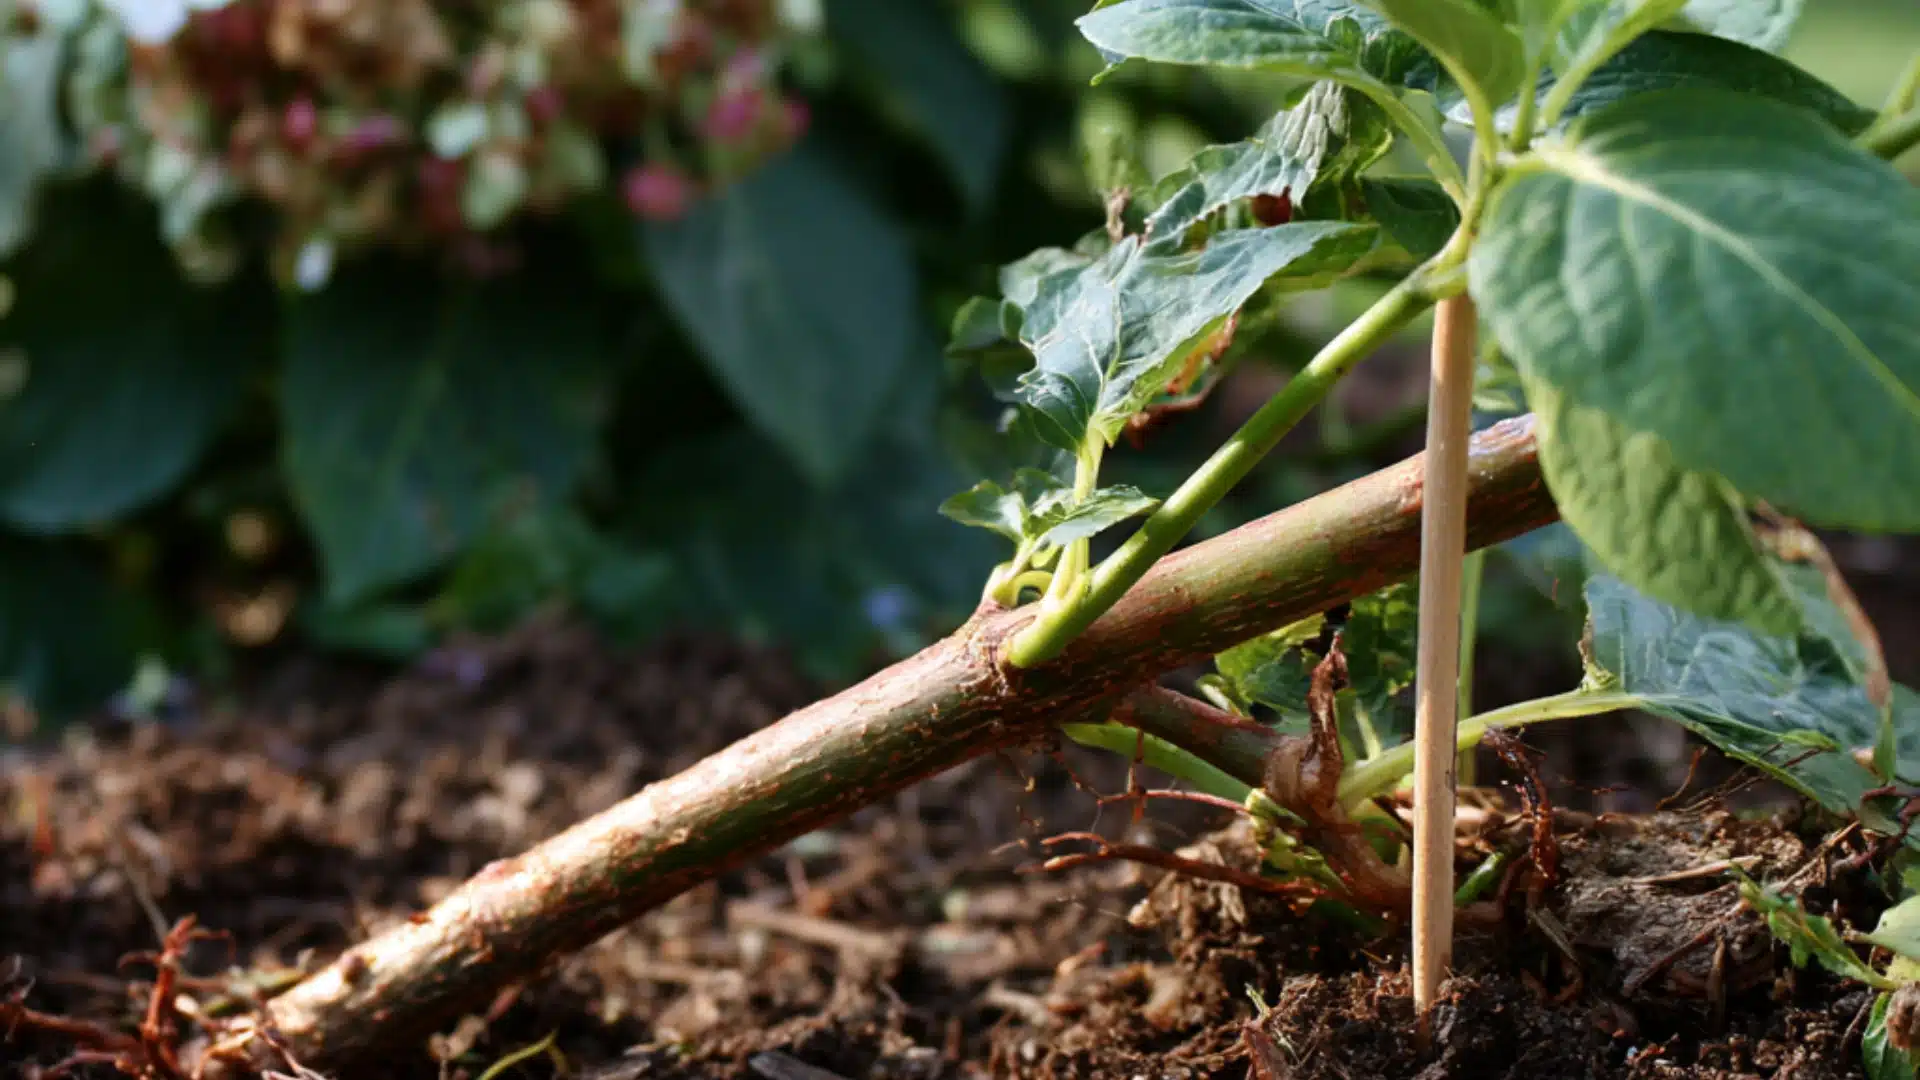
Step 1: Pick a Low-Growing Branch
Choose a flexible, low-growing branch that can easily reach the ground. It should be from this year’s or last year’s growth.
Avoid thick, old woody branches. They don’t root as well and are harder to work with.
Step 2: Wound the Branch
Gently scrape off a small section of the outer bark where you want roots to grow. Apply a little rooting hormone powder to that spot.
This step is optional, but in my experience, it speeds things up and yields a much better result.
Step 3: Bury It
Dig a small, shallow trench in the soil below the branch.
Bend the wounded section down into the trench and cover it with soil. Use a U-shaped pin or a small rock to hold it in place.
Step 4: Wait and Check
Water the area regularly to keep the soil moist. After a few months, gently tug the branch.
If you feel resistance, roots have formed. Cut it free from the parent plant and move it to its new spot.
How to Propagate Hydrangeas by Division?
Division is the fastest way to get a full-sized new plant. Instead of waiting for roots to grow, you simply split an existing plant into two or more sections.
This works best for smooth hydrangeas and oakleaf hydrangeas.
Step 1: Pick the Right Time
The best time to divide hydrangeas is in early spring or early autumn.
The cooler temperatures reduce stress on the plant. Avoid dividing in summer; the heat makes it harder for the plant to recover.
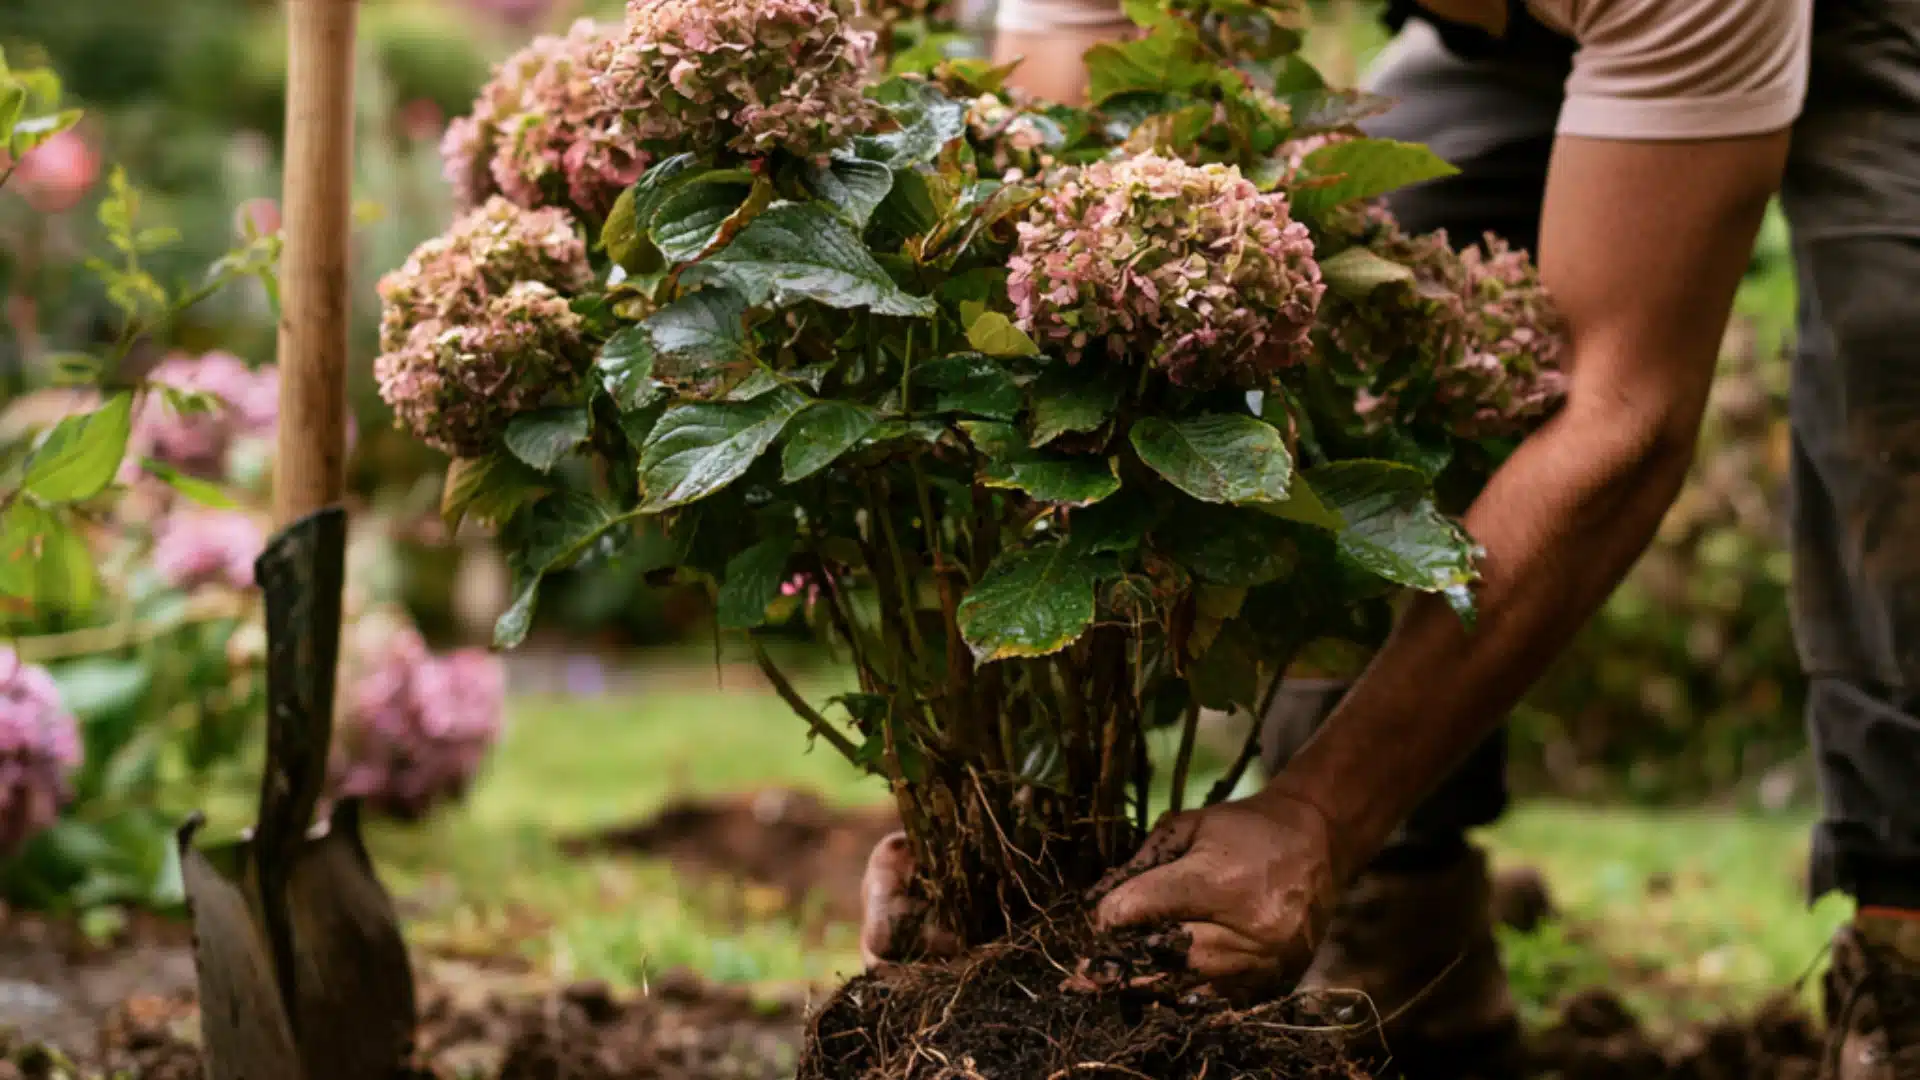
Step 2: Dig Up the Plant
Use a sharp spade to dig around the base of the plant. Go wide enough to avoid cutting through too many roots.
Gently lift the whole plant out of the ground.
Step 3: Split It
Look for natural sections or crowns in the root ball.
Use your spade or a sharp knife to divide the plant into two or more sections. Make sure each section has a good amount of roots and stems attached.
Step 4: Replant Immediately
Move each new section to its new spot right away. Plant it at the same depth it was growing before.
Water it well and keep the soil consistently moist for the first few weeks.
How to Care for Newly Propagated Hydrangeas?
Getting your cutting to root is just half the work. How you care for it after that makes all the difference.
Water it the Right Way
Keep the soil consistently moist but never soggy. New roots are very fragile. Too much water will rot them. Too little water will dry them out.
I check the soil every day for the first few weeks.
Give it the Right Light
Newly propagated hydrangeas need bright but indirect light. Direct sun is too harsh at this stage.
I keep mine in a shaded spot that gets morning light and afternoon shade. This gives them enough energy to grow without stressing them out.
Wait Before You Fertilize
I know it’s tempting to feed your new plant right away. But hold off.
Wait until you see new leaves forming. That’s a sign the roots are strong enough to handle fertilizer. Starting too early can actually burn the young roots.
Transplant at the Right Time
Don’t rush to move your new plant outdoors. Wait until the roots are well established.
Early spring or early autumn is the best time to transplant. Give it plenty of water after moving it to its new spot.
Final Thoughts on How to Propagate Hydrangeas
Propagating hydrangeas is not complicated. You just need the right method, the right timing, and a little patience.
Pick a healthy stem. Keep it moist. Give it time. That’s really all there is to it.
I’ve used all three methods myself: cuttings, layering, and division. They all work. You just need to start.
So go outside, look at your hydrangea plant, and pick that first stem. Your next free plant is already waiting for you.
People May Ask
1. What Months do You Take Hydrangea Cuttings?
The best months are May, June, and July, when the plant grows actively.
2. Can You Put Hydrangea Cuttings Straight Into Soil?
Yes, you can. Push the cutting directly into damp potting mix and keep it moist
3. How Long Does It Take for Hydrangea Cuttings to Root?
Most hydrangea cuttings root within two to four weeks with the right care.