You’ve been buying ginger for years when you could’ve grown it yourself
A lot of people think it’s complicated or only possible in warm tropical climates. That’s just not true.
This blog is here to fix that and show you how easy it really is to how to grow ginger at home.
Best Types of Ginger for Home Growing
Multiple varieties of ginger are cultivated in various ways. While several demand more space, some grow in containers. All three of these types are great for cultivating at home:
- Common Ginger:The most popular choice for home cultivation of plants. It is similar to the ginger commonly found in stores. It does not require much space and grows easily in pots.
- Zingiber Mioga, or Japanese Ginger: It thrives in colder climates. It grows primarily for its flower buds and stems rather than its roots.
- Mioga Ginger: Suitable for light-shade conditions, Mioga is a close relative of Japanese ginger. It functions well indoors and requires little maintenance.
Select a Healthy Ginger Knob
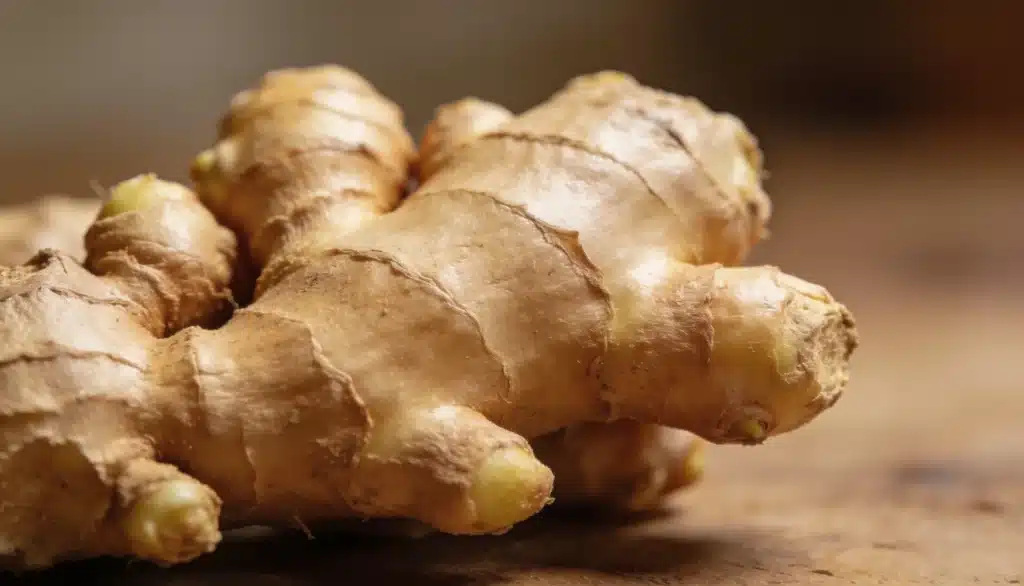
Picking the right ginger knob is the first real step to a good harvest. Head to a local nursery or organic grocery store.
Look for a firm, plump piece with visible growth buds, those small, greenish tips on the surface. The more buds, the better. Avoid anything that looks soft.
Organic ginger works best because non-organic ones is often treated with growth inhibitors. A healthy knob gives your plant the strongest possible start.
The Ideal Growing Environment
It seeks out shade, hydration, and sunshine. A plant’s capacity to flourish or struggle depends heavily on its environment.
Best Climate
Ginger grows best in warm, humid climates. It performs well at temperatures between 68°F and 86°F (20°C and 30°C).
If you live somewhere with a short warm season, don’t worry; ginger grows well in pots that you can move indoors when it gets cold.
Temperature and Humidity
- Ideal temperature: Keep ginger between 68°F and 86°F (20°C and 30°C). Anything below 50°F (10°C) can damage the roots.
- Humidity: Ginger loves moisture in the air. Aim for 70-90% humidity. A simple way to do this indoors is to mist the leaves regularly or place a tray of water near the pot.
- Avoid cold drafts: Keep the plant away from air conditioners and cold windows. A sudden drop in temperature can significantly slow growth.
If your home feels dry, especially in winter, group your ginger pot with other plants. Plants naturally release moisture, which raises humidity around them.
Sunlight Needs
- Indirect light is best: Ginger doesn’t like harsh, direct sun. Too much direct sunlight can scorch the leaves and dry out the soil fast.
- Ideal placement: A spot near an east or west-facing window works well. The plant gets gentle morning or evening light without the harsh midday sun.
- Outdoors: If placing outside, a shaded or partially shaded spot under a tree or canopy is perfect.
If your space doesn’t get much natural light, a grow light on a 12-hour timer works just as well for ginger.
Prepare the Soil and Sprout Ginger Before Planting
Good soil prep sets ginger up for a strong season.
Sprouting Ginger Before Planting
Soak the rhizome in warm water for 12 to 24 hours before planting. This softens the skin and wakes up the growth buds.
After soaking, place it in a warm spot indoors for 2 to 3 weeks until small green shoots appear.
Once sprouted, cut the rhizome into 1 to 2-inch pieces, making sure each piece has at least one visible bud before planting.
Let the cut pieces dry for 24 hours before planting. This seals the cut surface and reduces the risk of rot.
Preparing the Soil
Use equal parts potting soil, compost, and coarse sand to keep the mix rich, loose, and well-draining.
Ginger grows best in slightly acidic soil with a pH between 6.0 and 6.5, so it’s worth testing before planting.
Fill the container or garden bed with the soil mix, leaving about 2 inches of space at the top to make watering easier.
How to Grow Ginger at Home?
You can plant the ginger in a container or directly in the ground.
Containers work well in small spaces and provide full control over soil and temperature.
1. Choosing the Right Pot
Ginger does best in a wide, shallow container rather than a deep one.
A pot that’s at least 12 inches wide and 12 inches deep gives the rhizomes enough room to spread out.
It should also have drainage holes at the bottom, since sitting in soggy soil is one of the fastest ways to rot the roots.
A plastic or glazed ceramic pot works well because it retains moisture longer than terracotta, which tends to dry out quickly.
For a single rhizome, a 12-inch pot is plenty; for multiple pieces, go with a 16-inch or larger.
Avoid pots that are too tall and narrow. Ginger grows horizontally, not down, so width matters more than depth.
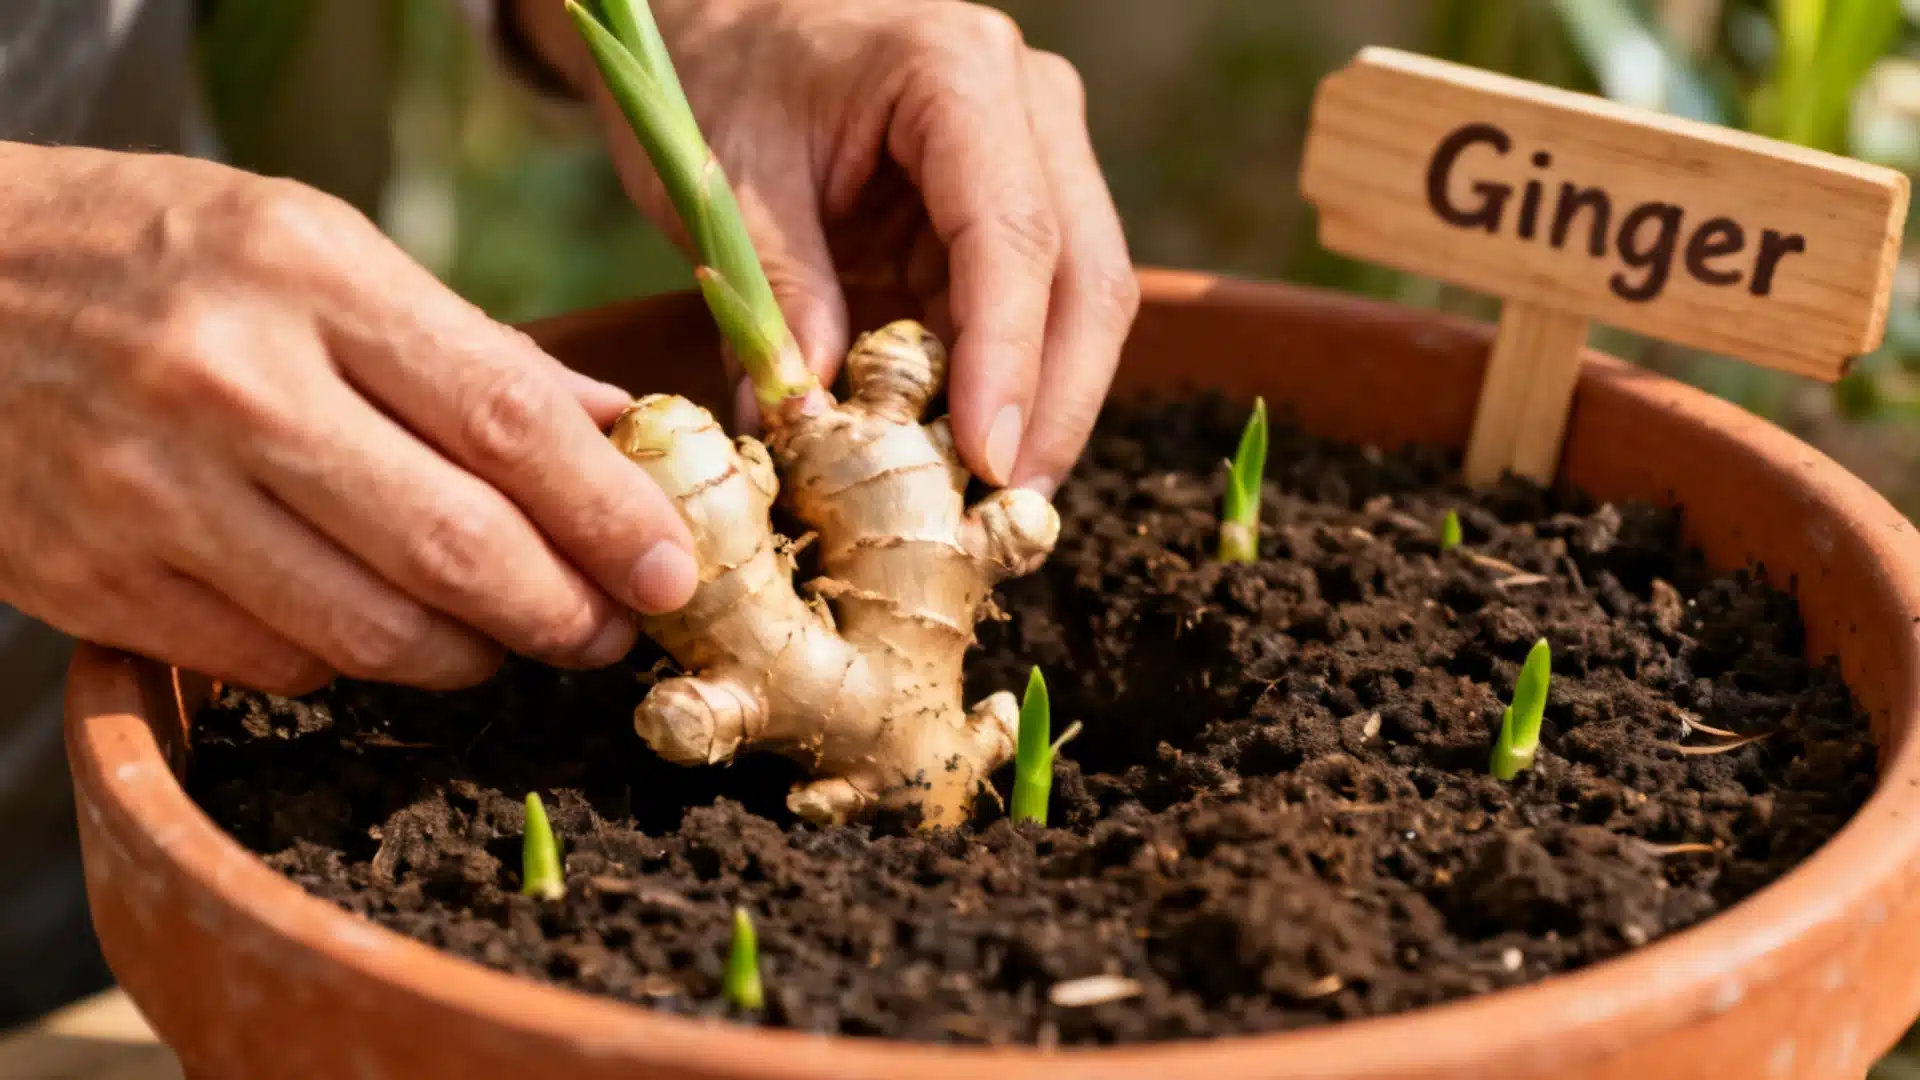
2. Proper Planting Depth and Spacing
Set each rhizome about 2 to 4 inches deep with the growth buds facing up.
Planting too deep slows sprouting, while planting too shallow leaves it exposed and prone to drying out.
Space multiple rhizomes at least 6 to 8 inches apart. Ginger spreads horizontally, and crowding them early results in competition for space and nutrients.
For pots, one or two rhizomes per 12-inch container is enough. In a garden bed, keep rows around 12 inches apart for healthy growth.
3. Watering After Planting
Water the pot or bed thoroughly right after planting, making sure moisture reaches all the way down to the rhizome.
After that first watering, ease off and let the top inch of soil dry out before watering again.
As the plant grows and the weather warms up, watering frequency can increase, but drainage should always be a priority.
Stick a finger an inch into the soil before watering. If it still feels damp, wait another day or two.
4. Selecting the Best Outdoor Location
Choose a spot with partial shade, as too much afternoon sun quickly dries the soil and stresses the plant.
The soil should be loose and well-draining; mixing in compost before planting goes a long way toward improving both texture and nutrient levels.
Avoid low-lying areas where water tends to collect after rain, since ginger roots sitting in pooled water will rot quickly.
5. Spacing Multiple Ginger Plants
Keep plants 8 to 10 inches apart so the roots have enough room to spread without competing for space. If planting in multiple rows, leave at least 12 inches between each row.
This gives enough room to water and tend to each plant without disturbing the others.
6. Mulching for Better Growth
Lay a 2- to 3-inch layer of mulch around the base of each plant to retain moisture, keep roots cool during warmer months, and slowly release nutrients back into the soil.
Straw, dried leaves, or wood chips all work well for ginger; just avoid synthetic mulches, as they offer no nutritional value.
Avoid synthetic mulches as they don’t add any nutritional value to the soil.
Take Care of Your Ginger After Planting
Once your ginger is in the ground or pot, consistent care keeps it growing strong. Here’s what to do at each stage.
Watering Schedule
During spring and summer, water 2 to 3 times a week to keep the soil consistently moist. This is the active growing period, and ginger needs steady moisture to thrive.
Fertilizing for Bigger Rhizomes
Use a balanced fertilizer, such as 10-10-10, or a compost-based feed once a month to support steady growth.
Start fertilizing 4 to 6 weeks after planting and stop once the leaves begin to yellow in the fall.
Managing Weeds Around Ginger
Pull weeds by hand rather than using tools. Ginger roots sit close to the surface, and digging around them can easily cause damage.
Supporting Healthy Root Development
Gently loosen the topsoil every few weeks to improve airflow to the roots. Also, keep the area around the plant undisturbed.
Signs Your Ginger is Ready to Harvest
When the leaves start turning yellow and the stems begin to dry out, the plant is telling you it’s done for the season. This usually happens around 8 to 10 months after planting.
- Early Harvest: 4 to 6 months; ginger is young, mild, and tender, great for cooking fresh or making tea.
- Mature Harvest: 8 to 10 months; rhizomes are larger, more fibrous, and stronger in flavor, best for long-term storage.
- Loosening Soil: Use hands or a garden fork to gently loosen soil around the plant before pulling.
- Pulling Grip: The base of the stem and pull slowly, avoiding yanking, as it can snap the rhizomes.
- Partial Harvest: Cut off what you need and leave the rest in the soil to keep growing.
- Partial Harvest Safe: If soil drains well and temperatures stay above 50°F (10°C), dig up before the first frost in colder climates.
Can Ginger Grow Indoors Year-Round?
Yes, ginger can absolutely grow indoors all year long. Unlike many plants, ginger doesn’t need direct sunlight or outdoor space to thrive.
It grows well in pots, making it perfect for a sunny windowsill or a warm corner of your home. The key is keeping it warm; ginger loves temperatures between 68°F and 86°F.
Give it bright, indirect light and moist soil, and it’ll keep growing through every season.
So no, you don’t have to wait for summer to enjoy homegrown ginger.
How to Store Freshly Harvested Ginger
Once you’ve harvested your ginger, storing it the right way keeps it fresh and flavourful for as long as possible.
Short-Term Storage Methods
- Room temperature: Keep unpeeled ginger in a cool, dry spot away from direct sunlight. It stays fresh for up to a week this way.
- Refrigerator: Place the unpeeled rhizome in a zip-lock bag or an airtight container. It keeps well in the fridge for up to three weeks.
Don’t peel ginger before storing. The skin acts as a natural barrier and keeps it from drying out.
Long-Term Storage Options
- Pickling: Slice the ginger thin and store it in vinegar. Pickled ginger lasts up to two months in the fridge.
- Drying: Slice and dry ginger in the sun or a low-temperature oven. Dried ginger keeps for up to six months in an airtight jar.
Freezing Ginger for Future Use
Freezing is the easiest long-term option. Place whole, unpeeled rhizomes in a freezer-safe bag and freeze for up to six months.
When needed, grate the frozen ginger directly into your dish; no extra effort required.
To Wrap Up
Growing ginger at home is simpler than most people think. With the right rhizome, a good pot, and consistent care, you can grow fresh ginger right on your balcony.
You can control everything. And once you get the basics right, ginger pretty much takes care of itself through the growing season.
So pick up a healthy rhizome from your nearest organic store, find a warm sunny spot, and get planting. Fresh homegrown ginger is absolutely worth the wait.
Frequently Asked Questions (FAQs)
1. Can You Plant Ginger Root from The Grocery Store?
Yes, you can. Pick an organic piece with visible green buds for the best results.
2. Can Ginger Grow in Shade?
Yes, ginger actually prefers shade over direct sunlight. It grows best in partial shade with bright, indirect light.
3. Can You Eat Ginger Leaves?
Yes, ginger leaves are edible. They have a mild flavor and work well in teas, soups, and wraps.