If you’re shopping for an easy to install DIY mini split AC in 2026 there are plenty of options to choose from. But which is really best? Four brands have likely shown up while you were researching. Many appear in every forum, YouTube comment section, and Sub Reddit: Zone Air, MrCool, Pioneer, and Cooper & Hunter. These brands, although similar, vary significantly in aspects that are extremely important for DIY installation. Picking the wrong one can cost you thousands in tools, professional installation costs, or a voided warranty. We’ll break down exactly how these brands differ, and the most important things to know before purchasing. 
Quick Answer: Which DIY Mini Split Is Best in 2026?
For homeowners who want the easiest to install mini split in 2026, Zone Air is widely considered the easiest true DIY mini split system on the market. Custom-cut pre charged line sets (a single continuous run from 8 to 75 feet), 115V plug-in option on 9k–12k models, and 24 SEER2 efficiency rating put it ahead of competing DIY brands like MrCool in the three most important aspects: installation simplicity, energy savings, and total installed cost. MrCool is the runner-up with a decent online community and solid pre charged lines, but its fixed-length line sets (extensions increase likelihood of refrigerant leaks), lower efficiency (up to 23 SEER2), and higher retail pricing put it behind Zone Air. A disappointing reality when inspecting Pioneer and Cooper & Hunter: they still require an HVAC technician to finish the installation. Which can add thousands of dollars in unnecessary cost.
Pioneer and Cooper Hunter are not technically DIY systems. This is significant because you lose out on perhaps the most appealing benefit of a DIY mini split system. Saving $3,000-5,000 on installation costs when you compare the total project against hiring a licensed HVAC technician.
- Choose Zone Air if you want the easiest diy install, the highest efficiency (24 SEER2), the best customer reviews, custom-length line sets, and 115V plug-in convenience.
- Choose MrCool if you value an online community, lots of YouTube walkthroughs, and are comfortable with fixed-length pre charged line sets.
- Choose Pioneer if you want the cheapest mini split equipment cost and are willing to use a vacuum pump, flare tools, and gauges.
- Choose Cooper & Hunter if you need hyper heat performance down to −22°F in an extreme cold climate and have the budget for pro install.
How DIY a “DIY Mini Split” Really Is for Each Brand
Not every brand calling itself a DIY mini split actually deserves the label. A true DIY system means the box includes a pre-charged line set with sealed quick-connect fittings, requires no vacuum pump, no manifold gauges, no EPA 608 certification, and the warranty explicitly allows homeowner installation. True DIY systems use pre-charged quick-connect lines, eliminating the need for HVAC tools entirely.
Here’s how each brand stacks up on a practical “DIY Ease” scale:
| Brand | DIY Ease (1–5) | Vacuum Pump Needed? | Pre-Charged Quick-Connects? | Warranty Covers Homeowner Install? |
|---|---|---|---|---|
| Zone Air | ★★★★★ | No | Yes (custom-cut single run) | Yes |
| MrCool | ★★★★☆ | No | Yes (fixed lengths) | Yes |
| Pioneer | ★★★☆☆ | Yes | No (optional flush kit) | Generally no |
| Cooper & Hunter | ★★☆☆☆ | Yes | No | No (licensed installer required) |
Standard mini split systems require traditional installation procedures including flaring, pressure testing and vacuuming. Pioneer and Cooper Hunter fall into this category, and are better suited for professional installation or for a partial self install where you handle mounting and electrical work, then call a local HVAC company to connect the line sets and open the refrigerant ports.
Zone Air and MrCool are currently the only true DIY systems with factory pre-charged line sets available in 2026.
Zone Air DIY Series: Why It’s the Easiest Install
Zone Air is designed from the ground up as a 100% homeowner-installable ductless mini split. The entire installation workflow is built around pre-charged line sets and plug-in power, so there’s no need for specialized HVAC tools, gauges, or refrigerant.
Key features:
- R-454B refrigerant (lower GWP, factory-sealed)
- Up to 24 SEER2 efficiency – the best garage mini splits reach up to 24 SEER2 efficiency, and Zone Air hits that mark on its 12k 230V wall unit
- Single zone sizes: 9k, 12k, 18k BTU
- Multi zone bundles up to ~36,000 BTU (3-zone)
- Indoor unit styles: wall mount, ceiling cassette (“Airframe”), concealed ducted air handler (“Thin-Air”)
The custom-cut line set advantage is the single biggest structural difference between Zone Air and every other diy brand. Zone Air sells pre charged line sets in a single continuous run from 8 to 75 feet. If your run is 40 feet, you get a 40-foot set. No coiling 10 feet of excess copper behind the outdoor condenser, no adapting two sections together like MrCool systems often do. Each additional quick-connect joint in a MrCool line set extension is a potential leak point. Zone Air gives you one pair of connections at the exact length you need.
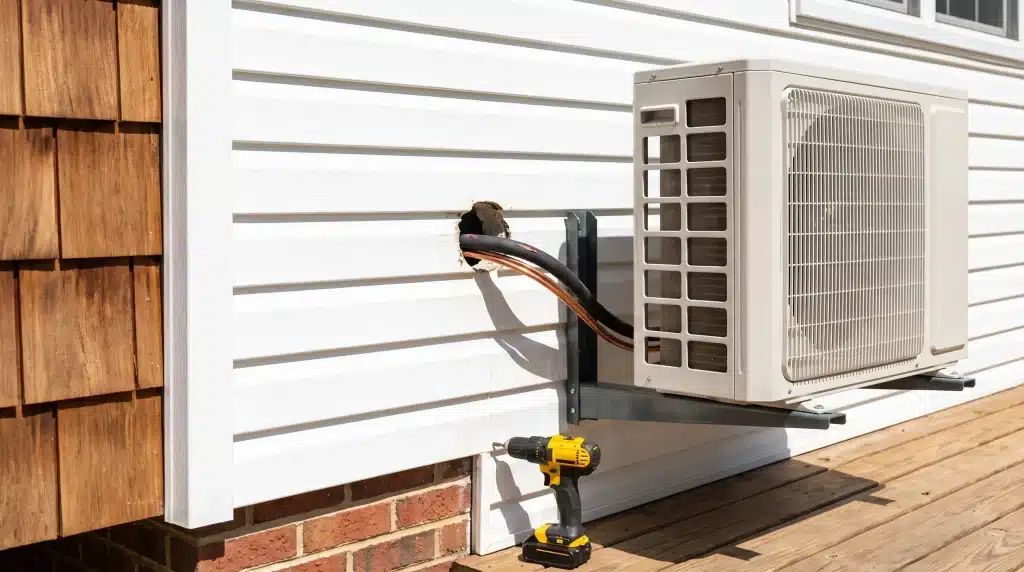
Many 9k and 12k Zone Air single zone systems are 115V plug-in. That means you plug into a standard dedicated 15A outlet, skip the 230V breaker install, and potentially avoid hiring an electrician. Wall bracket, indoor unit, drill one hole, mount the outdoor unit, connect the line set, plug in. That’s it.
Multi zone condensers can mix and match wall-mounted, ceiling cassette, and concealed ducted indoor heads on the same outdoor unit. MrCool’s DIY multi zone is limited to wall and cassette only.
Pricing is 10–20% cheaper than comparable MrCool units thanks to direct-to-consumer sales. A Zone Air 12k single zone DIY kit runs about $2,049.99 versus higher retail for MrCool equivalents.
Custom line set + 115V plug-in + 24 SEER2 = easiest DIY choice in 2026.
MrCool DIY Series: The Established DIY Mini Split Brand
MrCool’s 4th and 5th generation DIY systems use pre-charged quick-connect line sets that require no vacuum pump or gauges. MrCool DIY systems come with pre-charged line sets for easy installation, and the large owner community on Reddit and YouTube makes troubleshooting straightforward.
Current MrCool DIY systems run R-454B refrigerant with SEER2 ratings up to about 23. Solid, but a step below Zone Air’s top 24 SEER2 mark. Standard sizes include 12k, 18k, 24k, and 36k BTU. Line sets come in fixed 16, 25, 35, and 50 foot lengths. If your run is 40 feet, you’re buying the 50-foot set and coiling 10 feet behind the condenser. For runs beyond 50 feet, you’ll need extension kits with couplers, adding joints and potential leak points.
Built-in Wi-Fi and the SmartHVAC app provide Alexa, Google, and SmartThings integration out of the box.
MrCool generally costs more at retail than comparable Zone Air diy systems, especially after adding accessories and extended warranty options. MrCool DIY units maintain full warranty with homeowner installation, which is a genuine advantage over Pioneer and Cooper Hunter.
On the review side, MrCool’s Trustpilot page shows solid but typically lower average ratings than Zone Air’s customer reviews across major platforms. Worth checking before you decide DIY brand loyalty.
Pioneer Mini Splits (WYS / Diamante / Pre-Charged Options)
Pioneer is a popular budget brand for homeowners comfortable with hiring a professional. Pioneer models are not true DIY systems. Pioneer units require specialized tools for installation, including vacuum pumps and flare tools.
The WYS and Diamante series are Pioneer’s most common models: affordable, reliable, and available across a wide BTU range. Most ship with R-410A or transitional refrigerant and traditional flared connections that must be evacuated to 500 microns before commissioning. Pioneer’s Kwik-E-Vac flush kits exist as an alternative to a full vacuum pump setup, but Pioneer itself still recommends vacuum pumping for best results and full warranty coverage.
Pros: Relatively cheap mini splits with wide BTU size range and solid cooling capacity for the price. Cons: Higher install complexity, tools needed (vacuum pump, manifold gauges, flaring tools, nitrogen), and a warranty that assumes a licensed HVAC technician performed the installation.
Cooper & Hunter: Hyper Heat and Cold-Climate Specialists
Cooper & Hunter is a heating-first brand that shines in extreme cold climate applications. Their hyper heat models like the Sophia and Astoria series deliver strong mini split heat and can heat effectively down to −22°F – mini splits can operate efficiently down to -22°F, and Cooper Hunter is one of very few brands that actually hits that spec consistently.
The Astoria series features open-panel indoor units that provide excellent easy maintenance access to evaporator coils, a practical advantage for long-term ownership. HSPF2 ratings on their hyper heat models tend to run higher than MrCool in comparable sizes, making them attractive to northern homeowners prioritizing winter heating reliability.
However, Cooper & Hunter is not a true diy mini split brand. Systems need standard HVAC tools and typically must be installed by a licensed tech to keep the 7-year compressor warranty valid. Pioneer and Cooper & Hunter systems typically void warranties if installed by homeowners, which means the savings from a diy install evaporate if something goes wrong.
Bottom line: Choose Cooper Hunter when heating capacity in extreme cold is more important than doing your own install. If you live somewhere that routinely drops below −10°F for weeks at a time, the pro install cost is worth the trade-off for dependable mini split heat and verified cold climate performance.
Zone Air vs MrCool vs Pioneer vs Cooper & Hunter: Core Specs Compared
SEER2 measures cooling efficiency in mini split systems, while HSPF2 measures heating efficiency for mini split systems. The four brands compared on the specs for a 12k single zone wall unit:
| Spec | Zone Air | MrCool DIY | Pioneer | Cooper & Hunter |
|---|---|---|---|---|
| Max SEER2 (12k) | 24 | ~23 | 20–22 | 22–23 |
| Refrigerant | R-454B | R-454B | R-410A (transitioning) | R-410A (model-dependent) |
| True DIY (no vacuum)? | Yes | Yes | No | No |
| Line Set Type | Pre-charged, custom-cut single run | Pre-charged, fixed lengths | Traditional (flare + vacuum) | Traditional (flare + vacuum) |
| Max Line Set Length | 75 ft | ~50 ft (coupler extensions) | Varies (field-added) | 100+ ft (pro install) |
| 115V Plug-In Available? | Yes (9k–12k) | Limited | Rare | Rare |
| Approx. 12k Price | ~$2,050 | Higher at retail | Lower equipment cost | Higher (Hyper Heat) |
| Indoor Unit Options (DIY) | Wall, cassette, ducted | Wall, cassette (limited) | Wall (pro for others) | Wall (pro for others) |
Zone Air leads on SEER2 (24 vs 23 for MrCool), custom pre-charged line set flexibility, 115V plug-in availability, and average customer review scores. MrCool is second-best for DIY thanks to pre charged lines and its broad community. Pioneer is the best value traditional split system. Cooper Hunter is the winner for cold climates with professional installation.
The complexity of refrigerant line installation significantly impacts the choice of mini split systems for DIY projects, and that’s where Zone Air’s single-run custom lines present the widest advantage.
Pre-Charged Line Sets vs Traditional Refrigerant Lines
A pre-charged line set comes factory-filled with the correct refrigerant charge, sealed at both ends with quick-connect fittings. You connect them between the indoor unit and the outdoor unit without ever opening the refrigerant valves. No vacuum pump, gauges, or ny specialized tools are needed. Mini split systems for DIY projects vary in installation ease based on refrigerant line management, and this is the single biggest factor.
Zone Air’s approach is unique: custom-cut single-run pre charged line sets from 8 to 75 feet. One continuous copper pair, one set of quick-connect fittings, at the exact length your install requires. MrCool offers fixed-length options (16, 25, 35, 50 feet). If your run doesn’t match, you either coil excess copper or join multiple sections with couplers, each coupler adding another potential leak point.
Traditional line sets used by Pioneer and Cooper Hunter are bare copper piping, pre-flared or requiring field flaring, that must be cut to length, torqued to spec, nitrogen-purged, and evacuated via vacuum pump to 500 microns or better. Extra length beyond the factory charge requires weighing in additional refrigerant per manufacturer tables. A slight mistake, poor flare, insufficient vacuum, or trapped moisture can degrade performance or damage the compressor over time.
Fewer joints and exact-length single runs are a structural reliability advantage unique to Zone Air’s DIY offering.
Single Zone vs Multi-Zone DIY Setups
A single zone system, one outdoor condenser plus one indoor unit, is the cheapest and easiest diy mini split option. It’s the right call for garages, workshops, spare bedrooms, and single rooms up to roughly 750 sq ft depending on BTU size. Nearly half of mini split households in the U.S. still operate with a single indoor unit (per RECS 2020), reinforcing that single zone is common and cost-effective.
Multi zone systems connect one outdoor unit to 2–5 indoor units. Both Zone Air and MrCool offer DIY multi zone options, but Zone Air allows mixing wall mount, ceiling cassette, and concealed ducted indoor units on the same outdoor condenser. MrCool’s DIY multi zone systems support wall and some cassette options but with narrower mix-and-match capability.
Multi zone installs are mechanically more complex even with pre charged lines, more holes, more routing, and more technicality in general. Beginners should likely start with a single zone diy mini split first, get comfortable with the process, and add zones later if needed.
Indoor Unit Styles: Wall, Cassette, and Concealed Ducted
The indoor head you choose affects comfort, aesthetics, and installation difficulty.
Wall-mounted units are the simplest and most common DIY style. All four brands offer wall units, and this is where most DIY installs start. Ideal for a master bedroom, living room, or garages where aesthetics aren’t a priority.
Ceiling cassette units mount flush in the ceiling for 360° airflow. They look cleaner and distribute air more evenly in larger rooms. Zone Air offers true DIY cassette options. MrCool has more limited cassette availability in their DIY focused lineup. Pioneer and Cooper Hunter cassettes usually require pro install due to weight, drain routing, and ceiling framing requirements. Better for those who care about aesthetics.
Concealed ducted air handlers hide in a closet or attic with short duct runs to multiple rooms. Zone Air’s ability to mix these with wall and cassette units on a single multi zone outdoor condenser is a key differentiator, you can cool the living room with a wall unit, handle the kitchen with a ceiling cassette, and duct two bedrooms from one concealed handler, all on one outdoor unit. Concealed units are often the best choice for those who value the aesthetic look of their home.
Sizing Your DIY Mini Split by Square Footage
The general rule: about 20 BTU per square foot in typical climates and standard construction. Adjust upward for poor insulation, high ceilings, direct sun exposure, or if you will be heating in extreme cold.
Quick sizing examples:
- 9,000 BTU → ~350–450 sq ft (one room, small office)
- 12,000 BTU → ~450–550 sq ft (a 12,000 BTU unit is ideal for a typical 2-car garage)
- 18,000 BTU → ~650–1,000 sq ft (large open-plan space)
A 500 square foot garage usually needs a 12k DIY mini split from Zone Air or MrCool. A 750 sq ft open room might call for 18k or two 9k indoor units on a multi zone condenser.
Oversizing causes short cycling and poor dehumidification. Undersizing means the system runs constantly without reaching the setpoint. Use a manual J load calculation or the brand’s sizing calculator for accuracy rather than guessing. Garages and rooms with poor insulation are excellent candidates for a single zone diy mini system because they’re thermally isolated from the rest of the house anyway.
115V vs 230V: Powering Your DIY Mini Split
In North American homes, standard outlets run on 115V (120V nominal) on 15A or 20A circuits. Larger appliances such as dryers, ranges, and central AC use 230V (240V nominal) circuits with dedicated breakers.
Zone Air offers 115V plug-in diy systems for 9k and 12k BTU sizes designed to run off a standard dedicated 15A outlet. That means many homeowners can skip installing a new 230V breaker entirely, removing one of the biggest barriers to a true homeowner install. No electrician needed in many cases (though you should verify local code).
MrCool, Pioneer, and Cooper Hunter are more often 230V hardwired units, especially at 12k BTU and above. Even MrCool’s 115V models require a dedicated circuit and outdoor disconnect, meaning they’re not “plug and play” like Zone Air’s 115v models.
The rule of thumb: 115V works for 9k–12k BTU. Anything 18k BTU and above almost always requires 230V. Safety regulations for electrical installations may still necessitate professional assistance, even for DIY units. If your local code requires a permit for new circuits, factor that into your plan.
Zone Air’s 115V plug-in option is a major reason it’s considered the easiest diy mini split on the market in 2026.
Cold-Climate and Hyper Heat Performance
“Hyper heat” means a heat pump delivers rated or near-rated heating capacity at temperatures well below freezing. Modern mini splits maintain 100% heating capacity down to 5°F, and the best hyper heat models keep producing useful heat far beyond that.
Brand-by-brand cold climate breakdown:
- Cooper & Hunter Sophia/Astoria hyper heat: operates in heating mode down to −22°F, delivering roughly 60% capacity at that extreme. Leads on HSPF2 among these four brands.
- Zone Air: reliable heating down to approximately −13°F. Mini splits can operate efficiently in temperatures as low as -13°F, making Zone Air solid for most U.S. winters outside the most extreme northern climates.
- MrCool DIY: newer models rated to heat in the low teens to −4°F depending on model. Full hyper heat is less common in the DIY lineup.
- Pioneer: cold climate models exist but require professional-level refrigerant handling. Budget “cheap” units may lose significant heating capacity below freezing.
Real-World Costs: Equipment, Installation, and Ownership
Here’s what the numbers actually look like in 2026:
Equipment costs:
- Cheapest mini split equipment starts around $650 for a single zone (bare-bones budget brand, equipment only)
- A 12,000 BTU mini split typically costs $799 to $1,349 for equipment
- Zone Air 12k single zone DIY kit: ~$2,050 including pre-charged line set and accessories
- A budget single-zone mini split costs $1,800 to $3,500 installed with professional installation
Installation costs:
- Professional installation costs vary from $500 to $2,000 per zone in labor costs alone
- DIY installation can save $1,500 to $3,000 per zone – that’s real diy savings that go straight back in your pocket
Operating costs: With electricity averaging around 18.4¢/kWh as of mid-2026, the gap between a 24 SEER2 system (Zone Air) and a budget 17–18 SEER2 unit adds up to hundreds of dollars per year. Over a 10–15 year lifespan, that efficiency difference can exceed the entire equipment cost difference.
Cheap mini splits can have shorter lifespans (10–14 years) and weaker support, whereas better-reviewed brands with AHRI listings and strong warranties – Zone Air, MrCool, Cooper Hunter, Pioneer – have more predictable ownership costs. Look up your chosen model in the AHRI Directory and calculate total cost over 10–15 years, not just sticker price.
Warranty and Reviews: What You Actually Get
Warranty coverage varies dramatically depending on the brand and how you install the unit.
Warranty terms by brand:
- Zone Air: 5 years parts, 7 years compressor. Homeowner install explicitly does not void the warranty.
- MrCool: DIY line supports homeowner install. MrCool DIY maintains full warranty for homeowner installations. Premium add-ons (Care Kit) can extend compressor coverage but are a recurring monthly expense.
- Pioneer: Warranty generally expects licensed HVAC technician install. Pioneer and Cooper & Hunter systems typically void warranties if installed by homeowners.
- Cooper & Hunter: 5 years parts, 7 years compressor. Installation must be performed by a licensed installer for full coverage.
Warranties on DIY systems can be contingent on following specific installation guidelines from manufacturers. Use the official line sets, follow torque specs, register the unit on installation day, and keep your receipt and install photos.
For comparison, Senville voids warranty if not installed by a licensed technician, making it another brand that isn’t suited for true self install despite sometimes being marketed near DIY categories. Senville offers strong value in mid-range cooling solutions but isn’t a diy brand.
Zone Air’s average customer reviews are higher than MrCool’s on major platforms. Good customer service and tech support matter most when something goes wrong mid-install at 8 PM on a Saturday. Check reviews before you buy.
Best Easy-Install DIY Mini Split for Common Use Cases
Small bedroom or office (~300–450 sq ft): Zone Air 9k 115V plug-in. Quiet operation, low draw, plugs into existing dedicated outlet. Easiest possible diy install for one room.
Typical garage or workshop (~400–600 sq ft): Zone Air 12k 115V or 230V, or MrCool 12k DIY. A 12,000 BTU unit is ideal for a typical 2-car garage. Zone Air edges ahead on efficiency and line set flexibility; MrCool is a solid alternate if you want more community how-to content.
Larger open room (~600–900 sq ft): Zone Air 18k single zone or two 9k units on a multi zone condenser. This is where Zone Air’s mix-and-match capability with wall and cassette indoor heads pays off for better airflow coverage.
Cold climate primary heat (below −10°F regularly): Cooper Hunter hyper heat with pro install. If you need heating mode performance at −22°F and this is your primary winter heating source, the pro install budget is justified. A Zone Air or MrCool DIY unit can supplement an existing system in a moderate climate but won’t match Cooper Hunter’s extreme cold climate performance.
Master bedroom supplement to central HVAC: Zone Air 9k or 12k wall unit as a single unit zone. Keeps the master bedroom at your preferred temperature without running the whole-house system. Quiet operation and high heating efficiency make it ideal for overnight comfort.
Other Mini Split Brands to Know (and When to Go Pro Instead of DIY)
Beyond these four, premium pro-install brands include Mitsubishi systems, Fujitsu, Daikin, LG, Gree, and Bosch. Mitsubishi is known for premium performance and durability. These brands deliver top-tier reliability but require professional installation and often cost $3,000–$5,000 more per full system versus DIY options. They do not offer pre charged line sets and are not diy systems.
These make sense for whole-home multi zone projects, large custom homes, or mission-critical spaces. If you’re retrofitting a 4,000 sq ft house with 6 zones, an HVAC tech installing Mitsubishi or Daikin is the right call.
Many homeowners choose a hybrid strategy: a Zone Air diy mini split for the garage, office, or addition, and leave existing central HVAC or pro-installed ductless for the main house. You don’t have to decide diy for the entire home – one zone at a time works fine.
For most first-time DIYers wanting one or two zones, Zone Air (and secondarily MrCool) are the most practical paths. You shouldn’t need an HVAC license or an HVAC guy on speed dial to heat and cool a single room. The split system market in 2026 finally makes that possible for most people.
Don’t buy from big box stores without verifying AHRI certification, warranty terms, and whether the unit actually includes pre charged line sets. A “deal” on unbranded equipment from an unknown seller often means no tech support, no warranty coverage, and no one to call when something doesn’t work. Stick with other mini split brands that have transparent specs and real support teams.
Next Steps: How to Choose Your Best Easy-Install DIY Mini Split
Follow this decision path:
- Measure your space in sq ft and evaluate insulation quality. Use a manual J load calculation for precision if you want to avoid over or undersizing.
- Decide on voltage. If you want 115V plug-in convenience, Zone Air is your primary option in the 9k–12k BTU range. If you can add 230V electrical work (or already have a circuit), your options expand.
- Choose single zone vs multi zone. Starting with a single zone is cheaper, simpler, and lets you learn the process. Multi zone makes sense if you’re conditioning 2+ rooms and want one outdoor unit.
- Pick your indoor unit style. Wall mount is easiest. Cassette and concealed ducted add complexity but improve aesthetics. Zone Air lets you mix all three on one condenser.
- Compare total cost and warranty. Factor in line set pricing, accessories, and 10-year operating costs at your local electricity rate. Zone Air’s 24 SEER2 and lower retail price generally win this calculation against MrCool, with Pioneer and Cooper Hunter serving as pro-level or advanced-DIY alternatives.