Turning a detached garage into a proper workshop is one of the most rewarding projects a DIYer can tackle. The short answer: start with a solid structure, add dedicated zones for each type of work, nail the lighting and storage, and the rest falls into place. Whether you paint furniture, build cabinets, or just need a space to fix things without taking over the kitchen table, this guide covers every decision that actually matters.
Why a Detached Garage Is the Best Starting Point
A detached garage has real advantages over a basement or attached space. Noise, dust, and fumes stay away from the living area. You can run power tools at 10 PM without waking anyone up. And when you close that door, work stays at work.
That said, most standard garages need real attention before they become functional. Bare concrete, a single overhead bulb, and zero storage are fine for parking a car but miserable for any kind of craft or construction work. The good news: fixing all of that is very doable on a weekend-warrior budget.
One thing worth noting: homeowners looking at garages in New York and other densely built metro areas often assume they need a custom build to get a good workshop. In reality, a standard two-car detached garage gives you more than enough square footage to create multiple dedicated work zones.
Assess the Structure Before Anything Else
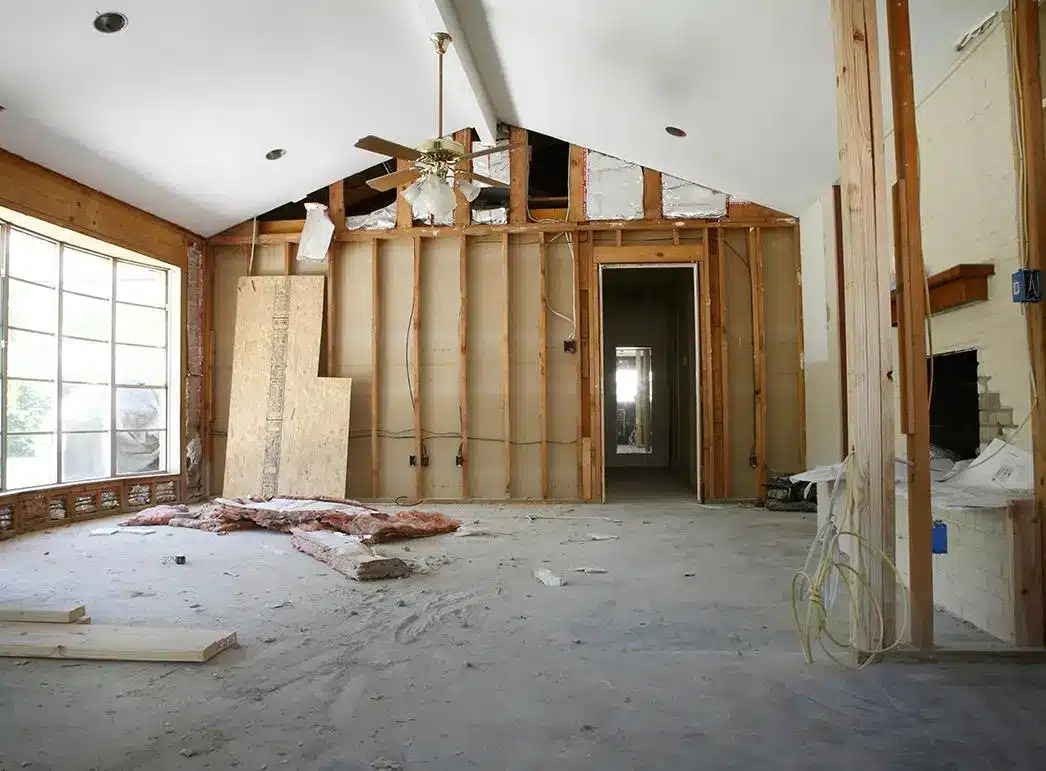
Before you buy a single shelf bracket or LED fixture, spend an hour really looking at what you have. Check the framing, the floor, the roof, and the electrical panel.
The most important thing is the wall framing. A solid wood-frame structure gives you endless flexibility: you can hang heavy tool cabinets, bolt a bench vise anywhere you want, and add outlets without worrying about load issues. If the studs are in rough shape or the structure feels soft, deal with that first.
For the floor, check for cracks or low spots where water pools. A simple epoxy coat seals the concrete against moisture and gives you a surface that’s easy to sweep. If your floor is in rough shape, a garage floor paint designed for workshops handles most light issues for under $100.
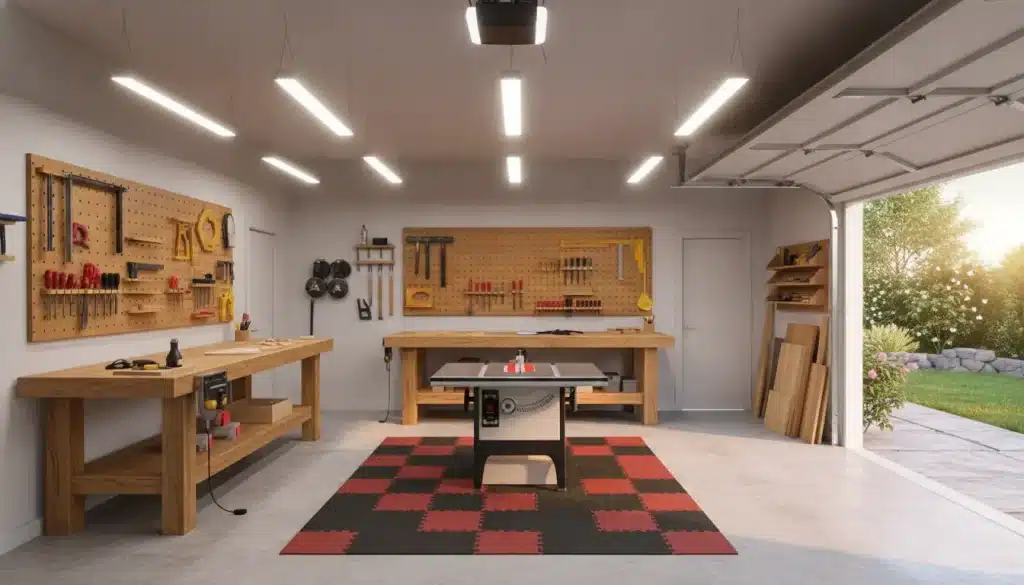
Garage Workshop Layout: How to Plan Your Zones
The best garage workshop layouts treat the space like a kitchen: everything has a zone, and zones connect logically so you move through a project without crossing the room ten times. Here’s a practical zone breakdown for a standard two-car garage (roughly 400-500 sq ft):
- Workbench zone along the back wall, with the most-used hand tools within arm’s reach;
- Power tool zone in the center or one side, leaving clearance for long boards or large panels;
- Storage zone along one sidewall for hardware, finishes, and seasonal supplies;
- Finishing/painting zone near a window or exterior door for ventilation;
- Assembly zone in the middle, which doubles as open floor space when not in use.
The biggest layout mistake most people make is pushing everything against the walls and leaving a dead zone in the center. Instead, think about workflow direction. Rough lumber comes in one side, gets cut at the power tool station, moves to the bench for assembly, then shifts to the finishing zone. That flow should feel logical, not like an obstacle course.
Workbenches: The Heart of Any Workshop
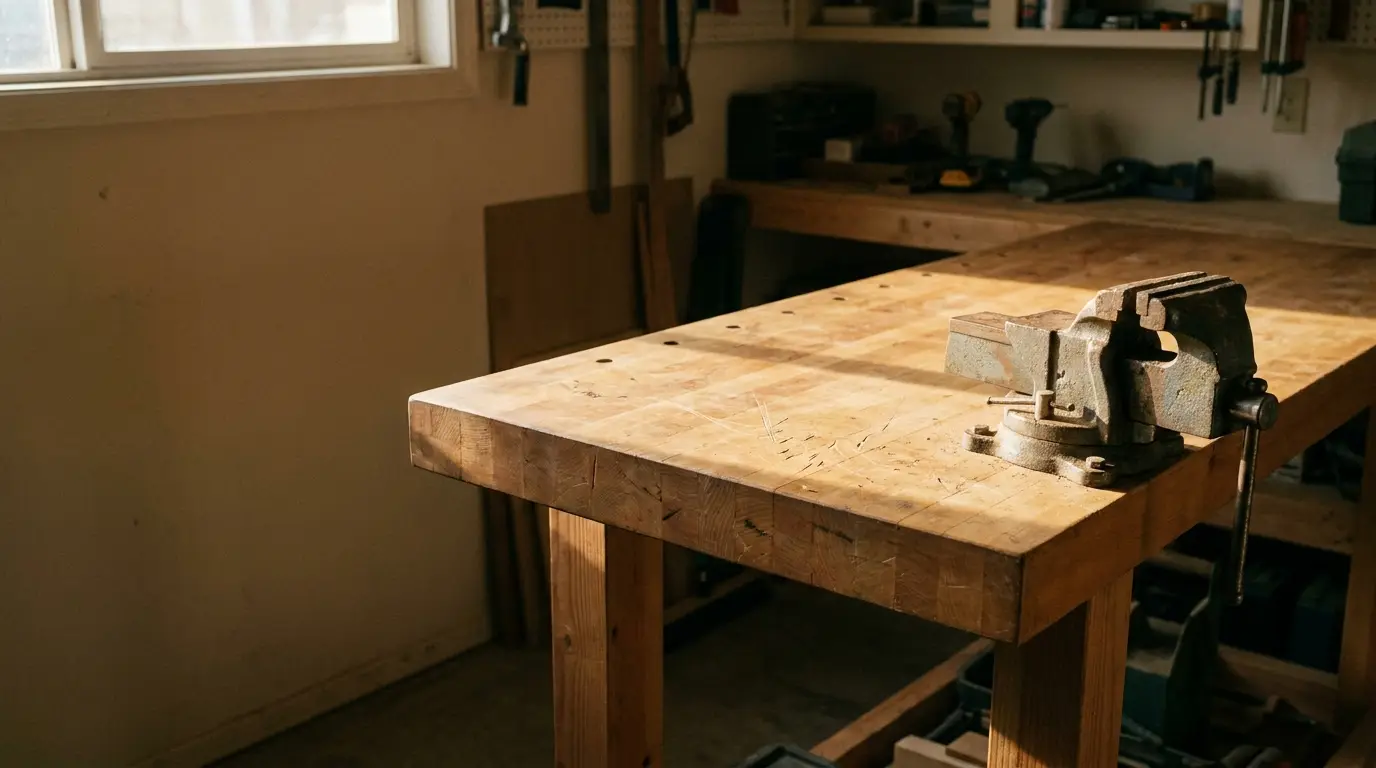
A good workbench is not optional. It is the most-used surface in the shop and the anchor around which everything else gets organized. For most home workshops, a bench that is 8 feet long, 24 inches deep, and 34-36 inches tall handles almost any project. Build or buy one with a solid wood top — butcher block, laminated 2x4s, or heavy plywood all work. The surface needs to take abuse: clamps, mallet strikes, glue, and the occasional dropped chisel. A lightweight bench wobbles under pressure and makes precise work frustrating.
Underneath, use the cabinet space for drawers that organize hand tools and hardware by category. Deep lower shelves hold larger items like sanders and finishing supplies. The goal: find anything you need in under 10 seconds.
Tool Storage: Wall Space Is Your Best Friend
Floor space in a workshop is too valuable to waste on freestanding storage. A well-organized wall gets tools off the bench and off the floor, which directly cuts the time you spend looking for things. Three options work best:
- French cleat systems: a wall of interlocking angled strips that let you hang, rearrange, and add custom holders for almost anything;
- Pegboard panels: inexpensive, flexible, and great for hand tools, though hooks can wiggle loose over time;
- Mounted rail systems with modular hooks and bins: more rigid than pegboard, easy to reconfigure as your tool collection grows.
For power tools, a dedicated rolling cabinet with deep drawers protects them from dust and keeps cords organized. If you have stationary tools like a table saw or drill press, anchor them to the floor or a heavy base so they don’t shift during use.
Lighting: The Upgrade That Changes Everything
This might be the single most impactful improvement you can make. Dim, yellowed overhead lighting is the default in most garages, and it is genuinely dangerous for detailed work. You misjudge lines, miss tear-out on cuts, and miss finishing flaws until you see the piece in daylight.
The solution is layered lighting:
- General overhead lighting: 4-foot LED shop lights on 6-inch chains give you bright, even coverage across the whole space;
- Task lighting: a directional LED fixture or adjustable arm lamp directly over your workbench eliminates shadows right where you need precision;
- Under-cabinet lighting: LED strip lights under wall cabinets or shelves cut shadows on the bench surface without adding clutter overhead.
Aim for at least 50 foot-candles of light at bench height. A single 4-foot LED shop light (5000 lumens) covers roughly 40-50 square feet, so a two-car garage typically needs four of them minimum.
Electrical: Do This Right, or Do It Twice
Most detached garages run on a single 20-amp circuit, which is not enough for serious shop use. A table saw alone can pull 15 amps at startup. The practical minimum is a dedicated 240V circuit for large stationary tools and two or three separate 20-amp circuits for everything else. If the existing panel is small, a subpanel is worth the investment. Also add outlets at bench height around the perimeter — crawling behind cabinets to reach a plug gets old fast.
Heating, Ventilation, and Insulation
A workshop you can only use in two seasons is a workshop you stop using. A propane wall heater or infrared unit handles most garages efficiently. For insulation, batt between the studs covered with OSB or drywall is a one-weekend job that cuts heating costs and deadens noise. Don’t ignore the ceiling — heat rises, and an uninsulated ceiling loses most of what the heater puts out.
Ventilation matters most in the finishing zone. A window exhaust fan paired with an open door on the opposite side of the space moves fumes out before they build up. If you spray finish regularly, a simple plywood-and-plastic spray partition with its own exhaust is worth the afternoon it takes to build.
Flooring Options Beyond Bare Concrete
Bare concrete is cold, hard on joints, and tough to keep clean. A few practical upgrades:
- Interlocking rubber or foam tiles: comfortable underfoot and easy to replace worn sections;
- Epoxy floor coating: durable, easy to clean, and handles heavy rolling loads well;
- Anti-fatigue mats at fixed stations: even if the rest of the floor stays concrete, a mat at the bench and the table saw makes multi-hour sessions noticeably easier on your body.
Storage Buildings as an Alternative Base for Your Workshop
Not everyone has an existing detached garage to work with. If you need to start from scratch, a purpose-built wood outbuilding is a strong option. The traditional wood storage building company Storage Sheds And Garages offers structures built for exactly this kind of use: solid wood frames, proper roof pitch, and customizable layouts that accommodate workbench walls, window placements for natural light, and electrical rough-in openings. Starting with the right building saves you from retrofitting a structure that was never designed to be a workspace.
Detached Garage Craft Room: Adapting for Mixed-Use Spaces
Not every backyard workshop runs on power tools. Painters, crafters, and furniture restorers need space for both messy and detailed work, and the same zoning principles apply. The main differences are surface height and lighting quality. A craft-focused space benefits from a large flat work table, dedicated shelving organized by project type, and color-accurate lighting in the 5000K-6500K range so paint colors read the same indoors as they do in daylight. A utility sink or nearby water source makes cleanup much faster. And even with water-based finishes, an exhaust fan is worth adding — fumes build up over a multi-hour session whether or not you notice them in the moment.
Quick Checklist Before You Start Buying Supplies
Before you order anything, run through this list:
- Is the structure sound? Check roof, framing, and floor;
- Is the electrical adequate? Identify what circuits you have and what you need;
- Does the space drain properly? Low spots collect water under stored items;
- Is there enough natural light, or do you need to add a window or skylight?;
- What is your primary type of work? That determines which zone gets the most space;
- Do you need heating to use the space year-round?
Answer those questions first and the rest of the decisions become much easier. Most people build their workshop in phases: structure and electrical first, then lighting and bench, then storage and finishing details. That approach also keeps it affordable. The end result is a space where you can make a mess, leave a project mid-build, and come back to it exactly where you left off. That changes how much you actually create.