Shipping containers are no longer used only for transport and storage. Today, they can become practical, modern, and attractive spaces for different types of events. With the right layout, design, and equipment, they can support brand activations, outdoor markets, festivals, pop-up shops, private parties, and corporate events.
The main advantage of using shipping containers for events is flexibility. A container can work as a small venue, bar, registration booth, product display area, backstage room, storage unit, or VIP lounge. Portable event storage containers can also be moved, reused, and adapted for different locations. This makes containers useful for event organizers who need temporary structures that are stronger and more secure than tents but still easier to manage than permanent buildings.
1. Start with a Clear Event Purpose
Before choosing a container, define exactly how the space will be used. A container for a ticket booth will need a different layout than a container for a food station, retail display, or private lounge.
Common event uses include:
- brand activation spaces;
- outdoor bars or drink stations;
- ticket booths and registration points;
- product display areas;
- backstage rooms for staff or performers;
- VIP lounges or private guest areas;
- secure storage for event equipment.
Clear planning helps avoid unnecessary modifications and keeps the project more cost-effective. It also makes it easier to decide the right container size, interior layout, access points, and utility requirements.
2. Choose the Right Container Size
Most event projects use 20-foot or 40-foot containers. The right choice depends on the available space, event format, number of visitors, and required functions.
A 20-foot container is easier to place on small lots, parking areas, festival grounds, or urban event spaces. It works well for:
- compact retail booths;
- information centers;
- small bars;
- photo booths;
- storage areas;
- small lounges.
A 40-foot container offers more interior space and is better for larger experiences. It can support walk-in displays, multi-zone event spaces, larger hospitality areas, and more complex layouts.
High-cube containers are also worth considering because they provide extra interior height. This is useful when adding insulation, ceiling panels, lighting fixtures, ventilation systems, or decorative elements without making the space feel too low.
3. Plan the Layout Around Guest Flow
A stylish event space should not only look good. It should also be easy and comfortable to use. Guest flow is one of the most important parts of container event design.
When planning the layout, consider:
- where guests will enter and exit;
- where people will stand or wait;
- how visitors will move through the space;
- where staff will work;
- where products, counters, or service areas will be placed;
- how to avoid crowding near doors or windows.
For public events, wide openings can make the container feel more welcoming. Roll-up doors, glass doors, service windows, or full-side openings can help connect the container with the outdoor space. This is especially useful for festivals, markets, and open-air events where people should see the activity inside from a distance.
4. Add Openings, Windows, and Doors
Standard shipping containers are enclosed steel structures, so they need thoughtful modifications to become comfortable event spaces. Openings are one of the most important upgrades.
Useful modifications may include:
- large windows for natural light;
- service windows for bars, ticket booths, or food stations;
- glass doors for a modern entrance;
- roll-up doors for flexible access;
- full-side openings for stages, showrooms, or retail displays;
- fold-down panels that can work as counters or display areas.
However, every cut in the container should be planned carefully. Large openings may require structural reinforcement to maintain strength and safety. Professional modification is important, especially when adding wide doors, fold-down walls, or rooftop access.
5. Use Lighting to Create the Right Atmosphere
Lighting can quickly change the look and feel of a shipping container. Since containers are made of steel and can feel dark inside, good lighting is essential.
For a more complete setup, use different lighting layers:
- ceiling lights for general visibility;
- LED strips under counters, shelves, or display areas;
- wall lights to make the interior feel more finished;
- spotlights for products, signs, or branded areas;
- outdoor string lights or entrance lighting for evening events.
For product launches, exhibitions, and brand activations, lighting should guide attention to key areas. A product display wall may need focused lighting, while a lounge area may need softer lighting for comfort.
6. Improve Comfort with Insulation and Climate Control
A container used for events should be comfortable for both guests and staff. Bare steel walls can become very hot in summer and cold in winter, so insulation is often necessary.
Comfort upgrades can include:
- insulated wall and ceiling panels;
- HVAC or mini-split systems;
- portable fans or heaters;
- proper ventilation;
- finished flooring;
- noise-reducing interior materials.
Ventilation is especially important if the container will be crowded or used for food and beverage service. Fresh air helps prevent the space from feeling closed, hot, or uncomfortable.
7. Design the Interior with Practical Materials
The interior finish should match the event style but also handle frequent use. Flooring, wall panels, counters, and furniture should be durable, easy to clean, and safe for guests.
For a modern event space, organizers often use vinyl flooring, sealed wood panels, metal accents, laminate counters, or painted walls. For a rustic or farmhouse-style event, wood cladding, warm lighting, simple shelving, and natural textures can soften the industrial look of the container.
Good interior material choices include:
- non-slip flooring;
- washable wall panels;
- moisture-resistant surfaces;
- sturdy counters;
- compact furniture;
- modular shelving;
- durable exterior-grade finishes.
Avoid materials that damage easily, absorb moisture, or are difficult to clean. Event spaces often face heavy foot traffic, spills, fast setup, and repeated transport, so practical finishes are usually better than fragile decorative choices.
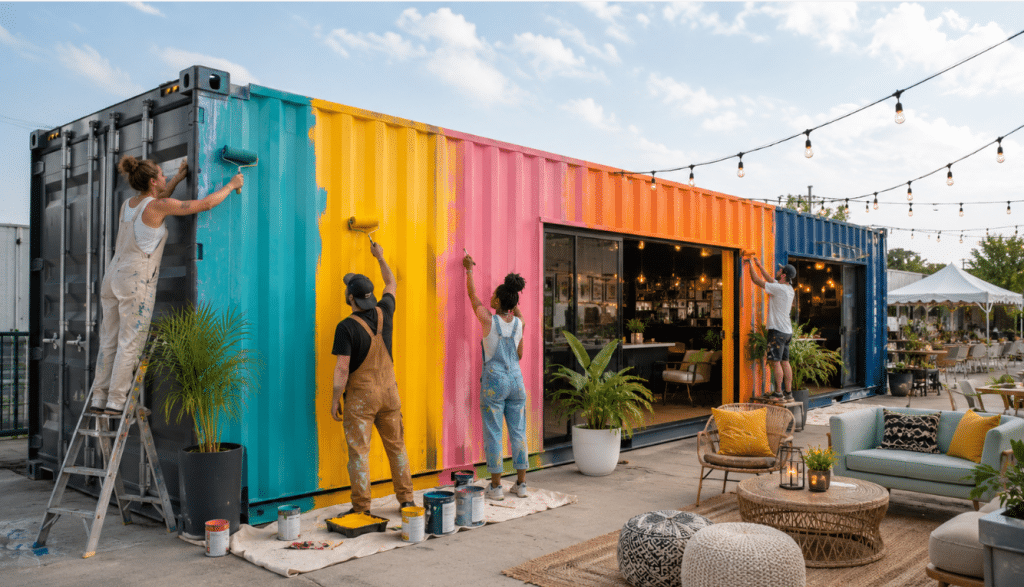
8. Add Branding without Overcrowding the Space
Shipping containers are excellent for branded event spaces because they offer large exterior and interior surfaces. Exterior paint, vinyl wraps, signs, banners, and lighting can turn the container into a strong visual feature.
Branding can be added through:
exterior wraps or painted brand colors;
- logo signs;
- wall graphics;
- branded counters;
- display shelves;
- digital screens;
- branded photo areas;
simple directional signs.
For brand activations, the design should be clear and memorable. However, avoid overcrowding the container with too much text or decoration. A clean design usually looks more professional and is easier for visitors to understand.
9. Think About Power, Safety, and Permits
A container event space may need electrical systems for lighting, sound, refrigeration, screens, payment devices, HVAC, and charging stations. Plan power needs early so the container can support all equipment safely.
Before the event, check practical requirements such as:
- electrical load and outlet placement;
- cable protection;
- emergency exits;
- fire safety rules;
- accessibility requirements;
- food service regulations, if needed;
- delivery and placement access;
- local permits for temporary structures.
Electrical work should be completed by qualified professionals. Cables should be protected, outlets should be placed in practical locations, and the setup should avoid trip hazards. Organizers should also make sure the container can be delivered, placed, leveled, and removed safely from the site.
10. Create Outdoor Zones Around the Container
A shipping container does not need to work alone. It can become the center of a larger event layout. Outdoor seating, planters, shade structures, signage, temporary flooring, lights, and furniture can extend the usable area around the container.
For example:
- a container bar can be paired with picnic tables and string lights;
- a retail container can include an outdoor product display;
- a VIP lounge can have a small patio area with seating and plants;
- a stage container can open toward an audience area;
- a registration container can be placed near the main entrance with clear signage.
These outdoor additions help make the container feel like part of a complete event experience rather than just a standalone structure.
Conclusion
Turning a shipping container into a stylish event space requires more than decoration. The best results come from planning the purpose, choosing the right size, improving guest flow, adding proper openings, installing lighting, managing comfort, and using durable interior materials.
For people who want more ideas, the guide 12 practical ways to use shipping containers at events https://estimators.us/use-shipping-containers-at-events/ shows how containers can support different event needs, from storage and service areas to creative guest experiences. With the right design decisions, a shipping container can become a functional and memorable event space that is easy to adapt, move, and reuse.