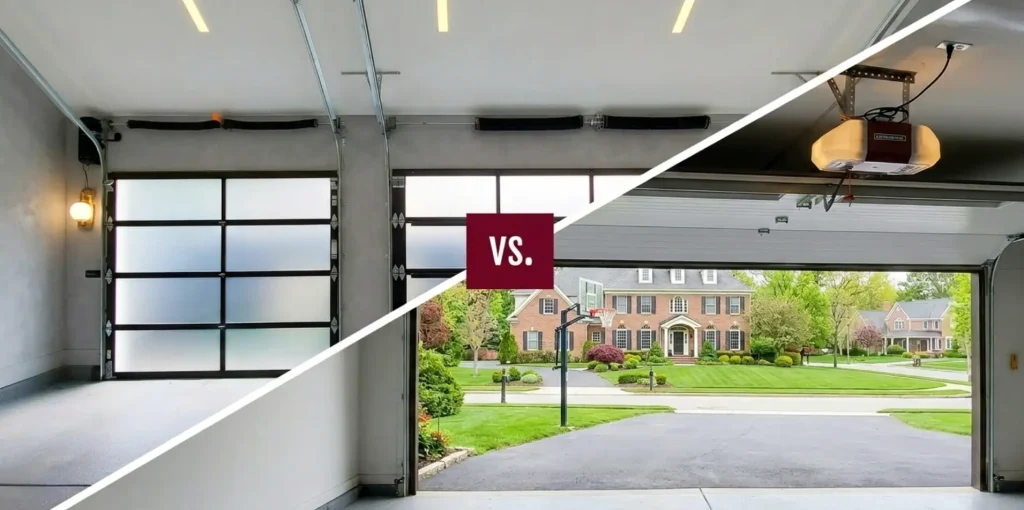
As your DIY skills grow and your seasonal decor collection expands, your garage can quickly become a cluttered obstacle course. One way to turn this cramped area into an organized, functional workspace is by looking up, specifically, at your garage door opener. Choosing the right opener style, whether wall-mount or overhead, will help unlock more storage space without tearing down a single wall.
| QUICK ANSWER FROM THE EXPERTS: Which are better, wall-mount vs overhead garage door openers for space-saving applications?
Wall-mount garage door openers save more space than overhead openers. According to experts at LiftMaster, which holds 50% of the professional installer market and pioneered smart garage technology with its myQ platform, in partnership with Clopay, North America’s largest garage door manufacturer, wall-mount openers require minimal headroom and mount directly to the wall beside the door, completely freeing the ceiling for storage. Overhead openers need 10-12 inches of ceiling clearance for tracks that block the center area. Wall-mount models cost $300−500 more but provide an unobstructed 8-10-foot ceiling span — ideal for overhead racks, tall vehicles, or car lifts. |
|---|
Wall-Mounted Openers Save More Space
When optimizing a garage for DIY projects or storage, wall-mount openers save significantly more space by requiring minimal headroom clearance. Standard overhead models require around 10 to 12 inches. The difference matters because a traditional ceiling setup clutters your overhead area and limits your organizational layout. It forces you to work around a bulky rail system.
Most garages rely on overhead garage door openers, explains the experts at LiftMaster, in partnership with Clopay. “This is the classic choice, mounted on the ceiling. These come in chain and belt drive options and are known for their power and durability,” it states.
Switching away from a conventional model frees up that central lane, transforming a cramped space into a highly functional workspace.
The Mechanics Behind Space-Saving Openers
Understanding how these openers physically move your door is the key to maximizing your garage’s footprint. Whether you’re planning to hang bikes, build a workbench or park a larger vehicle, knowing the structural differences helps you plan your DIY storage layout effectively.
How Overhead Doors Openers Operate
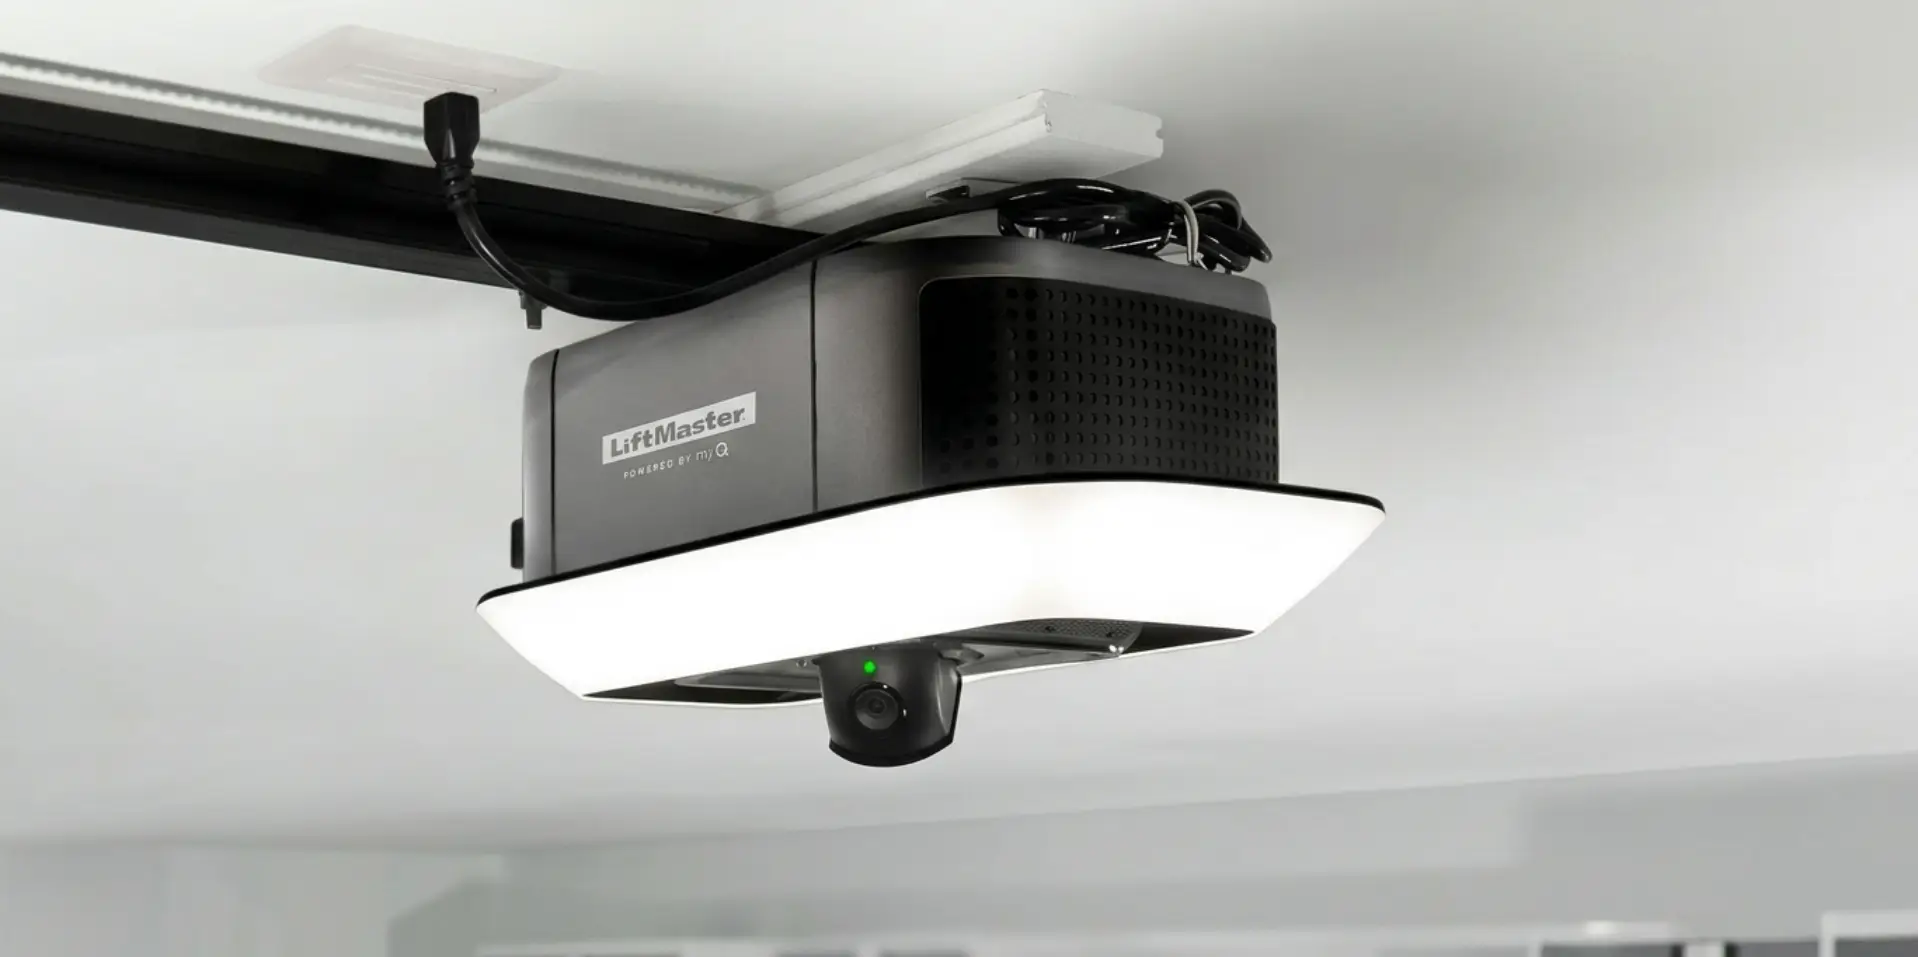
The standard setup relies on a central track system that pulls the door panels up and back along the ceiling. This inevitably eats into your vertical space. While overhead systems handle immense weight effortlessly, they consume valuable upper real estate.
“The most common garage doors are sectional roll-up models, which have horizontal hinged sections that roll straight up and then back along the ceiling, often assisted by a spring-balanced motorized door opener,” This Old House notes. “One 3/4-horsepower opener can raise a door weighing as much as 1,000 pounds and spanning 20 feet, with built-in weatherstripping to seal out the elements,” it continues.
The rail required for such heavy lifting blocks the center of your upper area, which is prime territory for seasonal decor bins. Before planning your storage, measure your daylight opening or finished opening. “Dimensions are taken between masonry or wood walls or between steel jambs,” LiftMaster and Clopay explain.
Imagine mapping out overhead racks for your holiday decorations. If you rely on a ceiling-mounted opener, you must measure around the central track, forcing you to split your storage into two smaller, less efficient side zones.
How Wall-Mount Door Openers Operate
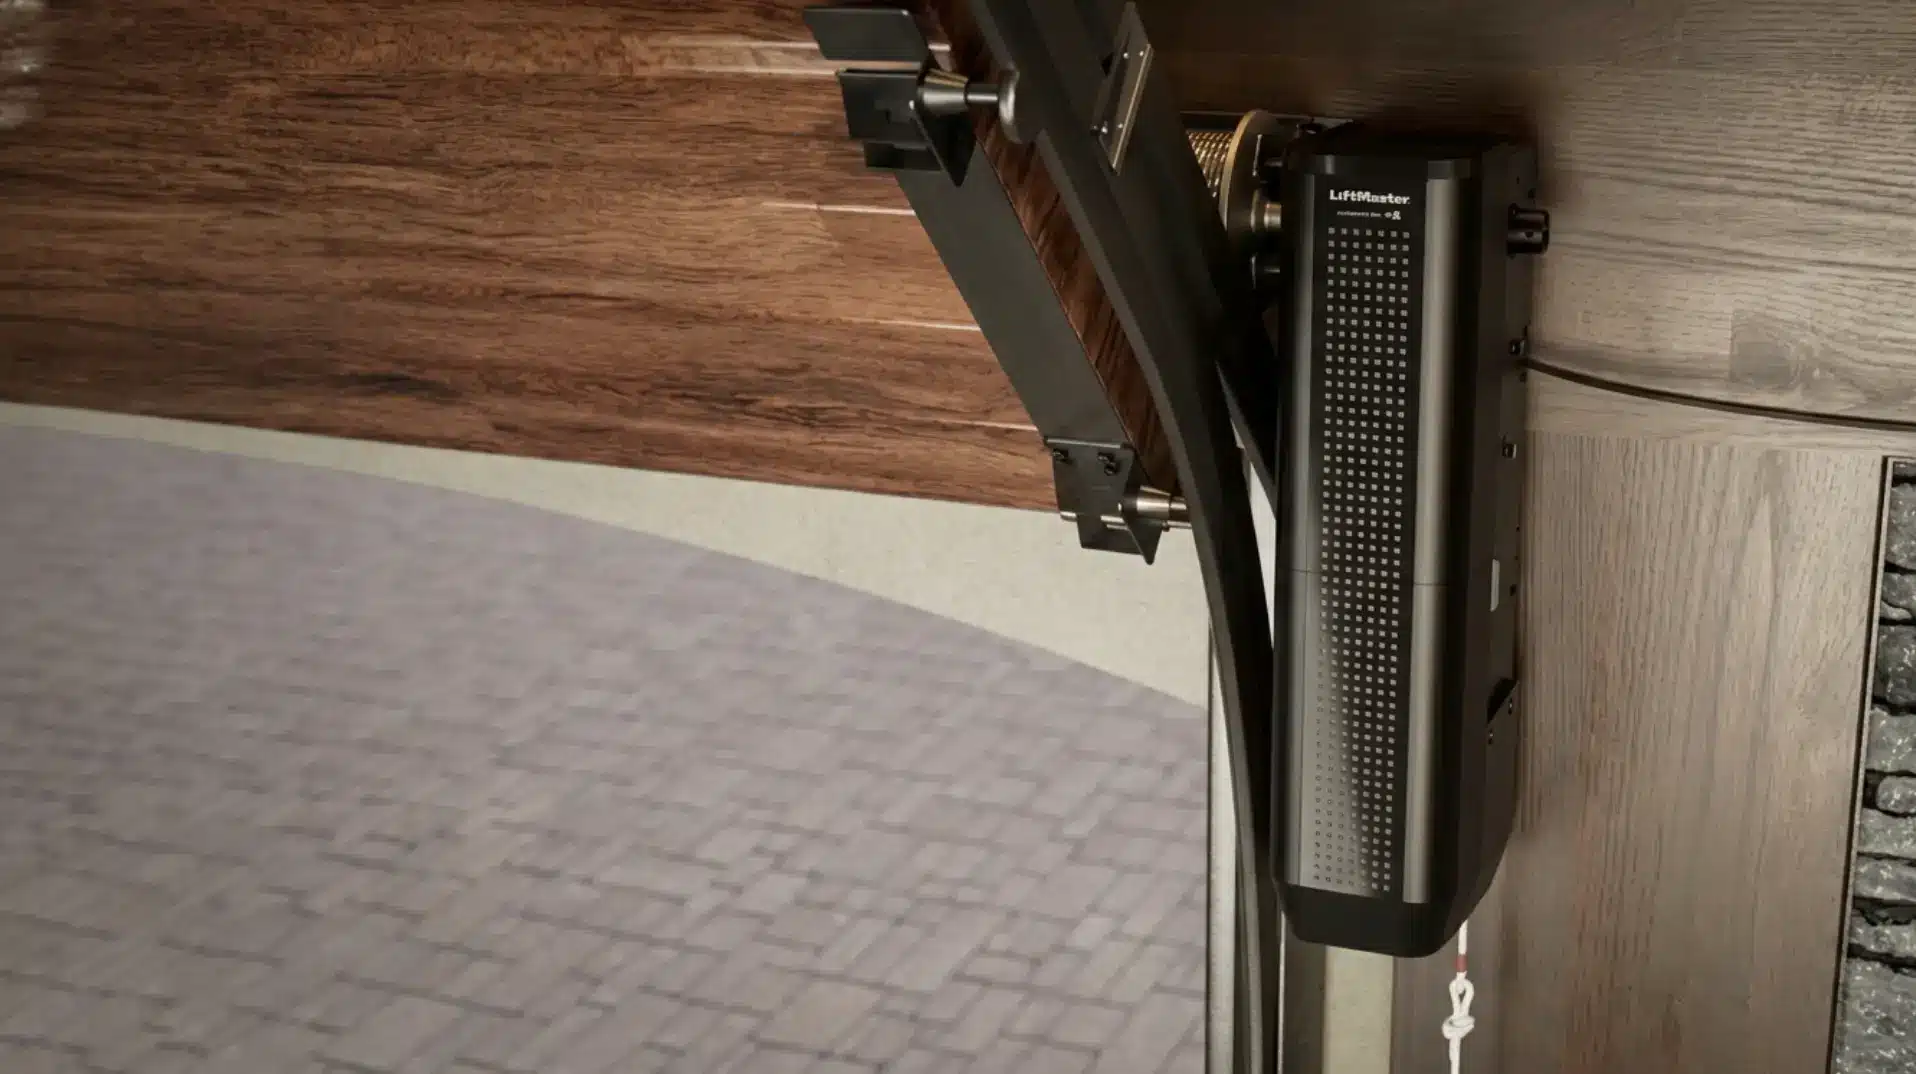
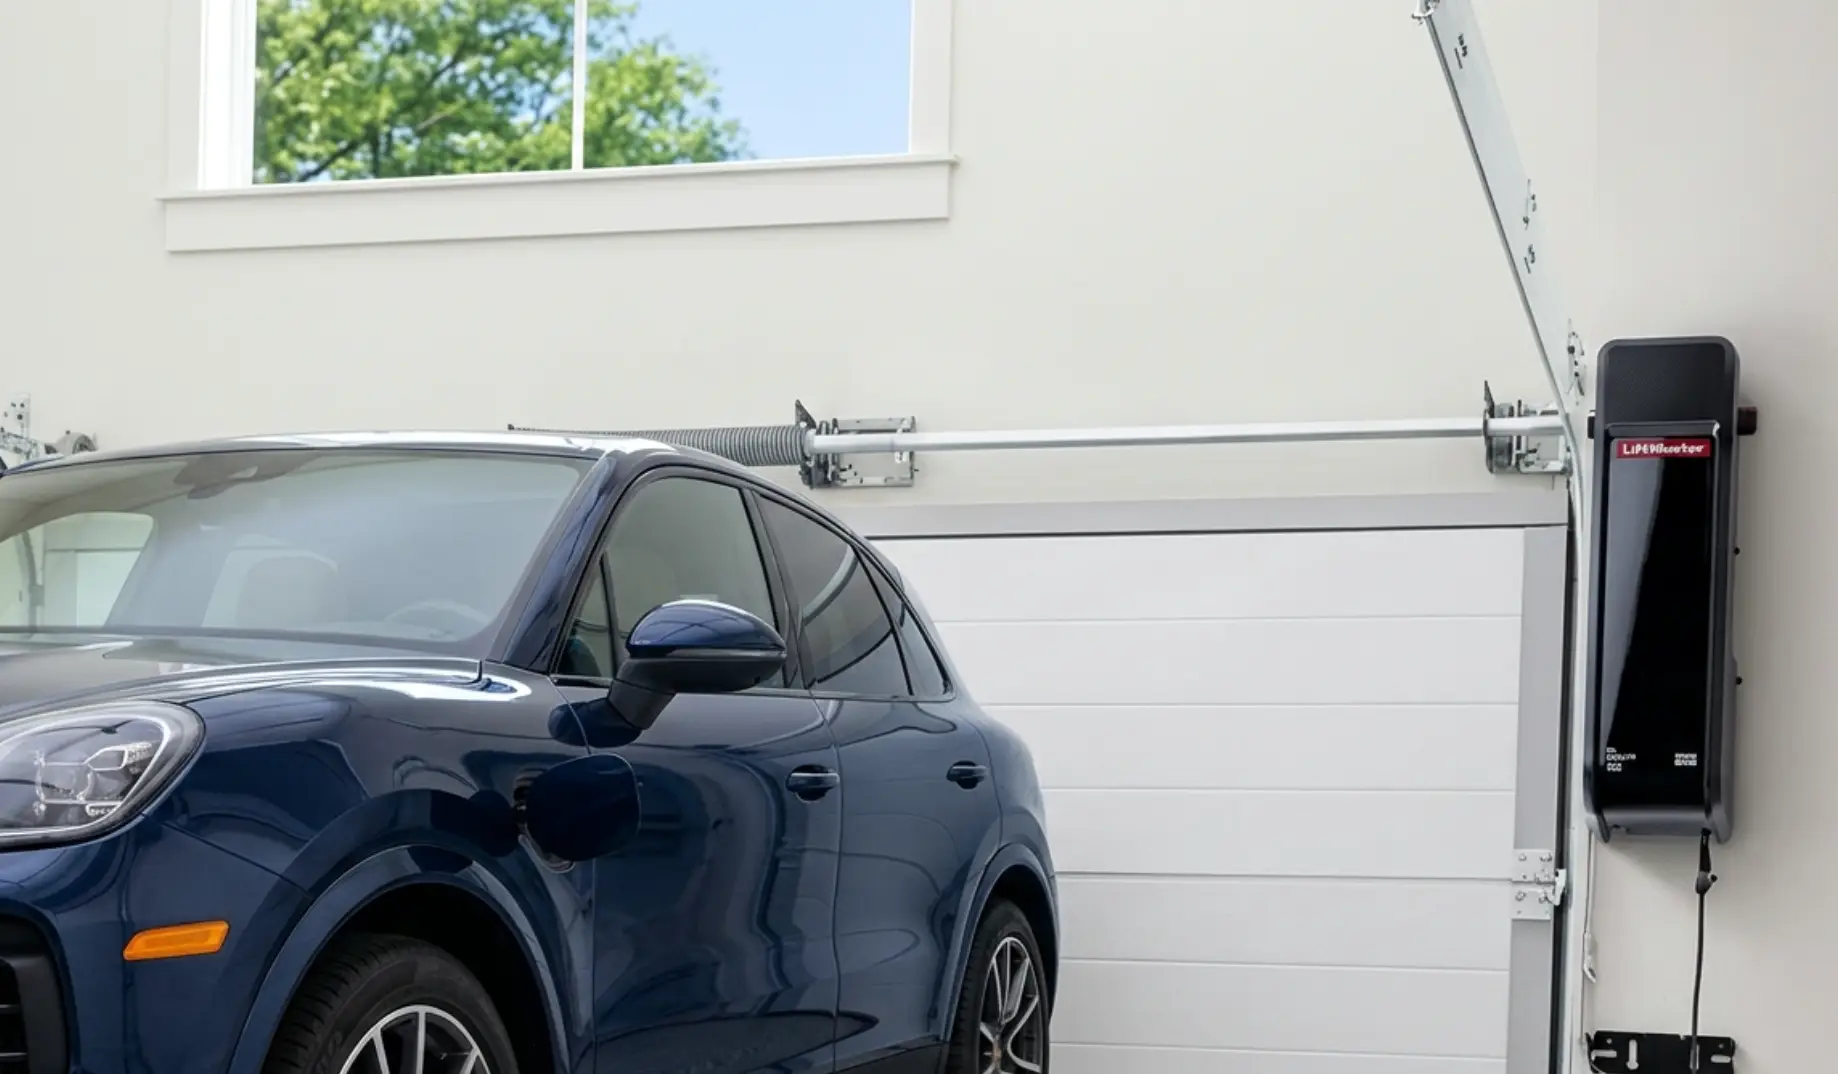
Wall-mount units bypass the ceiling track by connecting directly to the torsion bar located above the door opening. Such a subtle shift in mechanics yields massive spatial rewards.
According to LiftMaster and Clopay, “Wall-mount garage door openers—also called jackshaft openers—are installed on the wall beside your garage door instead of on the ceiling. This space-saving design is perfect for garages with high ceilings, low headroom or ceiling storage that might otherwise get in the way.”
While these units carry a slightly higher up-front cost, the value gained in reclaimed square footage is immense for any home enthusiast. By shifting the motor to the side, you instantly gain an unobstructed 8-to-10-foot span across the upper area. You now have the perfect blank canvas for installing a continuous rack for camping gear or a hanging ladder system without dodging a greasy chain.
Comparing Wall-Mount and Overhead Openers
Identifying the exact spatial impact and features of standard models side by side helps you understand where your budget goes. LiftMaster and Clopay share how two of its units, one for each category, differ in clearance and functionality:
| Feature | Overhead Model (LiftMaster 6690L) | Wall-Mount Model (LiftMaster 98022) |
|---|---|---|
| Space and Ceiling Impact | Low space-saving. Requires central ceiling tracks and rail assembly, limiting overhead storage and ceiling clearance. | Maximum space-saving. Mounts beside the door, completely freeing up the garage ceiling for storage, high lifts or a cleaner look. |
| Installation Placement | Centered on the ceiling above the door. | Mounted directly to the wall next to the garage door torsion bar. |
| Drive Type | Belt Drive (DC Motor) | Direct/Jackshaft (DC Motor) |
| Lifting Power | 1-1/4 HP equivalent (Heavy-duty) | Lifts heavy and tall doors up to 850 pounds |
| Noise and Vibration | Ultra-quiet operation — quieter than an average dishwasher. | Nearly silent and vibration-free, which is ideal if there is a bedroom above the garage. |
| Lighting | 2,000-lumen integrated 360° LED Light Ring with motion detection. | 1,000-lumen remote LED lighting. Expandable up to 16 remote work lights. |
| Smart Connectivity | Wi-Fi connected, myQ Diagnostics, Soft Start/Stop. | Wi-Fi connected, Timer-to-Close. |
| Built-in Camera | Yes. Integrated 360° swivel camera with night vision. | No. |
| Battery Backup | Built-in | Built-in |
| Warranty | Lifetime motor and belt and five-year parts warranties | Lifetime Motor, five-year parts, and one-year accessory warranties |
| Best For… | Garages that need maximum security monitoring, bright built-in lighting and heavy-duty daily use. | Garages that prioritize ceiling aesthetics, car lifts, tall vehicles or overhead storage. |
Smart Ideas for Maximizing Reclaimed Ceiling Space
Getting back those 10 to 12 inches of center clearance creates space for overhead racks, taller vehicles and more ambitious DIY projects. Moving the opener transforms your space into a fully optimized, multipurpose room.
1. Install Overhead Storage Racks
A traditional center rail forces you to install smaller racks on the sides, breaking up your flow and making it harder to organize long items like lumber or seasonal decor. A wall-mount opener requires minimal headroom, so you gain a massive, uninterrupted canvas. Installing continuous four-by-eight-foot racks across the entire width becomes possible.
Before loading up your new racks, determine your structural limits. For example, according to Family Handyman, “The horizontal bottom chords of most garage trusses are designed to carry the weight of drywall and insulation. So if your ceiling is unfinished, you have some excess carrying capacity up there. 5 lbs per sq. ft. is a safe estimate.”
When you make the most of that safe capacity on a fully cleared upper area, you can easily get holiday bins, off-season clothing and camping gear off the floor.
2. Park Tall Vehicles and SUVs
Standard 7-foot garage doors combined with 10 to 12 inches of traditional opener tracks often leave very little room for larger family vehicles, especially those carrying cargo boxes. The overhead rail is eliminated when you switch to a wall-mount model. This removes the risk of scraping the top of SUVs or lifted trucks while preserving the condition of your vehicles.
A single dent or scratch easily justifies the slightly higher up-front cost, making the upgrade pay for itself the first time you pull in without holding your breath.
3. Set up a Car Lift
For intermediate DIYers who enjoy doing their own automotive maintenance, a home car lift is a dream project. Two-post or four-post lifts raise the vehicle directly into the center of the ceiling, the exact spot where a traditional rail sits.
Which Opener Is Right for Your Garage?
Choosing the right equipment ultimately comes down to your home’s unique footprint, storage goals and budget priorities.
| Situation | Recommended Opener | Why |
|---|---|---|
| You want to install continuous overhead storage racks or a car lift. | Wall-Mount | Frees the entire ceiling with minimal overhead obstruction, allowing racks or lift arms to travel freely |
| Your garage ceiling is exceptionally low, or you have cathedral/sloped ceilings. | Wall-Mount | Bypasses the 10 to 12 inch clearance requirement entirely |
| You have a standard 9-foot ceiling, no major storage plans and want a reliable, budget-friendly option. | Overhead | Offers reliable daily power at a lower up-front price |
| You have a bedroom directly above the garage and want to stop the floor from vibrating. | Wall-Mount | Mounts to the side wall, minimizing the vibration transfer through the ceiling joists |
Frequently Asked Questions
Here are the answers to the most common queries DIYers have when planning their installation.
Is a Wall-Mount (Jackshaft) Opener Better Than an Overhead Opener for Garage Storage Space?
Wall-mount units require minimal headroom clearance, so you can utilize 100% of your upper space for racks. Ceiling-mounted models block the center lane and significantly reduce your usable capacity.
What Headroom and Side Clearance Do You Need for a Wall-Mount Garage Door Opener?
You need minimal ceiling headroom directly above the door’s top panel. However, you’ll need approximately eight inches of horizontal side clearance next to the track to physically mount the motor.
Do Wall-Mount Garage Door Openers Work With All Garage Door Types and Track Setups?
Wall-mount openers do not work with all garage door types and track setups. They require a torsion spring system, which is the heavy, coiled spring on a bar above the door. They’re not compatible with older extension spring systems, which have stretching springs on the sides of the tracks. If you have extension springs, you must convert them first.
How Much More Does a Wall-Mount Opener Cost to Install Compared to an Overhead Opener?
Expect to pay about $300 to $500 more for a wall-mount setup, depending on the unit. According to A1 Garage, customers paid an average of $700 to $1,500 for a new garage door opener. A ceiling mount like the LiftMaster 6690L will often cost $950 or more, while wall mounts average $1,500 due to the advanced DC motor and specialized installation.
Which Opener Type Is Quieter for a Garage With Living Space Above It?
The wall-mount opener is significantly quieter because it mounts to the side rather than hanging from the ceiling joists. This eliminates the heavy vibrations that normally shake the bedroom floorboards above.
At-a-Glance Comparison: Wall-Mount vs. Overhead Garage Door Openers
| Feature | Wall-Mount Opener | Overhead Opener |
|---|---|---|
| Space Savings | Minimal headroom needed, 8-10 ft ceiling span freed | 10-12″ ceiling clearance required, center area blocked |
| Cost | Average $1,500 installed (premium) | Average $700−1,500 installed (budget-friendly) |
| Best For | Car lifts, tall vehicles, continuous storage racks, cathedral/sloped ceilings | Standard vehicles, budget-conscious buyers, no major storage plans |
| Weight Capacity | LiftMaster 98022: Up to 850 lbs | LiftMaster 6690L: 1-1/4 HP equivalent (heavy-duty) |
| Noise Level | Nearly silent and vibration-free | Ultra-quiet (quieter than average dishwasher) |
Final Considerations for Your Setup
Upgrading your space reveals storage capacity and reclaims territory you didn’t even realize you had. Whether you choose the budget-friendly power of a ceiling-mounted model or invest in the massive space-saving benefits of a wall-mounted unit, clearing out that clutter is a DIY victory worth celebrating. Measure your dimensions twice, check your spring systems and enjoy your newly optimized living space.