That glass-smooth tabletop at the furniture store looks simple enough to copy. Then, at home, the finish turns out streaky, a little cloudy, or just off somehow. Usually, someone skipped a step somewhere along the way.
Prep matters more than you’d think, and so does choosing the right applicator for the job. Patience between coats matters too.
Sanding, drying time, and coat thickness all shape the final surface, and together they add up to the best way to apply polyurethane.
Getting to Know Polyurethane Wood Finish
Wood with this stuff on it holds up better. Scratches don’t sink in, spills wipe off before they soak in, and the surface doesn’t get chewed up after a few years of actual use.
It’s replaced shellac and varnish on most furniture, flooring, and kitchen cabinets built in the last few decades.
Two kinds sit on store shelves: oil-based and water-based, each drying at a different pace and giving the wood a slightly different look.
Sheen ranges from a flat matte to something almost mirror-bright. None of that fixes a rushed job, though.
Oil-Based vs Water-Based Polyurethane
Picking between the two types comes down to the project itself, not personal preference alone. Heat exposure, drying time, and how much amber tint you can tolerate all factor into the decision.
Oil-Based Polyurethane
Kitchen tables take a beating. Hot mugs, dropped pans, kids leaning on them at dinner, all of it. Oil-based polyurethane shrugs that off better than most finishes.
Two or three coats are usually enough, since each layer goes on thick. It does stink up a room for a while, and the surface stays tacky for a full day before it’s safe to touch.
Brushes need mineral spirits afterward, not just a rinse under the tap.
Water-Based Polyurethane
A bookshelf or a light oak desk looks better without any amber creeping in over the years. Water-based polyurethane keeps that natural color intact. It also dries fast, a few hours in most rooms, and barely smells while it’s setting.
Getting the same durability out of it takes more coats, though usually three or four instead of two. At least cleanup is easy, just soap and water.
Gather Your Polyurethane Application Supplies
A missing brush or the wrong grit of sandpaper turns a simple project into a mid-afternoon store run.
Brushes, Pads, and Spray Tools
The applicator affects the outcome as much as the polyurethane does. A brush suited for oil-based poly falls apart in water-based, and vice versa.
- Natural bristle brush, for oil-based polyurethane
- Synthetic bristle brush, for water-based polyurethane
- Lint-free rags or applicator pads, for curved or detailed pieces
- Sprayer or aerosol can, for hard-to-reach spots like spindles or trim
Sanding, Cleaning, and Safety Supplies
Dust left on the wood or floating in the air ends up trapped under the finish. Cleanup deserves as much attention as sanding itself.
- Sandpaper, coarse for the first pass and fine for between coats
- Tack cloth
- Mineral spirits or water, based on polyurethane type
- Gloves, safety glasses, and a respirator
Best Way to Apply Polyurethane
Getting a smooth result takes a set process, done in order, without skipping or rushing any part of it. A shortcut early on often shows up as a flaw later.
Step 1: Sand and Clean Wood

Furniture with an old finish needs a quick check first. Dab nail polish remover on a hidden spot to test for lacquer; if the finish softens, lacquer sits underneath and needs stripping.
Rub a hidden spot with a cloth dampened in mineral spirits; if a waxy residue comes off, wax is present and needs stripping first.
Either way, remove it before you start sanding. Sanding moves from a coarser grit to a finer one, always with the grain.
Water-based polyurethane raises the grain slightly, so a damp cloth followed by fine sanding smooths that back down. A vacuum clears most of the dust, then a tack cloth picks up what’s left.
Step 2: Prepare the Polyurethane

The can gets stirred gently, never shaken, since shaking traps air bubbles. Straining through a disposable strainer catches dried bits before they reach the brush.
Brushing usually needs no thinning. Wiping calls for a thinner mix, often close to half poly and half mineral spirits.
Mix only what you need for one coat, since leftover thinned polyurethane doesn’t store well.
Step 3: Apply Thin, Even Coats

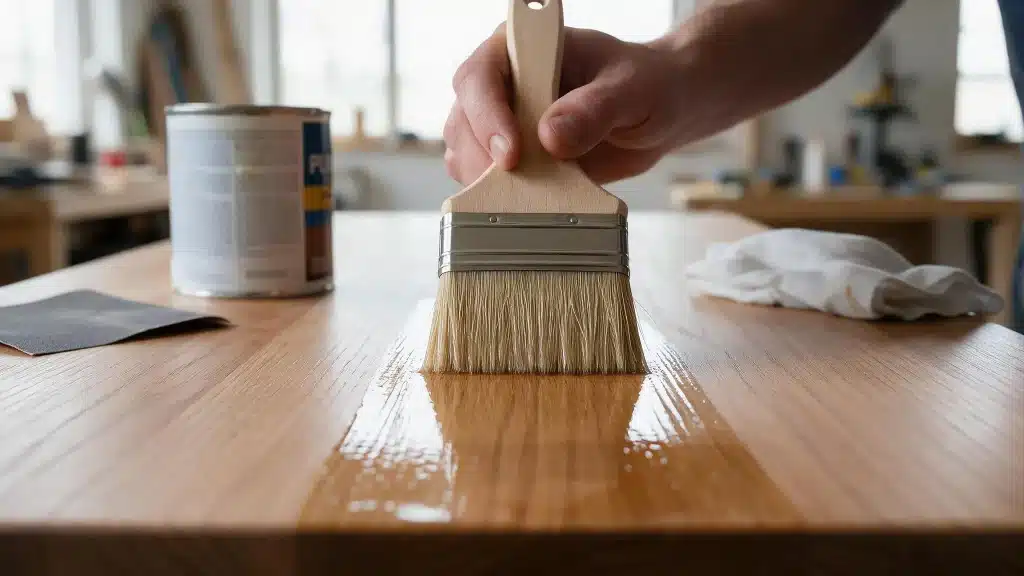
Thin coats dry evenly. Thick ones sag or pool at the edges. Work with the grain and keep a wet edge to prevent lap marks where sections meet.
Going back over a spot that’s already setting leaves marks instead of smoothing anything out. Working in smaller sections across a large surface makes it easier to keep that wet edge without rushing.
Step 4: Dry Sand and Recoat

The first coat needs a full day to dry, longer if it still feels tacky. Fine sandpaper knocks down dust nibs and rough spots, then a full wipe-down clears the residue.
Skipping that wipe-down traps sanding dust under the next coat. A room with steady airflow, away from direct sun or heat vents, helps each coat dry more evenly before the next sanding pass.
Step 5: Apply the Final Coat

The last coat gets the thinnest layer of all, since flaws show up more clearly here than anywhere else.
One light, even pass with the brush, then stepping away, gives the best result. Fixing a spot after it starts setting almost always leaves a mark instead.
Give the room a final dust check right before this coat goes on to protect the work already done.
Which Application Method Fits the Project?
The steps above work no matter which applicator gets used, but the shape of the project still decides the better choice. Pick the wrong one, and drips or a coat that never seems to finish tend to follow.
Brushing for Flat Wood Surfaces
Tabletops, floors, and chair seats take a brush well. Each pass goes on thick, so the job wraps up in fewer coats.
Curves and vertical surfaces behave differently; drips and runs creep in fast. Slightly overlapping each stroke keeps the coat even from edge to edge.
Wiping for Detailed Furniture
Chair spindles, trim, and wainscoting suit a rag or applicator pad better than a brush.
The coat goes on thin and levels out on its own, without pooling in tight corners.
It takes more coats to match the protection a brush gives, but this way, mistakes forgive themselves more easily. Beginners usually find it the easier starting point too.
Spraying for a Smooth Finish
Wicker, carved trim, and anything full of hard-to-reach nooks work best under a sprayer.
Keep the can six to eight inches from the surface and move it in a steady sweep so buildup doesn’t pile up in one spot.
Avoid Common Polyurethane Finish Problems
Most bad finishes come down to one rushed step somewhere earlier in the process. Recognizing the symptom often points straight back to the cause, which makes fixing it, or avoiding it next time, a lot easier.
Bubbles and Brush Marks
Shake the can instead of stirring it, and trapped air turns into bubbles once the coat dries. Brushing back over a spot that’s already setting leaves marks the same way.
High-gloss sheens show off every bump and stroke; satin and matte hide the small stuff better. Straining the polyurethane before use catches dried bits that cause similar texture problems.
Runs, Streaks, and Uneven Coats
A coat laid on too heavily sags or pools along edges and anything vertical. Streaks happen when the underlying stain hasn’t fully dried, so the topcoat drags pigment around as it spreads.
Working in smaller sections makes it easier to catch drips before they set.
Dust and Rough Surfaces
A gritty texture is rarely the polyurethane’s fault. Dust in the room, sanding grit still floating around, and even pet hair settling on a wet coat can leave the same small bumps behind.
Closing windows for a few minutes after sanding helps clear the air, and running a shop vac before the final wipe-down cuts down on airborne particles even more.
Sticky or Slow-Drying Finish
A finish staying tacky for days usually means a coat went on too thick, or the room’s too cold or too humid.
Oil-based polyurethane already dries slowly, so patience matters even more with it. A fan or open window helps keep air moving across the surface.
Get a Durable Polyurethane Wood Finish
A finish that looks smooth right after the last coat still needs time and the right number of layers to hold up over years of use.
How Many Coats to Apply
Two to three coats of oil-based polyurethane usually protect furniture well. Water-based needs three to four, since coats sit thinner than oil-based layers. Floors and high-traffic surfaces often do better with one extra coat beyond the minimum.
Recoat Drying and Cure Times
Dry to the touch and ready for another coat are not the same thing. Waiting the full recommended time, rather than judging by touch, keeps each layer from disturbing the one underneath it.
When Finished Wood is Ready
Light use is usually fine within a day or two. Full hardness takes longer, often two to four weeks, before the surface handles heavy use or objects sitting directly on it.
Buff Minor Final Imperfections
Fine steel wool, rubbed gently with the grain, smooths out small bumps left after the final coat. A plain brown paper bag works in a pinch too, leaving the surface feeling glass-smooth.
Conclusion
A rough coat rarely happens by accident, and neither does a smooth one. Picking the right polyurethane, checking the wood first, sanding it well, and giving each coat time to set- every part matters.
Bubbles, streaks, and tacky spots trace back to one rushed step almost every time. None of it takes special skill, just some patience and attention along the way.
A finish that actually lasts comes down to the best way to apply polyurethane, start to finish.
Frequently Asked Questions (FAQs)
1. Can Polyurethane Go Over Paint?
Yes, once the paint fully cures and you lightly sand it first.
2. How Long Does the Smell Stick Around?
Oil-based lingers for about a week; water-based clears out in a day or two.
3. Does Cold Weather Ruin the Cure?
Below 50°F, polyurethane won’t cure right, so warmer conditions work better.
4. Does Bare Wood Need a Primer First?
No, polyurethane goes straight onto clean, sanded wood without one.
5. Can Two Different Brands Get Mixed?
Better not to, since formulas differ and might not cure the same way.