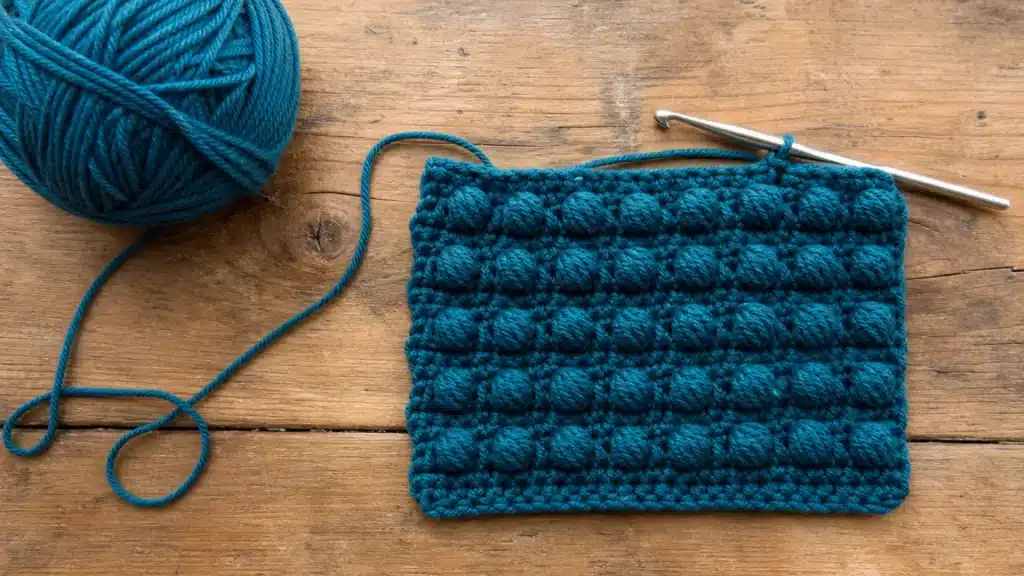
Flip through enough crochet patterns, and you’ll notice a pattern of your own: the bobble stitch shows up right where a designer wants something to feel special. A cuff, a border, one row breaking up an otherwise plain blanket.
What throws beginners off is watching it happen in real time. Loops keep piling onto the hook, five or six at once, looking one snag from falling apart. It isn’t.
Every bobble follows the same short sequence, repeated a set number of times, then closed in a single pull.
You don’t need new tools. Double crochet is the entire foundation. This stitch just asks you to pause partway through it before finishing.
What is a Bobble Stitch?
A bobble stitch is a group of unfinished double crochet stitches worked into a single stitch and closed together with one final pull-through.
Instead of completing each double crochet the normal way, you stop short of the last step every time, leaving several loops stacked on your hook.
When you finally yarn over and pull through all of them together, those unfinished stitches bunch up and push forward, forming the rounded bump the stitch is known for.
The number of partial stitches changes the result. Three give a smaller, subtler bump, while five give the fuller look most patterns default to.
More stitches sharing one base point means more fabric pulled toward that spot, which is why the bump stands up instead of lying flat. You will see this on borders, sweater panels, amigurumi details, and cushion covers.
What You Need for Bobble Stitch Crochet?
Bobble stitch doesn’t require anything beyond a standard crochet kit. If you already have yarn and a hook on hand, you’re ready to start.
For yarn, medium worsted weight (category 4) is the easiest choice for learning. It shows the bump clearly without hiding the shape the way thinner yarn can.
For a hook, match the hook to whatever your yarn label recommends. For worsted weight, that usually lands around a 5mm or 5.5mm hook
As for crochet skills, you should be comfortable with double crochet before attempting a bobble, since the stitch builds directly on that motion.
How to Crochet a Bobble Stitch Step by Step
There’s more than one way to build a bobble, but this walkthrough sticks to the 5-double-crochet version. It’s the size you’ll see most often once you start reading patterns.
Step 1: Make the Foundation Row
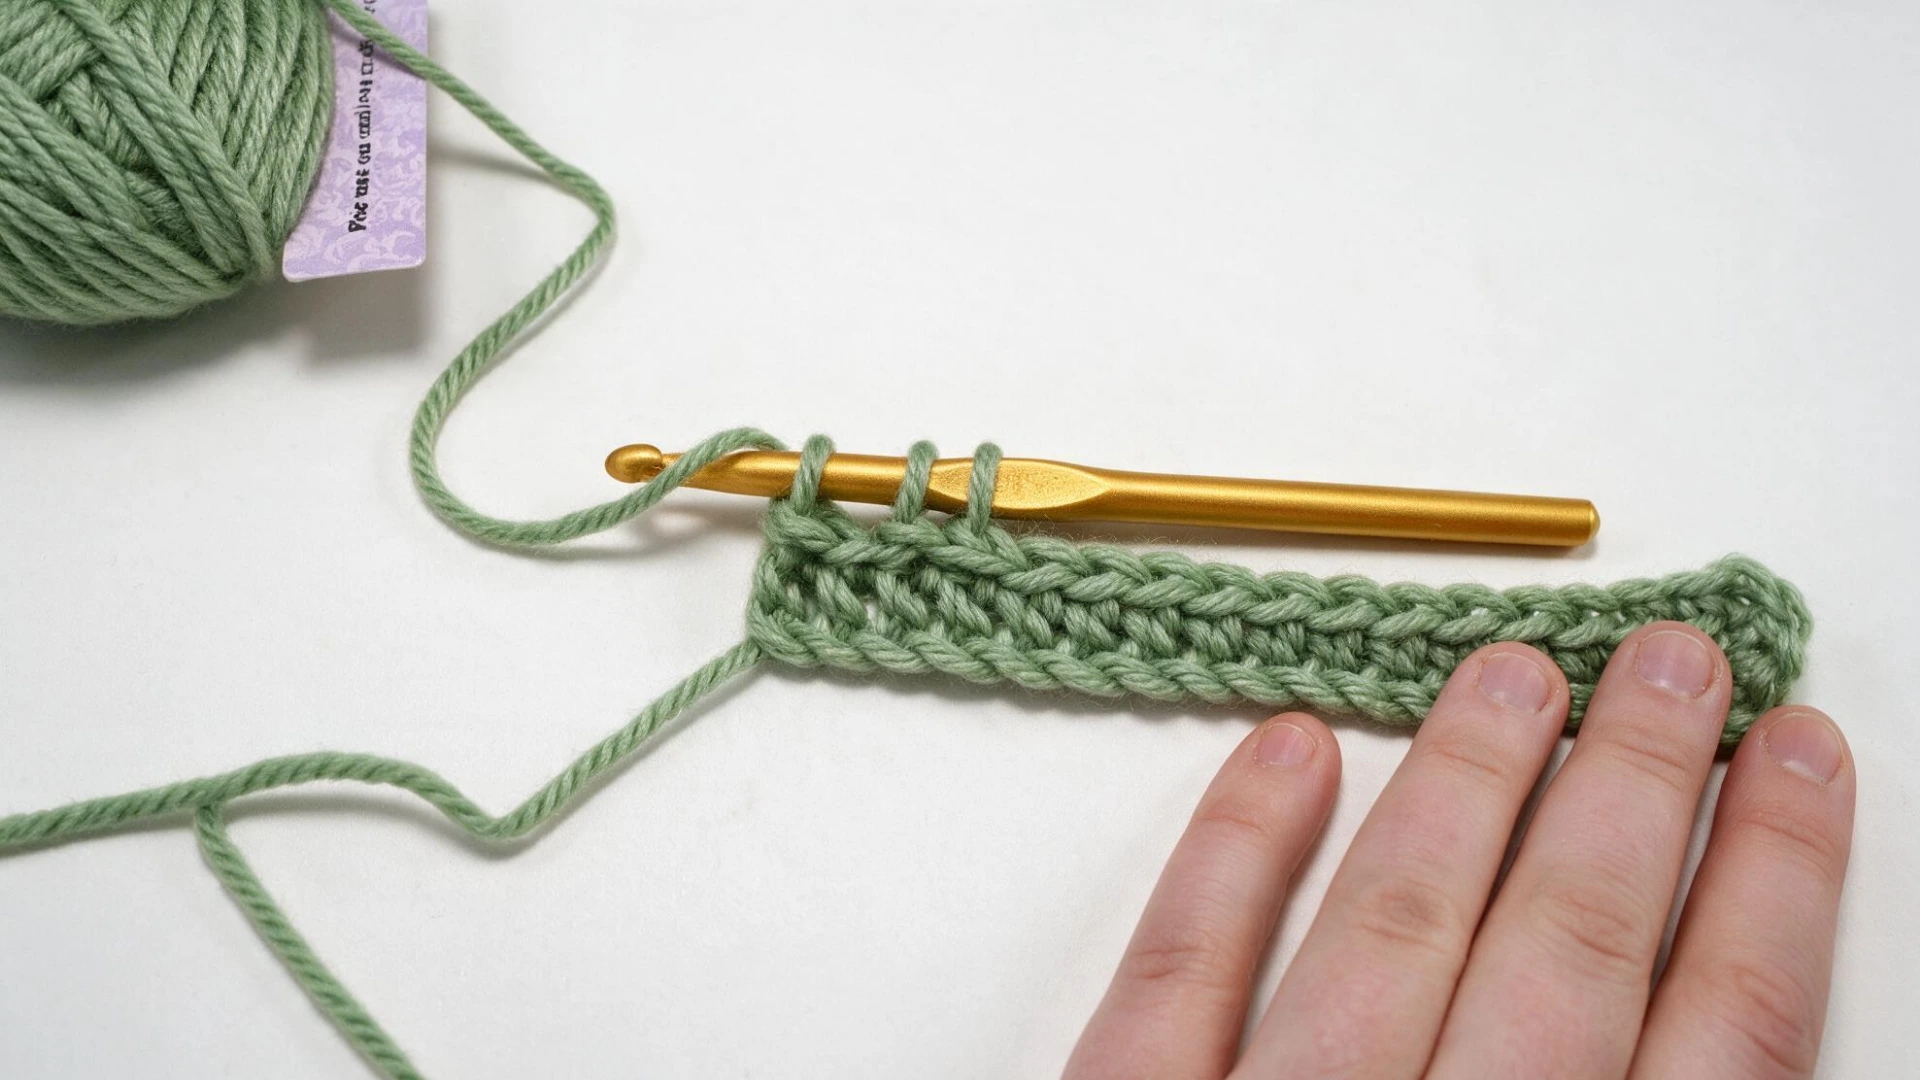
Chain an even number of stitches. Beginning in the first stitch from your hook, work a single crochet across the full length of the chain.
This gives you a sturdy base to build the bobble row on, so don’t skip straight to bobbles without it.
Step 2: Start the Bobble Row
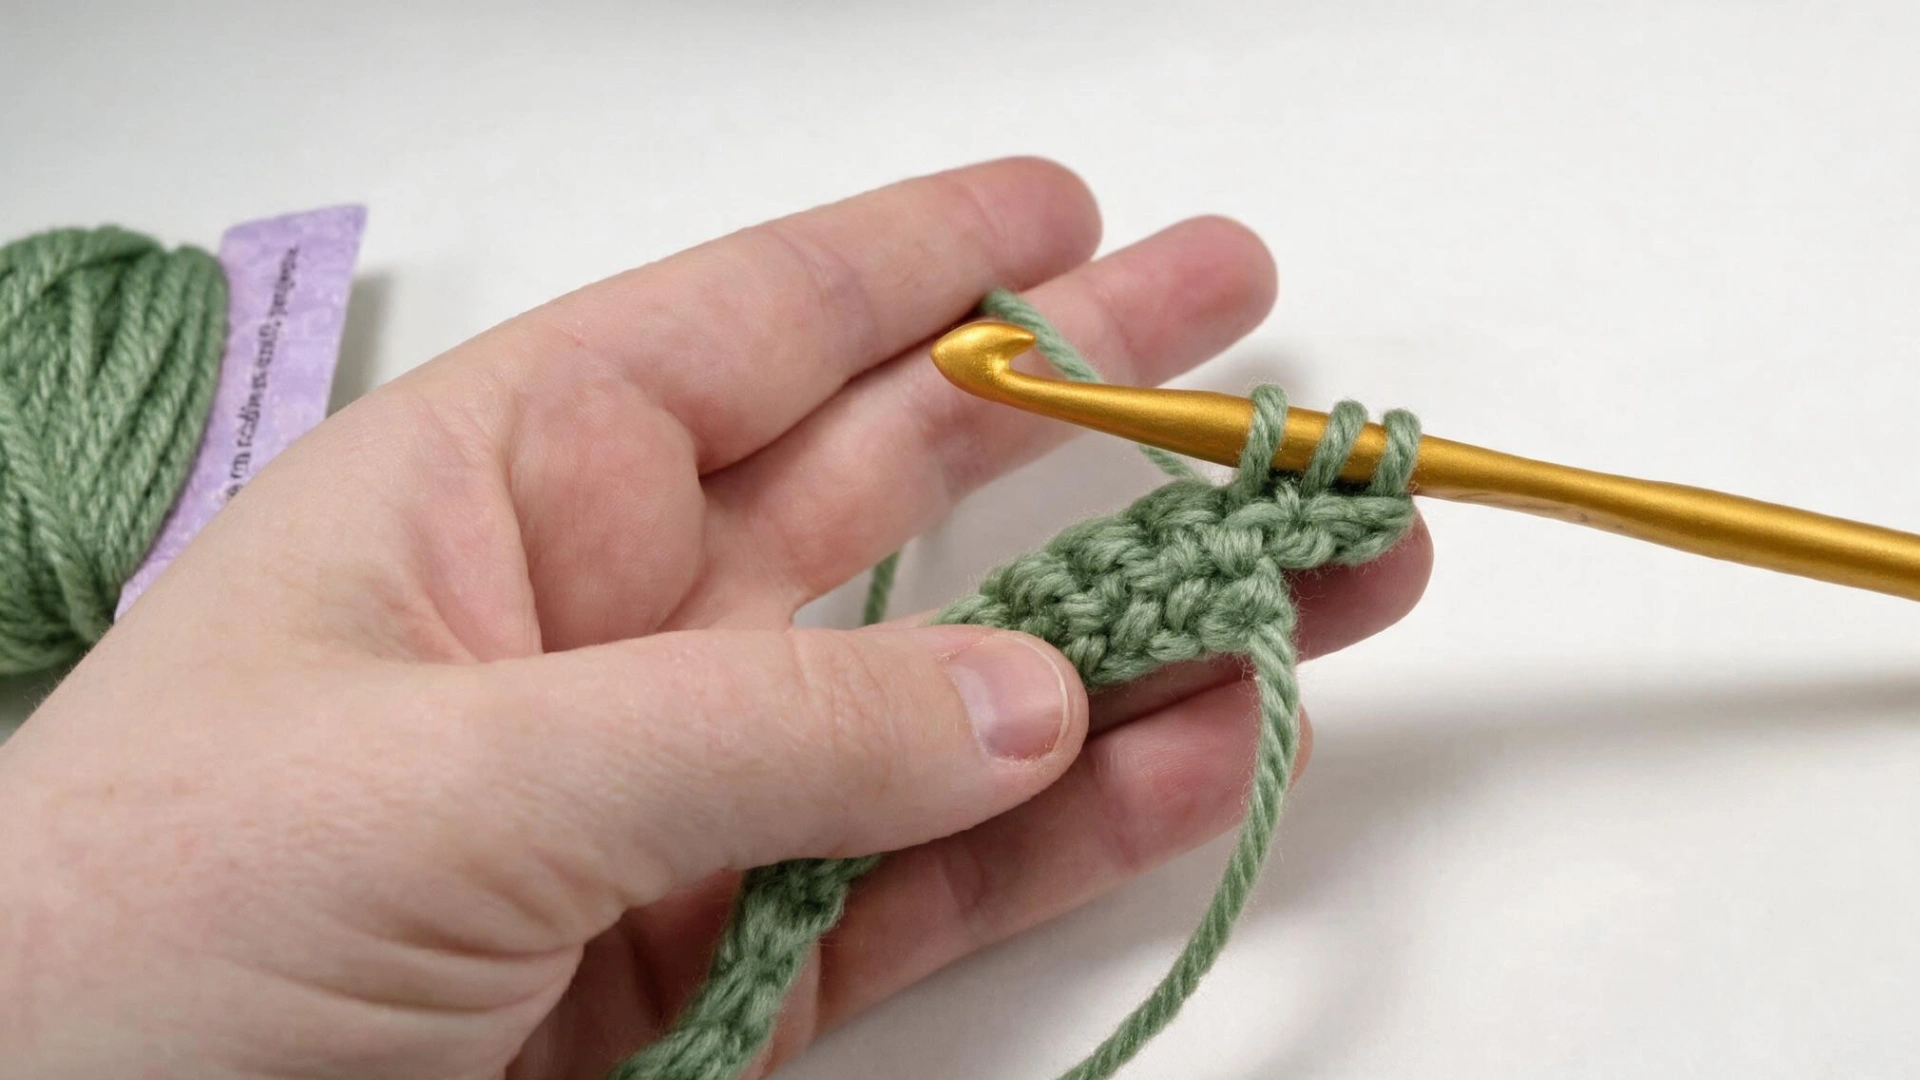
At the end of the row, chain three and turn your work.
Begin your first double crochet in the very first stitch, keeping in mind that the turning chain counts as the first stitch of the row.
This turning chain sets your row height and keeps the edge even.
Step 3: Leave the Double Crochet Unfinished
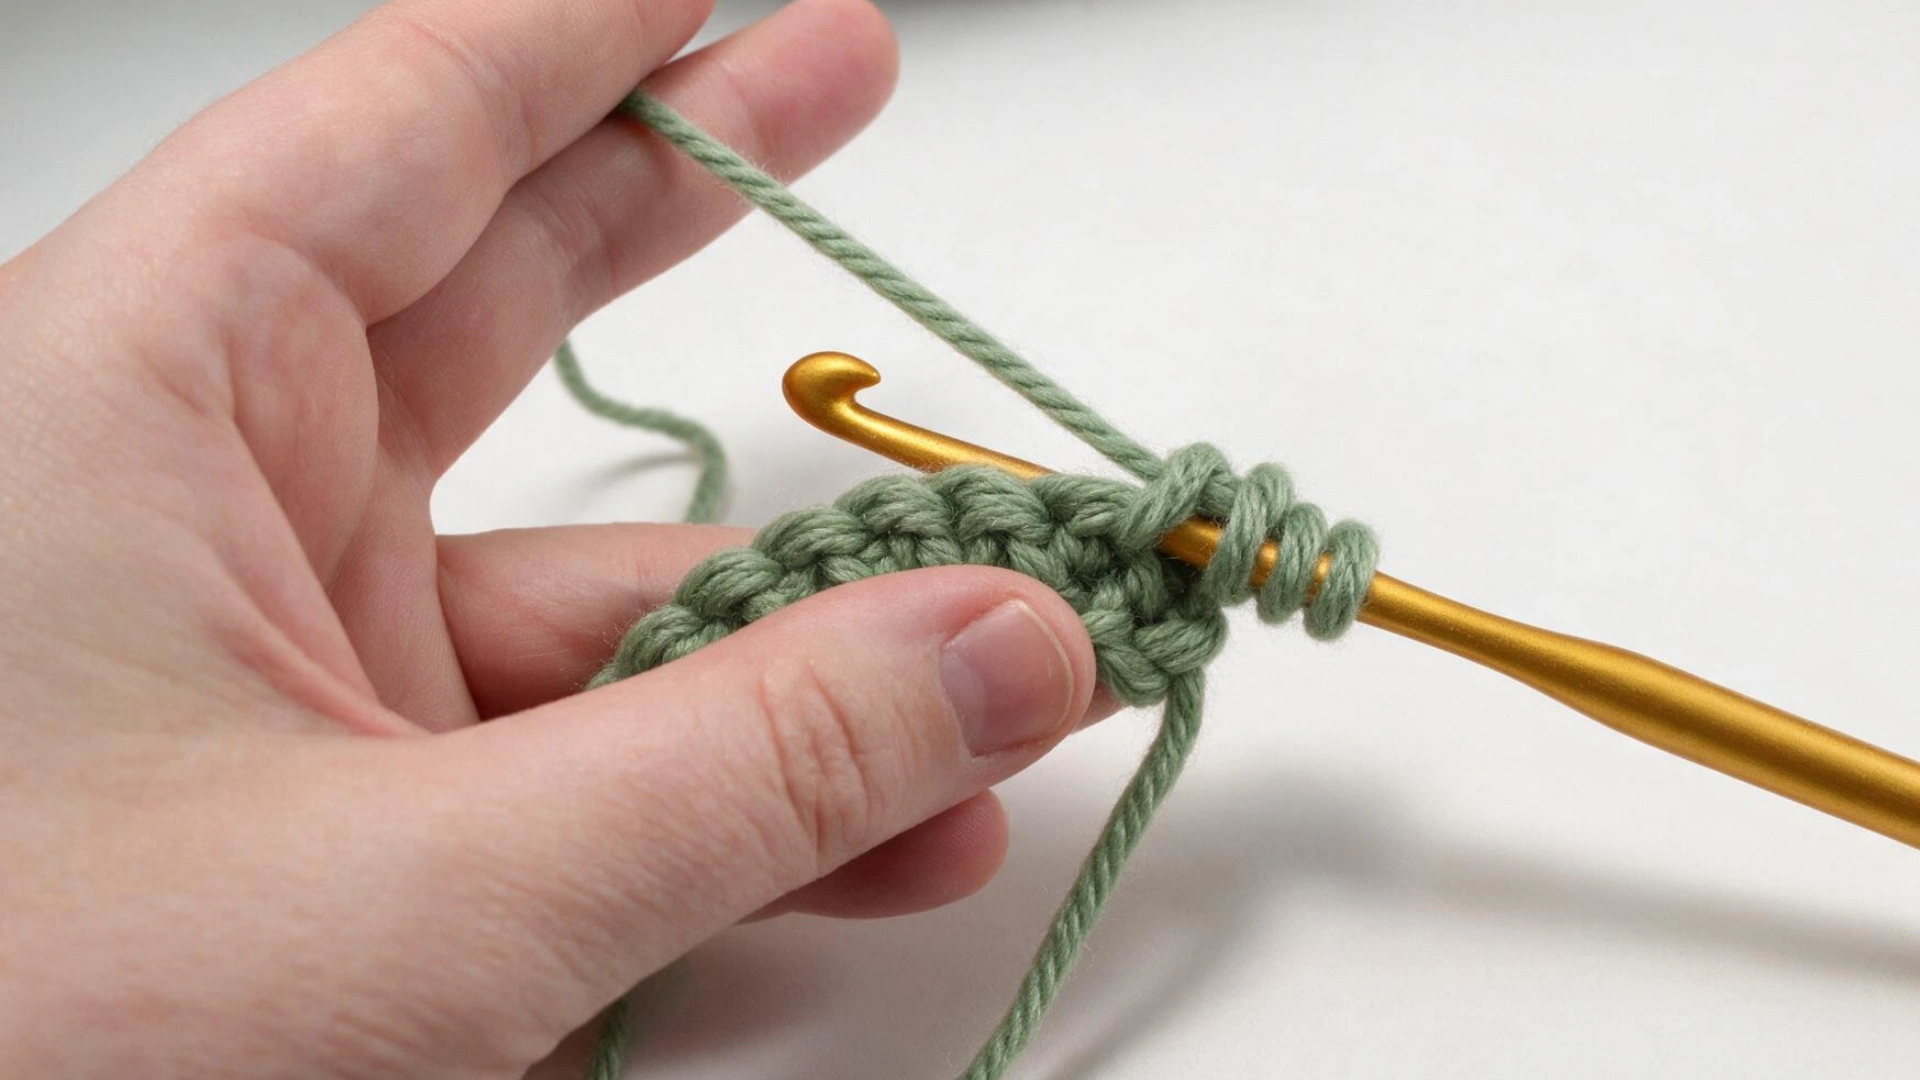
Yarn over, insert your hook into the stitch, and pull up a loop as usual.
Yarn over again, but this time pull through only the first two loops on your hook, leaving the stitch incomplete.
That unfinished loop is what lets the bobble build up instead of closing right away.
Step 4: Repeat in the Same Stitch
Work several more unfinished double crochets into that same stitch, pulling through just the first two loops each time.
Continue until you’ve built up five partial stitches in total, all sharing the same base without moving to a new spot.
Step 5: Check for Six Loops
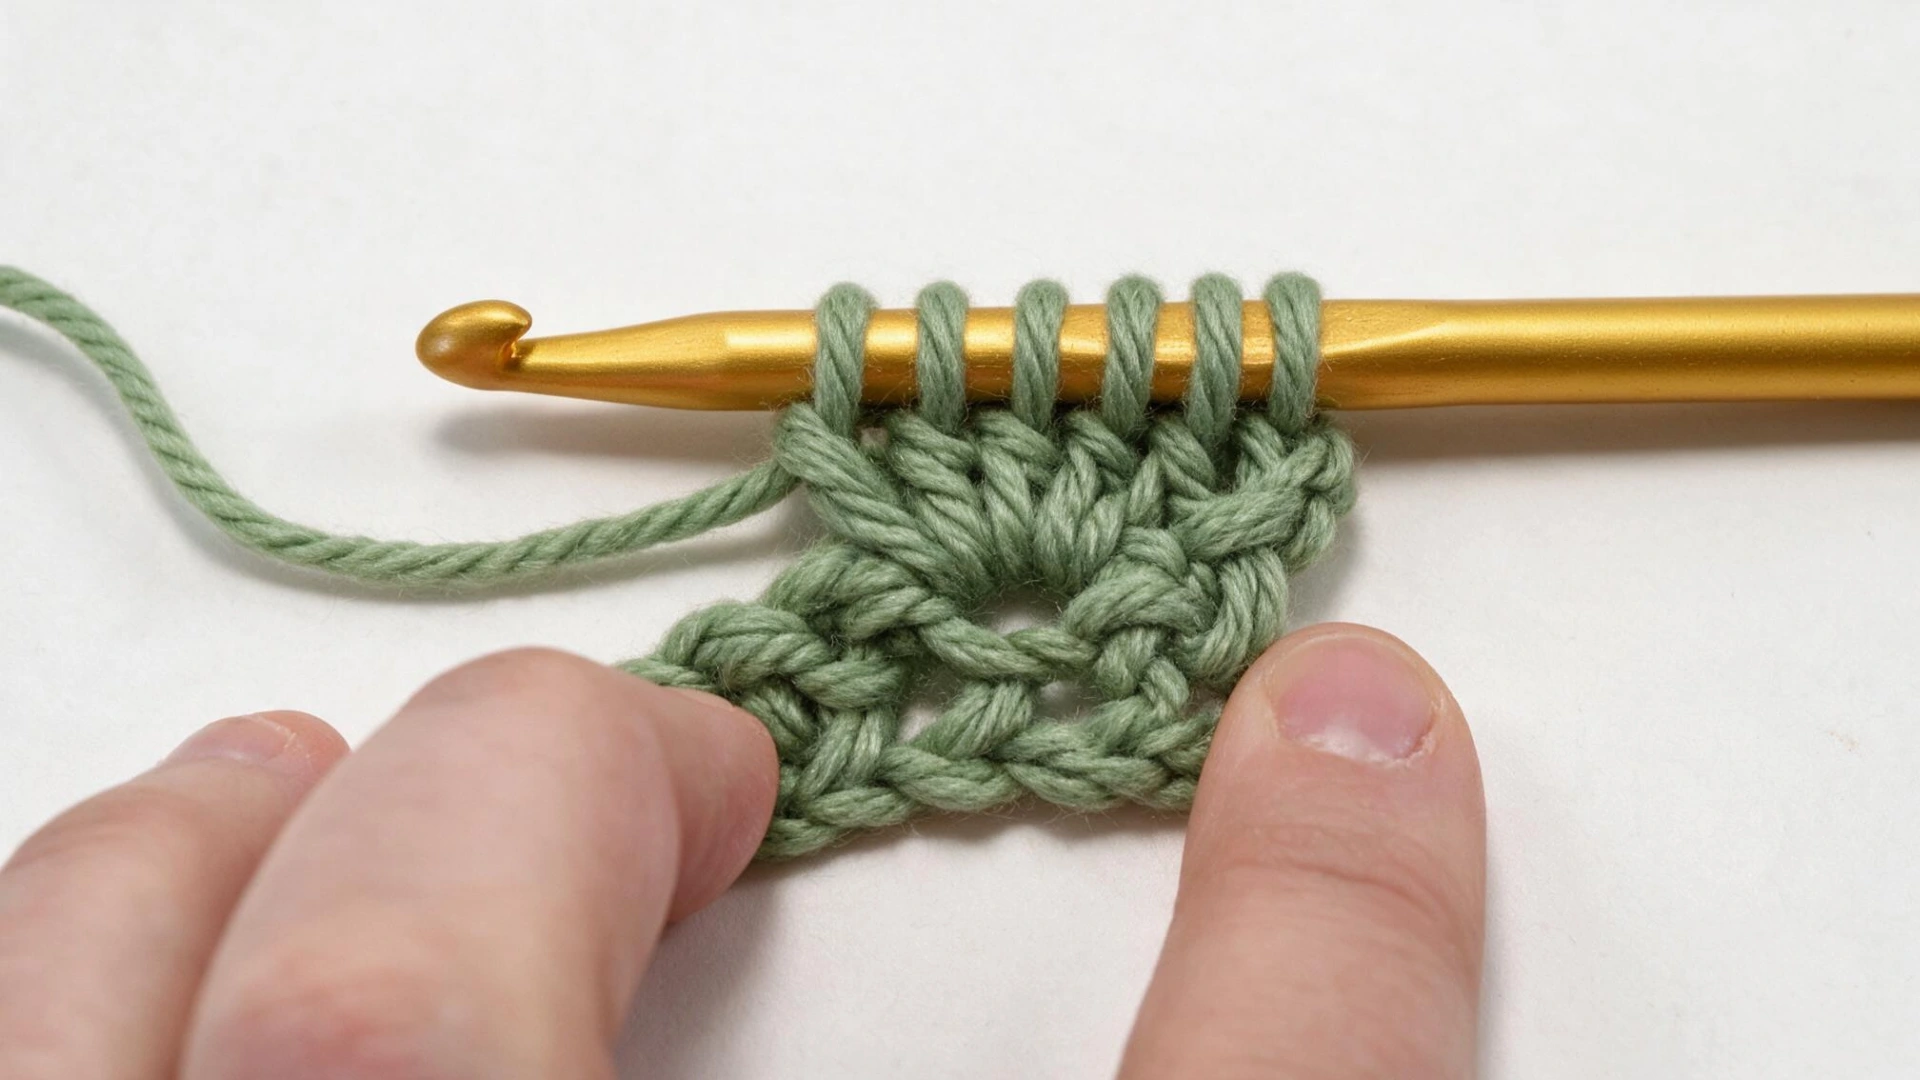
Pause and count the loops sitting on your hook.
You should see six altogether: your original working loop plus one from each of the five unfinished double crochets you just made.
This quick check catches mistakes before you close the stitch.
Step 6: Close the Bobble and Move On
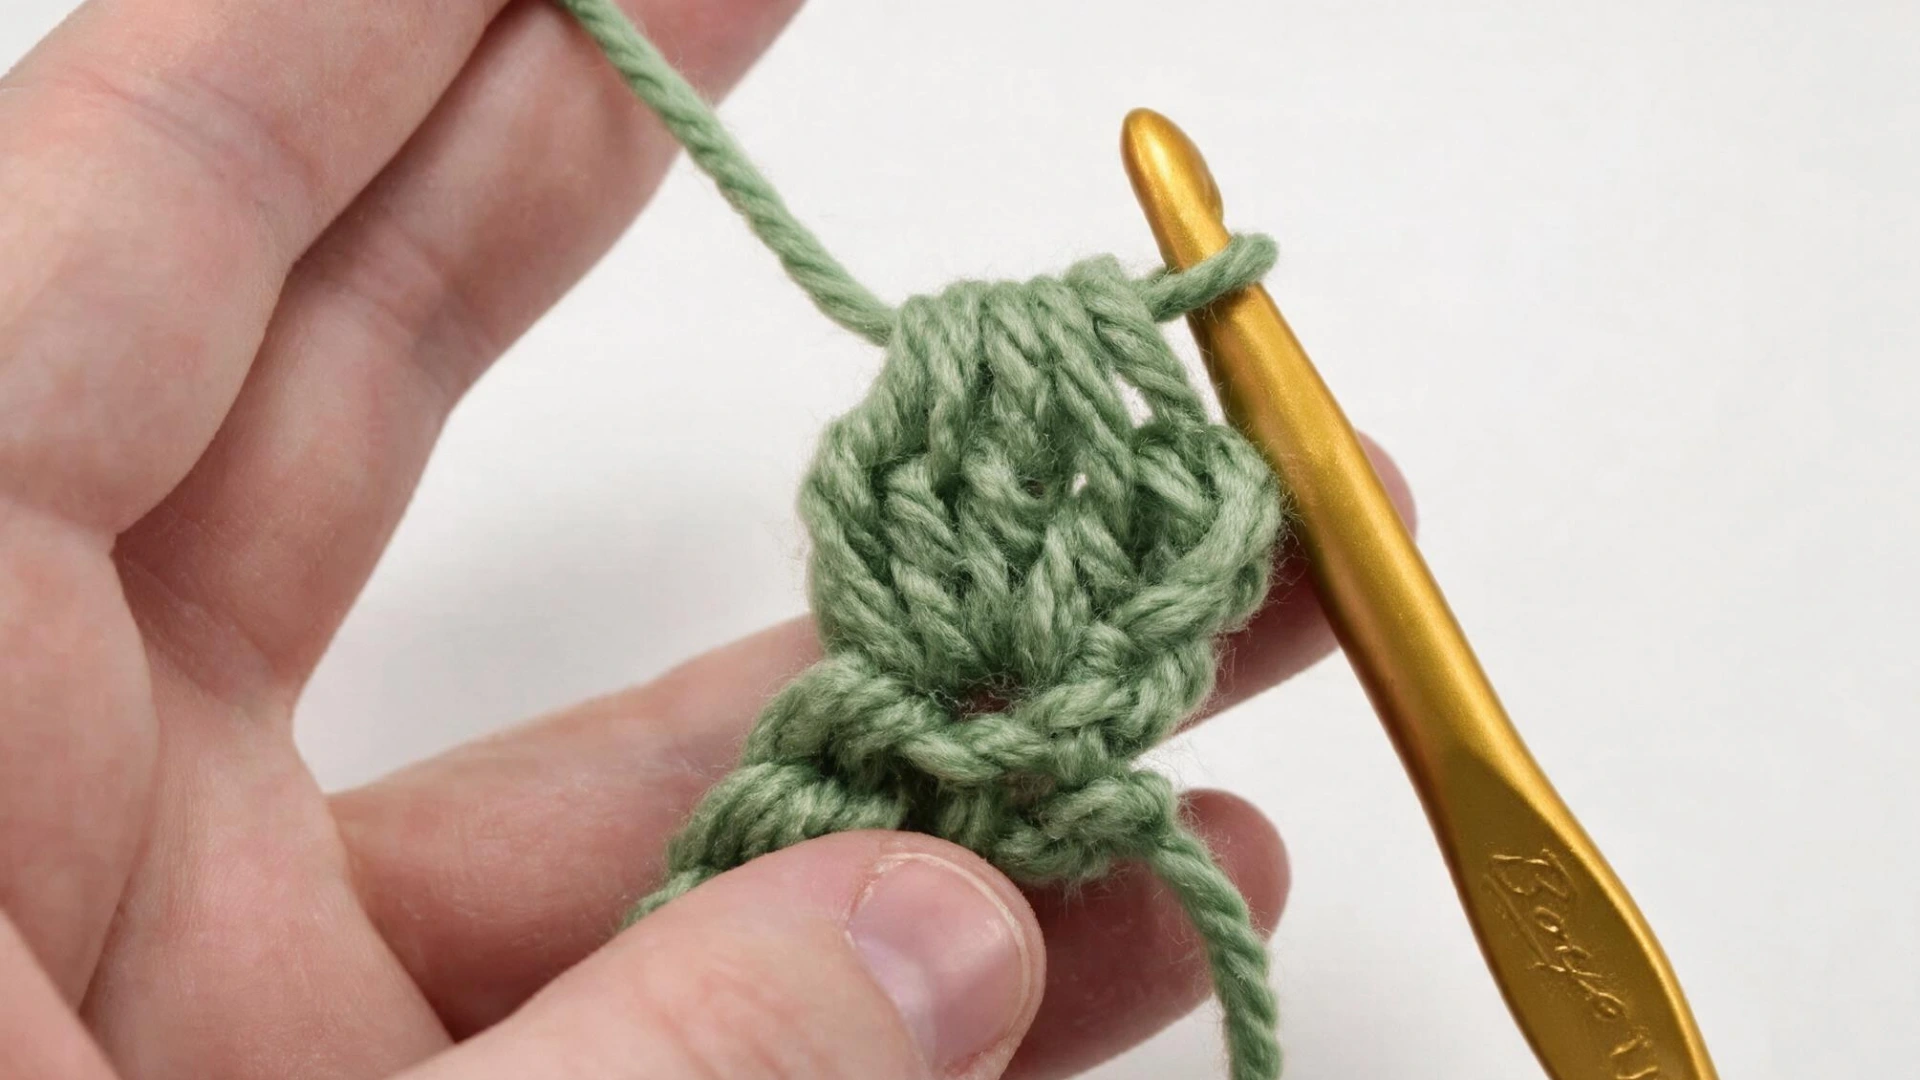
Yarn over once more and pull through all six loops, tightening gently so the stitches gather into a raised bobble.
Then work a single crochet in the next stitch to add space between bobbles and keep the fabric flat.
Step 7: Continue Across the Row
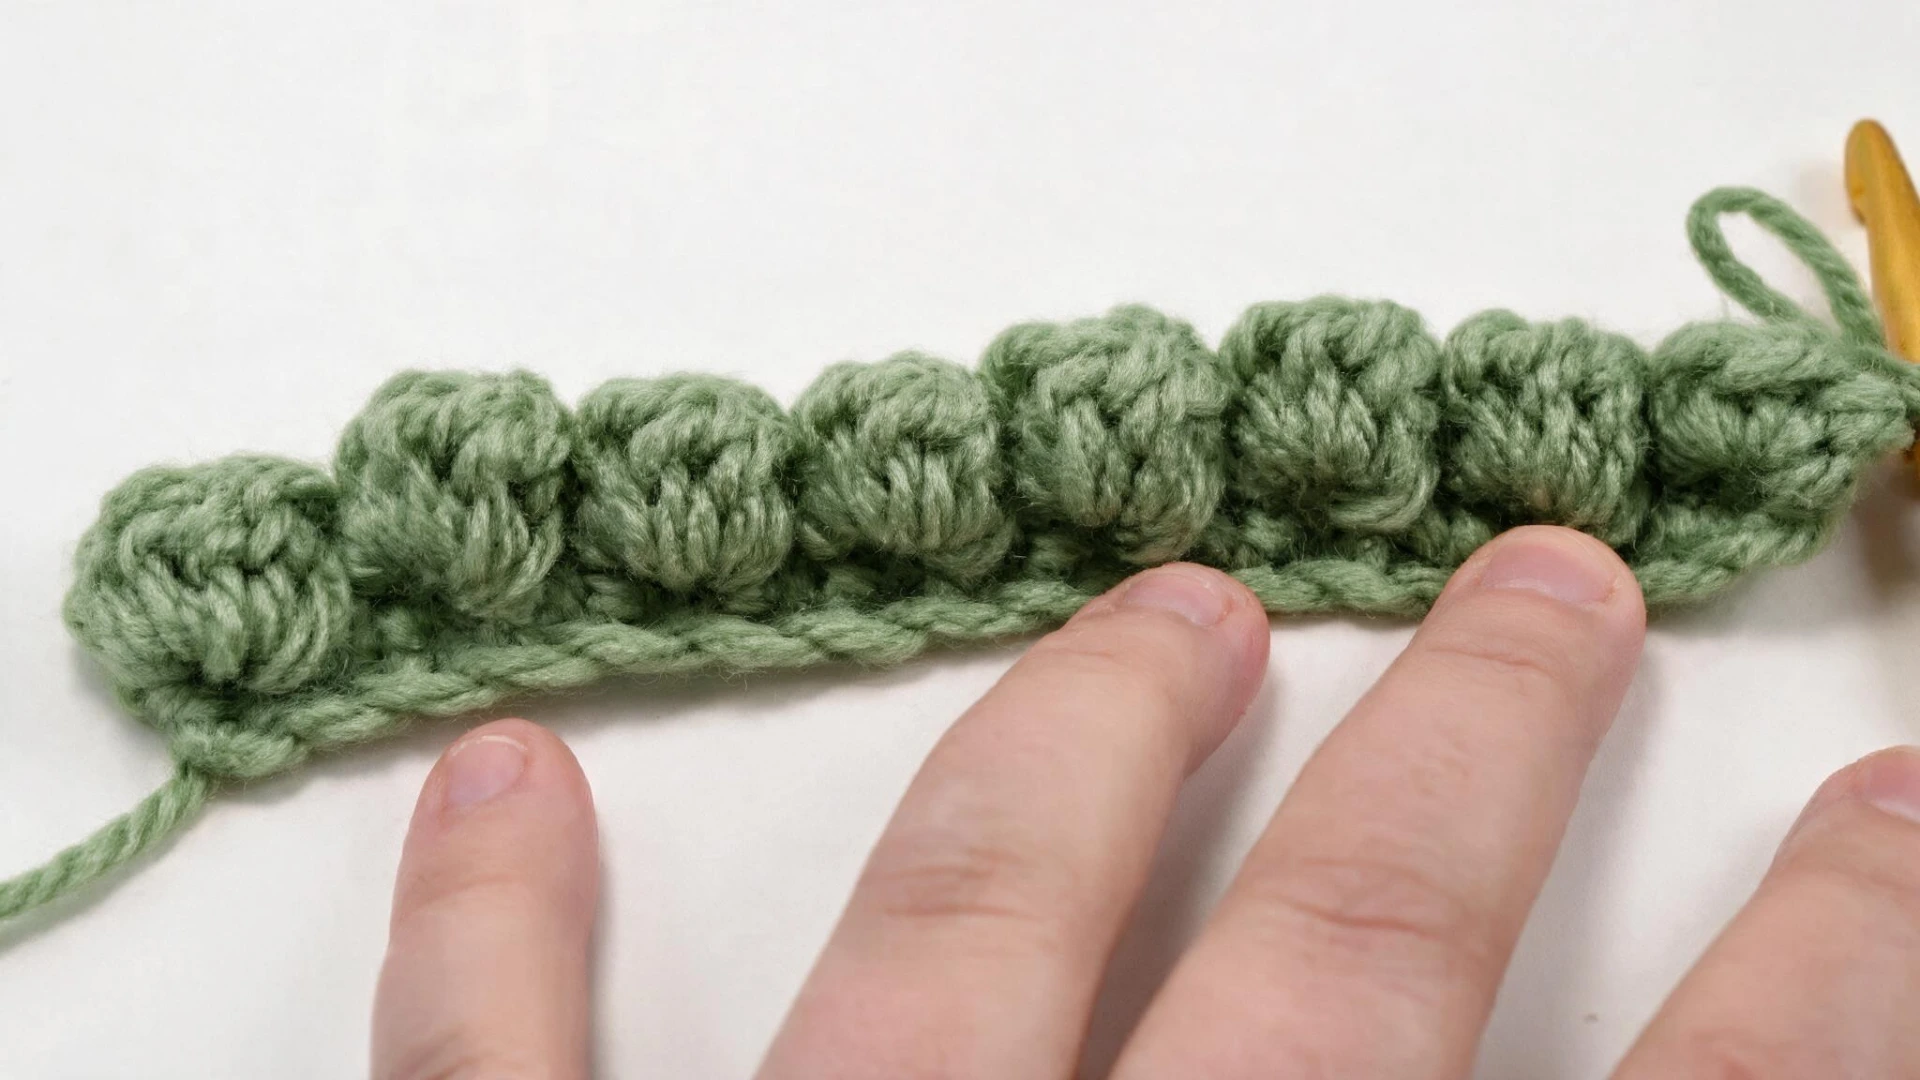
Work another five-loop bobble in the following stitch, then follow it with a single crochet.
Keep alternating between the two until you reach the end of the row, checking your tension periodically so the bumps stay consistent in size.
Crochet Bobble Stitch Variations
Once you’ve got the basic bobble down, the same technique bends in a few different directions depending on the look you’re after.
Changing the stitch count, the stitch type, or even the yarn color shifts the size and impact of the bump without touching the core method you already learned.
Three Double Crochet Bobble
The three-double-crochet bobble is built from three partial double crochets, giving a subtle bump that suits baby blankets and delicate garments.
Four Double Crochet Bobble
The four-double-crochet bobble is a middle-ground size, with five loops on the hook before closing. It adds texture without dominating the row.
Five Double Crochet Bobble
The five-double-crochet bobble is the default size, with six loops stacking up before closing to produce a bump that’s easy to see and feel.
Two-Color Bobble Stitch
For a two-color bobble, switch colors right before the final pull-through to land the bump in a contrasting shade against the background row.
Final Thoughts
All bobbles start with the same concept: piling up the stitches that aren’t yet finished in a certain area and closing them off all at once in a single move.
Once the basic movement feels natural, changing the size, switching colors, or spacing the bobbles differently is just a variation on what you already know.
It is best to practice on a small piece of crochet first before attempting an entire blanket or sweater panel.
Frequently Asked Questions
1. How Many Double Crochets Make a Bobble Stitch?
Most patterns use three, four, or five double crochets worked into the same stitch, with five being the most common default.
2. Is Bobble Stitch Crochet Difficult for Beginners?
Not if you already know double crochet. The main challenge is keeping loops from twisting on the hook, which gets easier after a few practice bobbles.
3. Why are My Crochet Bobbles Not Popping Out?
Usually the surrounding stitches are too loose, or the bobble was worked on the wrong side. Tighten tension and push the bump forward with a finger.
4. Does Bobble Stitch use More Yarn?
Yes. Packing several stitches into one spot uses more yarn than plain rows of the same size.