Every crocheter starts somewhere, and most beginners stumble on their first stitch.
Slip stitch crochet often gets skipped in early lessons, yet it holds an entire project together. This simple stitch joins rounds, finishes edges neatly, and rescues dropped loops in seconds.
Once learned, it turns messy edges into clean, finished work. No fancy tools are needed, just a hook, some yarn, and a few spare minutes.
Beginners who master this stitch gain more confidence with every new pattern they try. The steps ahead break the process into small, easy pieces. Grab a hook and some yarn, and get started right away.
What is a Slip Stitch?
The slip stitch is the shortest and the easiest stitch of crochet. This stitch adds little height compared to other stitches.
Crochet makers usually use this stitch to join rounds and move from one stitch to another without increasing thickness. It is also suitable for finishing seams and edges.
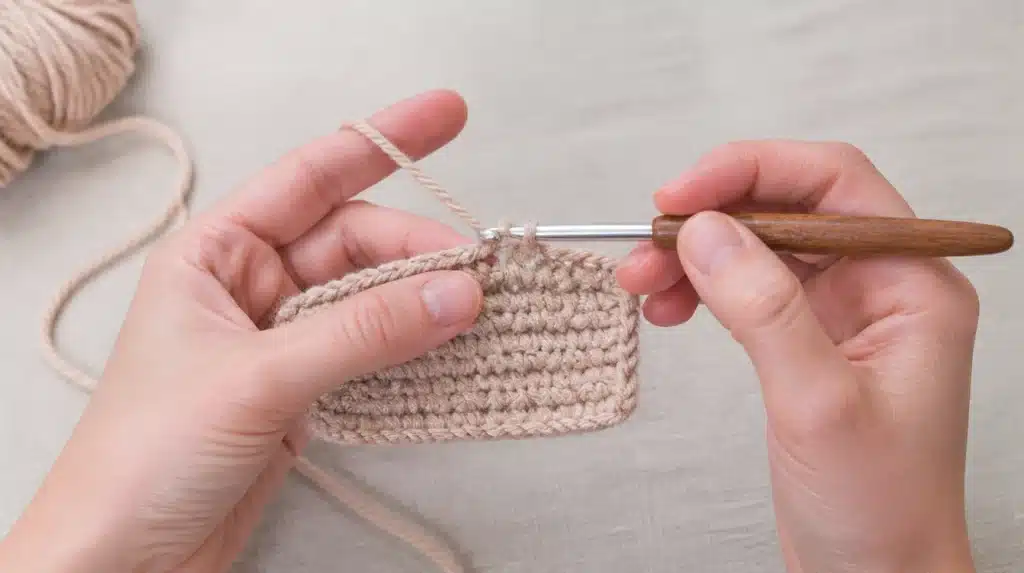
A slip stitch can be made by inserting a hook in the stitch, making a yarn over, and pulling out the yarn through both the stitch and the loop.
It is also used in many patterns for joining the end of a round to its beginning stitch.
Tools Required
Pre-checklist before starting with the yarn:
- Crochet Hook: Any hook will do, although medium-sized hooks (4mm-5mm) are ideal for beginners.
- Yarn: Smooth medium yarn makes the stitches visible and easy to hold.
- Scissors: Necessary for cutting the ends of the yarn after completing a stitch or round.
- Yarn Needle: Helpful in weaving the loose ends once the practice piece is completed.
- Stitch Markers: To mark the first stitch when making a round.
- Proper Lighting: For better visibility of each loop.
How to Slip Stitch Crochet: Step by Step
Learning crochet becomes easy with clear, small steps. Each stage builds smoothly on the last.
Step 1: Start With a Slip Knot
Begin by tying a slip knot and securing it on your hook. You want to ensure that it isn’t too tight or too loose.
It should be comfortably tight and slide easily along your hook. This loop is the foundation for every stitch that follows, so getting its tension right matters.
Step 2: Insert the Hook
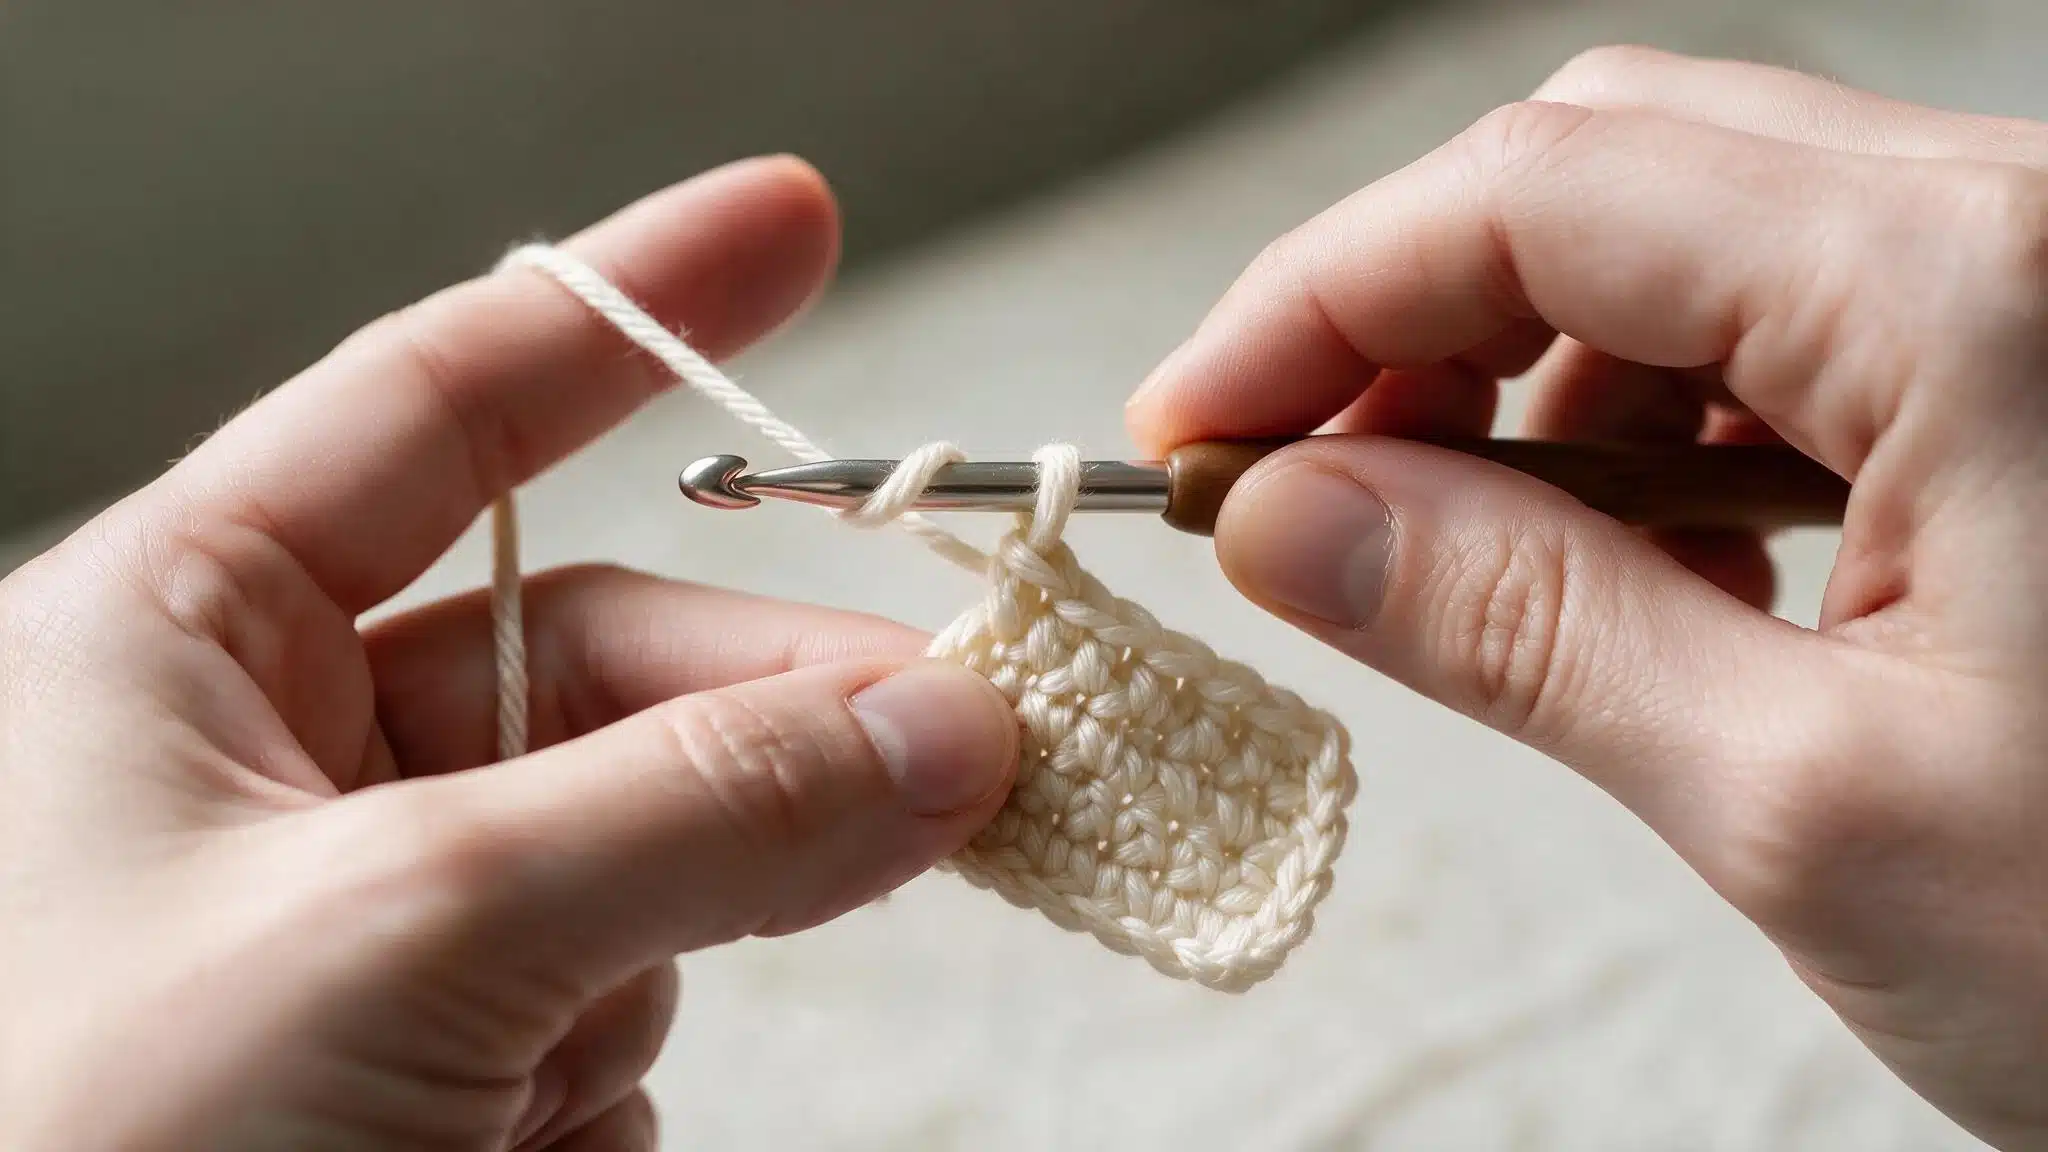
Move the hook in the next stitch under both top loops. This is the right grip to maintain the stitch intact.
Beginners often take only one of the loops, which changes the stitch’s design. That is why pay attention to taking both of the loops while creating a row of stitches.
Step 3: Yarn Over the Hook
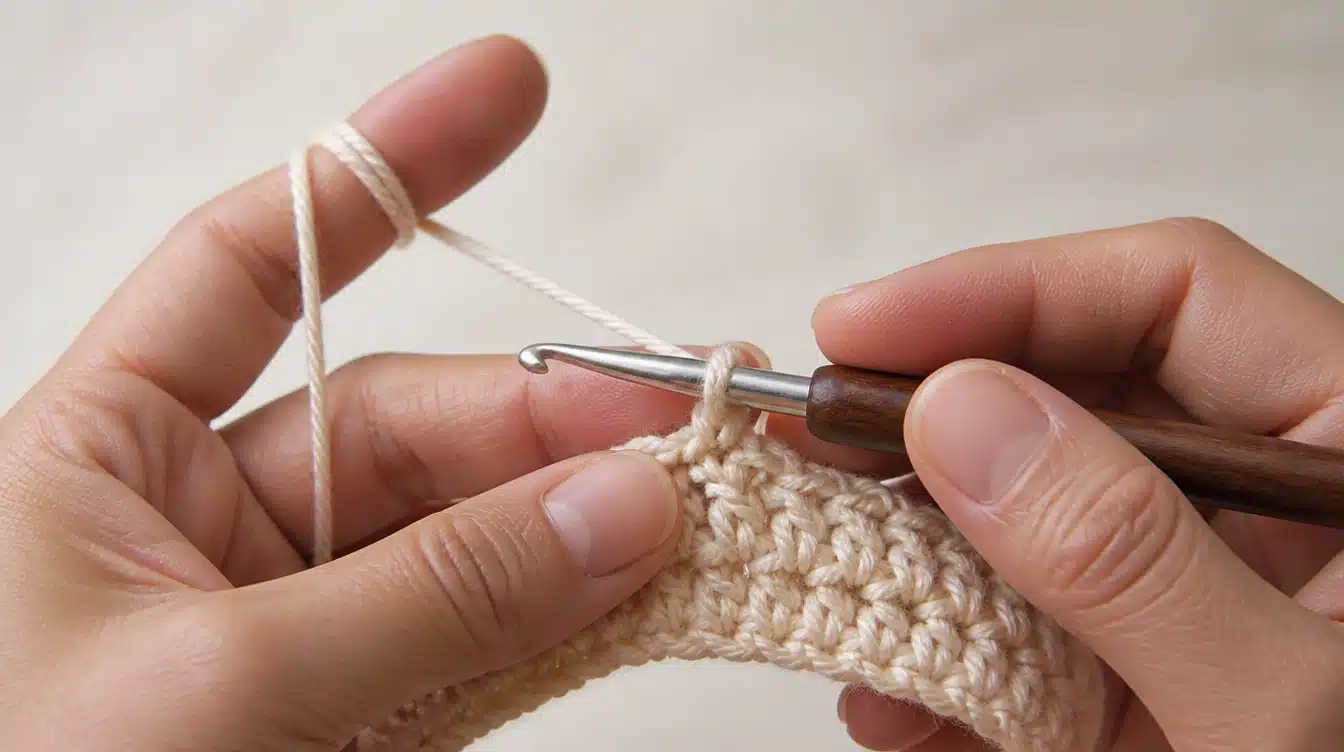
Now hold the yarn behind the hook and make a loop over it such that the yarn ends up lying on the hook.
The yarn is now positioned for the next step. Now hold the yarn firmly, but not too tightly.
Step 4: Pull Through Both Loops
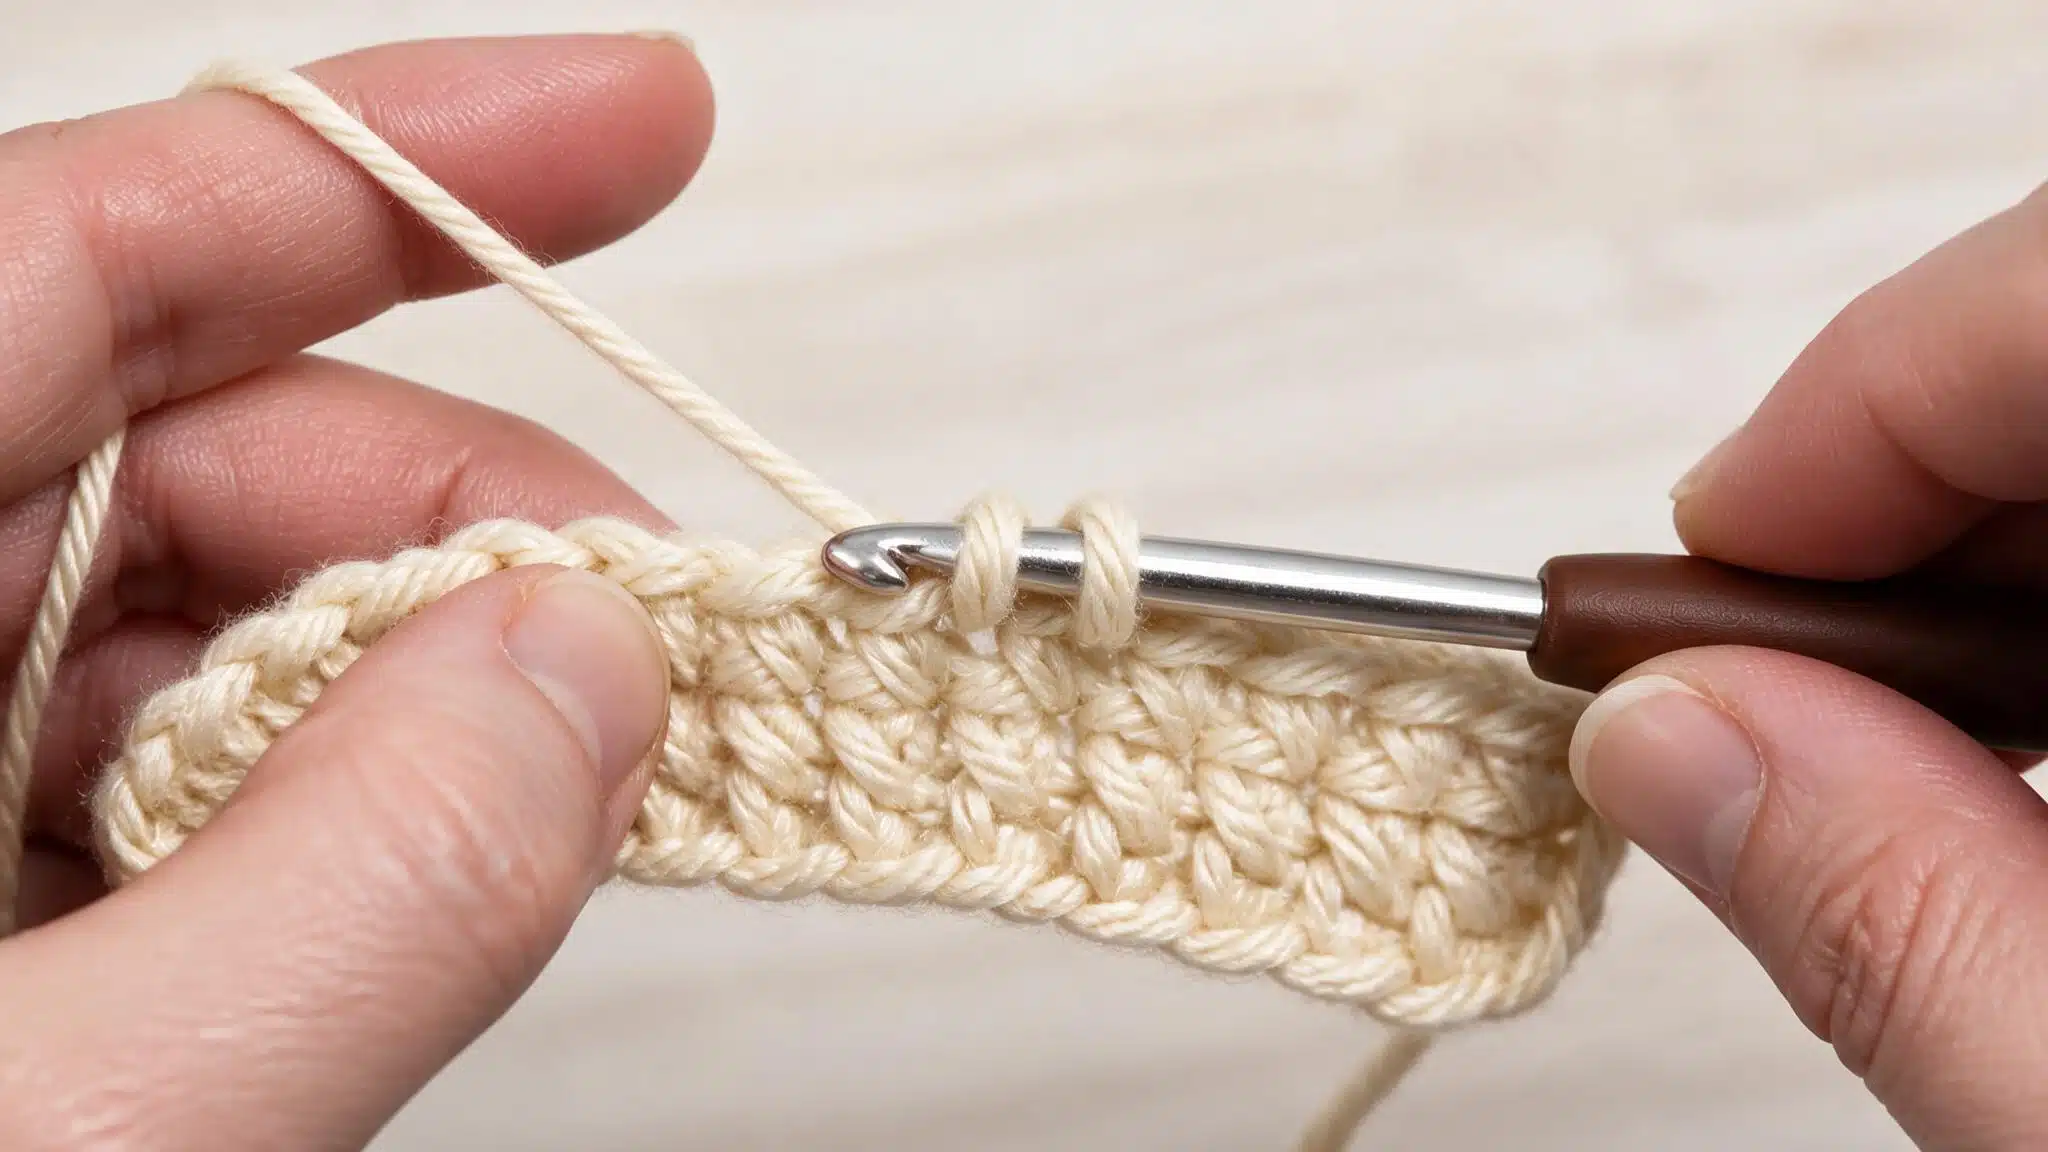
Take the yarn that is already wrapped and pass it through both the stitch and the loop on the hook. This completes the slip stitch move.
In this case, your hook is holding the one loop once again, thus enabling you to start making the next stitch in the current row or round.
Step 5: Repeat Across the Row
Repeat this step throughout the row by inserting the hook, yarn over, and pulling the yarn through each stitch one after the other.
Maintain consistent tension throughout the process to ensure an even finish at the end.
How to Join Crochet Squares Using Slip Stitch Crochet?
Joining squares together often feels tricky for beginners, but slip stitch makes it simple.
This technique creates a flat and strong seam between two items. It is ideal for use in blankets, pillows, and granny squares. The good thing about this join is that it doesn’t add any extra bulk.
This is how to join two crochet squares using slip stitch:
- Line up the Squares: Place both squares side by side with edges matching and right sides facing.
- Insert the Hook: Push the hook through the corresponding stitch on both squares at once.
- Yarn Over and Pull Through: Wrap the yarn over the hook, then pull it through both loops together.
- Move to the Next Stitch: Insert the hook into the next matching stitch pair along the edge.
- Repeat Until the Edge is Joined: Continue the same motion across the entire seam line.
- Fasten off Securely: Once the edge is complete, cut the yarn and pull it through the last loop.
Where are Slip Stitches Used?
The slip stitch can be found throughout the project in several instances.
First, the crocheter may use it to travel from side to side within a row without raising the height to make a new section in a particular spot.
Another purpose of this stitch is that it connects the final stitch of the round to the first one, making it a neat circle instead of a spiral.
Besides joining, this technique is quite useful for finishing a piece. A row of slip stitches helps an edge look neater without increasing its thickness.
Sometimes, crocheters use it to connect two pieces together (such as a square or panel) into one whole piece. This crochet stitch is helpful. It may not catch your eye on its own, but most patterns use this stitch somehow.
Crochet Slip Stitch Variations
Slip crochet isn’t always done the same way. Changing where you place the hook can create different textures and finishes.
1. Back Loop Slip Stitch
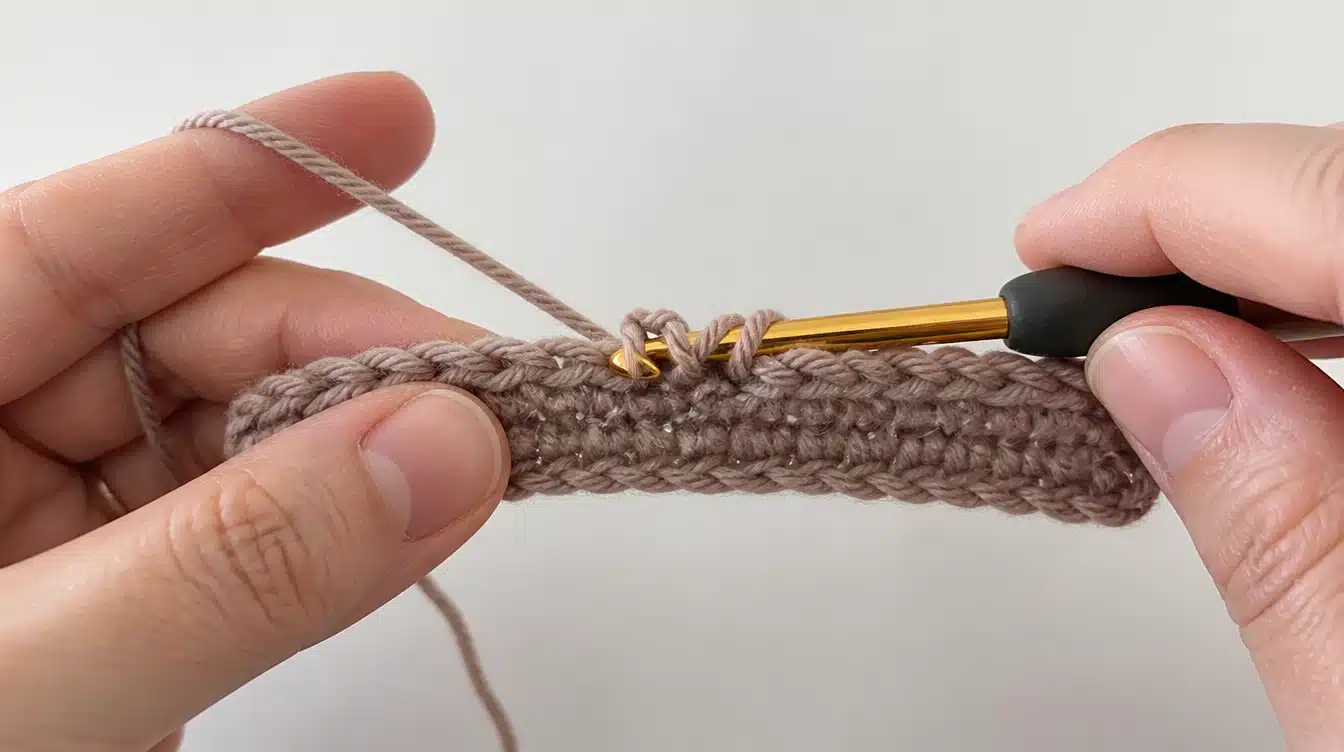
This variation inserts the hook only through the back loop of each stitch, leaving the front loop untouched. It creates a slight ridge across the fabric.
Crocheters often use this method for ribbed edges or textured borders. The extra ridge adds a subtle detail without changing the stitch height.
2. Front Loop Slip Stitch
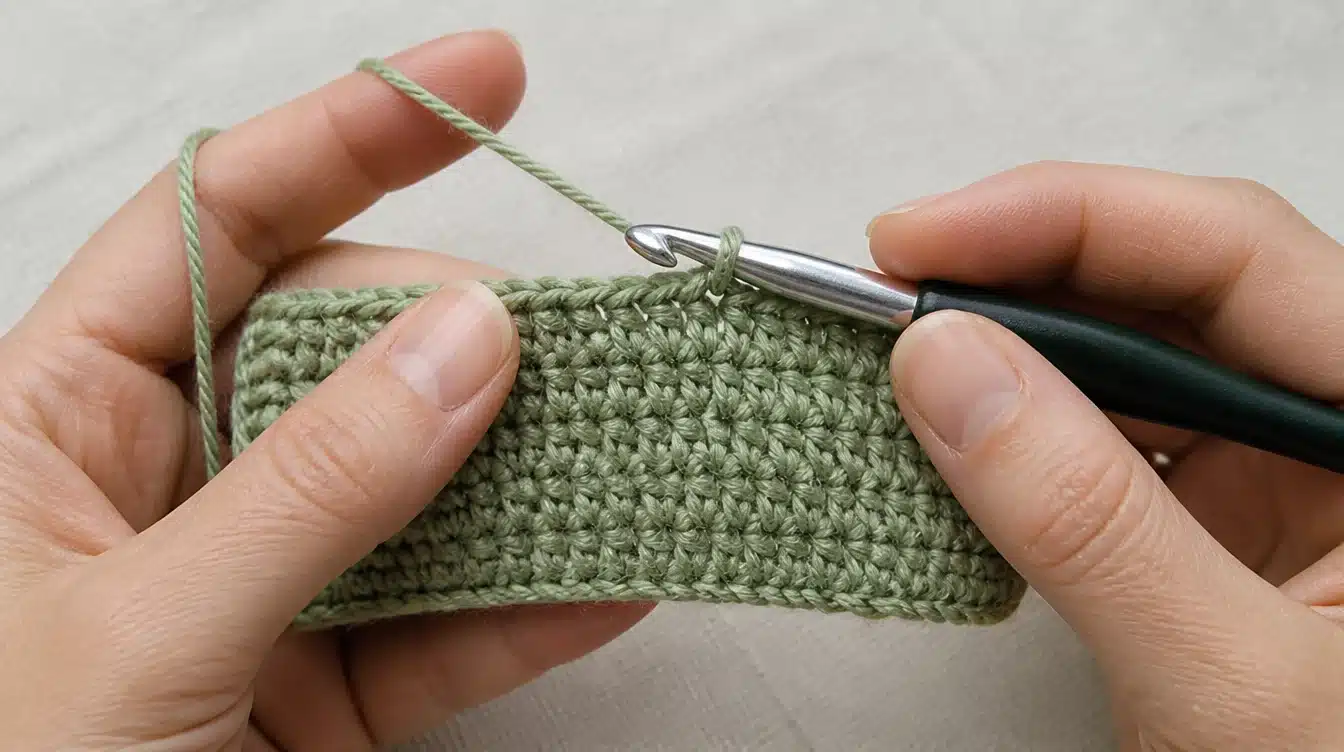
Here, the hook goes through only the front loop of the stitch. This leaves the back loop free, forming a raised line on the opposite side.
It gives a smoother finish than the back-loop version. Many use it for decorative surface lines or subtle pattern accents.
3. Surface Slip Stitch
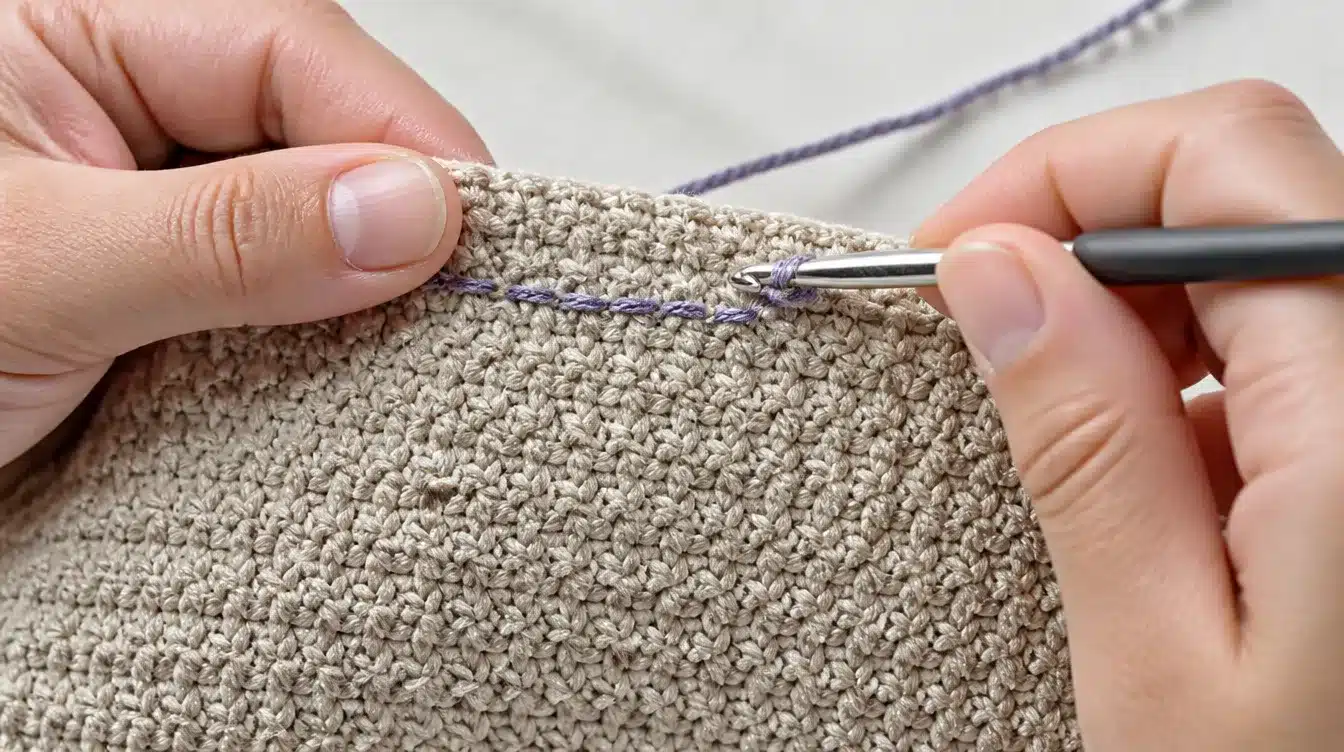
This method works on top of finished fabric rather than during the main row. The hook pulls loops through existing stitches to form lines or shapes.
Crocheters use it to add designs, letters, or borders onto a completed piece without redoing the whole project.
4. Slip Stitch Crochet Ribbing
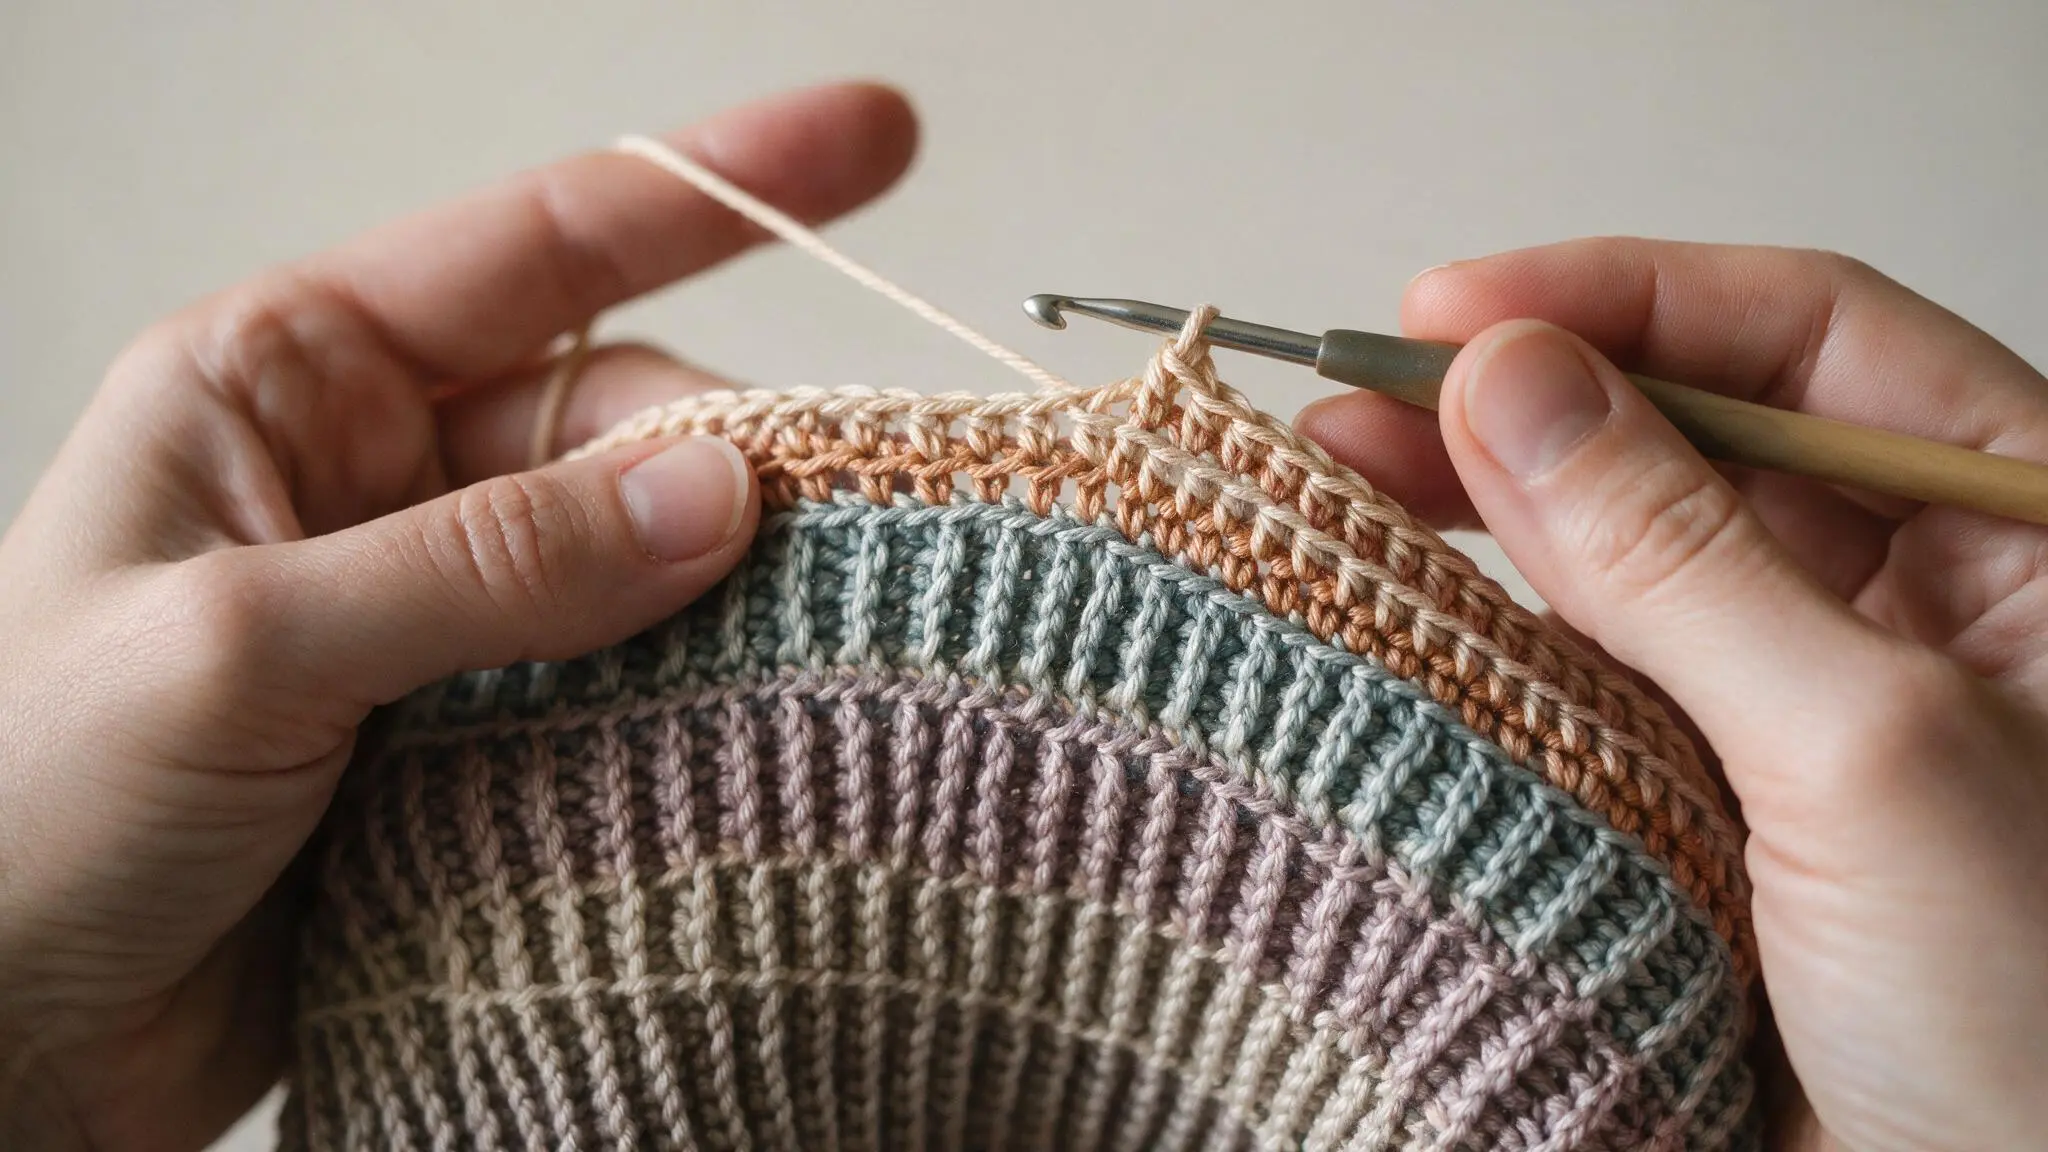
This technique works through the back loop repeatedly across many rows, creating stretchy, ridged fabric. It resembles knitted ribbing in appearance and feel.
Many crocheters use this method for hats, cuffs, and waistbands that need a snug, flexible fit.
Slip Stitch Crochet vs Single Crochet
Both stitches look similar at first glance, but they serve different purposes. Knowing the difference helps beginners pick the right stitch for each task.
| Feature | Slip Stitch Crochet | Single Crochet |
|---|---|---|
| Height Added | Almost none | Short, noticeable height |
| Main Purpose | Joining, moving across stitches | Building fabric and texture |
| Number of Loops on Hook | One loop at a time | Two loops before final pull |
| Common Use | Edges, seams, closing rounds | Blankets, amigurumi, garments |
| Speed to Work | Very fast | Slower than slip stitch |
Conclusion
Slip stitch crochet turns out to be one of the easiest skills a beginner can pick up. It joins rounds, finishes edges, and connects squares without any fuss.
Once the hand gets used to the motion, the stitch becomes almost automatic.
This small stitch carries a lot of weight in crochet work. It holds seams together, keeps borders neat, and links pieces into bigger projects.
Every crocheter, new or experienced, ends up using it somewhere along the way. Grab a hook, pick some yarn, and try crochet today. A little practice now saves a lot of trouble later.
Frequently Asked Questions (FAQs)
1. What is a Slip Knot in Crochet?
A slip knot is the first loop placed on the hook. It anchors the yarn before you begin stitching.
2. How to do a Slip Stitch in a Crochet Chain?
Insert the hook into a chain stitch, yarn over, then pull through both loops in one motion.
3. Does Slip Stitch Count as a Stitch?
Yes, it counts as a stitch, though it adds little height compared to other crochet stitches.