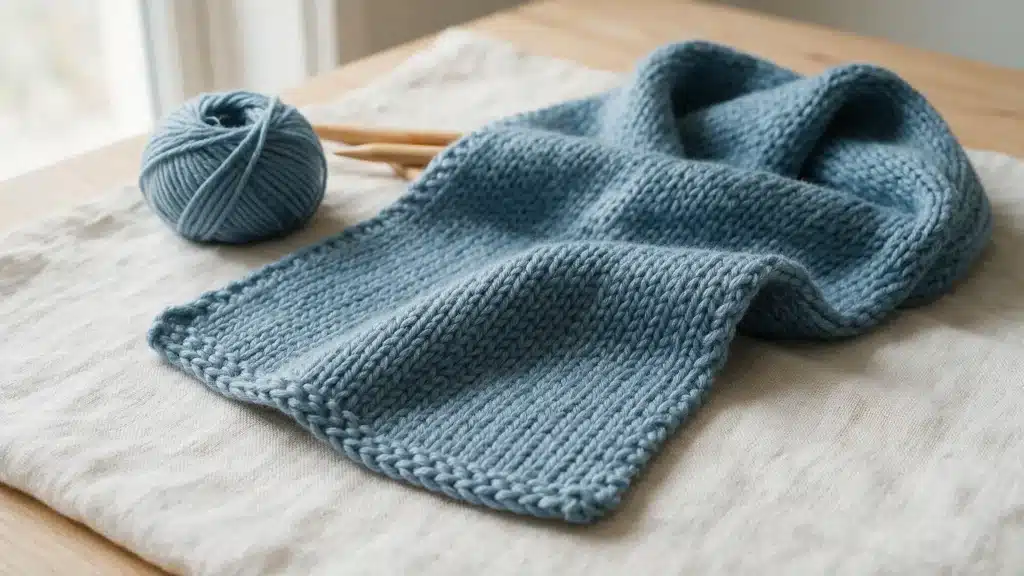
Finishing a knitting project comes down to one final skill: casting off.
It’s the step that locks your stitches in place, so your work doesn’t unravel the moment it comes off the needles.
Whether you’re wrapping up a scarf, a hat, or your very first swatch, this last row seals everything you’ve knitted so far into a piece that actually holds together.
It can feel fiddly the first time you try it, but the motion is simple once it clicks. This blog walks through the basic technique step by step, plus a few variations for different edges.
What Does Cast Off Mean in Knitting?
Casting off is the technique used to finish a row of knitting so the stitches stay secure once they’re off the needle.
Without it, your last row would simply slide loose, and the whole piece would unravel from the top down, stitch by stitch.
The process works by lifting each stitch up and over the one next to it, one at a time, until a single loop remains on your needle.
This creates a neat, sealed edge across the top or bottom of your piece that holds its shape over time and through repeated wear or washing.
It’s typically the very last step in a project, done once all your rows of knitting are fully complete.
What You Need to Cast Off
You only need a few basic items to cast off your knitting:
- Your knitted piece with live stitches still on the needle.
- The knitting needles you used for the project.
- Working yarn
- Scissors
- A yarn or tapestry needle for weaving in the loose end.
How to Cast Off Knitting?
Now that you know what casting off does, here is how to actually do it.
This standard method uses nothing but basic knit stitches and a simple lift-and-pass motion, worked one stitch at a time across the row.
Follow each part in order, and by the end you’ll have a finished edge ready to come off the needles for good.
Step 1: Knit the First Two Stitches
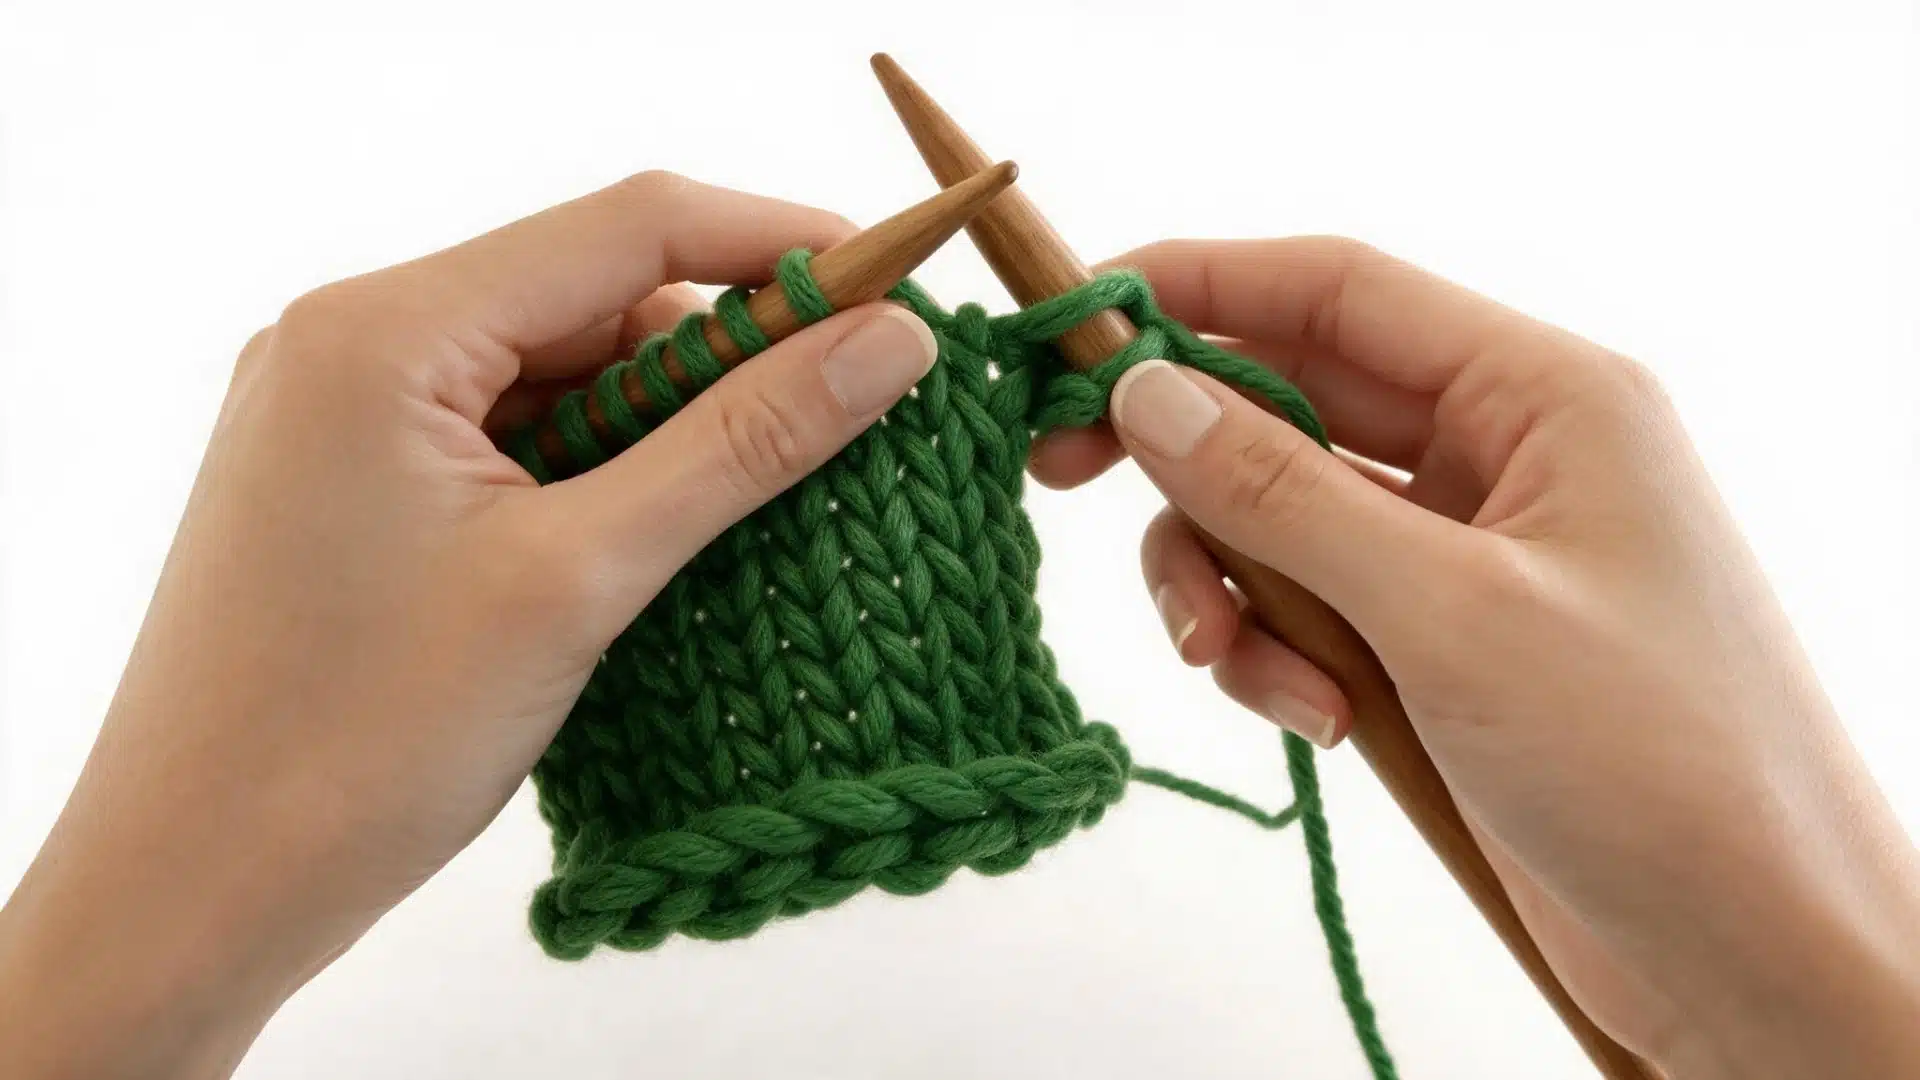
Start by knitting as you normally would to create two stitches on your right-hand needle.
These two stitches are what you’ll use to begin the cast-off sequence before you move on to the next step.
Step 2: Lift the First Stitch
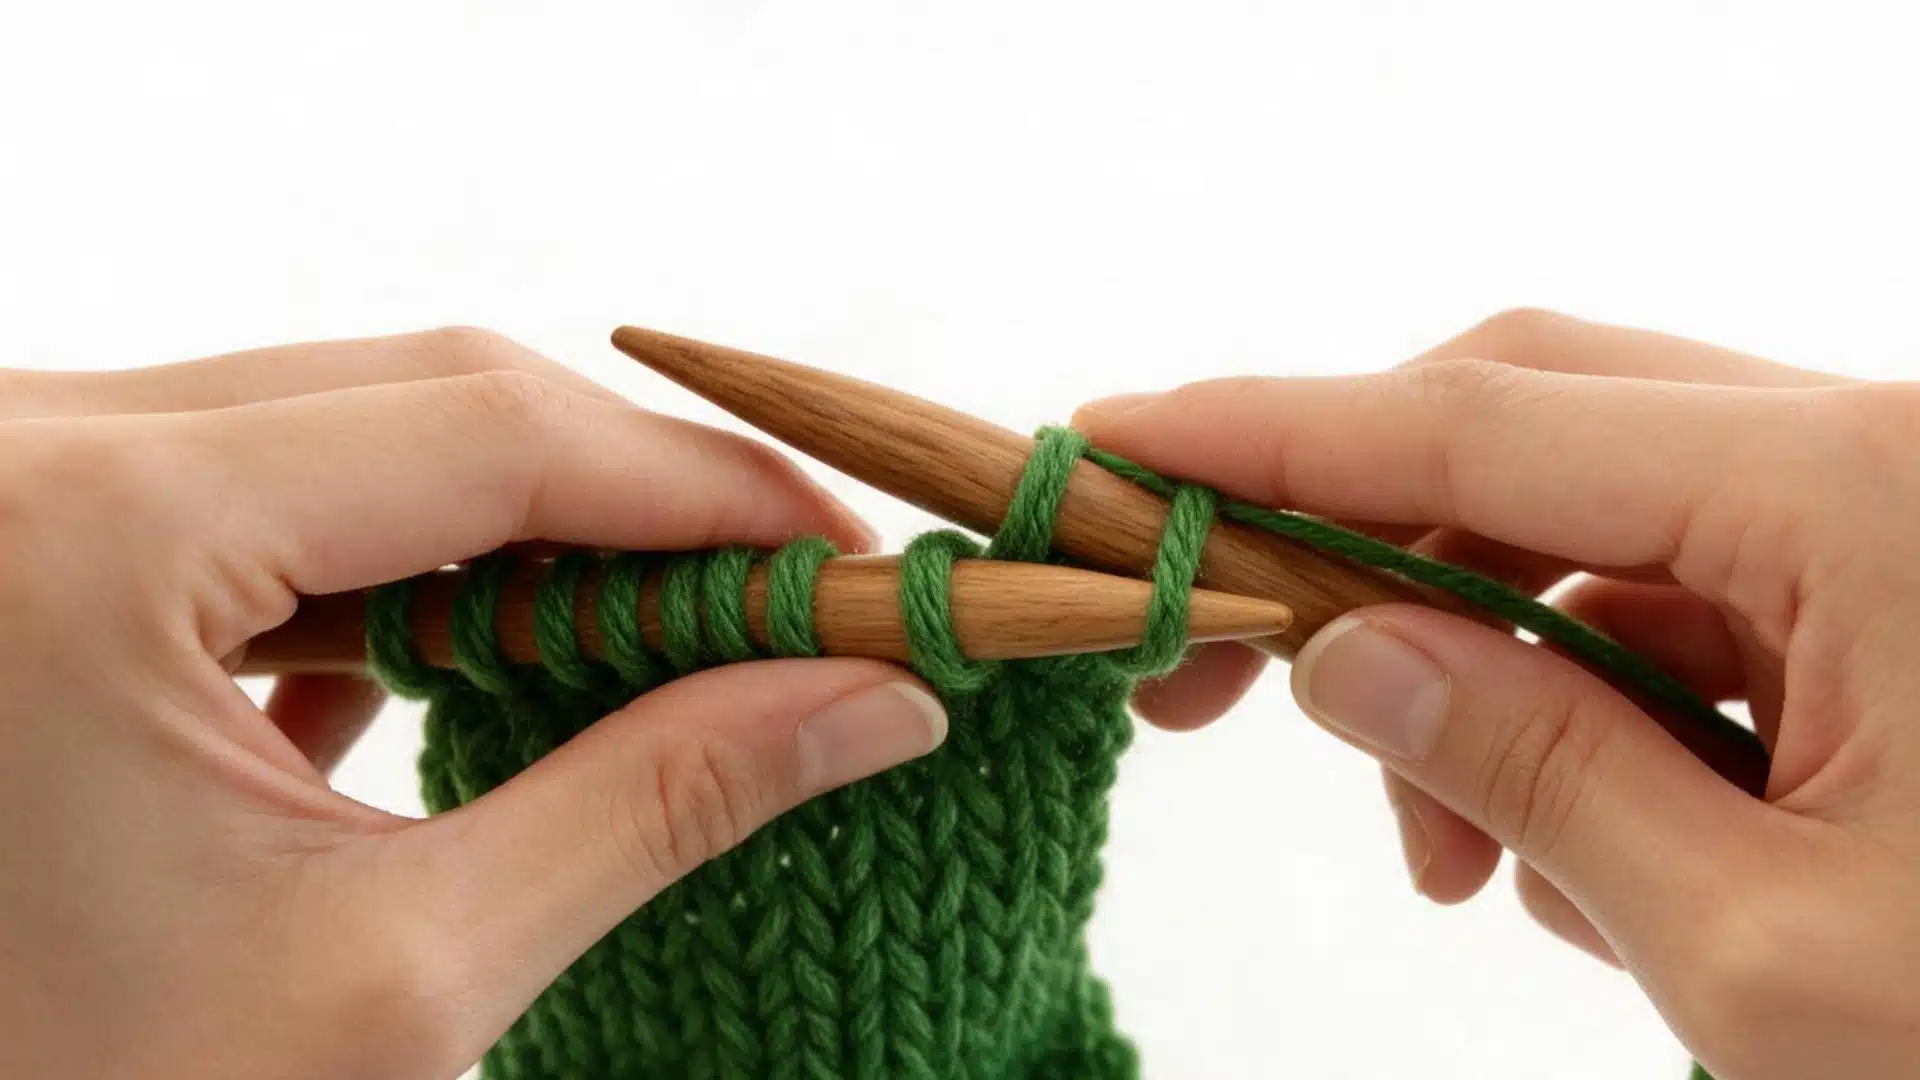
Using the tip of your left needle, pick up the first stitch you knitted, the one sitting further from the needle tip. Keep it steady as you prepare to move it over.
Step 3: Pass It Over the Second Stitch
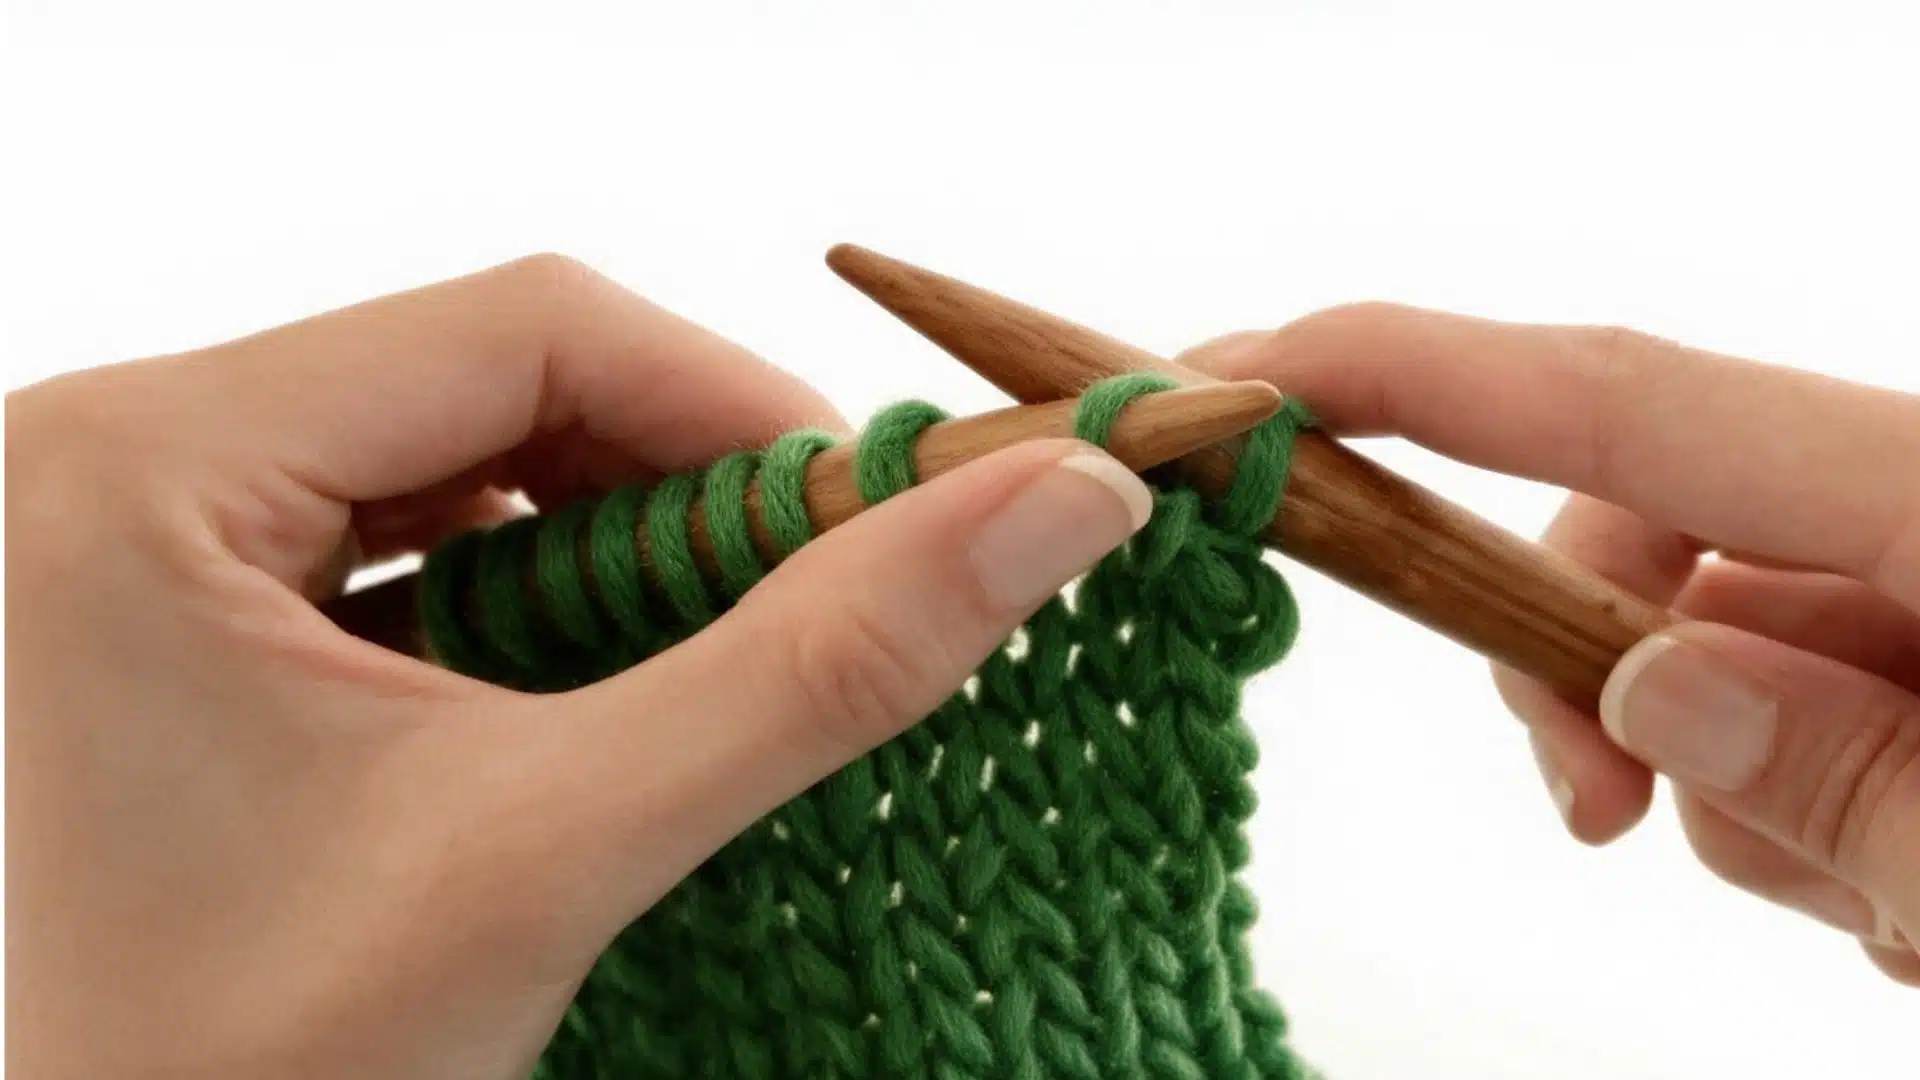
Lift that first stitch up and over the second stitch, then let it drop off the needle completely. Only one stitch remains on your right needle once this motion is finished.
Step 4: Knit the Next Stitch
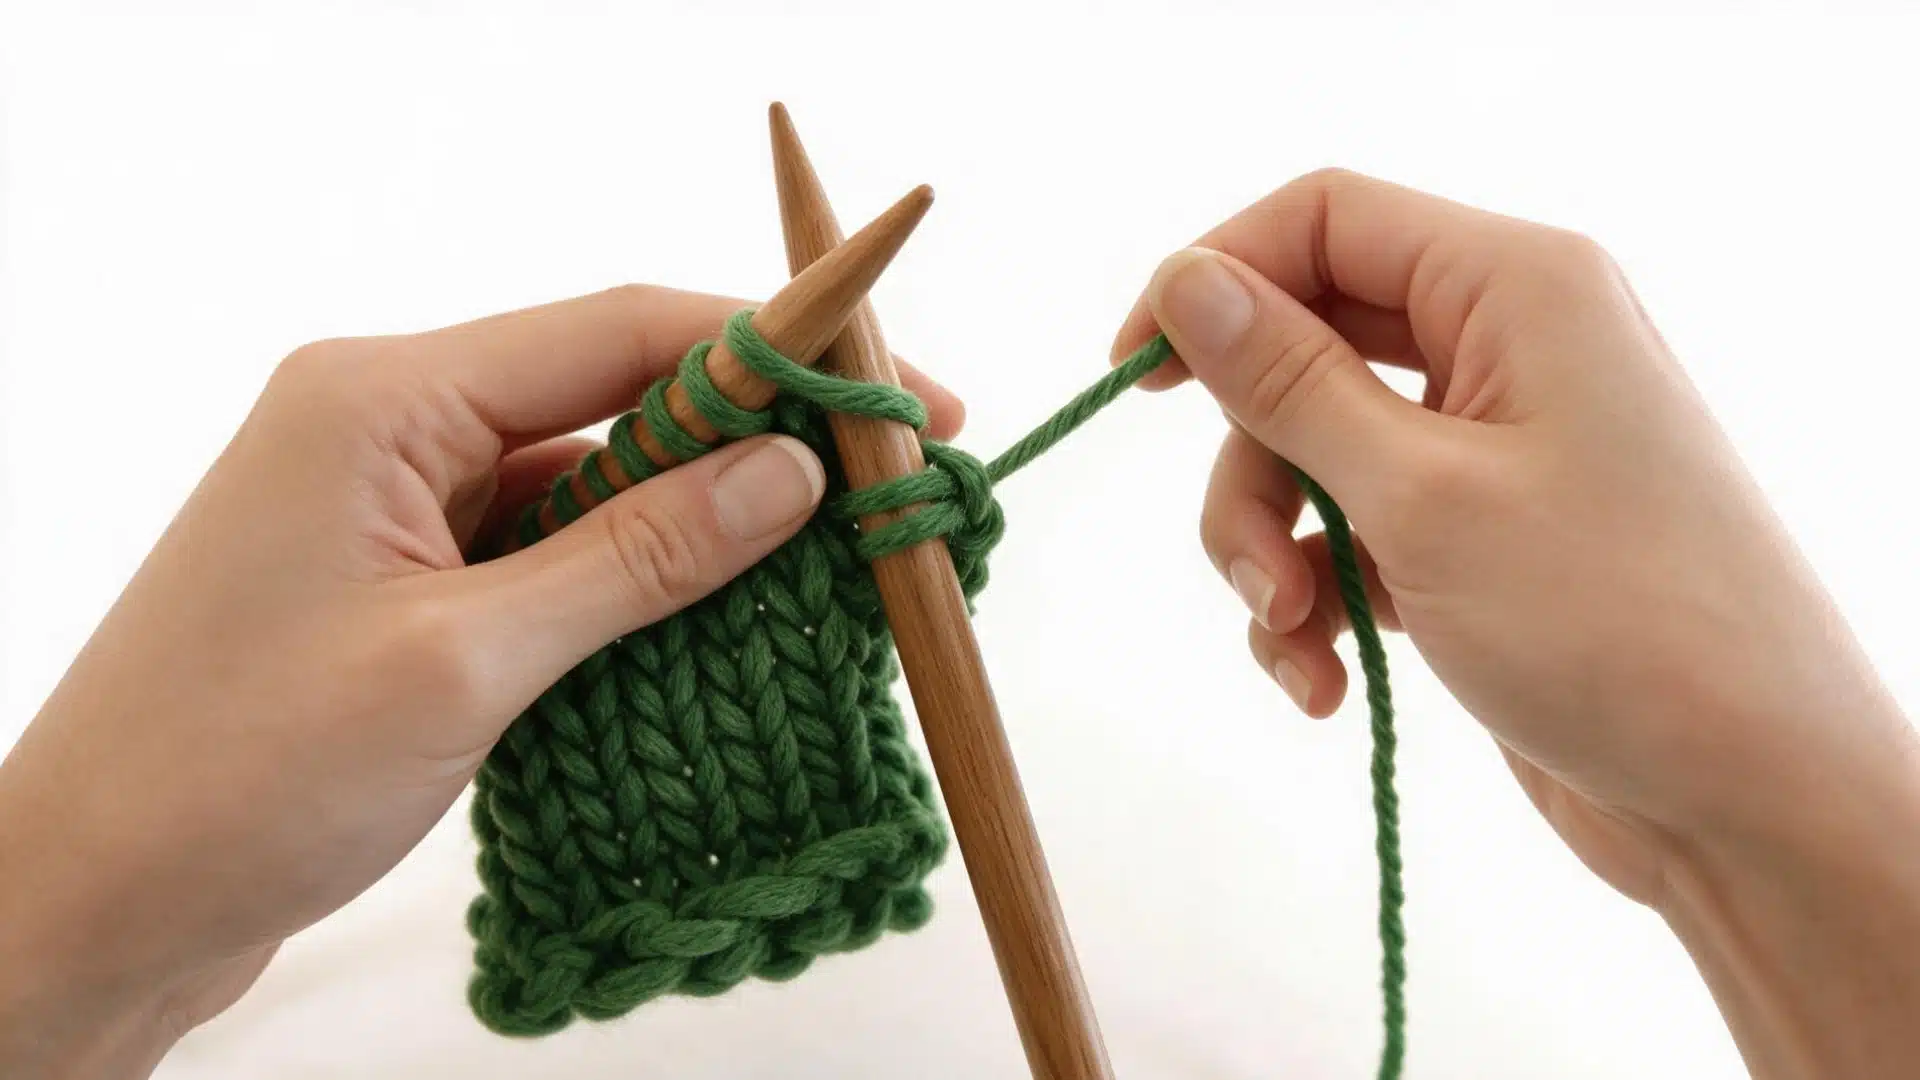
Knit one more stitch from your left needle, bringing you back to two stitches sitting on your right needle. This sets you up to repeat the lift-and-pass motion again.
Repeat Steps 2–4 across the row until only one stitch remains on your right needle
Step 5: Finish the Last Stitch
Cut the working yarn, leaving a few inches of tail, then pull it through the final loop and pull the tail snug so the loop closes, without a knot.
Weave the loose end in along the wrong side to keep it hidden.
Is There a Difference Between Cast Off and Bind Off?
No, there’s no real difference between the two. Cast off and bind off describe the exact same technique for finishing a row of knitting; the only difference is regional wording.
“Cast off” is used more often in the UK, Australia, and other Commonwealth countries, while “bind off” is the term you’ll typically see in US and Canadian patterns.
So if a pattern tells you to bind off and another tells you to cast off, follow the same steps either way, since they’re referring to one and the same process.
When Should You Use a Stretchy Bind Off Instead?
A standard cast off works fine for most projects, but it can end up too stiff for edges that need to stretch.
Use a stretchy bind-off on things like sock cuffs, hat brims, and the tops of mittens, where the edge has to expand to fit over a foot, head, or hand.
Ribbed sections also do better with a looser finish, since a regular cast-off tends to flatten the ribbing and pull it in tighter than the rest of the piece.
If the finished edge needs to give rather than sit firm, a stretchy method will hold up better than the standard one.
What if Your Cast-Off is Too Tight?
A tight cast-off usually comes down to pulling each stitch too firmly as you pass it over the next one.
If you notice the edge puckering or pulling in compared to the rest of your work, try loosening your grip on the yarn as you go.
Switching to a needle one or two sizes larger for just the cast-off row is another easy fix, since it gives each stitch more room without changing your regular knitting tension.
If the edge is already finished and still too tight, you can unpick the row and redo it with either approach.
Casting Off in Pattern
Not every cast off needs to look the same.
Depending on the stitch pattern you’re finishing or which side of the fabric you’re working on, you may need to adjust how you work each stitch before passing it over.
Cast Off Knitwise
This is the standard method described above, where you work every stitch as a knit stitch before passing it over.
It’s the most common cast-off and works well for most projects.
Cast Off Purlwise
Follow the same lift-and-pass steps, but purl each stitch instead of knitting it.
Use this when a pattern calls for a purl cast-off, often on the wrong side of the work or when the edge needs to blend into a purl section.
Cast Off Ribbing
For ribbed edges like on hats, cuffs, or sweater hems, work each stitch in the pattern it’s set in.
Knit the knit stitches and purl the purl stitches as you go, then pass each one over as usual. This keeps the stretch of the ribbing intact instead of flattening it out.
Wrapping Up
Casting off is the final skill that turns your knitting from loose stitches on a needle into a finished piece that holds together.
The core method comes down to a simple, repeatable motion: knit a stitch, lift the one before it over, and keep going until one loop remains.
From there, whether you cast off knitwise, purlwise, or in pattern to preserve ribbing, the same basic principle applies throughout.
Keep your tension relaxed, size up your needle if the edge feels tight, and take your time with the last stitch. Once this technique feels natural, you’ll be able to finish any project with a clean, secure edge.
Frequently Asked Questions (FAQs)
1. How Much Yarn Do You Need to Cast Off?
Leave a tail about three to four times the width of the edge you’re binding off, plus a few extra inches for weaving in.
2. Can You Cast Off With a Different Needle Size?
Yes. Switching to a larger needle for just the cast-off row helps keep the edge from coming out too tight.
3. Can You Undo a Cast Off Row?
Yes, though it’s fiddly. You’ll need to carefully unpick each stitch one at a time and place it back onto a needle.
4. Should You Cast Off on the Right Side or Wrong Side?
It depends on the pattern, but most projects are cast off on the right side unless the instructions say otherwise.
5. Do You Need to Block Knitting After Casting Off?
Not always, but blocking helps even out the edge and gives the finished piece a more polished, professional look.