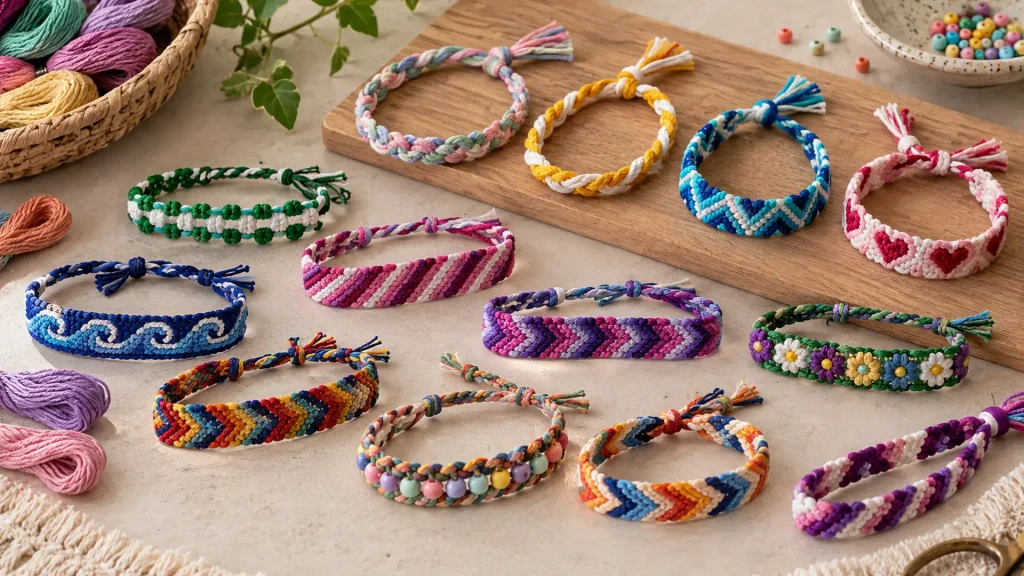
Friendship bracelets are one of those crafts that will never go out of fashion.
You crafted them at camp, swapped them with friends in middle school, and no doubt you have spotted them making a comeback recently on the wrists at music festivals and in schools alike.
There is no need for expensive equipment or large sums of money to start making friendship bracelets; a few threads of embroidery floss, some patience, and proper friendship bracelet patterns are really all you need.
A pattern can be as simple as using two knots and repeating them continuously; more elaborate patterns include chevrons, waves, and even strings with people’s names on them.
It’s time to grab your floss and clipboard (or some tape and a hard surface).
What You Need to Make Friendship Bracelets
You don’t need much to start stacking up thread bracelet patterns. A pack of embroidery floss in a handful of colors covers most of the designs in this list, though a few call for extras like beads or letter charms.
Here is what to have on hand:
- Embroidery floss (six-strand cotton floss works best, and a variety pack gives you more color combos to play with)
- Scissors for cutting your strands to length
- A clipboard, safety pin, or tape to hold your knot in place while you work
- A ruler or tape measure to keep your strands even
- Small beads with holes wide enough for floss, if you want to try a beaded design
- Letter beads or letter charms, only needed for name or alpha patterns
Basic Friendship Bracelet Knots to Know
Every pattern in this list comes down to a small handful of knots. Once you have these down, you can follow almost any pattern chart without getting lost.
Forward Knot
The forward knot is the one you will use the most.
You tie it by crossing your working strand over the strand next to it, forming a shape like the number 4, then pulling it through and up to tighten.
Two of these in a row, using the same two strands, complete one full forward knot.
Backward Knot
The backward knot is the mirror image of the forward knot.
Instead of crossing left over right, you cross the strand on the right over the one on the left, forming a backward 4 shape before pulling it snug.
You will usually tie this one twice in a row as well, just like its forward counterpart.
Forward-Backward Knot
This one combines both knots you just learned.
You tie a forward knot first, then immediately follow it with a backward knot using the same two strands.
- Tie one forward knot and pull it tight
- Without switching strands, tie one backward knot
- Move to the next pair once both knots sit snug against each other
Backward-Forward Knot
As you might guess, this knot flips the order. You start with a backward knot, then close it out with a forward knot on the same pair of strands.
Patterns that call for this combination usually create a slightly different lean or texture in the finished row compared to the forward-backward version, so try both and compare them on your own strands.
Friendship Bracelet Patterns to Try
These are ranked roughly from easiest to hardest, so if you are brand new to this, start from the top and work your way down as your knots get more confident.
1. Simple Braided Friendship Bracelet

This is how the majority of people begin, and there is a good reason for it.
The technique uses three to four strands and braids them like hair, without any forward or backward knotting.
Choose colors that complement each other, secure one of the ends, and begin crossing the outside strands over the center strand with regularity until you’ve made it long enough for your wrist.
This technique is forgiving, which means it doesn’t matter if your crossings aren’t perfectly even.
2. Twisted Friendship Bracelet

This pattern uses just two colors and one knot, which makes it a good next step after the braid.
Tie a forward knot with your left strand onto the right one, over and over down the line, and the strands will start to spiral around each other on their own.
The twist comes from repetition, not from anything you have to force.
- Use two contrasting colors so the spiral actually shows up
- Keep your tension even so the twists sit at a consistent angle
- Anchor the top with tape or a clipboard so the spiral does not loosen as you work
3. Chinese Staircase Bracelet

Don’t let the name fool you; this one looks more complicated than it is.
You work with a single color down the left strand, tying forward knots onto each strand to the right, one after another, all the way across, then repeat the row using the same strand again instead of switching sides.
The result is a tight column of knots that curls slightly, almost like a small staircase resting against the rest of the bracelet. Once you get the rhythm down, it moves fast.
4. Candy Stripe Friendship Bracelet

This one relies more on color than knot variety.
You alternate two colors every couple of rows using forward knots, creating clean horizontal stripes down the length of the bracelet, like old-fashioned candy wrappers.
- Pick two colors with strong contrast, like red and white or navy and cream
- Tie two or three rows in one color before switching to the next
- Keep row counts consistent so the stripes stay an even width throughout
5. Zipper Friendship Bracelet

Here you take two center strands of different colors and tie alternating forward-backward knots on that same pair, row after row, so the colors swap position each time and interlock like the teeth of an actual zipper.
This one takes a little extra concentration because you need to be careful about which side should come up next.
6. Fishtail Friendship Bracelet

This one borrows its structure from fishtail braiding, but uses knots instead of crossing strands.
You work in pairs from the outside in, tying a small group of knots on the left, then the right, then bringing both toward the center where they overlap slightly.
The overlap creates a woven texture that looks more intricate than it is once you get the rhythm of alternating sides down.
7. Classic Chevron Friendship Bracelet

It is one of the best-known friendship bracelet designs ever made – the design of the stacked Vs patterned bracelets.
You begin from the outer edges and work inward: tie forward knots from the left edge toward the middle, and backward knots from the right edge toward the middle, so the two sides meet in the center.
8. Zigzag Friendship Bracelet

This one uses a single strand that travels back and forth across the row instead of staying anchored to one side.
You tie a series of knots moving right, then reverse direction and knot your way back left, using the same working strand the whole time.
The zigzag shows up as a visible line weaving through a solid background color, which makes it a nice contrast piece next to the chevron.
9. Arrowhead Friendship Bracelet

This pattern looks similar to a chevron at first glance, but only points in one direction instead of forming a full V.
You tie forward knots across the row, moving one strand at a time from left to right, then work backward knots on the way back using a narrower set of strands.
The result is a series of arrow shapes pointing the same way down the whole bracelet.
10. Heart Friendship Bracelet

This one takes a bit more counting since each half is curved rather than straight, unlike the clean diagonal lines of a chevron or diamond, though the overall shape is still symmetrical.
You knot two curved halves separately, working forward and backward knots on each side to build the rounded top of the heart, then bring both halves together into a point at the bottom.
It helps to have a pattern chart in front of you the first time you try this one.
11. Wave Friendship Bracelet

This pattern uses forward and backward knots in a repeating curve instead of sharp angles, giving it a softer, flowing look than the chevron or arrowhead.
You tie a few forward knots moving one direction, then ease into backward knots that curve the line the other way, so the strand rises and dips like a wave across the row.
It reads as more advanced than it feels once your hands find the rhythm.
12. Flower Friendship Bracelet

This one is built from small diamond or chevron clusters arranged around a center point, so it helps to have those techniques down before attempting it.
You knot four short sections that angle toward a shared middle, then close the gaps between them so the shape reads as petals instead of separate diamonds.
Adding a bead or a different color at the center strengthens the flower look without adding much extra knotting.
13. Beaded Friendship Bracelet

This pattern is less about a specific knot sequence and more about where you slide a bead into an otherwise plain design, so it pairs well with patterns you have already learned, like the twisted or striped bracelet.
You thread a bead onto your working strand between knots, then continue knotting as usual so the bead sits flush against the row instead of dangling loose.
Small seed beads with a wide hole work best.
How to Finish a Friendship Bracelet
Once your pattern reaches the length you want, you still need a way to secure it so it does not unravel on the wrist.
Braided Ends
Stop knotting your pattern and braid the remaining strands together for about an inch, then tie an overhand knot to lock the braid in place.
Trim the extra length once you are happy with the fit.
Adjustable Sliding Knot
Loop the two end strands from each side around each other and tie a series of knots that slide along the bracelet, letting you loosen or tighten the fit instead of committing to one wrist size.
Loop and Button Closure
If you started with a loop, finish the other end by braiding the strands and tying a button on securely. Slide the button through the loop to close the bracelet, like a coat closure.
Wrapping Up
The best part about friendship bracelet patterns is how quickly a plain strand of floss turns into something someone will actually wear.
Pick one, tape it down, and give it a real shot before deciding it is too hard. Most of the trouble people run into is just tension, not talent, and that evens out after your first couple rows.
Keep extra floss around once you finish, because a friend will probably ask for a matching one before you have tied off the last knot.
Frequently Asked Questions (FAQs)
1. How Many Strings Do You Need for A Friendship Bracelet?
You can get away with four to eight strings for most patterns, though wider designs may need more.
2. Can Friendship Bracelets Get Wet or Be Washed?
Yes, but if you soak them often, the colors will fade faster, so take them off before showering or swimming.
3. What Causes a Friendship Bracelet to Curl?
Curling usually means your tension is uneven, so pull each knot with the same force as you go.
4. How Do You Keep Friendship Bracelet Knots Even?
Anchor your work so it does not shift on you, and pull every knot snug before moving to the next one.