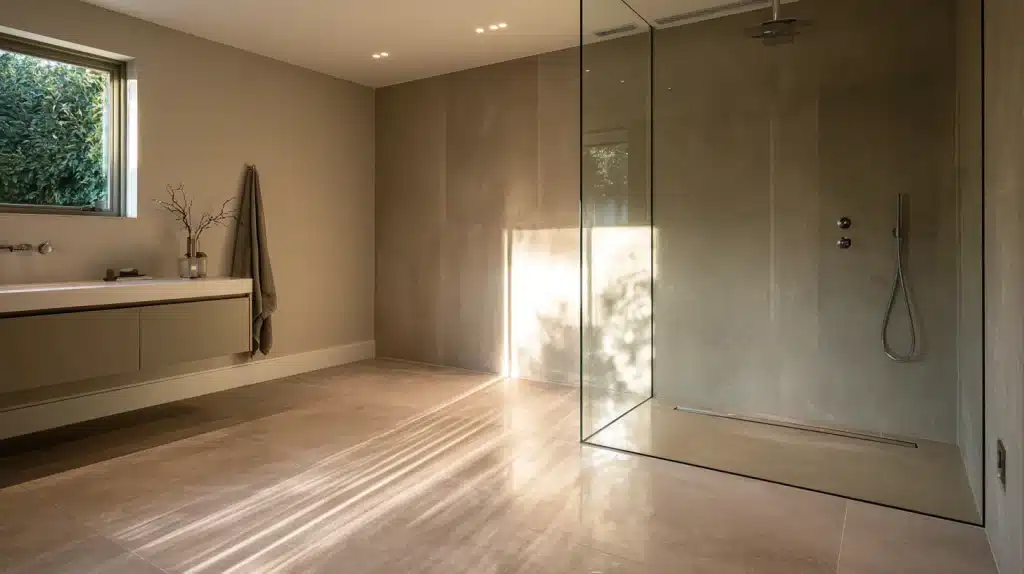
A wet room bathroom turns the entire room into one continuous waterproofed surface, with no shower tray, curb, or enclosure separating the shower from the rest of the space.
That open layout is a big part of why homeowners are drawn to it: it looks sleek, it can make a small bathroom feel larger, and it removes the step-over edge that trips people up.
But an open shower also means the whole room has to be built to handle standing water, which raises real questions about cost, drainage, and daily upkeep.
This blog covers the benefits and drawbacks, what to plan for before installing one, design ideas that work well in practice, and how to clean glass shower doors over the long run.
Features of a Wet Room Bathroom
In a wet room bathroom, there is no separate shower enclosure; instead, it’s a space you can shower in without a typical shower base or step-up from the bathroom floor.
Typical elements may include:
- Waterproofed floors and walls
- A gently sloped floor
- Central or linear drainage
- No raised shower curb
- An optional glass splash screen
Unlike a standard walk-in shower, which still drains on its own through a separate pan, a wet room’s shower and surrounding floor share one waterproof surface and one drainage system.
Wet Room Bathroom Pros and Cons
It can improve accessibility and make even a compact bathroom feel more spacious. However, achieving that simple open appearance requires careful construction behind the finished surfaces.
Consider both sides before choosing this layout.
Benefits of a Wet Room
This removes many of the visual barriers found in traditional bathrooms. The key advantages include:
- More open space: Continuous flooring can make a small bathroom appear larger.
- Better accessibility: No curb means easier access for wheelchairs, walkers, and people with limited mobility.
- Simpler cleaning: Fewer shower tracks, corners, and curtains collect grime.
- Flexible layout: You can position showerheads, benches, niches, and screens more freely.
- Modern appearance: Minimal barriers create a clean, streamlined look.
They can be particularly useful for people planning an aging-in-place bathroom.
Drawbacks of a Wet Room
The biggest disadvantage is that the entire room must be prepared for water, not just the shower. Potential concerns include:
- Higher cost: Full-room waterproofing pushes installation to roughly $6,000–$35,000, depending on size and finishes.
- More waterproofing work: Tanking and slope work are labor-intensive and require experienced installers.
- Wider splash: Without a curb, towels and storage need to sit outside the splash zone.
- Slip and moisture risk: Requires slip-resistant tile and stronger ventilation than a standard bathroom.
- Costly if done wrong: Poor waterproofing can let water reach the subfloor or the room below.
Towels, toilet paper, cabinetry, and electrical fittings also need to be positioned carefully, away from heavy splash areas.
What to Consider Before Installing a Wet Room?
For a wet room to be successful, construction is much more important than the design aspect. This is why waterproofing, drainage, ventilation, and slope of the floor must come first before any choice of tiles.
Here are four aspects to prioritize.
Waterproofing and Drainage
Tanking, the waterproof membrane applied under the tile across the entire floor and up the lower walls, is what makes it work, and it’s not a step to cut corners on.
Getting the slope and membrane right takes experience; an installer who’s done wet rooms specifically, not just standard showers, is worth seeking out for this part of the job.
Flooring and Ventilation
Since the floor will be fully wet, the selection becomes more critical than in a regular bathroom. It is necessary to use tiles that are resistant to slipping along with grouts that are water-resistant.
The ventilation system plays a crucial role, so install a proper exhaust fan.
Bathroom Layout and Splash Zones
The positioning of the shower head relative to the vanity, toilet, and storage will determine how wet this area gets daily.
Towel and toilet paper storage is better positioned either in a niche in the wall or clearly out of the splashing area, and not on an open shelf above the shower area.
Cost and Existing Bathroom Structure
Its installation cost depends on bathroom size, plumbing alterations, choice of tiles, drainage, and waterproofing. Preserving existing drainage and plumbing can save money.
Moving pipes, adjusting the floor, installing costly stone, and installing a linear drain can raise the budget of the renovation process significantly.
Wet Room Bathroom Ideas That Work Well
Good ideas should improve function as well as appearance. Features that control water, increase usable space, or simplify cleaning generally work better than purely decorative additions.
Here are six options worth considering.
Add a Frameless Glass Screen

Glass Shower Screen without Frame: The glass screen captures water coming straight from the shower without closing off the bathroom.
This will not block views but protects the vanity, toilet, towels, and storage area from getting wet.
Clear glass is especially handy in small bathrooms because it marks the wet area without dividing the space.
Use the Same Tile Across the Floor

Maintain the continuity from the shower stall to the bathroom to create a seamless effect. Without an interruption in the flooring, the room will feel larger than it is.
Use slip-resistant tiles throughout the wet area to achieve both goals.
Combine a Tub and Shower in One Wet Zone

Ensure that the bath and the open shower are located in the same area that has been waterproofed. This gives you both bathing facilities without installing two separate bathing spaces.
Using a standalone bathtub is ideal, but ensure there is enough space around it for easy cleaning.
Choose a Linear Drain

The linear drain is installed along one of the sides of the shower and not in the center of the floor. This lets the floor slope in one direction, creating a neat tile pattern.
Installing it along one of the walls can make it fit better into the design.
Add a Floating Vanity

A wall-mounted vanity keeps cabinetry raised above the wet floor while leaving more flooring visible. This makes the bathroom feel less crowded and provides easier access underneath for mopping or squeegeeing.
Choose moisture-resistant cabinetry and position the vanity beyond the heaviest splash zone for additional protection from everyday water exposure.
Use a Built-In Shower Niche

A recessed shower niche helps you store items without adding another fixture in the wet area. Your shampoo, soap, and other products will still be within arm’s reach, and there won’t be any clutter on the floor.
Make sure the niche is not exposed to the water stream of the shower.
How to Clean and Maintain it?
The cleaning process is relatively easy due to fewer shower tracks, shower curtains, and edges in the room, but nevertheless, it requires frequent cleaning since water is spread across more of the room area.
Some basic practices will help avoid the build-up of soap scum, hard water stains, and mold.
Keep Floors and Drains Clean
Rinse away soap residue regularly and remove hair before it collects around the drain.
For routine maintenance:
- Clear the drain weekly.
- Use a mild bathroom cleaner on tile.
- Scrub grout gently when buildup appears.
- Squeegee excess floor water toward the drain to prevent pooling.
Keeping the drain clear also helps prevent slow drainage and standing water.
Clean Glass Shower Doors
Glass screens quickly show soap scum and mineral marks, especially in hard-water areas.
After showering:
- Run a squeegee over the glass.
- Wipe remaining water from the edges.
For deeper cleaning, use a non-abrasive glass cleaner suitable for shower surfaces. A diluted vinegar solution may also help with mineral deposits when compatible with nearby finishes.
Avoid abrasive scrubbers that can scratch glass or damage protective coatings.
Prevent Mold and Excess Moisture
Proper ventilation is one of the simplest ways to prevent mold in a humid area. Ventilators can be turned on when taking a shower as well as after to eliminate any humidity that remains.
It is important to check grout, sealants, wall joints, and the vicinity of the glass screen for cracks and openings.
Is a Wet Room Bathroom Right for You?
It works best when its practical strengths align with how you intend to use the bathroom. Accessibility, space, cost, and maintenance should matter more than appearance.
Think not only about your current needs but also how you might use the bathroom in the future. It might be suitable for you if:
- Want a step-free shower
- Need improved accessibility
- Have a compact bathroom
- Prefer an open contemporary layout
- Want fewer shower barriers to clean
- Are planning for aging in place
It may be less suitable if you have a tight renovation budget, weak existing ventilation, limited drainage options, or prefer keeping the shower completely separate from the rest of the bathroom.
Conclusion
A wet room bathroom could add space to the bathroom, increase accessibility, and produce an efficient and uninterrupted design.
It eliminates the need to clean tracks and trays daily, though glass screens will still require regular maintenance to remain clear.
However, the downside is the need for thorough waterproofing, better drainage, increased moisture protection, and possibly increased installation costs.
Carefully review all the points above before building it. If done correctly, it would look neat and efficient.
Frequently Asked Questions (FAQs)
1. Can You Install a Wet Room Upstairs?
Yes. The floor structure must support the installation, and you need proper planning for waterproofing and drainage to protect the rooms underneath.
2. Can You Use Regular Bathroom Furniture in a Wet Room?
Furnishings likely to contact water must have a waterproof coating. Keep wood cabinets and non-waterproof storage outside the primary splash zone.
3. How Long Does It Take to Install a Wet Room?
Installation typically involves demolition, plumbing, waterproofing, curing, tiling, and fixture installation. Therefore, timing depends heavily on the existing bathroom.
4. Do You Need Planning Permission for a Wet Room?
Requirements differ according to the location. Interior remodeling doesn’t necessarily require permission, but structural, plumbing, and electrical modifications sometimes do.