A needle threaded, fabric stretched tight, and no idea which stitch to try first. That moment trips up plenty of beginners before any thread even touches the fabric.
Hundreds of embroidery stitches exist, but only a small group forms the base of most designs people stitch and share.
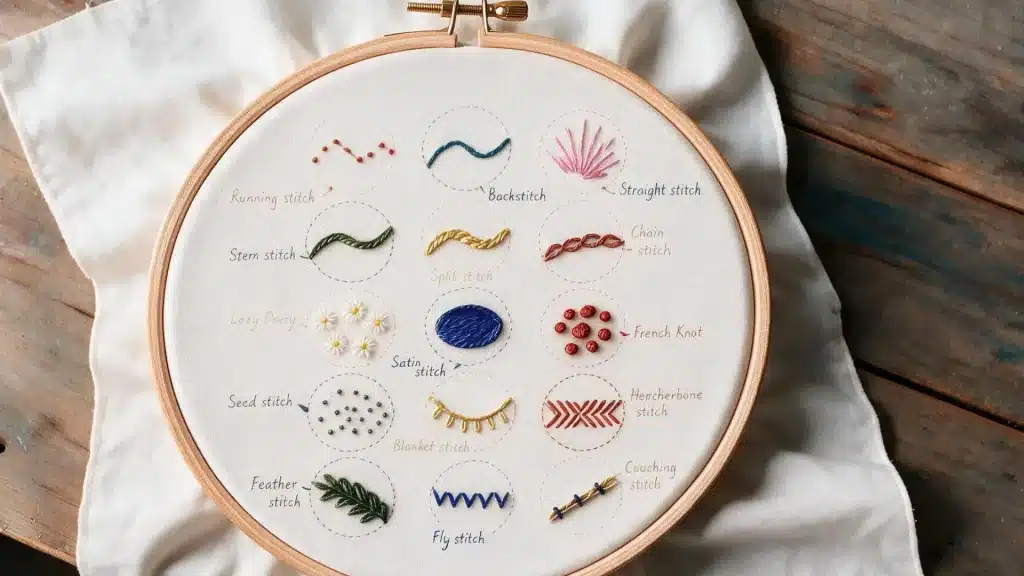
Basic embroidery stitches are that starting group, and they make the whole process easier to follow. Fifteen appear below, each with its best use and a simple tip for getting it right.
Things You’ll Need
A few simple tools make stitching smoother from the very first try.
- Embroidery floss: the thread used for every stitch, split into thinner strands for finer detail
- A needle with a wide eye: lets floss pass through easily without fraying
- Plain fabric: gives stitches a clean, even surface to sit on
- Sharp scissors: trims floss cleanly without snagging the threads
- An embroidery hoop: holds fabric taut so stitches sit flat and even
Floss splits into six strands, and using fewer strands creates finer, more delicate lines.
Starting a thread without a knot works well for most stitches, leaving a small loop caught by the first stitch.
Finishing off means sliding the needle under nearby stitches on the back before pulling gently. Left-handed stitchers often work in reverse compared to right-handed instructions, and that works just fine.
Fabric left too loose in the hoop often causes puckering. Keeping it drum-tight makes every stitch easier to control.
A Closer Look at Basic Embroidery Stitches
Every stitch here builds on the same basic motion: needle up, needle down. Once that motion feels natural, telling each stitch apart becomes much easier.
1. Running Stitch
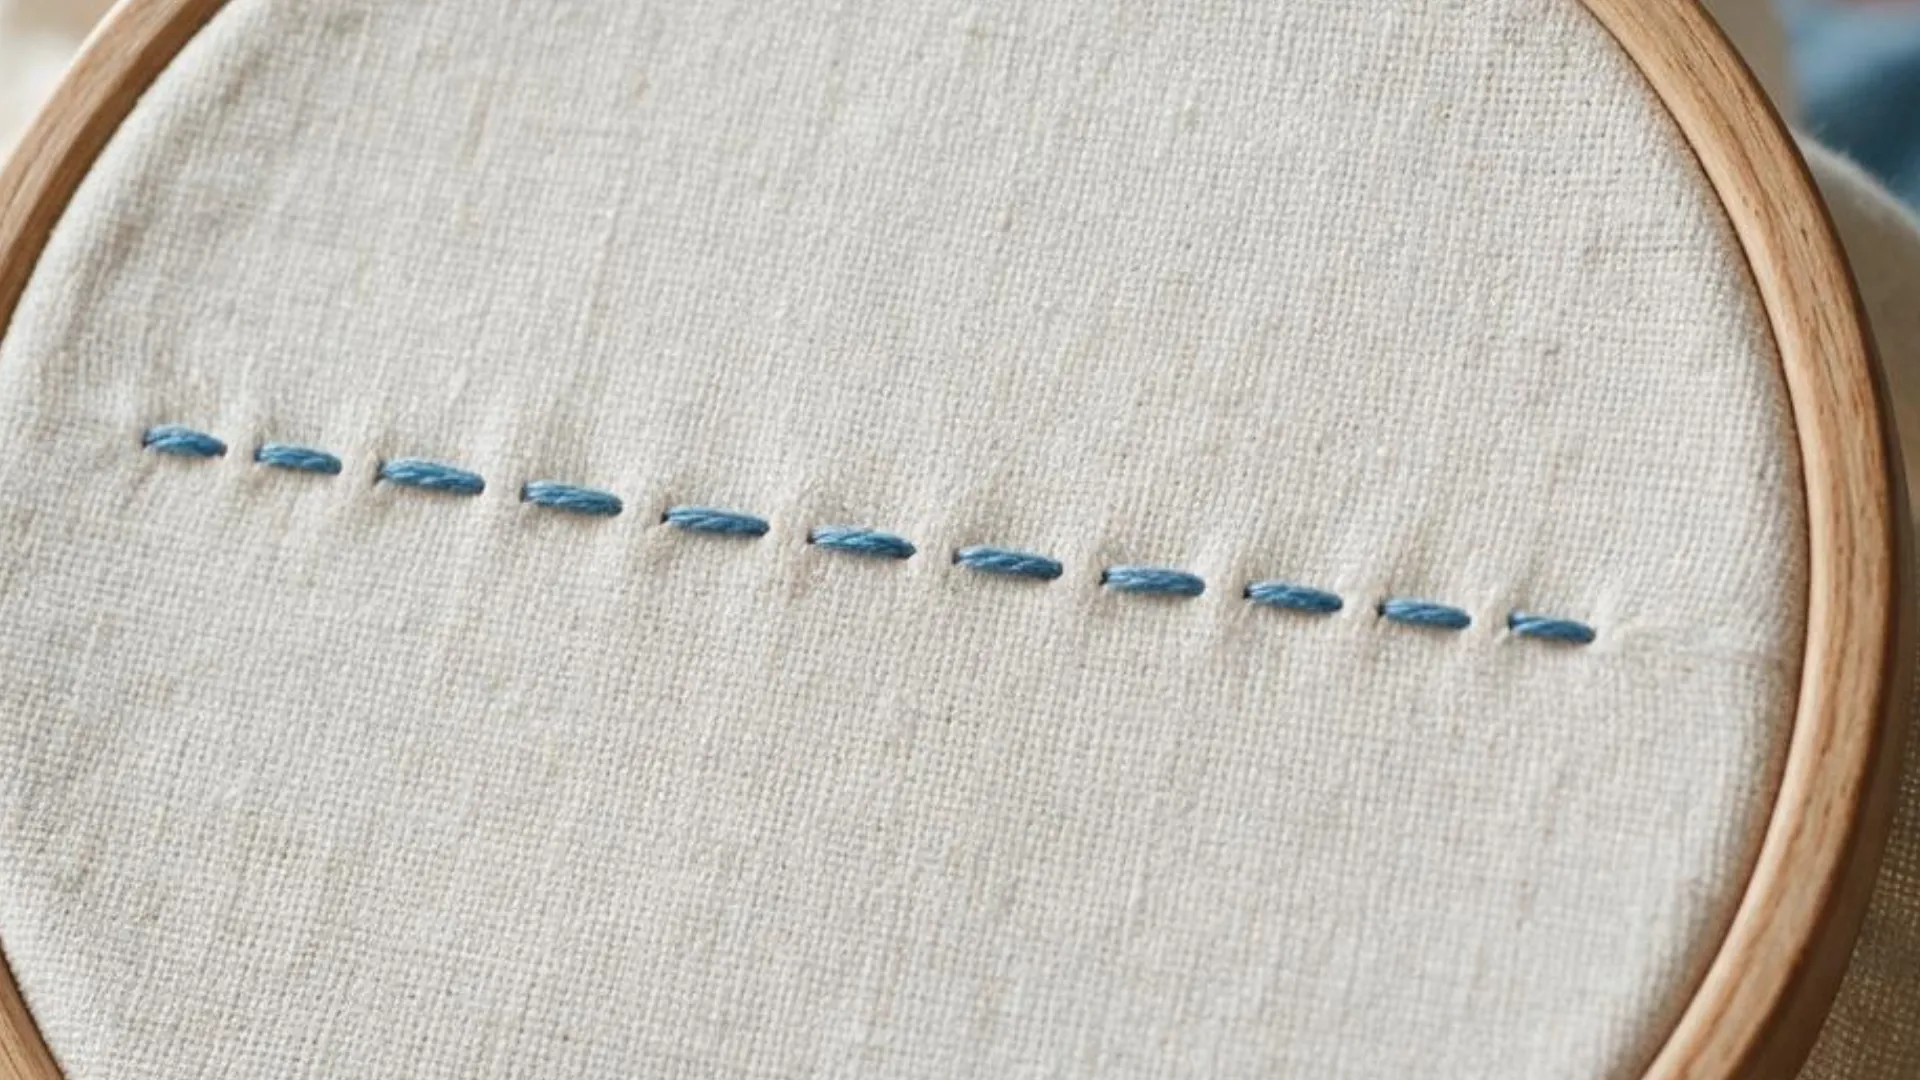
The needle comes up through the fabric, goes back down a short distance, then comes up again farther along.
This motion repeats at even intervals across the line. Running stitch is a common choice for borders, dashed outlines, and simple patterns.
Keeping every stitch and gap equal in length gives it a clean, even look.
Uneven stitch length is a common mistake with running stitch. Measuring the first few stitches with a finger helps keep the rest consistent.
2. Backstitch
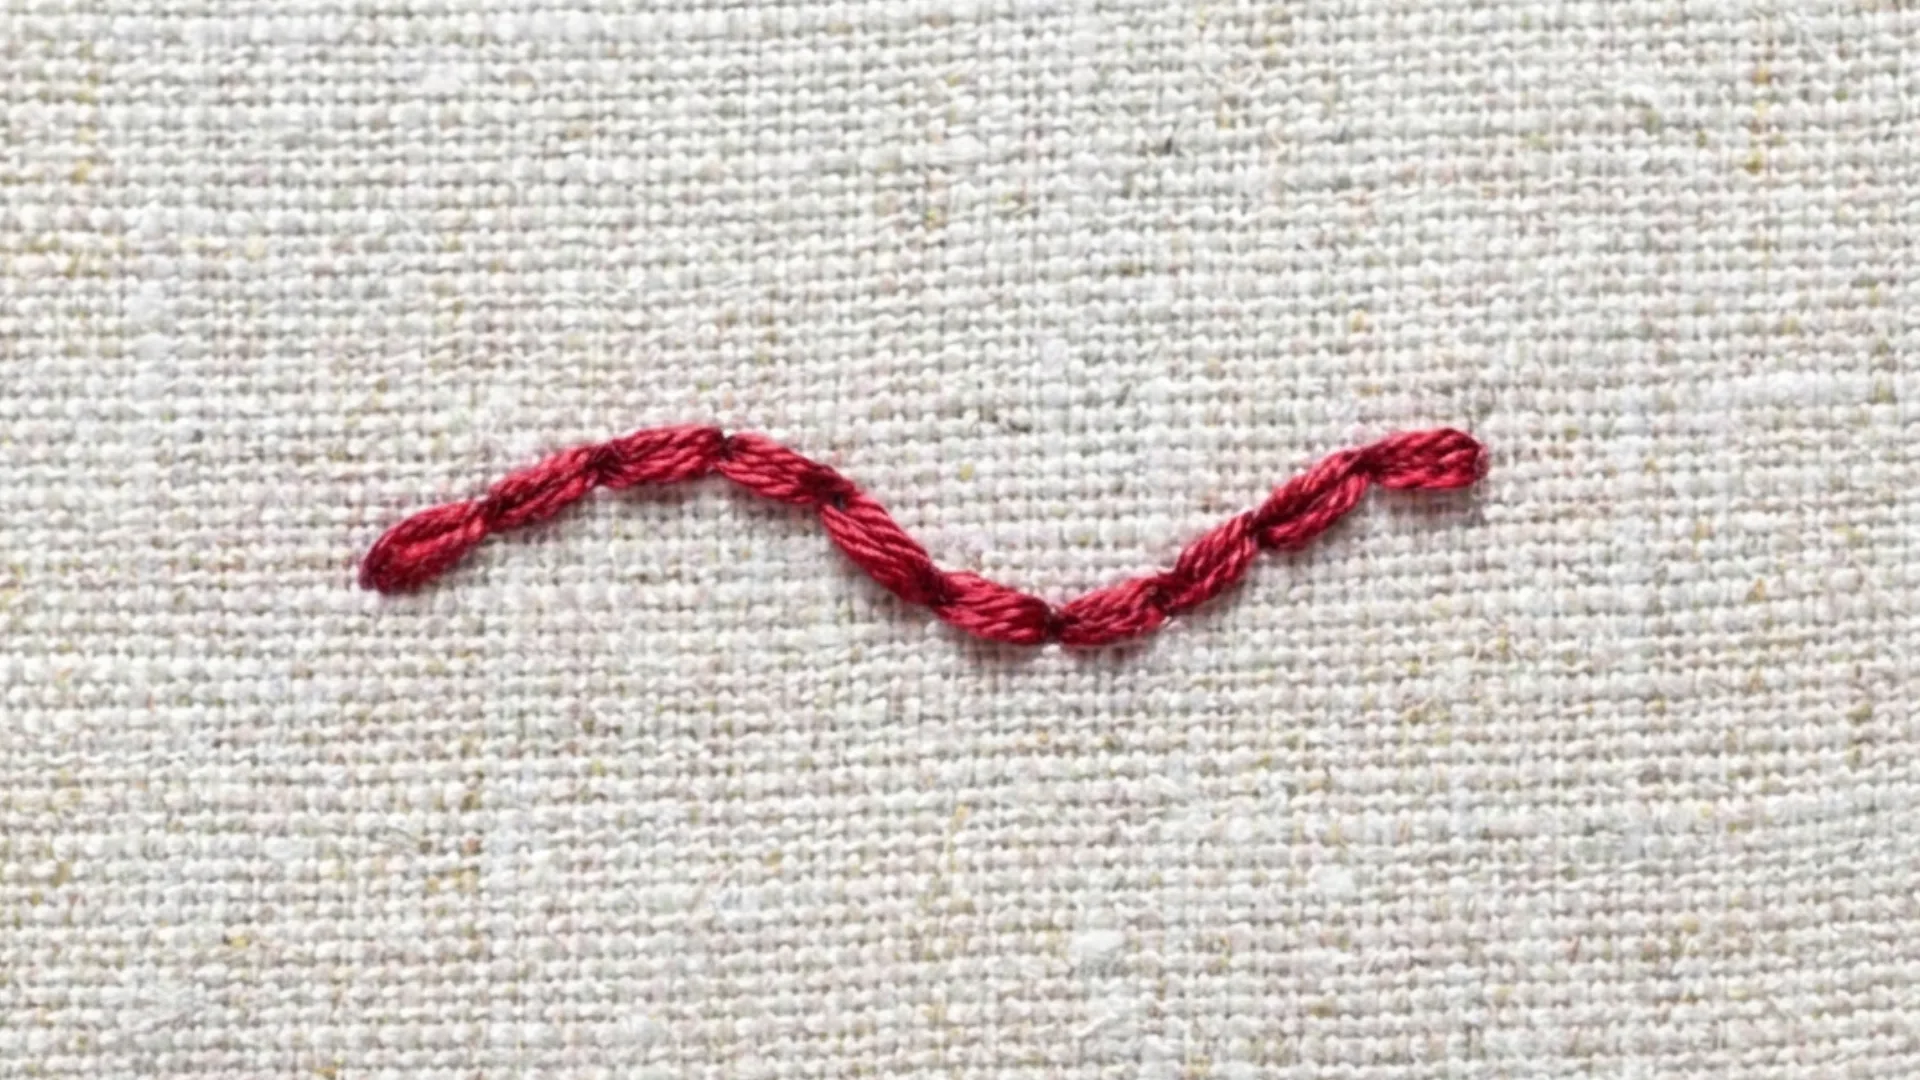
The needle comes up a short distance ahead, then goes back down into the hole where the last stitch ended.
It comes up again one stitch length further along, repeating the same backward motion.
This connects each stitch directly to the one before it. Backstitch suits lettering, outlines, and detailed shapes with no visible gaps.
3. Straight Stitch
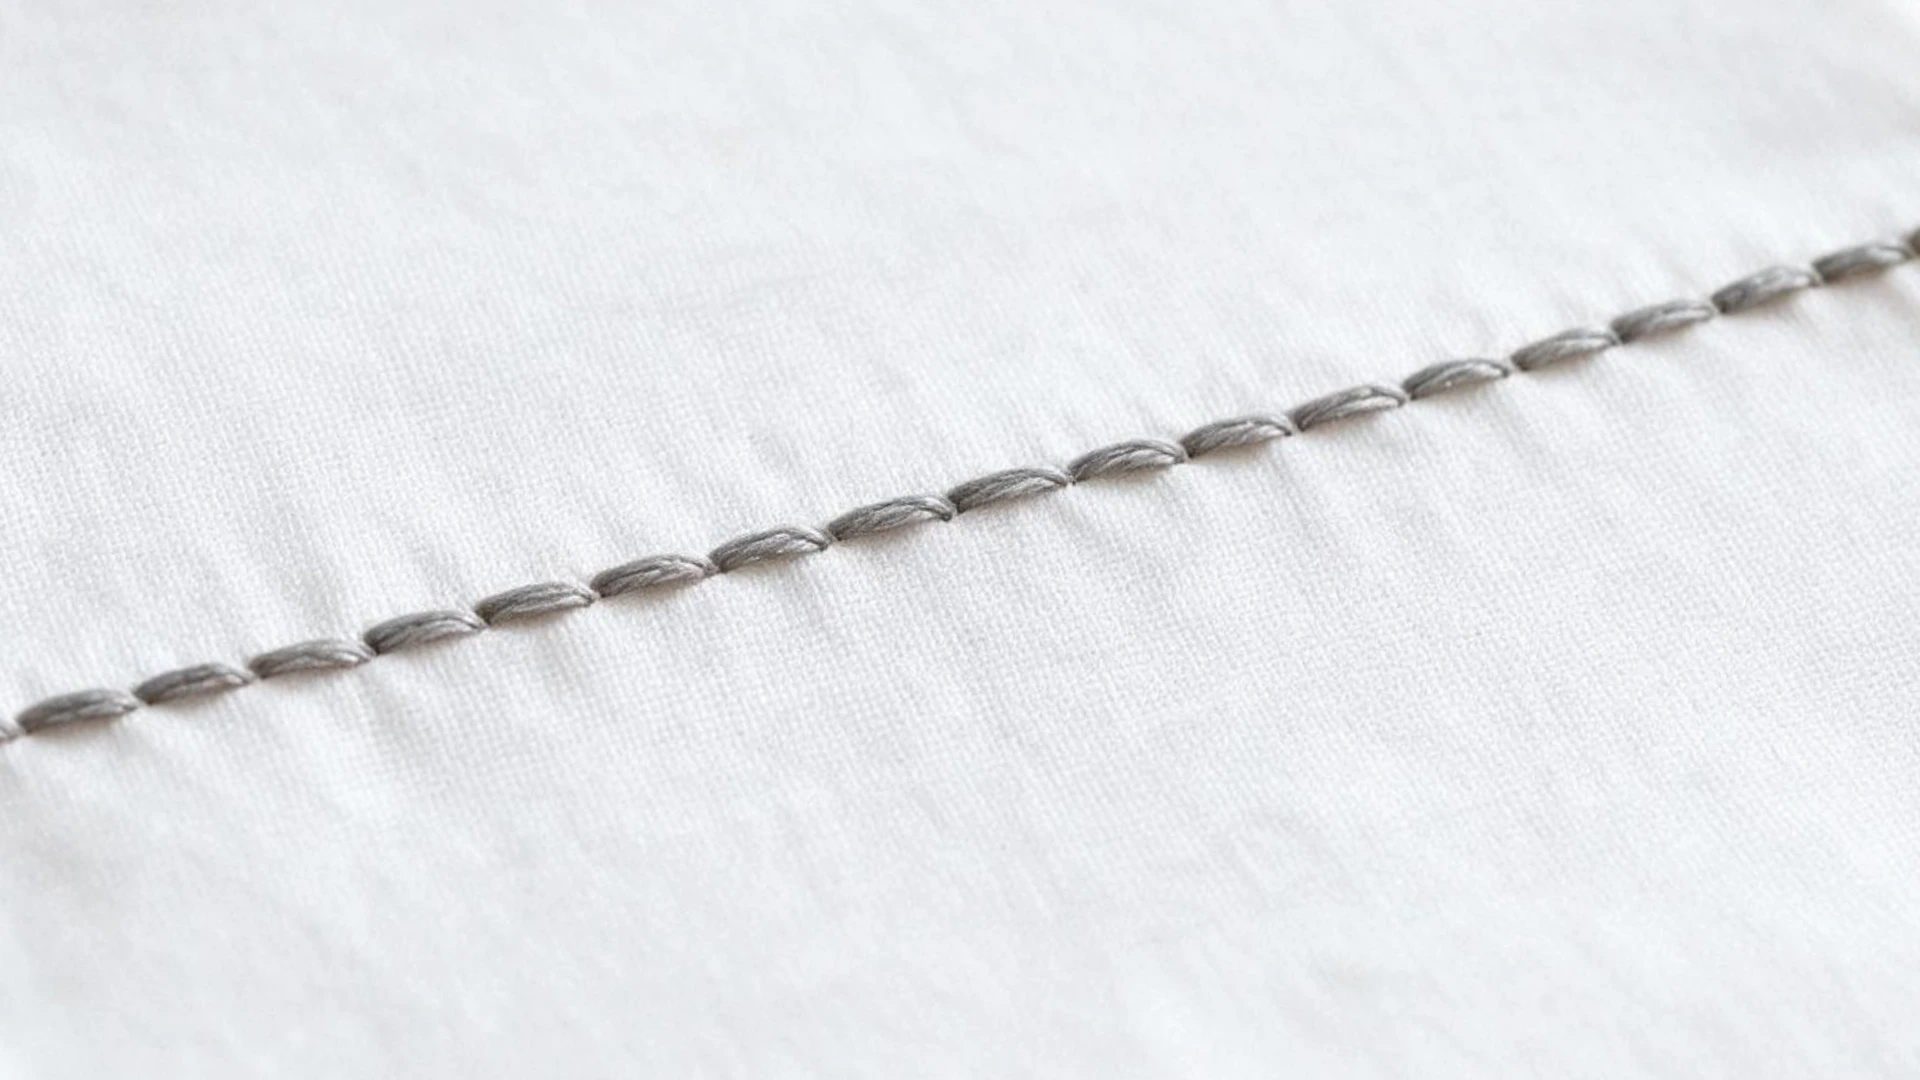
The needle comes up at the starting point, then goes straight back down at the end of the stitch. Each stitch stands completely alone, with no connection to the next one.
The straight stitch comes in handy for small details like rays, stars, and leaves. Stitches that run too long tend to lose their shape over time.
4. Stem Stitch
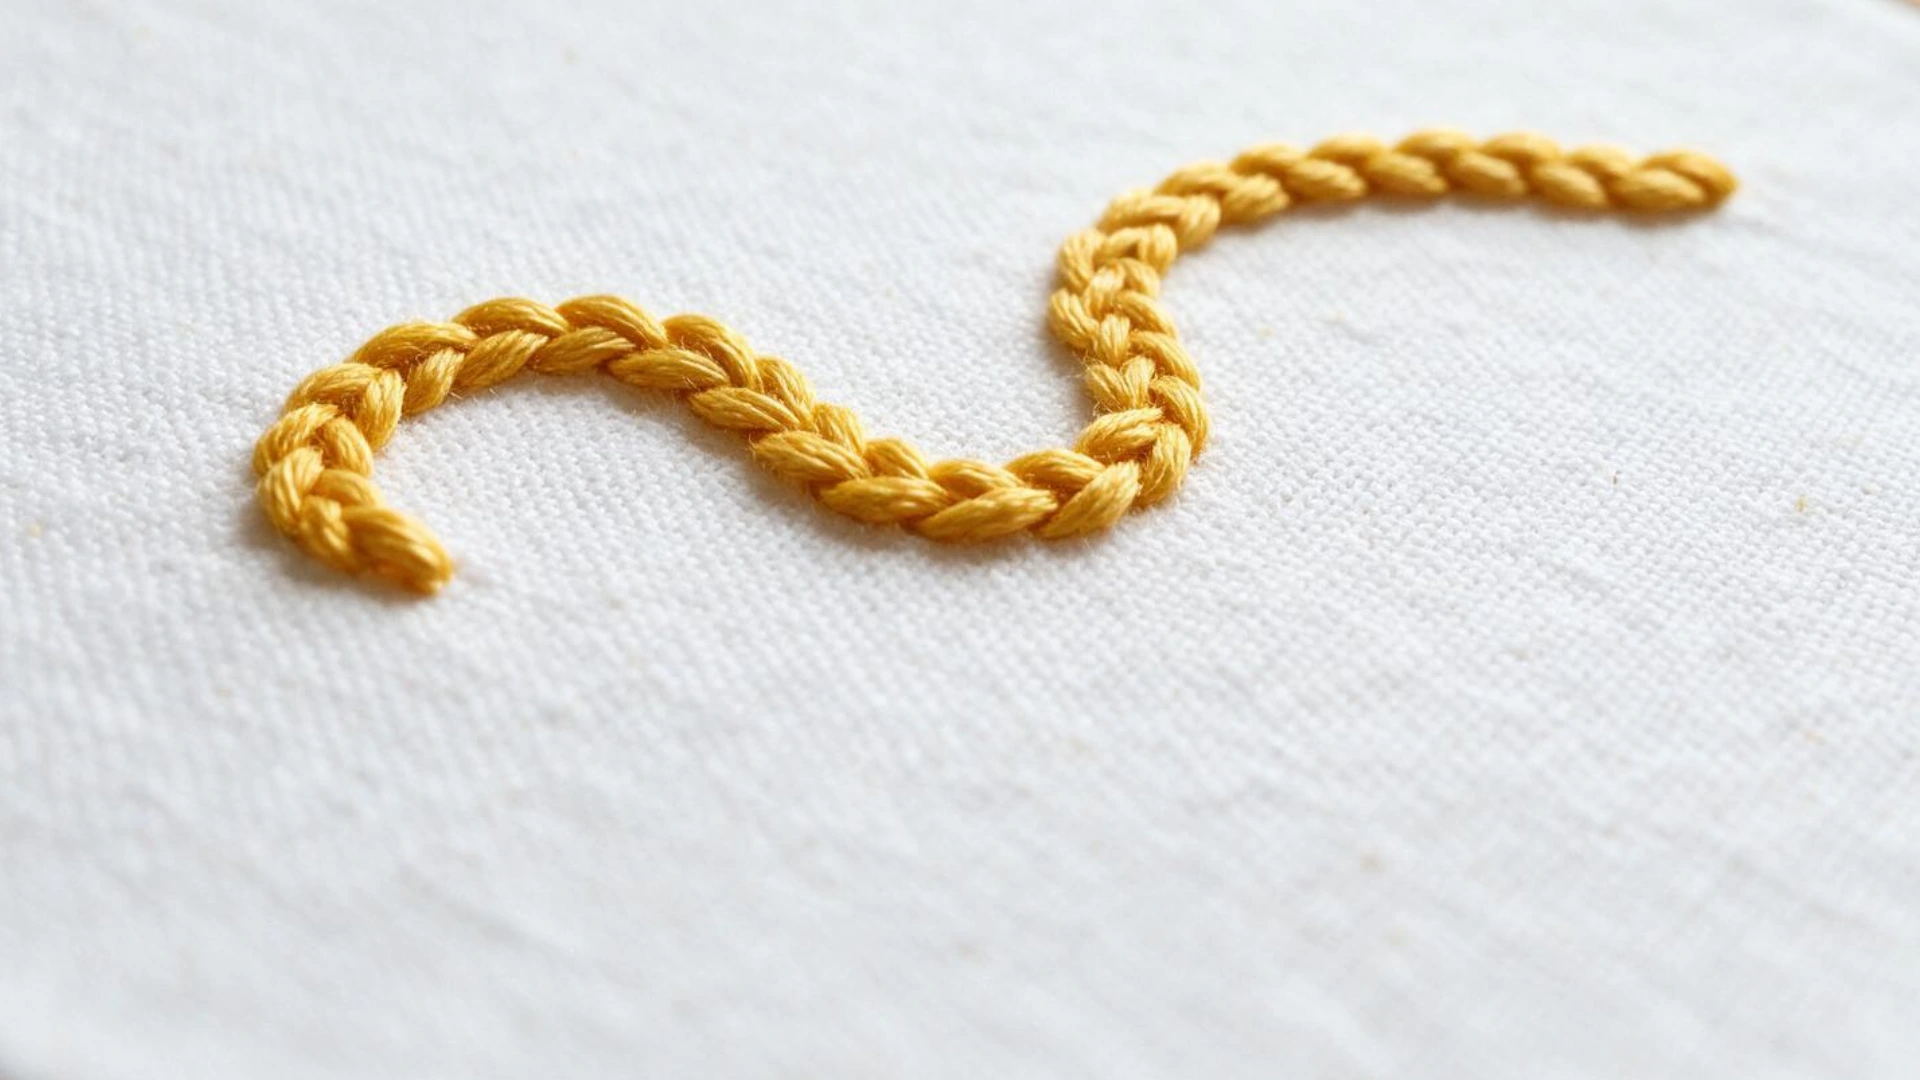
The needle comes up at the starting point, goes down a stitch length ahead, then comes back up halfway between those two points, then comes back up halfway between those two points, just to one side of the line rather than directly on it.
Each new stitch starts from that halfway point, overlapping the one before it. This builds a slightly raised, rope-like line for stems and curves.
Keeping the needle on the same side of the thread keeps the line neat around tight curves.
5. Split Stitch
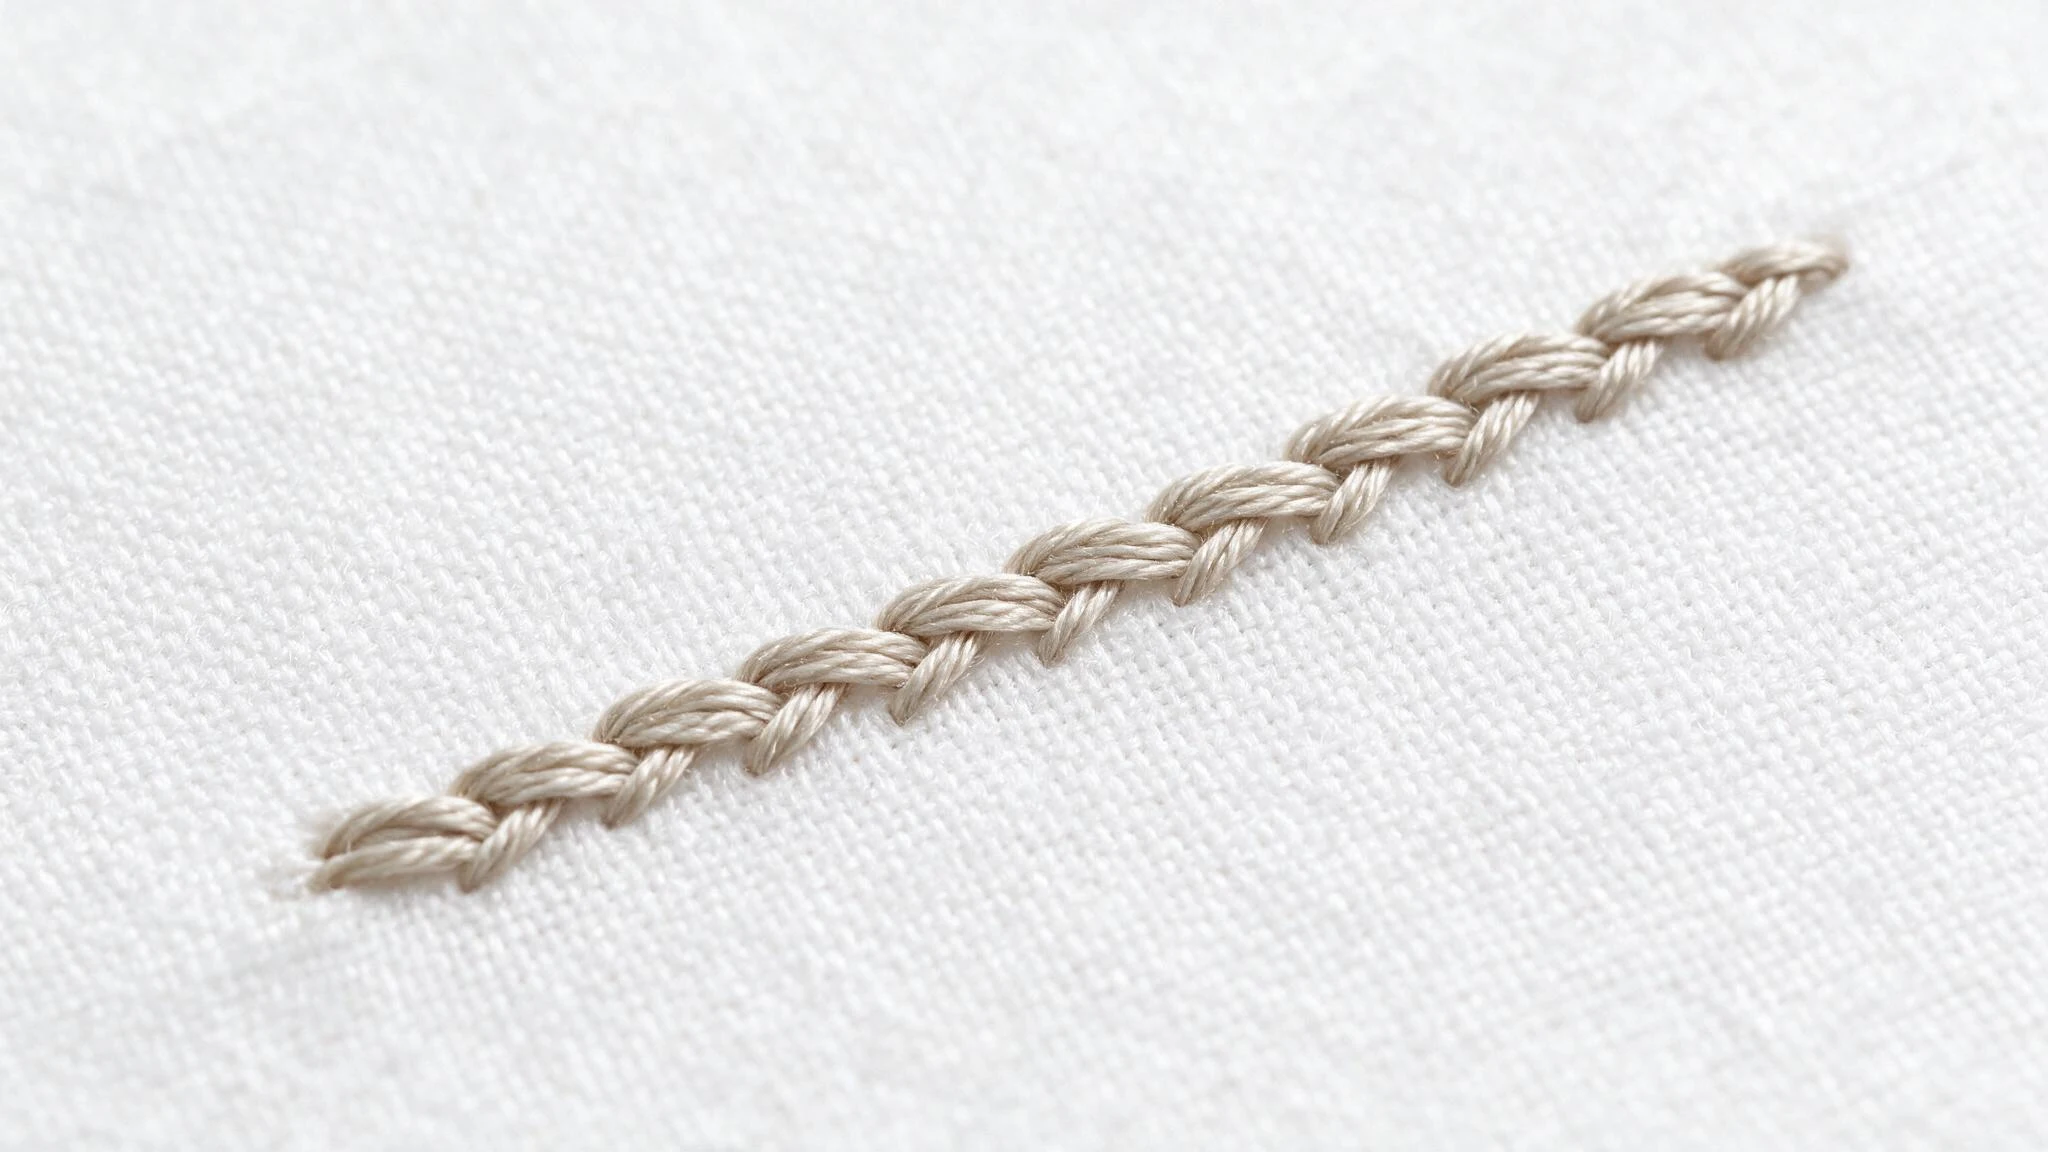
The needle comes up at the starting point, goes down a short distance ahead, then comes back up through the middle of that same stitch.
Splitting the thread this way creates a smooth, connected line. Split stitch has a slightly different texture than stem stitch, closer to a fine chain.
It suits smooth outlines, curves, and detailed lettering.
6. Chain Stitch
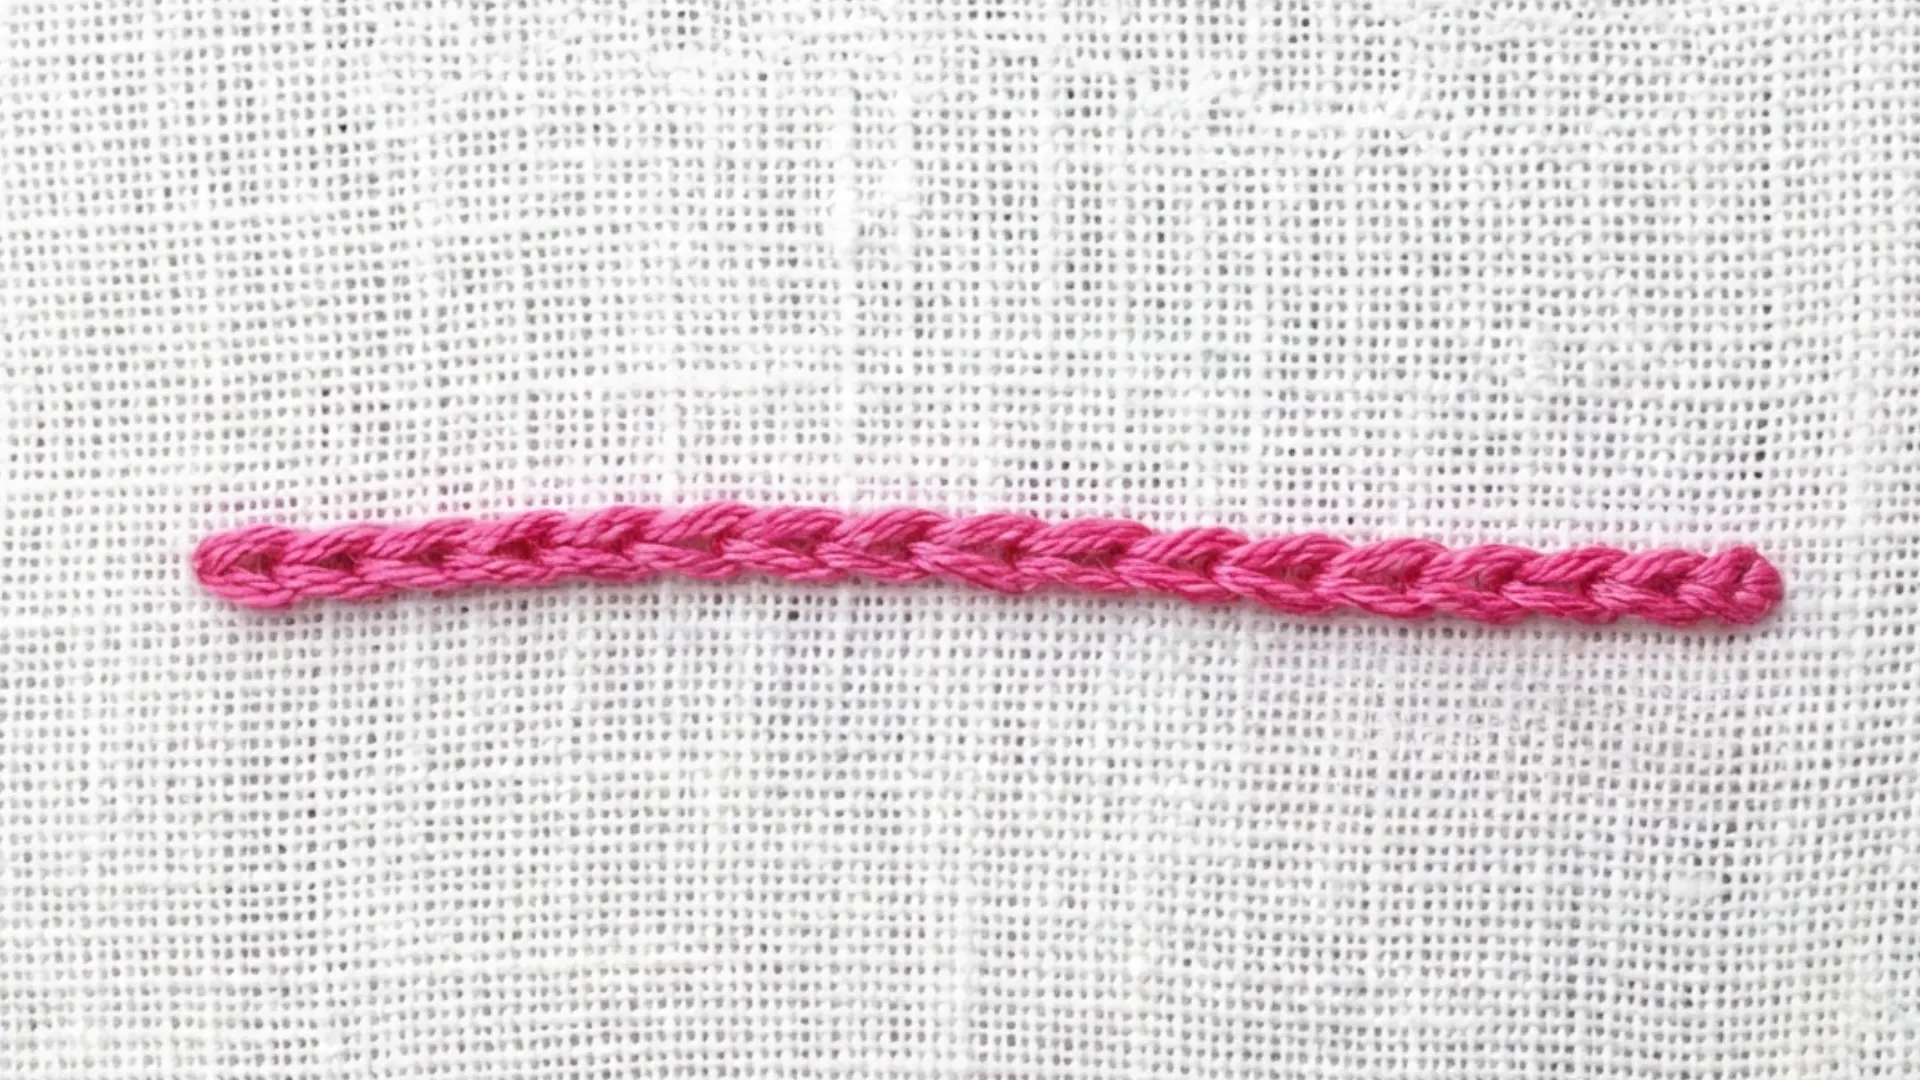
The needle comes up at the starting point, then goes back down into that same hole, leaving a small loop on top of the fabric.
It comes up again a short distance ahead, catching that loop before pulling through. Repeating this motion builds a connected chain of loops down the line.
Chain stitch is a strong pick for bold outlines, borders, and decorative lines with visible texture.
7. Lazy Daisy Stitch
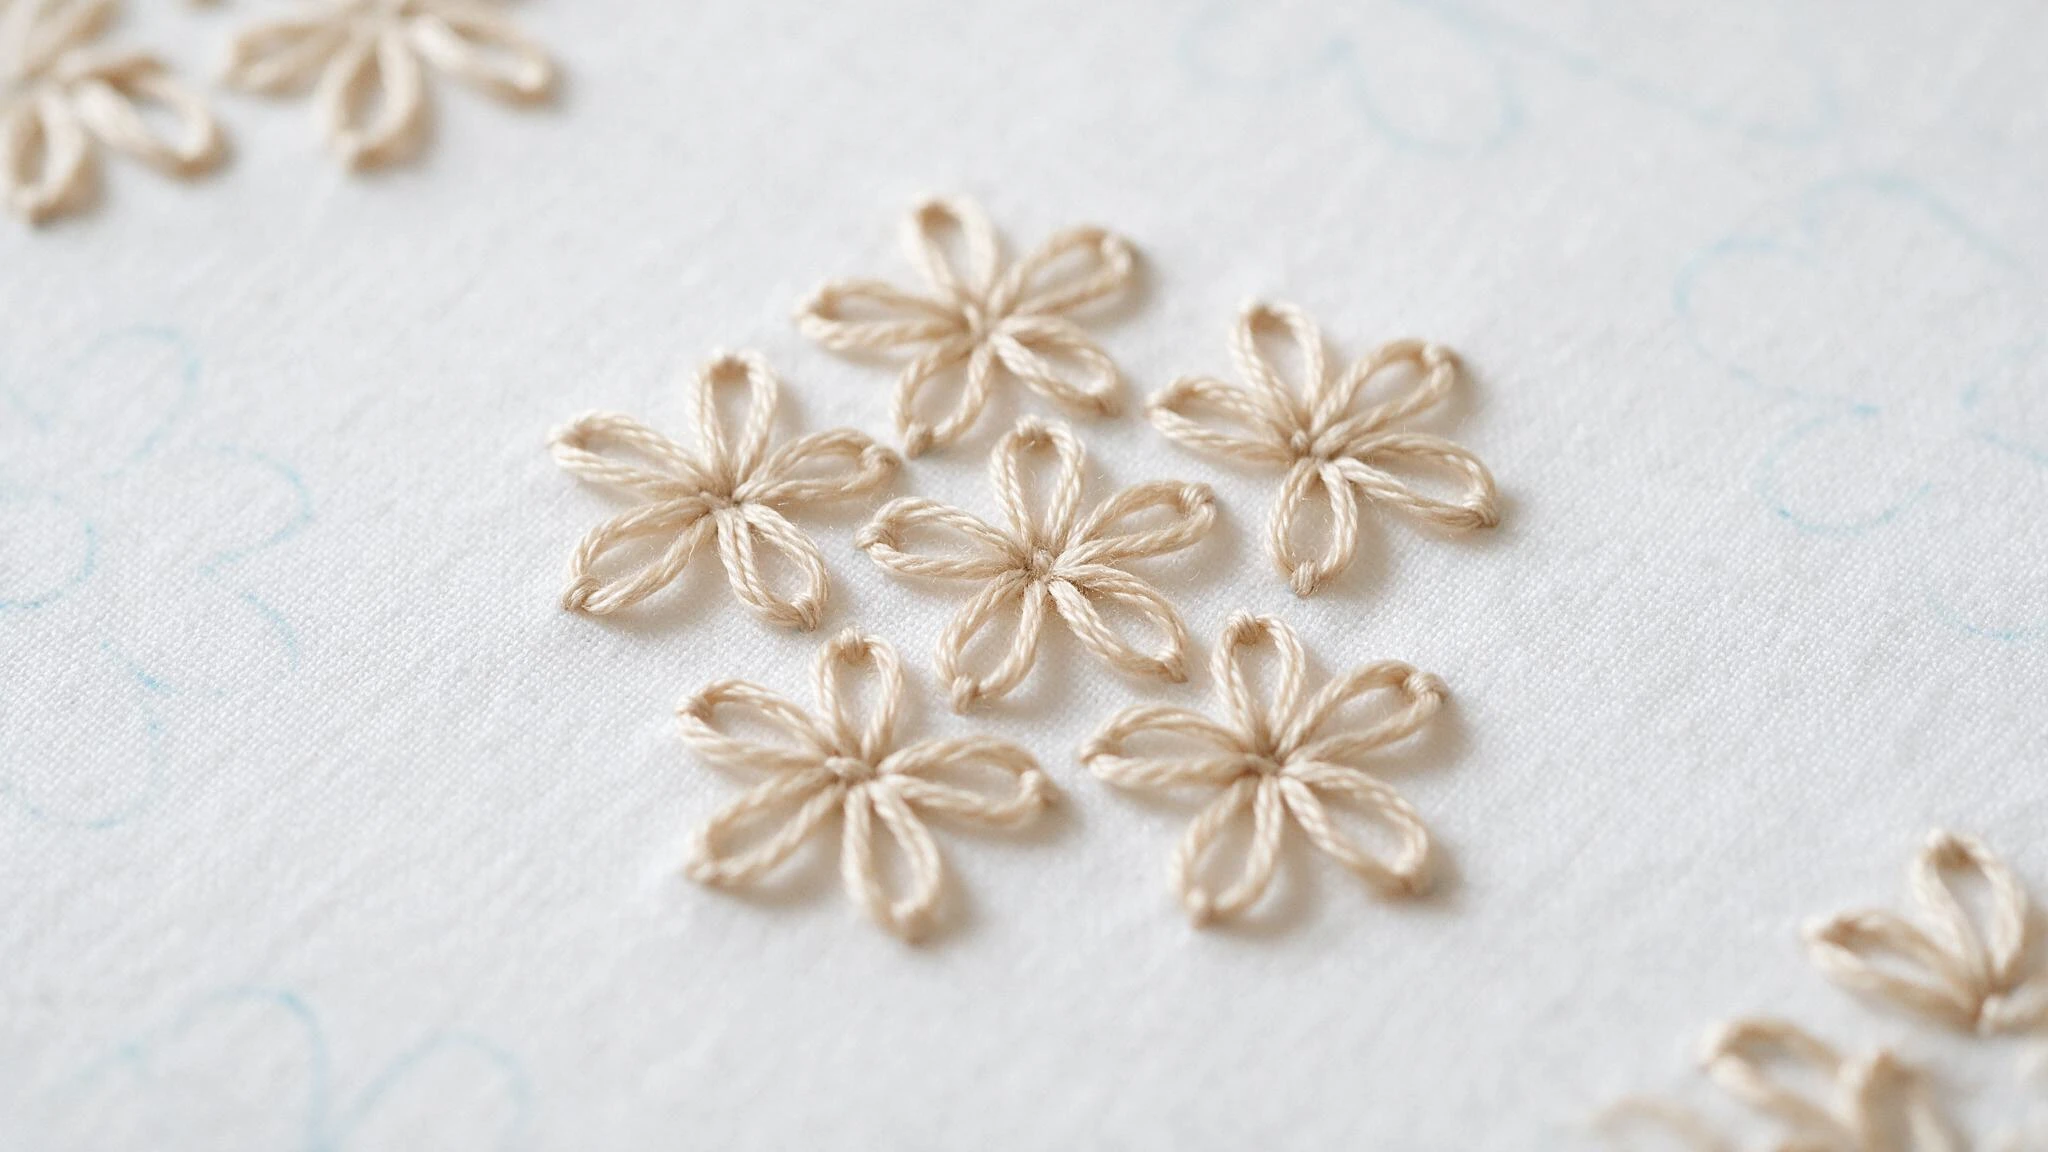
The needle comes up at a center point, then goes back down into that same hole, leaving a loop on top of the fabric.
It comes up again a short distance away, catching the loop, then a tiny stitch anchors it in place. Repeating this around a central point forms a flower shape.
Lazy daisy stitch works well for flowers, leaves, and small decorative motifs.
8. Satin Stitch
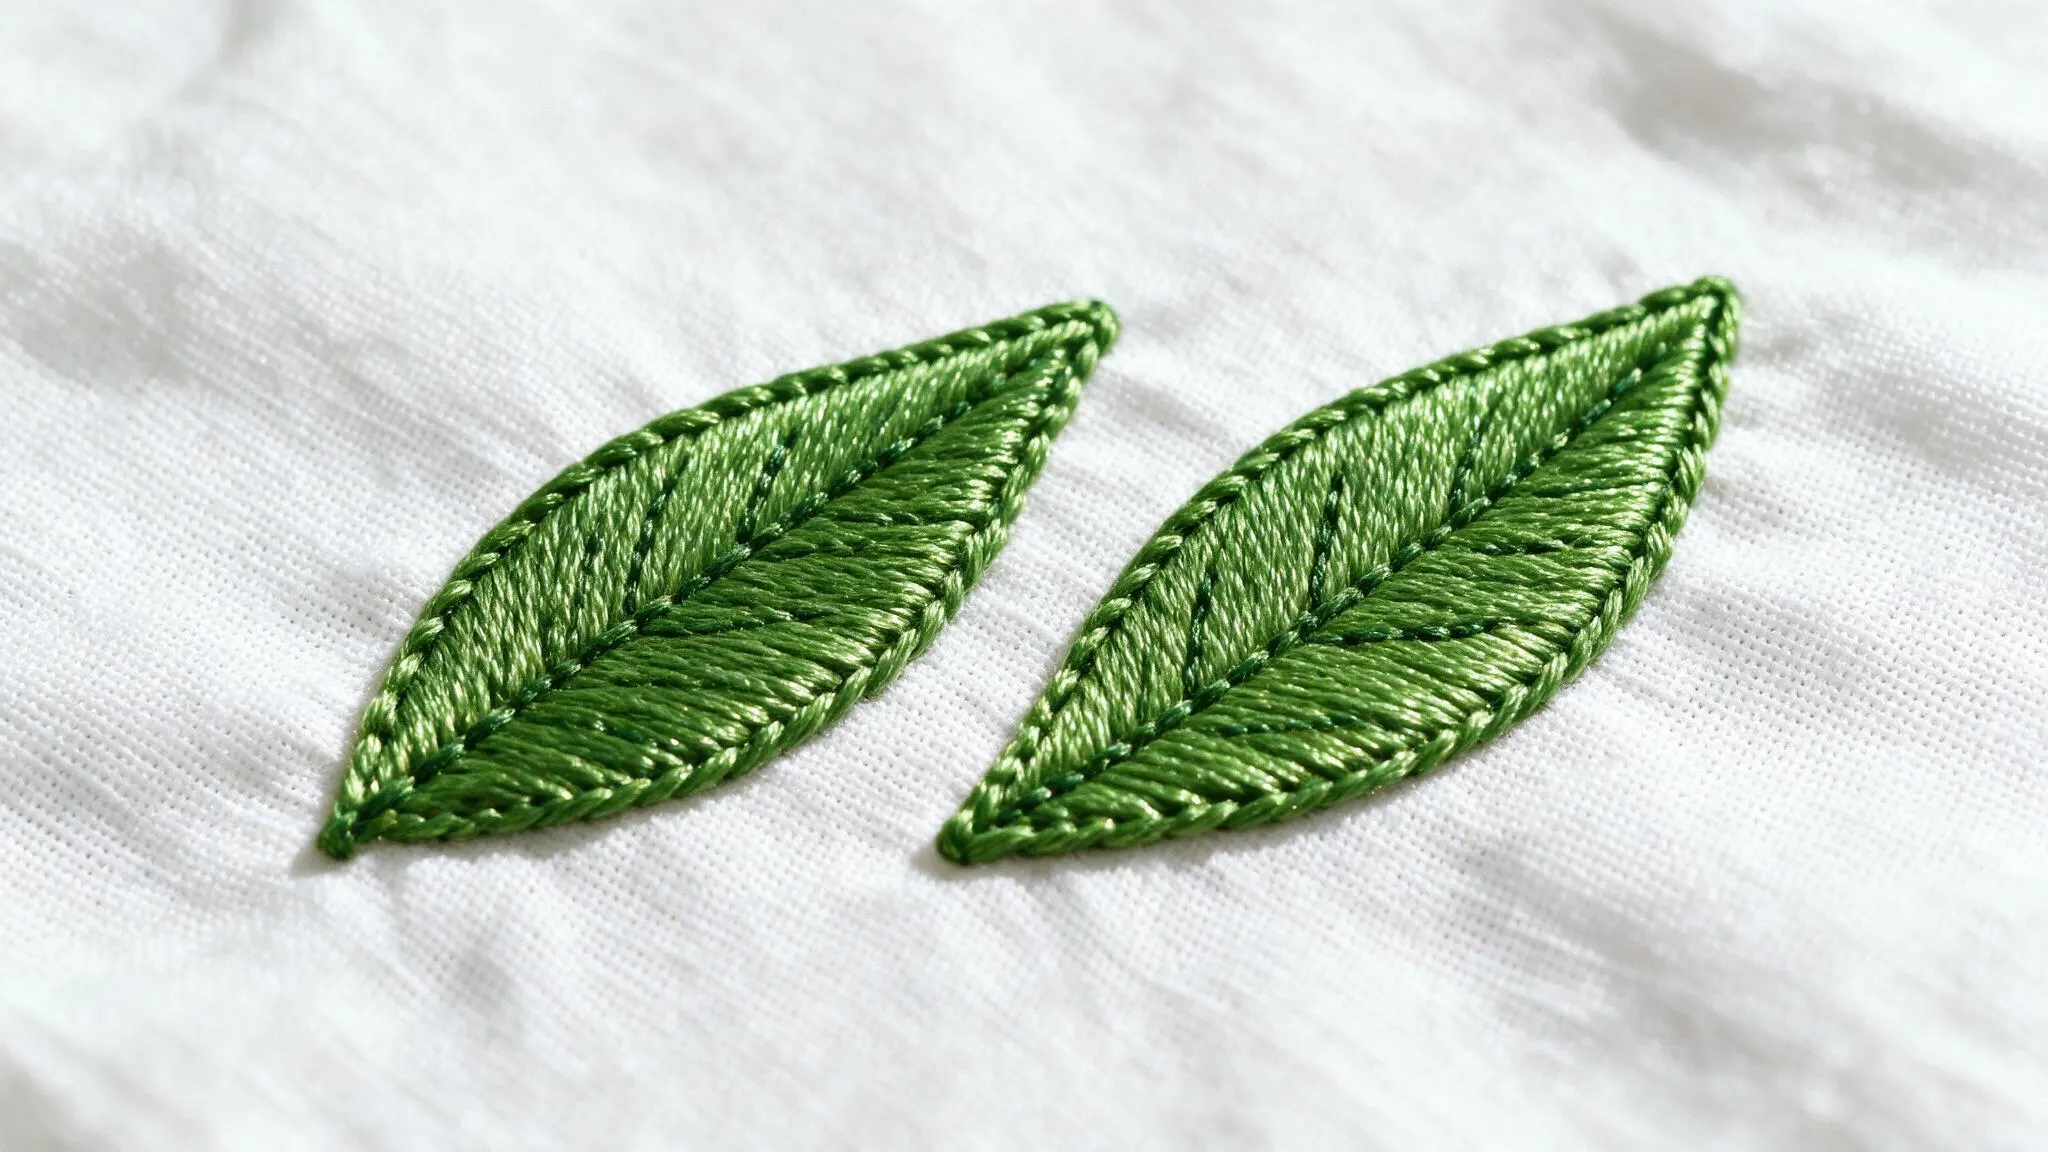
The needle comes up on one edge of a shape, goes straight down on the opposite edge, then comes back up right next to the starting point.
Repeating this across the whole shape fills it in completely. Satin stitch works well for petals, leaves, and other small solid areas.
Stitch direction changes the finished look and gives it a subtle sheen.
Pulling thread too tightly is a common mistake with satin stitch. Loosening tension slightly helps keep the fabric flat instead of puckering.
9. French Knot
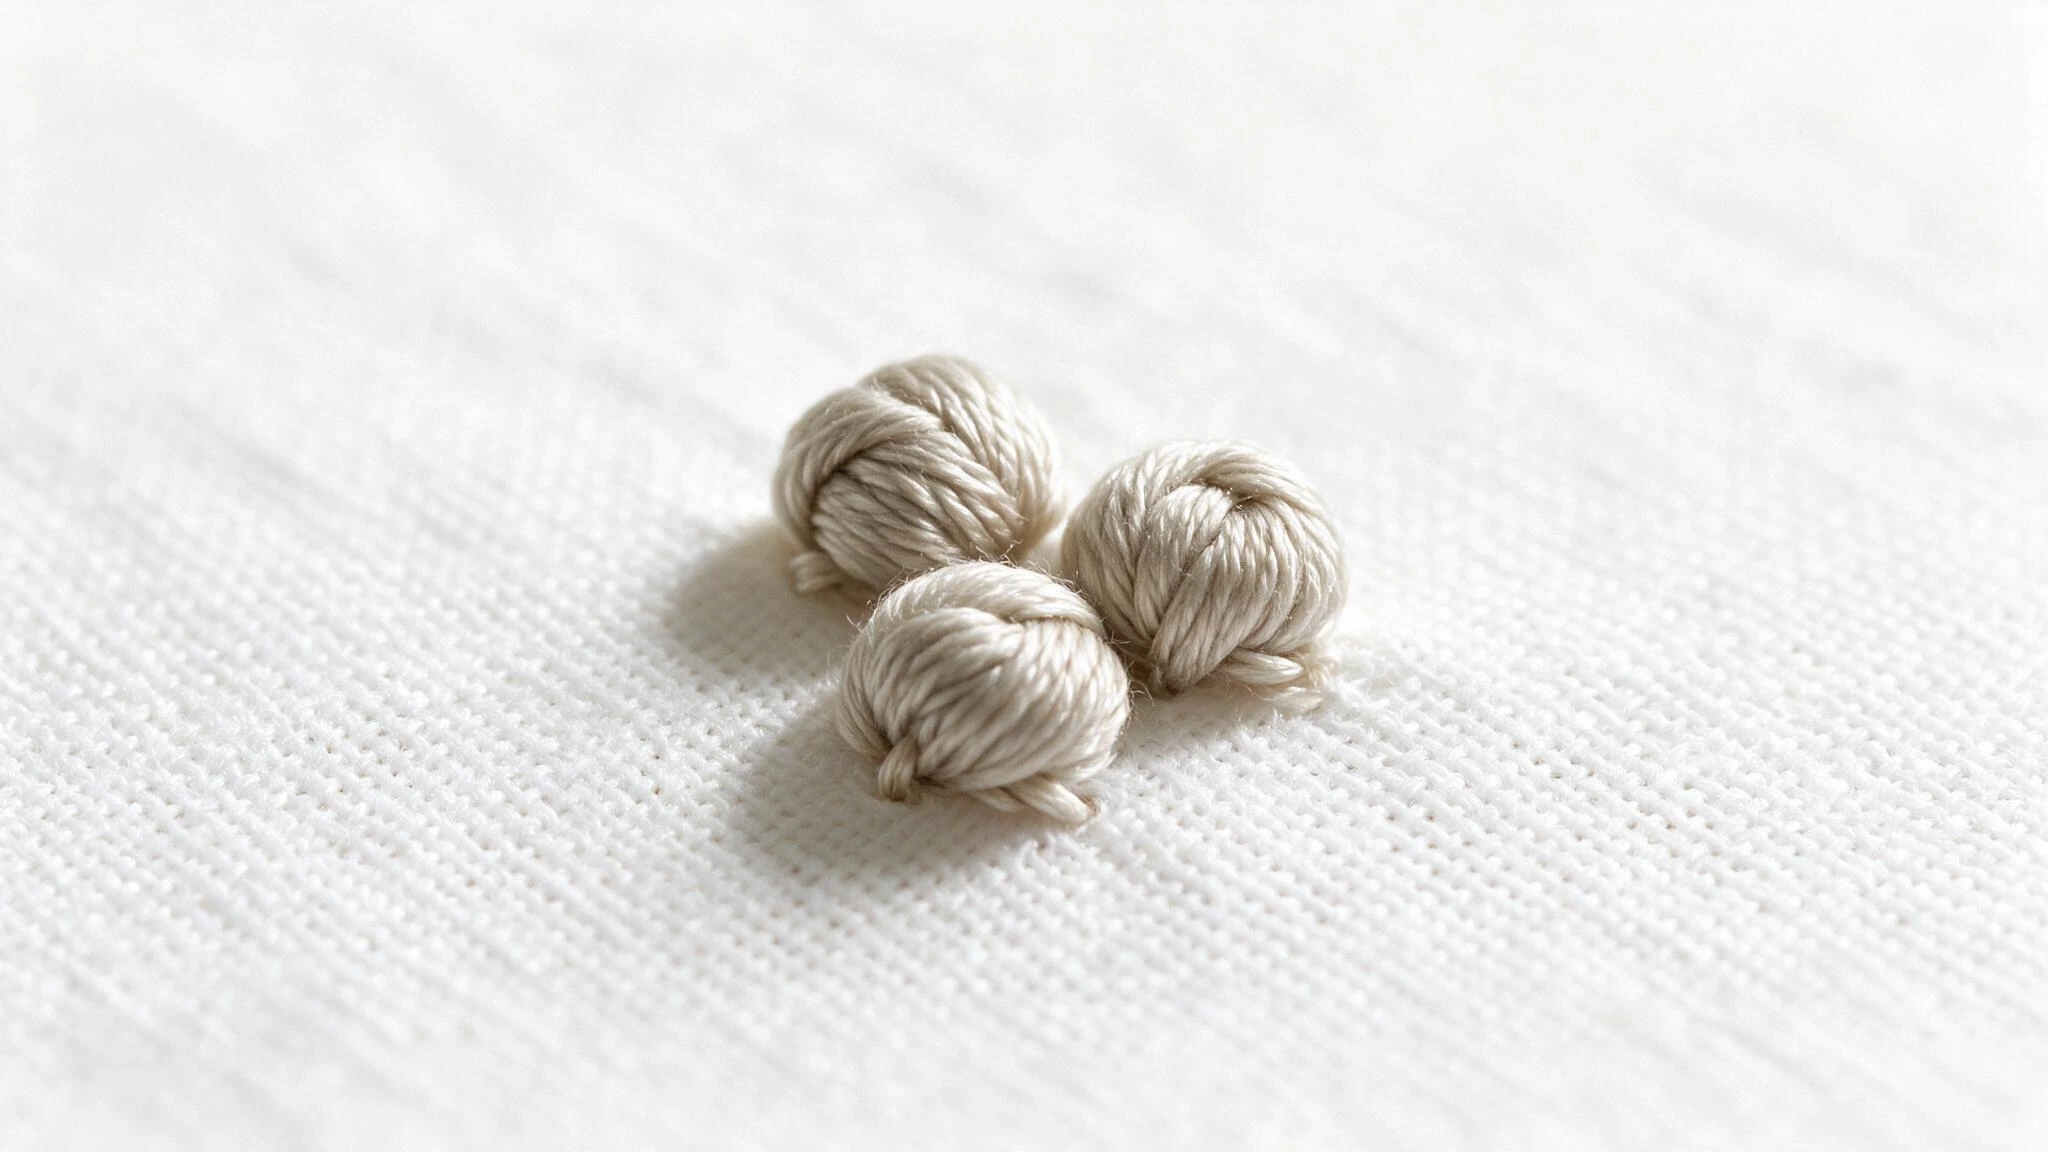
The needle comes up through the fabric, and the thread wraps around the needle tip two or three times.
The needle then goes back down close to, but not exactly in, the starting point. Pull the thread through slowly while holding it firm to create a small, raised knot.
French knots work well for flower centers, eyes, and small bursts of texture.
Using too many floss strands can make French knots bulkier than intended. Fewer strands create smaller, neater knots for fine detail work.
10. Seed Stitch
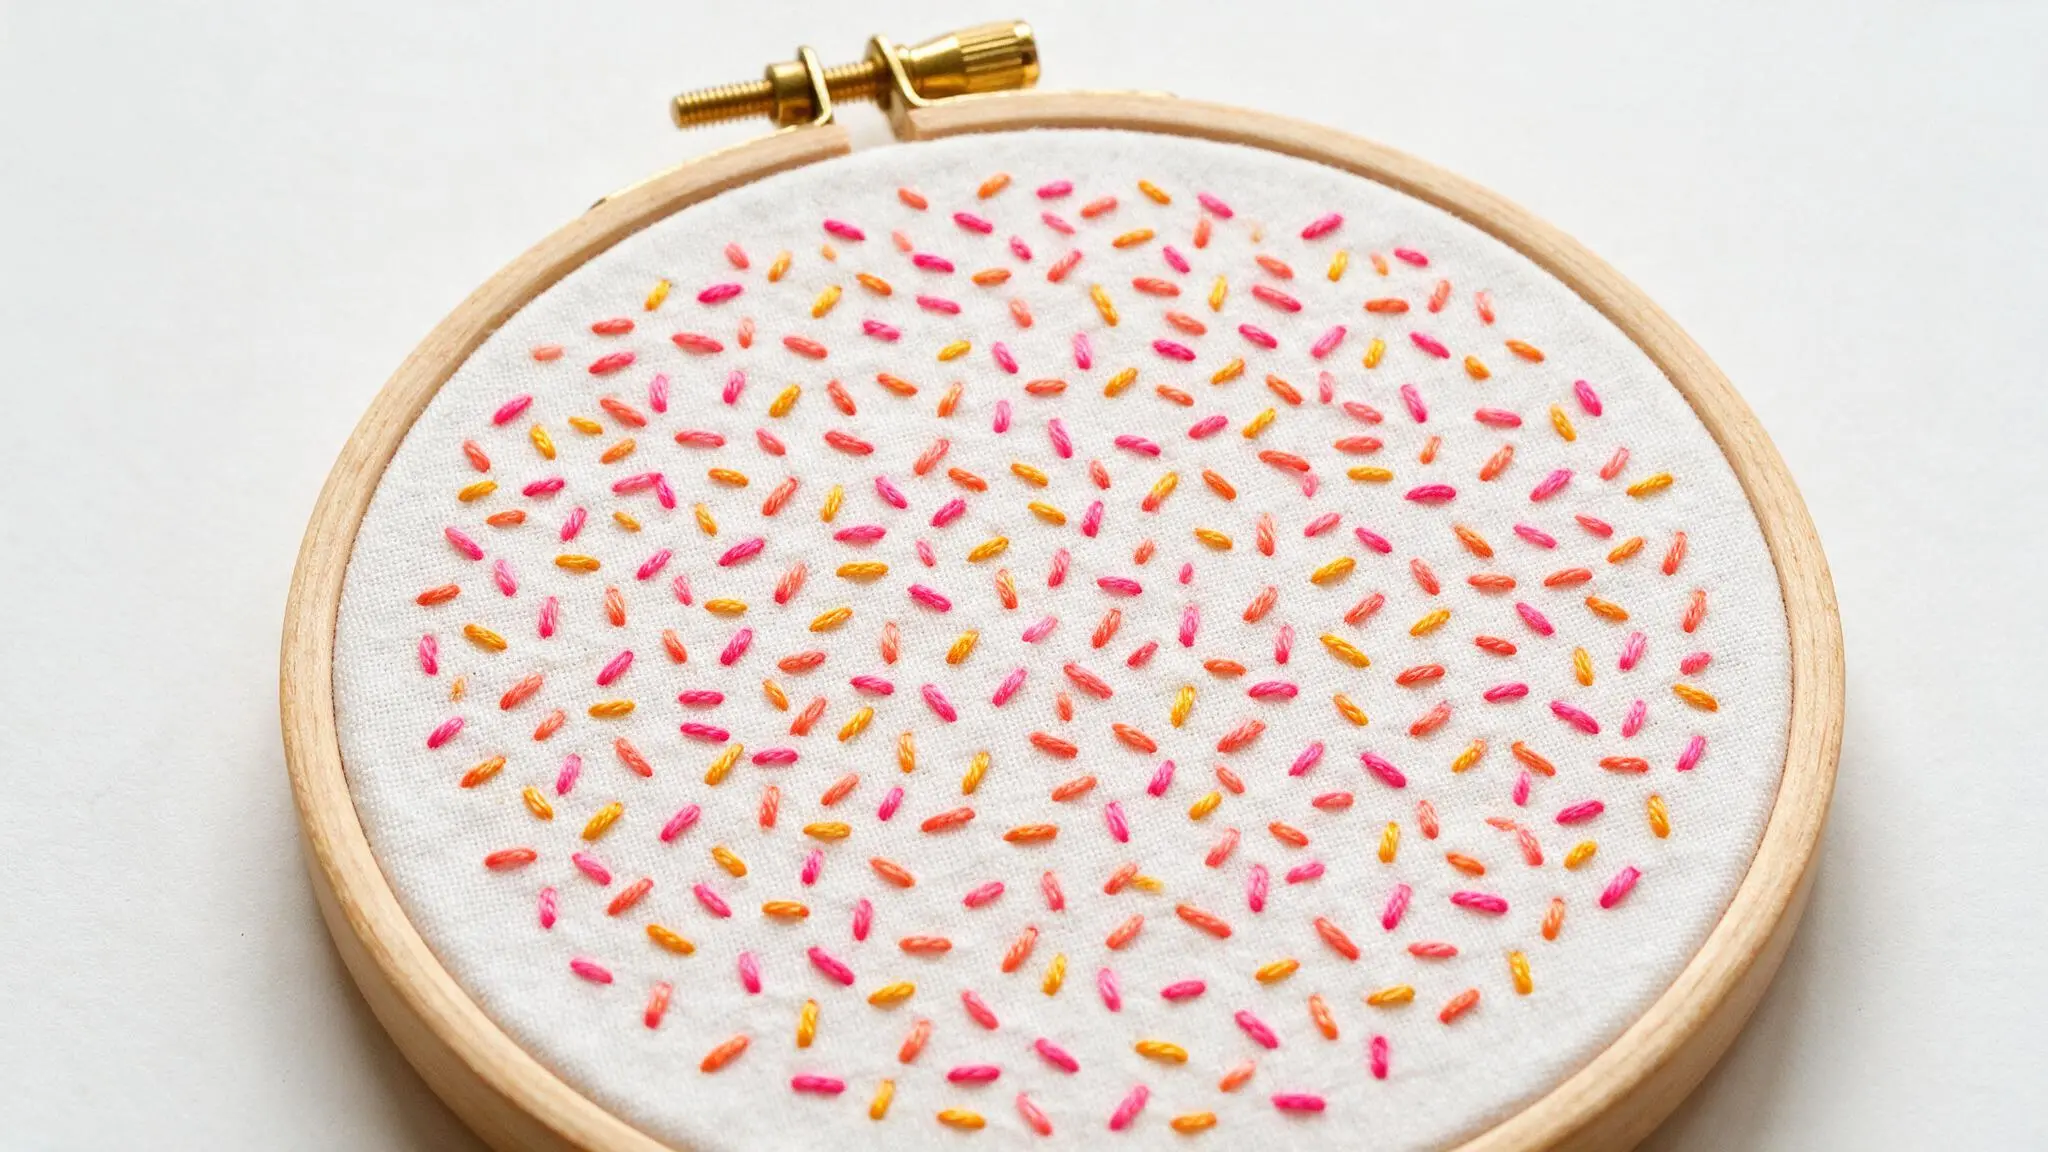
The needle comes up at a point, goes down a short distance away, then comes up again somewhere new nearby. Each stitch faces a slightly different direction rather than lining up in a row.
Seed stitch adds detail to filling backgrounds and adds light, natural texture. Keeping the placement random gives it the most realistic effect.
11. Blanket Stitch
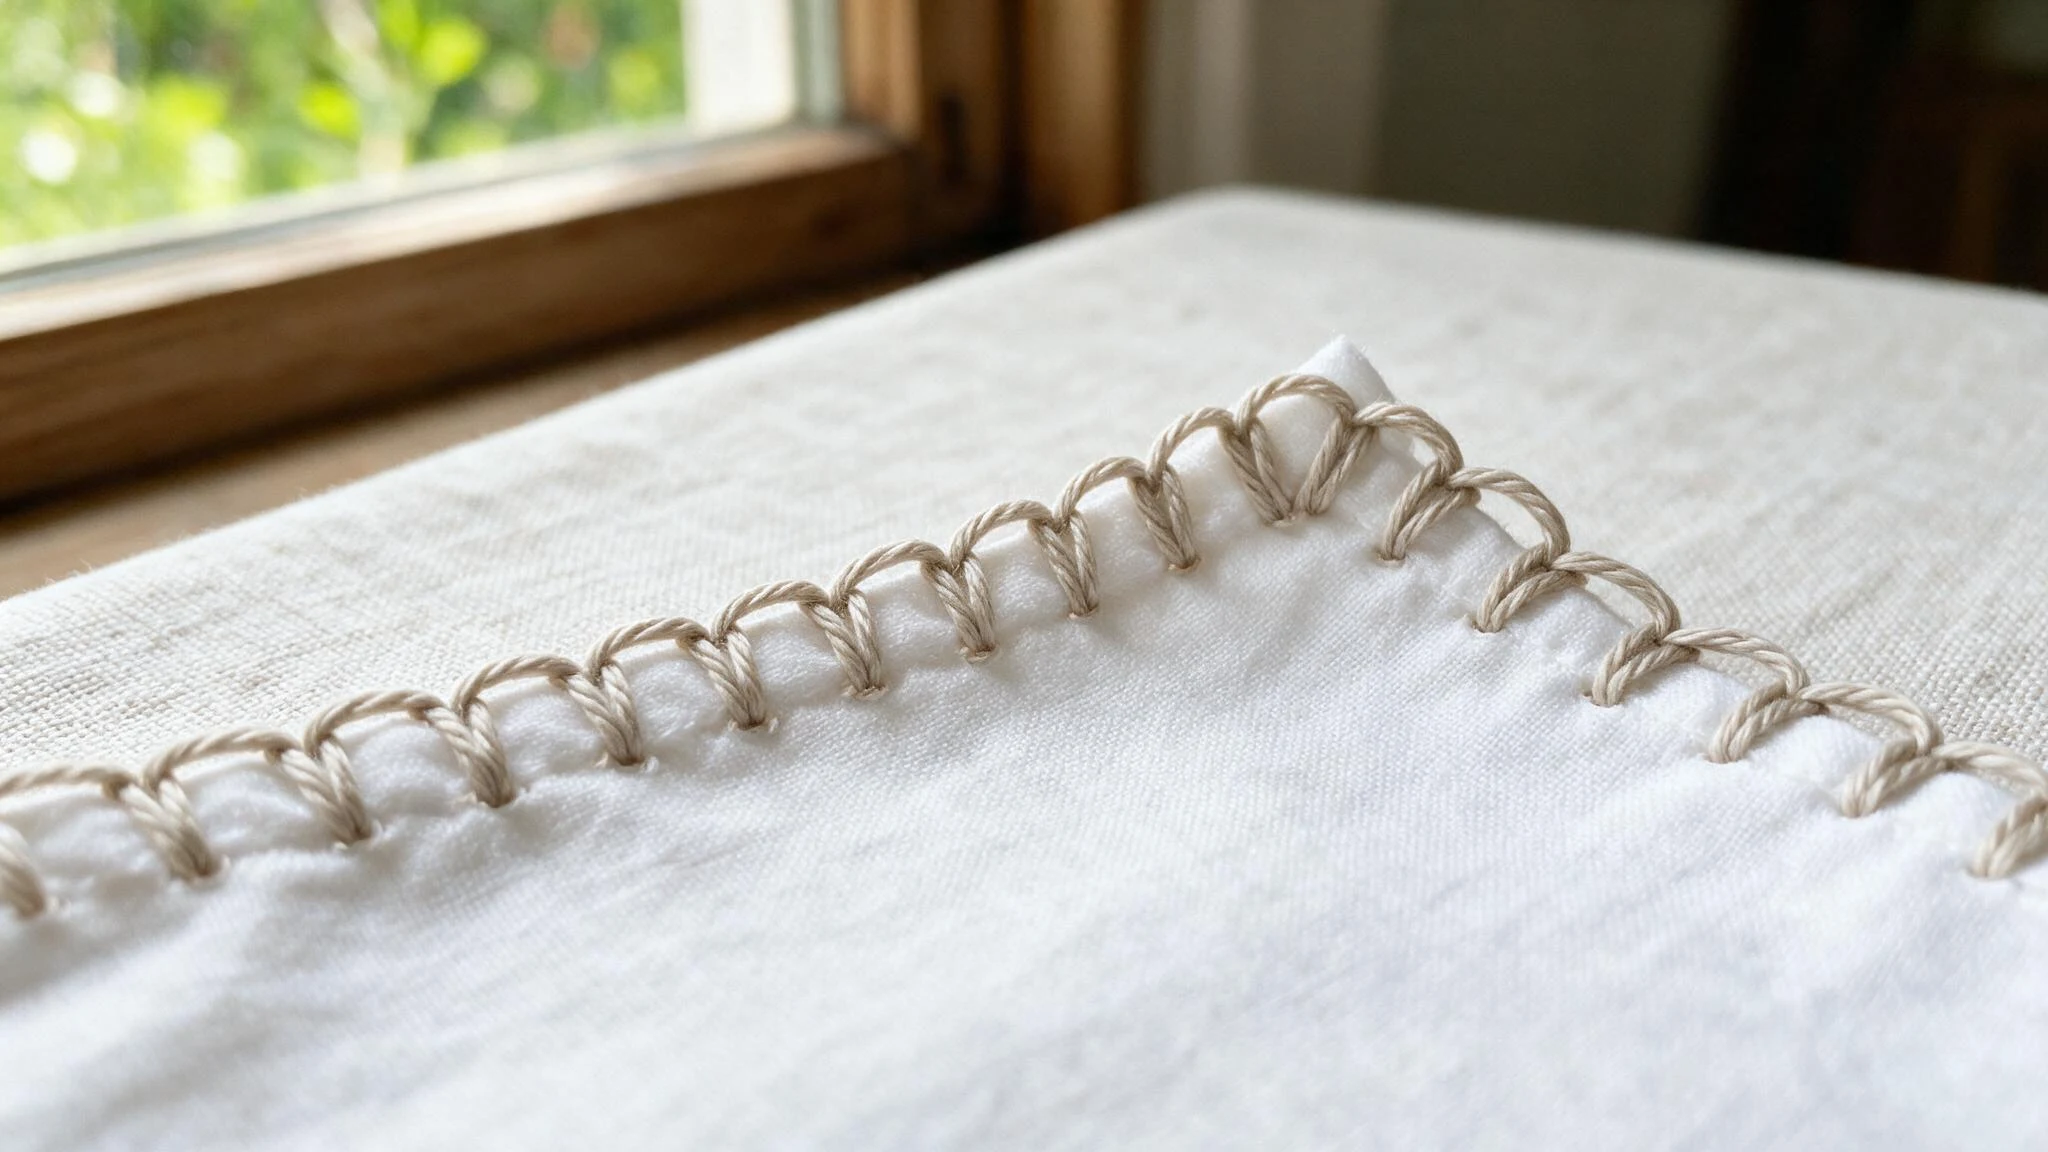
The needle comes up along the edge of the fabric, then goes down a short distance in from that edge.
It comes back up right on the edge, catching the thread under the needle before pulling through. Repeating this along the border creates a row of connected, upright stitches.
Blanket stitch works well for finished edges, appliqué, and decorative borders.
12. Herringbone Stitch
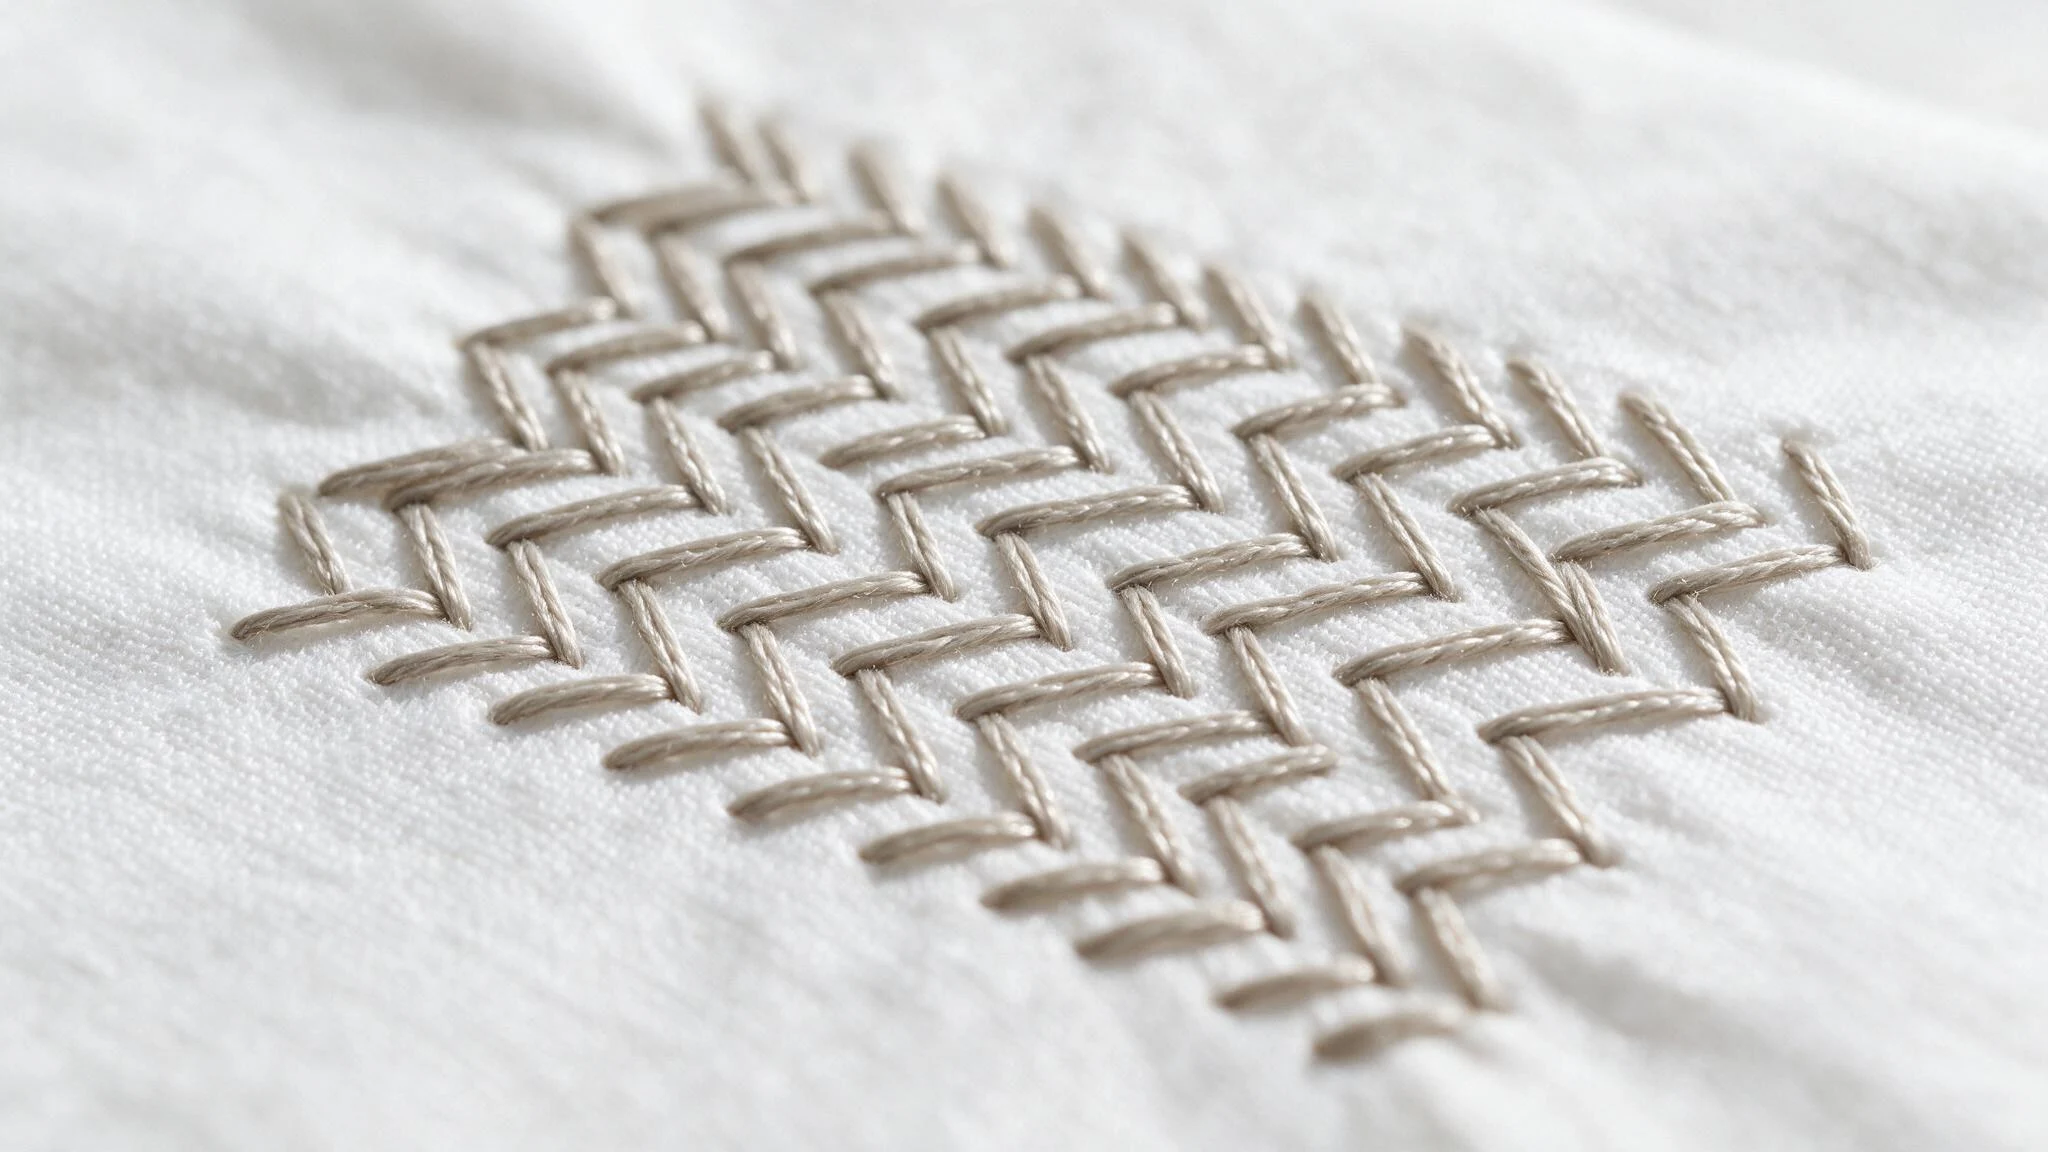
The needle comes up on one side of a line, then crosses over to go down on the opposite side, slightly ahead.
It comes back up on the first side again, further along, creating a crossed pattern. Repeating this back-and-forth motion builds a connected zigzag line.
Herringbone stitch suits borders, decorative bands, and textured filling.
13. Feather Stitch
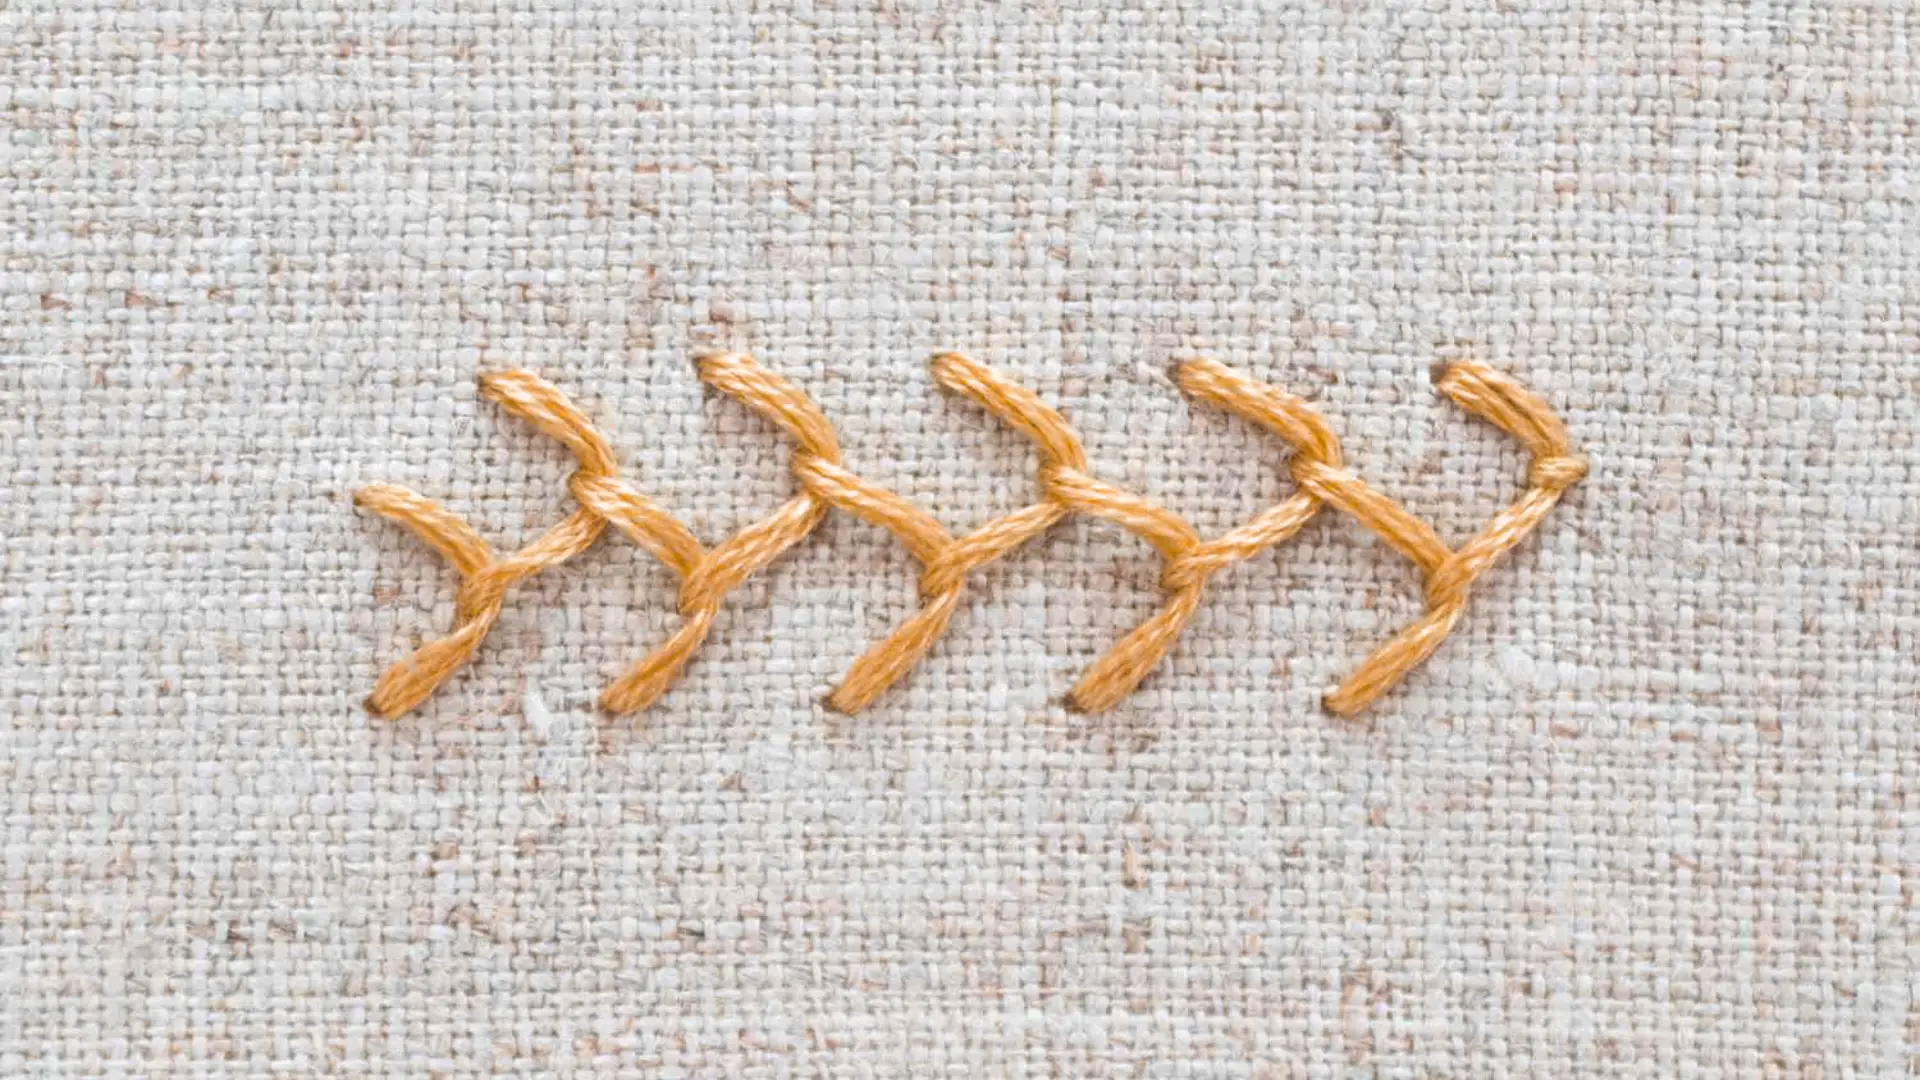
The needle comes up at the center line, then goes down slightly to one side, catching a loop of thread with the next stitch.
It comes back up at the center again, alternating sides with each new stitch.
This alternating motion creates a branching, feather-like pattern down the line. It suits vines, borders, and flowing decorative lines.
14. Fly Stitch
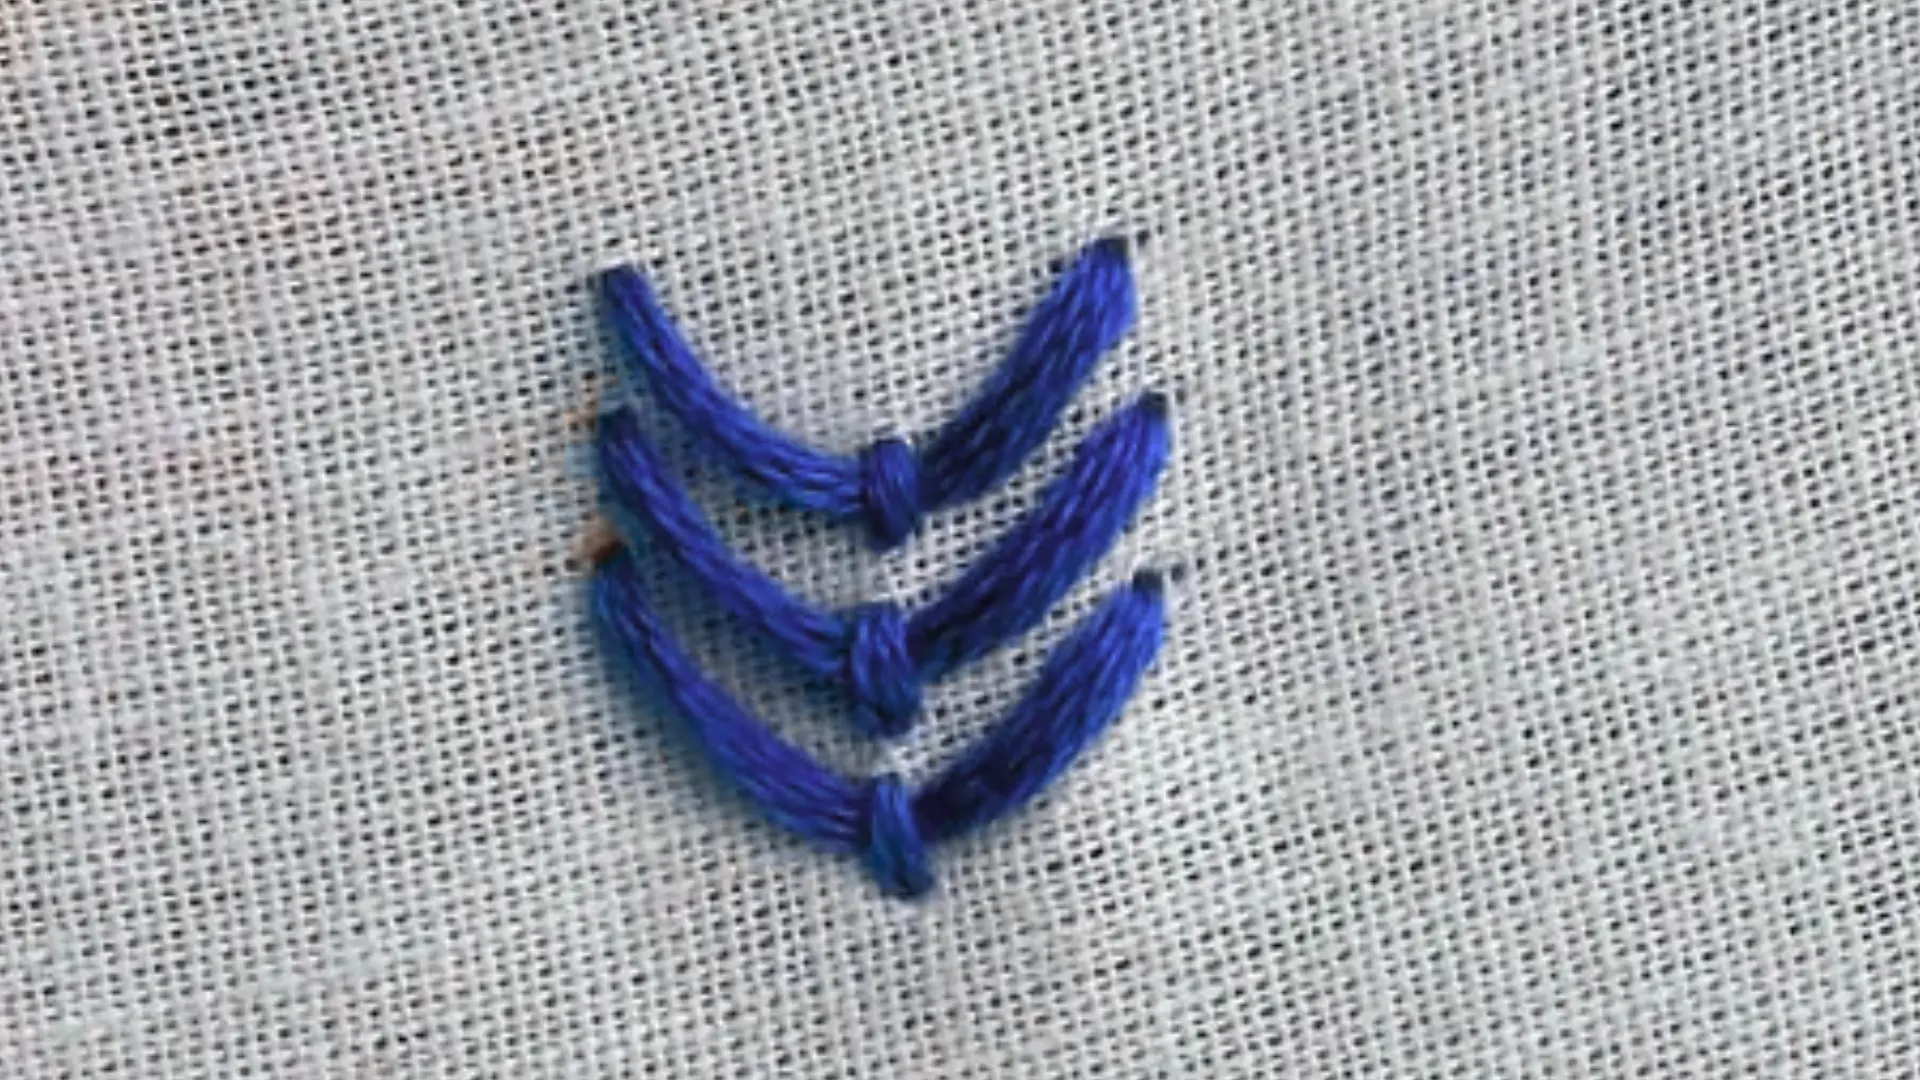
The needle comes up at one point, goes down at another to form a V shape, then comes back up at the base of that V. A small stitch anchors the point in place, securing the shape.
Fly stitch works well for leaves, branches, and scattered small motifs. Adjusting the width of the V changes how open the shape looks.
15. Couching Stitch
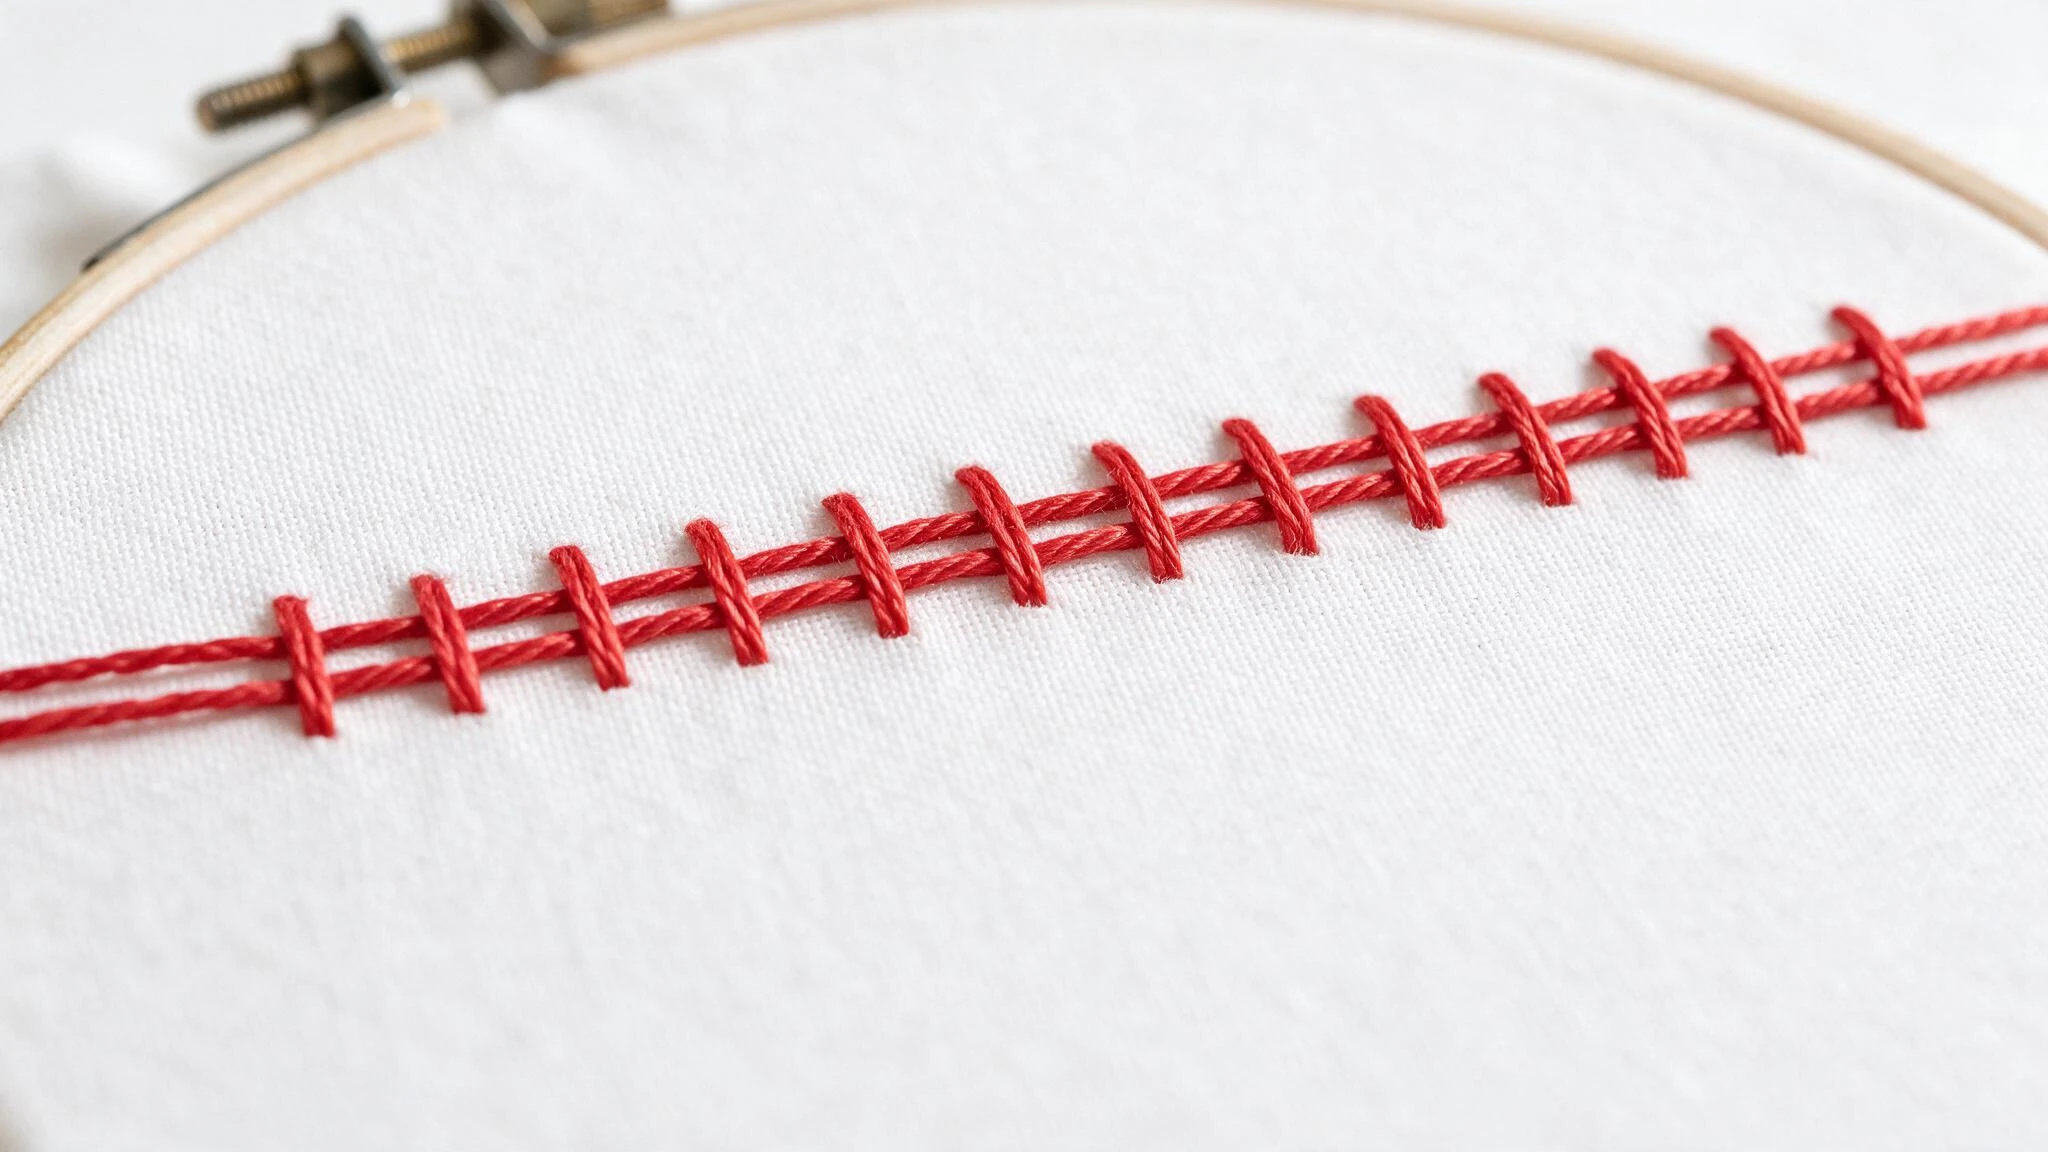
A thicker thread lies flat along the surface of the fabric, following the line of the design.
The needle comes up on one side of that thread, then goes down on the other, forming small stitches that hold it in place.
Repeating this at even intervals secures the entire length. Couching stitch works well for thick threads, curves, and bold lettering.
A Guide to Stitching Needle Size
The right needle size makes floss glide through fabric instead of fighting it.
Embroidery needles are sized by number; the higher the number, the finer and shorter the needle. Matching size to floss thickness and fabric weight keeps stitches even and prevents fraying or oversized holes.
| Needle Size | Best For |
|---|---|
| Size 3–5 | Thick threads, couching, heavy fabric |
| Size 6–8 | Standard 6-strand floss, general stitching |
| Size 9–10 | 2–3 strand floss, fine detail work |
| Size 11–12 | Single-strand floss, delicate lettering, silk fabric |
Practice with a Simple Stitch Sampler
Putting stitches into practice works better than learning each one in isolation.
A small sampler gives every stitch a place to be tried out, compared, and remembered before moving on to a full project.
Divide Fabric Into Stitch Sections
Scrap fabric marked into fifteen small sections gives each stitch its own space to practice.
Practice Lines, Curves, and Shapes
Straight lines suit running stitch and backstitch.
Curves work for stem stitch and chain stitch. Shapes suit satin stitch, while scattered spots work for seed stitch and French knots.
Compare Similar Stitches Together
Practicing running stitch beside backstitch, stem stitch beside split stitch, and chain stitch beside lazy daisy stitch makes the differences between them easier to see.
Combine Stitches Into One Design
A simple floral sampler brings several stitches together.
Stem stitch forms the stems, lazy daisy stitch makes the petals, satin stitch fills in the leaves, and French knots sit at the center of each flower.
Putting Stitches to Work
Simple lines, filled shapes, and raised knots each have a clear reason for being chosen over one another.
Matching stitches to the right job, rather than guessing, is what separates basic embroidery stitches from a random pile of techniques.
Once the different types of embroidery stitches have names and uses attached to them, picking one for a project stops being a puzzle.
Choosing where to begin no longer needs to be a barrier. A small sampler, or one flower stitched from start to finish, puts these stitches to work right away.
Frequently Asked Questions (FAQs)
1. How Many Embroidery Stitches Are There Overall?
Estimates run into the hundreds, shaped by different cultures and time periods.
2. Can These Stitches Be Done on Any Fabric?
Tightly woven fabrics like cotton or linen hold stitches better than stretchy or loose ones.
3. How Long Does It Take to Get Comfortable with These Stitches?
Most beginners notice steadier, more even stitches within a few short practice sessions.
4. Do Embroidery Stitches Fade or Come Undone After Washing?
Stitches secured properly with quality floss hold up well through gentle hand washing.
5. Is a Sewing Machine Needed to Start Embroidery?
No, hand embroidery only needs a needle, floss, fabric, and a hoop.