A clean-looking sink can still hide greasy food residue beneath the splash guard and inside the garbage disposal chamber during normal everyday use.
This hidden buildup can cause stubborn odors and make an otherwise tidy kitchen feel unpleasant soon after daily the.
This blog explains how to clean garbage disposal components safely using basic supplies, practical methods and a clear maintenance schedule for dependable long-term care.
Continue reading to learn how to remove hidden grime, avoid common cleaning mistakes and keep the appliance fresher without causing unnecessary damage.
Why Cleaning The Garbage Disposal Matters
Small food particles can settle along the chamber walls and beneath the rubber splash guard during normal everyday kitchen use.
Because these hidden surfaces remain damp, leftover residue may develop a greasy texture and create persistent unpleasant kitchen odors indoors.
Thorough cleaning removes stubborn film from areas that ordinary dishwashing water cannot reach, the same reasoning behind routines to clean a stainless steel sink beyond just wiping down the basin.
Routine maintenance also helps homeowners identify cracked rubber, loose fittings, slow drainage, or moisture collecting inside the cabinet below early.
Finding these warning signs early can prevent minor maintenance concerns from developing into larger plumbing problems requiring expensive professional repairs.
Materials Needed to Clean a Garbage Disposal
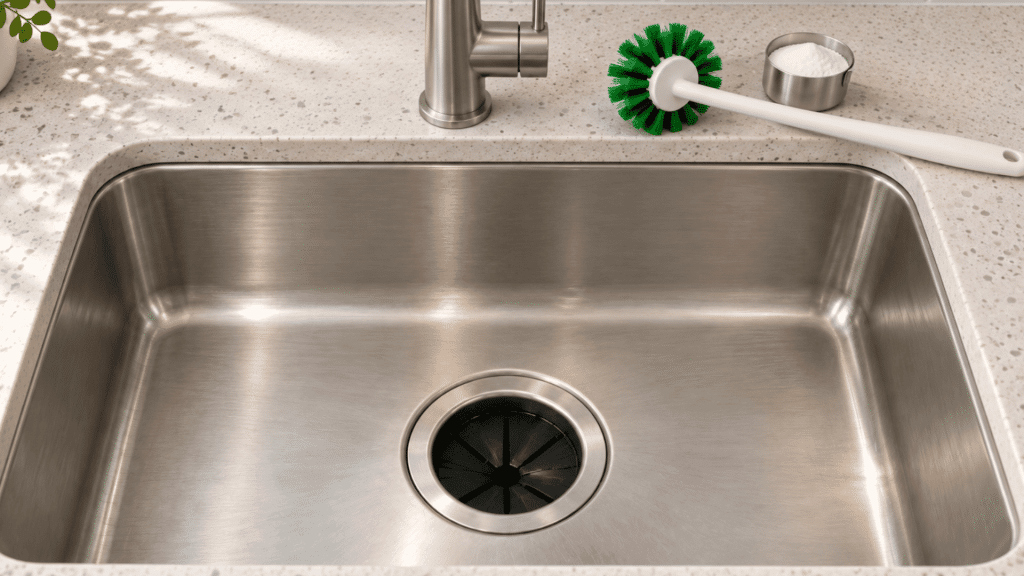
Only a few basic materials are required to clean the splash guard and flush the garbage disposal through the updated five-step process.
|
Material |
Purpose |
|---|---|
|
Rubber gloves |
Protect hands during cleaning |
|
Garbage disposal brush |
Scrubs beneath the splash guard |
|
Sink stopper |
Holds warm water in the sink |
|
Baking soda |
Loosens residue and reduces odors |
|
Measuring cup |
Measures the baking soda |
|
Warm and cold water |
Cleans and rinses the disposal |
How to Clean a Garbage Disposal
Follow these five steps in order to remove food residue and odors while keeping the garbage disposal safe during cleaning.
Step 1: Scrub The Splash Guard

Switch off the disposal and disconnect its power before lifting each rubber flap, preventing accidental movement while the opening is being cleaned.
Scrub both sides of the splash guard with warm water, mild dish soap, and a narrow brush that reaches hidden grooves.
Clean around the drain rim without placing fingers inside, then rinse the rubber thoroughly and replace it when cracks, stiffness, or warping appear during a careful inspection.
Step 2: Fill The Sink with Warm Water

Place the stopper securely over the disposal opening after the splash guard has been cleaned and returned to its correct position.
Fill the sink halfway with warm water, creating enough volume to carry loosened grease and food residue through the chamber later.
Use warm rather than extremely hot water because excessive heat can soften greasy buildup and move it farther into the household drain line during the flushing process later.
Step 3: Mix Baking Soda into The Water

Measure one-quarter cup of baking soda and spread it evenly through the warm sink water before the disposal begins operating.
Stir gently with a long-handled utensil so the powder dissolves without requiring hands to move near the drain opening.
Baking soda helps loosen light greasy film and control ordinary food odors, although it it cannot remove solid obstructions or correct mechanical problems inside the disposal chamber during regular household cleaning sessions.
Step 4: Flush The Garbage Disposal

Reconnect the disposal only after every brush, cloth, utensil, and cleaning tool has been removed completely from the sink basin.
Start the appliance and remove the stopper, allowing the baking soda water to rush through the chamber and carry away loosened residue.
Keep hands clear while the sink drains, then stop immediately if grinding or rattling suggests a trapped object, the kind of blockage some homeowners diagnose with a DIY plumbing camera before the disposal operates again safely.
Step 5: Complete a Cold Water Rinse

Run a moderate stream of cold water while the disposal continues operating for several seconds after the baking soda mixture drains.
Add several drops of mild dish soap when extra degreasing is needed, then allow the clean water to rinse away remaining foam.
Turn off the appliance first and leave the cold water running briefly so loosened particles travel beyond the chamber instead of settling again inside the drain line.
Different Methods for Cleaning a Garbage Disposal
1. Cleaning with Lemons: Grind several small seedless lemon pieces with cold running water to loosen light residue and leave the chamber smelling fresher.
2. Vinegar Ice Cubes: Freeze diluted vinegar in an ice tray, then grind several cubes with cold water to loosen residue and control unpleasant odors.
3. Using Baking Soda: Pour baking soda into the switched-off disposal, leave it briefly, then rinse the chamber thoroughly with warm water and soap.
4. Cleaning with Borax: Add a small amount of borax, wait several minutes, then flush thoroughly while following the manufacturer’s instructions for safe cleaning.
5. Dish Soap and Water: Add several drops of dish soap, run cold water and operate the disposal briefly to remove fresh greasy food residue safely.
6. Commercial Disposal Cleaner: Use a manufacturer-approved disposal tablet according to its label, then complete the stated rinsing process before operating the appliance again.
How Often Should The Garbage Disposal be Cleaned?
Daily users can clean the rubber splash guard weekly and complete a deeper cleaning process once every month for maintenance.
A disposal used only occasionally may need thorough attention every four to six weeks, depending on how often the appliance processes food scraps.
The schedule should reflect actual conditions because visible film, slow drainage, or recurring odors can signal a blocked drain that needs professional attention, not just a cue to run another baking soda cycle.
Kitchens serving larger households or preparing frequent meals may require shorter intervals because more food passes through the appliance daily.
After grinding suitable scraps, run cold water briefly to carry remaining particles away and support a consistent cleaning routine afterward.
Important Garbage Disposal Safety Tips
Keep the wall control covered while cleaning so another person cannot switch on the appliance unexpectedly.
Long hair, loose sleeves, jewelry and cleaning cloths should remain away from the drain whenever the motor operates.
Never combine separate cleaning products. Bleach can react with acids or ammonia and create dangerous gases.
The CDC provides guidance for using bleach safely, including the importance of ventilation and following label directions.
Stop using the unit if smoke, sparks, a burning smell, severe vibration, or an active leak appears. These conditions require qualified inspection rather than continued testing at the sink.
Conclusion
Regular cleaning helps control odors, remove concealed food deposits and keep the sink area more pleasant during everyday kitchen use.
The safest approach combines disconnected power, careful splash guard scrubbing, suitable cleaning products and a thorough cold-water rinse afterward inside the chamber.
Checking the manufacturer’s instructions before using unfamiliar products can prevent accidental damage to internal components and connected household plumbing.
Try the method that best matches the appliance, then comment below with the cleaning technique, maintenance tip or disposal problem that has worked for your kitchen.
Frequently Asked Questions
Why Does The Garbage Disposal Smell when The Dishwasher Runs?
Odors appearing during dishwasher cycles may come from residue inside the shared drain connection or an incorrectly installed dishwasher hose.
Can a Dirty Garbage Disposal Attract Fruit Flies?
Fruit flies may breed in moist organic residue around the splash guard, drain opening, or nearby sink overflow channel areas.
Should The Garbage Disposal be Cleaned Before a Vacation?
Clean the disposal before leaving home for several days, then rinse thoroughly so food residue does not remain inside the appliance.