Crafting doesn’t require years of experience or a table full of expensive supplies.
The majority of the easy crafts for adults on this list can be made with materials that are already in a kitchen cabinet, drawer, or the bottom of a recycling bin; consider cardboard scraps, mason jars, and old T-shirts.
You don’t need to guess what will happen next because each project below is broken down into brief, one-line steps.
This list covers a wide range of possibilities without requiring a significant time investment or a trip to the craft store, from simple home décor pieces to ideas created for group nights, gifts, pets, and even a little extra revenue.
Take whatever is available and begin.
Easy Crafts to Make at Home
If you’re looking for easy crafts for adults that don’t require any specific talents, lengthy supply lists, or a trip across town, this is the place to start.
Each of the projects below makes use of inexpensive items from the dollar store or items that are already lying around the house. Select one, clear a table, and begin.
1. Standing Wine Cork Trivet
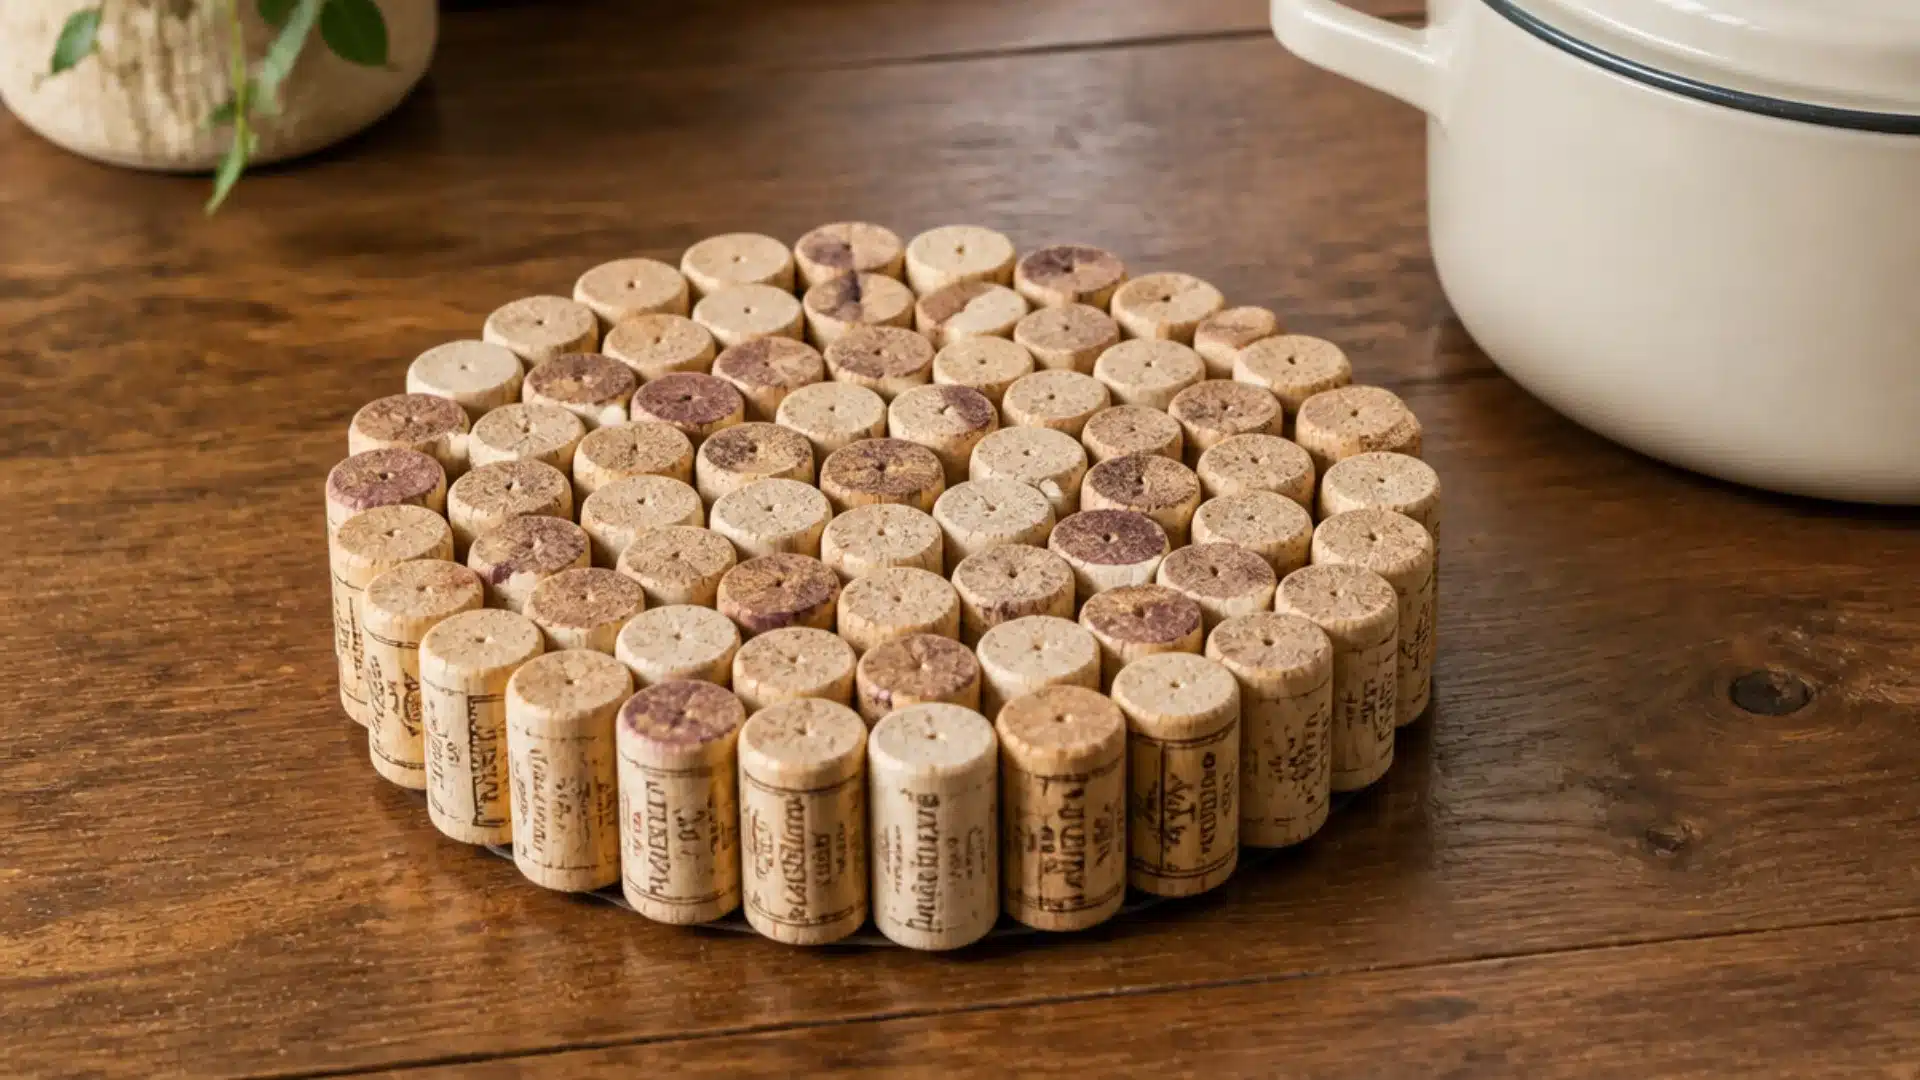
This concept uses old wine corks, which accumulate quickly, without needing to cut or measure anything.
In addition to making the process easier, keeping the corks gives the trivet a solid, textured surface for hot pots and pans.
Step-By-Step:
- Gather 25 to 30 wine corks, or get a large bag from a craft shop.
- Place the upright corks side by side in a rectangle or circle.
- Hot-glue each cork to its neighbor around the sidewalls.
- For support, adhere the entire cluster to a thin felt or cork backing.
- Let it dry flat for an hour before using.
Best for warm dishes or serving bowls rather than pots straight off the stove, since hot glue can soften under high heat.
2. Mod Podge Photo Tile Coasters
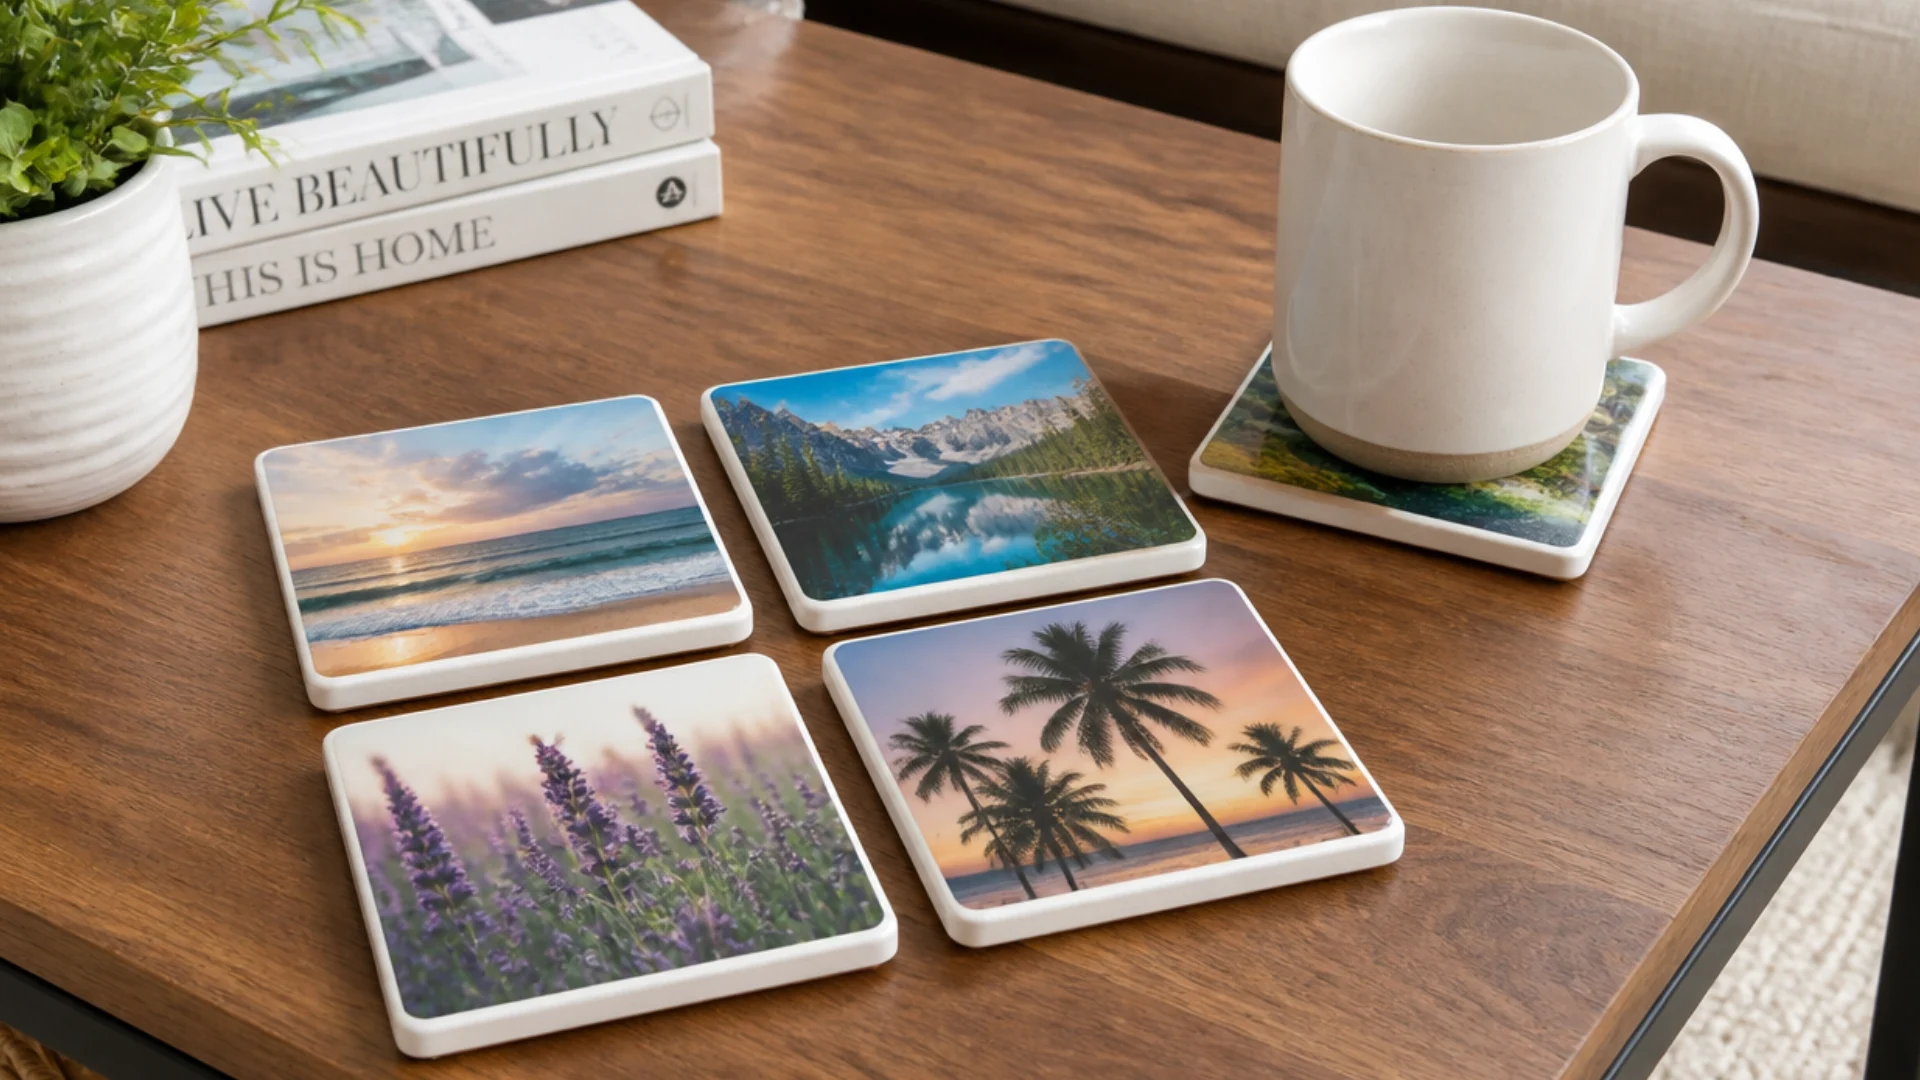
A photo and a few coats of Mod Podge turn plain ceramic tiles into sentimental mementos. A batch of four requires less than an hour of hands-on time, and it makes a great tiny present.
Step-By-Step:
- Purchase a set of simple ceramic tiles from a hardware shop.
- To fit each tile, print or cut your favorite photos.
- Press the photo onto the tile after applying a layer of Mod Podge.
- Use the edge of a credit card to eliminate air bubbles.
- After applying two more coats of Mod Podge and letting them dry, add felt pads underneath.
3. No-Sew T-Shirt Yarn Bowl
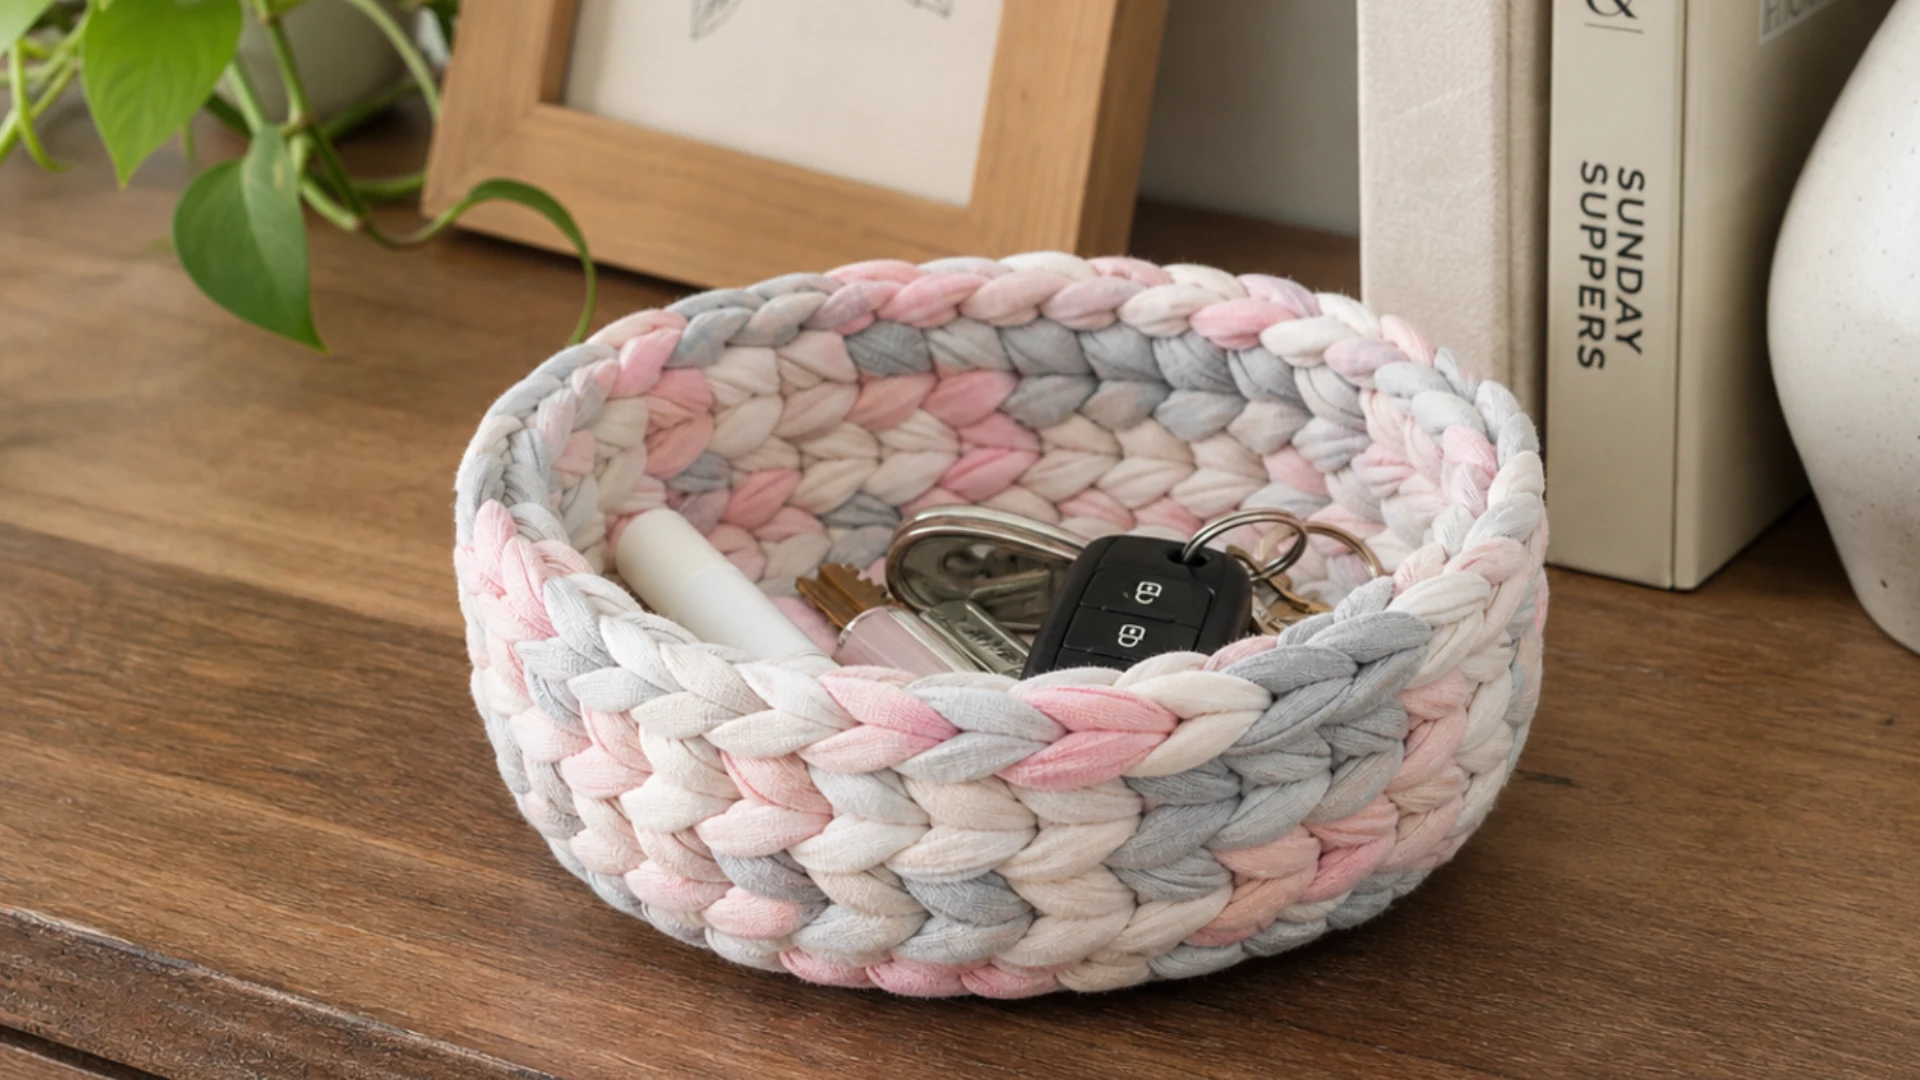
Without the use of a needle or thread, old T-shirts may be braided and coiled into a robust small bowl. It resists small odds and ends on a counter, stray change, and keys.
Step-By-Step:
- Cut two or three old T-shirts into long, uniform strips.
- Braid the strips into a single, long rope.
- Beginning in the center, wind the rope flat into a spiral.
- As you proceed, hot-glue each new coil ring to the ring underneath it.
- Glue the end down, then continue coiling upward until the sides reach bowl height.
4. DIY Beeswax Food Wraps
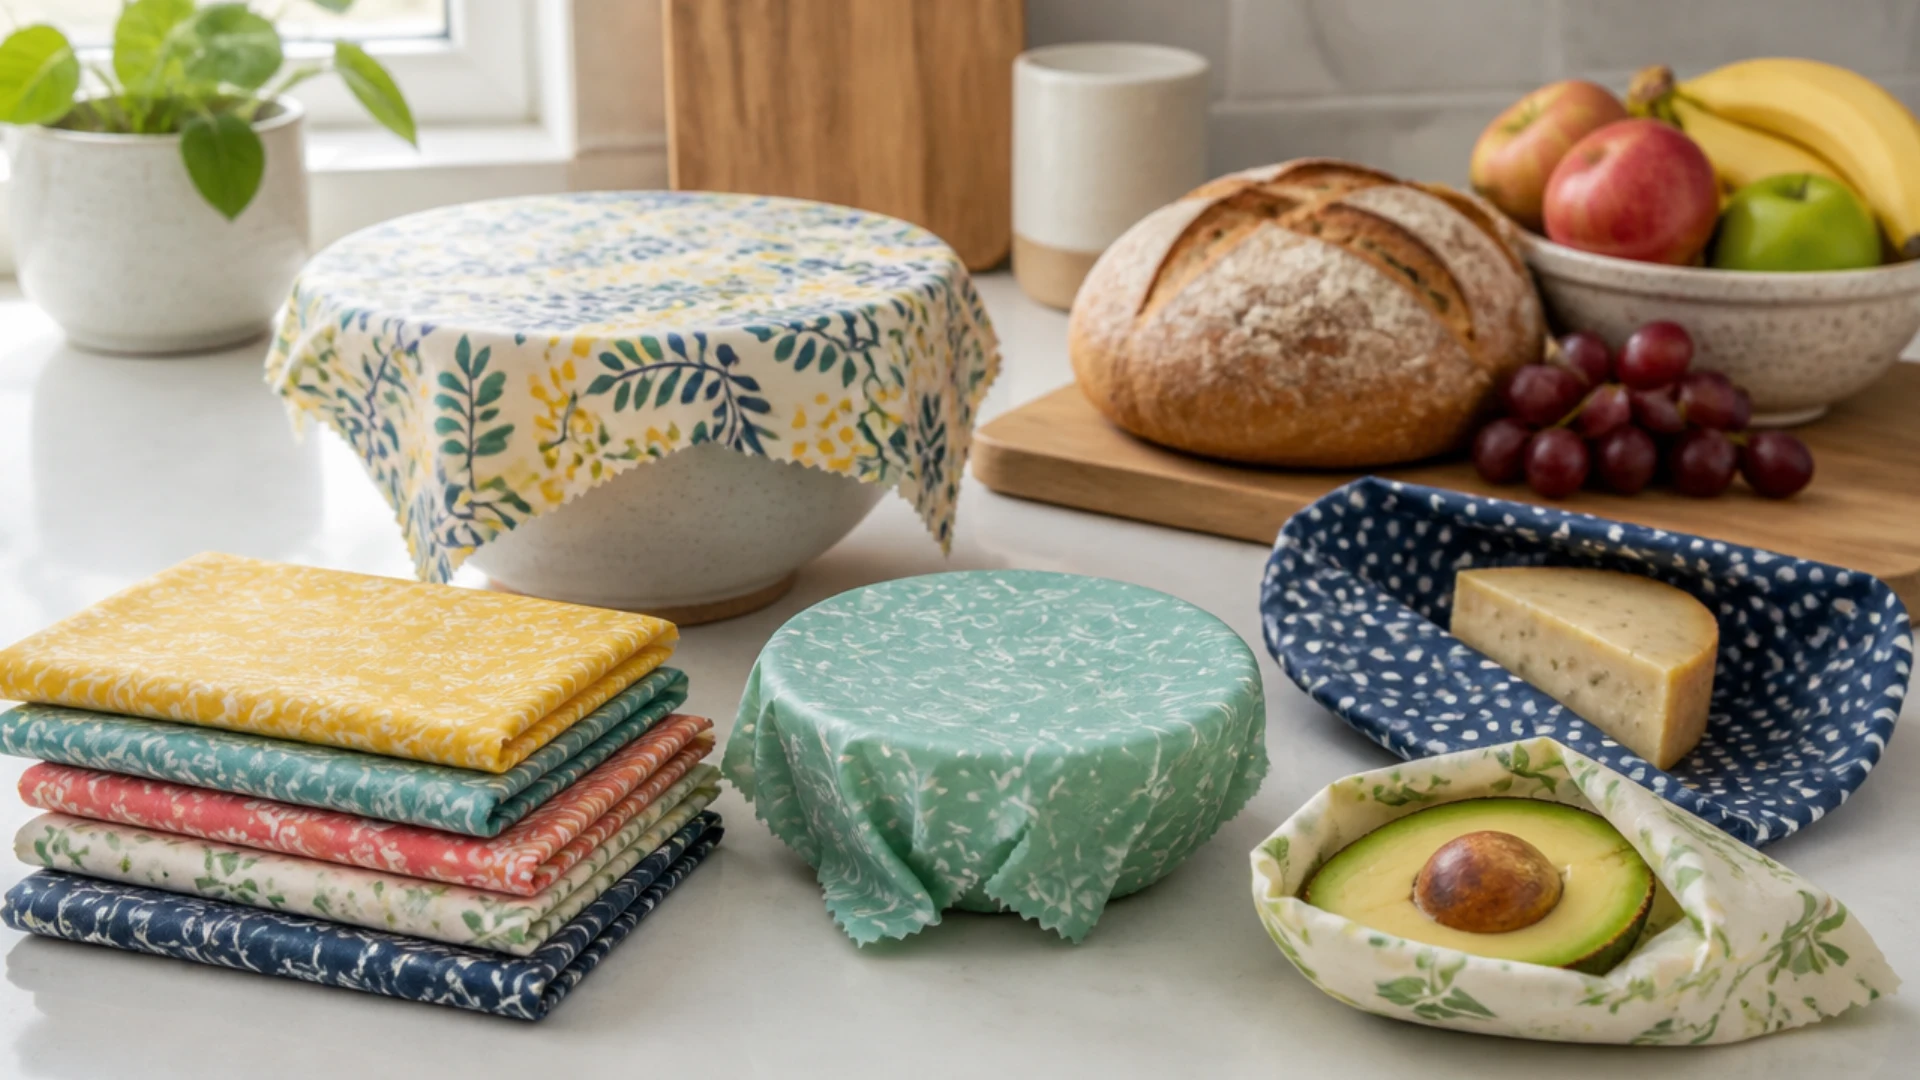
The only purchase here is a small package of beeswax pellets, which covers ten or more wraps.
These take the place of plastic wrap for sandwiches and bowls, and with minimal maintenance, they last for months.
Step-By-Step:
- Slice the cotton fabric into squares.
- Evenly distribute pellet or grated beeswax on the fabric.
- Iron it on low heat until the wax melts through, sandwiched between two sheets of parchment paper.
- While the fabric is still soft, peel it off the parchment paper and wave it in the air for 30 seconds so the wax sets.
- Instead of using plastic wrap, use it to cover bowls or wrap sandwiches.
5. Pressed Flower Laminated Bookmarks
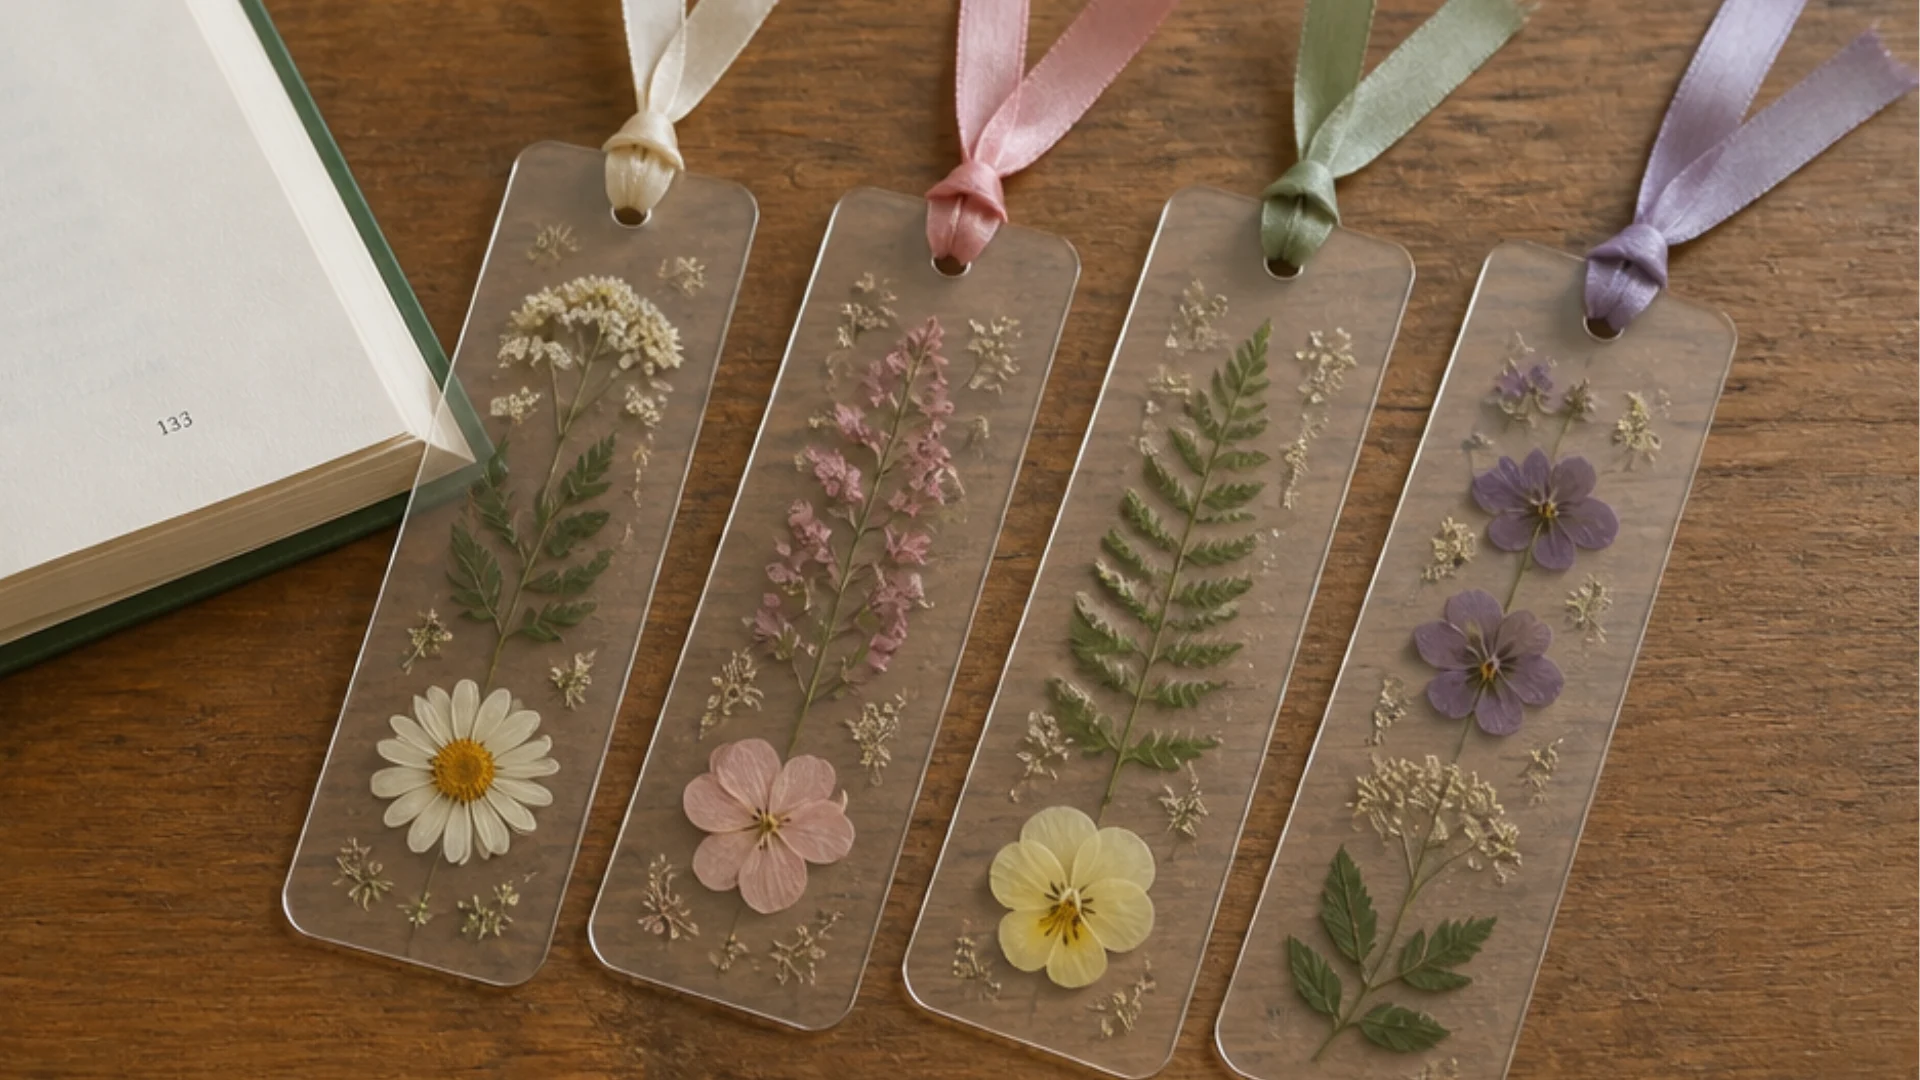
Create a bookmark that can withstand regular use by pressing flowers or leaves between two sheets of clear contact paper.
No special tools are needed, no mixing, and no waiting days for anything to cure.
Step-By-Step:
- For three to five days, press flowers or foliage flat inside a hefty book.
- Place the pressed pieces on a cardstock strip that has been trimmed to the size of a bookmark.
- Cut two pieces of transparent contact paper that are somewhat bigger than the bookmark.
- Smooth out any air bubbles by sandwiching the cardstock between the two adhesive sheets.
- Punch a hole at the top, trim the edges, and secure with a ribbon.
6. No Sew T-Shirt Fringe Tote Bag
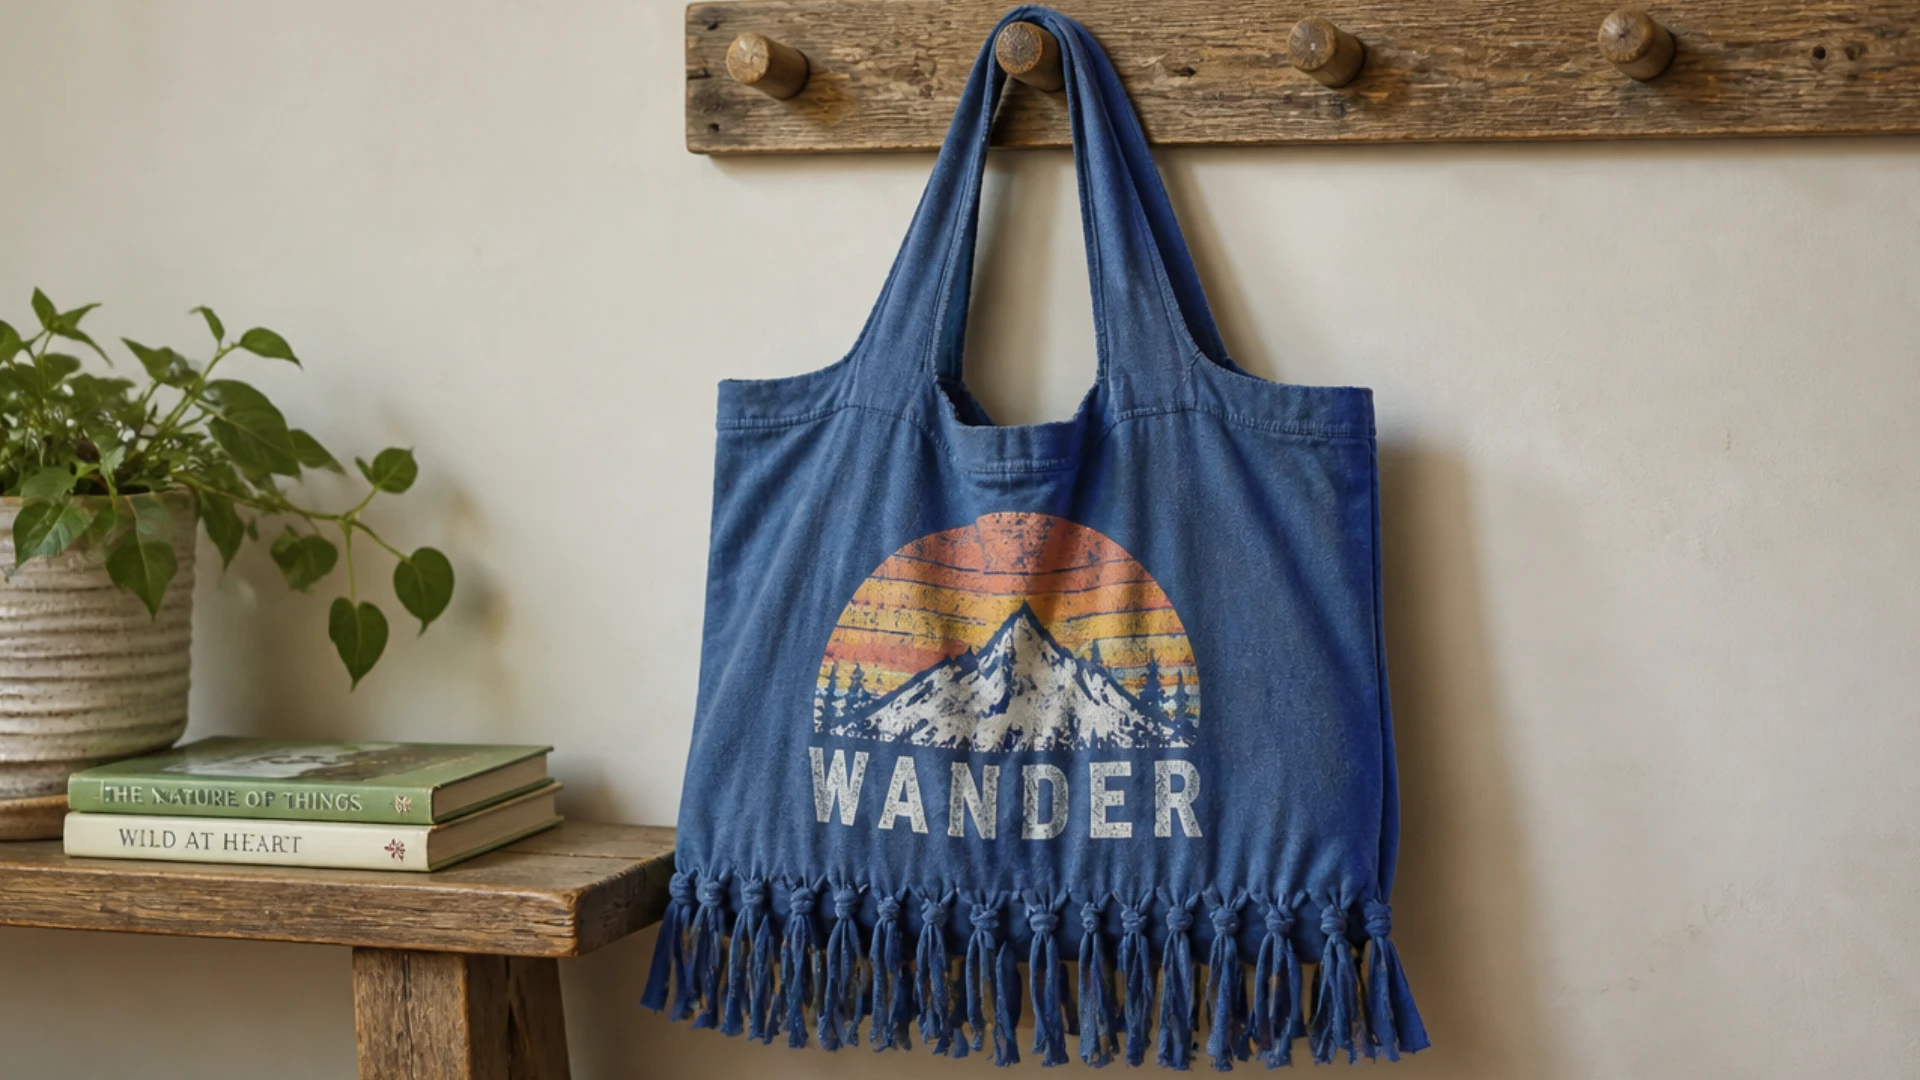
With scissors and some knot-tying, you can turn an old T-shirt into a functional tote without a sewing machine or fusible tape.
When the bag is turned right-side out, the sleeve and neck holes serve as the handles and opening.
Step-By-Step:
- Cut off the neckline and sleeves of an old, durable T-shirt.
- Flip it over.
- Cut 1-inch fringe strips through both layers along the bottom hem.
- To seal the bottom, double-knot each front strip to the corresponding back strip.
- The sleeve and neck holes become the bag opening and handles when the bag is turned right-side out.
7. Salt Dough Keepsake Recipe Card
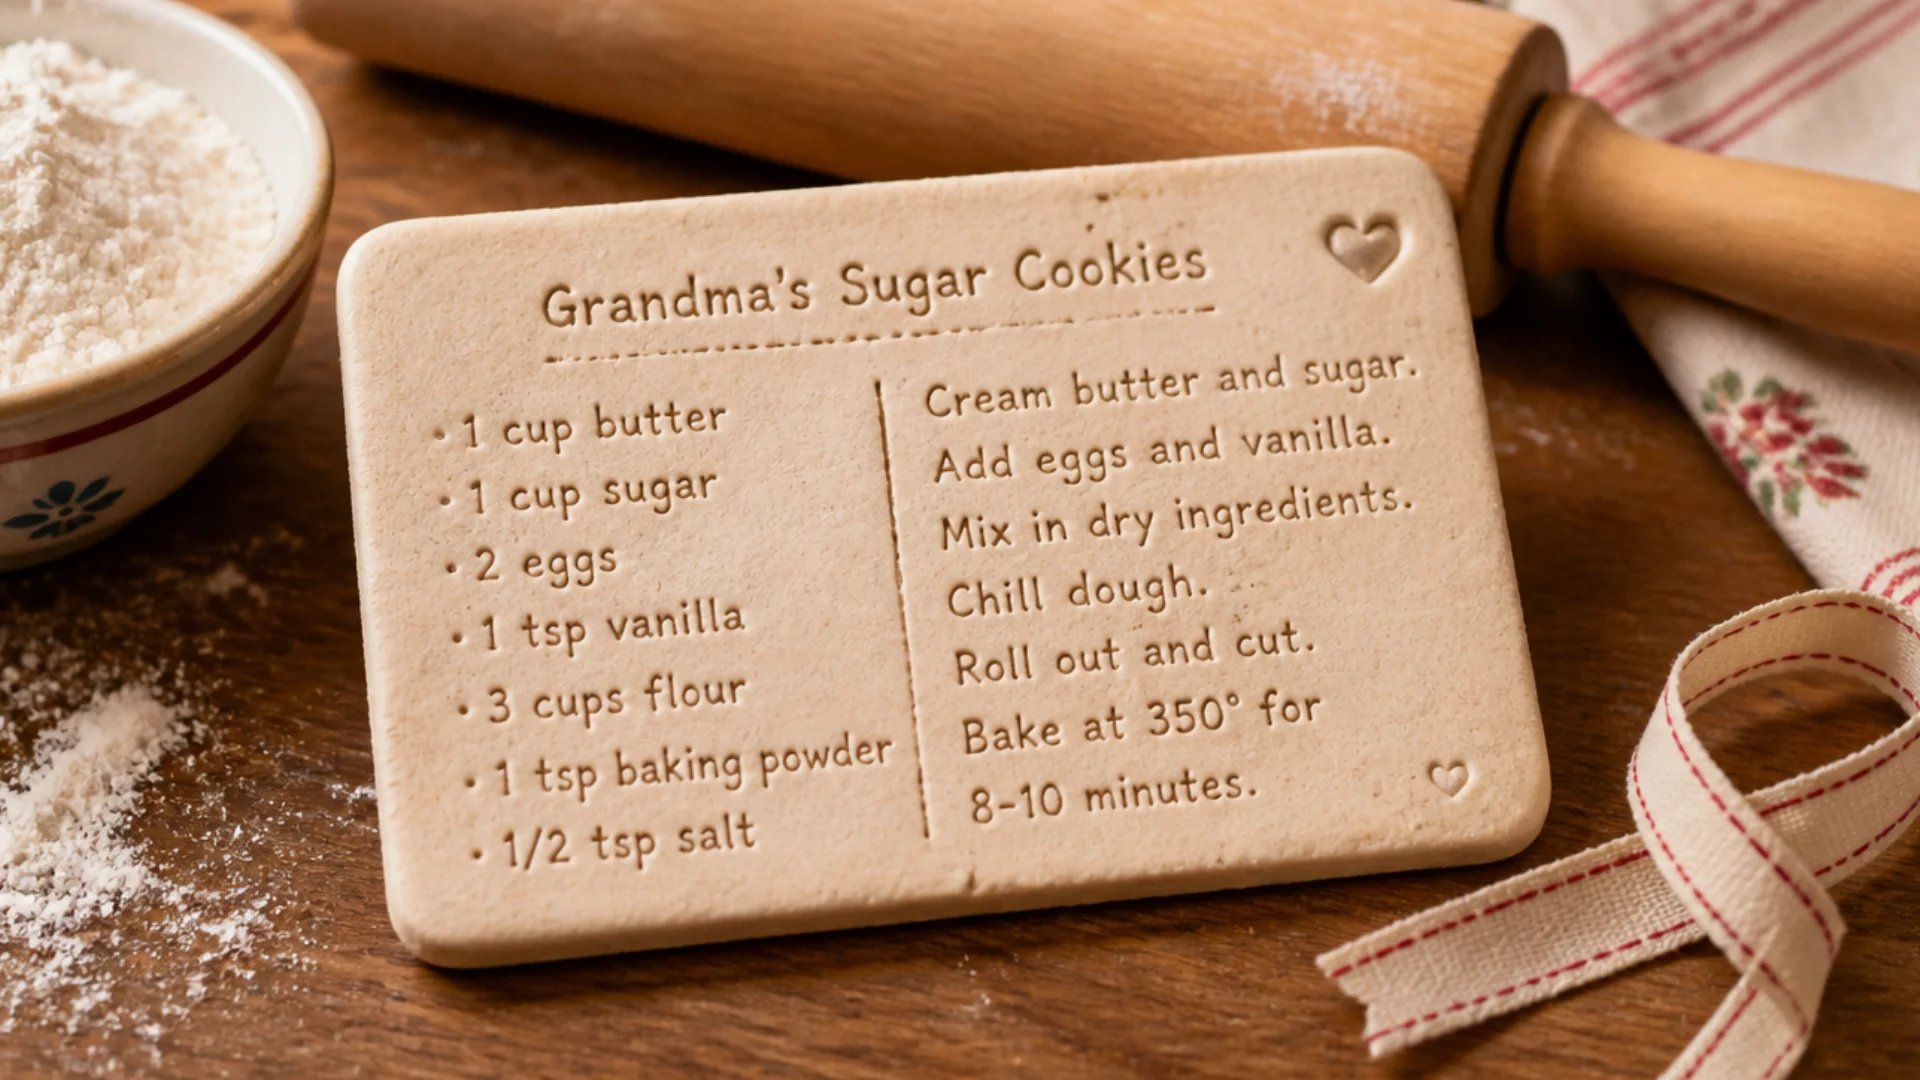
A handwritten family recipe or a handprint can be preserved in this durable memento made with flour, salt, and water. With items that most kitchens already have, it’s an inexpensive project.
Step-By-Step:
- Mix 2 cups flour, 1 cup salt, and 1 cup water into a dough.
- Roll it out to about 1/4-inch thick.
- Cut into a card or plaque shape.
- Press a handwritten family recipe or handprint into the surface before it dries.
- Bake at 200°F for 2–3 hours until fully hardened, then paint or seal if desired.
Easy Crafts for Adults with Disabilities
This section deviates from the typical one-size-fits-all list since different disabilities require different types of projects.
Instead of presuming a single format works for everyone, each craft below is designed around a specific need, such as sensory regulation, familiar memory, limited grasp, or easy instructions.
8. Sensory Calm Down Jars
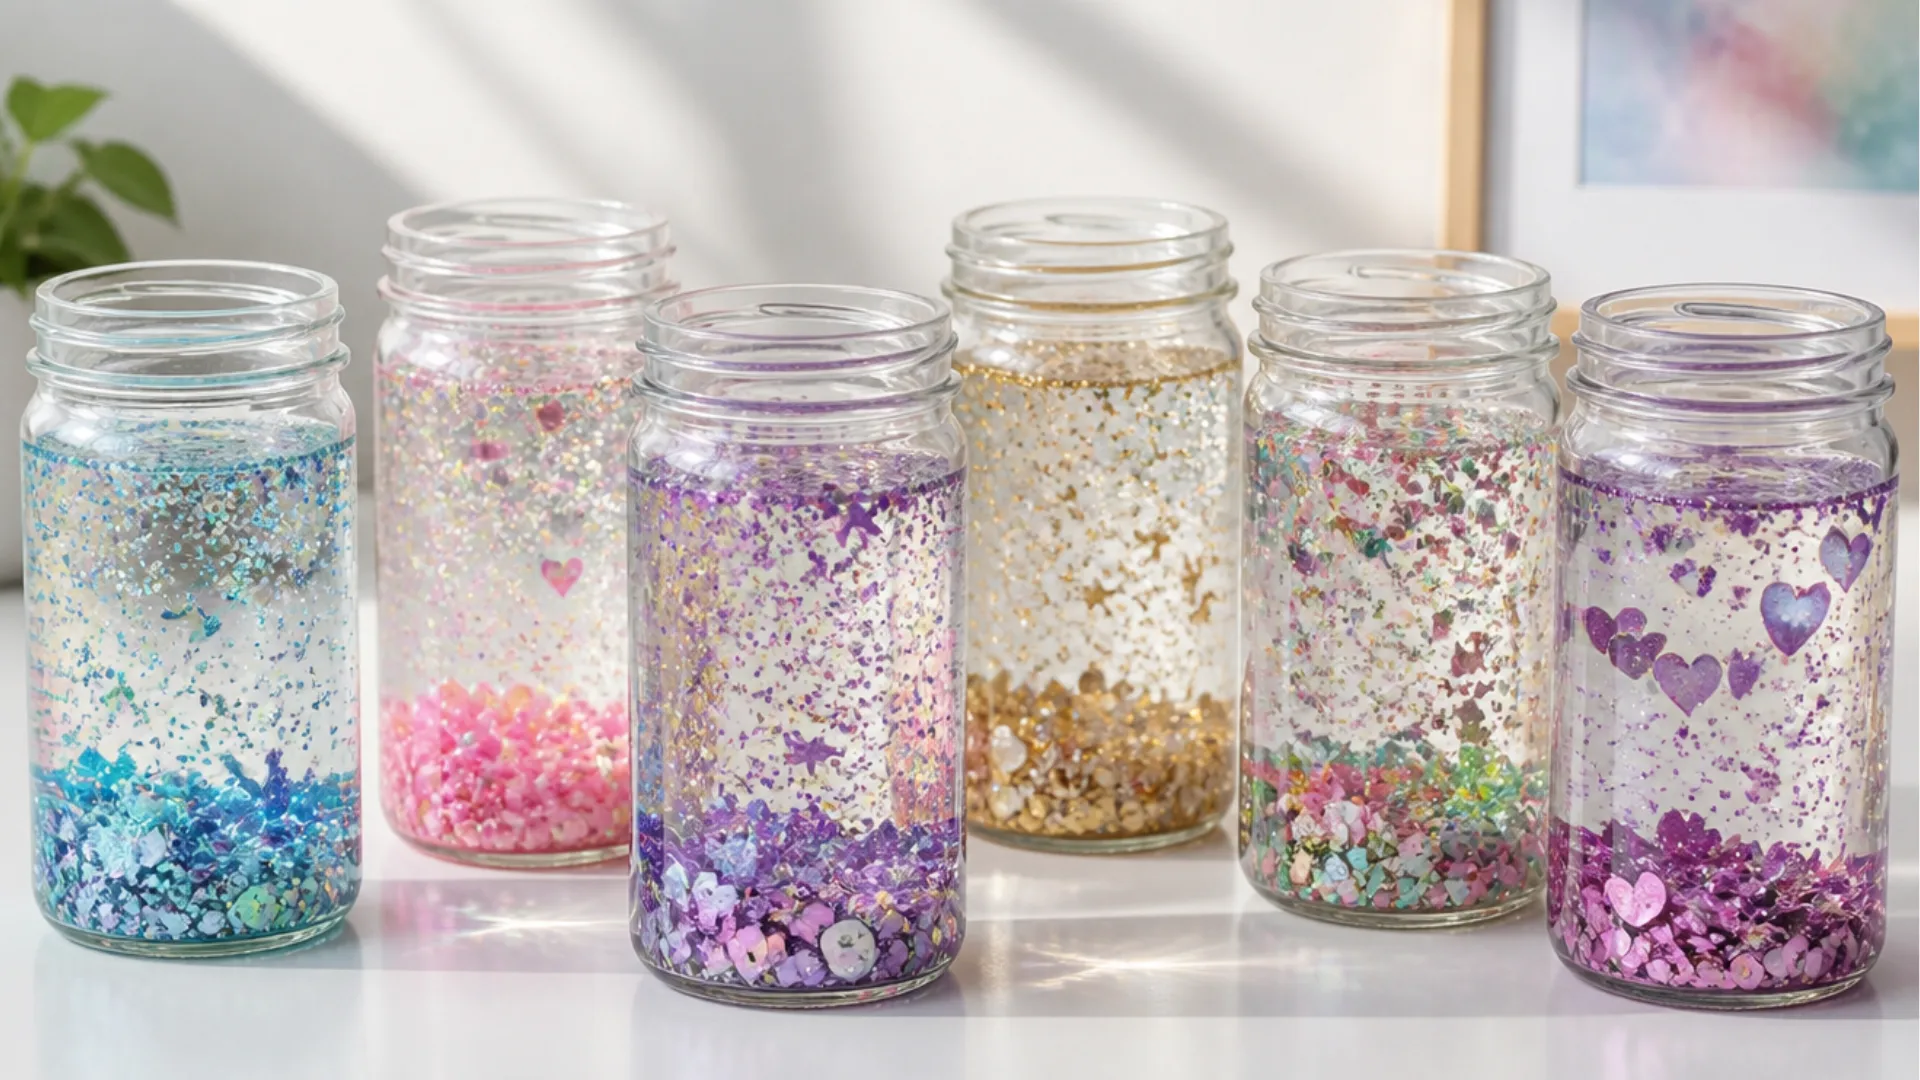
This jar provides something to see and shake rather than a final result to evaluate, making it ideal for those with developmental impairments and sensory processing differences.
It’s simple to revisit the leisurely, soothing image created by the glitter suspended in gel-thickened water.
Step-By-Step:
- Fill a clear jar or bottle two-thirds full with water.
- Add a spoonful of clear glue or hair gel and stir.
- Drop in glitter, sequins, or small shells.
- Top off with more water, leaving a small air gap.
- Secure the lid tightly with hot glue so it can be handled and shaken safely.
9. Reminiscence Photo Memory Board
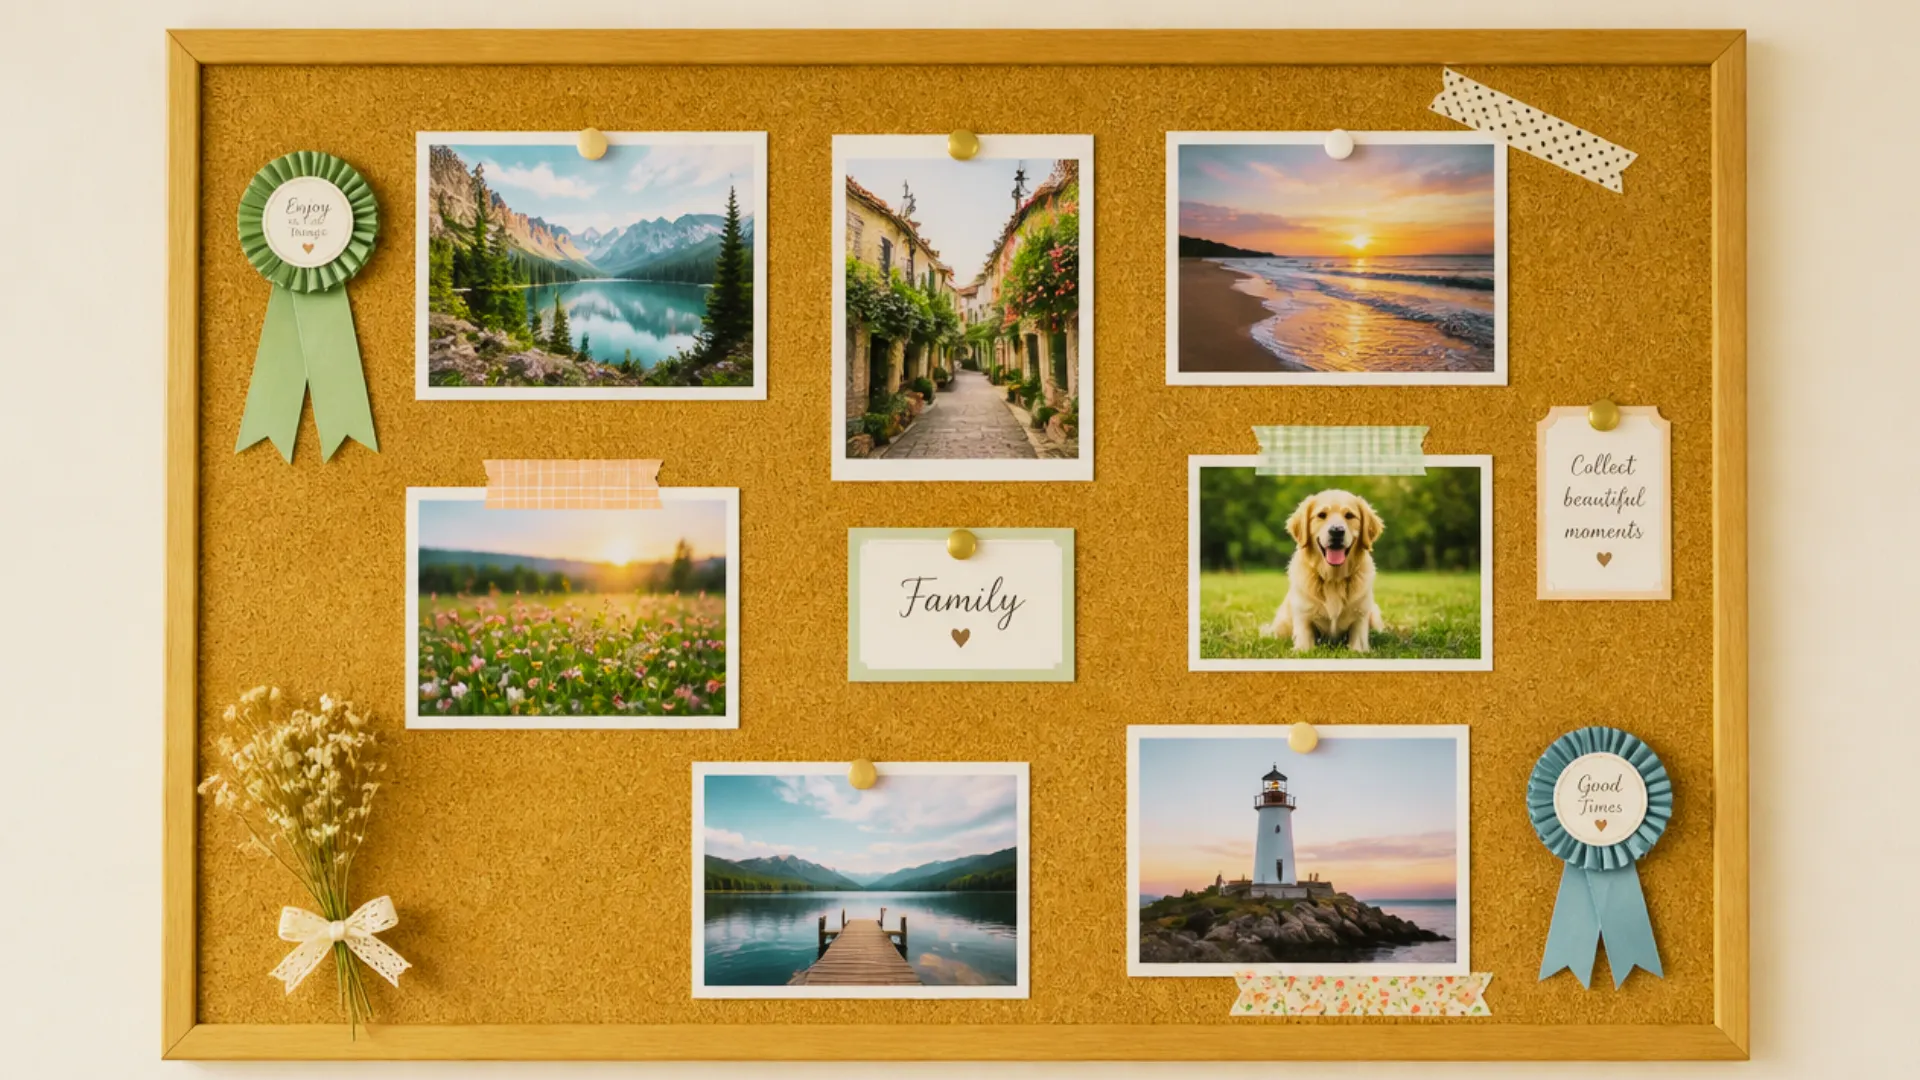
This craft relies more on familiar faces and locations than on fine motor skills or a “correct” arrangement, making it ideal for adults with dementia.
Even on its own, the repetitive process of organizing and adhering pictures is soothing, and the completed board often sparks discussion long after it is created.
Step-By-Step:
- Gather a few large printed photos of family, pets, or familiar places.
- Lay the photos out on a plain cardboard or corkboard base before gluing anything.
- Glue each photo down one at a time, working at whatever pace feels comfortable.
- Add simple trim like ribbon or washi tape around the edges if desired.
- Hang or display the finished board somewhere it will be seen and talked about often.
10. Chunky Wooden Bead Bracelet
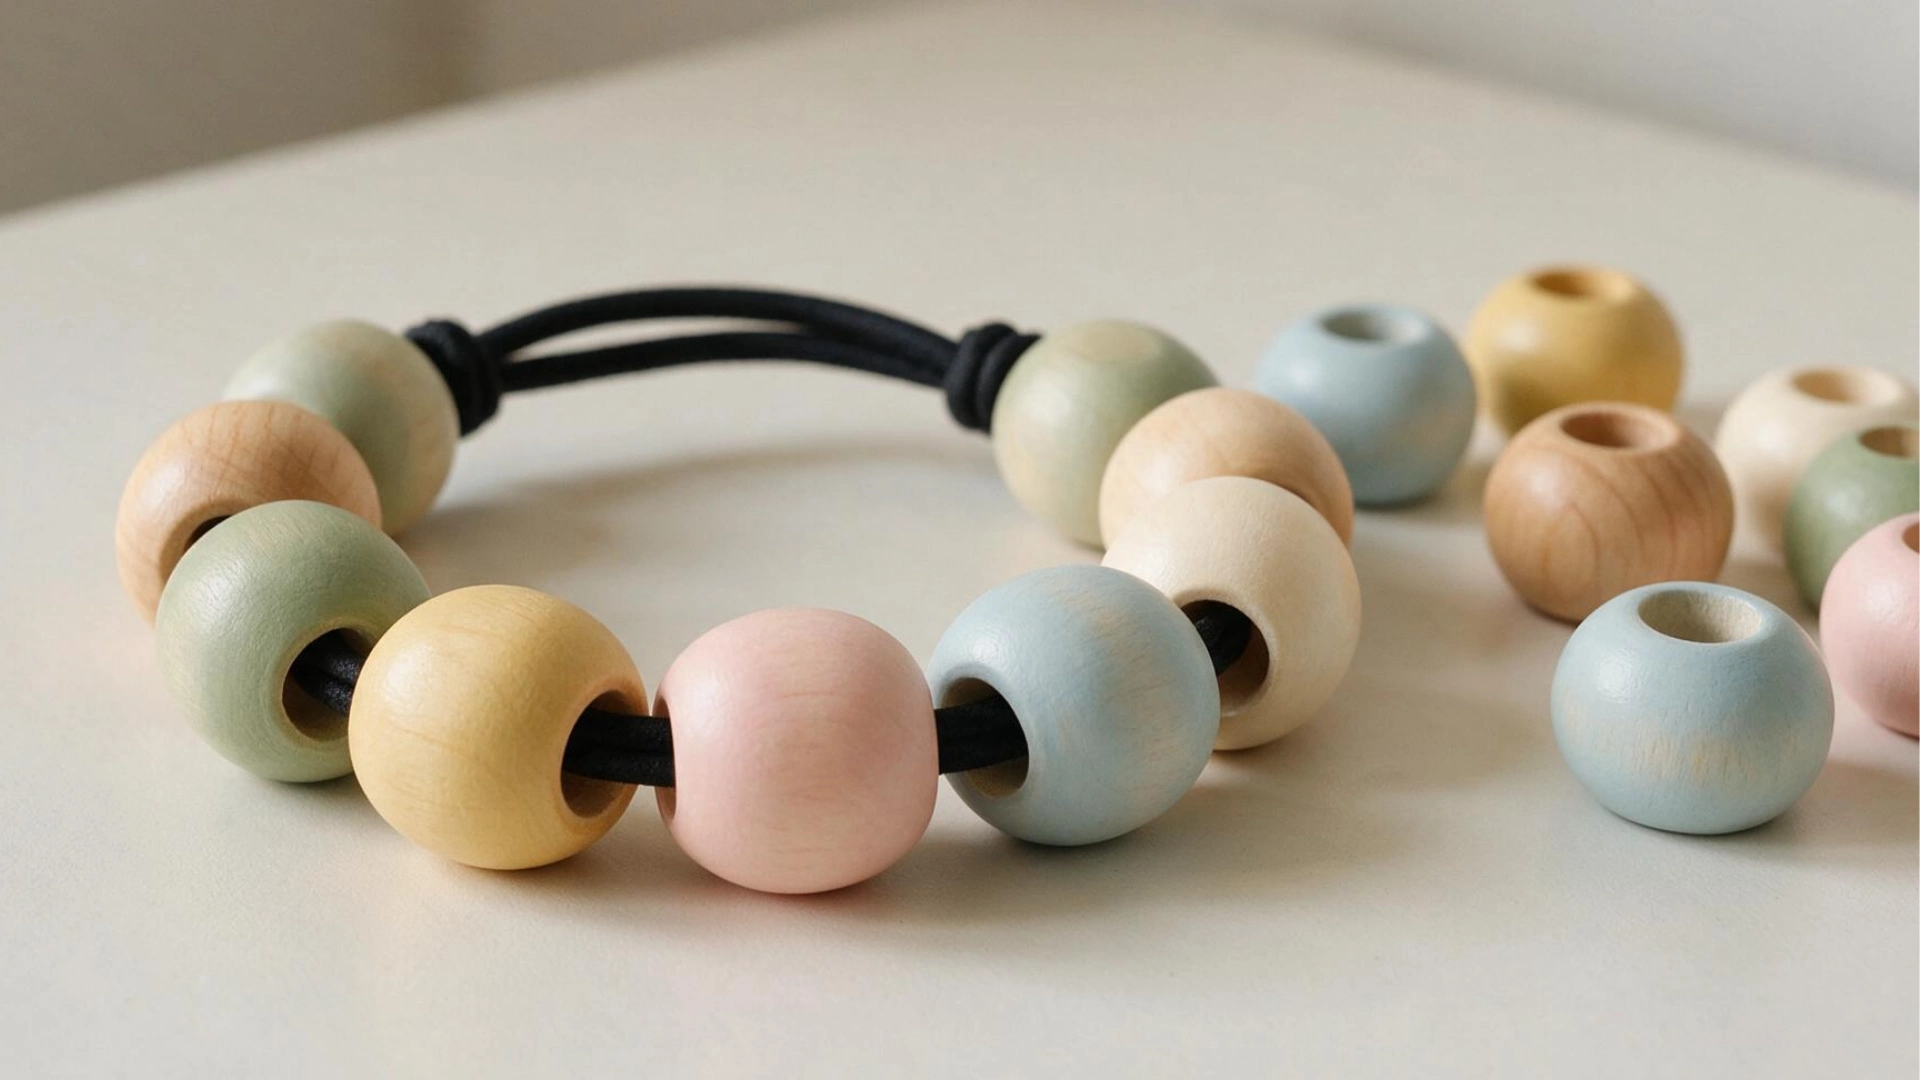
This bracelet uses large wooden beads that are easy to grasp and thread onto thick elastic wire, making it best suited for developmental challenges involving weak fine motor control.
The emphasis remains on stringing and color selection because nothing here needs to be pinched or handled precisely.
Step-By-Step:
- Cut a length of thick elastic cord to fit around the wrist with some slack.
- Choose a mix of large wooden beads in different colors or shapes.
- Thread the beads onto the cord one at a time.
- Tie the two ends of the cord together in a secure double knot.
- Trim the excess cord and tuck the knot inside a bead to hide it.
11. Pre-Cut Foam Bookmarks
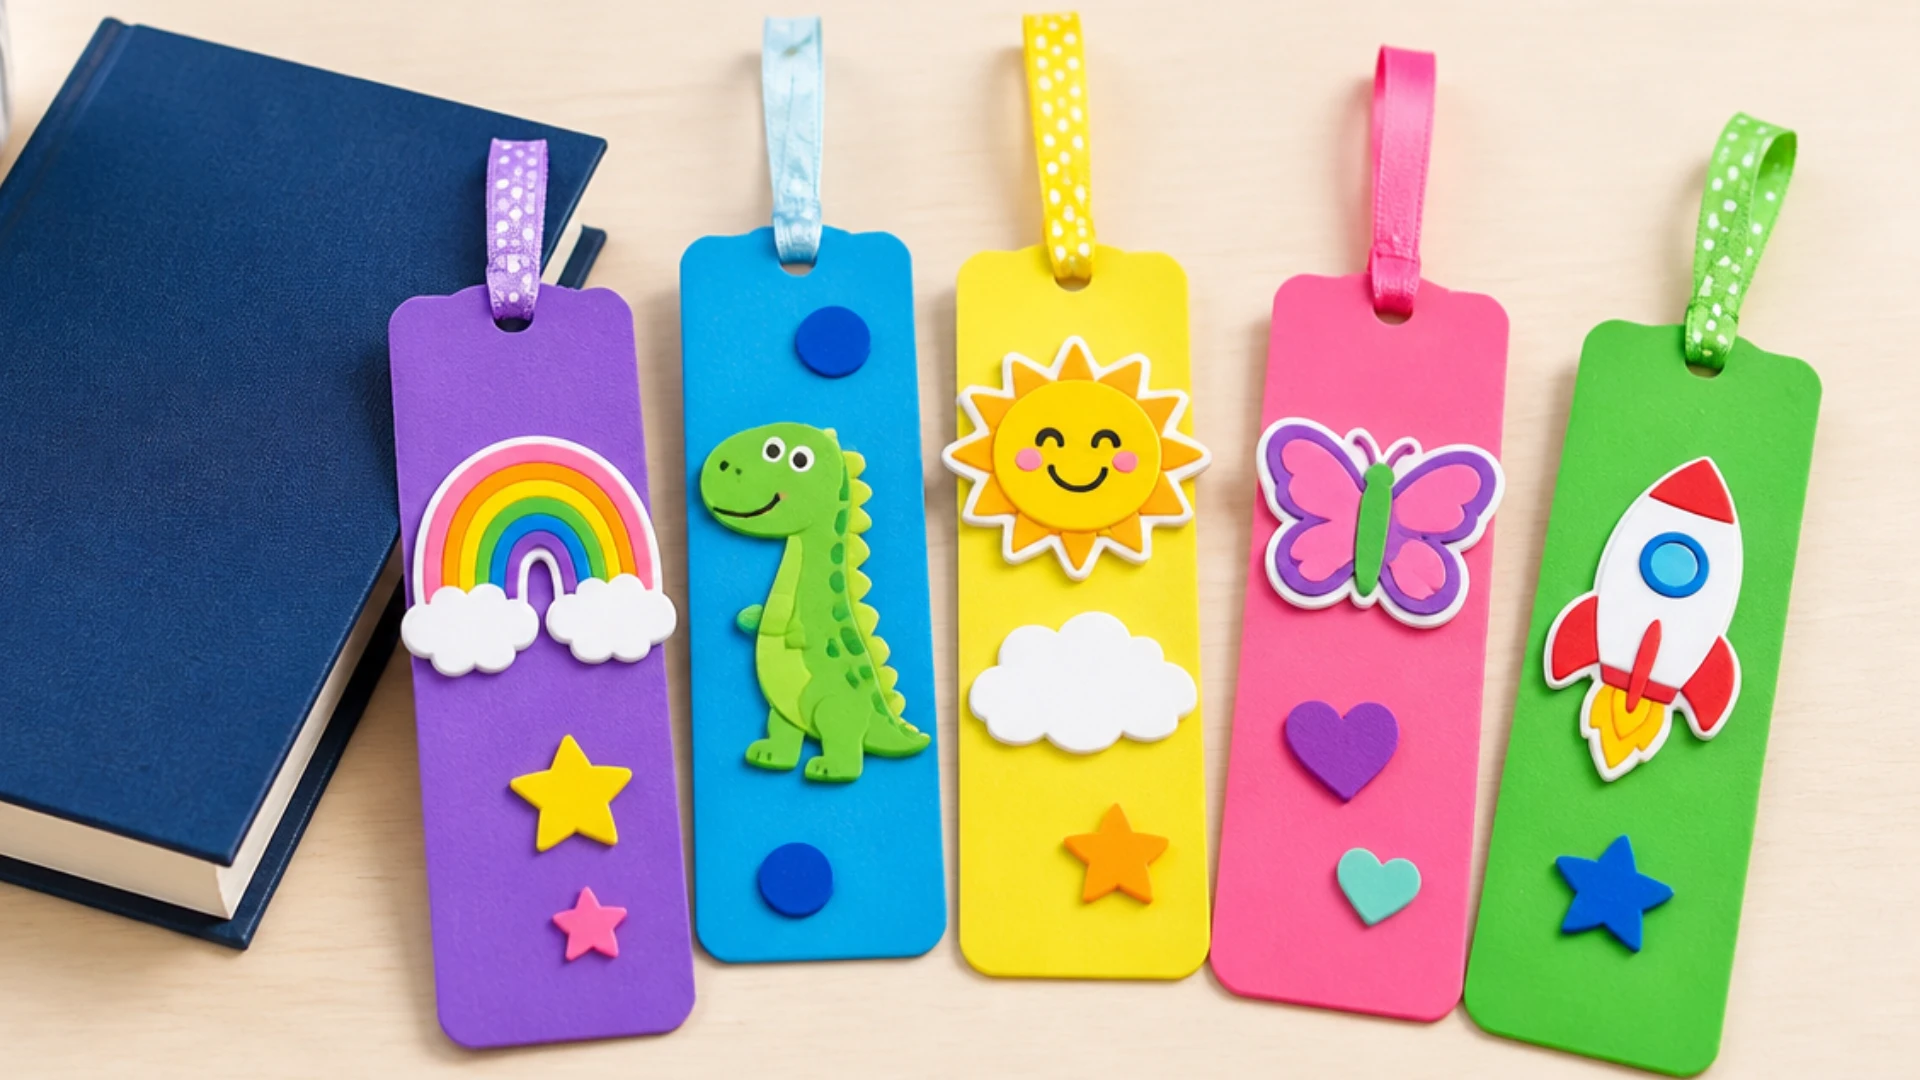
This bookmark is ideal for those with learning challenges because it breaks instructions into one visual step at a time, without requiring extensive reading.
Chunky markers and pre-cut foam shapes make it simple to start decorating right away.
Step-By-Step:
- Cut foam sheets into rectangles ahead of time, or buy pre-cut foam shapes to skip cutting entirely.
- Set out large stickers, foam shapes, and chunky markers.
- Decorate the foam rectangle freely; no fine detail required.
- Punch a hole in the top with a standard hole punch.
- Loop a ribbon or yarn through the hole and knot it.
Easy Crafts for Pets and Animals
This is some of the most forgiving crafting on the list because pets don’t care about polish. There isn’t much danger in trying any of the projects below because they all employ leftover food, cardboard, or scrap fabric.
Here are options for both dogs and cats, plus a treat that works for both.
12. No Sew Fleece Knot Dog Toy
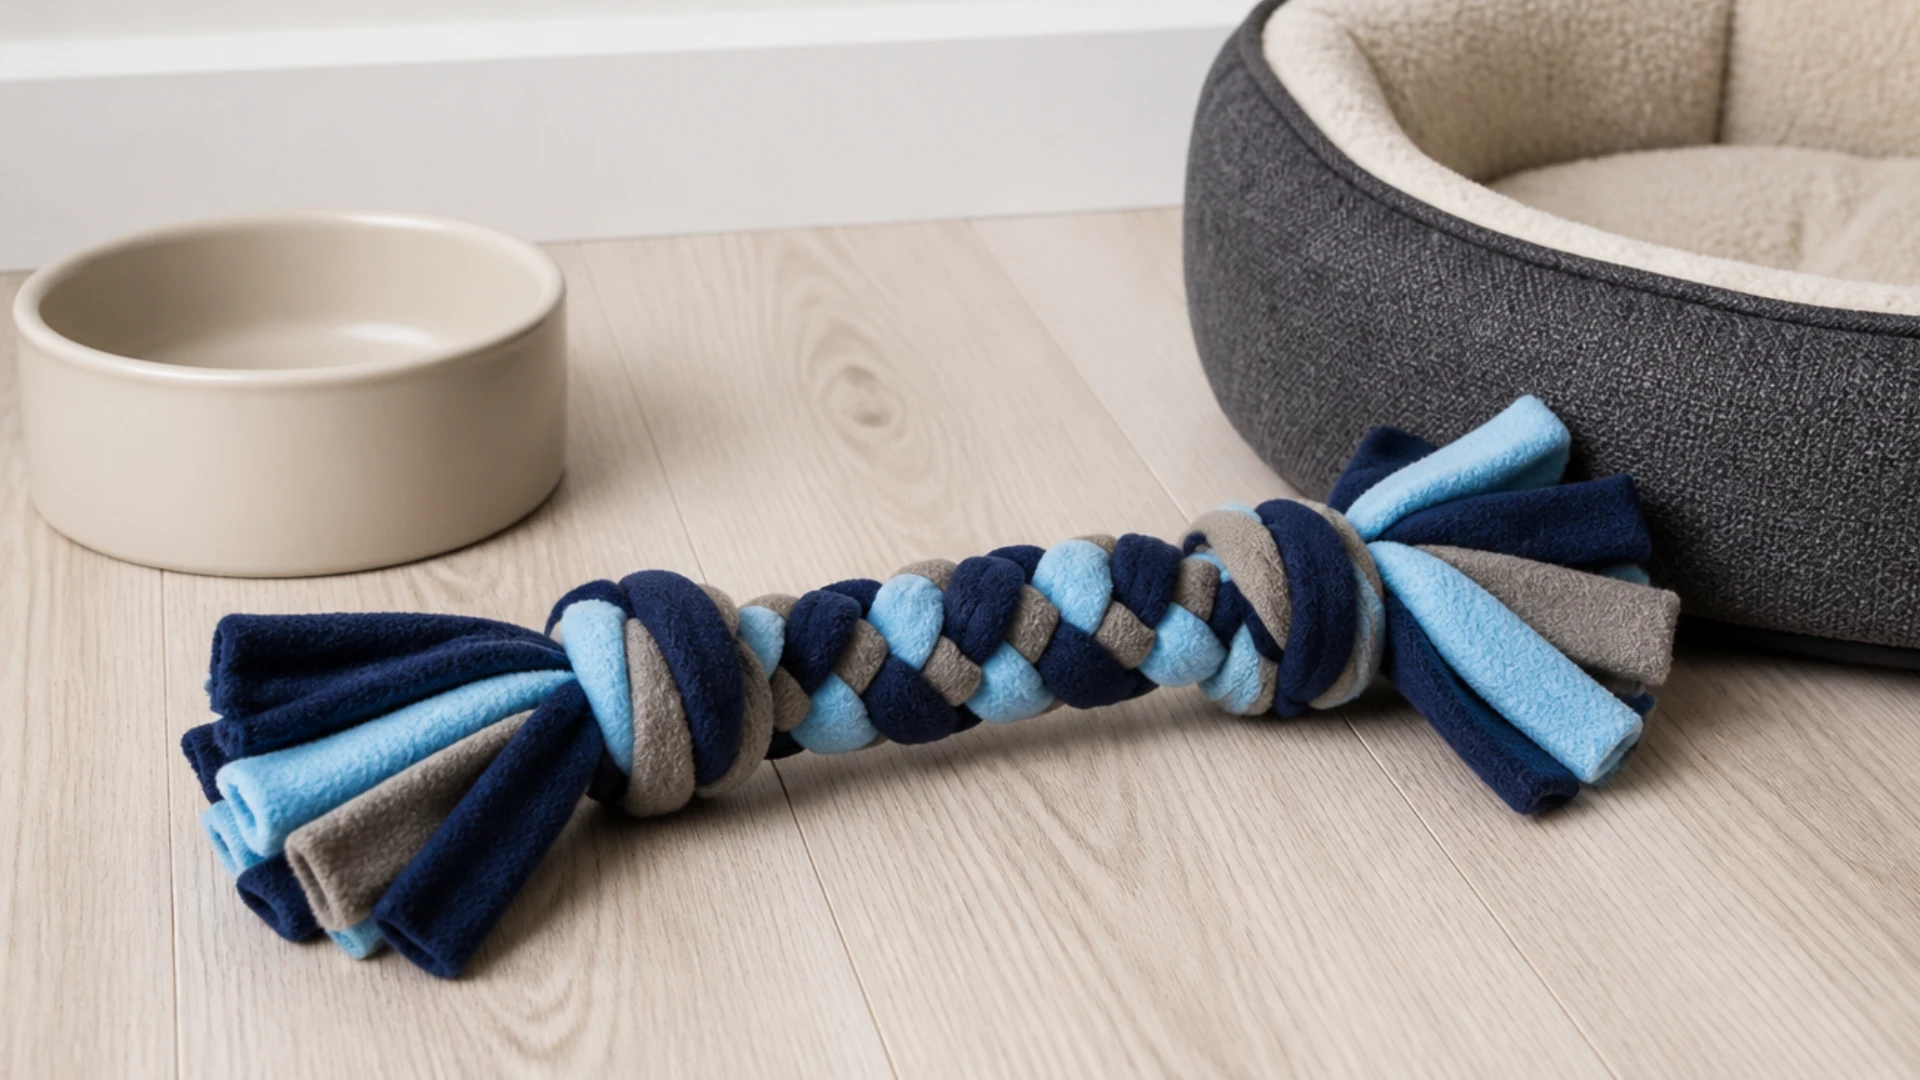
You only need to cut and knot leftover fleece to create a sturdy tug toy; no needle is needed. Once the fabric is cut, you can assemble it in minutes, and it resists chewing.
Step-By-Step:
- Cut two matching strips of fleece fabric, about 4 inches wide.
- Lay the strips flat.
- Cut both layers into fringe on each short end.
- Tie the fringed ends into knots on both sides.
- Twist and knot the middle for a tug-friendly grip.
13. Catnip Fabric Mouse
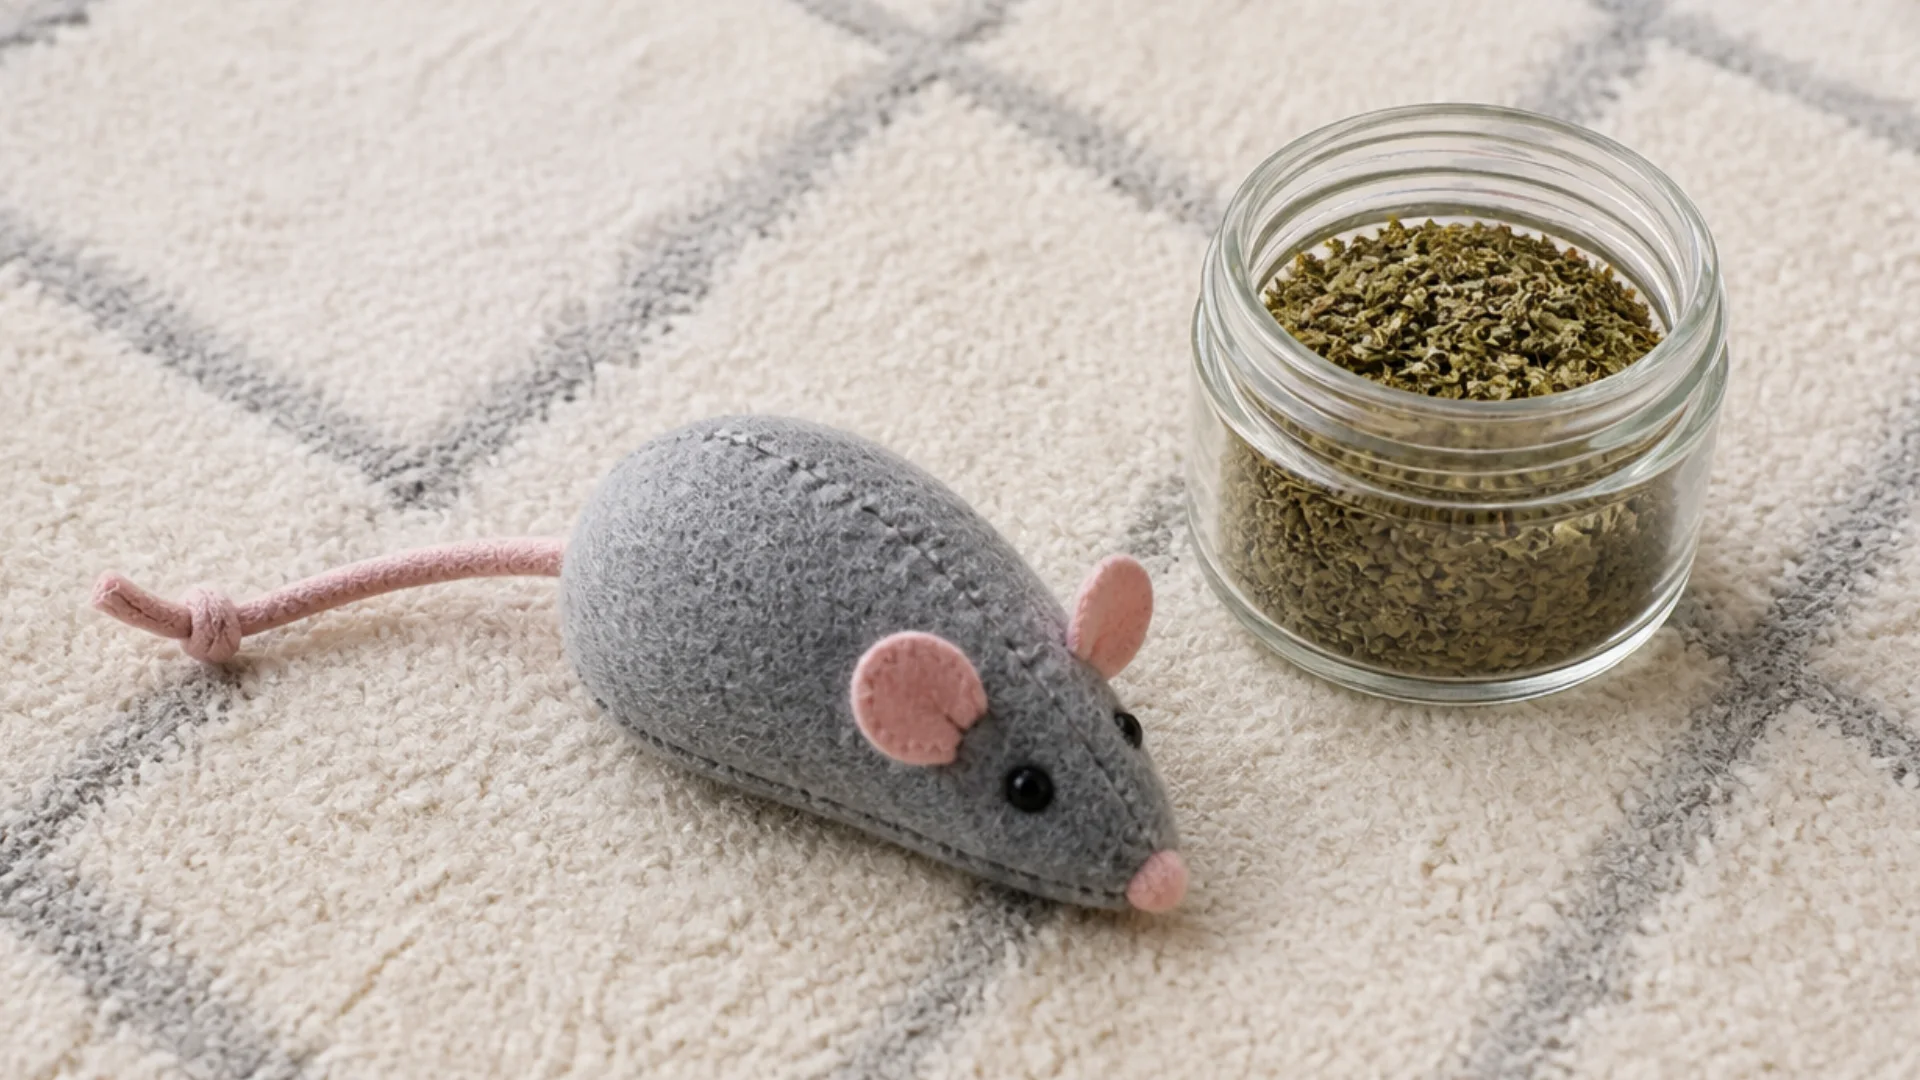
A basic mouse toy is made with felt and fabric glue. A simple felt form becomes something a cat will genuinely pursue when you insert a pinch of catnip before sealing.
Step-By-Step:
- Cut two mouse-shaped pieces from felt.
- Run fabric glue around the edges of one piece, leaving a small gap.
- Press the second piece on top and let the glue set for a few minutes.
- Before fully sealing the gap, tuck in a pinch of dried catnip.
- Glue the gap shut and let it dry flat for an hour before giving it to your cat.
14. Cardboard Coil Cat Scratcher
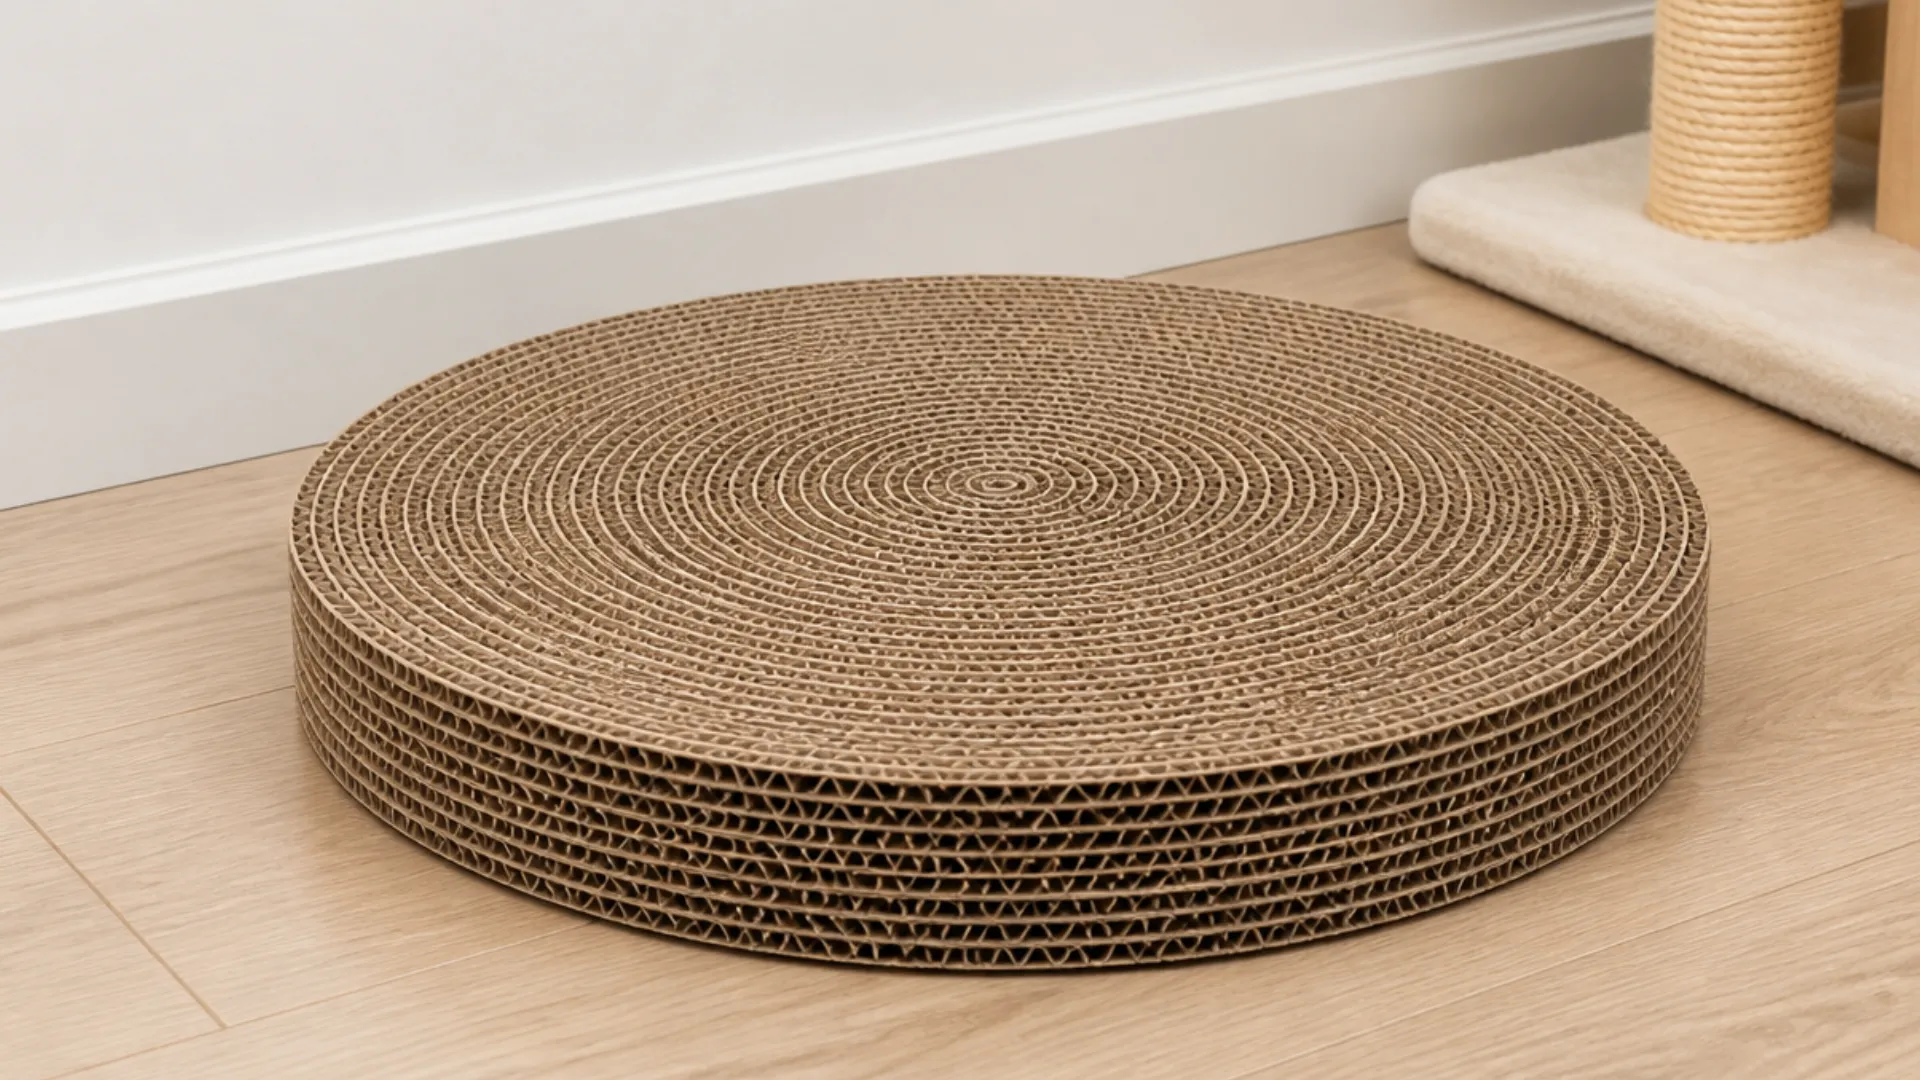
You only need to cut, coil, and glue an extra cardboard box to turn it into a scratching pad. It’s a useful way to give cats a dedicated scratching area while reusing packaging.
Step-By-Step:
- Cut a long strip of corrugated cardboard, about 4 inches wide, from a spare box.
- Coil the strip tightly into a spiral, starting from one end.
- Use a binder clip or rubber band to hold the coil in place as you go.
- Glue each new wrap to the layer beneath it, working in small sections.
- Let the glue dry fully before removing the clip and setting it out.
15. Frozen Lick Mat Treats
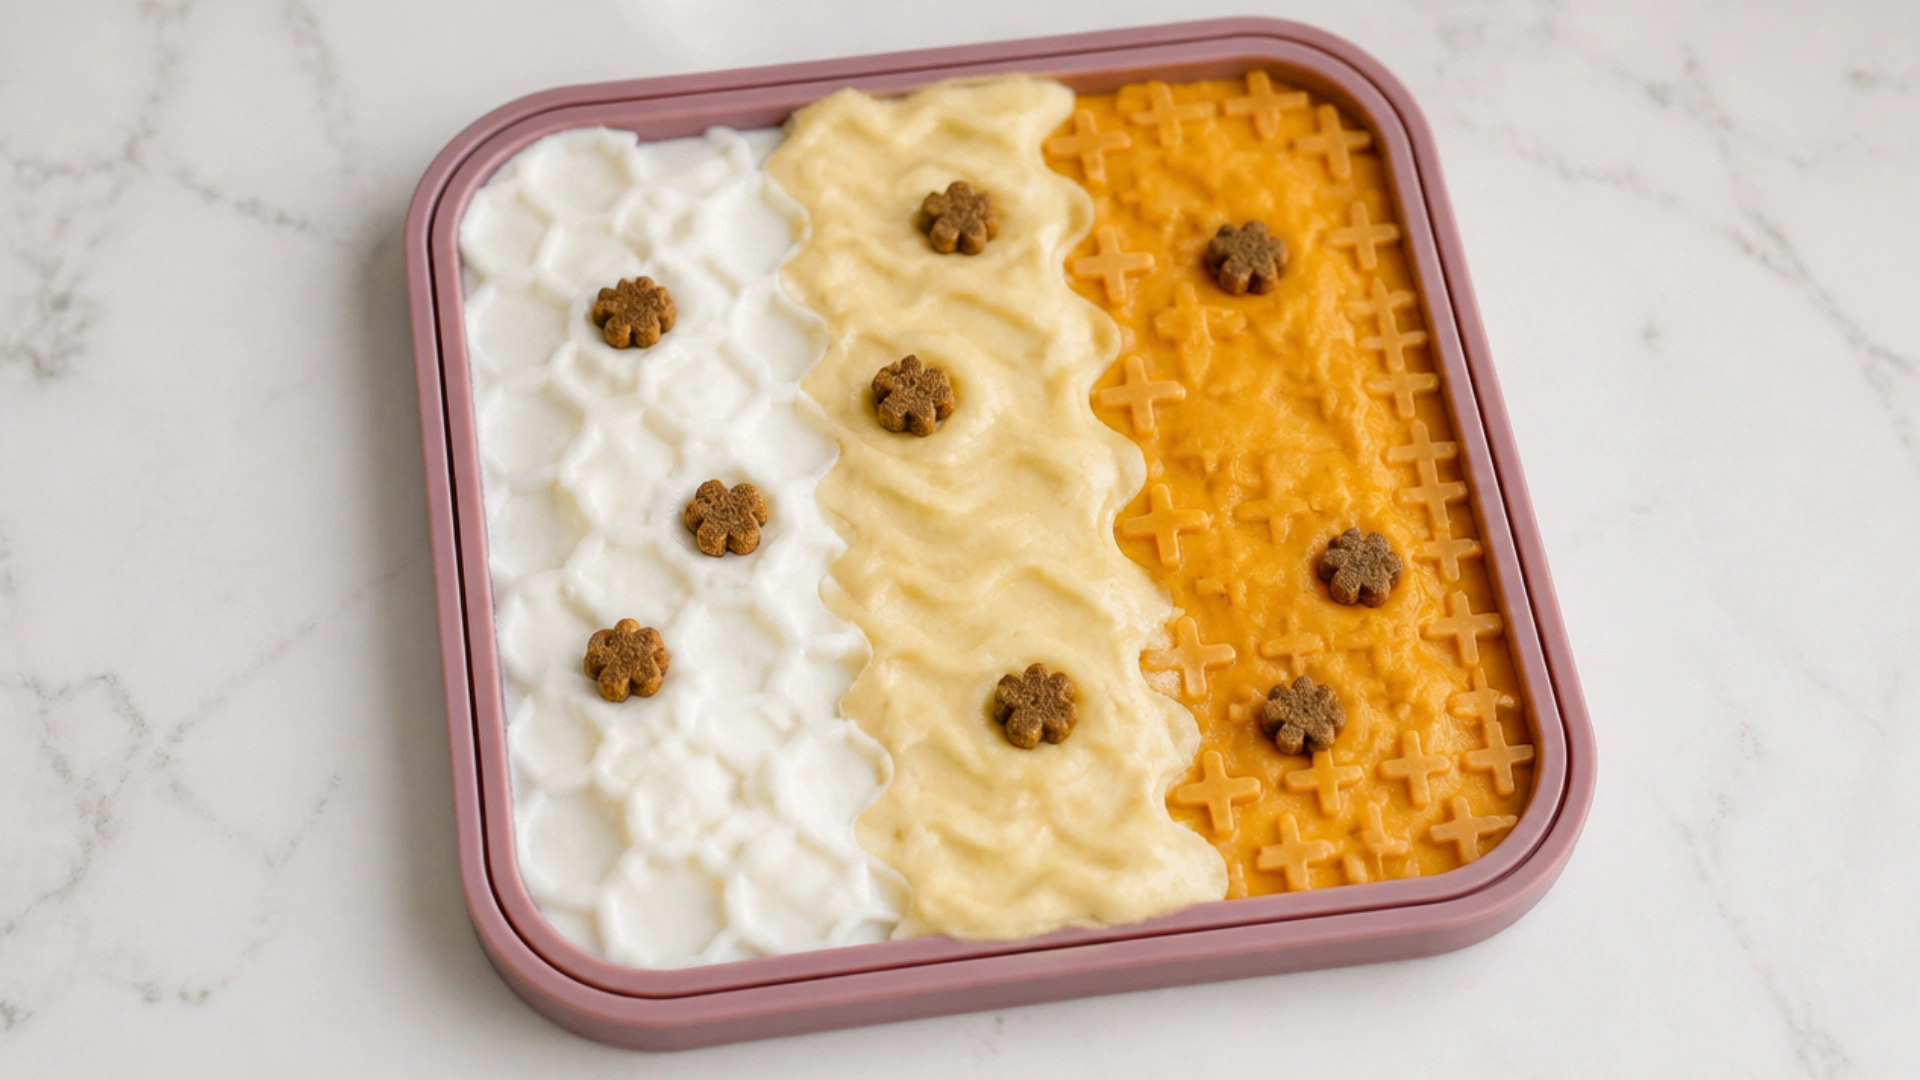
Freeze pureed pumpkin, banana, or plain yogurt to make a leisurely, gratifying treat for cats or dogs. A silicone lick mat makes cleanup easier, but an ice cube tray is available; it works just as well.
Step-By-Step:
- Spread plain yogurt, mashed banana, or pumpkin puree onto a lick mat or into an ice cube tray.
- Smooth it into the grooves or cells with a spoon.
- Press in a few pet-safe treats or kibble pieces.
- Freeze for at least 2 hours.
- Pop out or serve directly once solid.
Easy Group Craft Ideas for Adults
Each of these ideas keeps individual variance low while still allowing personal touches, since group creating works best when everyone can jump in at the same skill level.
These are perfect for a family gathering, a girls’ night out, or any occasion to gather a few folks around a table.
16. Acrylic Pour Coaster Night
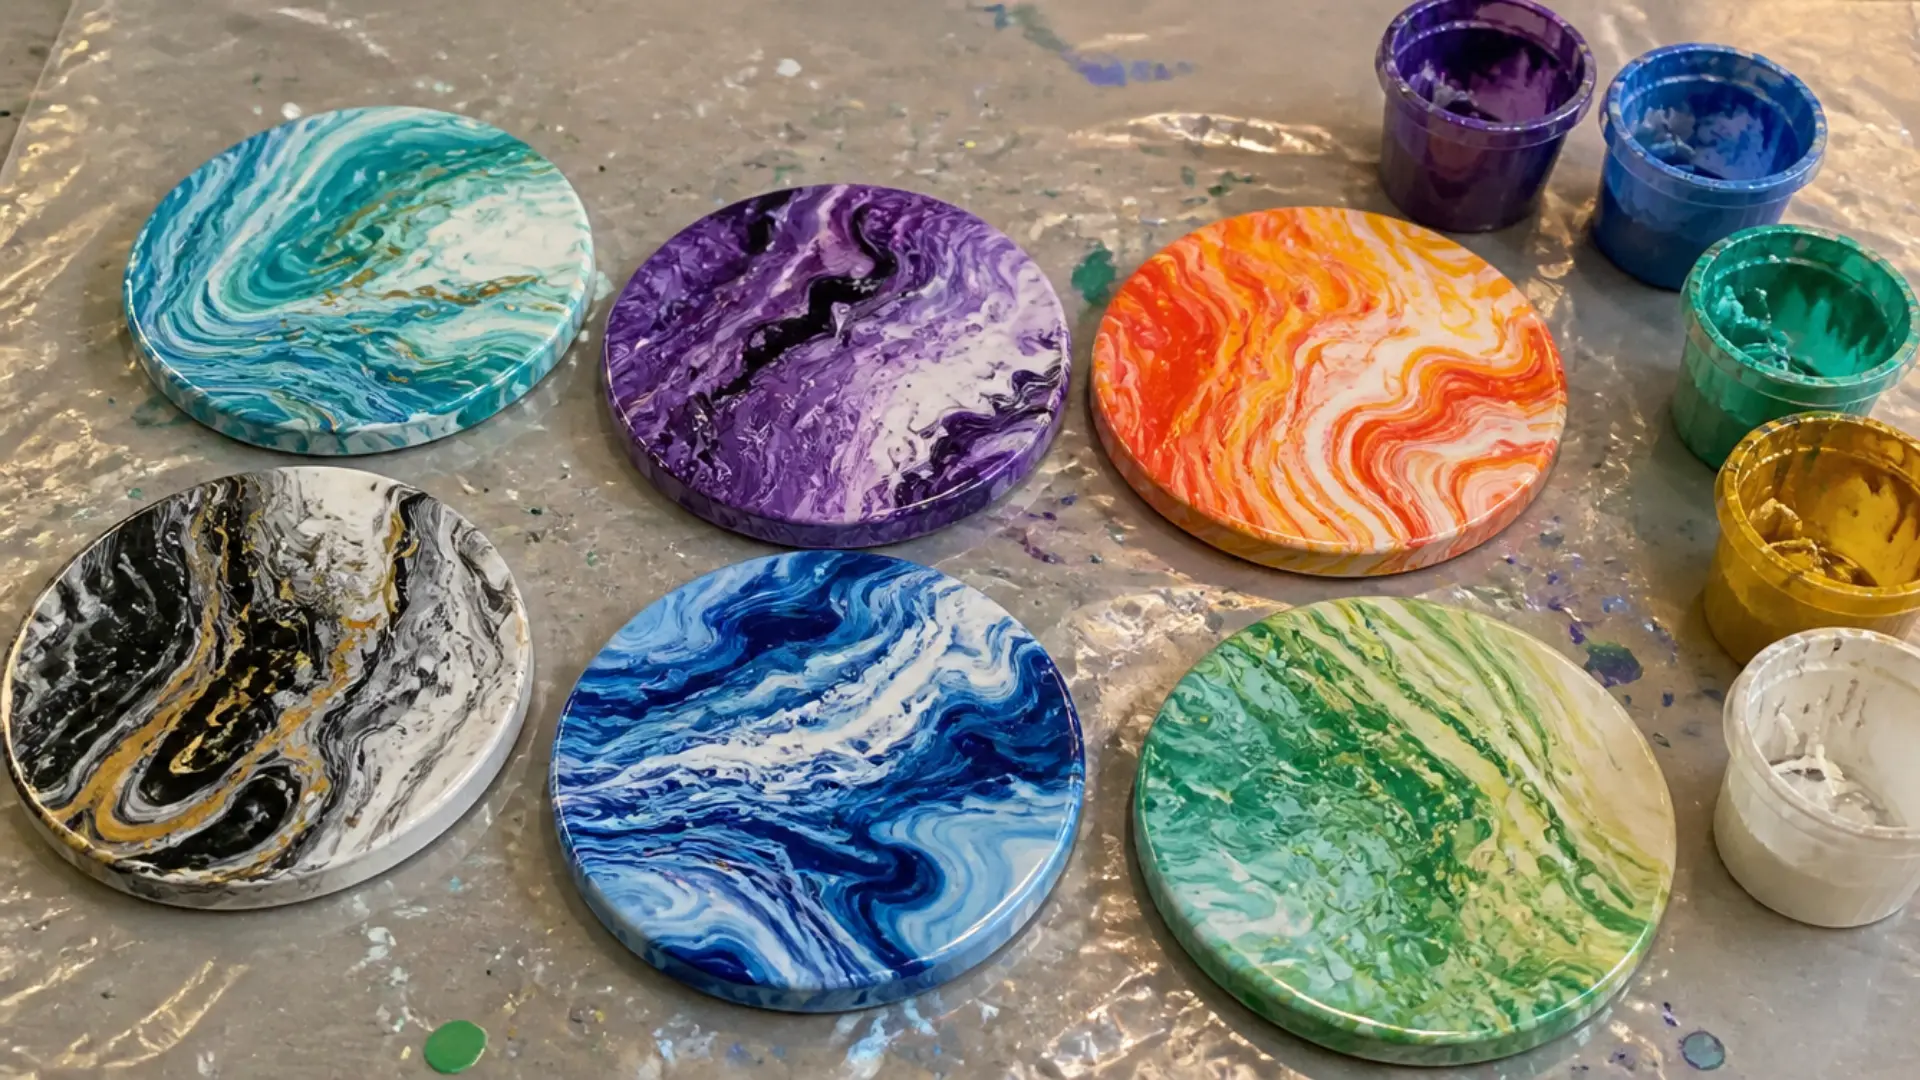
A few paint colors and pouring medium create erratic, marbled designs that look fantastic regardless of how the pour turns out.
Setting up a covered table before anyone starts is worthwhile because it’s messier than the other options on this list.
Step-By-Step:
- Cover the table with a plastic tablecloth or trash bags before setup.
- Mix acrylic paint with pouring medium in small cups, one per person.
- Layer 3–4 colors into one pouring cup per person.
- Flip the cup onto a blank coaster and lift straight up.
- Gently tilt the coaster to spread the paint, then let it cure flat and undisturbed for 24 hours.
17. Vision Board Party
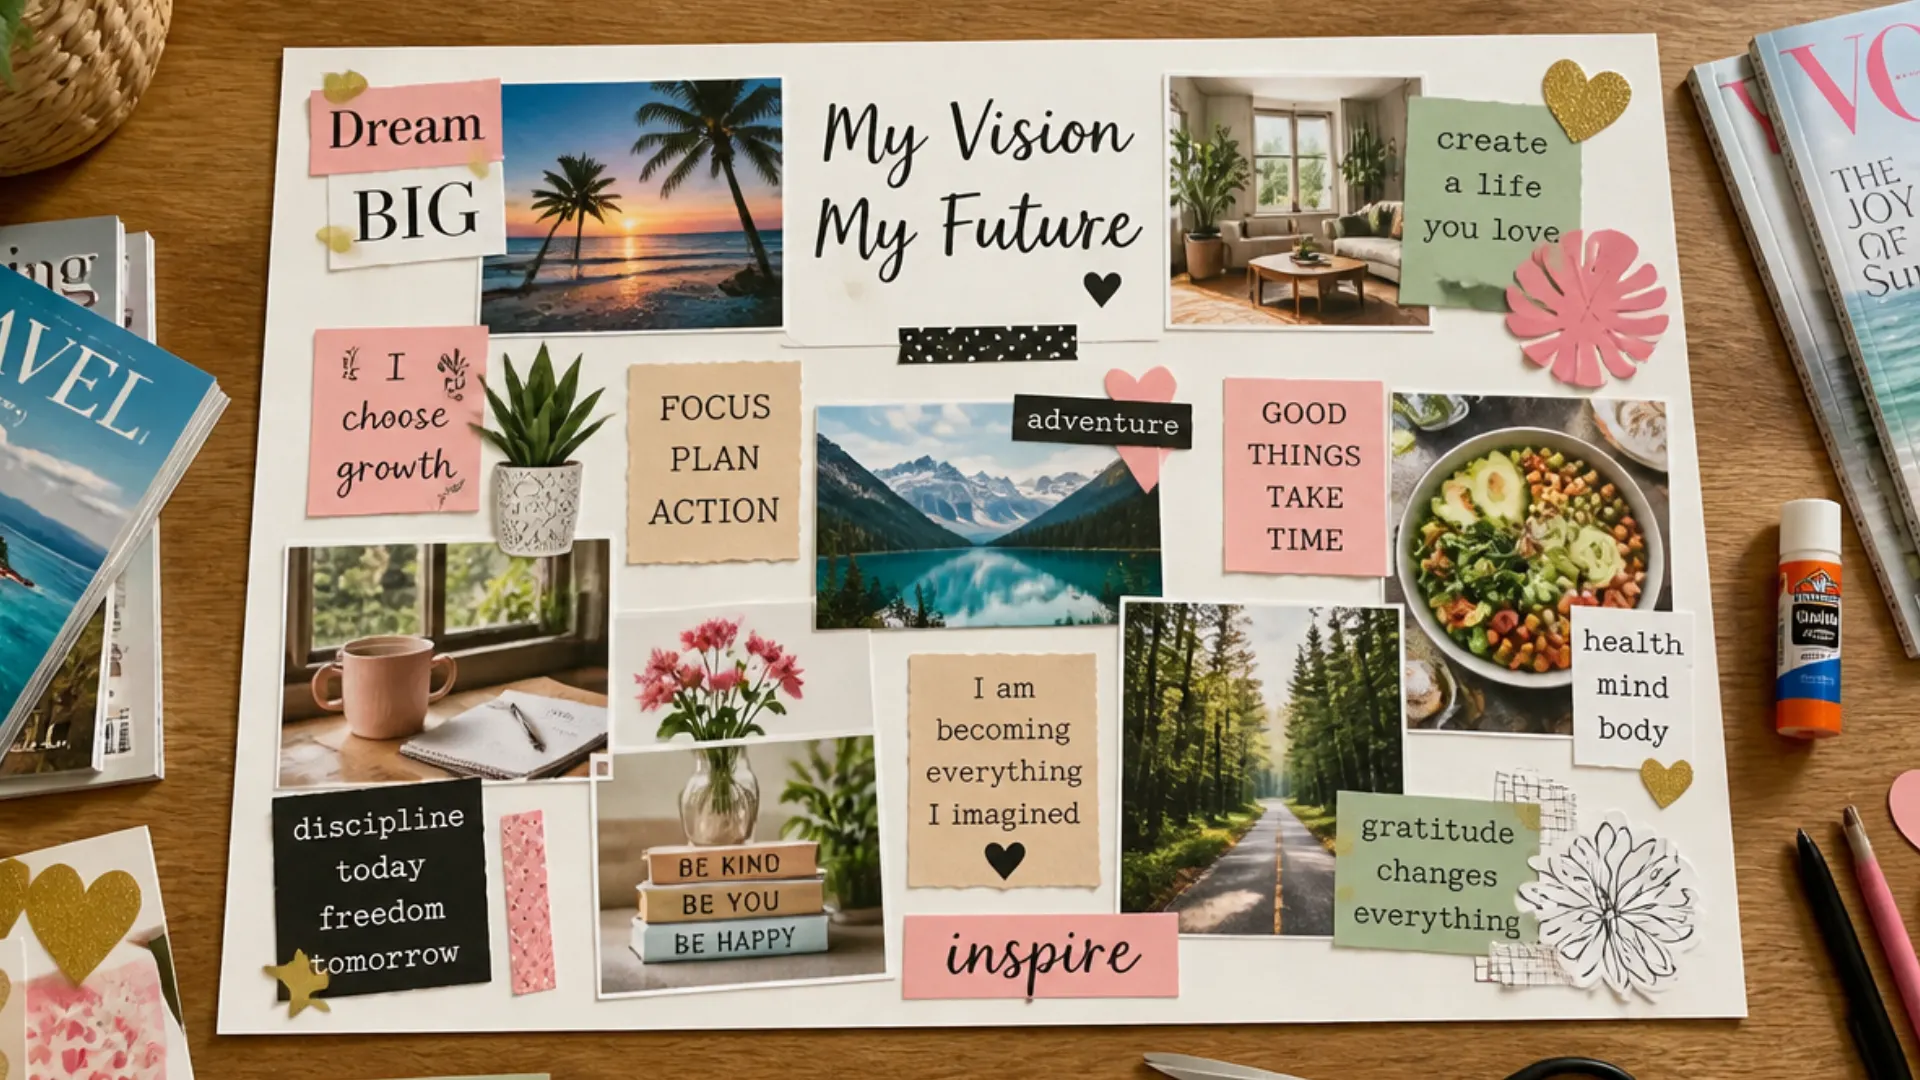
Everyone can brainstorm goals for the upcoming year without feeling pressured by using a poster board and a stack of old magazines.
The best part of the evening is often the conversation that comes from sharing the completed board.
Step-By-Step:
- Provide a stack of magazines, printed images, and poster board for each guest.
- Have everyone flip through and tear out images or words that resonate.
- Arrange the cutouts on the poster board before gluing anything down.
- Glue the final layout in place.
- Go around the group and have each person share one focus area from their board.
18. Friendship Bracelet Swap
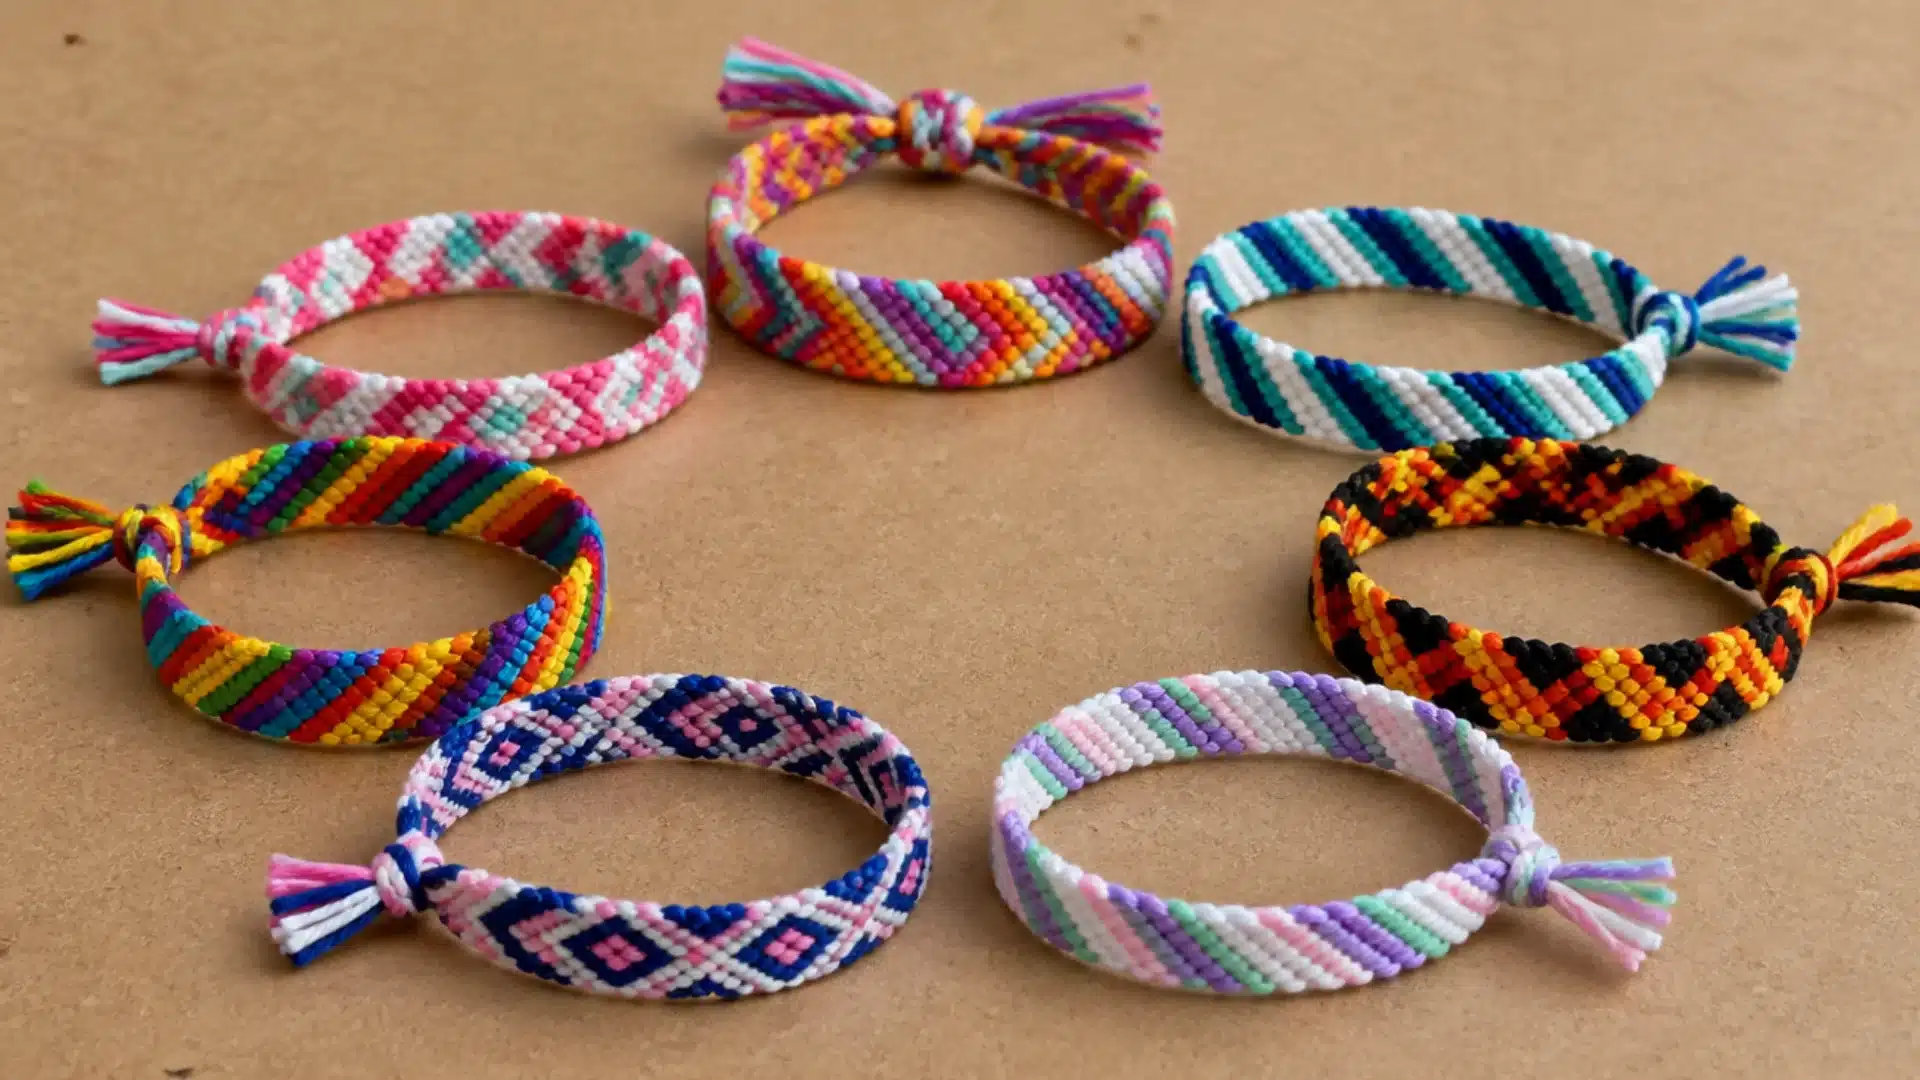
To start a bracelet-making group, all you need is embroidery floss and a basic knot pattern. Each member adds a small personal memento after the evening concludes, and the group trades.
Step-By-Step:
- Set out embroidery floss in a shared color palette.
- Have each guest cut and knot a starting bundle of six strands.
- Teach one simple pattern, like a forward knot or candy stripe, for everyone to follow.
- Knot off and trim each finished bracelet.
- Have guests trade one bracelet with someone else in the group before leaving.
19. Group Embroidery Hoop Initials
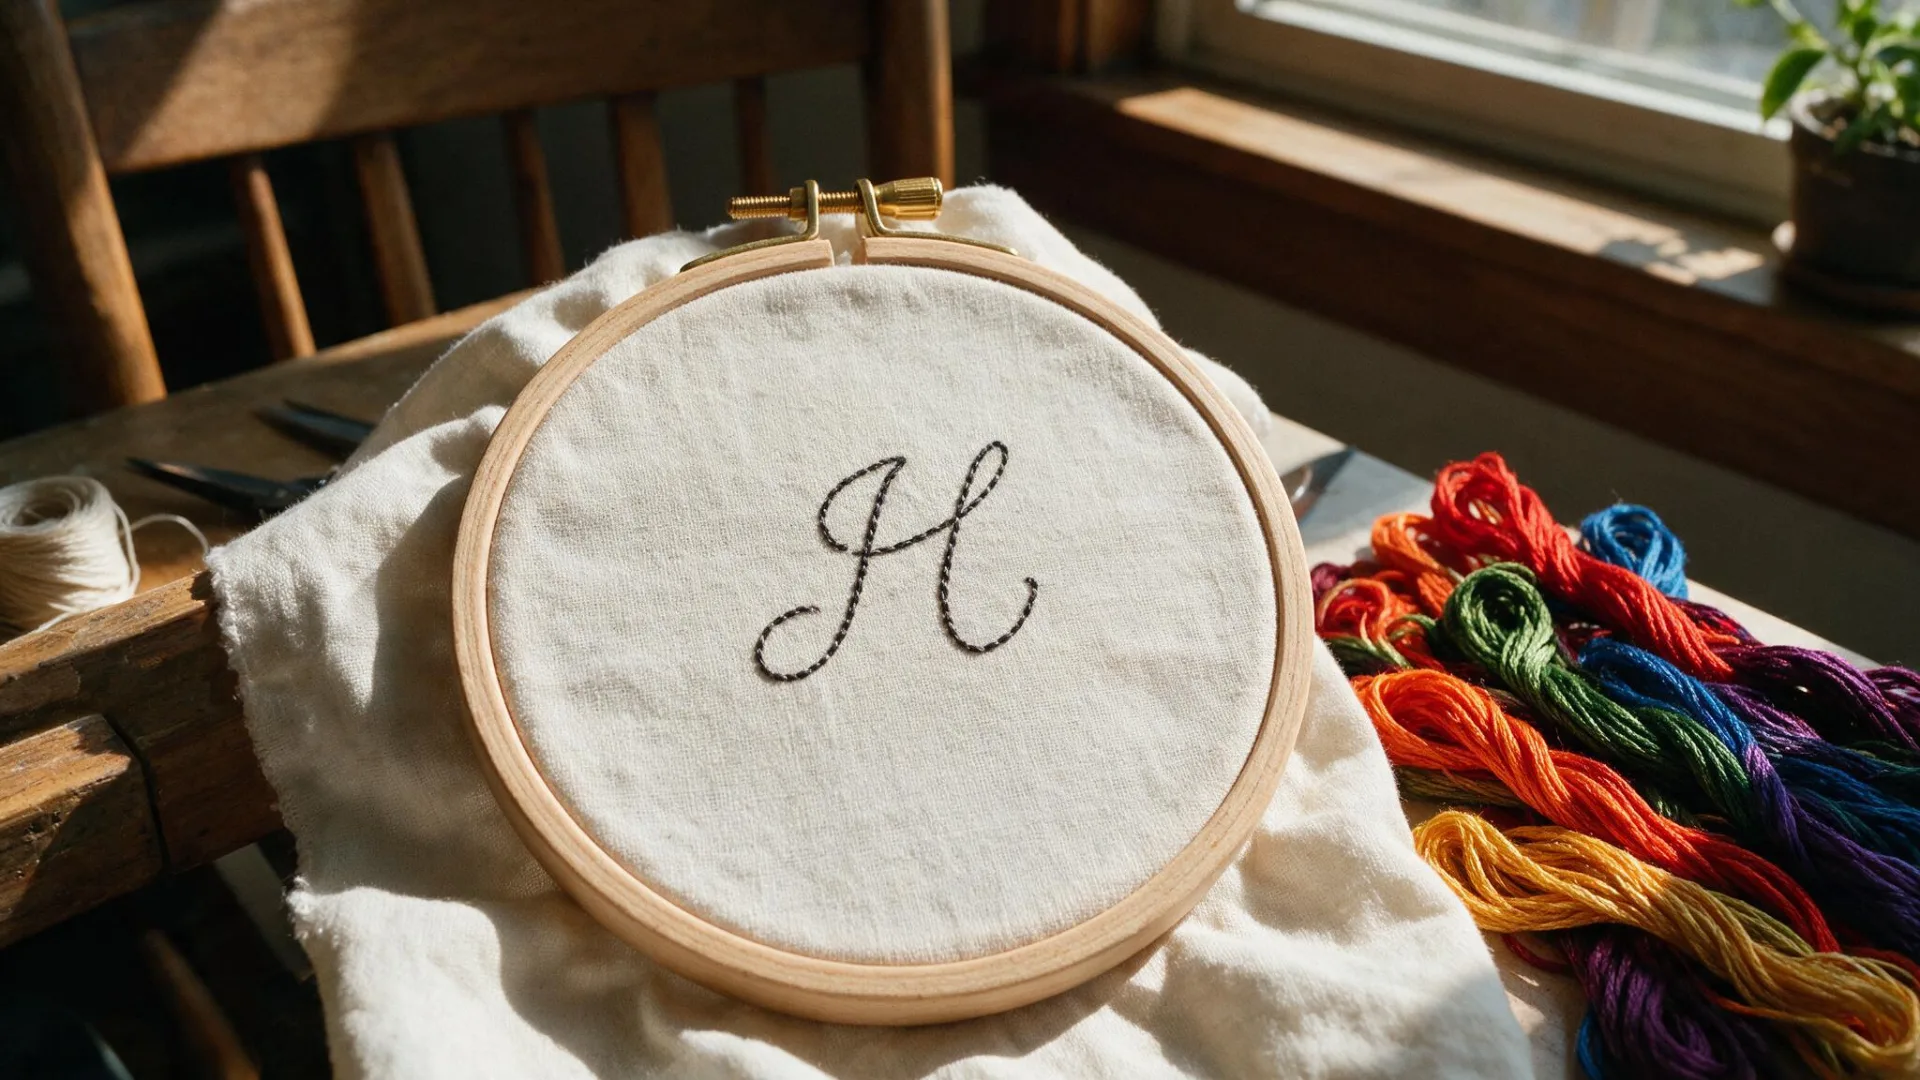
Every visitor works on a little hoop of their own, tracing one initial and using one simple stitch to fill it in. No one gets stuck or falls behind if the design and stitch type are consistent throughout the group.
Step-By-Step:
- Stretch a piece of fabric across a small embroidery hoop for each guest.
- Trace a single large initial or simple shape onto the fabric with a fabric pen.
- Teach one stitch, a basic running stitch, for the whole group to use.
- Have each guest stitch along their traced line.
- Trim loose fabric around the hoop’s edge and display the finished set together.
Easy Crafts to Make and Sell
This batch of easy crafts for adults has a different goal: making several pieces instead of one, so it needs a little more setup than the rest of the list.
Even though some of the techniques need patience as materials cure or set, they are all still beginner level.
20. Pressed Flower Resin Coasters
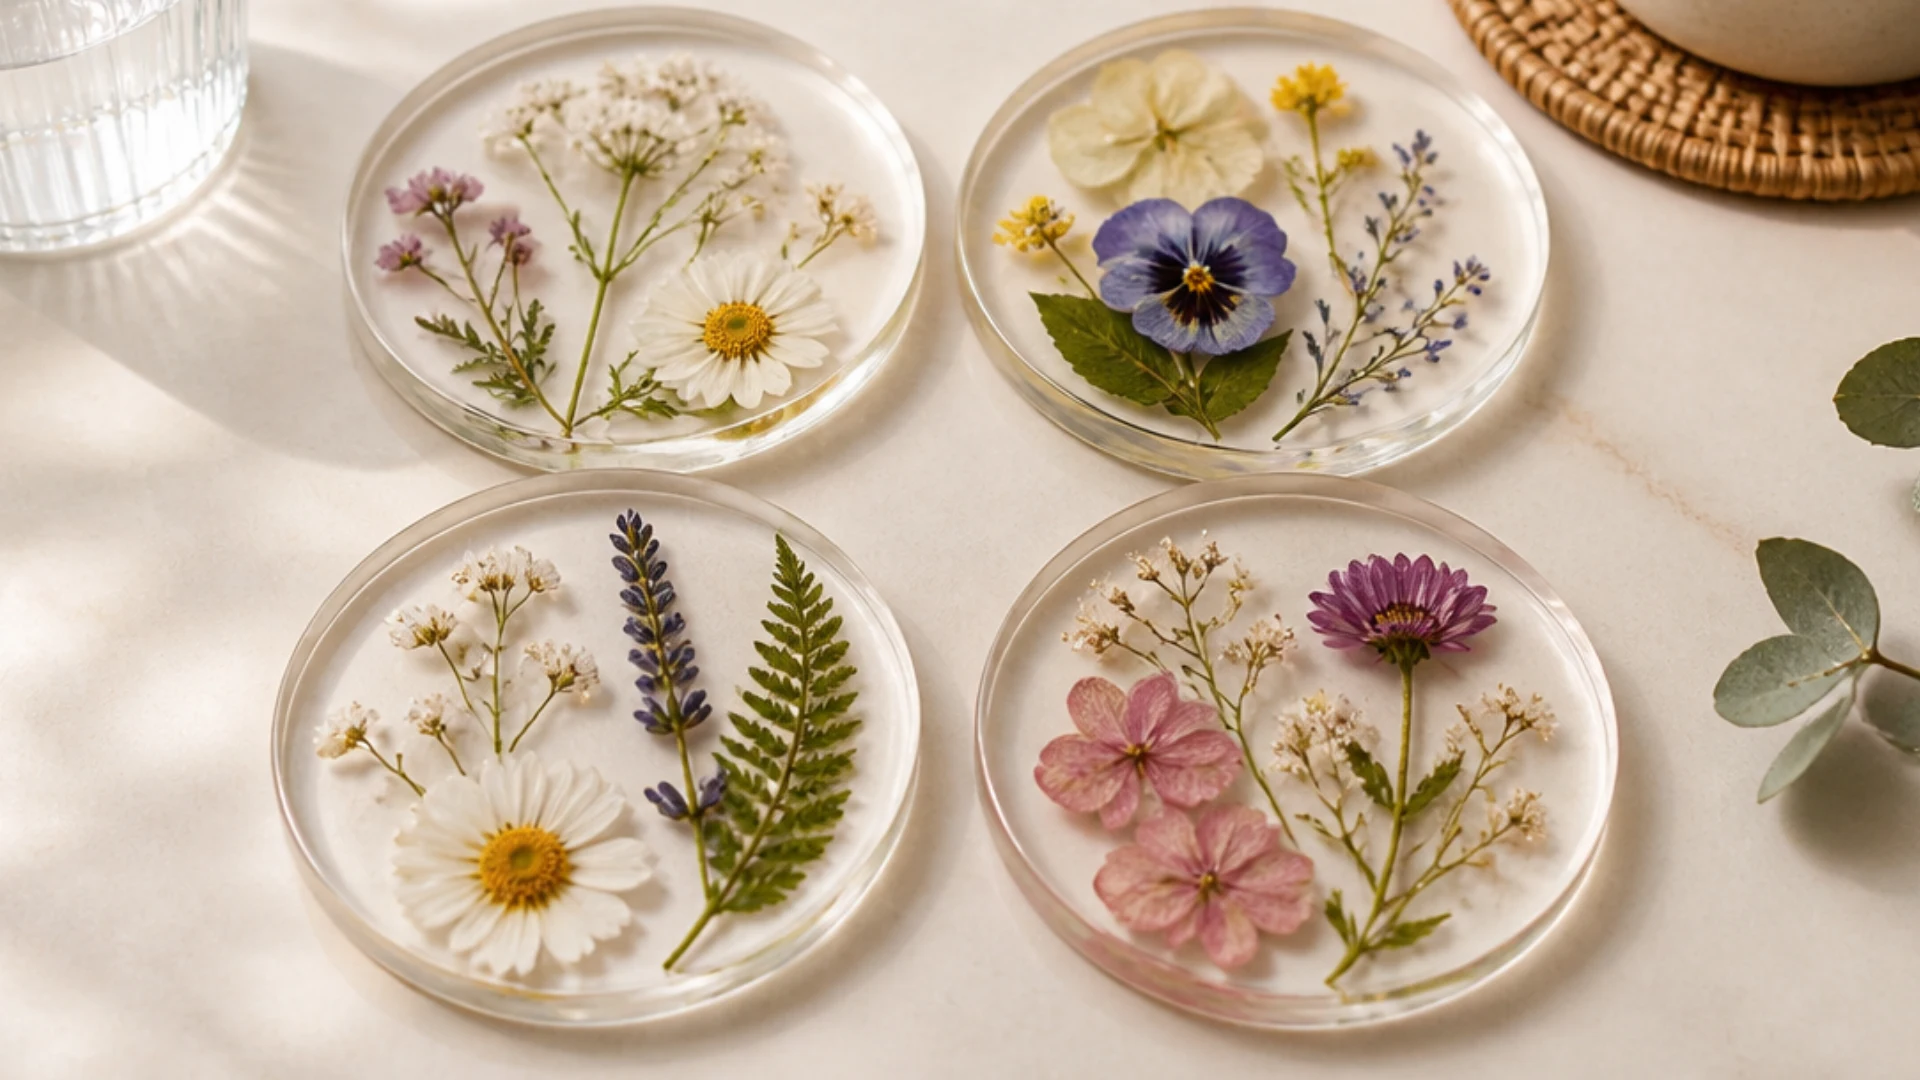
Resin requires careful mixing, a ventilated area, and gloves, and it takes longer than most items on this list to cure completely, typically 24 to 72 hours. The reward is a long-lasting, polished coaster that sells for a healthy markup.
Step-By-Step:
- Arrange dried pressed flowers inside a silicone coaster mold.
- Mix a small batch of clear casting resin per the kit’s exact ratio.
- Pour a thin layer over the flowers and pop bubbles with a toothpick.
- Let cure fully per the resin’s instructions, usually 24–72 hours.
- Sand any rough edges and batch-produce in sets of four to sell.
21. Hand Poured Soy Candles in Thrifted Jars
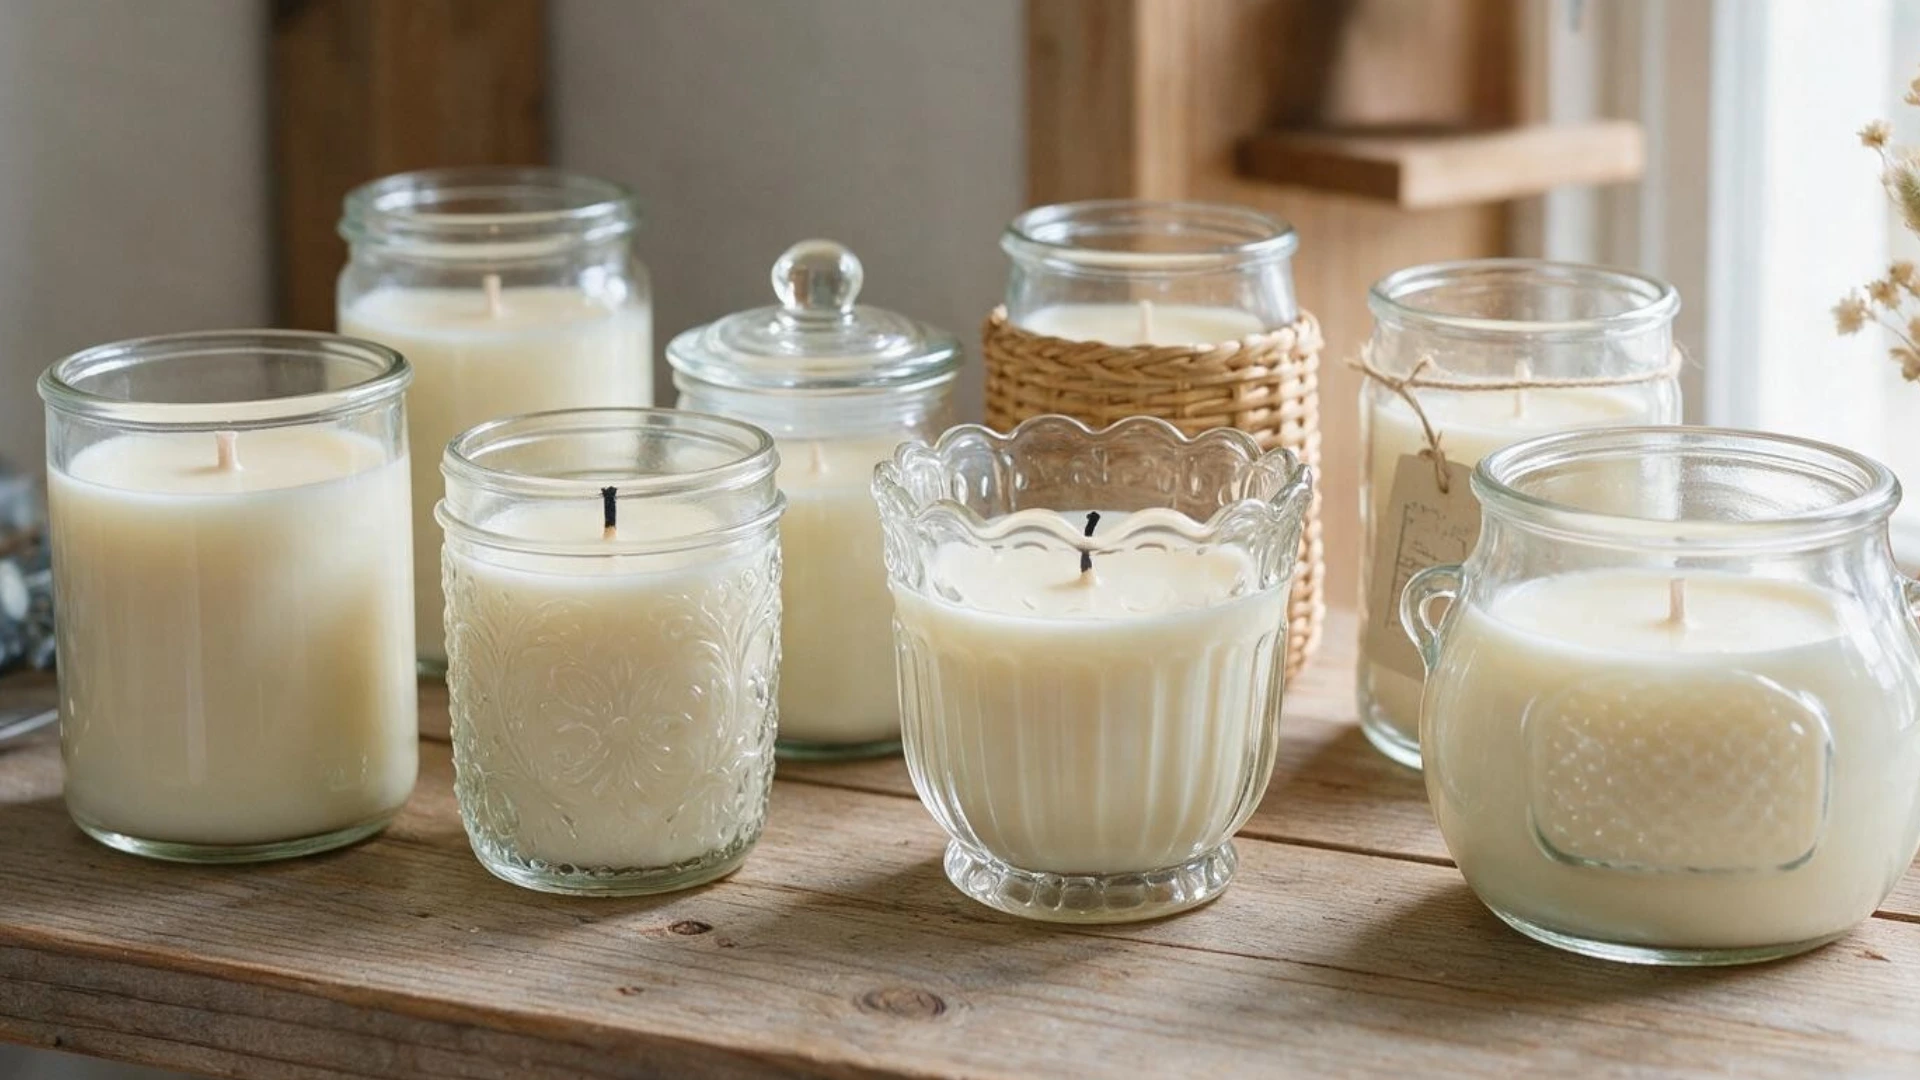
Glass jars from thrift stores reduce the cost of materials, and soy wax, a wick, and fragrance oil transform them into candles that may be sold.
The one thing that matters for a clean burn is the temperature of the wax, which may be monitored with a kitchen thermometer.
Step-By-Step:
- Collect clean glass jars from thrift stores or recycling.
- Melt soy wax flakes in a double boiler, checking the temperature with a kitchen thermometer.
- Stir in fragrance oil once melted and off the heat.
- Secure a wick in the center of each jar and pour in the wax.
- Let cool fully, trim the wick, and label with scent name and burn time.
22. Beaded Charm Bracelets
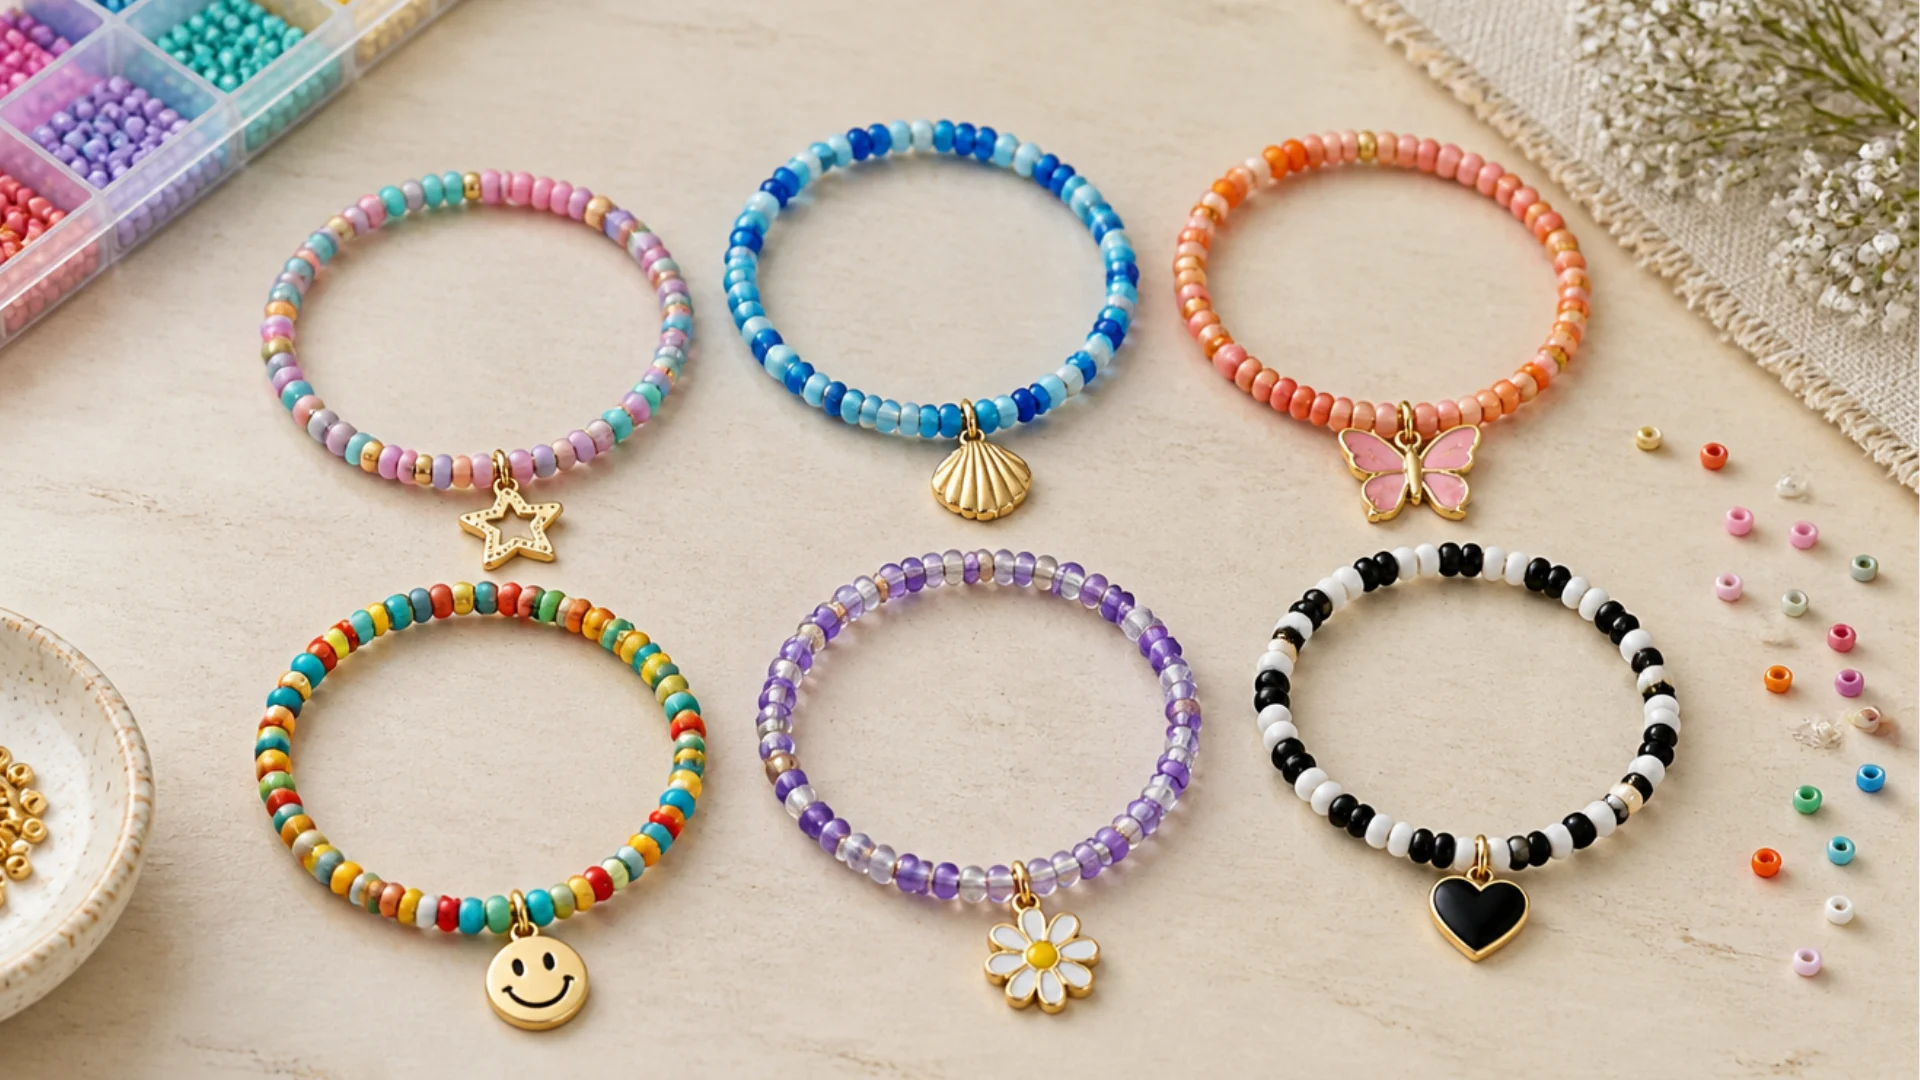
One of the quickest crafts to prepare for sale is the combination of seed beads and a themed charm on stretch cord. One afternoon of work can become a small, diverse product line with a few different color schemes.
Step-By-Step:
- Cut a length of stretch cord per bracelet.
- String a mix of seed beads and a themed charm.
- Repeat the pattern until the strand reaches wrist length.
- Knot the stretch cord tightly, adding a dot of glue to the knot for hold.
- Trim excess and batch-make in a few color palettes to sell as a set.
23. Painted Mini Terracotta Planters
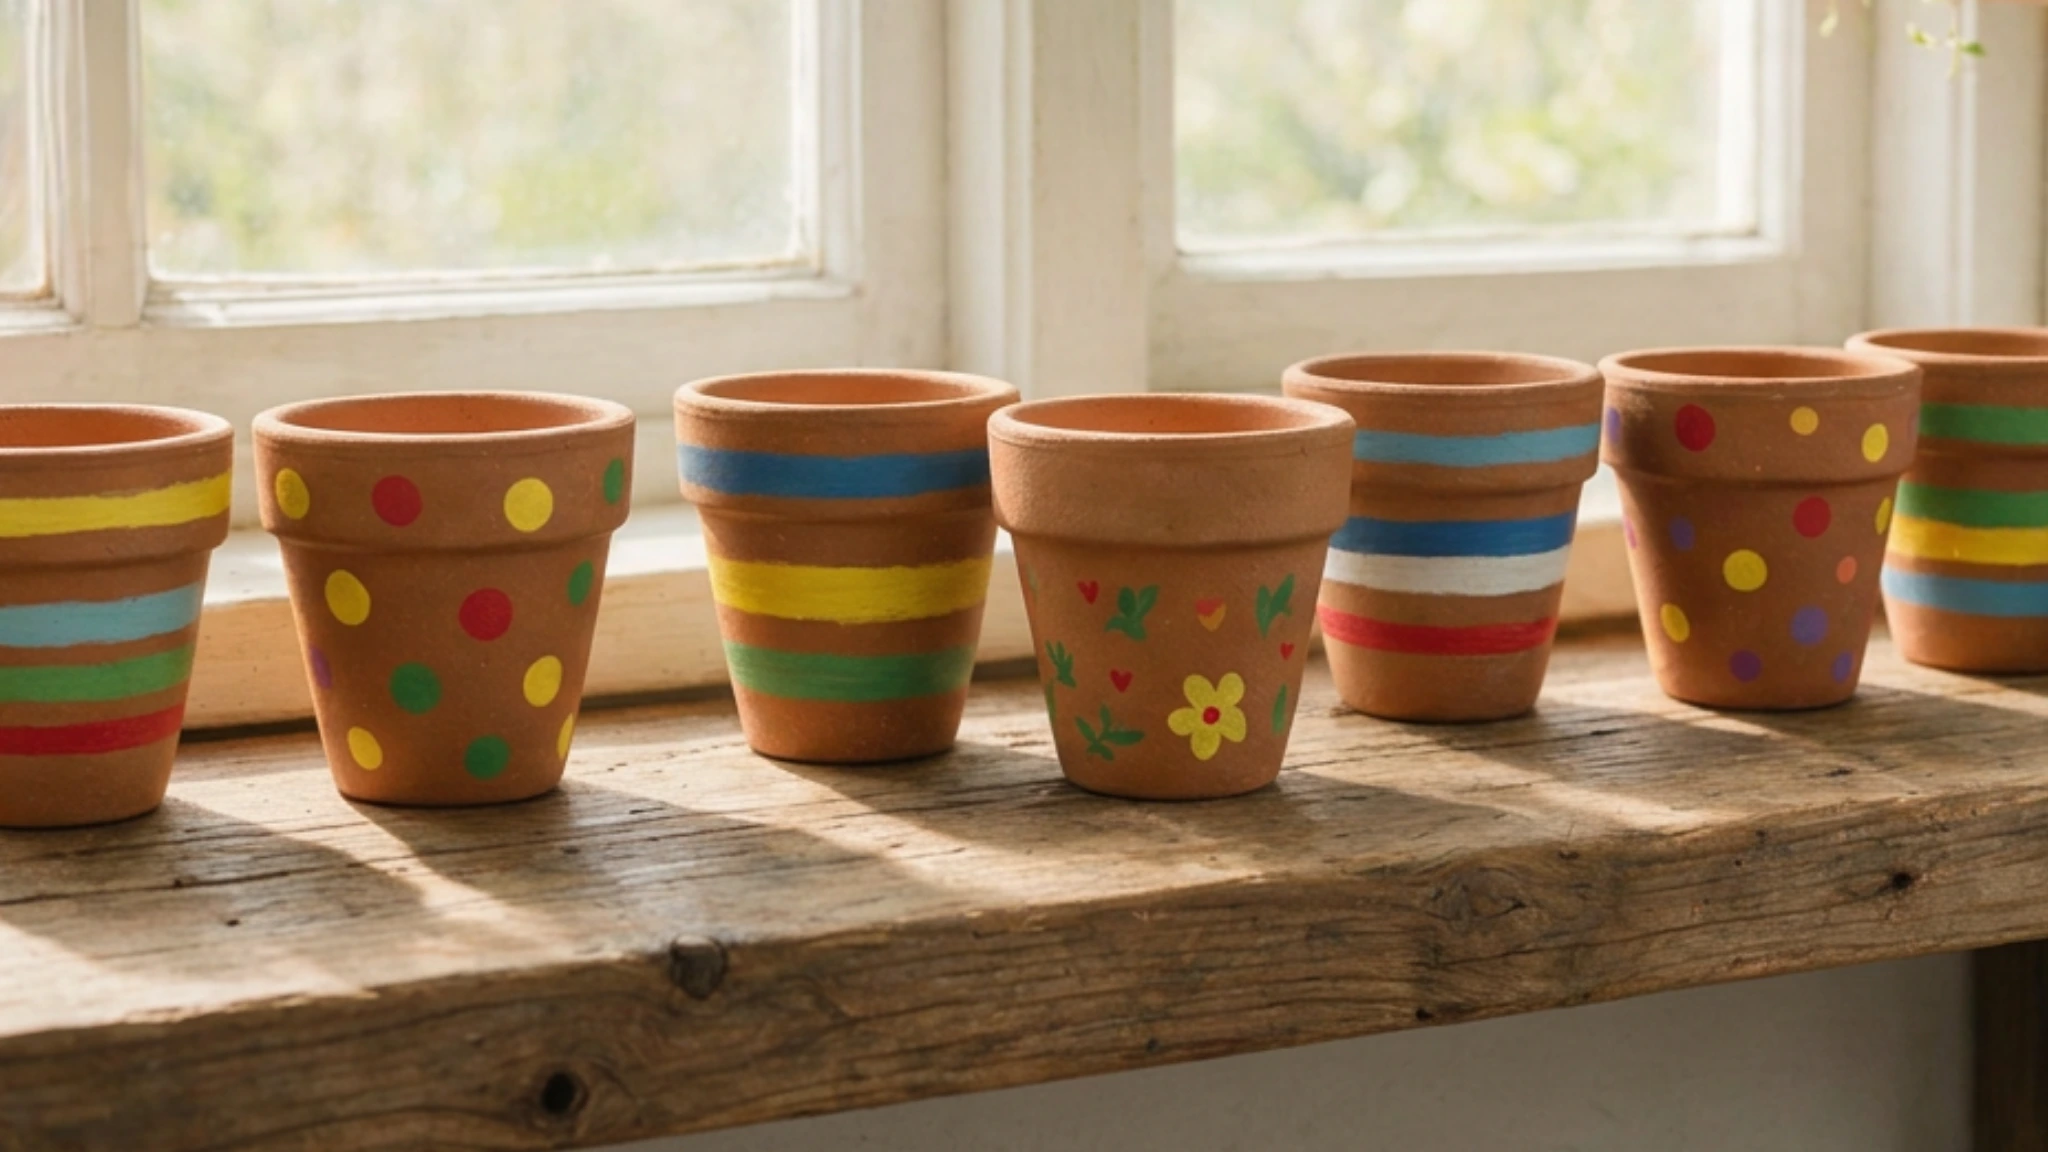
Terracotta pots made in bulk are one of the most effective crafts to make in large quantities because they turn out quickly and take paint well.
A straightforward design, such as stripes or dots, keeps each batch consistent without requiring much labor per item.
Step-By-Step:
- Buy small terracotta pots in bulk from a craft or garden store.
- Prime the outside with a light basecoat.
- Paint a simple pattern, like stripes, dots, or a single motif, on each pot.
- Seal with a matte varnish once dry.
- Line up a batch of 6–10 for a craft fair or online sale display.
Easy Christmas Crafts for Adults
This is the list’s most focused area, designed for people who already know they want a Christmas activity instead of a generic craft concept. Each one is assembled in a single sitting using basic, seasonal materials.
24. Dollar Store Snow Globe Jar
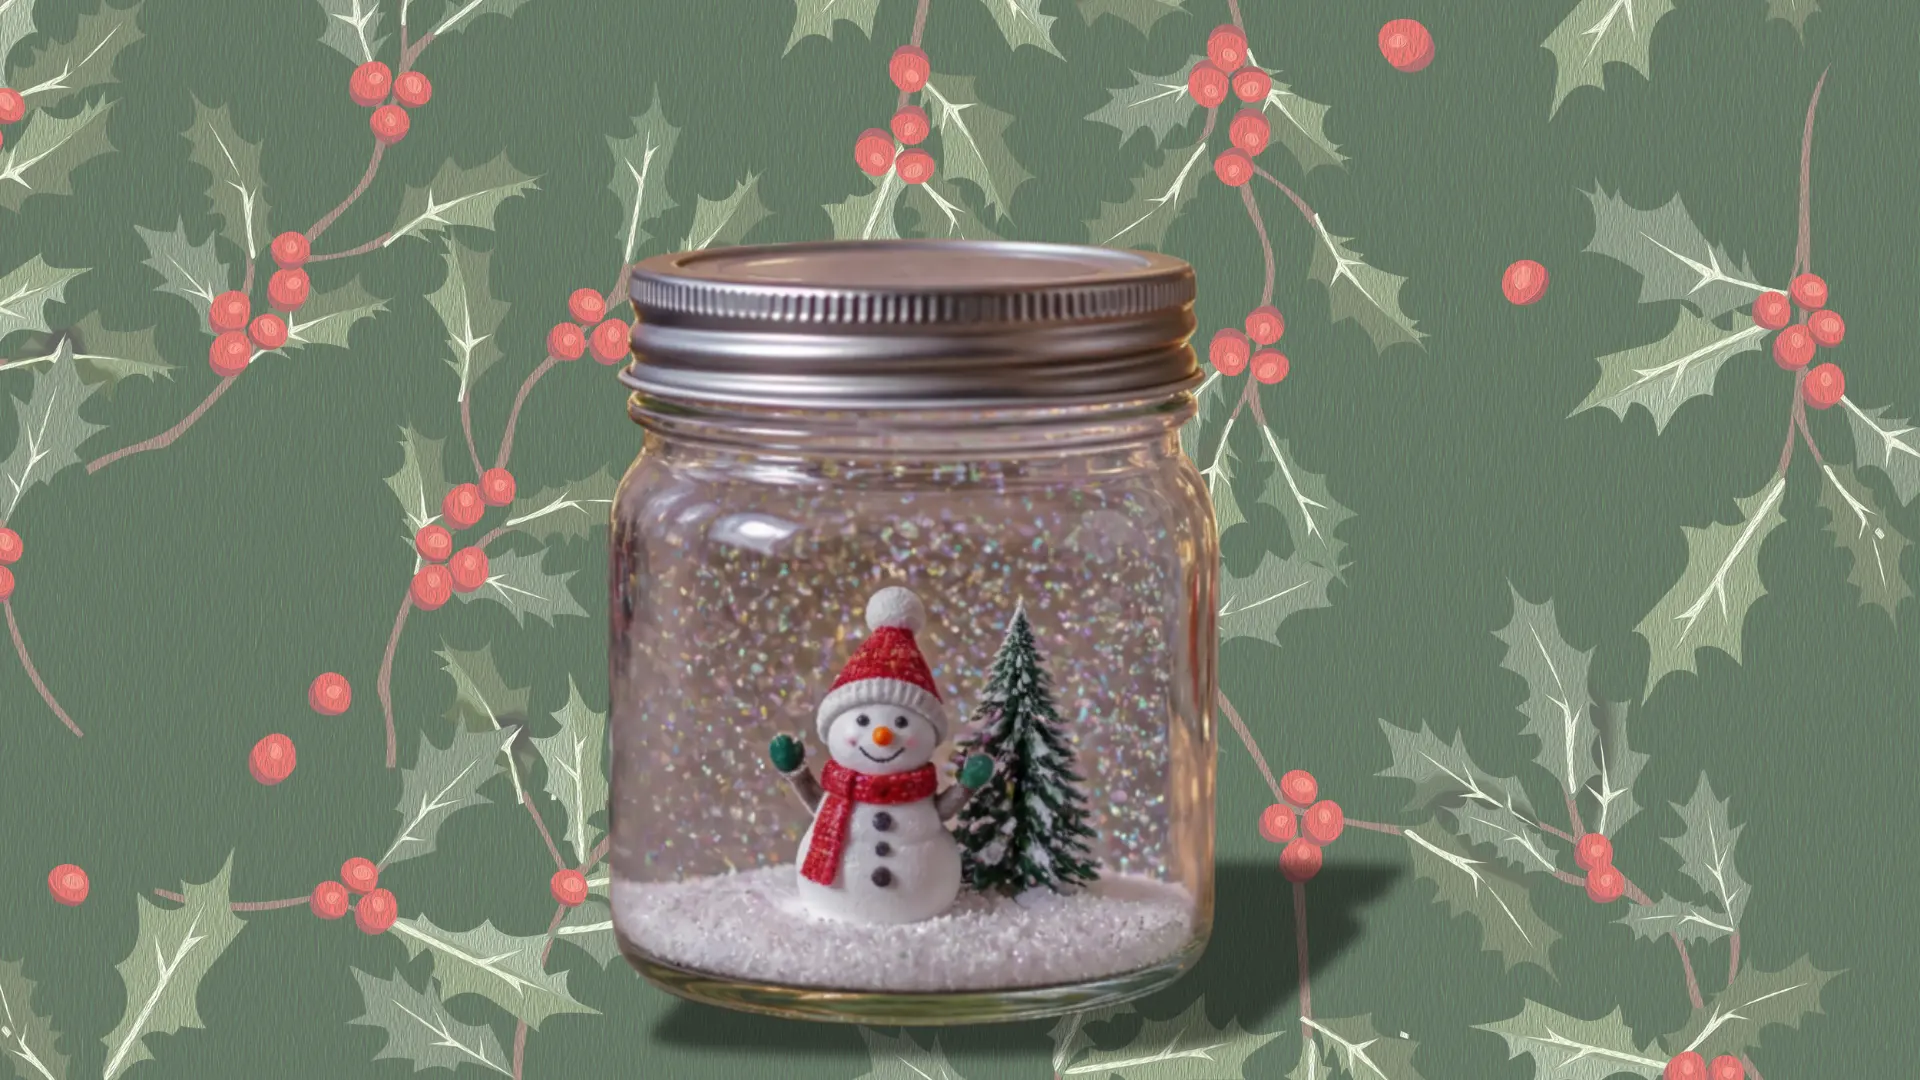
With a few drops of glycerin and a dash of glitter, a small glass jar and a figure can become a functional snow globe.
In this case, waterproof adhesive is important since regular craft glue will come away when the figurine is submerged in water.
Step-By-Step:
- Remove the lid from a small glass jar.
- Glue a small figurine or ornament to the inside of the lid with waterproof glue and let it set for an hour.
- Fill the jar with water and a few drops of glycerin.
- Add a pinch of fine glitter for “snow”.
- Glue the lid back onto the jar and seal the edge before flipping it over.
25. Salt Dough Ornament Gift Tags
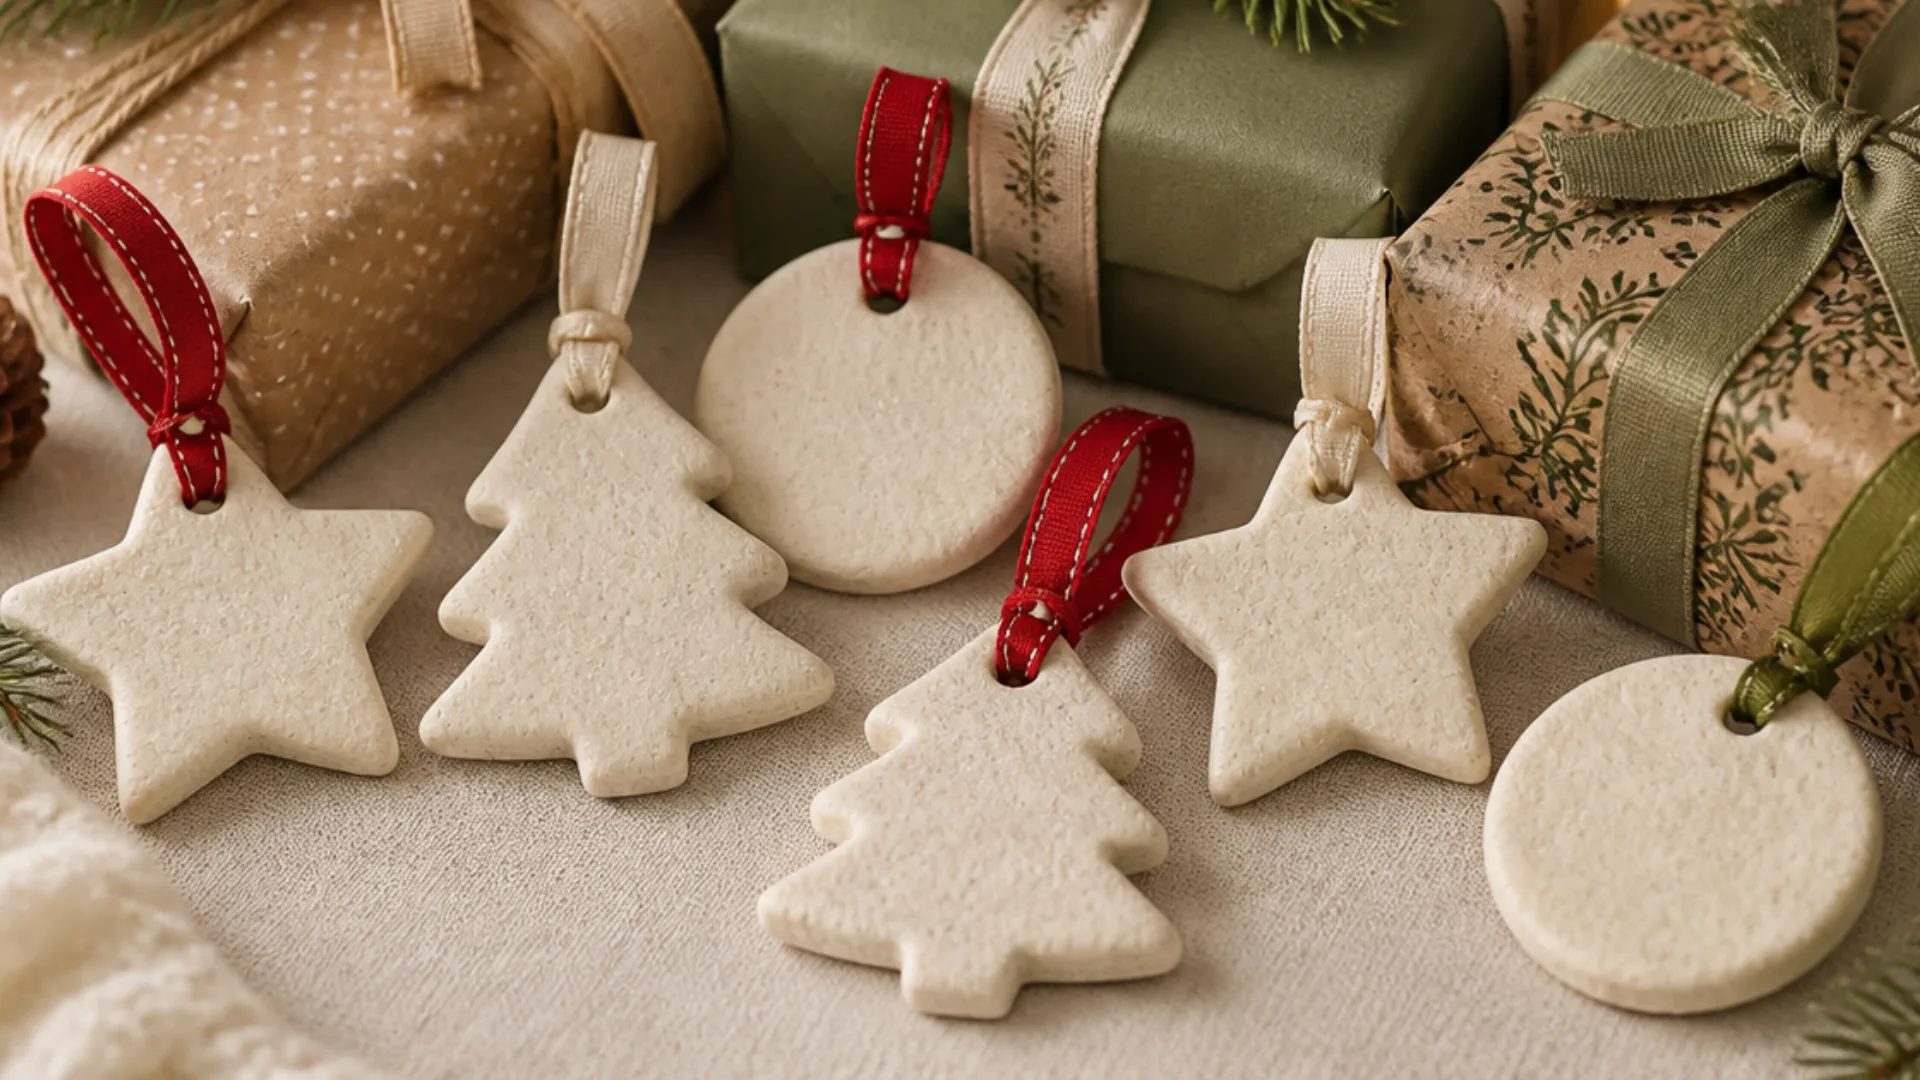
Gift tags are made by cutting ornamental forms out of the same flour-salt-water dough from earlier in the list and baking them.
Each one becomes a memento that lasts longer than the wrapping paper, with a painted name or brief note.
Step-By-Step:
- Mix 2 cups flour, 1 cup salt, and 1 cup water into a firm dough.
- Roll it out and cut into ornament shapes with a cookie cutter.
- Poke a small hole near the top with a straw for hanging.
- Bake at 200°F for 2–3 hours until fully hardened.
- Paint with a name or message once cooled, then thread with ribbon.
26. Fringe Fleece Scarf Gift
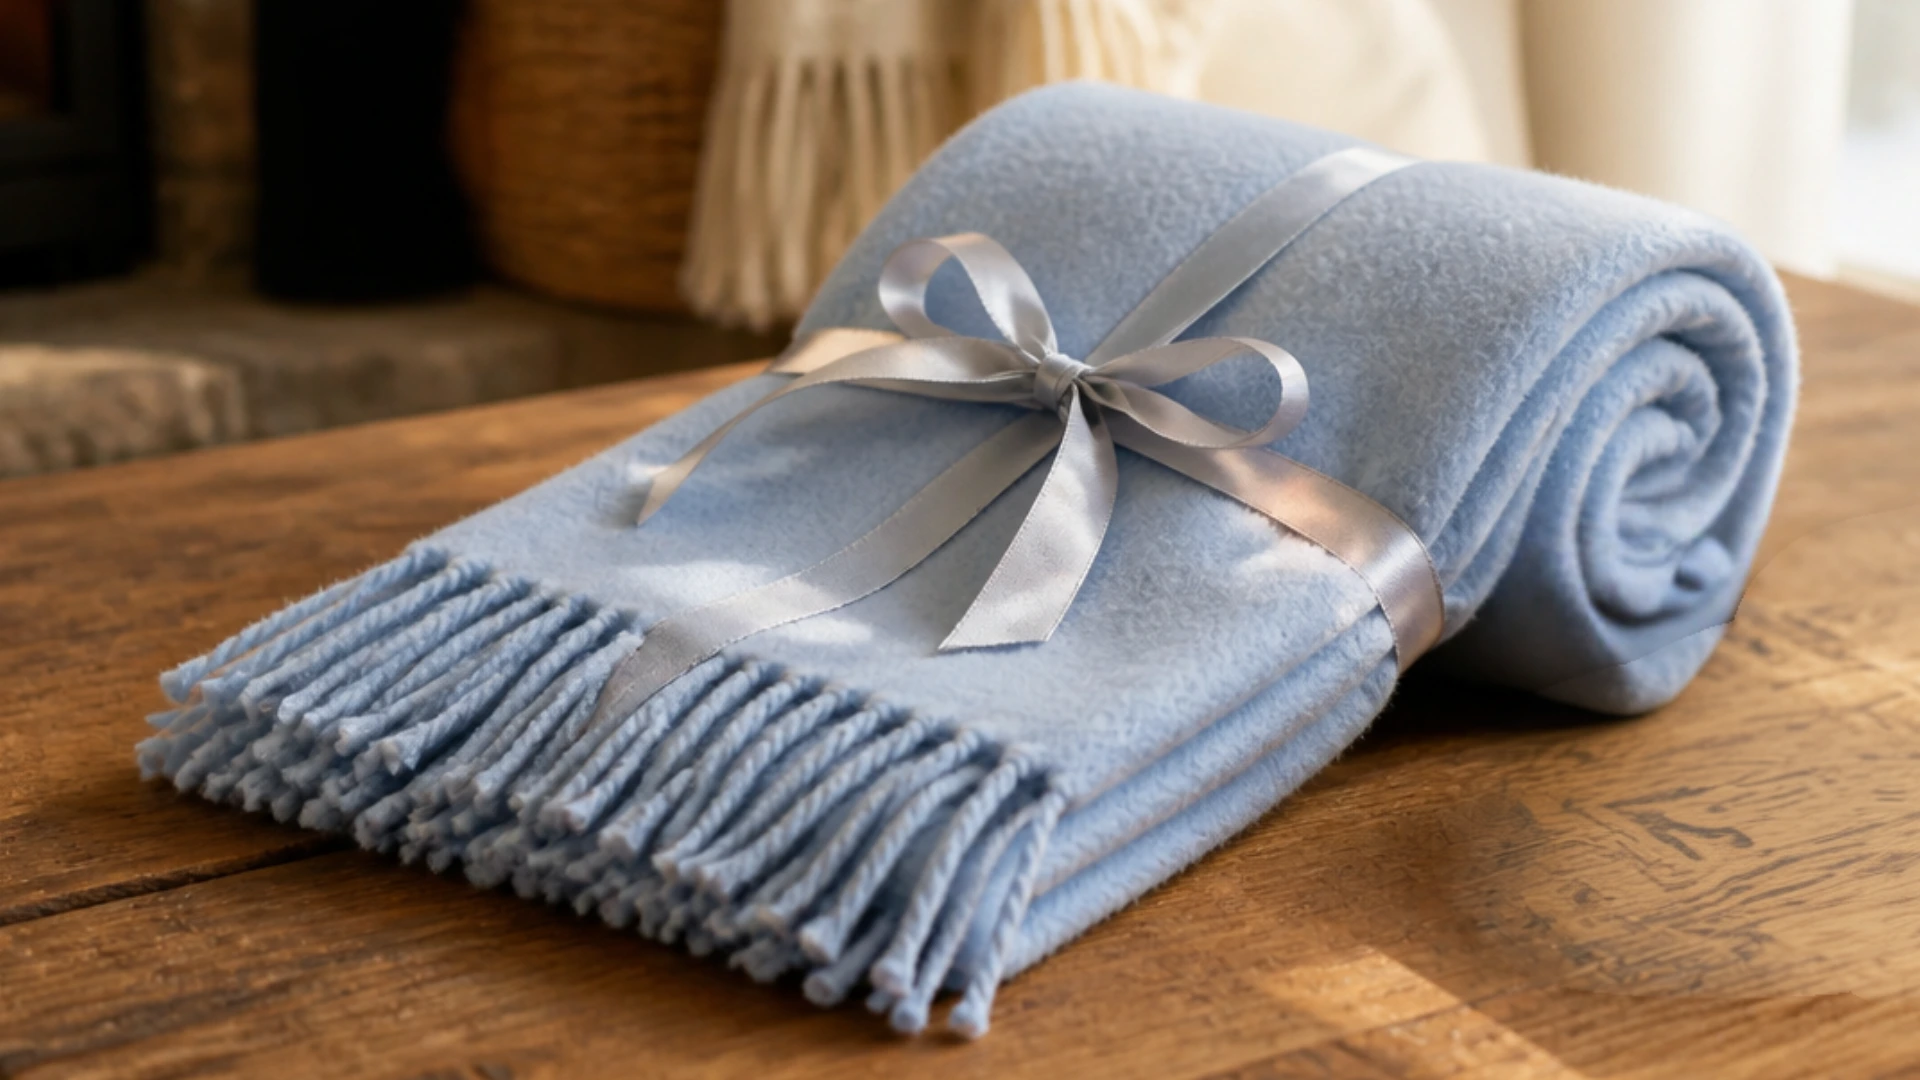
All it takes to create a finished scarf from a length of fleece cloth is cutting and knotting. Once the fringe is tied off, it’s a simple last-minute present that nevertheless looks deliberate.
Step-By-Step:
- Cut a length of fleece fabric about 8 inches wide and 60 inches long.
- Trim both short ends into 4-inch fringe strips.
- Tie each fringe strip into a single knot, working across both ends.
- Trim the fringe evenly if needed.
- Roll and tie with ribbon for gifting.
Conclusion
That’s the point of these easy crafts for adults: pick whichever one matches how much time and mess you’re up for today. The rest will still be here next weekend.
They only require some time, a few household necessities, and a willingness to get a little glue on the fingers; none of them require a large supply run or prior knowledge.
A bag of flour, a drawer full of used t-shirts, or a few corks are frequently plenty to start something worth saving or donating.
One of the best times to choose one and see where it goes is during the next free hour.
Frequently Asked Questions (FAQs)
1. What are the Easiest Crafts for Adult Beginners?
Salt dough tags and no-sew T-shirt totes need zero prior skill or experience. If it’s your first time crafting, stick to projects with five steps or fewer.
2. What Crafts can Adults Make at Home with Things they Already have?
T-shirt yarn bowls, pressed flower bookmarks, and salt dough keepsakes use only common household items.
3. What Crafts Can I Make and Sell for Extra Money?
Resin coasters, soy candles, beaded bracelets, and painted planters all sell well in batches.