So, the garlic leaves in your garden are turning yellow and flopping over. Now what?
You must be standing over your garden bed, with a fork in hand, wondering when to harvest garlic. If you dig too soon, you might regret it. If you wait too long, then you might regret that too.
Turns out, timing really matters here. Pull garlic early, and you’re left with bulbs the size of your thumb. Wait too long, and the cloves split apart right in the soil. Either way, you lose out.
But garlic isn’t shy about telling you when it’s ready. You just have to know what to watch for.
That’s what this guide is for. It will help you know when to harvest garlic, plus how long it actually takes to grow, start to finish.
When to Harvest Garlic (Signs to Look For)
Forget about the calendar, as your garlic already knows when it’s ready. It just needs you to pay attention.
The Bottom Leaves Turn Yellow or Brown
Start with the leaves. See those bottom two or three turning yellow, maybe brown. That’s your first sign the plant is done feeding those leaves, meaning it’s now putting all its energy into the bulb.
Don’t rush and pull it the moment you spot this. If you harvest too soon, you’re left with small, weak bulbs. They won’t taste like much, and they definitely won’t last in storage.
Some Leaves Stay Green Up Top
Watch this over the next few days. Most gardeners wait until several of the lower leaves have browned, but five or six leaves up top are still green. That mix is what you want. Not all brown, not all green.
If you wait until every single leaf turns brown, that’s a problem too. The bulbs can crack open underground, and the cloves start separating. Once that happens, your garlic won’t keep for long.
The 90-Day Mark Rolls Around
Timing helps too, but it’s more of a backup than a rule. Garlic usually takes around 90 days from planting to harvest. Though honestly, this depends a lot on your climate and which variety you planted. So don’t stress if your garlic runs a little early or late.
Do a Test Dig to Be Sure
So how do you know for sure? Dig around one plant and feel the bulb through the soil. You’re checking for something plump, with skin that feels papery, almost like tissue paper.
If it feels small, or the skin peels off too easily, give it a few more days.
How Long Does Garlic Take to Grow

Your garlic will take about 8 to 10 months to grow, from planting to harvest. Here’s how that breaks down:
- Fall-planted garlic: 8 to 10 months (hard neck), 7 to 9 months (soft neck)
- Spring-planted garlic: 4 to 6 months, though your bulbs will turn out smaller
If you plant in fall, do so a few weeks before the ground freezes. That will give your cloves enough time to grow roots before winter hits.
Then, your cloves will just sit there through the cold months. But don’t worry, that’s normal, as garlic actually needs this chilling period. It triggers the process, which helps with bulb formation.
If planting in spring, you’ll see little green shoots pushing through the soil. From there, things move faster, and the plant keeps growing through spring and into early summer. By mid to late summer, your bulbs should be ready to pull.
Now, the honest answer to how long garlic takes to grow is that you won’t always get the exact same timeline every year. The variety you’re growing matters, and so does your climate. Cold winters actually help your garlic grow bigger, healthier bulbs.
Planting in spring instead? You can still grow garlic, but expect smaller bulbs and a shorter wait, somewhere around 4 to 6 months.
How to Harvest Garlic Step-by-Step?

You have waited months for this, so get it right.
Step 1: Pick the Right Day
Wait for dry soil, and if it rained recently, give it a day or two to dry out before you start digging. You want soil that’s soft enough to dig into easily, but not soggy, muddy, or waterlogged.
Step 2: Loosen the Soil and Lift the Bulb
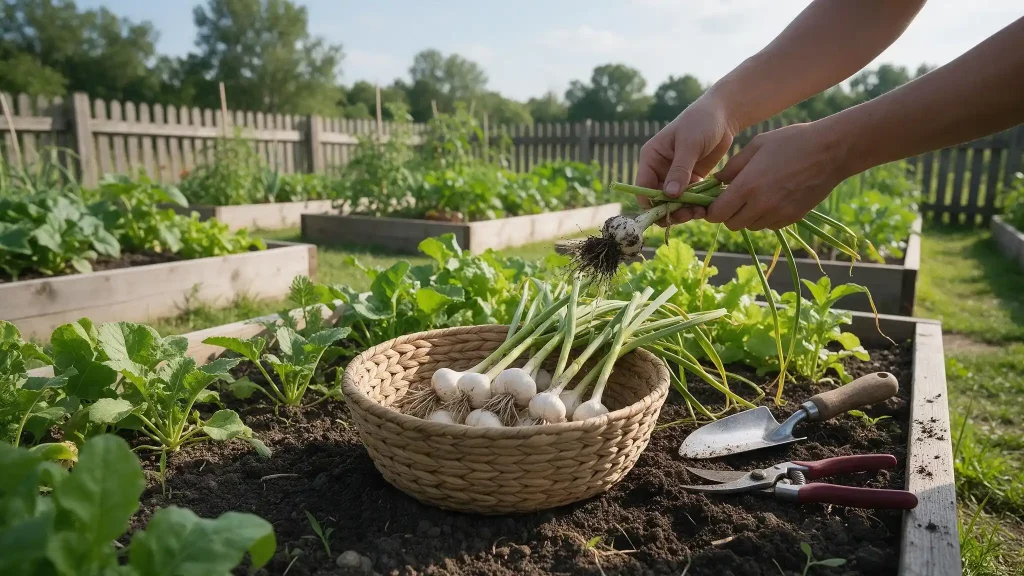
Grab a garden fork or shovel and push it in about 4 to 6 inches away from the plant. Don’t dig too close, or you risk stabbing the bulb.
Work the fork underneath, then gently lift from below. Never pull garlic out by its stem. The stalk can snap or tear the neck open, letting disease creep in later.
Support the base with your hand as it comes free.
Step 3: Handle It with Care
Brush off loose dirt by hand, but skip the water. Washing fresh garlic adds moisture it doesn’t need, and that moisture leads to rot down the line.
Keep the stem, leaves, and roots attached for now. You’ll trim everything after curing, not before.
Move your bulbs to a shady spot right away, since fresh garlic bruises easily and doesn’t like direct sun.
Step 4: Cure It Properly
Lay your bulbs in a single layer, or tie them into small bundles and hang them up. Choose a spot with good airflow, no direct sunlight, and low humidity.
Let them sit for 2 to 4 weeks. Once the stems dry out and the skins turn papery, your garlic is fully cured and ready for storage.
Garlic Harvest Time by Variety
The type you planted plays a big role in when you’ll harvest.
Hardneck garlic grows a stiff center stalk, called a scape, with a stronger flavor. It’s ready when about 40% of the leaves turn brown. Watch the scape; once it straightens from its curl, harvest is close.
Softneck garlic ripens differently and handles more leaf dieback before digging. Many gardeners wait until only five green leaves remain. Softneck also matures about 10 days earlier than hardneck.
Quick breakdown:
- Hardneck: Harvest at 40% brown leaves, scapes straighten
- Softneck: Harvest at five green leaves; matures slightly earlier
Climate matters too, as softneck handles warm climates well, making it a better fit for hotter regions. So if other’s garlic came out earlier than yours, this could be why. Different variety, different timeline.
Garlic Harvest Timing by Season
Where you live matters just as much as what you planted.
In warm climates, garlic can be ready as early as May or June. If you’re in a warmer region, you’ll likely harvest before your northern neighbors.
Most of the country harvests in mid to late summer, usually late June through August. This is the typical window for garlic planted the previous fall.
Cooler climates run later. Long, cold winters can push harvest into August. That extra chill actually helps your bulbs grow bigger, so the wait pays off.
A quick snapshot:
- Warm regions: May to June
- Most regions: Late June to August
- Cold regions: Late July to August
Weather plays a role too, not just your calendar. A cooler or wetter season can shift your harvest by a week or two, even in the same region.
So don’t worry if your garlic isn’t ready right on schedule. Your local climate has the final say.
When to Stop Watering Garlic?
Stop watering garlic about 2 to 3 weeks before you plan to harvest.
Why You Should Cut Back on Water
Cutting back gives your bulbs a chance to dry out and harden underground. Skip this step, and you risk mold, rot, or bulbs with weak, thin skins that won’t store well.
Watch the Leaves for the Signal
When the bottom third of the leaves turns yellow, that’s your cue to ease off. Some plants also start leaning or falling over around this time.
At this stage, the plant is putting its remaining energy into the bulb instead of the leaves.
What to Do in Rainy Regions
If you are in a rainy area, this can get tricky since you can’t control the weather. In that case, it might be worth harvesting a little earlier to avoid rot.
Storing Garlic After Harvesting
Curing
Give bulbs 2 to 4 weeks in a cool, dry spot. They’re ready when the necks feel papery, and the skins turn tight. Trim the roots and cut the stem to about an inch.
Choosing the Right Spot
Store garlic somewhere cool, dark, and dry, around 60°F to 65°F. A pantry shelf or mesh bag works well. Skip the fridge and sealed bags, since both trap moisture and lead to mold or early sprouting.
Keep Bulbs Whole
Peeled or chopped garlic breaks down fast, so store bulbs whole for as long as you can. Properly cured garlic lasts 4 to 8 months, depending on the variety. Softneck garlic tends to store longer than hardneck.
Wrapping It Up
Growing garlic isn’t complicated; it just takes patience. Now you know what to look for when it comes to when to harvest garlic. Look for yellowing leaves, a bit of a wait, and a quick test dig if you’re ever unsure.
You also know how long garlic takes to grow, usually 8 to 10 months from clove to harvest, and that timing your planting right sets the whole season up. Harvest it right, cure it properly, and store it well.
So this season, don’t just guess. Watch your plants, trust the signs, and pull your garlic when it’s truly ready.
Frequently Asked Questions
1. How Do I Know if My Garlic Is Ready to Harvest?
Look at the leaves. When the bottom three to five leaves turn yellow or brown, but a few leaves up top are still green, your garlic is ready.
2. How Long Does Garlic Take to Grow from Planting to Harvest?
Garlic usually takes 8 to 10 months to grow. Fall-planted garlic takes longer than spring-planted garlic, which is ready in about 4 to 6 months.
3. What Happens if I Harvest Garlic Too Early or Too Late?
If you harvest too early, you’ll get small, underdeveloped bulbs. Too late, and the cloves can separate inside, shortening how long your garlic stores.
4. How Long Does Cured Garlic Last in Storage?
Properly cured garlic lasts 4 to 8 months. Softneck varieties often store longer than hardneck ones.