Caulk seals the small joint where a bathtub meets the wall. Once that bead cracks, peels, or pulls loose, water may get into the open space and reach nearby materials.
Learning how to caulk a bathtub is a useful DIY skill. The work takes a few basic tools and careful surface prep.
Most of the time goes into removing the old bead and cleaning the joint. Grab the supplies, clear the tub area, and follow these steps for a neat new seal.
What Does Bathtub Caulk Do?
Bathtub caulk seals the joint between the tub and nearby tile, wall panels, or other finished surfaces.
Water runs across these areas during baths and showers, so an open joint can let moisture pass behind the surface. Bathroom caulk stays flexible after it cures.
That makes it useful where two materials meet, and small amounts of movement may occur. Caulk and grout serve different purposes.
Grout fills the spaces between tiles. Caulk is used at joints such as the line where a tub meets a tiled wall. A sound bead also gives the edge of the tub a neat, finished look.
What Type of Caulk Works Well for a Bathtub?
Bathtubs need caulk made for bathroom use and regular water exposure. Read the tube before buying since formulas and approved surfaces differ between products.
| Caulk Type | Typical Use | Main Trait |
|---|---|---|
| 100% silicone | Tub and shower joints | Waterproof after curing |
| Bathroom silicone | Tubs, sinks, and showers | Made for wet areas |
| Siliconized acrylic | Certain bathroom joints | Often easier to clean up |
| Painter’s caulk | Trim and dry indoor gaps | Usually a poor pick for tub joints |
100% silicone is widely used around tubs. It stays flexible and is sold in formulas made for wet bathroom areas.
Tools and Materials Needed for Caulking a Bathtub
Set the tools near the tub before removing the old bead. Having the supplies within reach makes it easier to work before fresh caulk starts forming a skin.
For most caulking bathtub jobs, gather:
- Bathroom-grade silicone or tub-and-tile caulk
- Caulk gun
- Utility knife
- Caulk removal tool
- Plastic scraper
- Cleaning cloths
- Suitable surface cleaner
- Painter’s tape
- Paper towels
- Disposable gloves
- Caulk finishing tool
Take extra care with acrylic, fiberglass, and plastic tubs. A metal blade can scratch some surfaces. A plastic scraper or plastic razor may be a better option for those areas.
How to Caulk a Bathtub?
Good surface prep and a steady application make it easier to form a smooth bead around the tub.
Step 1. Inspect the Existing Bathtub Caulk
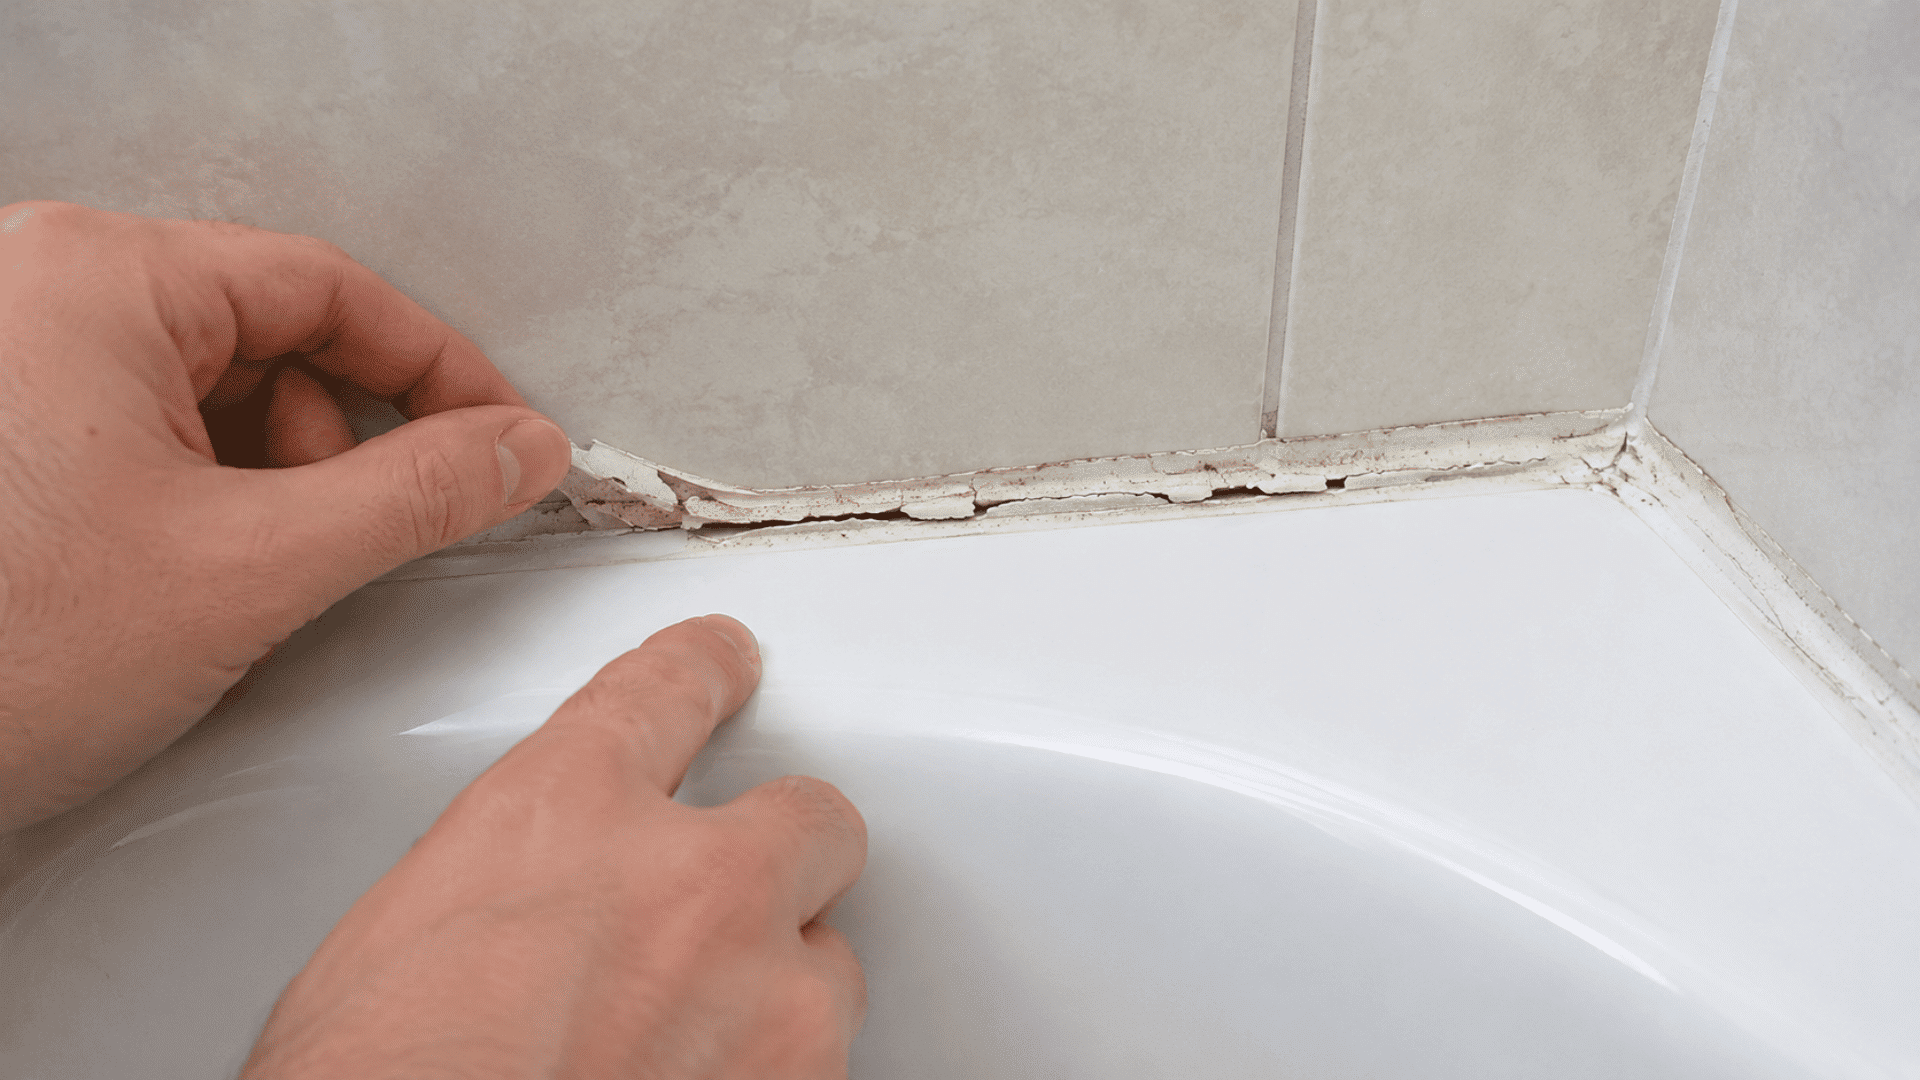
Check the full edge of the bathtub, including corners and areas that get wet often.
Look for cracks, gaps, peeling caulk, loose edges, and sections pulling away from the tub or wall.
Check nearby tile, flooring, and wall material for water marks, swelling, or softness. Larger damage may need repair before re-caulking.
Use a flashlight along the joint. Side lighting can make small cracks and gaps easier to spot.
Step 2. Remove the Old Caulk
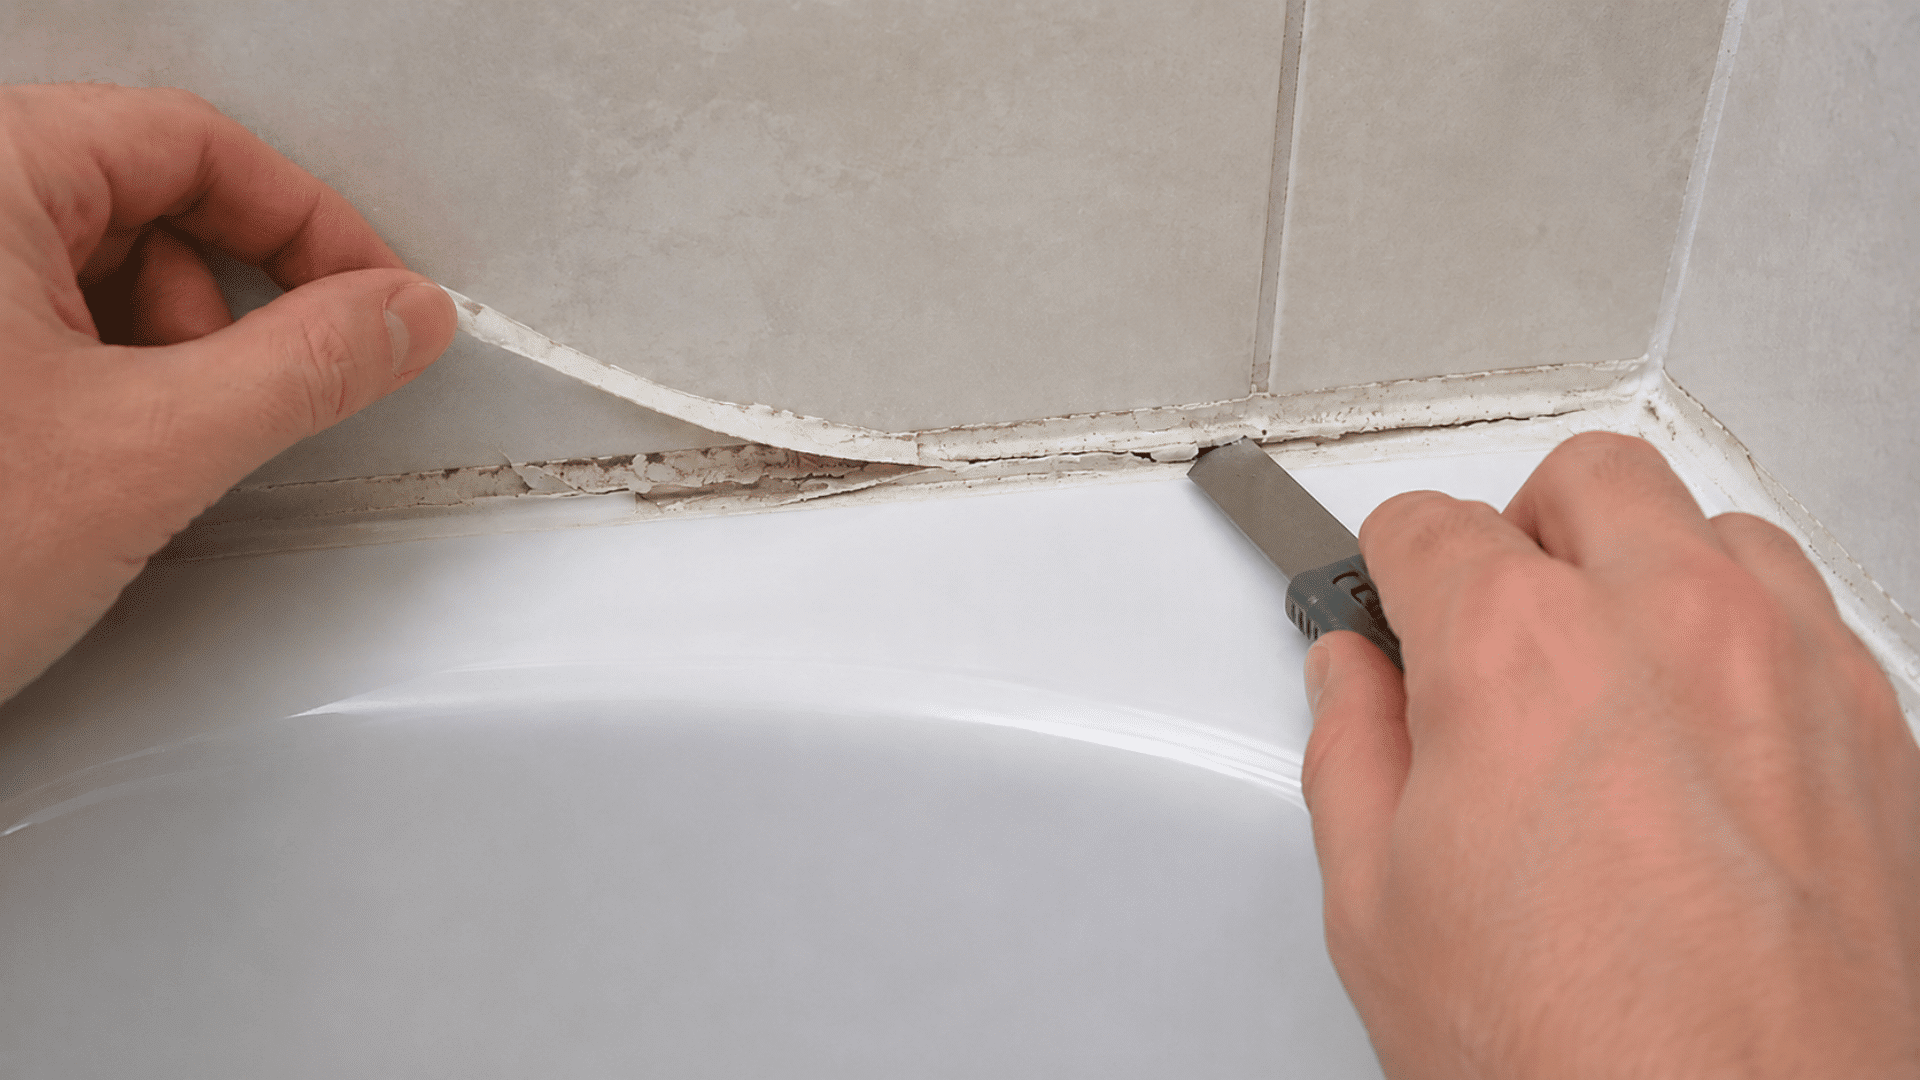
Start by removing the old bead. Carefully cut along its top and bottom edges. Lift one end and pull away as much caulk as possible.
Use a removal tool for stuck sections. Work slowly on the acrylic, fiberglass, or plastic surfaces to prevent scratches.
Pull the caulk in long strips when possible. This leaves less residue to scrape away later.
Step 3. Remove Remaining Caulk Residue
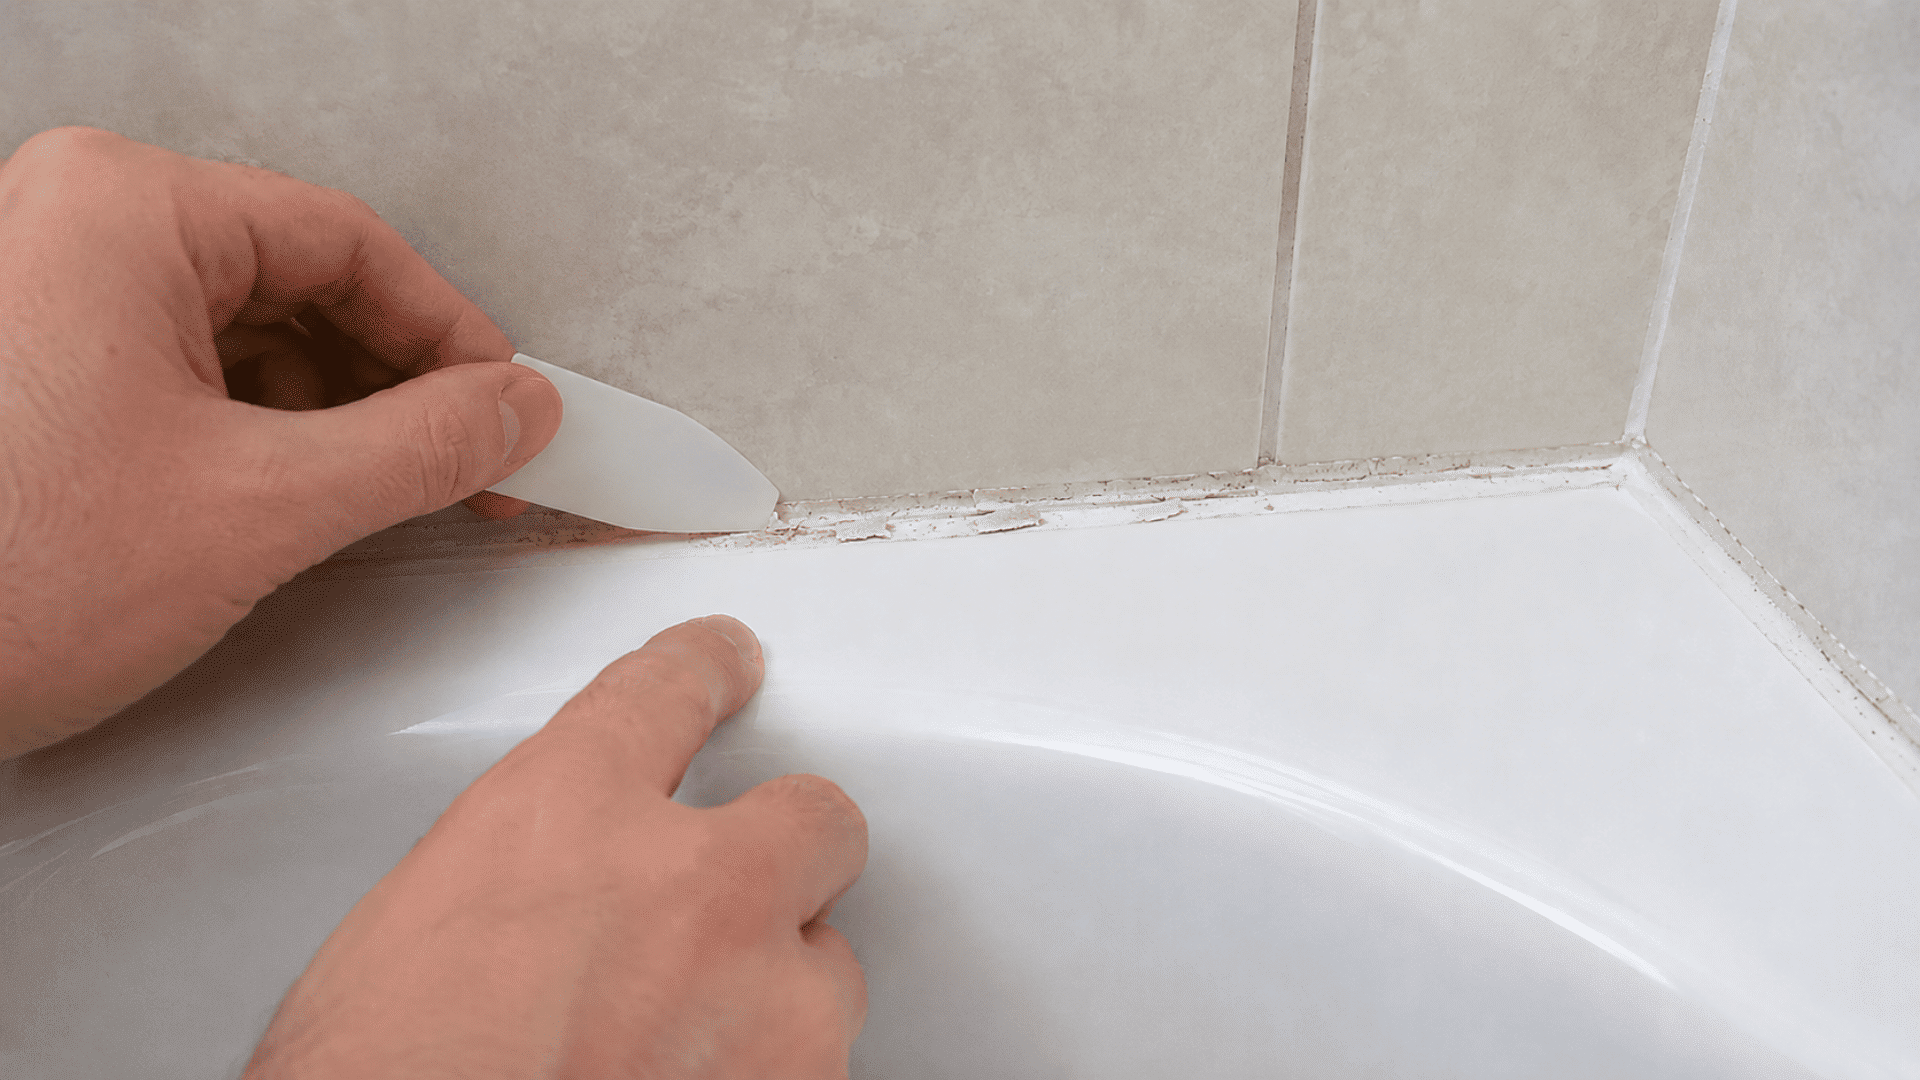
After the main bead is removed, some old caulk may still cling to the surface; this step clears that leftover residue.
Small pieces of old silicone may stay on the tub or wall after the main bead comes off. Scrape these spots carefully with a plastic tool.
For stubborn residue, use a caulk remover that is safe for the surface. Read its label before use and test it on a hidden area first.
Run your finger over the cleaned joint while wearing gloves. Small silicone patches are often easier to feel than see.
Step 4. Clean and Dry the Joint
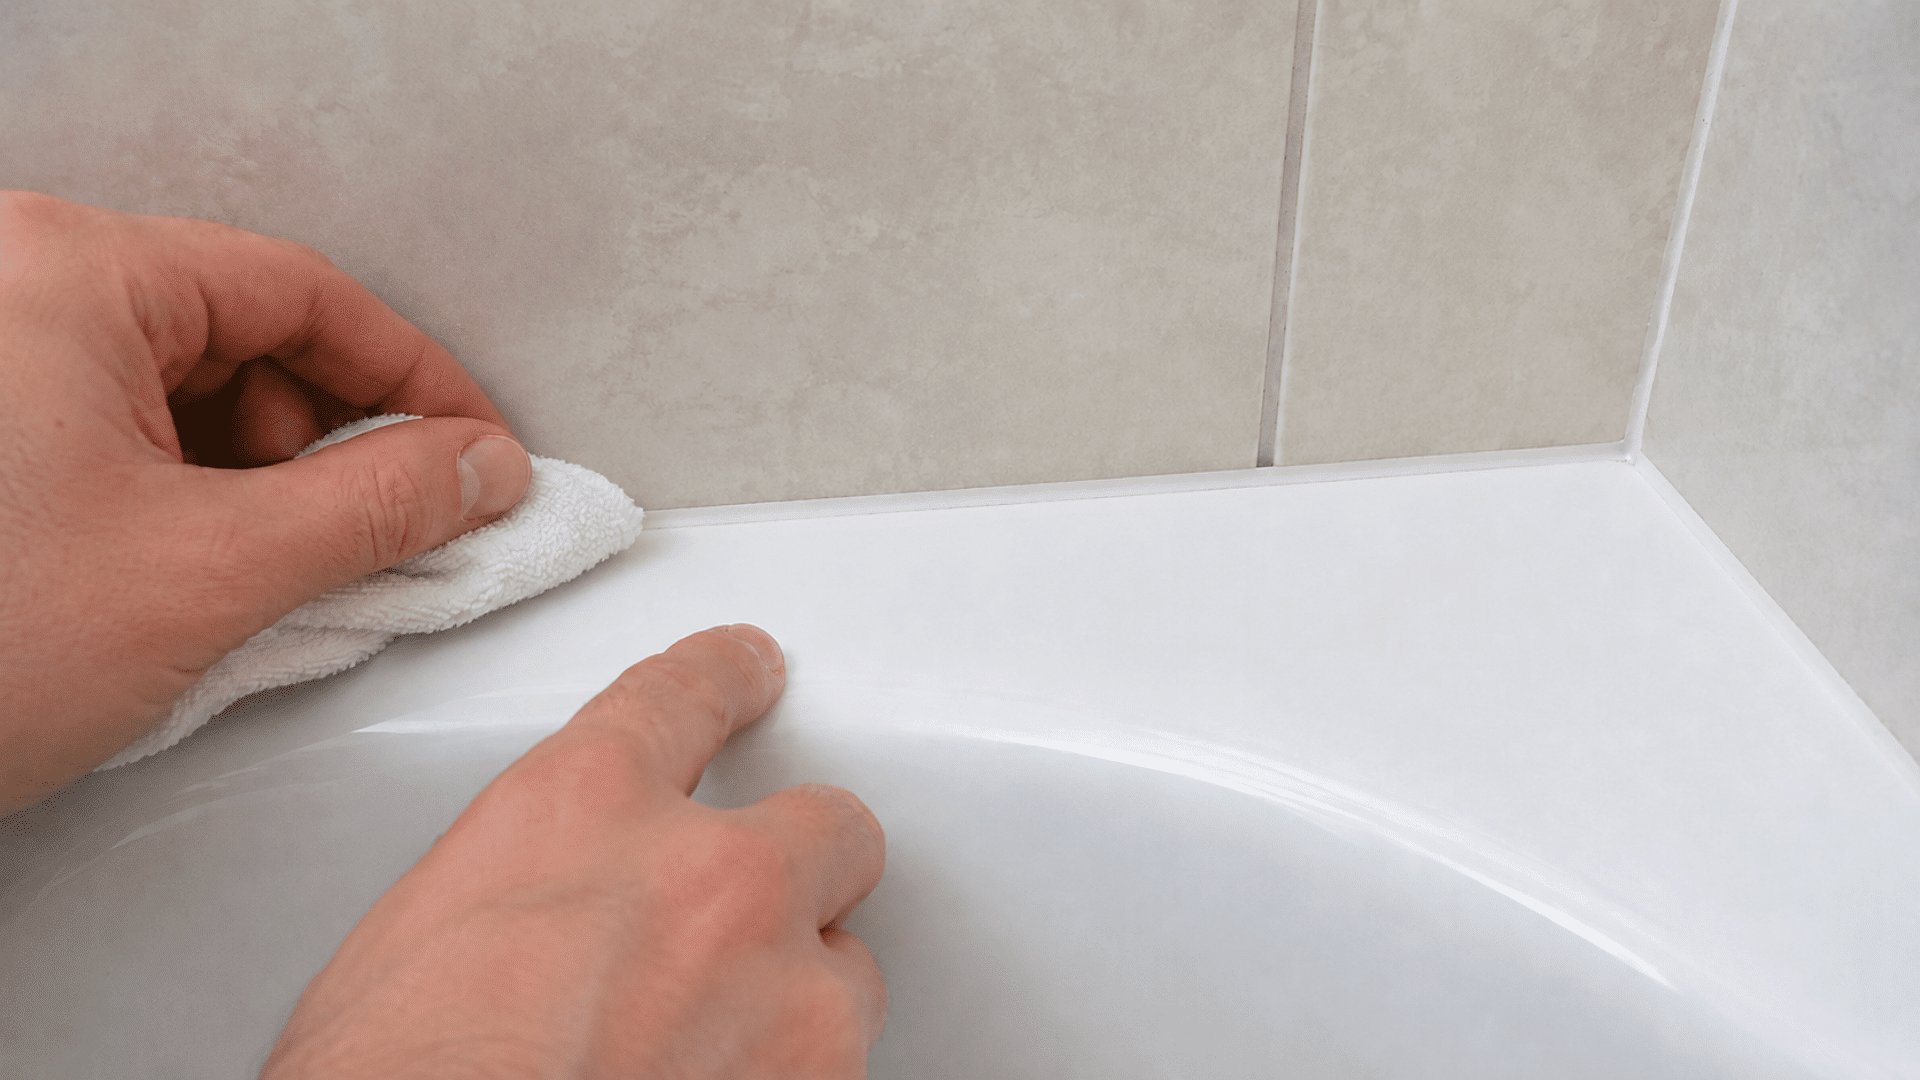
Clean the open joint to remove soap film, dust, dirt, and leftover residue. Wipe the tub and wall surfaces well. Follow the cleaning directions given on the new caulk tube.
Many silicone products need a clean and dry surface before application, so give the area enough time to dry.
Do not rush the drying stage. Moisture left in the joint can affect how some caulks stick.
Step 5. Apply Painter’s Tape
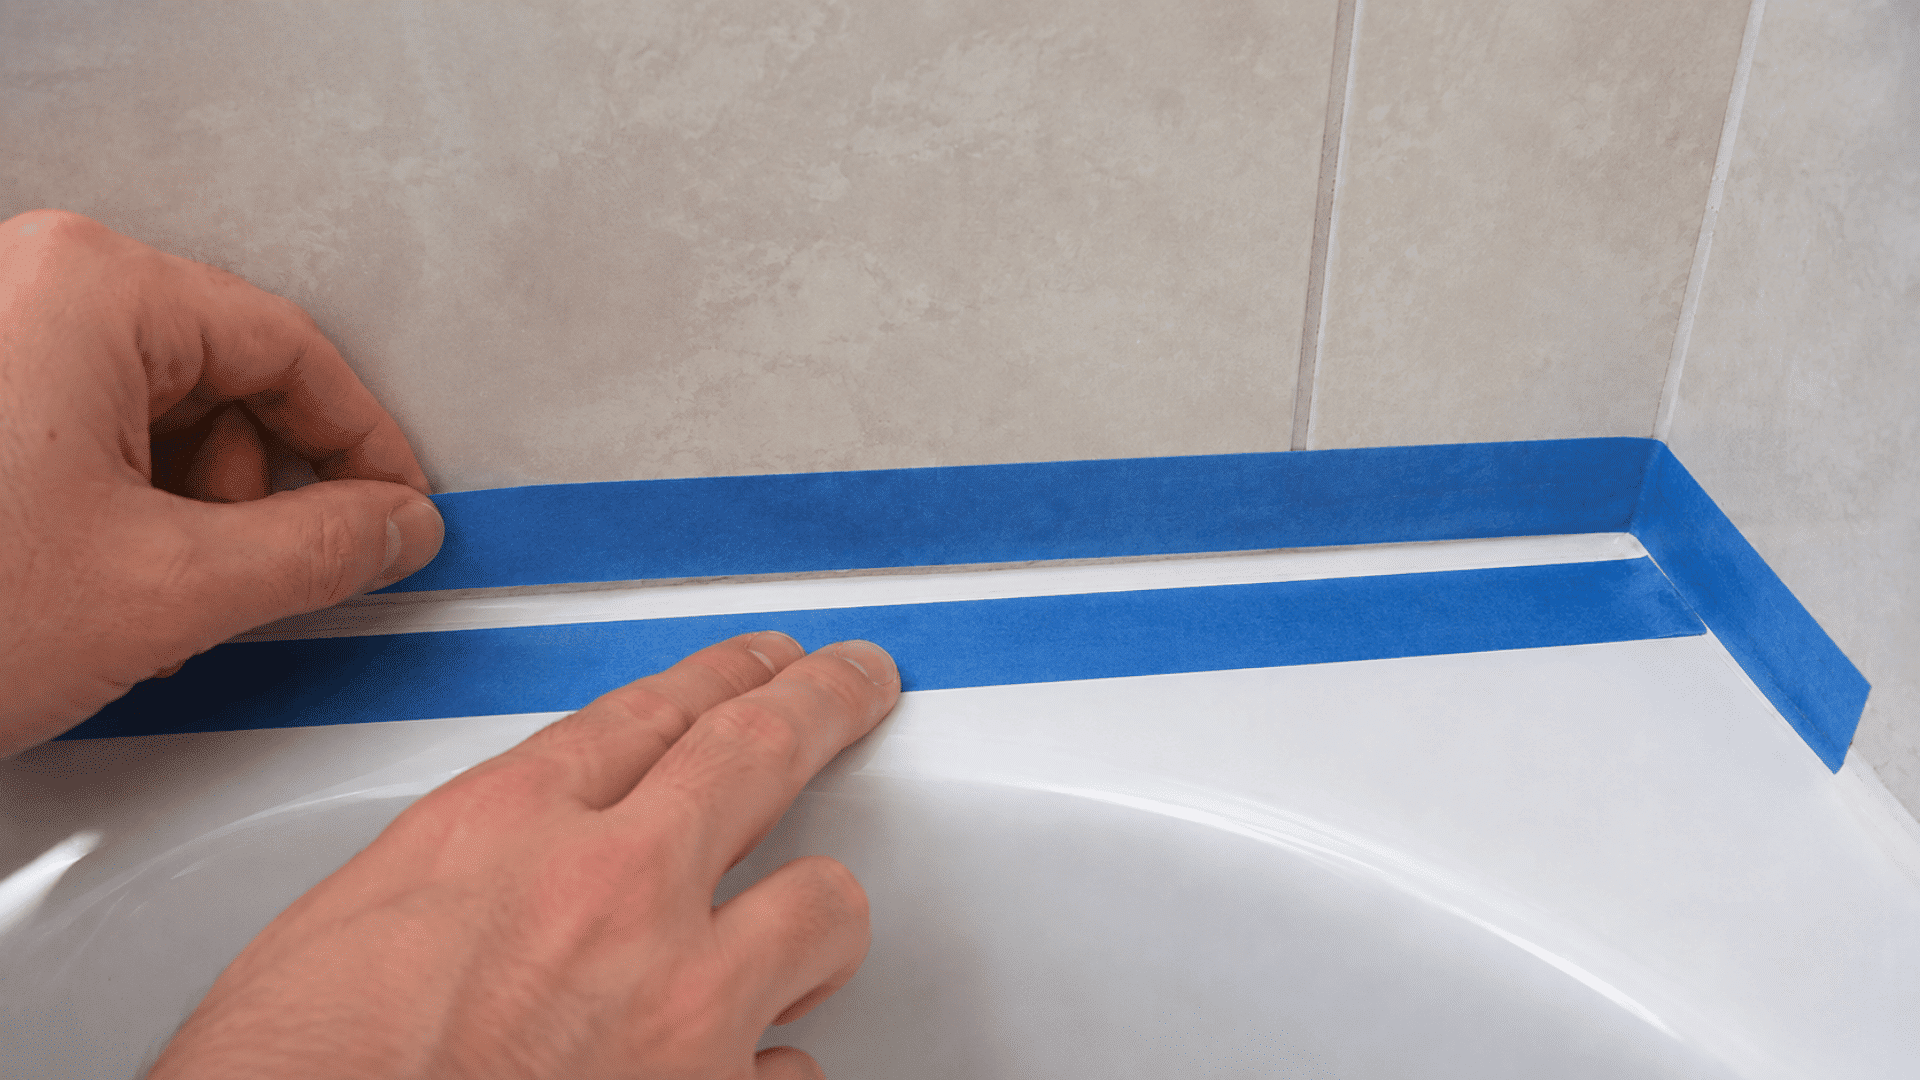
Place one strip of painter’s tape along the bathtub and another along the wall.
Leave an even space between the strips for the new bead. Press the tape edges firmly so wet caulk does not spread underneath.
Keep enough space for the caulk to touch both surfaces. Tape is optional, but it can help first-time DIYers make cleaner edges.
Keep the tape gap consistent from one end of the tub to the other.
Step 6. Prepare the Caulk Tube and Gun
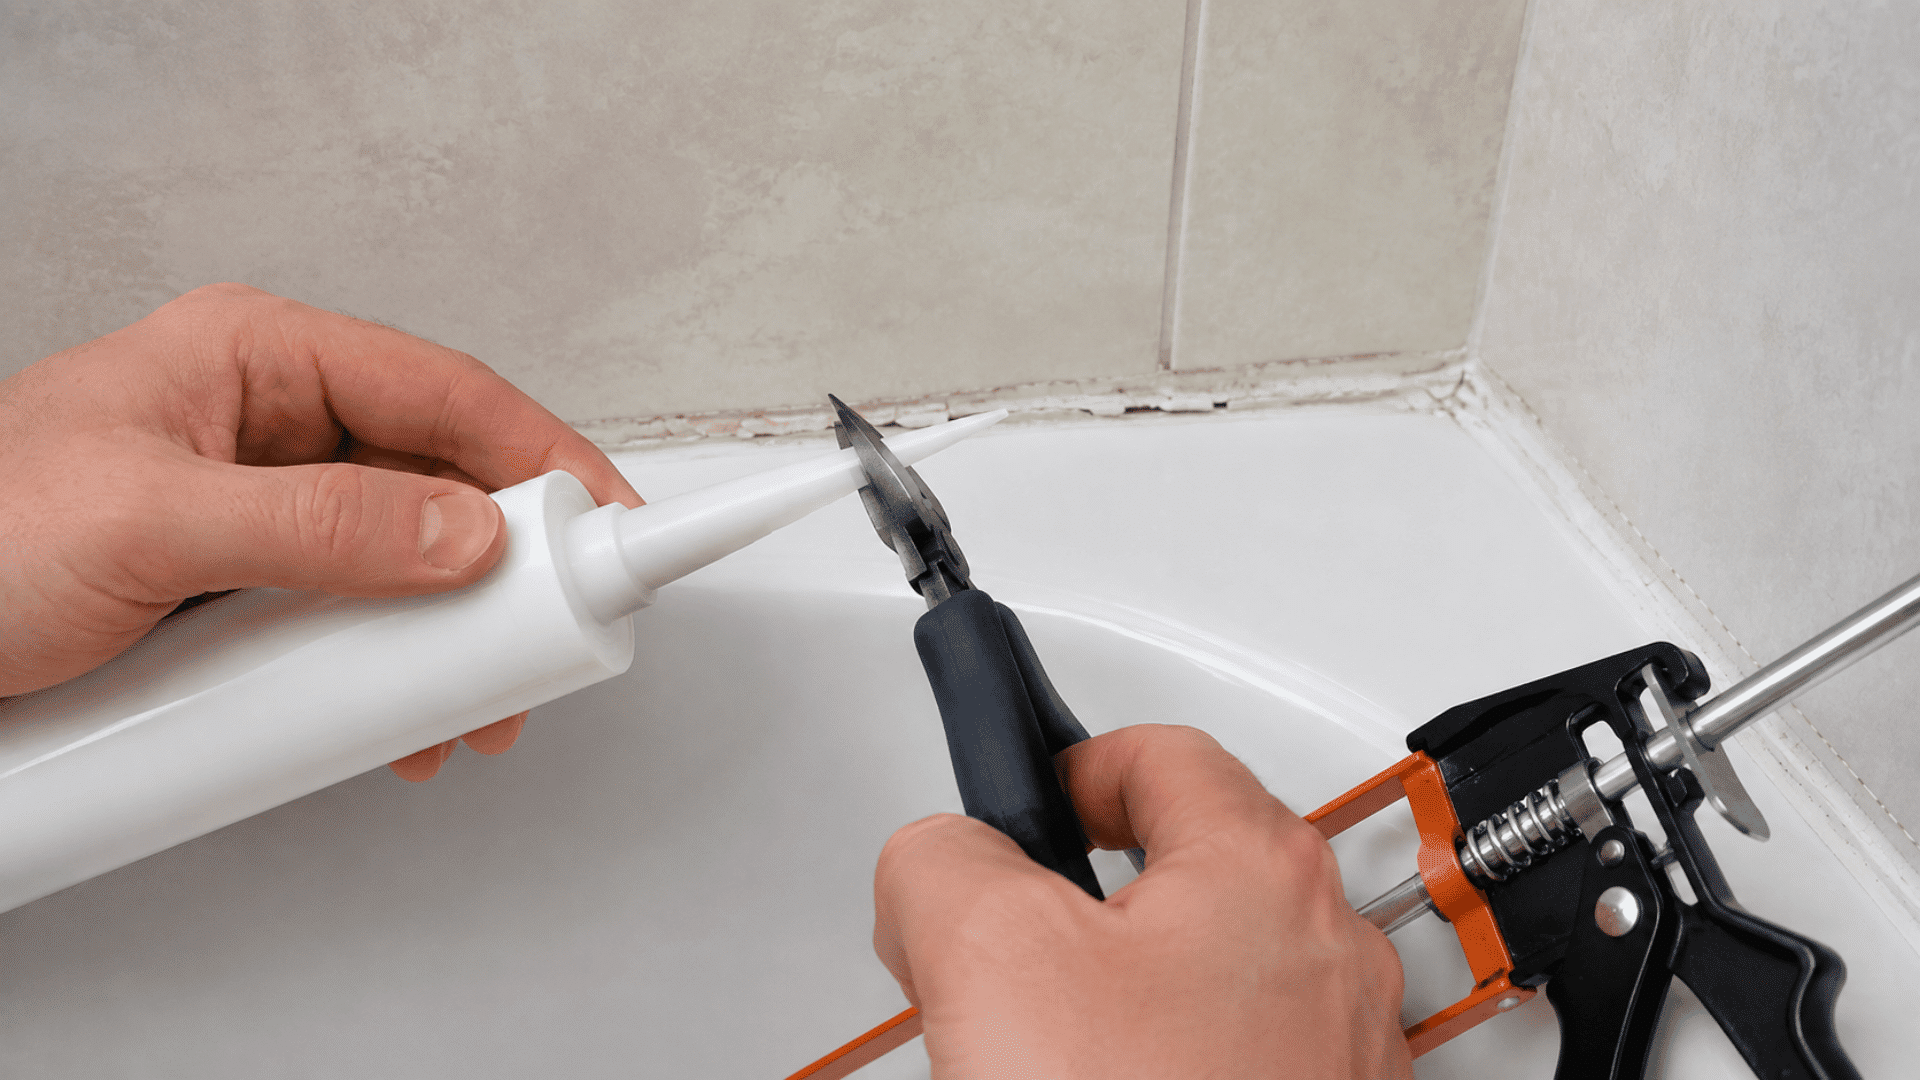
Cut the nozzle near its tip at an angle. Start with a small opening since a large hole can release too much caulk.
Open the inner seal if required, then place the tube into the caulk gun. Test a short bead on scrap cardboard. Trim the nozzle slightly more if the flow is too narrow.
Start with a small nozzle opening. Make it slightly larger only if the bead needs more caulk.
Step 7. Apply a Steady Bead of Caulk
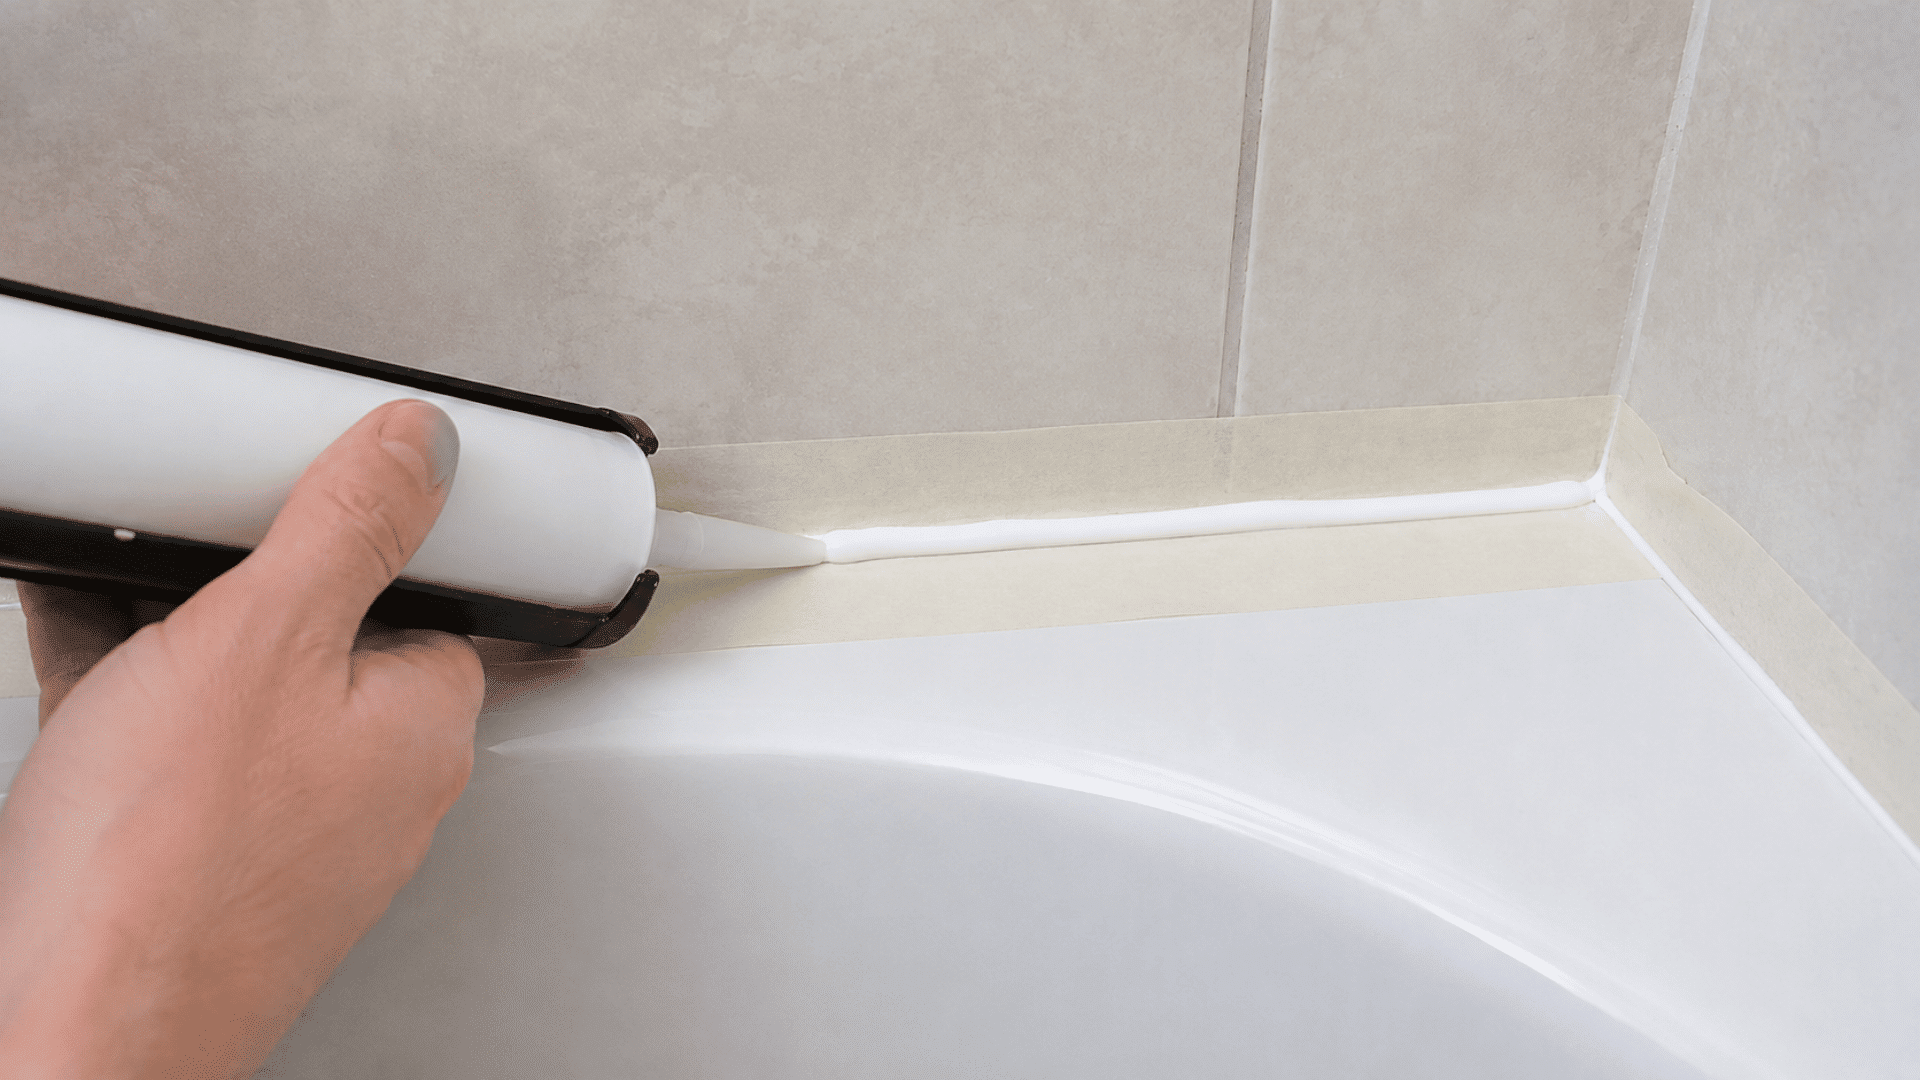
Place the nozzle against the joint at one end of the bathtub. Press the trigger gently and move along the seam at an even speed.
Keep the bead continuous when possible and use enough material to fill the joint without creating a thick mound.
For long joints, work in sections that can be finished within the product’s working time.
Keep the gun moving as you press the trigger. Stopping in one spot can leave blobs in the bead.
Step 8. Smooth the Caulk Bead
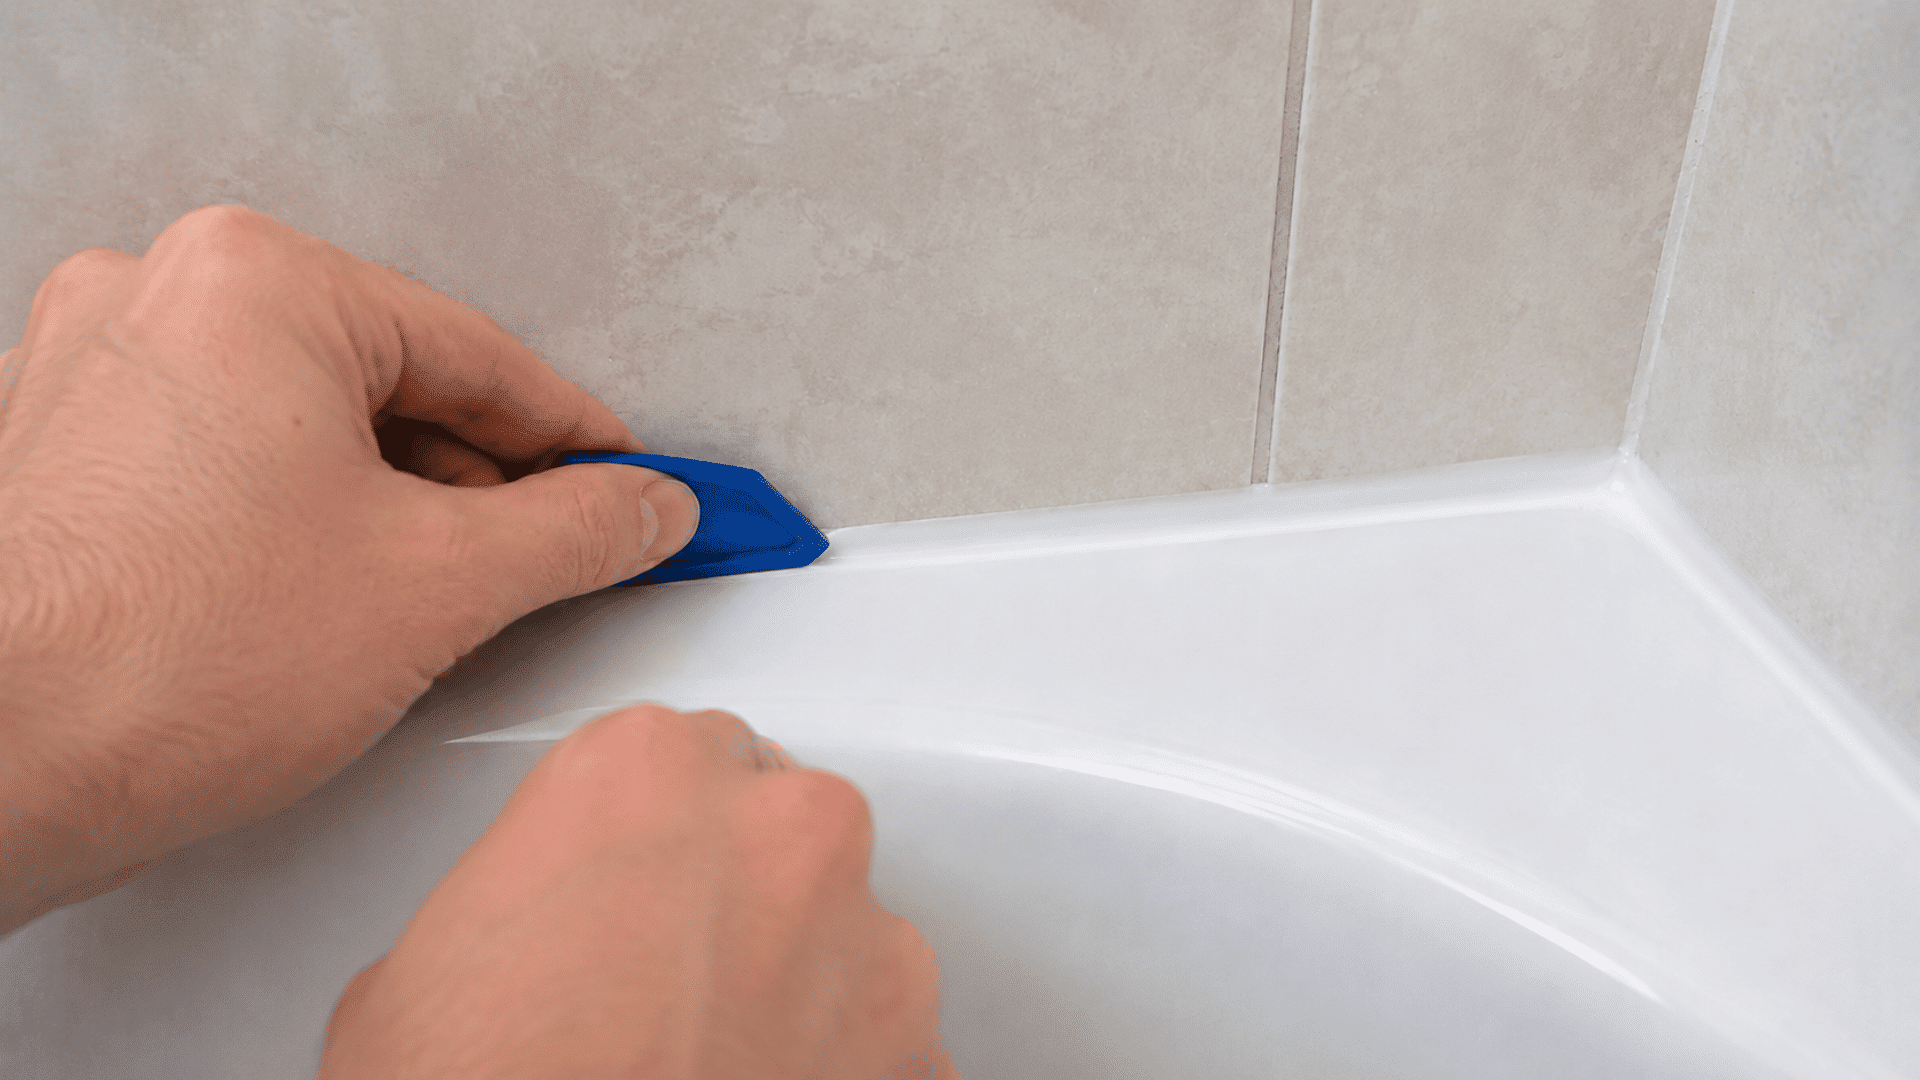
Smooth the fresh caulk before a skin starts forming. Run a finishing tool along the bead using light, steady pressure.
Remove extra material as it collects and keep the caulk in contact with both sides of the joint.
Avoid passing over the same section too many times, since repeated handling can leave ridges and marks.
Clean excess caulk from the finishing tool after each pass so it does not get dragged onto the next section.
Step 9. Remove the Tape and Let the Caulk Cure
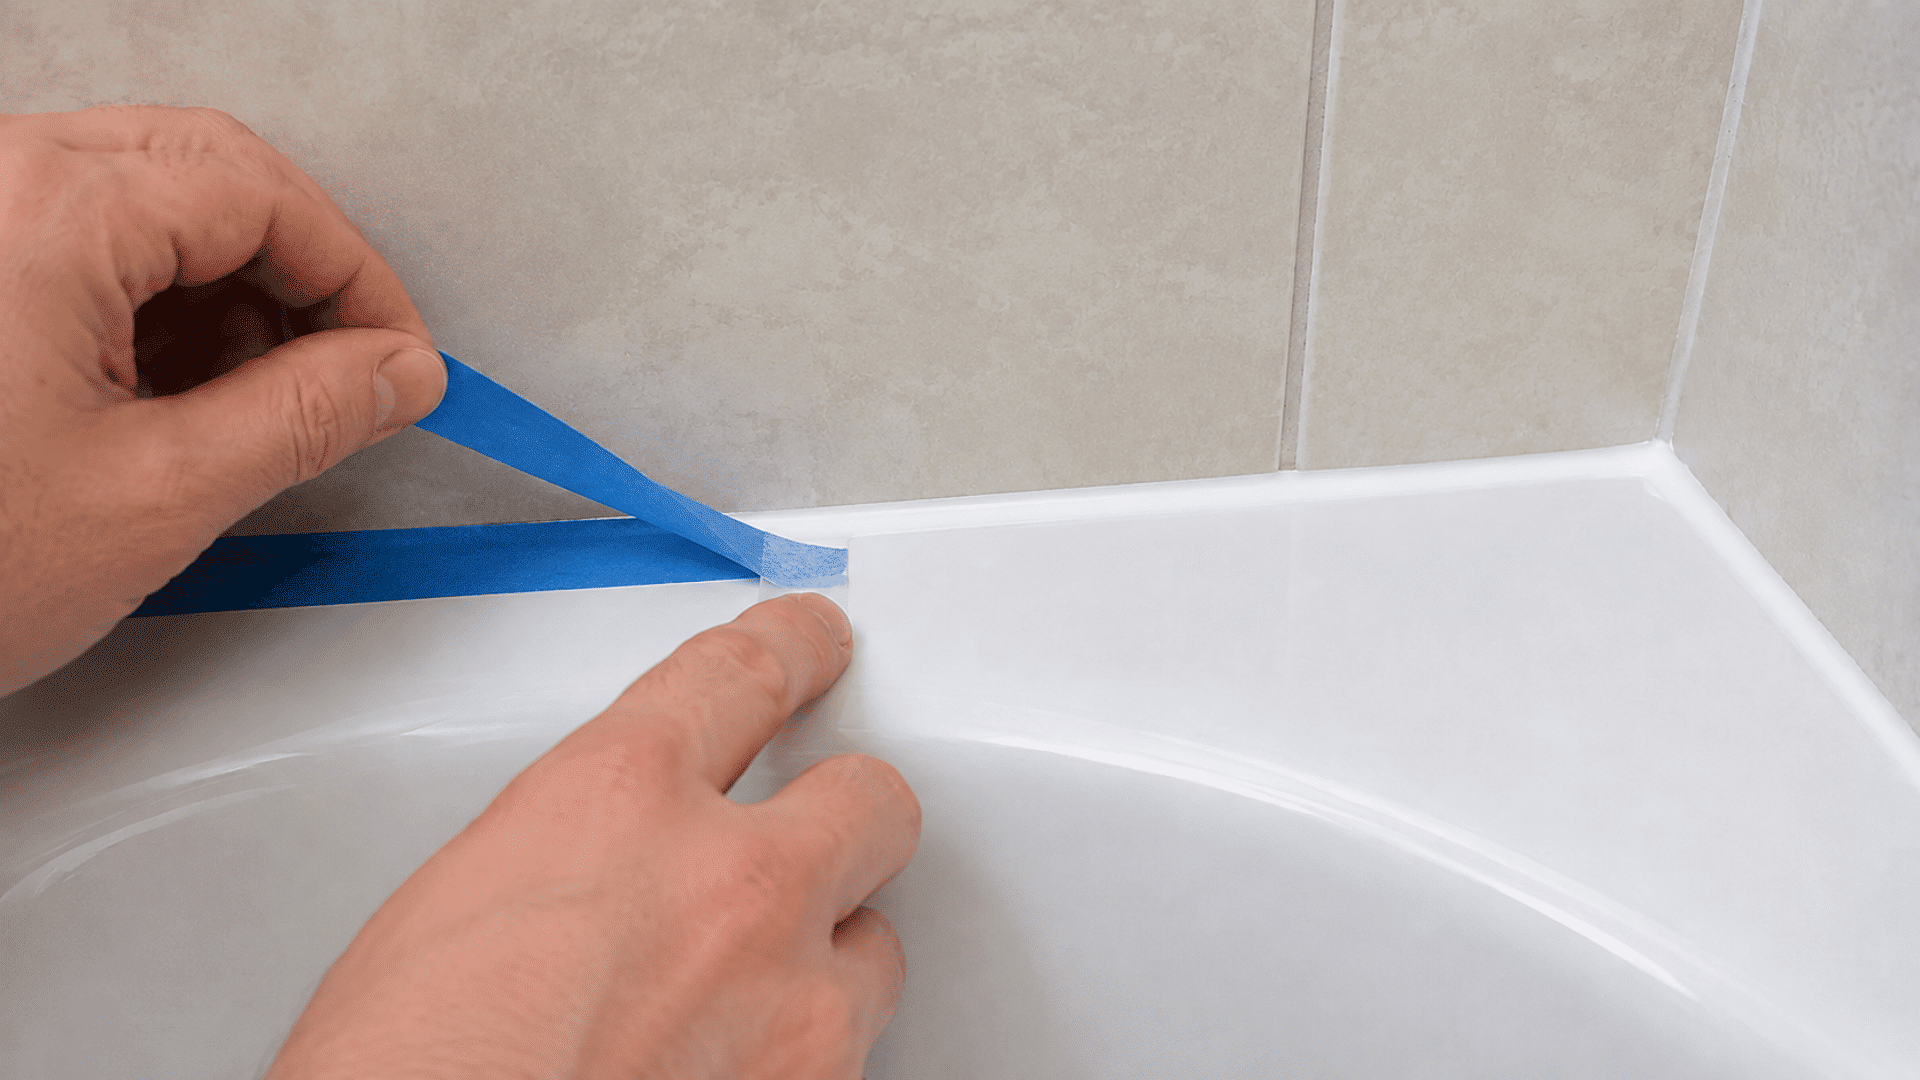
Remove the painter’s tape while the caulk is still workable. Pull it away slowly without dragging it through the new bead.
Leave the seal untouched after the tape comes off. Keep water away for the water-ready period stated on the product label. Full cure time may be longer.
Check the tube before starting the job so the bathtub can stay unused for the required waiting period.
How Long Does Bathtub Caulk Take to Dry?
There is no single drying time for every bathtub caulk. The waiting period comes from the formula listed on the tube.
A product may form a surface skin before it reaches its full cure. Water-ready time can also be shorter than full cure time.
For example, some GE and DAP kitchen-and-bath silicone products state that they can be exposed to water after about 30 minutes. Other bathroom caulks list longer waiting periods.
Check the label on the exact product being used before running water in the tub.
Follow its water-ready and full-cure instructions rather than using one timing rule for every brand or formula.
When Should a Bathtub Be Re-Caulked?
Bathtub caulk doesn’t need replacing on a fixed schedule; check it periodically and replace it once you notice damage or separation from the surface.
Signs that it may be time for new caulk include:
- Cracks through the caulk bead
- Edges pulling away from the tub
- Gaps along the wall joint
- Loose or brittle sections
- Missing pieces of caulk
- Stains that stay after cleaning
- Water getting into an open joint
- Sections that peel when lightly touched
Should the Bathtub Be Filled Before Caulking?
Some installers fill a bathtub with water before sealing the wall joint.
The added weight places a load on the tub and may cause slight movement in certain installations.
This step does not apply to every bathtub. Tub material, framing, supports, installation method, and the sealant being used can affect the process.
Check the bathtub maker’s installation directions before filling it for a caulking job. Follow any instructions given for loading or supporting the tub during sealing.
If no such step appears in the tub instructions, there is no reason to treat a full bathtub as a rule for every caulking job.
How to Get a Clean Caulk Line Around a Bathtub
A clean caulk line starts with good prep and steady application. These simple tips can help keep the bead neat:
- Remove All Old Caulk First: Clear away loose material and residue so the new bead sits on a clean joint.
- Cut a Small Nozzle Opening: Start small and test the caulk flow before working around the tub.
- Keep the Gun at a Steady Angle: Move along the seam at an even speed for a more consistent bead.
- Use Light Trigger Pressure: Too much pressure can release extra caulk and leave thick spots or blobs.
- Smooth the Bead While It Is Workable: Use a finishing tool before the surface starts to form a skin.
- Remove Painter’s Tape Early: Pull it away before the caulk hardens to help keep the edges neat.
- Keep Paper Towels Nearby: Wipe extra caulk from tools as needed during the job.
How to Make Bathtub Caulk Last Longer?
Start with a caulk listed for bathroom use and compatible with the tub and wall materials. Prepare the joint as stated on the package before applying the bead.
Once the caulk has cured, clean the tub edge without cutting or scraping the seal. Take care around the bead when using cleaning brushes or sharp tools.
Repair nearby plumbing leaks soon after they appear. Water that keeps reaching the area can cause problems around the tub even when the bead looks fine.
Use the bathroom fan during and after showers if one is installed. Check the caulk from time to time for new cracks or loose edges.
Common Bathtub Caulking Mistakes
Small mistakes during prep or application can affect how the new caulk looks and sticks. Watch out for these common problems:
- Applying fresh caulk over loose or peeling old silicone.
- Leaving soap film, dirt, or old caulk residue on the joint.
- Moving the caulk gun unevenly and leaving gaps or blobs.
- Waiting too long before smoothing the fresh bead.
- Leaving painter’s tape in place until the caulk hardens.
- Using the bathtub before the stated water-ready time has passed.
When Should a Professional Repair the Bathtub Area?
Caulk can close a joint, but it cannot repair damaged wall or floor materials behind the tub.
Call a qualified repair professional if tiles are loose, the wall feels soft, flooring has swollen, or water keeps appearing after the tub has been recaulked.
A bathtub that moves a lot under normal use may also need its supports or installation checked.
Very wide or uneven joints may point to another installation issue rather than worn caulk alone.
Mold or decay found behind removed caulk may also call for added repair work. Fix the cause before sealing the joint with a new bead.
Final Thoughts
Knowing how to caulk a bathtub can make a worn tub edge look cleaner and close gaps where water could enter.
Start by removing failed material and cleaning the joint. Apply bathroom-rated caulk in a controlled bead, smooth it within the stated working time, and keep it dry as directed on the tube.
A little patience during prep often makes the application much easier.
Got a bathtub caulking tip that worked well at home? Add it in the comments so other DIY readers can try it too.
Frequently Asked Questions (FAQs)
1. Can Bathtub Caulk Stick to Tile and Fiberglass?
Yes, many bathroom caulks bond to tile and fiberglass. Check the product label to confirm both surfaces are listed as compatible.
2. Why Does Bathtub Caulk Turn Yellow?
Age, cleaning products, moisture, and the caulk formula can affect its color. Yellowing alone does not always mean the seal has failed.
3. How Thick Should a Bathtub Caulk Bead Be?
The bead should fill the joint without leaving a large mound. Follow the sealant maker’s joint-size directions for the best bead width and depth.