Four months into the season, the sprouts come off soft, not tight. That usually points to timing, not bad luck or poor soil. Brussels sprouts need weeks of cool weather to fill out properly, and rushing the process always backfires.
A crowded bed or an inconsistent watering schedule can undo months of otherwise careful work.
Understanding how to grow Brussels sprouts means tracking the growth stages, because skipping one throws things off.
Get the fall timing right, and the reward is a stalk full of firm, frost-sweetened sprouts by November.
Know This Before Growing Brussels Sprouts
Full sun for at least six hours a day isn’t negotiable for Brussels sprouts. Soil should drain well but hold onto some moisture, with a pH close to 6 or 7.
The plant needs about 80 to 120 days from transplant to harvest. That stretch shapes decisions throughout the season, especially around when to expect the first frost.
Water counts for more than you might think once the plants take hold. Skip it for even a week in a hot stretch, and the sprouts stay small and uneven.
Cold weather, unlike with most vegetables, works in the plant’s favor. A light frost near the end pulls sugar into the sprouts and makes them taste noticeably better.
What Brussels Sprouts Need to Grow
Before you plant, it helps to know what the plant needs to thrive. Four things make the biggest difference.
Full Sun
Brussels sprouts need direct sunlight most of the day to build strong stalks. Less than six hours often leads to weak, spindly plants with fewer sprouts.
Fertile and Well-Drained Soil
Rich, loose soil gives roots room to spread without sitting in water. A pH between 6 and 7 keeps nutrients available to the plant.
Cool Growing Conditions
This crop grows best in mild temperatures, not heat. High heat during the season leads to bitter, poorly formed sprouts on the stalk.
Garden Space
Each plant needs real room, since Brussels sprouts stretch tall and wide by maturity. Cramped spacing crowds roots and blocks airflow around the plant.
How to Grow Brussels Sprouts?
Miss a step here, and it rarely shows right away. It surfaces weeks later, usually when it’s too late to fix.
Step 1: Choose the Right Planting Time

Cool weather is what makes Brussels sprouts taste right, and this timing decision is the first real step to growing Brussels sprouts. Fall harvest works best in nearly every climate.
Count back 90 to 100 days from the first expected frost, and plant around that date. Spring works too, but only where summer never gets brutally hot.
Warm-winter regions do the opposite, planting in fall for an early spring harvest. Wait too long into summer, and the plant never gets the cool stretch it needs to finish.
Step 2: Start Seeds Indoors or Outdoors
Indoors beats outdoors here, mostly because it gives you a head start. Plant seeds about a quarter inch deep in trays or small pots with seed-starting mix.
Cover with a light layer of soil; they take one to two weeks to germinate under warm, bright light. Direct sowing works too, but only where the season runs long enough to spare an extra three weeks.
Step 3: Prepare Soil Before Planting

Work compost or aged manure into the soil a few weeks before transplanting. The ground needs to be fertile but still drain well, with a pH around 6 to 7.
Avoid any bed that grew cabbage, broccoli, or kale in recent years. Those crops carry the same soil-borne diseases forward.
Step 4: Transplant and Space Plants Correctly
Give seedlings about a week outdoors before transplant day, moving them gradually from shelter into full sun and wind.
Set each one at the same depth it grew in its pot, spaced 18 to 24 inches apart, with rows 30 to 36 inches apart. Press the soil firmly around the base once the plant is in.
Loose soil at the roots is a quiet cause of soft, underfilled sprouts down the line.
Alternative Step 4: Grow Brussels Sprouts in Containers
A pot works fine for Brussels sprouts, as long as it’s big enough. Twelve inches wide and twelve inches deep is the minimum root space they need.
Drainage counts for more in a container than in the ground, since standing water rots roots fast. Use a real potting mix instead of garden soil, keep it to one plant per pot, and set it somewhere that gets full sun all day.
Step 5: Water Brussels Sprouts Consistently

Watering has to stay steady, not occasional, from transplant to harvest. About 1 to 1.5 inches a week is the target, whether that comes from rain or a hose.
Deep watering matters more than frequent watering, since the roots sit lower than you might expect.
Let the soil dry out during sprout formation, even briefly, and the sprouts that come in later stay loose and undersized.
Step 6: Fertilize During Active Growth
Once the plants show real growth, usually a few weeks after transplanting, side-dress with a balanced fertilizer.
Repeat every three to four weeks through the season. Ease off nitrogen as harvest approaches, or the plant shifts toward leafy growth instead of tight, dense sprouts.
Brussels Sprouts Growing Stages
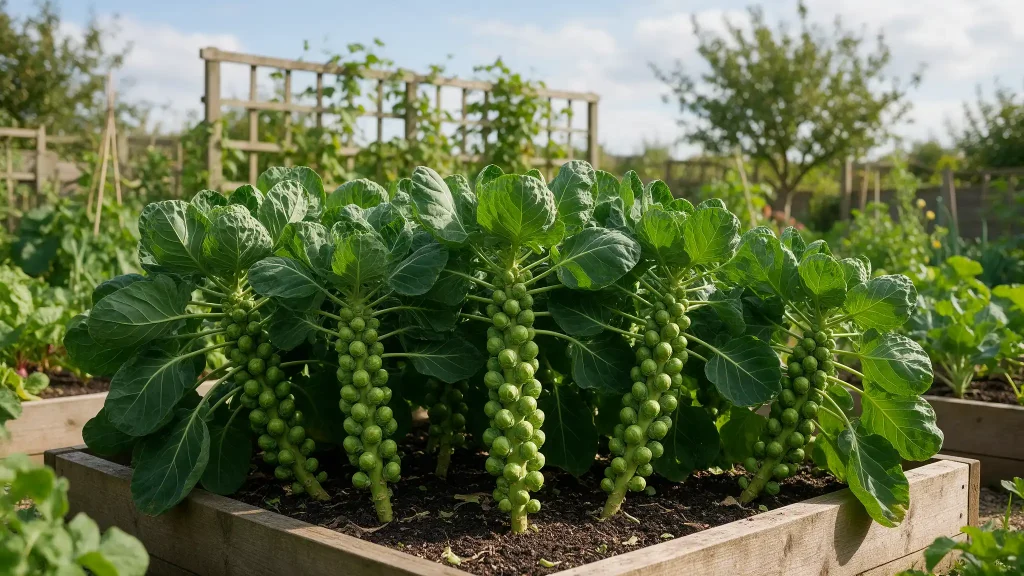
Sprouts fill in from the bottom of the stalk first, then move upward as the plant matures. Each of the Brussels sprouts growing stages asks for something different.
Germination and Seedling Stage
Round seed leaves poke through the soil within a week or two. True leaves follow soon after. Light matters most here. Not enough of it, and the stems come in thin, pale, and leggy before the plant ever gets a real start.
Leaf and Stalk Growth Stage
Weeks three through ten are the bulking-up phase. The stem thickens, leaves widen, and the plant finally starts looking like something.
Water deeply. Side-dress with fertilizer once growth picks up. Check under the leaves for cabbage worms while watering, since they hide well and multiply fast.
Sprout Formation Stage
Small buds show up where each leaf meets the stalk, usually as the weather starts to cool around weeks ten to fourteen.
This stage doesn’t forgive dry spells. Skip watering for even a few days, and the buds that form stay loose instead of tight. Pull off yellowing leaves near the bottom. It sends more energy where it’s actually needed.
Sprout Maturing Stage
By week fourteen, the lowest sprouts are firm and roughly 1 to 1.5 inches across. Ready to pick. Work from the bottom of the stalk upward as more sprouts catch up in size.
A light frost right before harvest sweetens them. Wait too long past that point, and they turn bitter or split open on the stalk.
Common Brussels Sprout Pests and Diseases
Brussels sprouts attract their share of trouble over a long growing season, from small sap-sucking insects to soil-borne disease. Catching the signs early makes the difference between a minor setback and a lost harvest.
Aphids
Aphids are small insects that cluster on the undersides of leaves and drain sap from the plant. Left alone, they weaken growth and attract sooty mold on the sticky residue they leave behind.
Cabbage Worms and Loopers
Green caterpillars chew ragged holes through leaves and can strip a plant fast if left unchecked. Row covers placed early keep the egg-laying moths from ever reaching the plants.
Flea Beetles
Tiny, jumping black beetles riddle young leaves with small round holes. Seedlings take the worst damage, so protecting plants early in the season matters more than treating mature ones.
Slugs and Snails
These pests feed at night, leaving ragged holes and slime trails across lower leaves. Damp mulch and cool weather both make conditions more favorable for them to spread.
Clubroot
This soil-borne disease stunts growth and causes wilting, even with adequate water. Roots develop swollen, distorted galls underground, and infected soil stays contaminated for years afterward.
Black Rot and Leaf Spot
Both diseases cause yellowing, V-shaped lesions, or dark spots on leaves, usually spreading in wet, humid conditions. Removing infected leaves quickly and avoiding overhead watering helps slow the spread.
How to Care for Brussels Sprouts

Once plants settle in, care shifts from planting decisions to ongoing maintenance. Weeds, wind, and pests eventually show up.
Mulch and Control Weeds
A few inches of mulch does a lot of work here. It holds moisture and blocks weeds before they take over. Brussels sprout roots sit shallow.
Digging too close to the stem can damage them without much warning, so mulch reduces how often that’s necessary.
Stake or Hill Tall Plants
These plants get tall, sometimes two to three feet, and wind is usually the bigger problem, not height. A strong gust can loosen roots enough to throw off the whole stalk.
Mound soil around the base for stability. On windier sites, a stake helps more. Pull off yellowing leaves near the bottom as you walk the row, but leave healthy ones alone.
Protect Plants From Common Pests
Cabbage worms and aphids find their way to nearly every plant at some point. Row covers placed early keep most of them out before moths lay eggs.
Hand-picking works too. Check under the leaves regularly, since that’s where both tend to hide. Watch for clubroot as well, a soil-borne disease that causes stunted, wilted growth.
Rotating away from cabbage-family crops for a few years helps keep it out of the soil.
When to Harvest Brussels Sprouts
Harvest doesn’t happen all at once with Brussels sprouts. Sprouts mature gradually, starting near the base and working upward.
Know When Sprouts Are Ready
Press one between two fingers. Hard means ready. Most sprouts hit 1 to 1.5 inches across at that point, and waiting too long past it leads to splitting or loose, soft heads.
Harvest From Bottom to Top
The bottom of the stalk finishes first every time. Cut or twist those off once they’re firm, then move upward as the rest catch up over the following weeks.
Consider Topping Before Harvest
Cutting off the growing tip, three to four weeks out, pushes the plant’s energy into the sprouts instead of new leaves. It’s optional. Skip it, and the harvest stretches out longer.
Harvest After Light Frost
Cold weather actually helps here. A light frost pulls sugar into the sprouts and knocks down the bitterness. Once picked, they’ll hold in the fridge for a week or two.
From Planting to Harvest
Brussels sprouts take real patience: months in the ground, careful spacing, and watering that can’t slip for long.
Learning how to grow Brussels sprouts starts with getting that timing right, since everything else follows from it. Containers work fine too, as long as the pot gives the roots enough room.
Watching the Brussels sprouts growing stages along the way catches problems while they’re still fixable. Not after they’ve already gone loose.
None of it is complicated, but skipping a step usually costs the harvest later. Once the first frost hits, sprouts pulled from a well-tended stalk taste noticeably better than the ones rushed off soon.
Frequently Asked Questions (FAQs)
1. Do Deer and Rabbits Eat Brussels Sprouts?
Both will, and fencing is usually what ends up solving the problem.
2. Can You Eat Brussels Sprout Leaves?
Yes, and they cook up well when treated like collard greens.
3. How Many Sprouts Does One Plant Produce?
Somewhere around 20 to 50, though a well-fed stalk can beat that number easily.
4. What Grows Well Next to Brussels Sprouts?
Onions and garlic are common picks, though results tend to vary by garden.